
KB ID 0000185
Problem
Using: vSphere 6.7 and VMware Standalone Converter Version 6.2.0
I’m performing this procedure on vSphere 6.7, back ith the release of vSphere 5, This process changed, with vSphere 4 and VI3, you had to install VMware Converter on the vCenter Server then download and enable the plugin in your VI client software (like this).
VMware now only has the “standalone converter“, so now you DONT install anything on the vCenter server, the converter runs on a client machine/server.
Note: This article is primarily concerned with shrinking guest hard drives, If you want to make your drives larger you can also use this process but the following article will be easier. Resizing Windows Volumes / Drives in VMware vSphere / ESX
Also if space is your consideration, you also might want to consider; VMware ESXi – Converting ‘Thick’ Provisioned Drives to ‘Thin’
Solution
Resizing (Shrinking) Guest Hard Drives in vSphere
Before you start:
Remember you are cloning a machine, don’t have clients writing data to the machine while this is going on, or there is the potential for data to be lost. If possible disable any services that will accept data, e.g. Exchange, SQL, Oracle, etc, prior to cloning.
Licensing: Only really applicable if you’re cloning a physical machine, but make sure you DO NOT have OEM Licensing. Also if you have Windows Storage Server, or Windows Appliance Edition, you should speak to a license specialist.
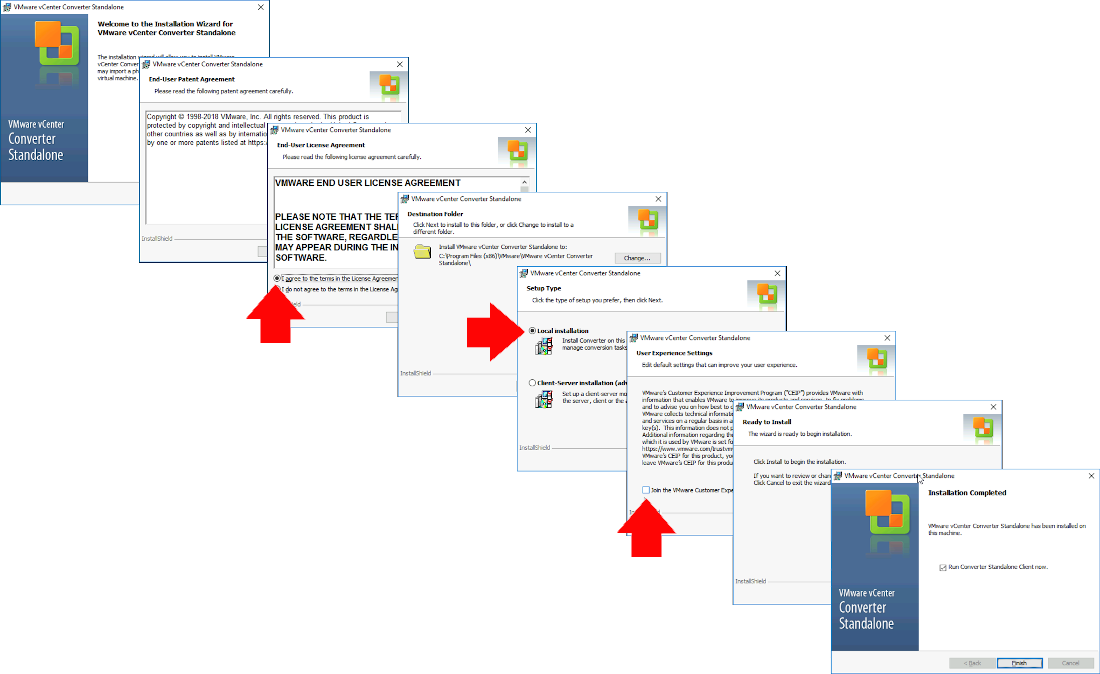
Installing VMware converter is pretty straightforward, run the install file accept the EULA, select. local installation, and I opt out of the ‘User Experience’, when complete it will open the Converter client by default, (as shown).
When the program opens > Convert machine > Type in the name of the machine you are going to convert, and credentials to logon and install the converter agent > Next.
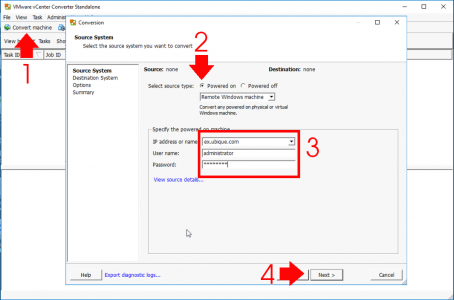
Type in the name of the machine you are going to convert, and credentials to logon and install the converter agent.
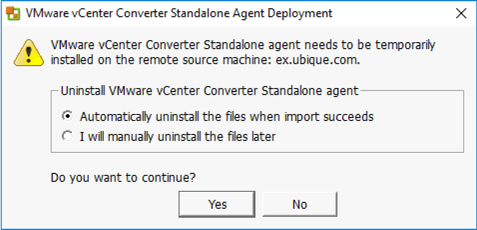
If you’re going to retire the target machine afterwards, this it does not really matter, but I leave it on the defaults > Yes.
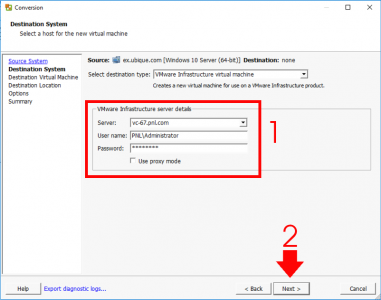
5. Now enter the vSphere/ESX target details that you are going to create the cloned copy on. > Next.
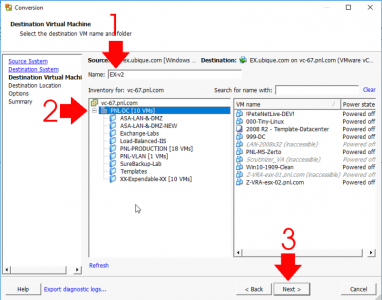
Give the new VM a name, select which folder to place the new VM into > Next. (Note: You may get a certificate warning, if so click ignore).
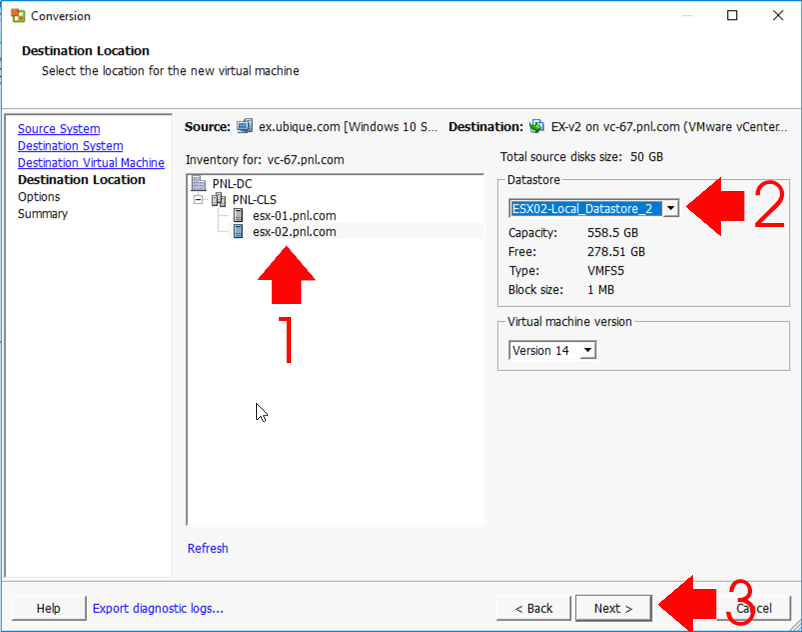
7. Chose a Cluster/Host > Choose which storage to place the files into. > Next.
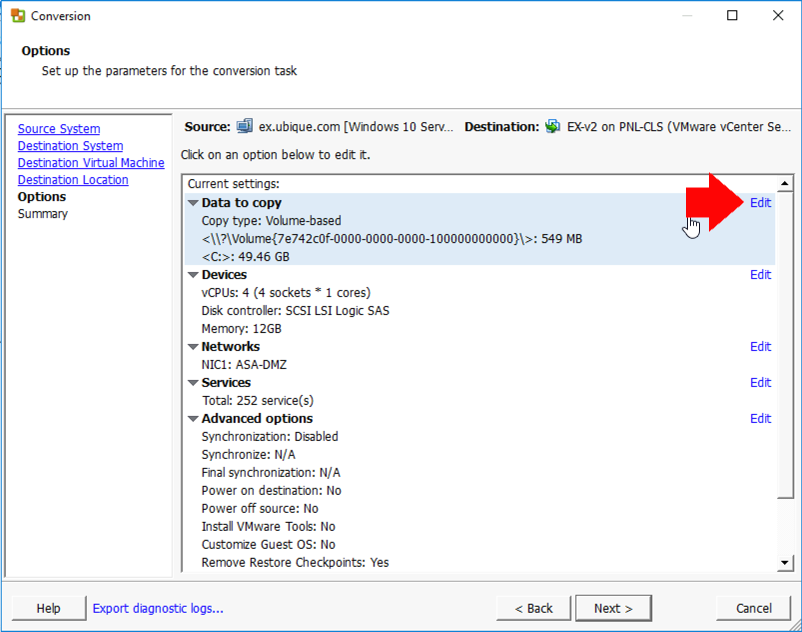
8. In the ‘Data to Copy’ section > Edit.
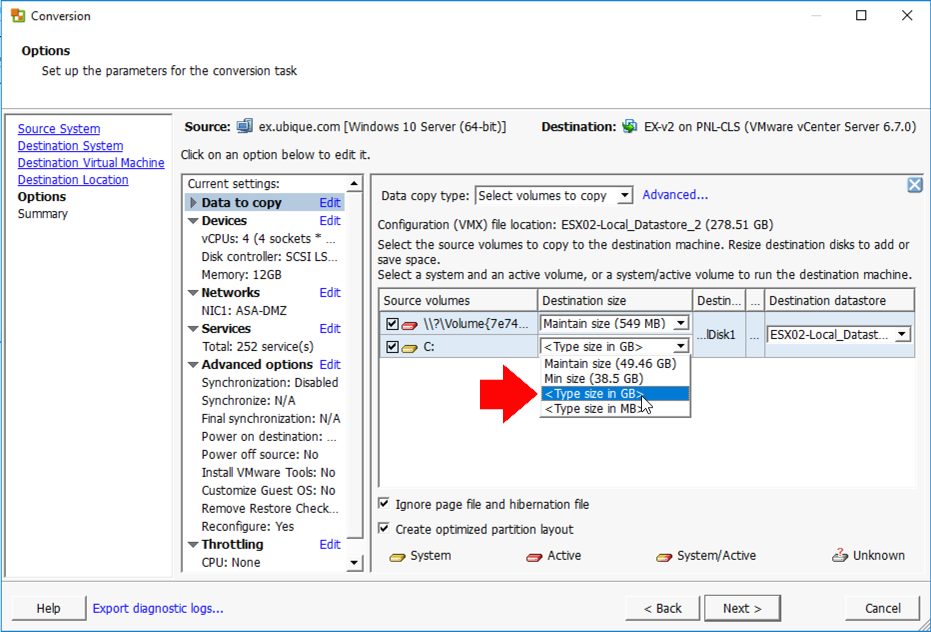
9. Here you can select the NEW sizes for the drive(s) on the cloned machine. > Next.
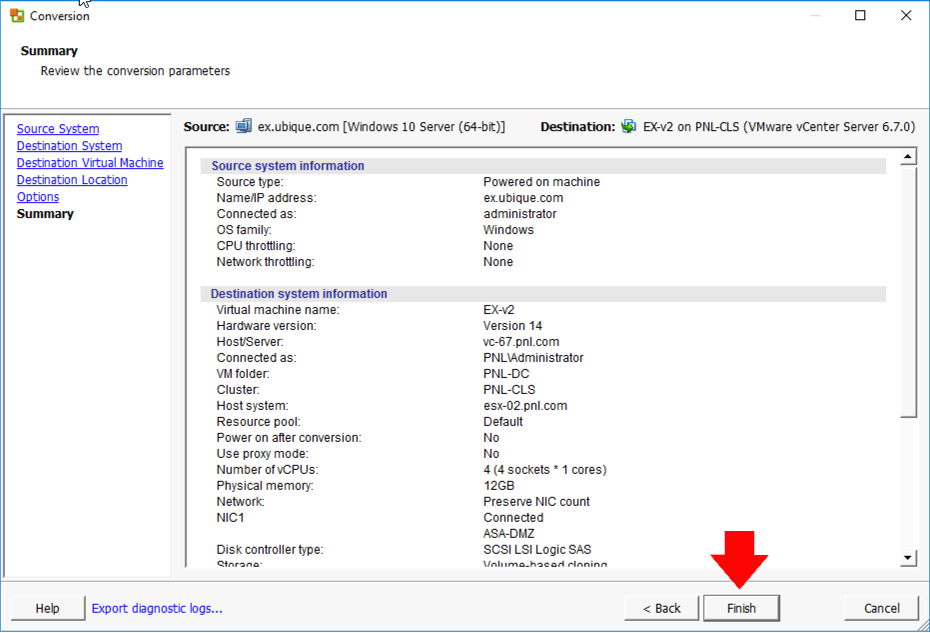
10. Finish.
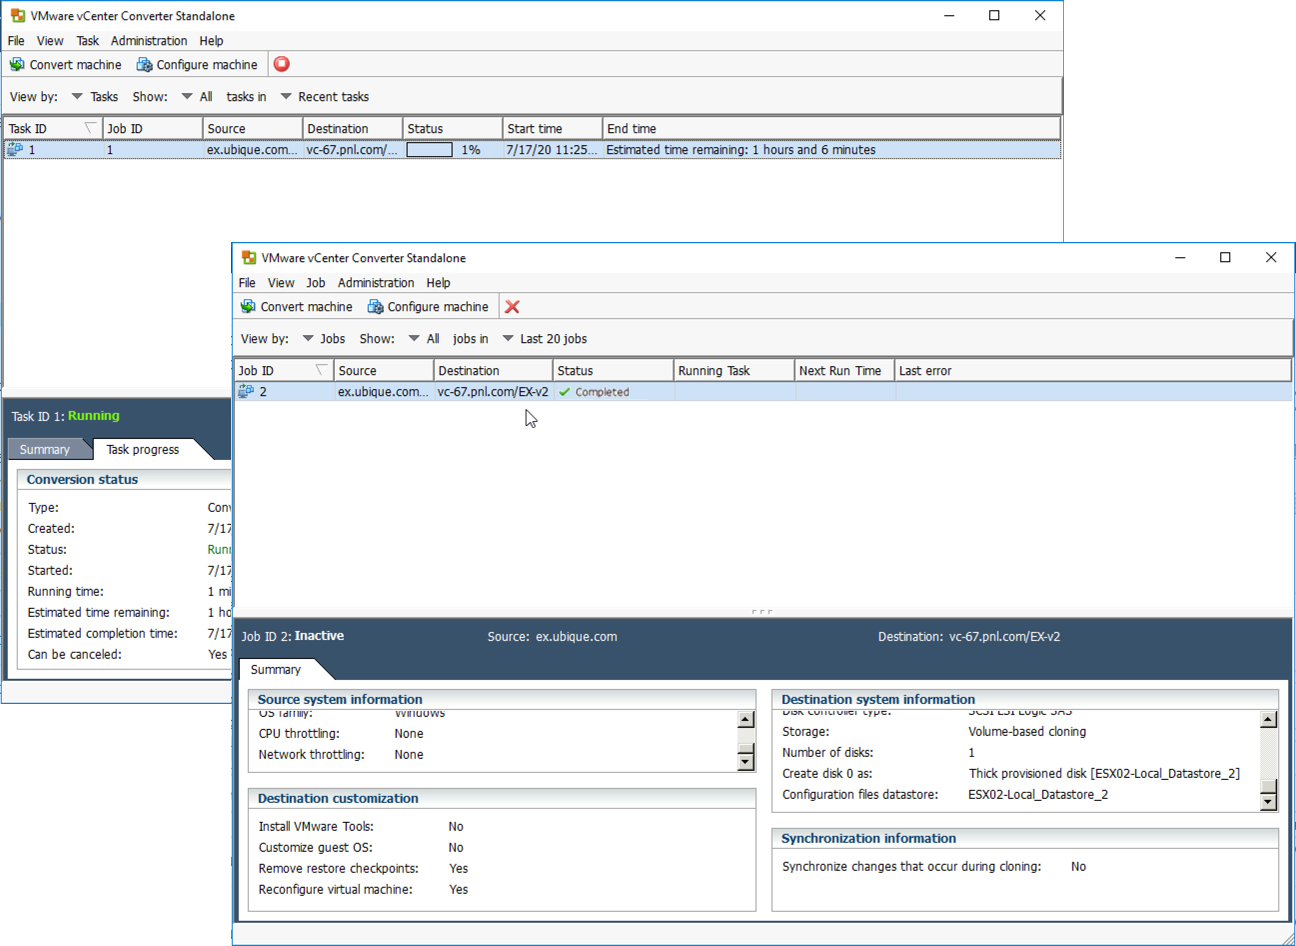
11. Depending on the size of the VM it can take a while.
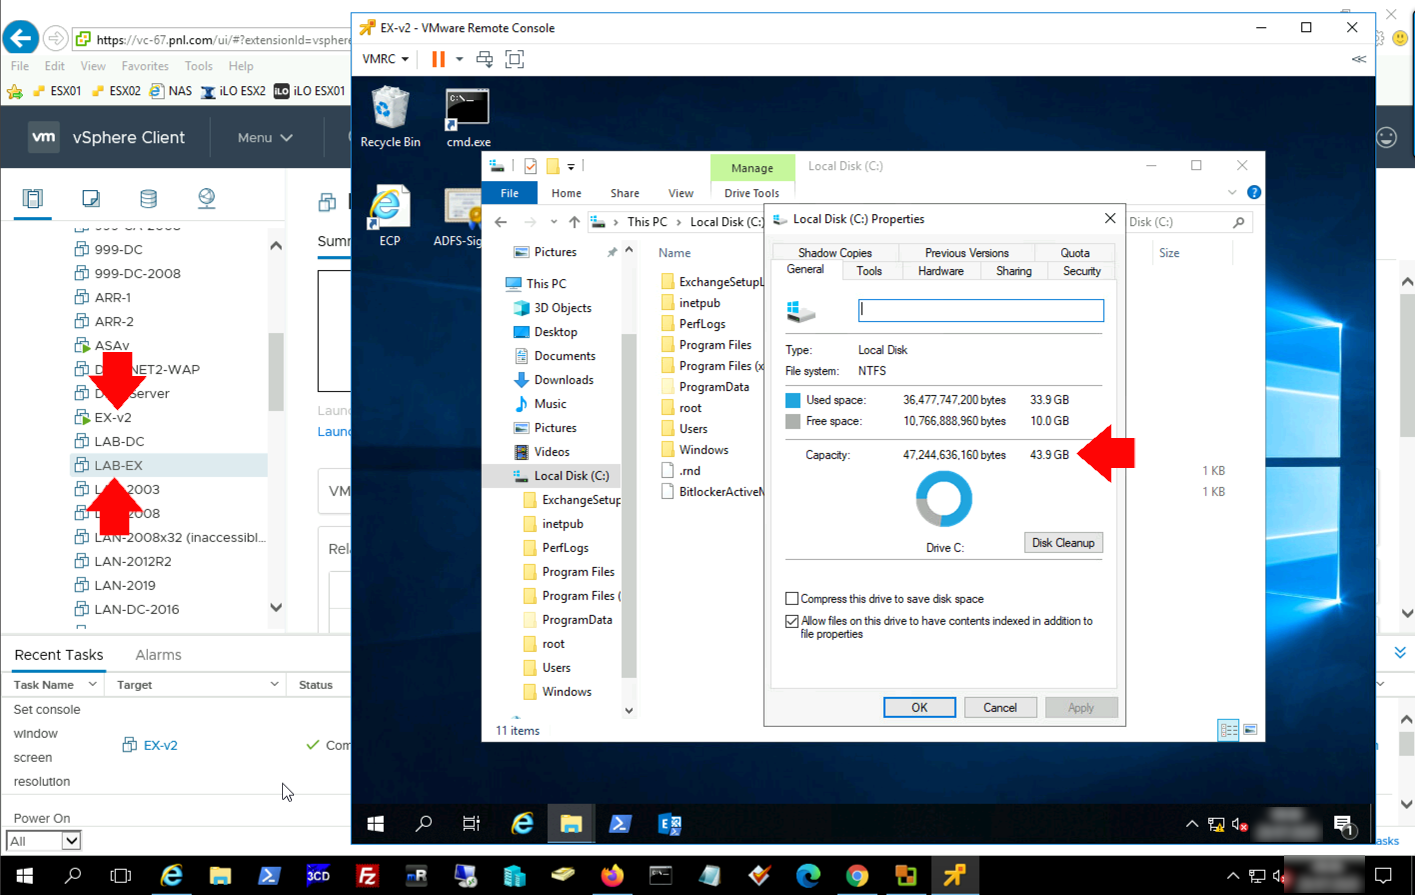
12. Now power of the original, and power on the new machine and TEST IT THOROUGHLY, when you are happy you can delete the source machine.
Resizing (Shrinking) Guest Hard Drives in vSphere 4 (and older)
The following procedure was done with VSphere4 but the process is the same in VI3. Before you start ensure that VMware Converter has been installed on the Virtual Center Server.
Related Articles, References, Credits, or External Links
VMware Converter ‘A file I/O Error Occurred’
VMware Converter ‘Unable to Connect to the Network Share’
VMware Converter – Unable to Deploy Agent