
KB ID 0000381
Problem
This article is primarily geared towards making your guest virtual machines hard drives LARGER, If you want to SHRINK or make the drive smaller then see the following article.
Resizing Guest Hard Drives using the VMware Converter
Solution
Re sizing a Guests Hard Drive (Make it larger)
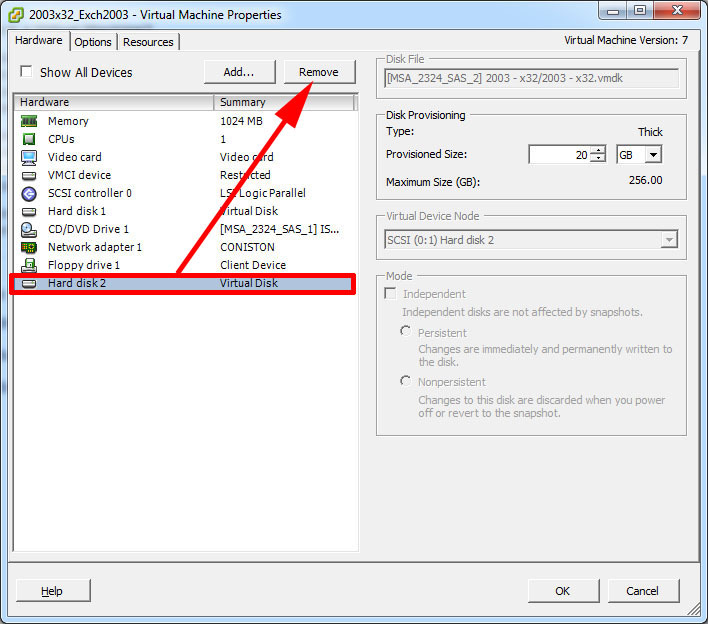
1. On the properties of the VM select the hard disk in question and locate its size.
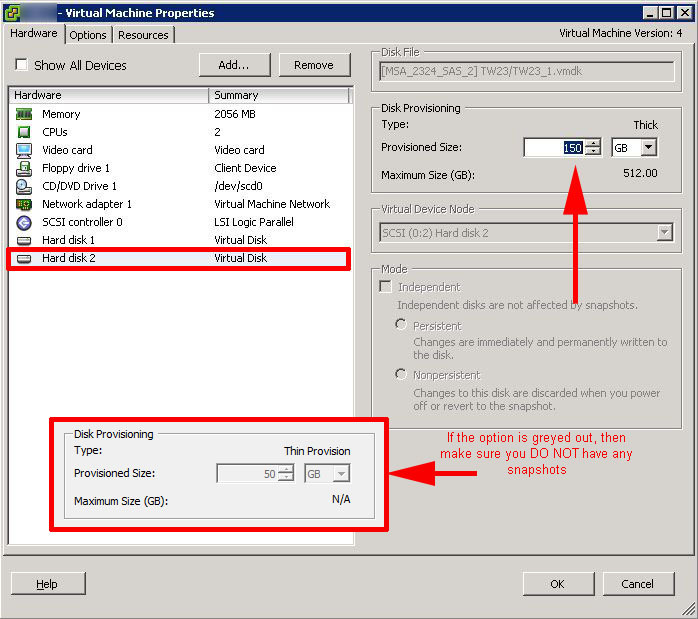
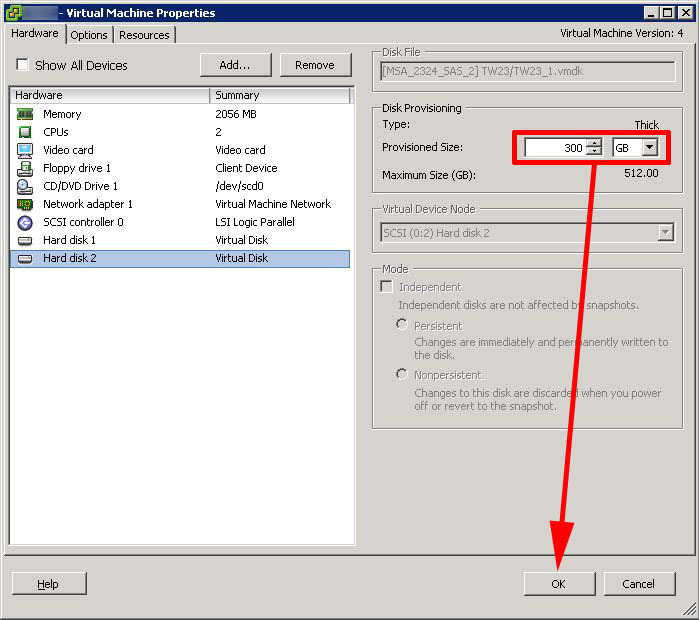
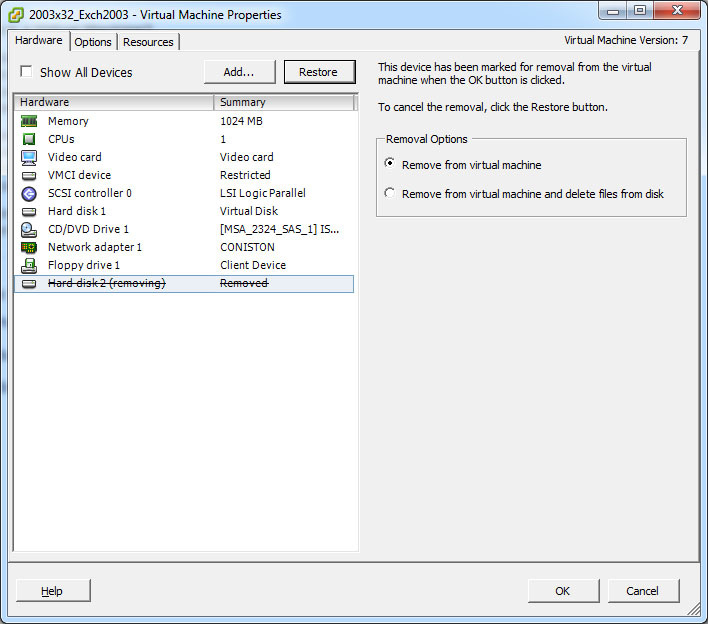
2. Enter the new size and hit OK. Note: Making the drive size smaller, will have no affect, if you want to do that clone the drive. If the option is “Greyed out” then make sure you DO NOT have any snapshots for this machine.
Re-sizing the guests “Volume” Option 1 – Graphically
Note: To do this using diskpart skip forward to number 10.
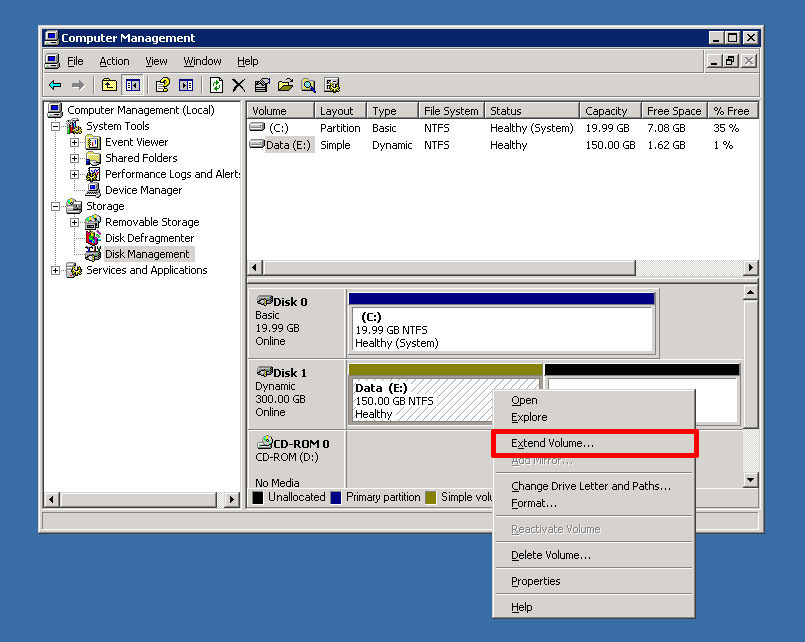
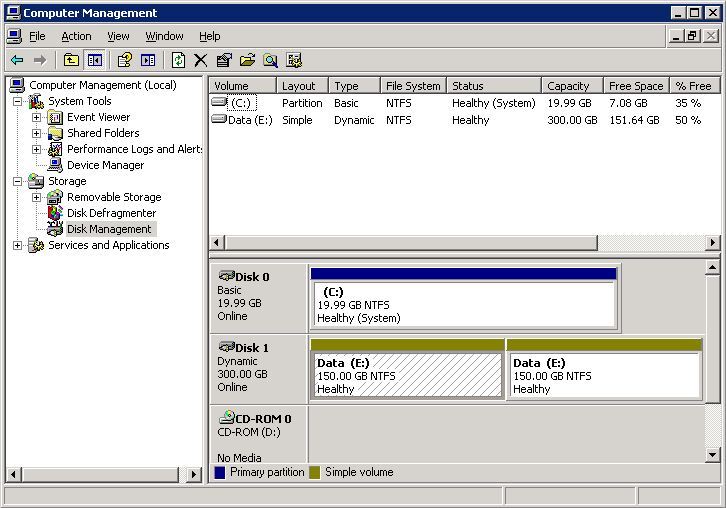
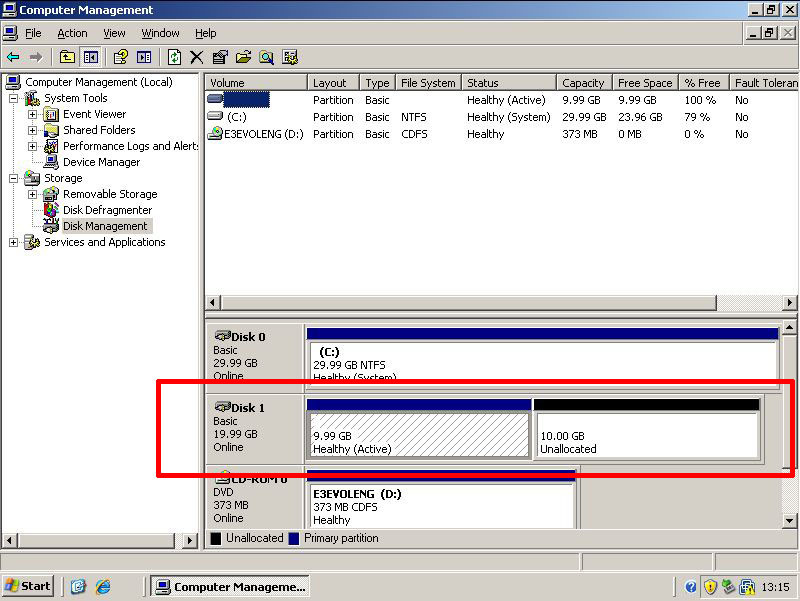
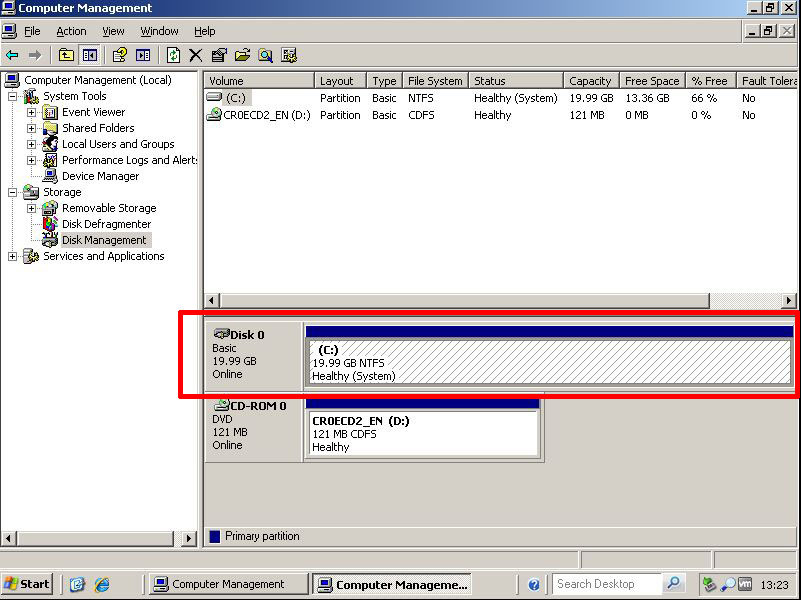
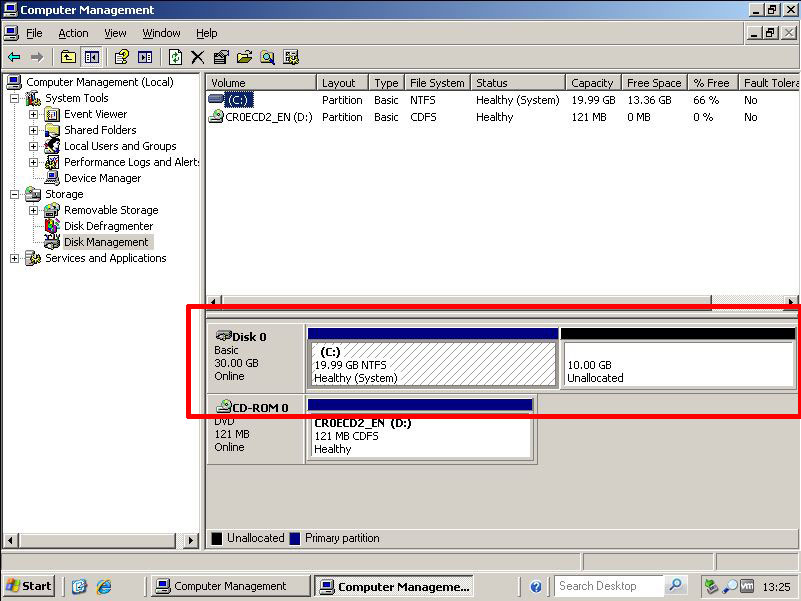
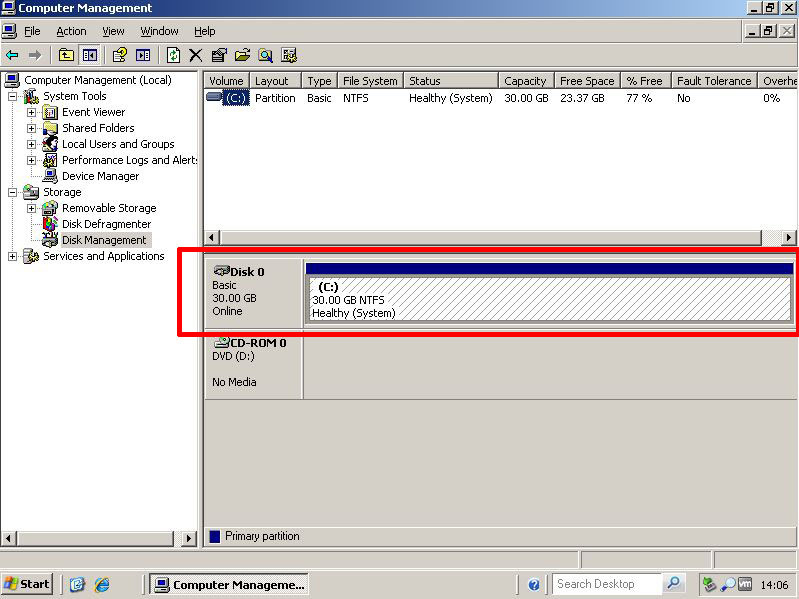
3. On the guest > Right click “My Computer” > Manage > Locate “Disk Management”. You will see there’s some free space that’s appeared on the end of the drive, (Click action > Re-scan if you can’t see it).

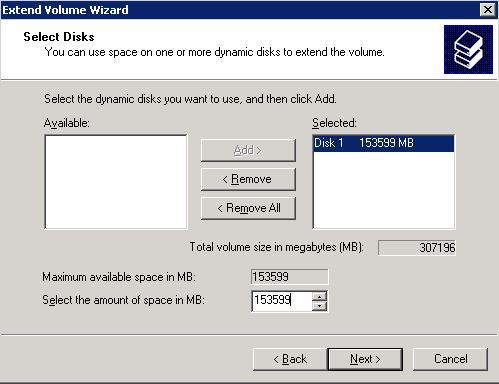
4. Simply right click the existing volume and select “Extend Volume”.
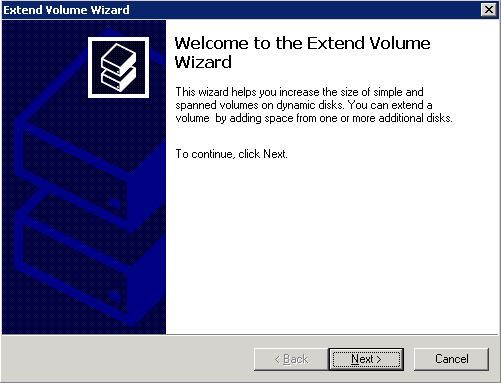
5. Next.
6. Copy in the extra space you want to assign (all of it probably) > Next.
7. Finish.
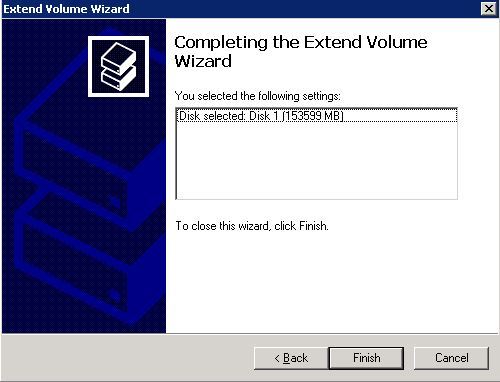
8. All the physical drive should now be committed.
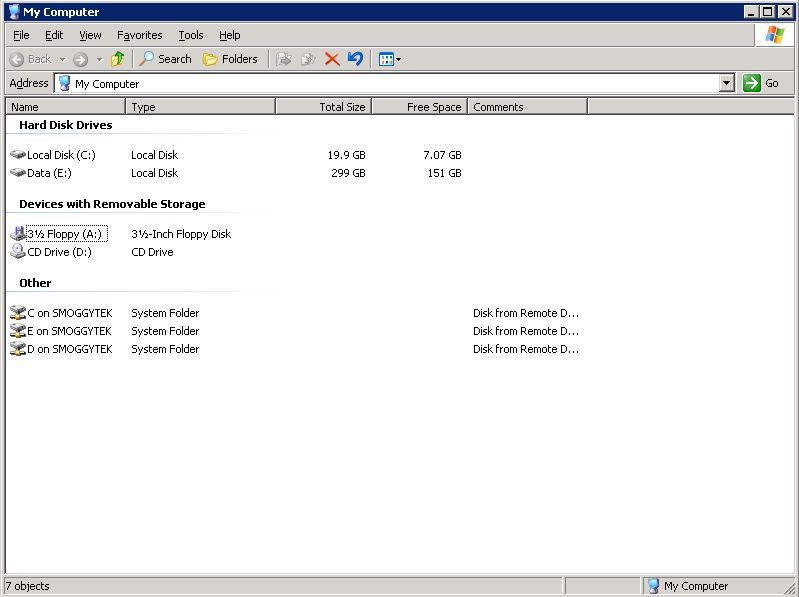
9. And just to be sure, look in “My Computer” the drive is now 300 GB.
Re-sizing the guests “Volume” Option 2 – From Command Line with diskpart
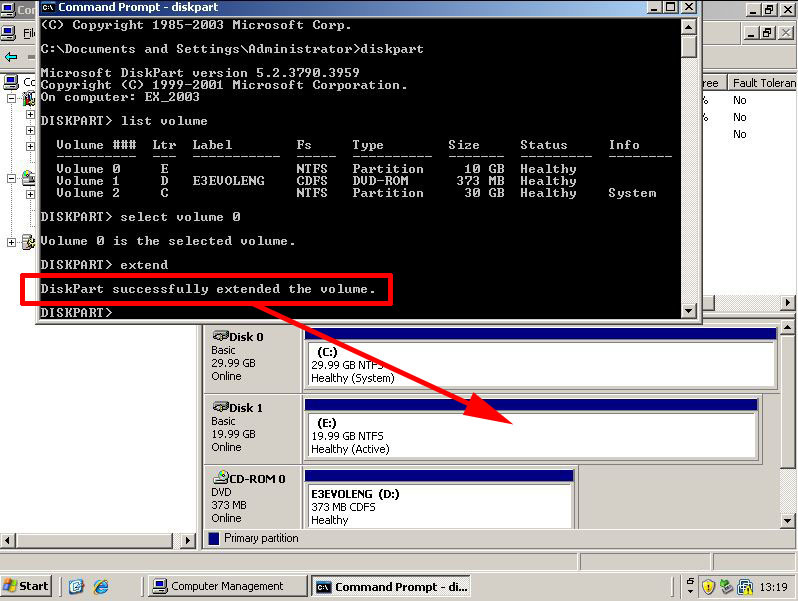
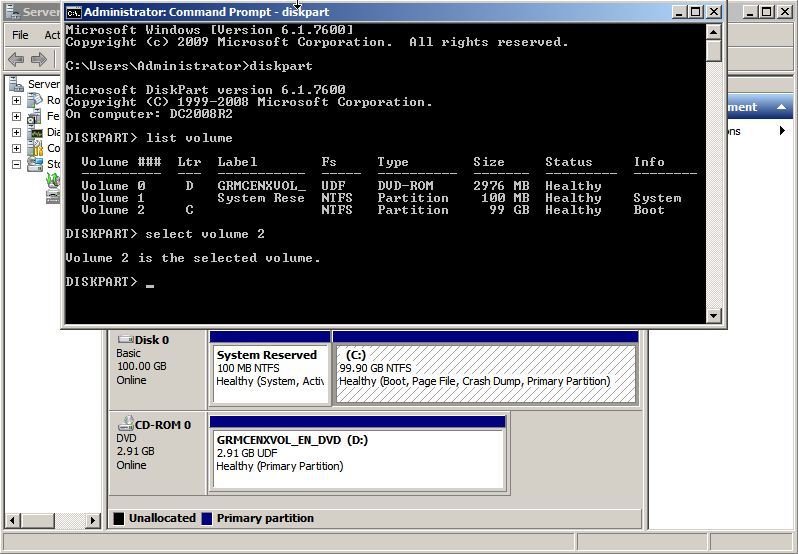
10. Start > run > cmd{enter}
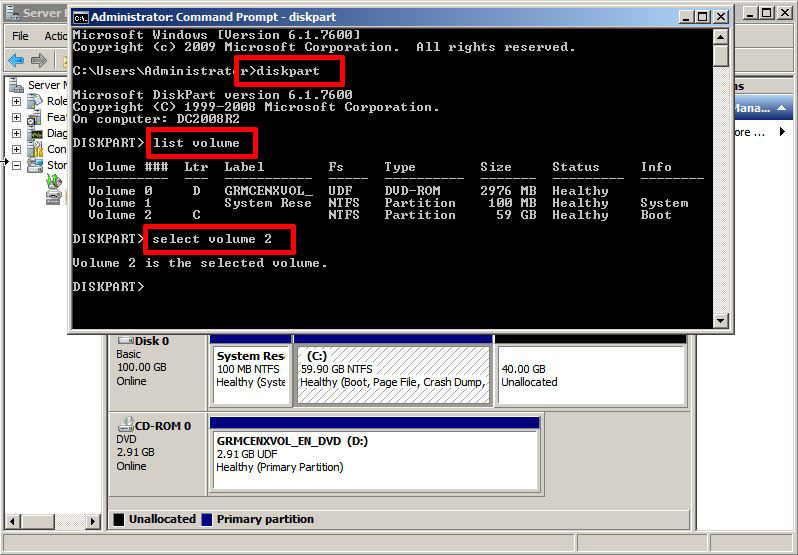
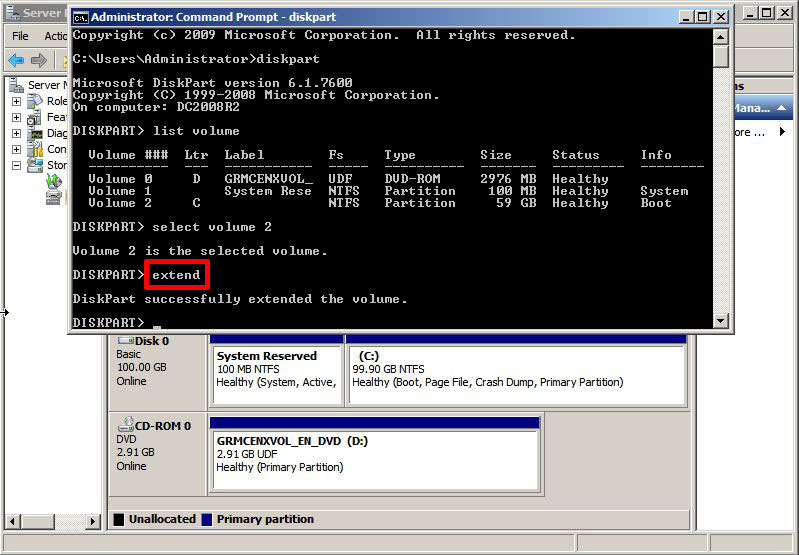
11. The final command is simply extend (This uses ALL the available free space.) Note the volume size in the picture below has jumped up by 40 GB.
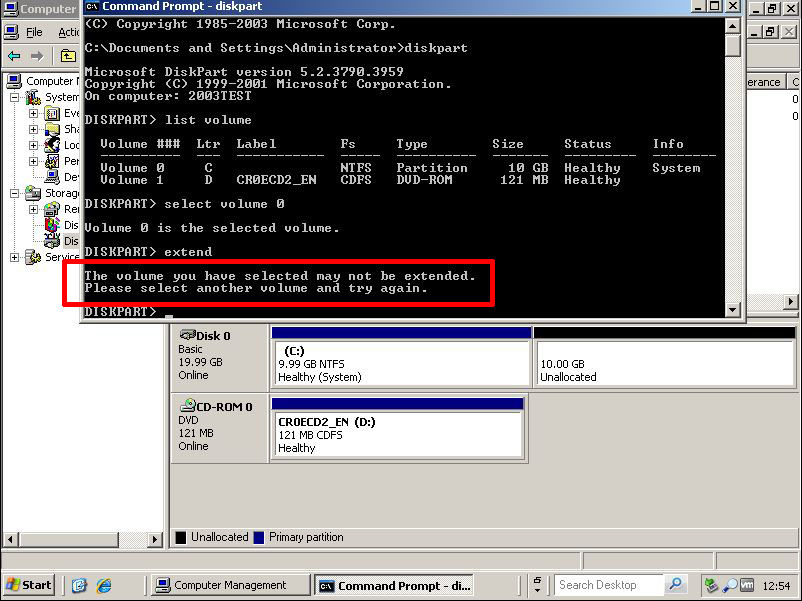
Resizing a System (boot) Partition.
Server 2008 R2 and Windows 7 can do this quite happily. Older versions of Windows do not like having their system drive re sized, you see the following error if you try,
Error: The volume you have selected may not be extended. Please select another volume and try again.
Option 1 (Connect this drive to another machine)
In a virtual environment this is much simpler, but even if its a real physical hard drive, you can put it into another server and re size it. In an ESX environment simply do the following,
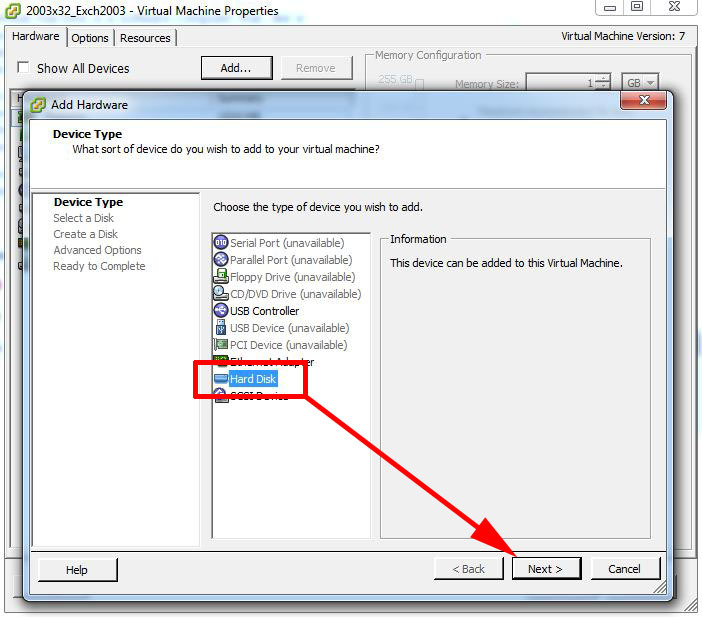
1. Shut down the machine that needs its drive re sizing, then go to another virtual machine’s properties and select add.
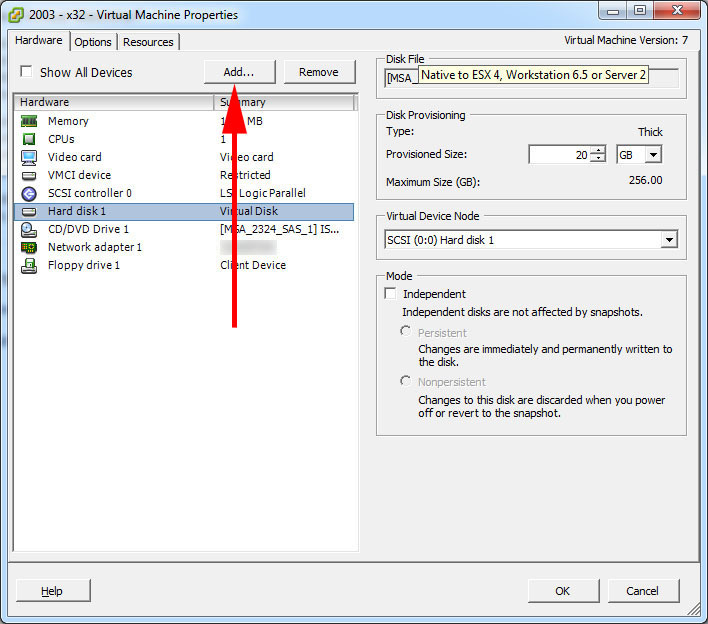
2. Hard Disk > Next.
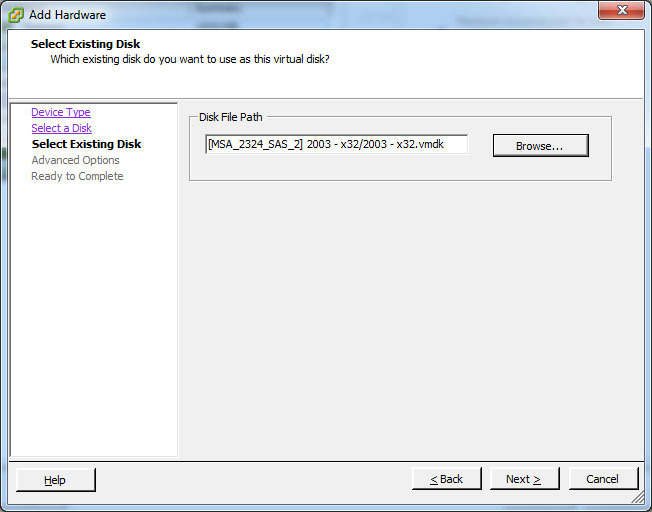
3. Select “Use existing virtual disk” > Next.

4. Browse to the the drive we want to re size > Next.
5. Next.

6. Finish.

7. Now on the VM (Action > Re-scan disks). You will see the drive, and it’s not listed as a system drive, so you can extend it using any of the methods listed above.
8. For example, heres the drive re sized using disport.
9. when you have re sized the drive go back to the properties of the machine you have connected it to, and remove it.
10. OK.
11. Now power on the original VM and drive will be re sized.
Option 2 (Re size the Windows volume with GParted)
Note: This will work for a physical server as well.
1. Here’s our system drive with some nice shiny free space.
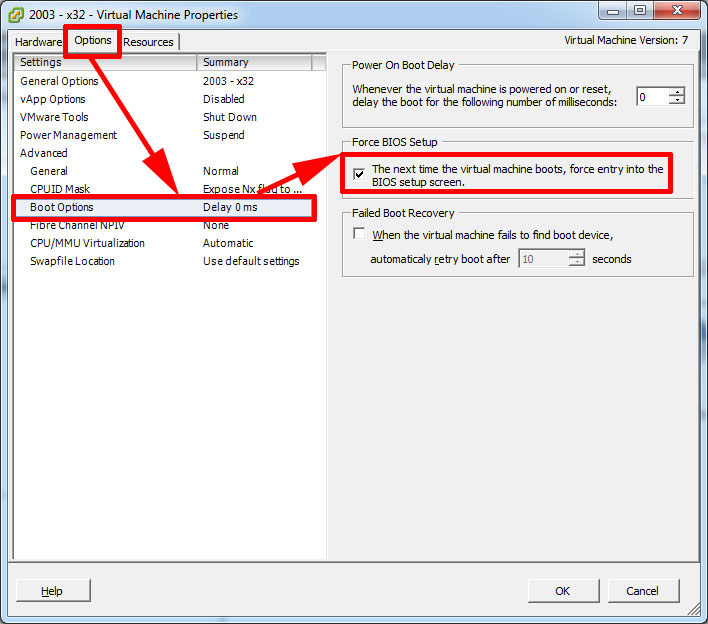
2. Make sure the server in question can boot from CD, in VMware do the following to boot to the machines BIOS, for a real server watch the screen as the server boots for instructions (Usually F10, F1 or Esc but differs depending on vendor).
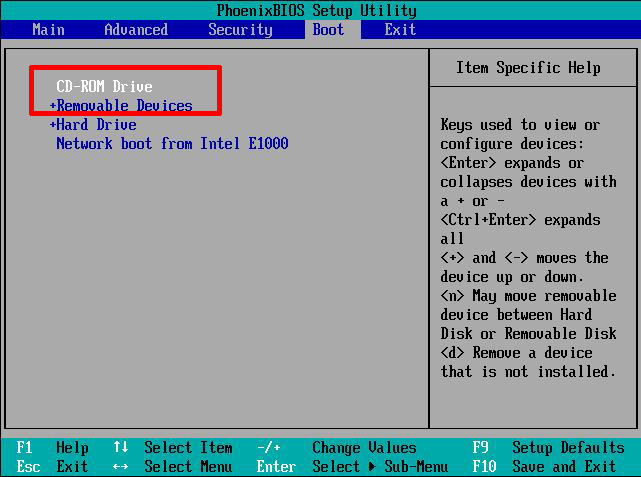
3. Locate the boot order and make sure CD/DVD is at the top of the list.
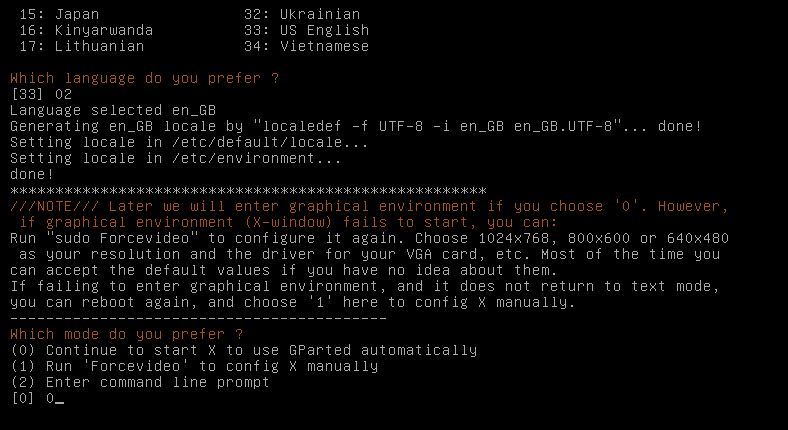
4. Download GParted burn the image to CD, if you are working on a real server (use ImgBurn if your stuck). Or simply point the VM to the iso image, and boot the machine in question from it. At the welcome screen press Enter.

5. Use your arrow and tab keys to select Don’t touch the keymap > OK.

6. Pick a language.

7. We want to launch the GUI (X Windows), so select 0 (Zero).
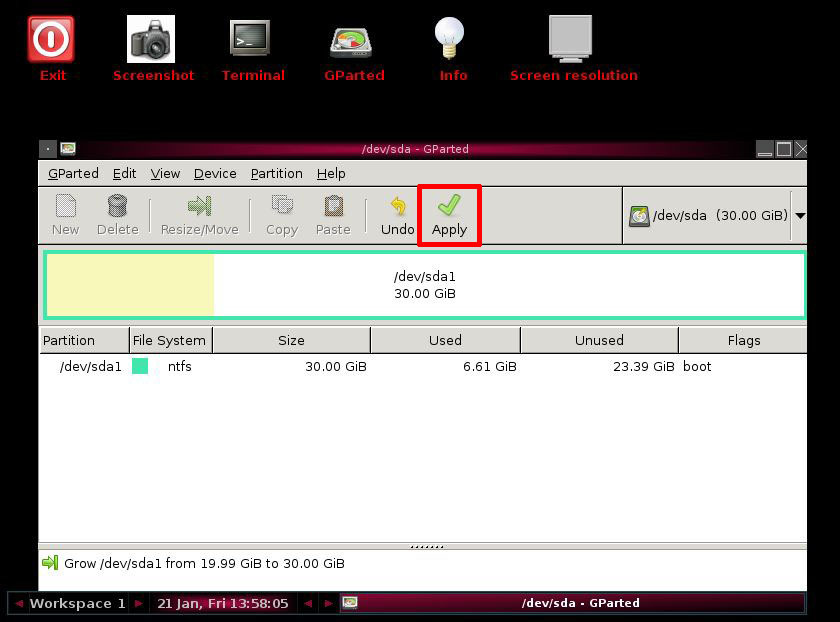
8. Select Re size/Move > Drag the arrow to include the free space > Re size/Move.

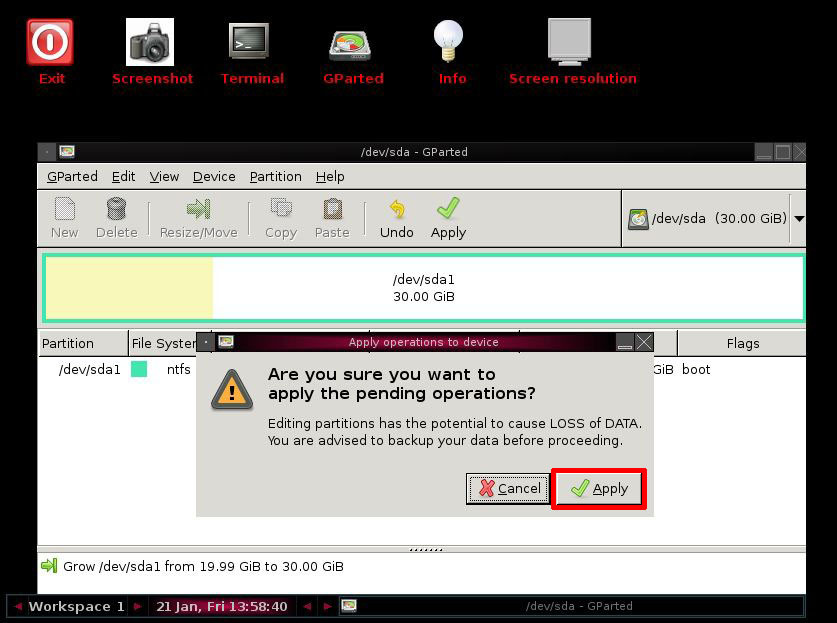
9. Apply
10. Apply.
11. Close.

12. Click GParted > Quit.

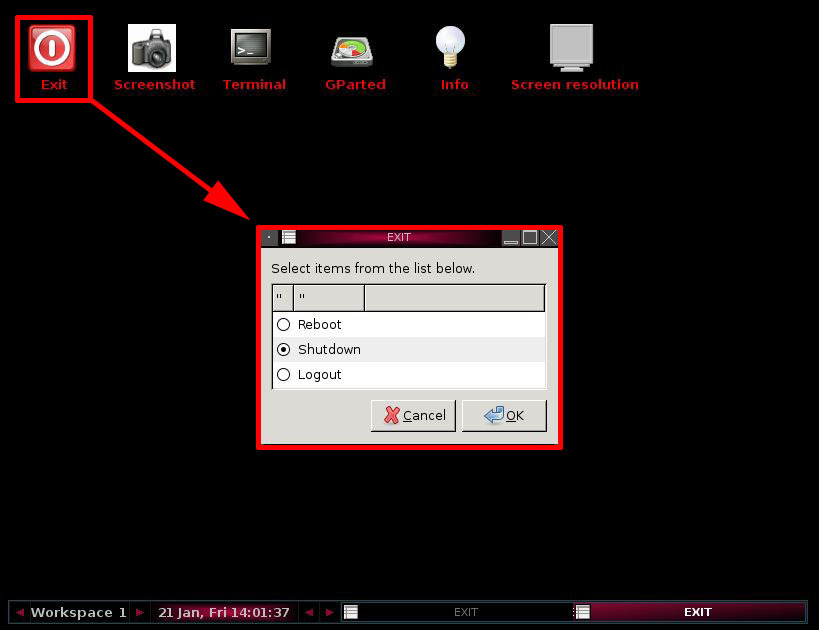
13. Exit > Reboot/Shutdown > OK.
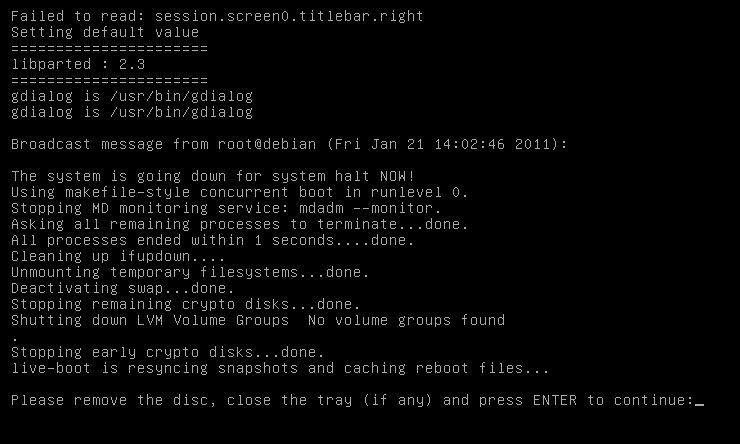
14. Remove the CD/ISO and press Enter.
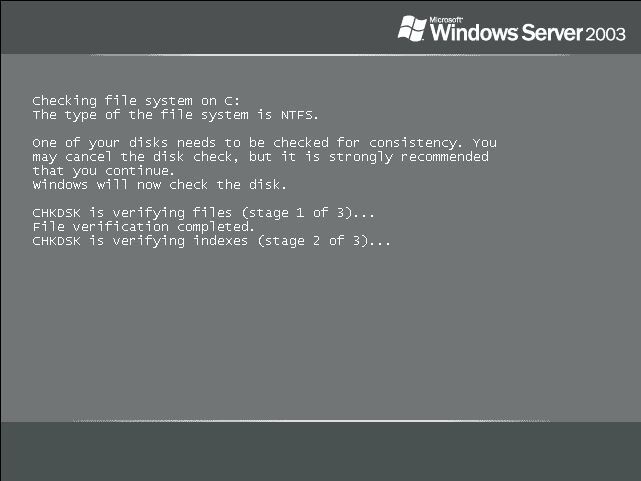
15. The guest will run chkdsk the firs time it boots. This is normal don’t panic.
16. Once booted the volume will be re sized.
Shrink a Windows Partition with diskpart
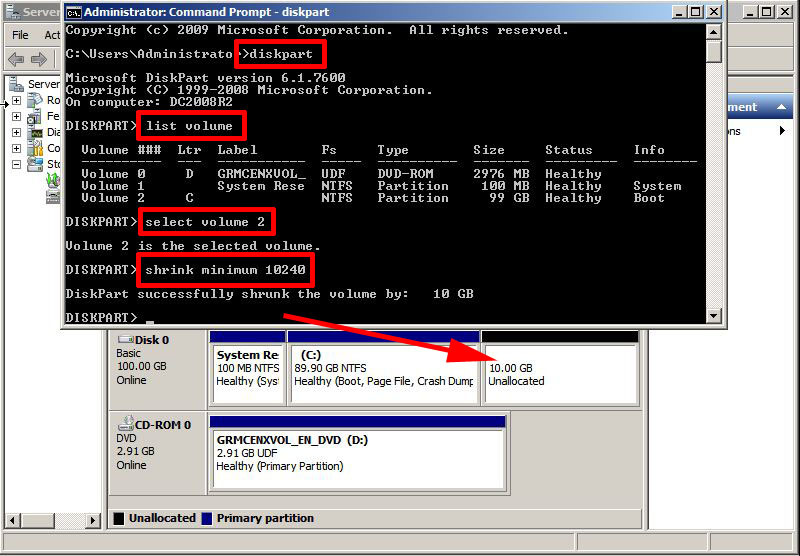
1. To actually make the volume smaller with diskpart, the initial commands are the same.
2. If you use “shrink” on its own is will shrink the drive as much as it can (I cannot think of any situation where you would do this!). So to shrink the volume by 10 GB simply issue a “shrink minimum 10240”. (The figure in in MB).
Related Articles, References, Credits, or External Links
Original Article Written 24/01/11