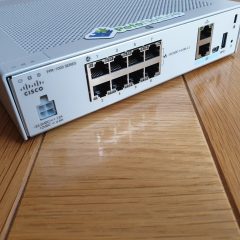
You have a Cisco FTD device that you manage via FDM, and you would like to setup port forwarding. In the example below I will forward TCP Port 80 (HTTP) traffic from the outside interface of my FTD Device (Firepower 1010) to an internal web server on 10.254.254.212
Solution (Step 1: Create an FTD NAT Policy)
Using a web browser connect to the FDM > Polices > NAT > Add.
Set the following options;
Title: Give the NAT rule a title e.g. Webserver-01
Create Rule for: Manual NAT
Status: Enable
Placement: Above a Specific Rule
Rule: InsideOutsideNATRule
Type: Static
Original Packet: Source Interface: inside
Original Packet: Source Address: Select ‘Create New Network’
In the Add new Network Object Window;
Name: Name of the server/object you are port forwarding to e.g. Webserver-01
Host: IP address of the server/object you are port forwarding to
OK
Back At the NAT Rule Window;
Source Address: Ensure it’s set to the object you just created
Original Packet: Source Port: HTTP (or whatever port you wish to forward)
Translated Packet: Destination Interface: outside
Translated PacketSource Address: Interface
Translated Packet: Source Port:HTTP (or whatever port you wish to forward)
OK.
Solution (Step 2: Create an FTD Access Control Policy Rule)
Policies > Access Control > Add.
Set the access rule as follows;
Title: Give the access rule a title e.g. Webserver-Access
Source Zone: outside_zone
Source Networks: any-ipv4
Source Ports: ANY
Destination Zone: inside_zone
DestinationNetworks: The Object you created (above)
Destination: Ports/Protocols: HTTP
OK
You can expand the rule, and see a diagram version if you wish.
Pending Changes > Deploy Now.
Wait! The changes probably haven’t deployed yet, you can check progress by clicking the pending changes button again.
Related Articles, References, Credits, or External Links
Note: This is for Cisco ASA 5500, 5500-x, and Cisco Firepower devices running ASA Code.
This comes up on forums a lot, some applications and most phone systems require a ‘LOT’ of ports to be open. Normally thats fine you just give the internal IP a static public IP and open the ports. But what if you don’t have a spare public IP? I’ve already covered port forwarding before.
Until version 8.4 you couldn’t even do this, you needed to create a translation for each port! Note: There is a bug in versions 9.0 and 9.1 that can stop this working, so check your OS with a ‘Show Ver’ command to be sure.
As I said this come up a lot on forums so when it asked on EE the other day, I fired up GNS3 and works out how to do it. Here is my topology;
So I will setup ‘port forwarding’ from the outside interface of ASA-1 for TCP ports 1000 to 2000 to then Internal Server (10.2.2.10).
1. Setup object groups for your internal server and for the range of ports you are going to forward.
[box]
!
object network Obj-Internal-Server
host 10.2.2.10
!
object service Obj-Ports-Range
service tcp destination range 1000 2000
!
[/box]
2. Then allow the traffic in with an ACL See MY WARNING before doing this.
[box]
!
access-list inbound extended permit tcp any host 10.2.2.10 range 1000 2000
!
access-group inbound in interface outside
!
[/box]
3. Perform the PAT translation from the outside interface to the internal server.
[box]
!
nat (outside,inside) source static any any destination static interface Obj-Internal-Server service Obj-Ports-Range Obj-Ports-Range
!
[/box]
Note: A lot of people ask to ‘port forward’ a range of ports when they actually mean ‘I would like to open a range of ports to an internal IP address’. Thats essentially just a one-to-one static NAT. I’ve already covered that before, but in our example i use a spare public ip 192.168.253.100.
You would like to set up port forwarding on a Sonicwall 2040, in this example I will assume we are forwarding SMTP (TCP port 25).
Sonicwall Pro 2040 – System Screen
Note: Notice the “Network Interfaces” section, take note of the names of the interfaces and what they are doing, this will become relevant later.
Solution
1. Log into the Sonicwall’s management console.
2. If you have not already done so create an address object for the server you are going to port forward to (Network > Address Objects > Scroll down > Add).
3. Service creation > If you have not already done so you need to create a “Service” (Firewall > Services > scroll to the bottom >Add) Note: This example is for HTTPS on port 443, for mail simply create SMTP on Port 25).
3. Expand Network > NAT Policies > Add > Original Source = Any > Translated Source = Original > Original Destination = WAN Interface IP > Translated Destination = {the object you created in step 1} > Original Service = {the service you created in step 2}> Translated Source = Original > Inbound Interface = X1 (default for outside) > Outbound interface = Any > Description = {a relevant comment} > OK.
4. Now you want to allow the traffic in expand Firewall > Access Rules > WAN to LAN > Add > Service = {the service you created in step 2} > Source = Any >Designation = WAN Interface IP > Users Allowed = All > Schedule = Always on > Comment = {a relative comment} > OK.
Related Articles, References, Credits, or External Links
If you didn’t already know the Remote Desktop Protocol Port is TCP 3389, that fine but what if you want to change it to something else? That begs another question, Why?
Well some people like to change the port to something else, so that different ports are open in the even of a nasty type performing a port scan on your machine/firewall, even the most clueless script kiddies know that if they see TCP 3389 open then RDP is probably going to be on the other end of it. Or you might want to have all you servers available to the internet via RDP (people do) but you can only port forward TCP 3389 to one internal IP address. If you change the ports for each server then you only need to forward one port to one server.
Solution
Note: This works on Windows 2000/2003/2008/XP/Vista/Windows 7
1. On the machine in question Click Start > Run (or type in the Start Search) > Regedit {enter}.
2. The Registry Editor will open.
3. Navigate to HKEY_LOCAL_MACHINESystemCurrentControlSetControlTerminal ServerWinStationsRDP-Tcp
4. In the right hand window locate PortNumber.
5. You will need to select Decimal, you will see by default its 3389 change it to something else (I suggest a number above 1024). In this case Ill use 3390.
6. Make sure that RDP is actually enabled on the machine in question. (Note: If this machine has a firewall enabled it will block the new port either enable that port or disable the local firewall)/
7. To connect to this machine from another one, use the same remote desktop client, Click Start > Run > MSTSC {enter} and the the target computers name or IP address then a colon then the new port number.
Related Articles, References, Credits, or External Links
If you have a server or host that you want to be publicly addressable and only have one public IP address then port forwarding is what you require.
Solution
Assumptions
1. You have a public IP on the outside of your Router.
2. You are performing NAT from your internal range of IP address to your External IP address.
To Make Sure
1. Run the following command:
[box]PetesRouter#show run | include ip nat inside[/box]
You should see a line like,
[box]ip nat inside source list 101 interface Dialer0 overload[/box]
2. That means NAT all traffic that access-list 101 applies to, to Dialer0 (this is an ADSL router and that’s it’s outside interface). To see what traffic is in access-list 101 is issue the following command:
[box]PetesRouter#show run | include access-list 101[/box]
You should see a line like,
[box]access-list 101 permit ip 10.10.0.0 0.0.255.255 any[/box]
3. This means permit (apply this ACL) to all traffic from 10.10.0.0/16 to anywhere. So its set to NAT all traffic from the inside network to the outside network.
4. Finally to see what IP is on your Dialer0 issue the following command:
[box]PetesRouter#show ip interface brief | exclude unassigned[/box]
You should see something like this
Now we know all traffic from 10.10.0.0/24 (All inside traffic) will be NAT translated to 123.123.123.123
Set up Port Forwarding
In this case Ill port forward TCP Port 443 (HTTPS) and TCP Port 25 (SMTP) to an internal Server (10.10.0.1).
1. First set up the static NAT translations.
[box]
PetesRouter#ip nat inside source static tcp 10.10.0.1 443 123.123.123.123 443 extendable
PetesRouter#ip nat inside source static tcp 10.10.0.1 25 123.123.123.123 extendableOR If you are running with a Public DHCP address
PetesRouter#ip nat inside source static tcp 10.10.0.1 443 interface Dialer0 443
PetesRouter#ip nat inside source static tcp 10.10.0.1 25 interface Dialer0 25
[/box]
2. Second stop that traffic being NATTED with everything else.
[box]
PetesRouter#access-list 101 deny tcp host 10.10.0.1 eq 443 any
PetesRouter#access-list 101 deny tcp host 10.10.0.1 eq 25 any
[/box]
3. Save the changes with “copy run start”, then press enter to access the default name of startup-config:
[box]
PetesRouter#copy run start
Destination filename [startup-config]?
Building configuration...
[OK]
PetesRouter#
[/box]
Setup port forwarding and restrict it to an IP or network
For things like HTTPS and SMTP you might want them accessible from anywhere but you might want to lock down access for something like RDP, (TCP port 3389) if that’s the case then you need to do the following.
1. Create a new ACL that allows traffic from you but denies it from everyone else (remember to put an allow a permit at the end).
[box]
PetesRouter#access-list 199 permit tcp host 234.234.234.234 host 123.123.123.123 eq 3389
PetesRouter#access-list 199 deny tcp any host 123.123.123.123 eq 3389
PetesRouter#access-list 199 permit ip any any
[/box]
Note: To allow a network substitute the first line for,
4. Finally apply the ACL you created inbound on the Dialer0 interface.
[box]
PetesRouter#configure terminal
Enter configuration commands, one per line. End with CNTL/Z.
PetesRouter(config)#interface Dialer0
PetesRouter(config-if)#ip access-group 199 in
PetesRouter(config-if)#exit
PetesRouter#
[/box]
5. Save the changes with “copy run start”, then press enter to access the default name of startup-config:
[box]
PetesRouter#copy run start
Destination filename [startup-config]?
Building configuration...
[OK]
PetesRouter#
[/box]
Related Articles, References, Credits, or External Links
WARNING: Allowing RDP traffic from ‘any’ IP this is a monumentally bad idea, ONLY allow RDP traffic from trusted hosts/networks, or better still, limit RDP to clients/locations the have their traffic protected by VPN.
You want to connect via “Remote Desktop” to multiple servers behind your firewall. To do this you have three options.
Note: This is an old article that refers to ‘pre 8.3’ code, for modern firewalls see this article.
Solution
Option 1 (Use if you have multiple free Public IP addresses)
Connect to the firewall, go to enable mode, then go to “Configure Terminal Mode”, and create a names entity for each Servers public and Private Address.
[box]
Petes-ASA> en
Password: *********
Petes-ASA#configure terminal
Petes-ASA(config)# name 192.168.1.1 Server1-Internal
Petes-ASA(config)# name 192.168.1.2 Server2-Internal
Petes-ASA(config)# name 123.123.123.123 Server1-External
Petes-ASA(config)# name 123.123.123.124 Server2-External
[/box]
Now Allow RDP to both of the servers with an Access con troll list and apply that access con troll list to the outside interface (Note if you already have in inbound ACL simply substitute the name “inbound” for yours.
Option 2 (Uses Port Forwarding and uses a different port for each server).
To deploy this option the ASA will accept the connection for each server on a different port, to do this each server must listen on a different port.
Connect to the firewall, go to enable mode, then go to “Configure Terminal Mode” then allow each port you are going to use (in this case 3389 and 3390).
2. Save the new config > File > “Save Running Configuration to flash”.
Cisco PIX (Version 6) Firewalls – Disable Web Management
If you are stuck on version 6, i.e. you are running a PIX 506E or PIX 501, then you CANNOT change the PDM port. you only option is to disable the PDM if you want to port forward https / ssl / TCP Port 443.
Related Articles, References, Credits, or External Links
In the following example I’m using 192.168.1.100 as the internal IP address of the View Server and the public IP address of the firewall is 123.123.123.123.
Which solution you use, depends on weather you are allowing access via a dedicated public IP that you will assign to the VMware View server, or if you do not have a spare public IP, you will need to use port forwarding.
Option 1 – You have a public IP that you want to assign to the VMware View Server
As I’m using 123.123.123.123 on the outside of my ASA I’m going to use another public IP address for the VMware View server (123.123.123.124) and I will statically map that to its internal IP address. Then I allow the ports to that IP address, and finally apply the access-list (ACL) that I’ve used to the outside interface (where the VMware View traffic will be coming from).
Warning: The last command (starting access-group, applies the access-list ‘inbound’ in the inbound direction on the outside interface, you may already have an access-list applied to this interface (the ‘show run access-group’ command will tell you) If you do have another ACL simply substitute the name of yours for the work inbound in my example below).
Option 2 – You want to use Port Forwarding (And your ASA is pre version 8.3)
Below I’m creating a static PAT entry for all the ports required, then allowing the traffic with an access-list, and finally applying the access-list (ACL) that I’ve used to the outside interface (where the VMware View traffic will be coming from)
Warning: The last command (starting access-group, applies the access-list ‘inbound’ in the inbound direction on the outside interface, you may already have an access-list applied to this interface (the ‘show run access-group’ command will tell you) If you do have another ACL simply substitute the name of yours for the work inbound in my example below).
Note: If you port forward https on the outside interface, as I’m doing here, you will not be able to access the ASDM from outside – unless you put it on another port. The following two commands would change the ASDM to port 2345 for example:
Option 3 – You want to use Port Forwarding (And your ASA is version 8.3 or newer)
Below I’m creating a network object for all the ports required and statically NATTING the ports required to them, then I’m allowing the traffic to reach that network object, and finally applying the access-list (ACL) that I’ve used to the outside interface (where the VMware View traffic will be coming from)
Warning: The last command (starting access-group, applies the access-list ‘inbound’ in the inbound direction on the outside interface, you may already have an access-list applied to this interface (the ‘show run access-group’ command will tell you) If you do have another ACL simply substitute the name of yours for the work inbound in my example below).
Note: If you port forward https on the outside interface, as I’m doing here, you will not be able to access the ASDM from outside – unless you put it on another port: The following two commands would change the ASDM to port 2345 for example:
If you have an FTP server, simply allowing the FTP traffic to it wont work. FTP (in both active and passive mode) uses some random high ports that would normally be blocked on the firewall. So by actively inspecting FTP the firewall will know what ports to open and close.
Solution
How you ‘allow’ access to the FTP server will depend on weather you have a public IP address spare or not, if you only have one public IP you will need to ‘port forward’ the FTP traffic to the server. But if you have a spare public IP address you can create a static mapping to that IP address instead.
Cisco ASA FTP Procedure
1. Connect to the firewall > Go to enable mode > Go to Configure terminal mode > Create an object for the FTP server > redirect all FTP Traffic to that object.
Note: In this example 192.168.1.1 is the IP of the FTP server.
[box]
USING PORT FORWARDING
User Access Verification
Password:
Type help or '?' for a list of available commands.
Petes-ASA> enable
Password: ********
Petes-ASA# configure terminal
Petes-ASA(config)# object network Internal_FTP_Server
Petes-ASA(config-network-object)# host 192.168.1.1
Petes-ASA(config-network-object)# nat (inside,outside) static interface service tcp ftp ftp
Petes-ASA(config-network-object)#exitPetes-ASA(config)#USING A SPARE PUBIC IP (STATIC MAPPING to 123.123.123.124)
User Access Verification
Password:
Type help or '?' for a list of available commands.
Petes-ASA> enable
Password: ********
Petes-ASA# configure terminal
Petes-ASA(config)# object network Internal_FTP_ServerPetes-ASA(config-network-object)#host 192.168.1.1Petes-ASA(config-network-object)# nat (inside,outside) static 123.123.123.124Petes-ASA(config-network-object)#exitPetes-ASA(config)#
[/box]
2. Then allow the FTP traffic in from outside.
Now you need to allow the ftp traffic in. Before you can add an ACL you need to see if you already have one. We are applying an ACL to the outside interface for traffic going in (I call this inbound for obvious reasons). To see if you already have an ACL applied, issue the following command;
[box]
Petes-ASA(config)#show run access-group
access-group inbound in interface outside
access-group outbound in interface inside[/box]
Note: In the example above we have an ACL called inbound that we MUST use. (If you added a new one, all the access list entries for the old one get ‘Un-applied’). If yours has a different name (e.g. outside_access_in then use that instead of the ACL name I’m using here). If you DONT have an access-group entry for inbound traffic then we will do that at the end!
[box]
Petes-ASA(config)# access-list inbound permit tcp any object Internal_FTP_Server eq ftp[/box]
3. Then: Only carry out the following command if you DO NOT HAVE an ACL applied for incoming traffic.
[box]
Petes-ASA(config)#access-group inbound in interface outside
[/box]
4. Then to allow the ASA to insect the FTP traffic, do the following;
1. Connect to the ASDM > Configuration > Firewall > Addresses Section > Add > Network Object > Give the FTP server a name > Set it to ‘Host’ > Enter The IP Address > Select the drop down arrow > Tick the ‘Add Automatic Address Translation Rule’ > Advanced.
2. Set Source interface = inside > Destination Interface = outside > Protocol = tcp > Real and Mapped ports = ftp > OK > OK > Apply.
3. To allow the traffic in right click the outside interface > Add Access Rule.. > Set the destination to the server you created earlier > and the service to tcp/ftp > OK > Apply.
4. Service Policy Rules > Inspection_default > Edit > Rule Actions > Tick FTP > OK > Apply.
5. Save the changes > File > Save running Configuration to Flash.
Cisco PIX FTP Procedure
1. Connect to the firewall > Go to enable mode > Go to Configure terminal mode > Access List for the inbound FTP traffic (Its wide open we will narrow it down in a moment).
[box]
User Access Verification
Password:
Type help or '?' for a list of available commands.
PetesPIX> enable
Password: ********
PetesPIX# configure terminal
PetesPIX(config)# access-list inbound permit tcp any any eq ftp
PetesPIX(config)# access-group inbound in interface outside
[/box]
2. Create a static mapping that locks all incoming FTP traffic to the internal servers IP address (In this case 192.168.1.1).
Note: This is for Cisco ASA 5500, 5500-x, and Cisco Firepower devices running ASA Code.
A very long time ago I wrote an article about how to port forward from a public IP address to multiple servers for RDP. Basically you would connect to the firewall using various different ports, and the firewall would change the port to the correct one for RDP (TCP port 3389, unless you changed it on the machine). Then send it to the correct server, so you could manage multiple servers from the same public IP.
Now that was so long ago it was before the version 8.3 NAT changes. This week I was working on a problem where every change I made that had to be tested meant I had to swap VPNs, and reconnect to servers and test comms. This was getting a bit time consuming so I needed a public server to jump on for testing. I didn’t want to expose RDP to my server, so I planned to use a different port and translate that port on the firewall. But how to do that with modern ASA code?