How Do I Find/Change My IP Address?

KB ID 0000208

What’s an IP address?

An IP address is the address used on a network to find your PC, Server, Laptop, or Printer etc. It’s the networking equivalent of your house number and post code (or Zip Code for visitors from over the pond).

Do you want your PUBLIC or PRIVATE IP address? As we started to run out of addresses, there were a number of solutions that we came up with, one you will see below (DHCP) the other is NAT (Network Address Translation) that lets many IPs on a network share one (or more) public IP addresses on the internet. If you want to know your PUBLIC address (your address in on the internet) then simply see below;

Your Public IP Address Is: [user_ip]

Where does my IP address come from?

You get an IP address by two methods,

1. Statically Assigned: Your address never changes and is allocated to you manually.

2. Dynamically Assigned: Your machine gets its IP address automatically via a system called DHCP.

What does an IP address look like?

Most IP addresses in use today are IP version 4 and consist of 4 numbers separated by three full stops (or once again, periods, for overseas visitors).

An IP address 192.168.1.100

Is that all my computer needs?

NO! You need FOUR pieces of information to access the internet and work properly;

1. The IP address itself (i.e. 192.168.1.100) this is unique to every machine on the network.

2. The Subnet Mask (i.e. 255.255.255.0) this tells the machine how big the network it is on, is.

3. The Default Gateway, this is another IP address on the network that you need to go through to get off the local network, i.e. to access the internet.

4. The DNS IP address, this is another IP address of a machine that can translate IP addresses into names (e.g. translate www.bbc.co.uk to 212.58.246.159).

What’s my IP address?

1. Windows Key + R > type ‘cmd’ {Enter}

2. A Command Window will open, click within the box and you can type in commands, the command to show your IP address is ipconfig, but this WONT show us the DNS settings as well, to do that the command is “ipconfig /all“.

Note: If you have many network connections you will get results for them all, you may need to scroll up and down to find the right one.>

IP Problems

Problem 1: My machine has got an IP address that is 169.254.x.y (where x and y can be any number from 1 to 254).

Answer: This machine is set to get its IP address automatically via DHCP but it cant speak to the DHCP server, because either the DHCP server is down or there is no connection between the DHCP server and you.

Problem 2: My IP address shows as 0.0.0.0

Answer: You have been given a static IP address and someone on the same network is using the same address, this causes an IP conflict, change one of the IP addresses.

Find out if your IP address is statically assigned of dynamically assigned

The more eagled eyed of you will see on the ipconfig /all results above that this machine is disabled for DHCP so its dynamically assigned however, on your Windows machine do the following.

1. Windows Key + R > Tyoe ‘ncpa.cpl’ {Enter}

2. Your network connections window should open and locate the connection you are connecting with (you might have many, be sure to select the right one, i.e. you might have one for dial up, one for wireless, one for a VPN to the office etc). Right click the connection and select properties.

3. On the window that appears you may have to scroll down the list, we are looking for its TCP/IP (on newer machines it will be called “Internet Protocol Version 4 (TCP/IPv4)”, Select it and click properties.

4. Now you can see if your addresses are set statically or dynamically.

How to change your IP address

To change your IP address you first need to know if you have a static IP address or a Dynamically assigned one. (That’s why this section is below the one above).

1. If you have a static IP address, simply change it on the screen shown (diagram above).

2. If you have a Dynamic IP address, you can either reboot the machine in question or Click Start > run > cmd {enter}

3. A Command Window will open, click within the box and you can type in commands, the command to release your IP address is ipconfig /release

Then to get a new address type in ipconfig /renew

Related Articles, References, Credits, or External Links

NA

Cisco ASA Site to Site IKEv2 VPN Static to Dynamic

KB ID 0001602

Problem

Site to Site VPNs are easy enough, define some interesting traffic, tie that to a crypto map, that decides where to send the traffic, create some phase 1 and phase 2 policies, wrap the whole lot up in a tunnel-group, and you’re done! But there needs to be a ‘peer address‘ in the crypto map, and if one end of the VPN is on DHCP that address is likely to change, so you cant supply that?

The solution is quite simple, Cisco had to address this years ago when they had remote IPSec VPN clients, you use a Dynamic Cryptomap, and because you can’t have a tunnel group either, you use the DefaultL2LGroup, (this gets used when a specific IP address is not defined).

Note: If you have many remote sites using DHCP why not consider configuring EZVPN instead?

Static IP ASA Config

Use the following, change the values in red, to suit your own requirements;

[box]

!
object network OBJ-MAIN-SITE-LAN
 subnet 192.168.1.0 255.255.255.0
!
object network OBJ-REMOTE-SITE-LAN
 subnet 192.168.2.0 255.255.255.0
!
access-list VPN-INTERESTING-TRAFFIC extended permit IP object OBJ-MAIN-SITE-LAN object OBJ-REMOTE-SITE-LAN
nat (inside,outside) source static OBJ-MAIN-SITE-LAN OBJ-MAIN-SITE-LAN destination static OBJ-REMOTE-SITE-LAN OBJ-REMOTE-SITE-LAN
!
crypto ipsec IKEv2 ipsec-proposal IPSEC-PROP-1
 protocol esp encryption aes-256
 protocol esp integrity sha-1
!
crypto dynamic-map DMAP-VPN 10 set IKEv2 ipsec-proposal IPSEC-PROP-1
crypto dynamic-map DMAP-VPN 10 set reverse-route
!
crypto map outside_map 999 ipsec-isakmp dynamic DMAP-VPN
crypto map outside_map interface outside
!
crypto IKEv2 policy 2
 encryption aes-256
 integrity sha512
 group 24
 prf sha512
 lifetime seconds 86400
!
crypto IKEv2 enable outside
!
group-policy GP-SITE-2-SITE internal
group-policy GP-SITE-2-SITE attributes
 vpn-idle-timeout none
 vpn-session-timeout none
 vpn-filter none
 vpn-tunnel-protocol IKEv2 
tunnel-group DefaultL2LGroup general-attributes
 default-group-policy GP-SITE-2-SITE
tunnel-group DefaultL2LGroup ipsec-attributes
 IKEv2 remote-authentication pre-shared-key Password123
 IKEv2 local-authentication pre-shared-key Password123
!

[/box]

Dynamic IP ASA Config

As above, change the values in red, to suit your own requirements, (this is essentially just a normal site to site IKEv2 config!)

[box]

!
object network OBJ-REMOTE-SITE-LAN
 subnet 192.168.2.0 255.255.255.0
!
object network OBJ-MAIN-SITE-LAN
 subnet 192.168.1.0 255.255.255.0
!
access-list VPN-INTERESTING-TRAFFIC extended permit IP object OBJ-REMOTE-SITE-LAN object OBJ-MAIN-SITE-LAN
nat (inside,outside) source static OBJ-REMOTE-SITE-LAN OBJ-REMOTE-SITE-LAN destination static OBJ-MAIN-SITE-LAN OBJ-MAIN-SITE-LAN
!
crypto ipsec IKEv2 ipsec-proposal IPSEC-PROP-1
 protocol esp encryption aes-256
 protocol esp integrity sha-1
!
crypto map outside_map 1 match address VPN-INTERESTING-TRAFFIC
crypto map outside_map 1 set pfs group5
crypto map outside_map 1 set peer 1.1.1.1
crypto map outside_map 1 set IKEv2 ipsec-proposal IPSEC-PROP-1
crypto map outside_map interface outside
!
crypto IKEv2 policy 2
 encryption aes-256
 integrity sha512
 group 24
 prf sha512
 lifetime seconds 86400
!
crypto IKEv2 enable outside
!
group-policy GroupPolicy_1.1.1.1 internal
group-policy GroupPolicy_1.1.1.1 attributes
 vpn-tunnel-protocol IKEv2
tunnel-group 1.1.1.1 type ipsec-l2l
tunnel-group 1.1.1.1 general-attributes
 default-group-policy GroupPolicy_1.1.1.1
tunnel-group 1.1.1.1 ipsec-attributes
 IKEv2 remote-authentication pre-shared-key Password123
 IKEv2 local-authentication pre-shared-key Password123
!

[/box]

Related Articles, References, Credits, or External Links

NA

HP MSM Controller – Using RADIUS With Windows Server

KB ID 0000922 

Problem

I’m very disappointed with HP, theres next to no information on how to do this. My plan was to secure wireless access with certificates, so only clients with a valid digital certificate could authenticate and connect to the wireless. After spending nearly a whole day on the phone to various technical support departments at HP, this remained an impossible requirement!

In the end, as the client only had a few laptops for wireless access, we had to set NPS to allow access to domain users, then filter the devices that were allowed on the MSM controller via MAC address.

Solution

1. Launch Server Manager (Servermanager.msc) Roles > Add Roles > Network Policy and Access Services > Next.

2. Accept the defaults, but on the Role Services page select ‘Network Policy Server’.

3. Expand Network Policy and Access Services > Right click NPS (Local) > Register in Active Directory > Accept the defaults.

4. Expand RADIUS Client and Servers > RADIUS Clients > New.

5. Specify a name > The IP address of the MSM controller > type in a shared secret and confirm it (this can be anything but remember it, as you need to enter it on the controller later > OK.

6. Expand Policies > Network Policies > New.

7. Give it a name > Next.

8. Add in Windows Groups and select the user group you wish to grant access to > OK > Add > Next.

9. Add in ‘Microsoft Protected EAP (PEAP)’ > OK > Next.

10. Move your newly created policy to the top.

11. Now create a new ‘Connection Request Policy’.

12. Add in NAS Port Type > Select Ethernet and Wireless – IEEE 802.11 > OK > Next.

13. Move your new policy to the top.

14. Log into the MSM > Home > Authentication > RADIUS Profiles > Add New Profile.

15. Give the policy a name > Enter the IP address of the NPS server > Then type in the shared secret, (you created in step 5.) > Save.

16. On the VSC for the wireless network you want to enable RADIUS for > Set Wireless protection to WPA > Mode to WPA2 (AES/CCMP) > Key source to Dynamic > Your RADIUS profile should be added automatically > Save.


Related Articles, References, Credits, or External Links

NA


Cisco – Configuring Dynamic Multipoint Virtual Private Networks 
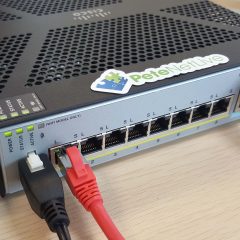
DMVPN

KB ID 0000954

Problem

A while back I uploaded a run through on how to deploy GRE tunnels and protect those tunnels with IPsec. That point-to-point GRE tunnel is a good solution, but if you have a lot of sites it’s not a solution that scales very well. Yes you can have 2147483647 tunnel interfaces, but good luck manually configuring all those tunnels and even if you did, if you want each of your remote sites to talk to each other you have all those tunnels to configure as well.

To address that we have DMVPN, rather than a point-to-point GRE tunnel it uses multipoint GRE that can have more than two endpoints. In fact it acts like a ‘network overlay’ that joins all the sites together. It is typically deployed in a hub-and-spoke configuration where one router (the hub) sits at the center and each remote site (spoke) joins the multipoint GRE, tunnels back to the hub. The magic part is, if one spoke needs to speak to another spoke, this is done by building a dynamic tunnel between them ‘on the fly’.

Below is the the network topology I’m going to use;

Note: If you use GNS3 heres the topology and configs for all the routers.

I have a main site that will be the ‘Hub Site’ and at that site MainSiteRTR will be the NHS router. The remaining three hub sites will act as ‘spokes’, so my ‘network overlay’ will be 192.168.1.0/24.

Solution

Configure DMVPN Hub (NHS) Router

Before I start, all the sites are pre-configured as per figure1 above, all the routers can see each other via EIGRP.

1. To begin the setup looks very much like a standard GRE tunnel, but we define a source but no destination (we don’t need to, because we specify tunnel mode gre multipoint). There are two commands for the NHRP setup, ‘ip nhrp map multicast dynamic‘ lets EIGRP information propagate to the ‘spokes’. And ‘ip nhrp network-id 1’ creates a group ID for the DMVPN group. All the spokes will need to share this ID to form tunnels with this NHS Router.<.p>

[box]

MainSiteRTR#configure terminal
Enter configuration commands, one per line. End with CNTL/Z.
MainSiteRTR(config)#interface Tunnel0
MainSiteRTR(config-if)# ip address 192.168.0.1 255.255.255.0
MainSiteRTR(config-if)# ip nhrp map multicast dynamic
MainSiteRTR(config-if)# ip nhrp network-id 1
MainSiteRTR(config-if)# tunnel source 1.1.1.1
MainSiteRTR(config-if)# tunnel mode gre multipoint
*Mar 1 00:02:31.651: %LINEPROTO-5-UPDOWN: Line protocol on Interface Tunnel0, changed state to down
MainSiteRTR(config-if)#exit
*Mar 1 00:02:41.635: %LINEPROTO-5-UPDOWN: Line protocol on Interface Tunnel0, changed state to up
MainSiteRTR(config)#

[/box]

Configure the Branch ‘Spoke’ Routers

2. There are a few differences here, first ‘ip nhrp map 192.168.0.1 1.1.1.1’ tells the branch router to map the 192.168.0.2 private IP permanently to the 1.1.1.1 public address. ‘ip nhrp map multicast 1.1.1.1’ tells the router to relay ALL its multicast traffic back to the hub router. ‘ip nhrp nhs 192.168.0.1’ tells the spoke router where the hub router is.

[box]

Branch1#configure terminal
Enter configuration commands, one per line. End with CNTL/Z.
Branch1(config)#interface Tunnel0
Branch1(config-if)# ip address 192.168.0.2 255.255.255.0
Branch1(config-if)# ip nhrp map 192.168.0.1 1.1.1.1
Branch1(config-if)# ip nhrp map multicast 1.1.1.1
Branch1(config-if)# ip nhrp network-id 1
Branch1(config-if)# ip nhrp nhs 192.168.0.1
Branch1(config-if)# tunnel source 2.2.2.1
Branch1(config-if)# tunnel mode gre multipoint
*Mar 1 00:07:28.403: %LINEPROTO-5-UPDOWN: Line protocol on Interface Tunnel0, changed state to down
Branch1(config-if)#exit
*Mar 1 00:07:38.387: %LINEPROTO-5-UPDOWN: Line protocol on Interface Tunnel0, changed state to up
Branch1(config)#

[/box]

3. Then configure each branch router the same, (apart from the tunnel source and the endpoint IP).

[box]

Branch 2 Router Config

Branch2#configure terminal
Enter configuration commands, one per line. End with CNTL/Z.
Branch2(config)#interface Tunnel0
Branch2(config-if)# ip address 192.168.0.3 255.255.255.0
Branch2(config-if)# ip nhrp map 192.168.0.1 1.1.1.1
Branch2(config-if)# ip nhrp map multicast 1.1.1.1
Branch2(config-if)# ip nhrp network-id 1
Branch2(config-if)# ip nhrp nhs 192.168.0.1
Branch2(config-if)# tunnel source 3.3.3.1
Branch2(config-if)# tunnel mode gre multipoint
Branch2(config-if)# exit
*Mar 1 00:09:32.631: %LINEPROTO-5-UPDOWN: Line protocol on Interface Tunnel0, changed state to up
Branch2(config)#

Branch 3 Router Config

Branch3#configure terminal
Enter configuration commands, one per line. End with CNTL/Z.
Branch3(config)#interface Tunnel0
Branch3(config-if)# ip address 192.168.0.4 255.255.255.0
Branch3(config-if)# ip nhrp map 192.168.0.1 1.1.1.1
Branch3(config-if)# ip nhrp map multicast 1.1.1.1
Branch3(config-if)# ip nhrp network-id 1
Branch3(config-if)# ip nhrp nhs 192.168.0.1
Branch3(config-if)# tunnel source 4.4.4.1
Branch3(config-if)# tunnel mode gre multipoint
Branch3(config-if)# exit
*Mar 1 00:11:05.259: %LINEPROTO-5-UPDOWN: Line protocol on Interface Tunnel0, changed state to down
Branch3(config)#
*Mar 1 00:11:15.247: %LINEPROTO-5-UPDOWN: Line protocol on Interface Tunnel0, changed state to up
Branch3(config)#

[/box]

Verifying and Testing the DMVPN Setup

4. On the main site;

[box]

MainSiteRTR#show dmvpn
Legend: Attrb --> S - Static, D - Dynamic, I - Incompletea
        N - NATed, L - Local, X - No Socket
        # Ent --> Number of NHRP entries with same NBMA peer

Tunnel0, Type:Hub, NHRP Peers:3,
 # Ent  Peer NBMA Addr Peer Tunnel Add State  UpDn Tm Attrb
 ----- --------------- --------------- ----- -------- -----
     1         2.2.2.1     192.168.0.2    UP    never D
     1         3.3.3.1     192.168.0.3    UP    never D
     1         4.4.4.1     192.168.0.4    UP    never D

[/box]

5. On a branch site (Note: There is only one tunnel to the Main Site);

[box]

Branch1#show dmvpn
Legend: Attrb --> S - Static, D - Dynamic, I - Incompletea
        N - NATed, L - Local, X - No Socket
        # Ent --> Number of NHRP entries with same NBMA peer

Tunnel0, Type:Spoke, NHRP Peers:1,
 # Ent  Peer NBMA Addr Peer Tunnel Add State  UpDn Tm Attrb
 ----- --------------- --------------- ----- -------- -----
     1         1.1.1.1     192.168.0.1    UP 00:08:24 S

[/box]

6. But if from the same branch site you ping another branch site, it will dynamically build a tunnel to that site also. (Note: The S denotes static, and the D denotes dynamic).

[box]

Branch1#ping 192.168.0.4
Type escape sequence to abort.
Sending 5, 100-byte ICMP Echos to 192.168.0.4, timeout is 2 seconds:
!!!!!
Success rate is 100 percent (5/5), round-trip min/avg/max = 32/60/108 ms

Branch1#show dmvpn

Legend: Attrb --> S - Static, D - Dynamic, I - Incompletea
        N - NATed, L - Local, X - No Socket
        # Ent --> Number of NHRP entries with same NBMA peer

Tunnel0, Type:Spoke, NHRP Peers:2,
 # Ent  Peer NBMA Addr Peer Tunnel Add State  UpDn Tm Attrb
 ----- --------------- --------------- ----- -------- -----
     1         1.1.1.1     192.168.0.1    UP 00:08:52 S
     1         4.4.4.1     192.168.0.4    UP    never D

[/box]

Protect and Encrypt the Tunnel(s) with IPSEC

7. BE AWARE the traffic traveling over these tunnels is still being sent in cleartext, it’s simply been ‘encapsulated’ with GRE. To rectify that we can protect the tunnels with IPSEC.

[box]

MainSiteRTR#configure terminal
Enter configuration commands, one per line. End with CNTL/Z.
MainSiteRTR(config)#crypto isakmp policy 10
MainSiteRTR(config-isakmp)# authentication pre-share
MainSiteRTR(config-isakmp)# encryption aes
MainSiteRTR(config-isakmp)# group 2
MainSiteRTR(config-isakmp)# hash sha
MainSiteRTR(config-isakmp)# crypto isakmp key Sh@reds3cret address 2.2.2.1
MainSiteRTR(config)# crypto isakmp key Sh@reds3cret address 3.3.3.1
MainSiteRTR(config)# crypto isakmp key Sh@reds3cret address 4.4.4.1
MainSiteRTR(config)# crypto ipsec transform-set TFS-PNL esp-aes esp-sha-hmac
MainSiteRTR(cfg-crypto-trans)# crypto ipsec profile PF-PNL
MainSiteRTR(ipsec-profile)# set transform-set TFS-PNL
MainSiteRTR(ipsec-profile)# interface Tunnel0
MainSiteRTR(config-if)# tunnel protection ipsec profile PF-PNL
*Mar 1 00:25:34.055: %CRYPTO-6-ISAKMP_ON_OFF: ISAKMP is ON
MainSiteRTR(config-if)# exit
MainSiteRTR(config)#

[/box]

8. Then simply repeat on the branch routers, the only difference is the peer addresses.

[box]

Branch 1 Router Config

Branch1#configure terminal
Enter configuration commands, one per line. End with CNTL/Z.
Branch1(config)#crypto isakmp policy 10
Branch1(config-isakmp)# authentication pre-share
Branch1(config-isakmp)# encryption aes
Branch1(config-isakmp)# group 2
Branch1(config-isakmp)# hash sha
Branch1(config-isakmp)#crypto isakmp key Sh@reds3cret address 1.1.1.1
Branch1(config)#crypto isakmp key Sh@reds3cret address 3.3.3.1
Branch1(config)#crypto isakmp key Sh@reds3cret address 4.4.4.1
Branch1(config)#crypto ipsec transform-set TFS-PNL esp-aes esp-sha-hmac
Branch1(cfg-crypto-trans)#crypto ipsec profile PF-PNL
Branch1(ipsec-profile)# set transform-set TFS-PNL
Branch1(ipsec-profile)#interface Tunnel0
Branch1(config-if)# tunnel protection ipsec profile PF-PNL
Branch1(config-if)#exit
Branch1(config)#
*Mar 1 00:36:47.179: %CRYPTO-6-ISAKMP_ON_OFF: ISAKMP is ON
Branch1(config)#

Branch 2 Router Config

Branch2#configure terminal
Enter configuration commands, one per line. End with CNTL/Z.
Branch2(config)#crypto isakmp policy 10
Branch2(config-isakmp)# authentication pre-share
Branch2(config-isakmp)# encryption aes
Branch2(config-isakmp)# group 2
Branch2(config-isakmp)# hash sha
Branch2(config-isakmp)#crypto isakmp key Sh@reds3cret address 1.1.1.1
Branch2(config)#crypto isakmp key Sh@reds3cret address 2.2.2.1
Branch2(config)#crypto isakmp key Sh@reds3cret address 4.4.4.1
Branch2(config)#crypto ipsec transform-set TFS-PNL esp-aes esp-sha-hmac
Branch2(cfg-crypto-trans)#crypto ipsec profile PF-PNL
Branch2(ipsec-profile)# set transform-set TFS-PNL
Branch2(ipsec-profile)#interface Tunnel0
Branch2(config-if)# tunnel protection ipsec profile PF-PNL
Branch2(config-if)#exit
Branch2(config)#
*Mar 1 00:37:57.239: %CRYPTO-6-ISAKMP_ON_OFF: ISAKMP is ON
Branch2(config)#

Branch 3 Router Config

Branch3#configure terminal
Enter configuration commands, one per line. End with CNTL/Z.
Branch3(config)#crypto isakmp policy 10
Branch3(config-isakmp)# authentication pre-share
Branch3(config-isakmp)# encryption aes
Branch3(config-isakmp)# group 2
Branch3(config-isakmp)# hash sha
Branch3(config-isakmp)#crypto isakmp key Sh@reds3cret address 1.1.1.1
Branch3(config)#crypto isakmp key Sh@reds3cret address 2.2.2.1
Branch3(config)#crypto isakmp key Sh@reds3cret address 3.3.3.1
Branch3(config)#crypto ipsec transform-set TFS-PNL esp-aes esp-sha-hmac
Branch3(cfg-crypto-trans)#crypto ipsec profile PF-PNL
Branch3(ipsec-profile)# set transform-set TFS-PNL
Branch3(ipsec-profile)#interface Tunnel0
Branch3(config-if)# tunnel protection ipsec profile PF-PNL
*Mar 1 00:39:10.515: %CRYPTO-6-ISAKMP_ON_OFF: ISAKMP is ON
Branch3(config-if)#exit

[/box]

9. To test re-establish the tunnels, and this time you can see they are protected;

[box]

MainSiteRTR#show crypto isa sa
IPv4 Crypto ISAKMP SA
dst             src             state          conn-id slot status
1.1.1.1         3.3.3.1         QM_IDLE           1002    0 ACTIVE
1.1.1.1         4.4.4.1         QM_IDLE           1003    0 ACTIVE
1.1.1.1         2.2.2.1         QM_IDLE           1001    0 ACTIVE

[/box]

Download the DMVPN labs and have a play

Related Articles, References, Credits, or External Links

Cisco Simple GRE Tunnels (With IPSEC)

Outlook Error 0x800CCC0F – Using POP3 To Exchange – Behind a Cisco CSC (Trend InterScan) Module

KB ID 0000642 

Problem

I upgraded a clients firewall and CSC software a couple of weeks ago, and ever since “some” users saw the following errors,

Error 0x800CCC0F

Task ‘{email address} – Sending’ reports error (0x800CCC0F): #The connection to the server was interrupted. If the problem continues, contact your server administrator or Internet service provider (ISP).’

Eventually it would time out altogether with the following error,

Error 0x800CCC0B

Task ‘{email address} – Sending’ reported error (0x800CCC0B): ‘Unknown Error 0x800CCC0B’

Solution

All I could discern from Googling the error, was that the AV (In this case the Trend Micro InterScan for Cisco CSC SSM), in the Cisco CSC Module) was probably the culprit.

I tried stopping the POP3 Service on the CSC that did NOT fix the error.

I confirmed that the CSC module was the root cause of the problem, by disabling the entire module with the following command on the Cisco ASA firewall;

[box]hw-module module 1 shutdown[/box]

Warning: If you do this, your CSC settings must be set to “csc fail-open” or web and email traffic will stop! Once you have confirmed this IS the problem you can re-enable the module with the following command.

[box]hw-module module 1 reset[/box]

I tried from my office and it worked fine, I could not replicate the error, I tried from various servers and Citrix box’s from other clients who kindly let me test from their network. Still I could not replicate the error! I went home and that was the first time I could see the same error their users were seeing. Sadly this led me on a wild goose chase, (I use Outlook 2007 at home and Outlook 2010 everywhere else so I (wrongly) assumed that was the problem).

Breakthrough!

As I could now replicate the error, I could at least do some testing, I attempted a send/receive and looked at the CSC Logging.

Note: To view CSC Logging, connect to the ASDM > Monitoring > Logging > Trend Micro Content Security > Continue > Enter the password > OK > View.

Every time it failed, I saw my public IP being logged with a RejectWithErrorCide-550 and RBL-Fail,QIL-NA. At last something I could work with.

This error indicates a problem with the Email Reputation system, I logged into the CSC web management console > and located this.

Then I disabled the ‘SMTP Anti-spam (Email Reputation)’, and everything started to work.

Conclusion

I understand the need for this system, but the nature of POP3 email clients, dictates they can connect in from anywhere, usually from a home ISP account on a DHCP address. I know from experience that major ISP’s IP ranges get put in RBL block lists (I checked by popping my IP in here, and sure enough it was blocked).

If you are going to use POP3 then you need to leave this system disabled, but to be honest, if you have Exchange, simply swap over to Outlook Anywhere and stop using POP3.

Related Articles, References, Credits, or External Links

Special thanks to Jenny Ames for her patience while I fought with this over a number of days.

Cisco AnyConnect – PAT External VPN Pool To An Inside Address

KB ID 0001104 

Problem

I got sent to Holland this week to look at a firewall deployment, and while I was sat in the Airport, I was going over the job I had to do, when I realised the solution I had suggested had a problem see below;

My brief was to provide remote AnyConnect VPN into the network so the client could get their network setup, and manage things remotely. However as I drew the network out in my head I realised that the situation above was what was going to happen.

How was I going to fix that? Well firstly I thought ‘Just put 192.16.1.1 on the management firewall, and move .2 and .3 to the main firewalls’. Well thats fine, but it does not leave me room for expansion, or if the client needs to add remote access to a production network. (Which will be needed in the future).

Then I thought ‘Can I put a static route on the main firewalls to route 192.168.100.0/24 to the management firewall’. Which is a pretty horrible solution to be honest, I’m usually on my soap box saying things like ‘It’s a firewall NOT a router!’. When I have a routing question I don’t know the answer to I ring Steve.

He suggested that I’d done something similar for another customer on a project we had worked on. In that case I had NATTED the traffic to the egress interface for management traffic. This was AnyConnect traffic but the principle would be the same, could I translate all the incoming AnyConnect traffic to the inside of the Management firewall? If I could, it would be scalable and simple.

Important Note

The networking types will be looking at this problem and thinking, ‘why not just do all the LAN routing on the switches, and share a routing table between them – job done?’ Well at this point I didn’t know what the switches were, (and as it turns out there were not the best). And All the LAN routing was being done by something not on the diagram, I did not have access to.

I had an hour and a half to kill before the flight, so I fired up GNS3, and by the time I was called to the gate, I had a complete working AnyConnect Solution, ready to play with the NAT/PAT rules. Twenty minutes into the flight, I had it working, and proved it with WireShark.

Solution

In all honesty it’s probably taken longer to explain the requirements, than it will do to show you the solution.

Before proceeding make sure you have AnyConnect setup and configured, I’ve pretty much done ALL the hard work for you in the article below, I will use the same Object Group names in this article, as I did in the following one;

Cisco ASA 5500 AnyConnect Setup From Command Line

At this point your routing will be breaking the return traffic flow, but here’s a top tip, if you enable management on your inside interface, you should be able to ping its IP address from your remote client just to prove connectivity. (This is a standard troubleshooting step I do, as it replies even if the NAT rules are incorrect). To enable, simply do this;

[box]

Petes-ASA# configure terminal
Petes-ASA(config)# management-access inside

[/box]

So if you followed my tutorial you will have a NAT rule that looks like this;

nat (inside,outside) source static any any destination static OBJ-ANYCONNECT-SUBNET OBJ-ANYCONNECT-SUBNET no-proxy-arp route-lookup

This basically means DON’T NAT/PAT this traffic, so all IP addresses will be the same on all networks. We need to remove this and tell it to PAT remote AnyConnect VPN traffic to the ‘inside’ interface, to do that the command we need is;

nat (outside,inside) source dynamic OBJ-ANYCONNECT-SUBNET interface

Lets do that and clear the translations on the firewall.

[box]

Petes-ASA(config)# no nat (inside,outside) source static any any destination static OBJ-ANYCONNECT-SUBNET OBJ-ANYCONNECT-SUBNET no-proxy-arp route-lookup
Petes-ASA(config)# nat (outside,inside) source dynamic OBJ-ANYCONNECT-SUBNET interface
Petes-ASA(config)# clear xlate

[/box]

If you are adamant you want to do this in the ASDM, here is what it looks like in there;

Now give it a test.

Footnote:

Here I have no ACLs applied, if you find you cannot access internal resources, you may not have ‘sysopt connection permit-vpn‘ in your config, (it’s a hidden command, so you wont see it). If so, you may need to allow ‘inbound’ traffic on the outside interface. Execute a packet trace, that will tell you.

Related Articles, References, Credits, or External Links

NA