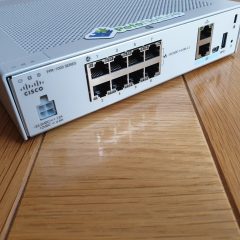
Out of the blue this started happening (to a previously working AnyConnect deployment).
Cannot connect to this gateway. Please choose another gateway and try again
I upgraded the client, the AnyConnect package in the firewall, the OS on the firewall and the ADSM! The error would not go away.
AnyConnect Error: Solution
Sadly I’d also blown away the Anyconenct config on the firewall, and rebuilt it from scratch, (because that caused a boatload of other problems down the line). Before I finally realised what the problem was.
The previous week I’d been doing some work on my public DNS and had incorrectly set the IP address of my AnyConect (the IP should have been x.x.x.6 and I’d changed it to x.x.x.5 How did I find out? I simply opened a browser and went to the AnyConnect URL and instead of looking at the firewall I was greeted with the logon screen for my exchange server!
So make sure you have NOT got a static NAT on your firewall set to the public IP of the firewall, or you have not PORT forwarded https (TCP Port 443) to an internal IP.
Related Articles, References, Credits, or External Links
I have to do this frequently, usually to put company logos into Visio/Omnigraffle drawings. To be honest I normally forget how to do it, and then have to Google the steps, and tell myself I really should document the procedure for next time. Well I’ve finally got round to it.
GIMP Removing Colour
Here I need to remove all the ‘white’ from this FortiClient logo (used in the previous article). Select Layer > Transparency > Colour To Alpha > White is already selected, (use the eye dropper to select a different colour if required) > OK.
Related Articles, References, Credits, or External Links
More and more people are using Azure as their primary identity provider, thanks in no small part to the massive success of Office/Windows 365. So if you want to provide a FortiGate/FortiClient SSL remote access VPN solution then securing it via Azure makes a lot of sense.
Multi Factor Authentication: If you have MFA on your Azure accounts then that’s a big box ticked for your accreditations and digital liability insurance also. This article does not cover enabling MFA in Azure, we are assuming you already have that enabled. I’ve covered that in other articles anyway, (use the search box above!)
Essentially your firewall will redirect authentication (via SAML) to Azure when you attempt to connect either via the web or tunnelled with the FortiClient.
You will need an Azure subscription (a trial one is fine), obviously a FortiGate firewall, and a publicly signed certificate for the firewall (see below).
Note: Stop asking if you can use self signed certs – this one cost me six dollars! It needs to be publicly signed so Azure trusts it!
Add and Configure the FortiGate SSL VPN Application
From within your Azure tenancy, locate Enterprise applications and choose to add a new one.
Do a search for Forti and you should see the FortiGate SSL VPN application, select it.
In the setup single sign on section, click ‘Get Started’.
Select SAML.
The ‘Vast Majority’ of the work that needs to be done will be done in here. In Section 1 (Basic SAML Configuration) you will enter FOURURLs (these URLs will reside on your FortiGate).
Change the values in red to match your own publicly resolvable FQDN, (which will match the CN on your certificate).
Identifier (Entity-ID)
[box]
https://vpn.petenetlive.com/remote/saml/metadata
[/box]
Reply URL (Assertion Consumer Service URL)
[box]
https://vpn.petenetlive.com/remote/saml/login
[/box]
Sign on URL (Yes it’s the same as the one above!)
[box]
https://vpn.petenetlive.com/remote/saml/login
[/box]
Then scroll down.
Log out URL
[box]
https://vpn.petenetlive.com/remote/saml/logout
[/box]
Then SAVE.
Section 2: Attributes and Claims, click edit.
Add a new claim.
Name = username, Source attribute = user.userprinciplename> Save.
Select the existing user.groups value > Change it to ‘All Groups’ > Tick ‘Customise the same of the group claim’ > Set the name to group > Save.
Note: It can take little while for the main page to refresh .
Section 3: SAML Signing Certificate. Download the Base64version of the certificate.
Back on your FortiGate > System > Certificates > Import > Remote Certificate.
Browse to and upload the certificate you just dowloaded.
Make a note of the certificate name, in this case it’s REMOTE_Cert_2 (You will need this later).
Section 4: Setup FortiGate SSL VPN. In this section there are three URLs that you need to take a copy of (they are used in the code block you will post into the FortiGate.
You now have all the elements you need to paste the following code block into your FortiGate, the following elements IN RED should be changed to match yours.
set-cert is the NAME that the FortiGate has given to its public cert, (mine’s the same as its common name, yours may be something else!)
entity-id, single-sign-on-url, and single-log-out-url are the URLs you pasted into section 1 (above).
idp-entity-id, idp-single-sign-on-url, and idp-single-log-out-url are the URLs you copied out of section 4 (above).
idp-cert is the NAME that the FortiGate has given to the cert you dowloaded from section 3 (above)
user-name and group-name are the attributes and claims you setup in section 2 (above).
[box]
config user saml
edit SSL-Azure-SAML
set cert vpn.petenetlive.com
set entity-id https://vpn.petenetlive.com/remote/saml/metadata
set single-sign-on-url https://vpn.petenetlive.com/remote/saml/login
set single-logout-url https://vpn.petenetlive.com/remote/saml/logout
set idp-entity-id https://sts.windows.net/de742342-edf0-49e7-8ca3-1402fddc17bc/
set idp-single-sign-on-url https://login.microsoftonline.com/de742342-edf0-49e7-8ca3-1402fddc17bc/saml2
set idp-single-logout-url https://login.microsoftonline.com/de742342-edf0-49e7-8ca3-1402fddc17bc/saml2
set idp-cert REMOTE_Cert_2
set user-name username
set group-name group
next
end
[/box]
Azure Groups
You will need a group in Azure created with the users that you wish to be able to authenicate into to the remote VPN. Take a copy of its Object ID (you will need that shortly).
With that object ID you can create a ‘Group’ on the FortiGate with the following code block
[box]
config user group
edit AAD-Remote-VPN
set member SSL-Azure-SAML
config match
edit 1
set server-name SSL-Azure-SAML
set group-name 02f047b1-8db2-4474-84df-21af6a16204c
next
end
next
end
[/box]
You will also need to add this group (In Azure) into the FortiGate SSL VPN application > users and groups > add user/group.
Click ‘None Selected” > Select your user group > Select.
Heed the warning! No nested groups, which is a little annoying, but you can’t say they didn’t warn you > Accept.
FortiGate SSL VPN
I’m going to use the basic settings to get this up and running, VPN > SSL VPN Settings > Listen on Interfaces (set to the outside facing interface (that the certificate name points to!) Server Certificate set to your publicly signed certificate > Scroll down.
Note: If you see a warning about not having configured SSL policy, dont worry we will fix that in a moment.
Create New.
Select the AAD user group (we created with the second code block) and set the Portal, (here I’m using full access so the remote client can use the web, or full tunnel options) > OK.
Policy & Objects > Firewall Policy > Create New.
Give the policy a sensible name > Incoming Interface will be SSL-VPN (Not outside!) > Outgoing interface is usually the inside (unless you have DMZs etc) > Source, add in All and your AAD-Group you created with the second code block above > DISABLE NAT > Scroll down.
Change Logging to ‘All sessions’ (Note: once fully deployed, you can change this to security events) > OK.
Note: It may error at this point if the portal you have chosen, (in this case full-access) has split tunnelling enabled, you can either disable split tunnelling on the portal, or change All in the destination section to a particular subnet on the the LAN).
Testing Forti Web SSL With Azure
From an external client connect the web address of your FortiGate, all being well it should redirect you to Azure, (or your ADFS portal if you use ADFS).
Provision authentication is successful, you should see something like this.
Testing FortiClient Azure SSL VPN With Azure
Install the FortiClient, (here I’m using the VPN only version). Give the connect a sensible name > Set the gateway to your public FQDN, and tick ‘Enable Single Sign On (SSO) for VPN Tunnel > Save.
SAML Login
After your Microsoft authentication prompt appears, the client should connect successfully.
Related Articles, References, Credits, or External Links
A colleague rang to ask if I had any thoughts about a problem that they were having, we do a lot of VMware VCSA upgrades for customers, the process fails if there is no DNS resolution of the FQDN during the upgrade process. We had tried to fix the problem by creating hosts records (typically we don’t have access to the client’s DNS servers that run in the virtual environment). I had thought (wrongly) that it simply needed to lookup the FQDN, but I’m told it also needs to do a reverse lookup (locate a PTR record).
We could of course just spin up either a Windows server and put DNS on it, or a Linux BIND server, but what if we could use the firewall? With Cisco this is a non starter, but what about the clients that have FortiGate?
FortiGate DNS
By default the feature isn’t enabled, you need to go to System > Feature Visibility > DNS Database > Enable it > Apply.
Network > DNS Servers > Create New.
Select the interface that will serve DNS queries > OK.
Back at the min page under DNS Database > Create New > Give the zone a sensible name > Set the domain name > Under DNS Entries > Create New.
First create a host (A Record) that will point the FQDN to the correct IP address.
Then create a pointer (PTR Record) that will point the IP address back to the FQDN.
It should look something like this > OK.
Then test from a client that’s connected to the Interface serving DNS requests.
Related Articles, References, Credits, or External Links