
KB ID 0001528
Problem
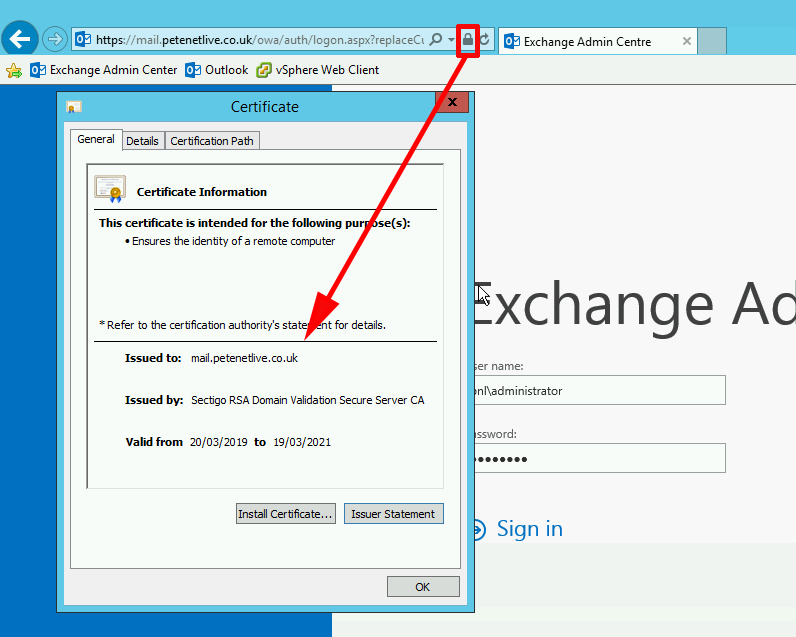
On my test network I have an Exchange server (Exchange 2016). As it’s publicly available and connected to Office 365 it needs a digital certificate. Because its my test network, I don’t want to spend a fortune on a certificates, so I buy the cheapest one I can find. I replaced it last week with a 2 year certificate for about $5.00.
When the certificate came I had certificate-name.crt, and a CA bundle, but I could NOT import it into Exchange, (because the private key was missing). I had the private key, I downloaded it when I made the certificate request.
So I had the certificate and the private key, I needed to import the private key into my Exchange server, or create a PFX file that had the certificate and the private key in it, that I could import into Exchange.
Create a PFX File with OpenSSL
The simplest way to create a PFX, (if you are feeling lazy,) is to go here and let them do it for you. But I know I could do this with OpenSSL, being a mac user I already have OpenSSL, if you are a Windows user you can install OpenSSL for Windows and do the same thing.
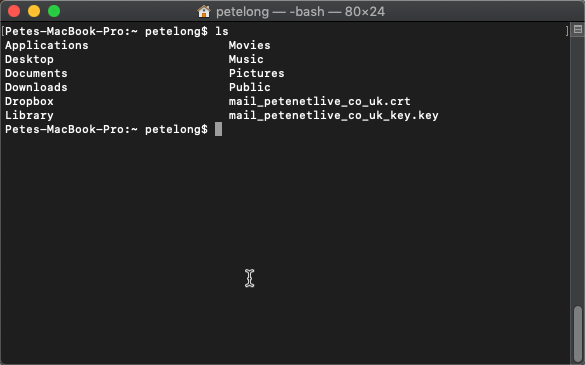
Firstly place your private key file and certificate in a folder you can get at like so;
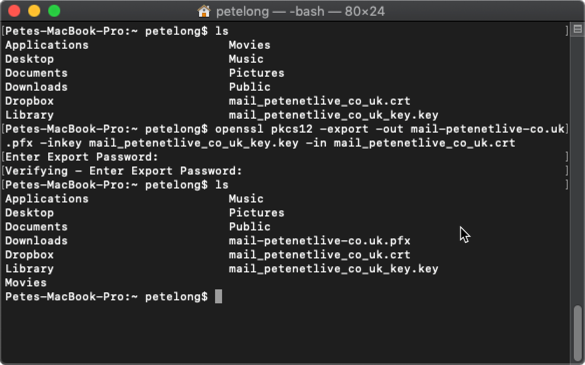
Then execute the following command;
openssl pkcs12 -export -out output-cert-name.pfx -inkey key-file-name.key -in input-cert-name.crt
When prompted to do so, enter a password, (you will need to enter this on your Exchange server, so make a note of it!) You will then have your .PFX file.
Import PFX File into Exchange
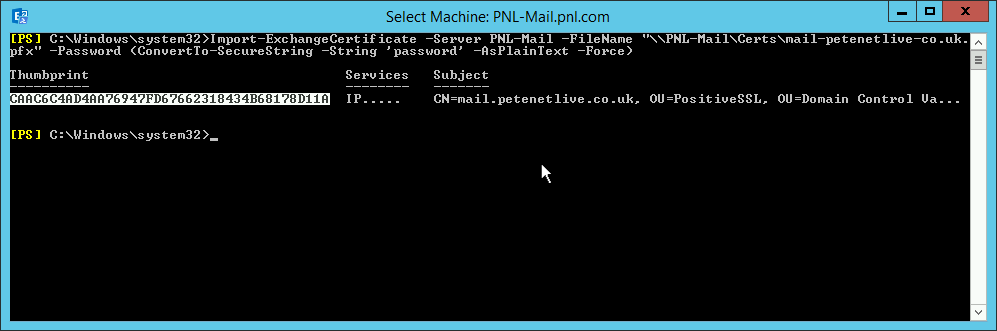
I prefer to use PowerShell, (if you want to use the Exchange Admin Centre scroll down.)
Import-ExchangeCertificate -Server Server-Name -FileName "\\Server-Name\Share-Name\Certificate-Name.pfx" -Password (ConvertTo-SecureString -String 'Your-Password' -AsPlainText -Force)
Copy the certificate thumbprint (as shown) to the clipboard.
Then you need to associate the Exchange ‘Services’ with this new certificate;
Get-ExchangeCertificate -Thumbprint YOUR-CERT-THUMBPRINT | Enable-ExchangeCertificate -Services IIS,SMTP,IMAP,POP
When prompted to do so enter ‘A’, (for replace all.)
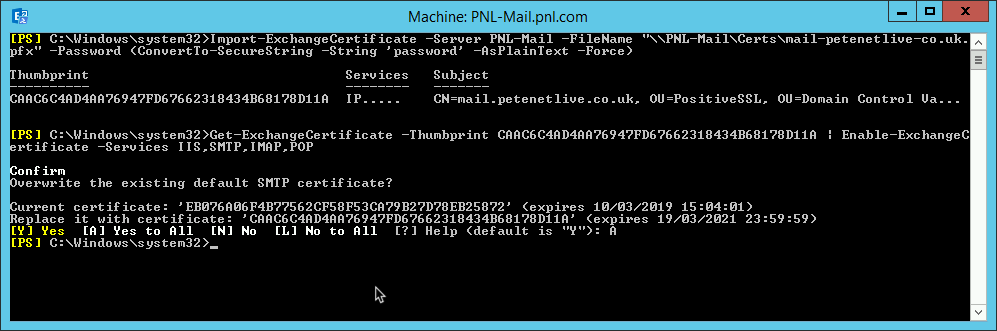
You should see the correct certificate used now, like so;
Note: If you only see a blank page for OWA and Exchange Admin Center (ECP) after changing certificates, then see the following post;
Exchange – OWA and ECP Websites Blank After Logon
Import a PFX From Exchange Admin Center
Servers > Certificates > Select the appropriate Server > Ellipses > Import Exchange Certificate > Add the path to the PFX file, and its password > Next.
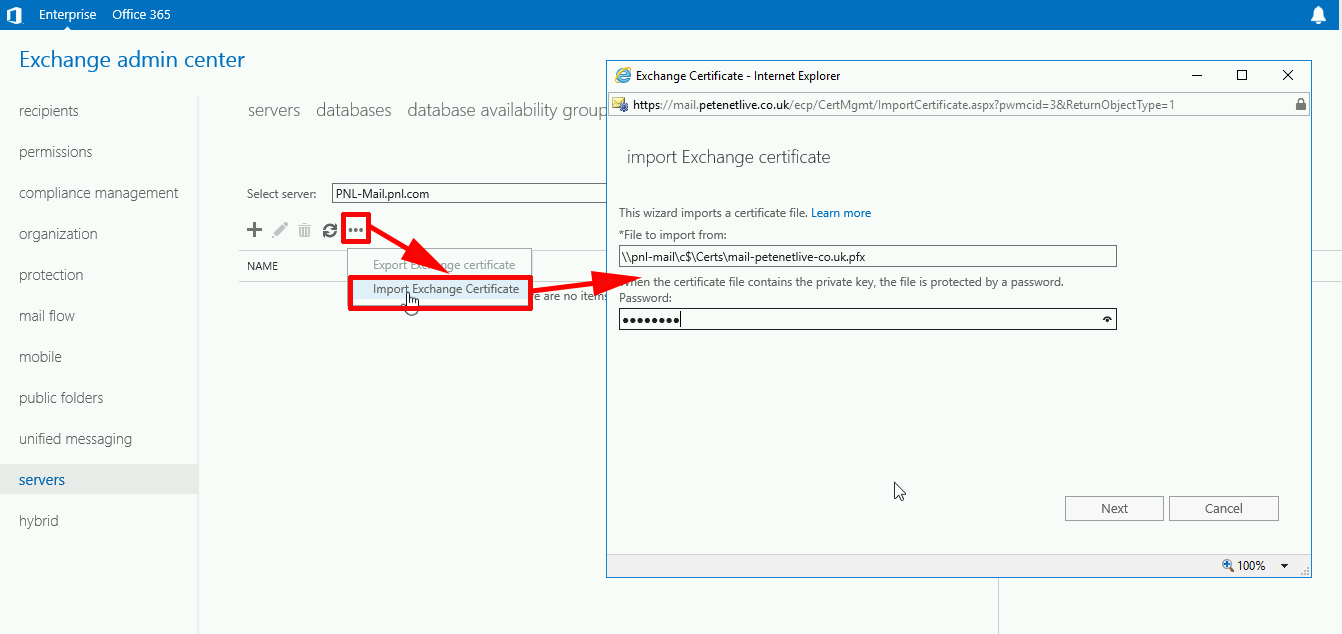
Add the server > Finish.

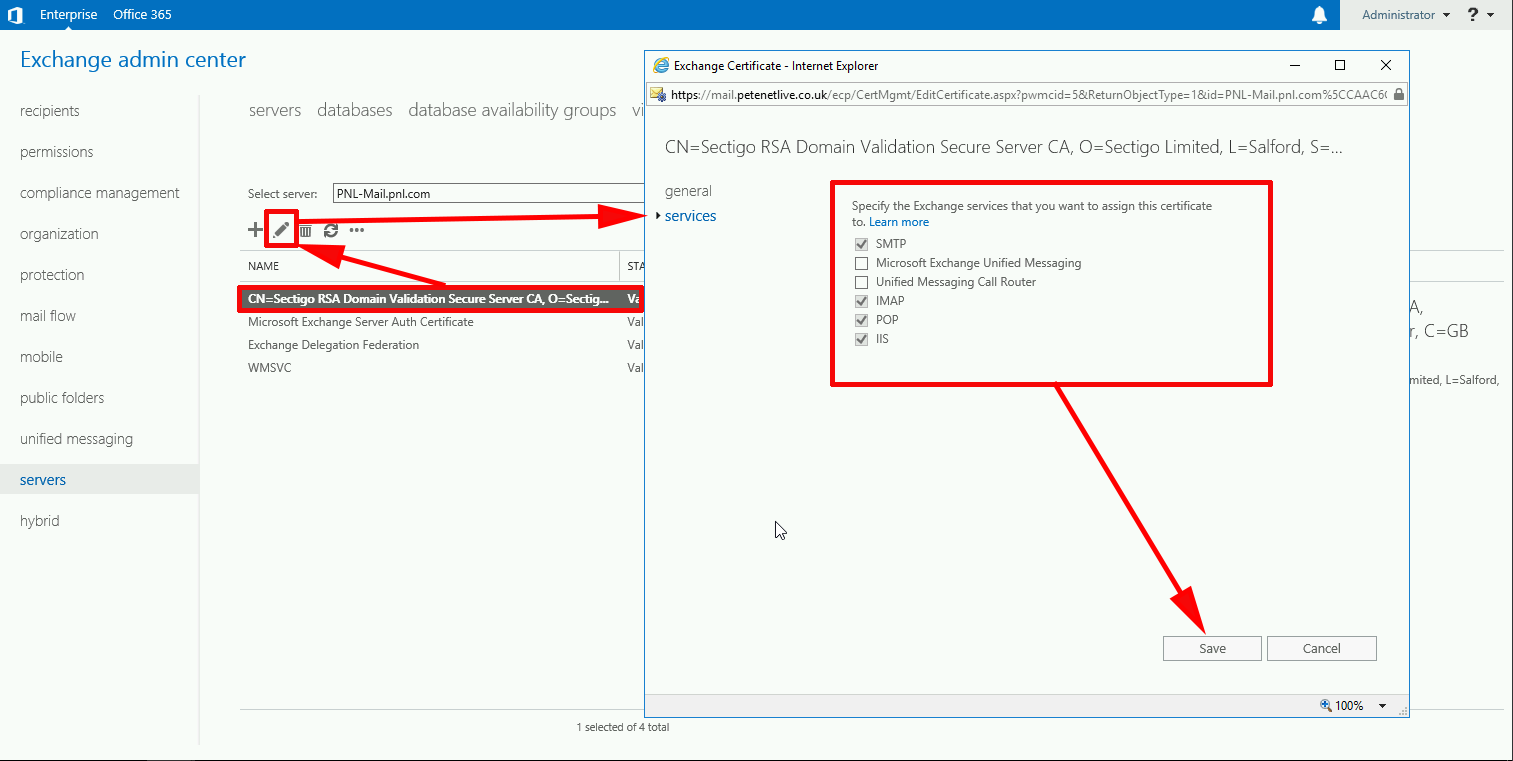
Now to enable the certificate for the appropriate Exchanges Services, select the cert > Edit > Services > Tick SMTP, IMAP, POP, and IIS > Save > OK.
Related Articles, References, Credits, or External Links
Exchange Certificate Import Error (reason: PrivateKeyMissing).
Exchange – Certificate Invalid ‘Revocation Check Failed’
Exchange: Blank Certificate Name
Exchange – OWA and ECP Websites Blank After Logon