
KB ID 0000737
Problem
In part one we built and configured the WDS Server. Now you need to prepare the reference Windows 8 machine so that you can ‘capture’ its image.
Solution
Before you start, make sure that the machine you are imaging has PLENTY of room on one of its local drive(s), because it copies the image locally, before it sends it to WDS.
Place Your Reference Windows 8 Machine in Audit Mode
To put all the software on your reference machine and configure it how you like, the machine needs to be in ‘Audit Mode’ before you start. There are TWO ways to put the machine into audit mode.
Note: While a machine is in audit mode, it will log on automatically as the Administrator, and every time the machine boots sysprep will launch (in anticipation of you needing it).
Option 1: A Newly Built Machine
1. When you have first built the Windows 8 machine, you will see the screen below, Press CTRL+SHIFT+F3, the machine will automatically reboot and enter audit mode.

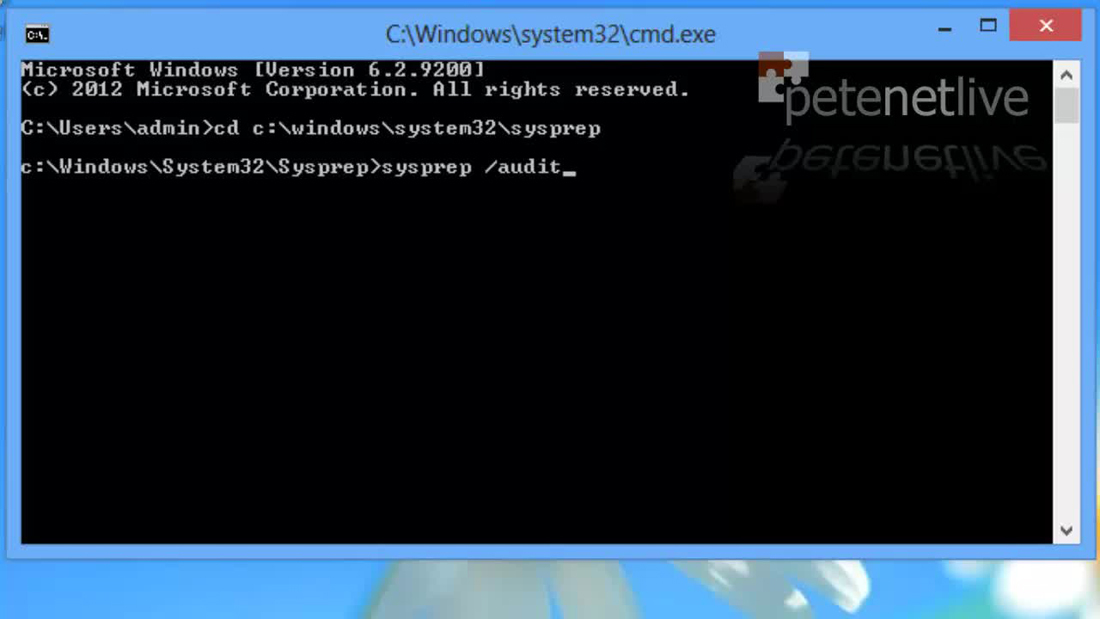
Option 2: You Are Already in Windows
2. You can also put a Windows 8 machine into audit mode by running the sysprep executable with the /audit switch.
3. Once in Audit mode, install all the program and configure all the settings you want in your master image. When you are happy run the sysprep program, (Or simply reboot, as sysprep launches at every boot when you are in audit mode).
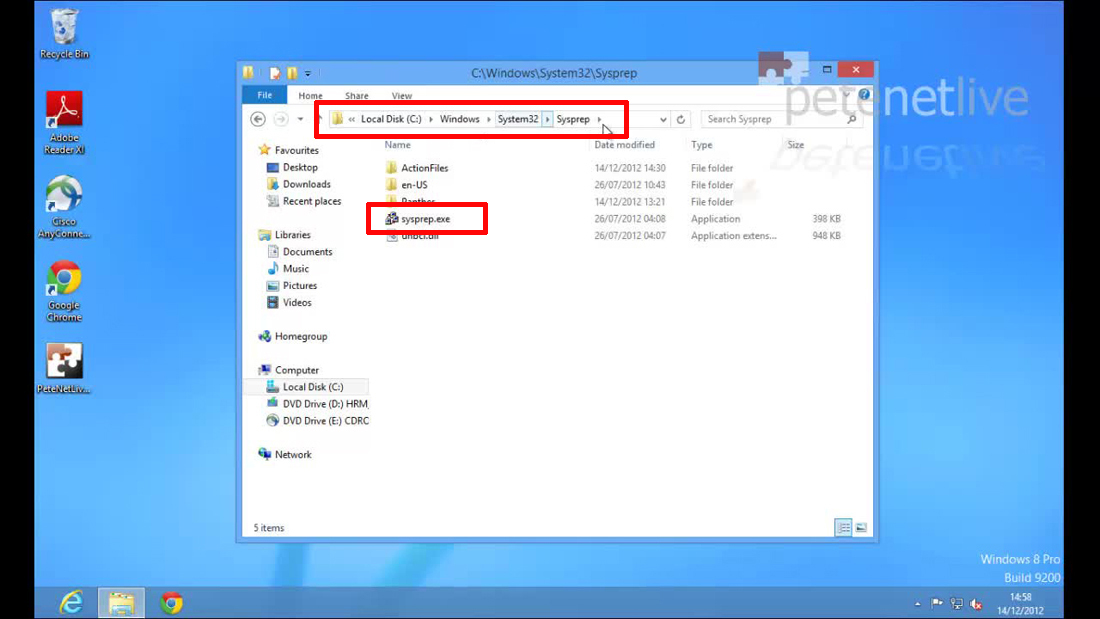
4. Tick the ‘Generalize’ option, select either shutdown or reboot, (If you choose reboot make sure the machine is ready to pXe boot from the network, and the boot order has the NIC BEFORE the hard drive, or sysprep will start and rebuild the machine before it’s imaged).

5. Sysprep will run, and shutdown or reboot as requested.

6. When the machine boots press F12 to boot from the WDS server.
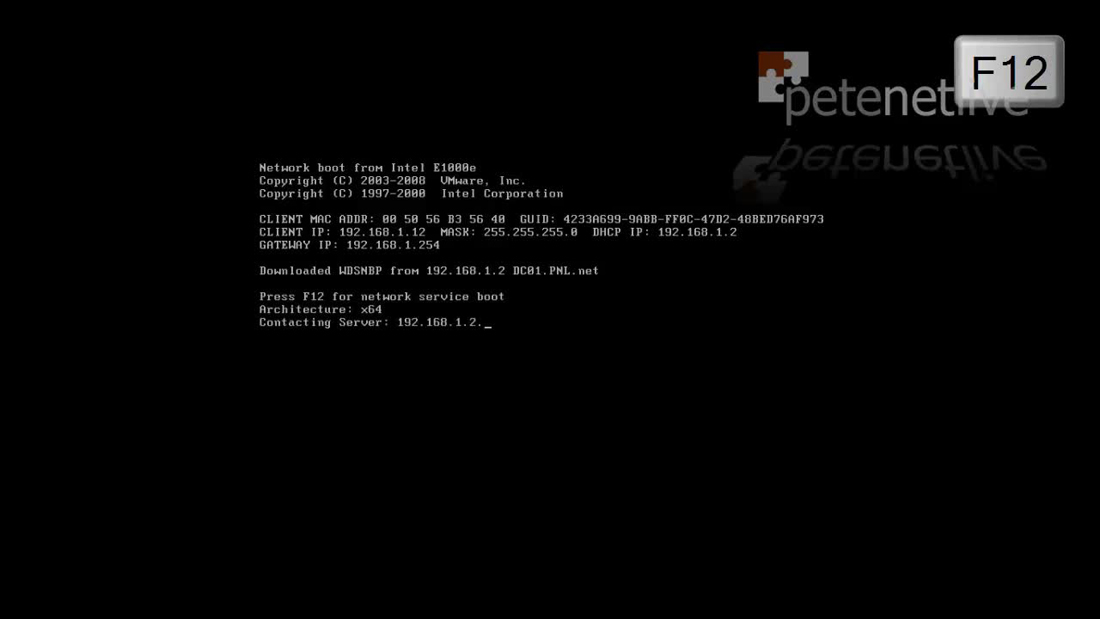
7. Note: Now you can see why (in part one) we called the boot image ‘Capture an Image’ and the capture ‘Capture an Image’. Select the capture option.

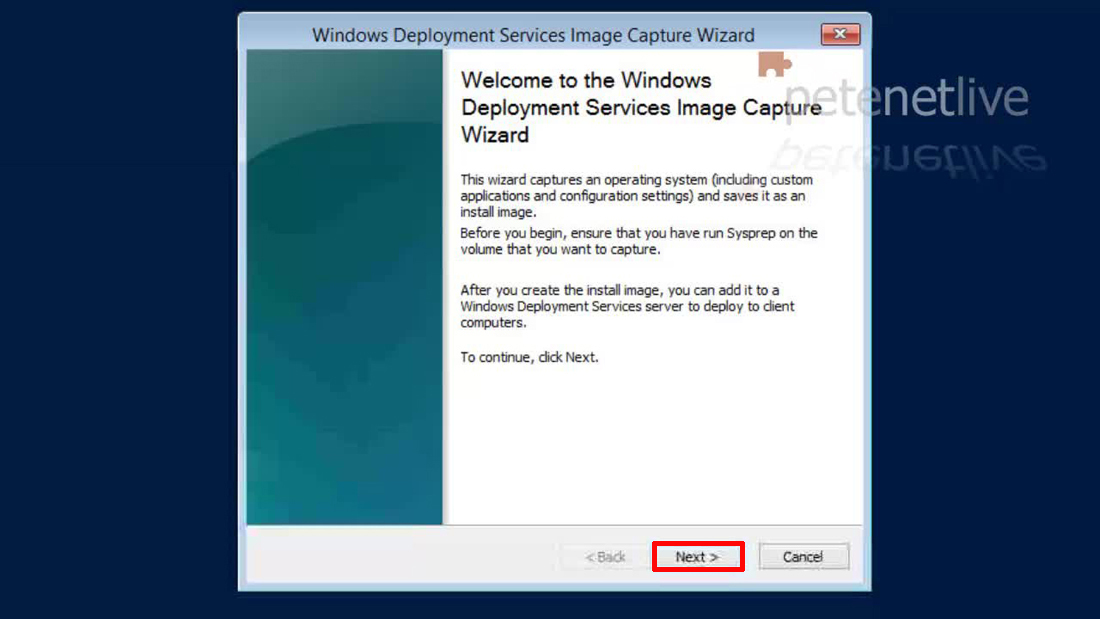
8. WindowsPE will run at the welcome screen > Next,
Note: If the process fails at this point, usually it’s because the network card driver for this machine IS NOT in the boot image.
Adding Drivers to Images on Windows Deployment Services
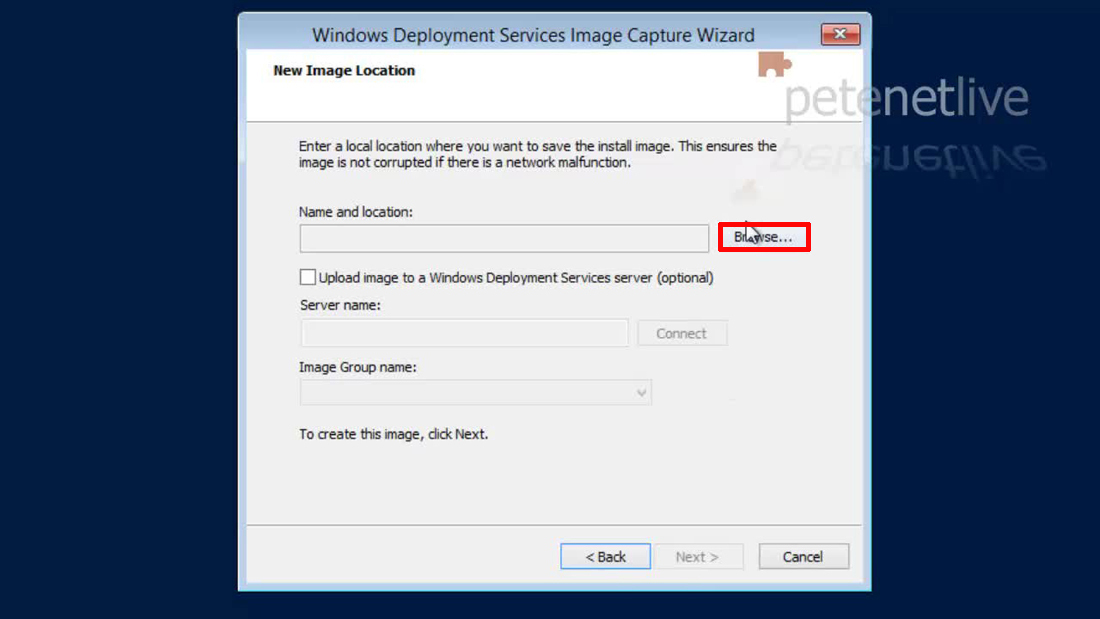
9. Select the volume that you want to image, (Note: It will NOT be C: that’s reserved, usually it’s D:) > Give the image a name, this is the name you will see in the WDS console, and when you are imaging the target machines > Enter a comment/description > Next.

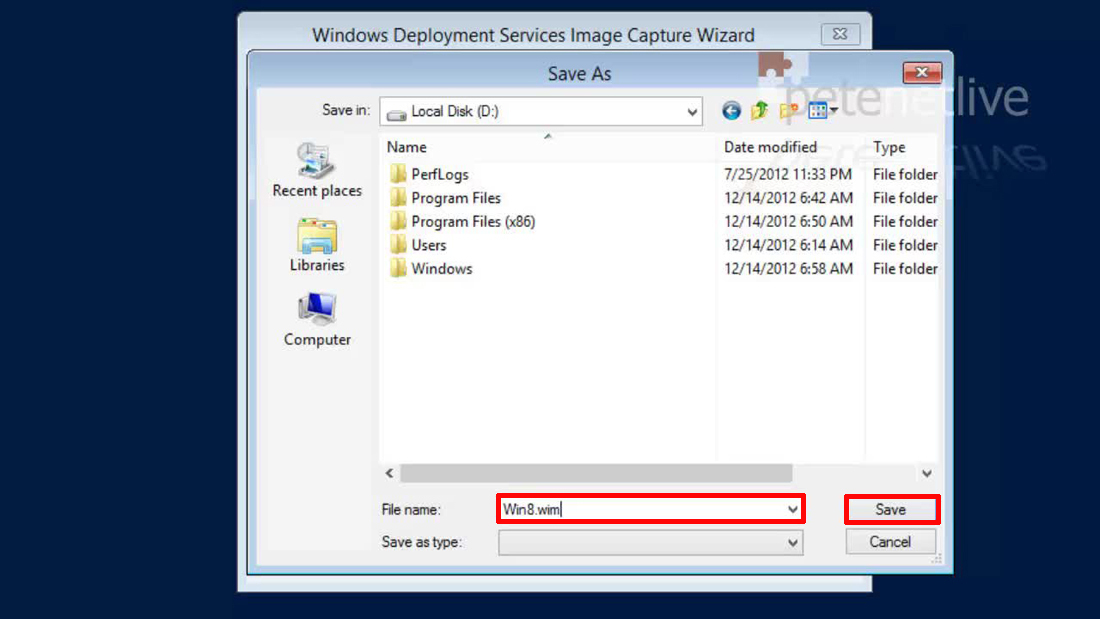
10. Browse.
11. Navigate to a local drive, and give the image a name with a .wim extension > Save.
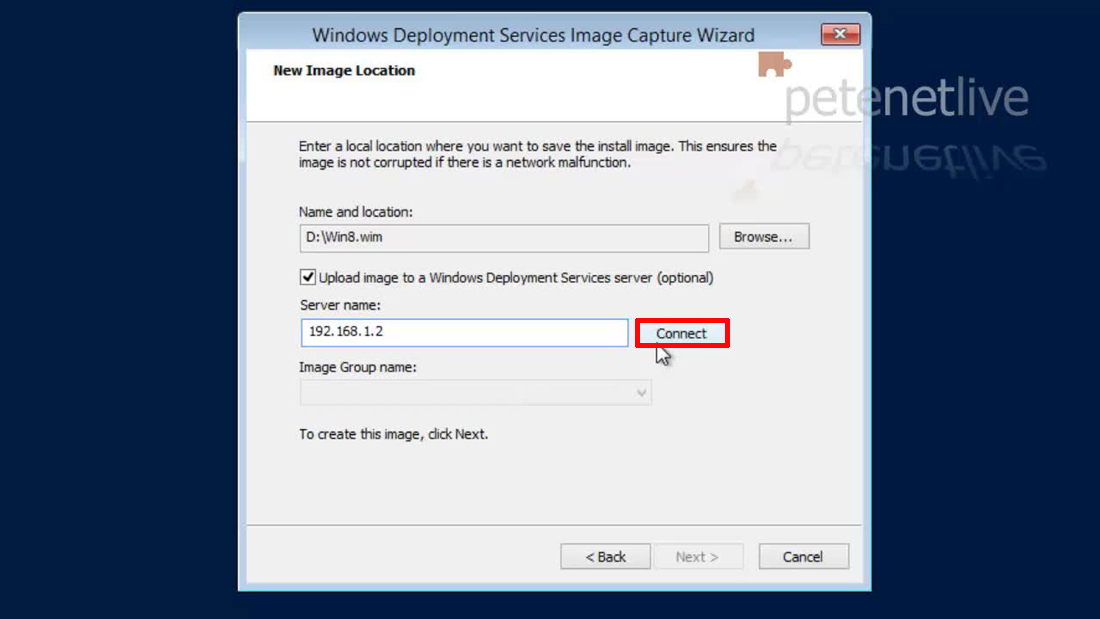
12. Tick the box to upload the image > Supply IP/Name of the WDS server > Connect.
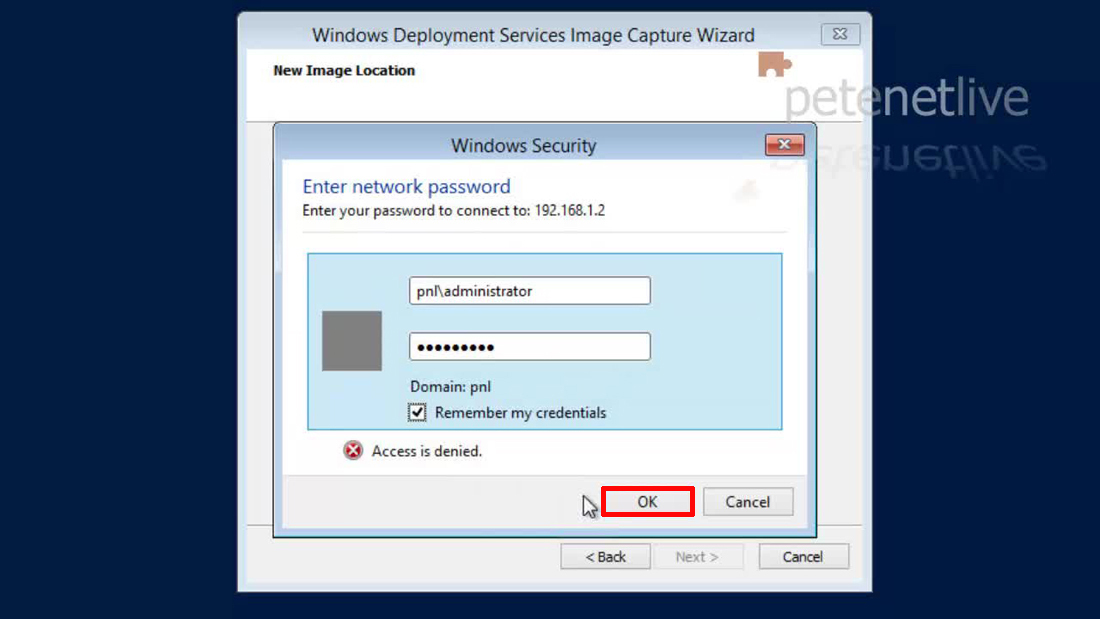
13. Supply credentials to log onto the WDS server > OK.
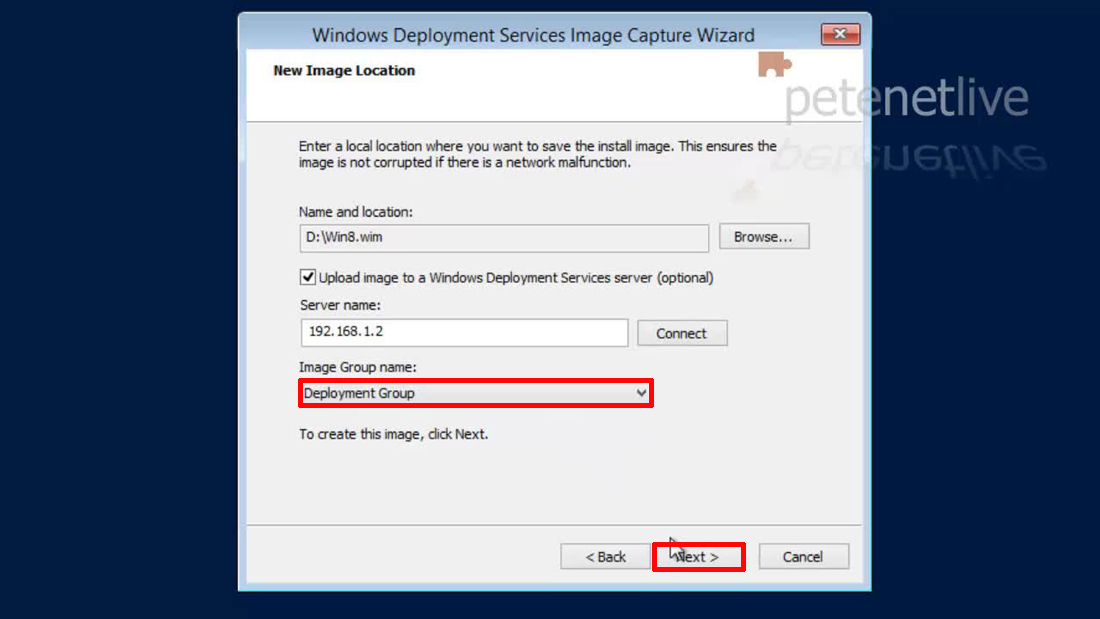
14. Once authenticated you can select the image group we setup in part one > Next.
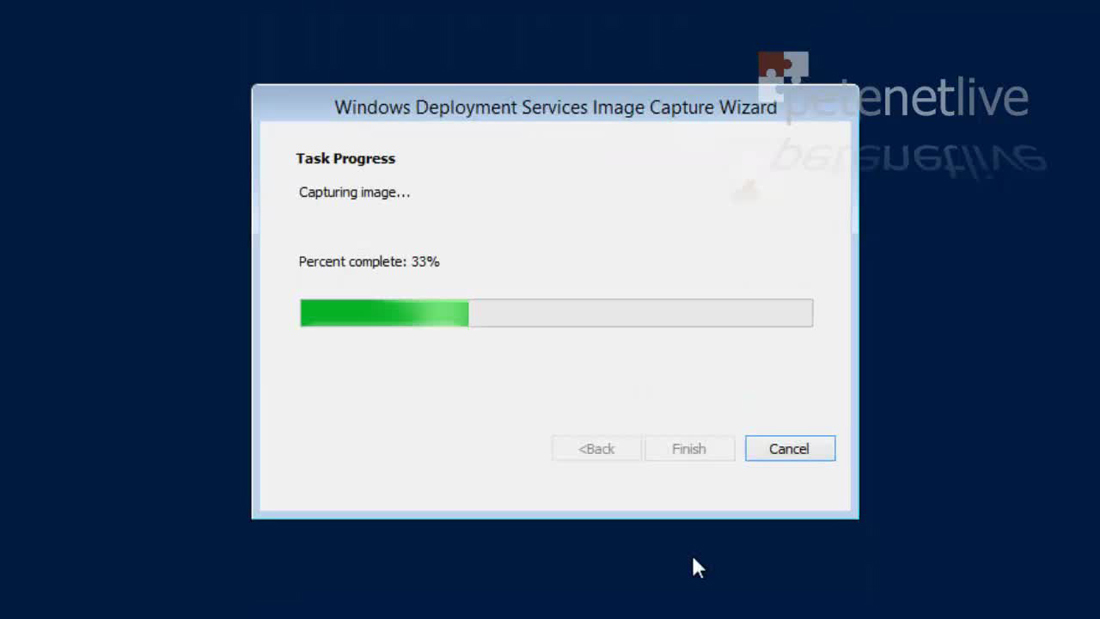
15. The image will be created on the reference machine.
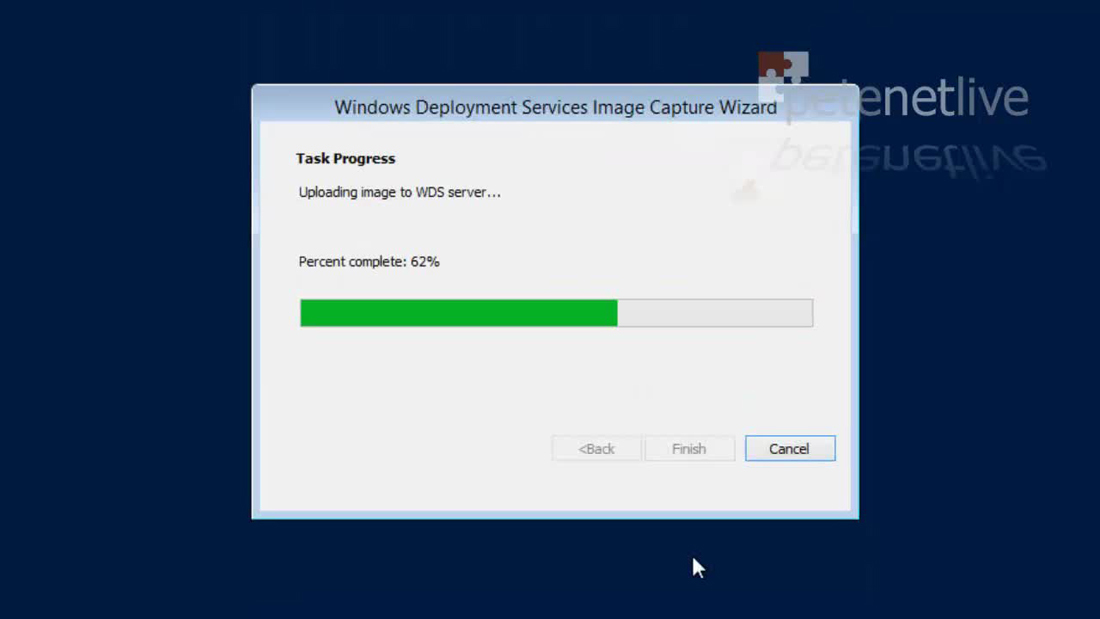
16. Then it will be uploaded to the WDS Server.
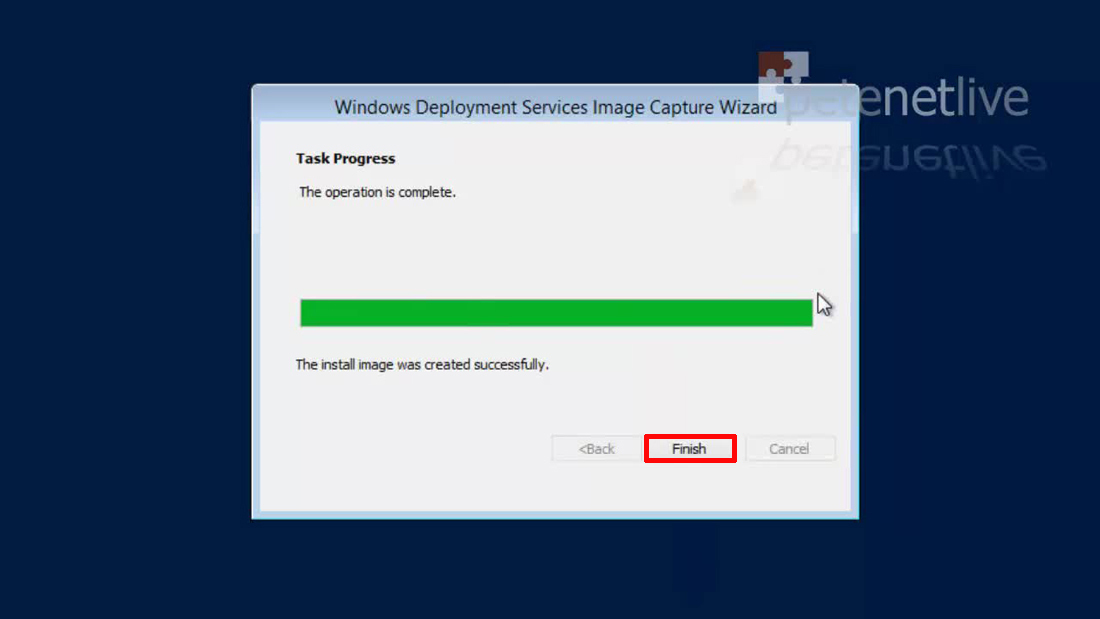
17. When complete click Finish. At this point the reference machine will reboot and rebuild itself.
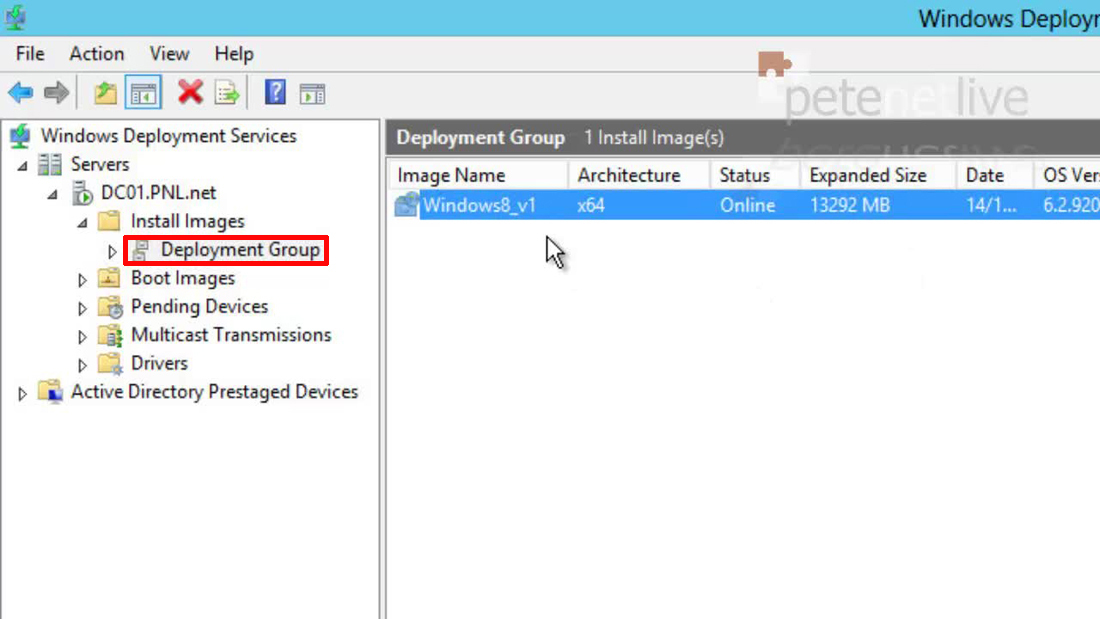
18. Back in the Windows Deployment Services management console yo will see the image you have just uploaded in your image group.
Note: Sometimes it can take a while to appear, be patient!
Related Articles, References, Credits, or External Links
2012 – WDS Deploying Windows 8 Part 3: Carry Out a Windows 8 Unattended Deployment 2012 – WDS Deploying Windows 8 Part 1: Install and Configure WDS