
KB ID 0000738
Problem
In part two we built our reference machine and took an image of it using WDS. Now to automate the deployments we need to create some unattended answer files, these will answer all the questions that the Windows 8 machines will ask while they are building. We will take those files and import them into the WDS server we configured in part one. Finally to make sure everything is working we will deploy Windows 8.
Solution
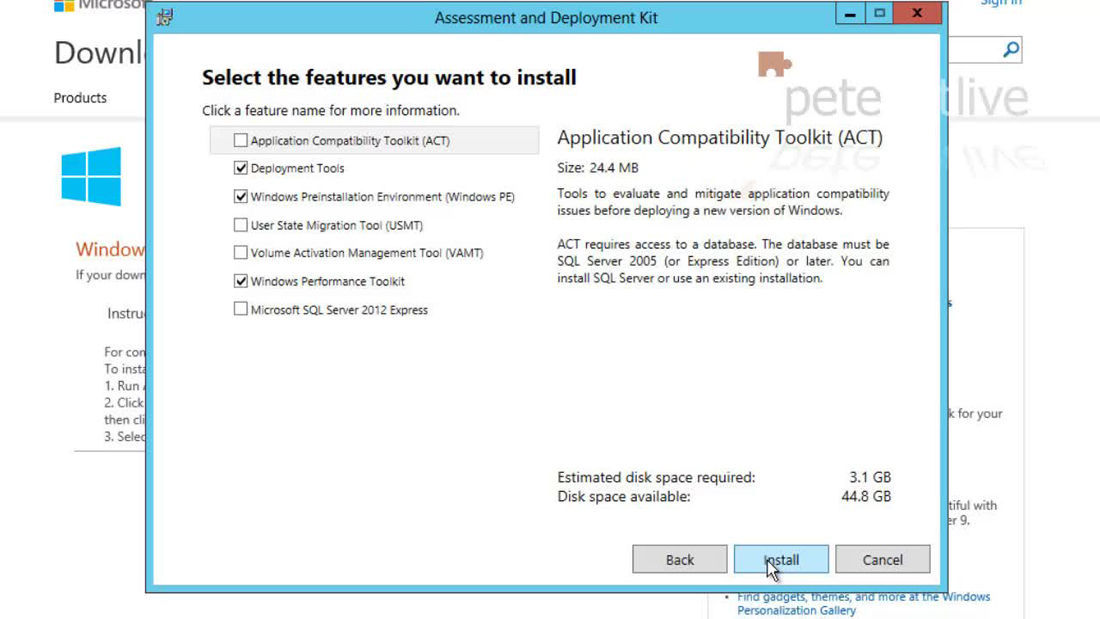
Download and Install the Windows Assessment and Deployment Kit for Windows 8
1. We used to have the WAIK for Windows 7, now this has been replaced with the ADK. (download link).
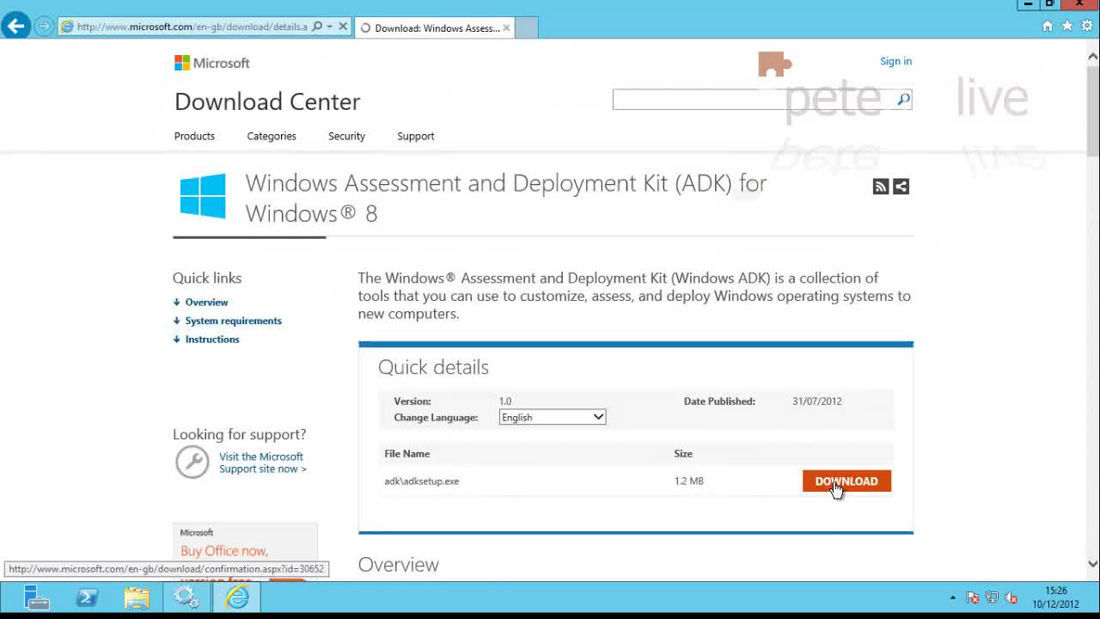
2. It’s a MASSIVE download, it will take a long time.
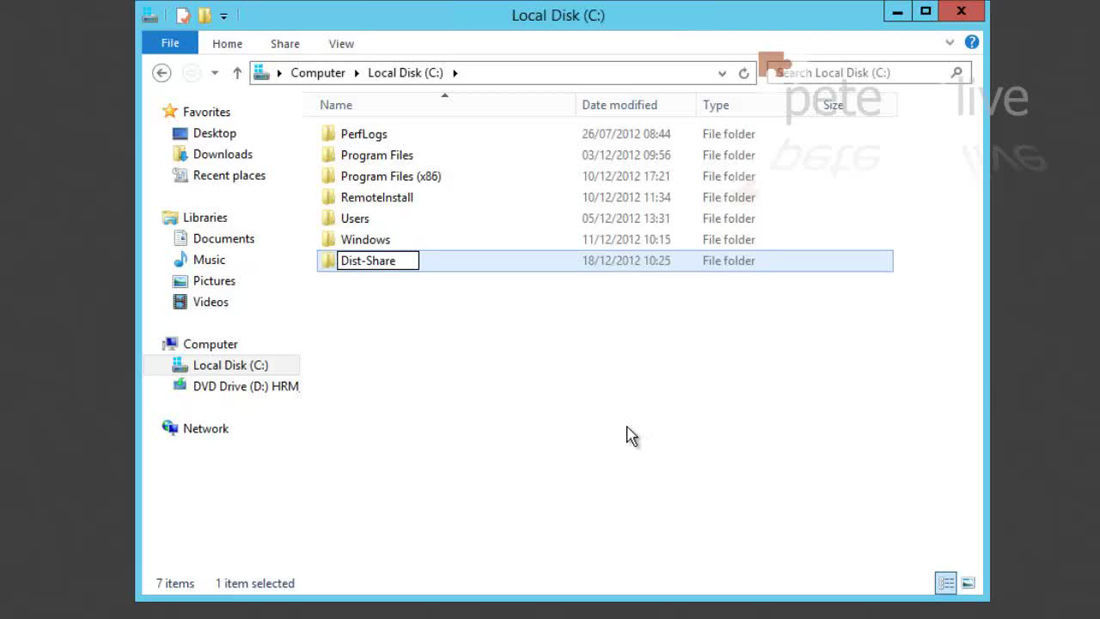
Create a WDS Distribution Share
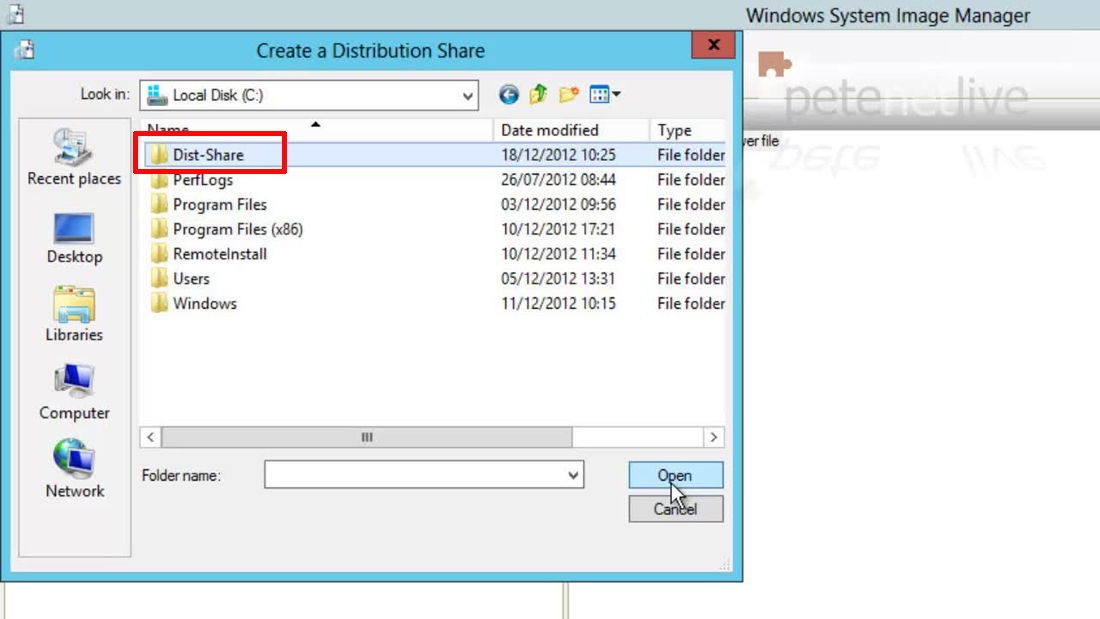
1. On a drive that has some room (Approx 5GB should be fine,) create a folder.
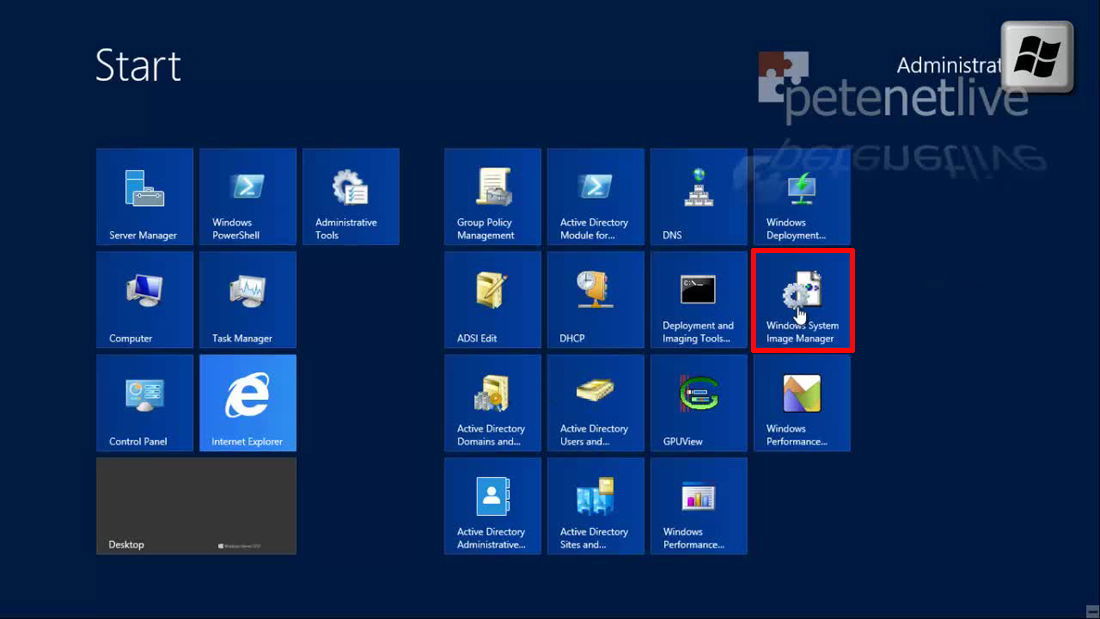
2. Launch the System Image Manager.
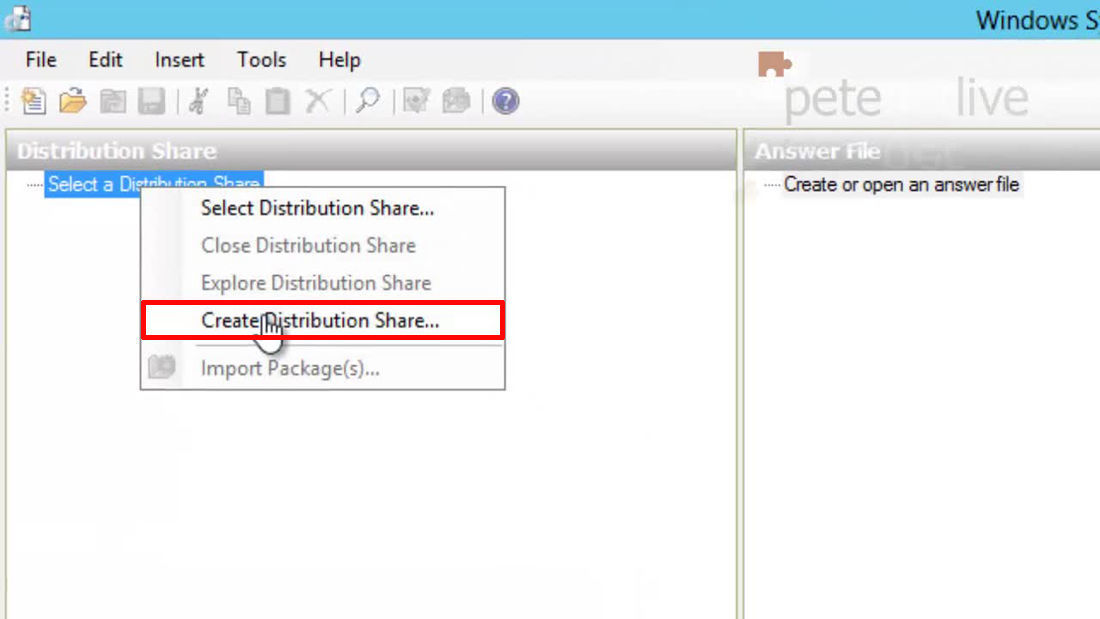
3. In the top left section > Right click ‘Select a Distribution Share’ > Select ‘Create Distribution Share..’
4. Navigate to the folder you created earlier.
5. Now you don’t need to do this next part, but I copy the full contents of the Windows 8 DVD into this folder as well.
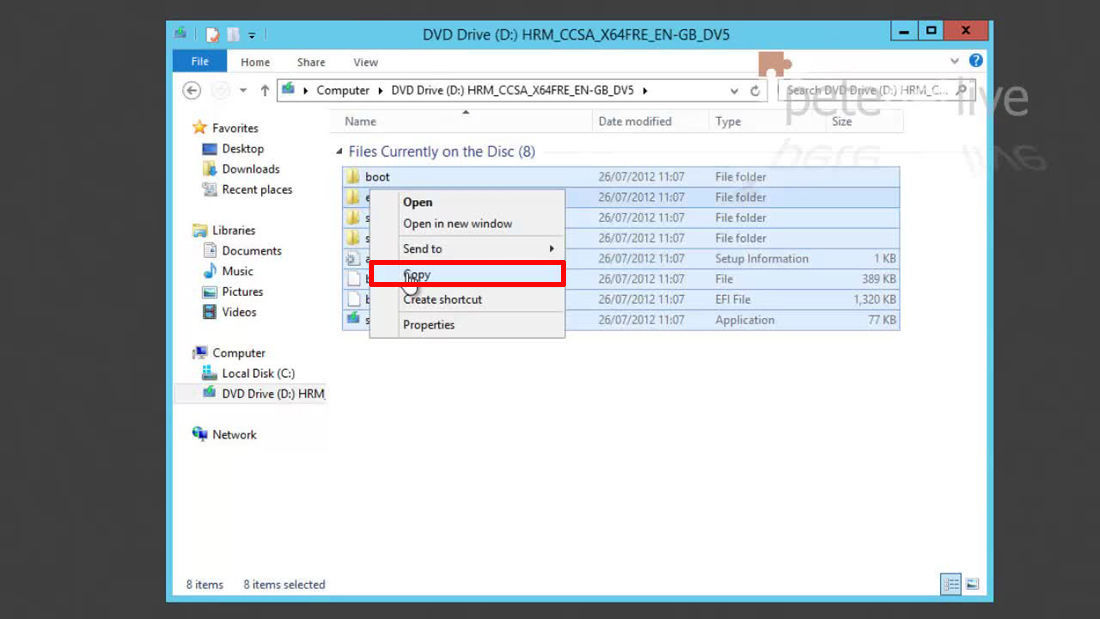
6. Like so.

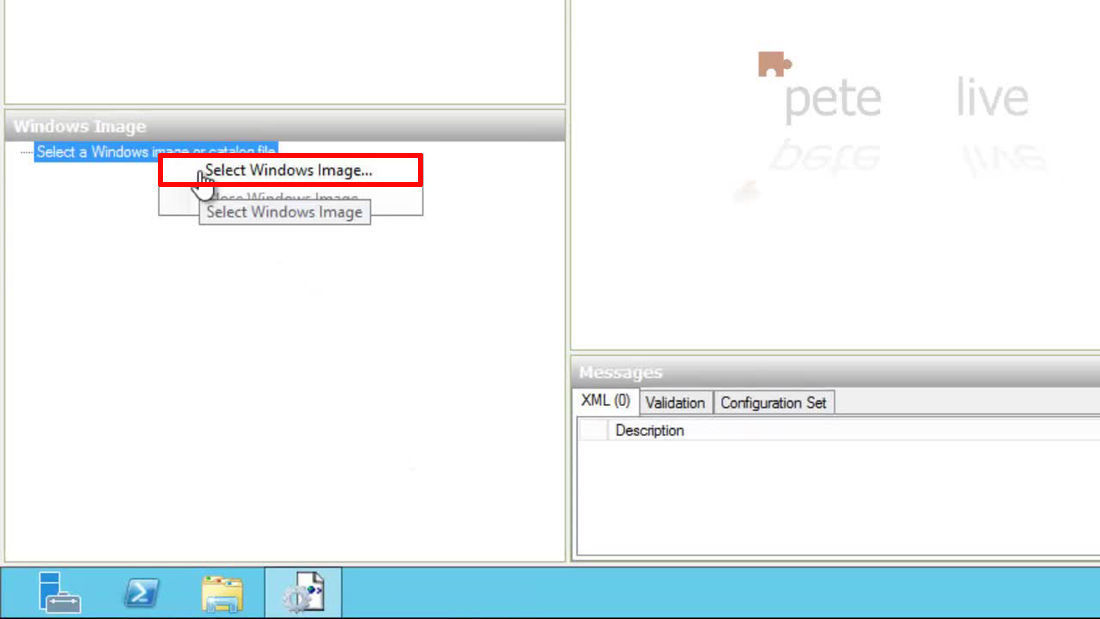
7. Then in the bottom left section > Right click > ‘Select Windows Image..’.
8. Navigate to the Windows 8 Media > Sources Directory > Select ‘install.wim’.
Note: The install.wim MUST match the version you are going to deploy, it’s no good pointing to a Windows 8 Pro image if you are going to deploy Windows 8 Enterprise.

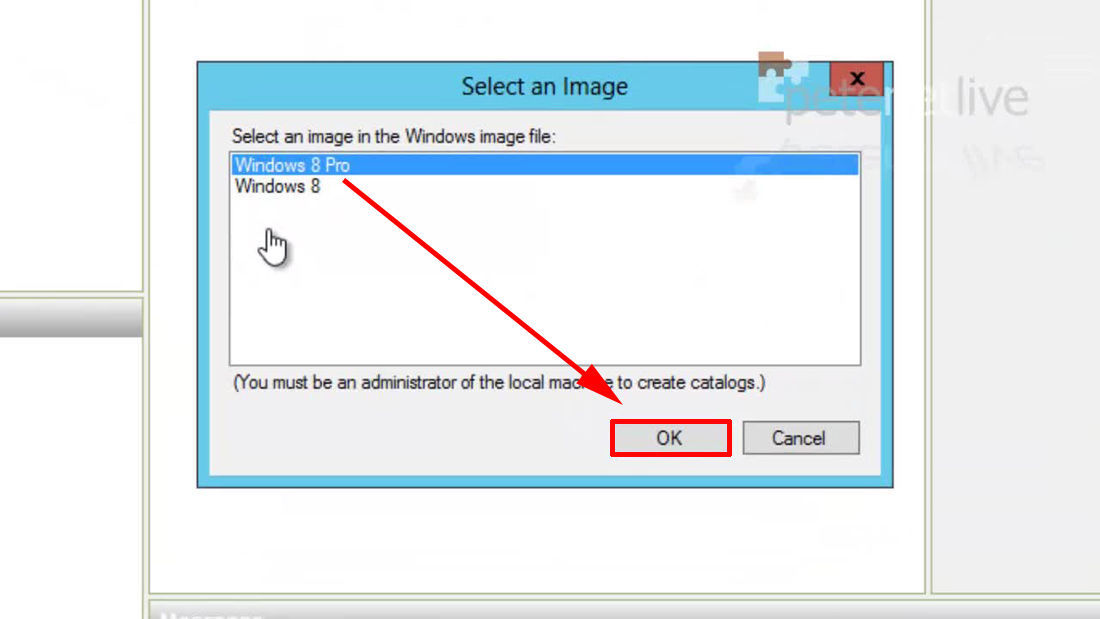
9. Select the version you are going to deploy > OK.
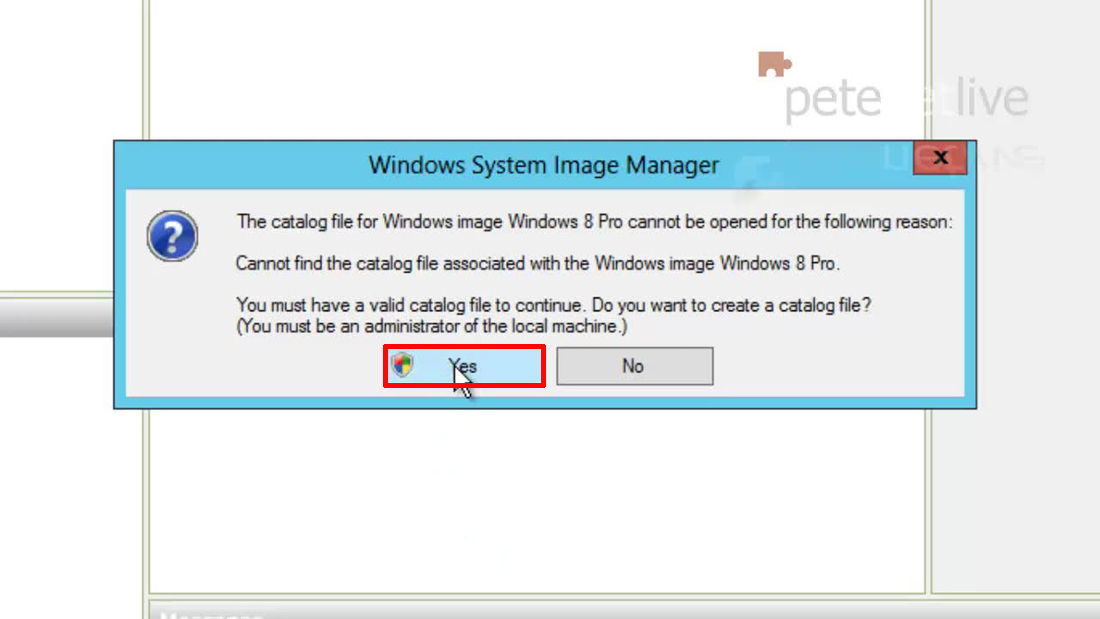
10. This is normal, select yes to create a catalog file. It will take a while, it has to mount the image, interrogate it and create all the components. Now would be a good time to put the kettle on.
Create the Unattended file for WDS (WDSUnattended.xml)
This unattended file will be just for the WDS settings, it will not be applied to the image you are going to deploy. It sets the keyboard and language settings for WDS to use, then it gives the credentials to connect to WDS, and wipes all the partitions from the target machines hard drive. It then repartitions it ready for deployment.
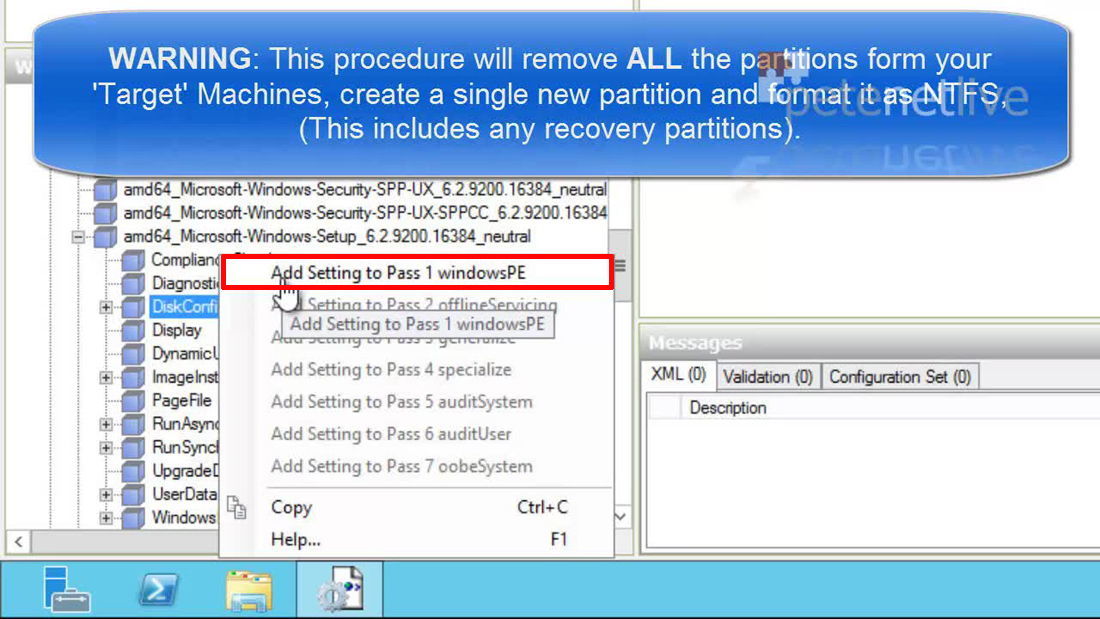
WARNING: As reiterated below, the disk configuration settings below will wipe the target machines drive of ALL partitions, even manufacturers rescue partitions. If you are imaging machines anyway this should not be a problem, but don’t email me to complain of you lose the recovery files for a laptop/PC while you were practicing!
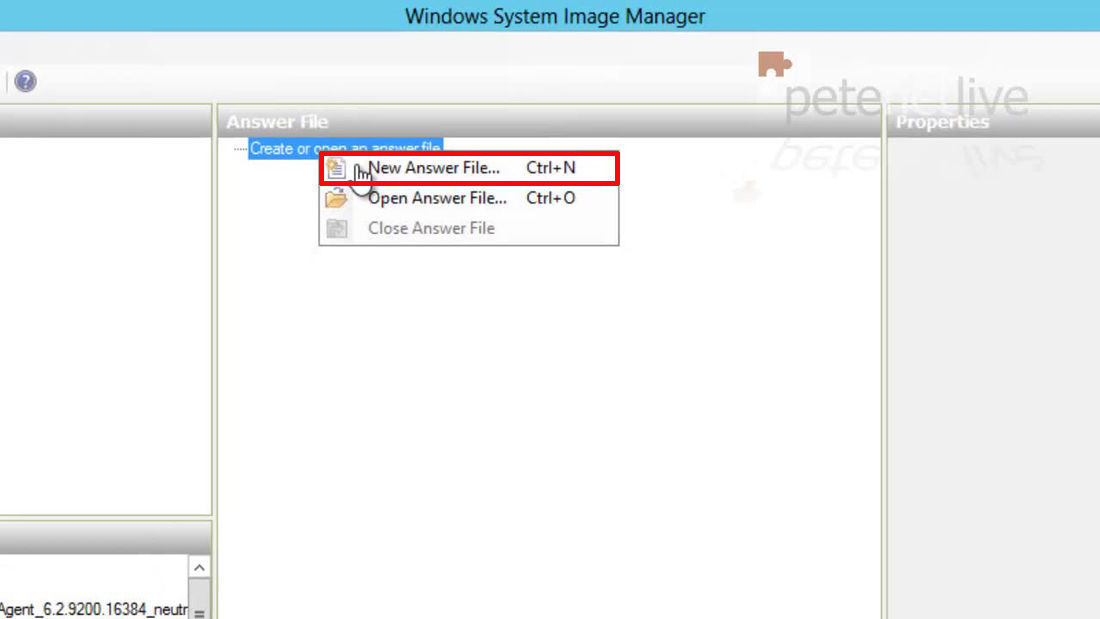
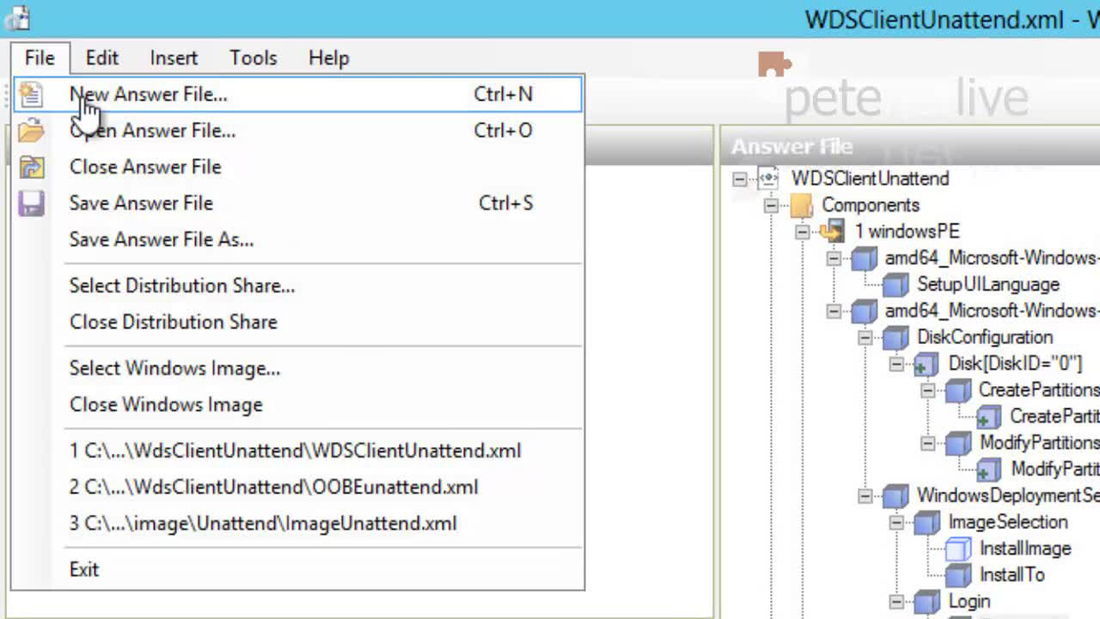
1. Create a new answer file.
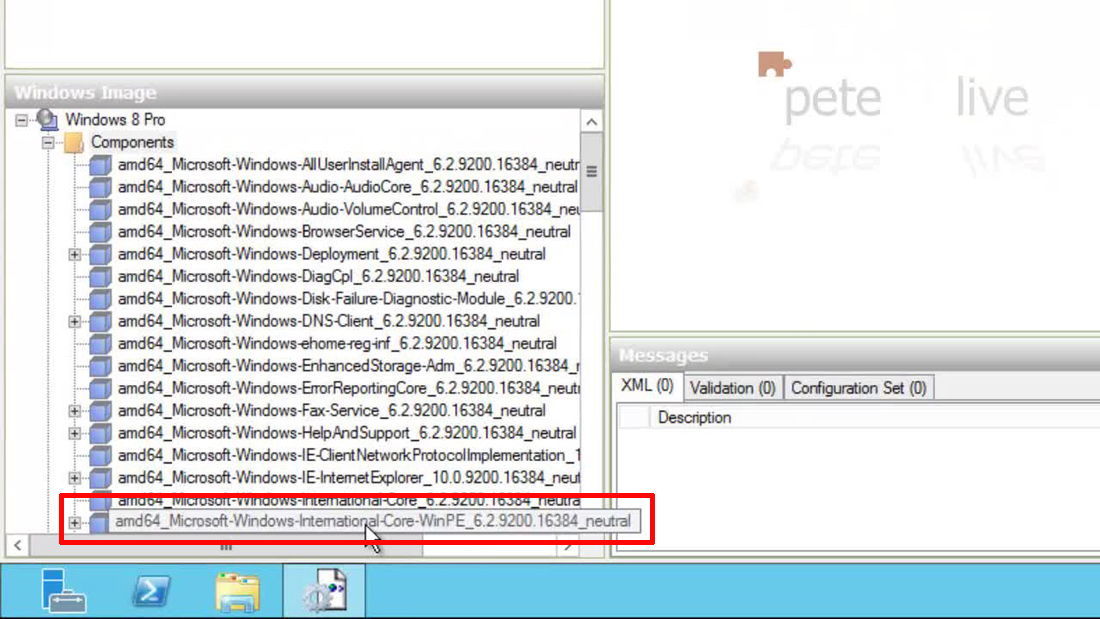
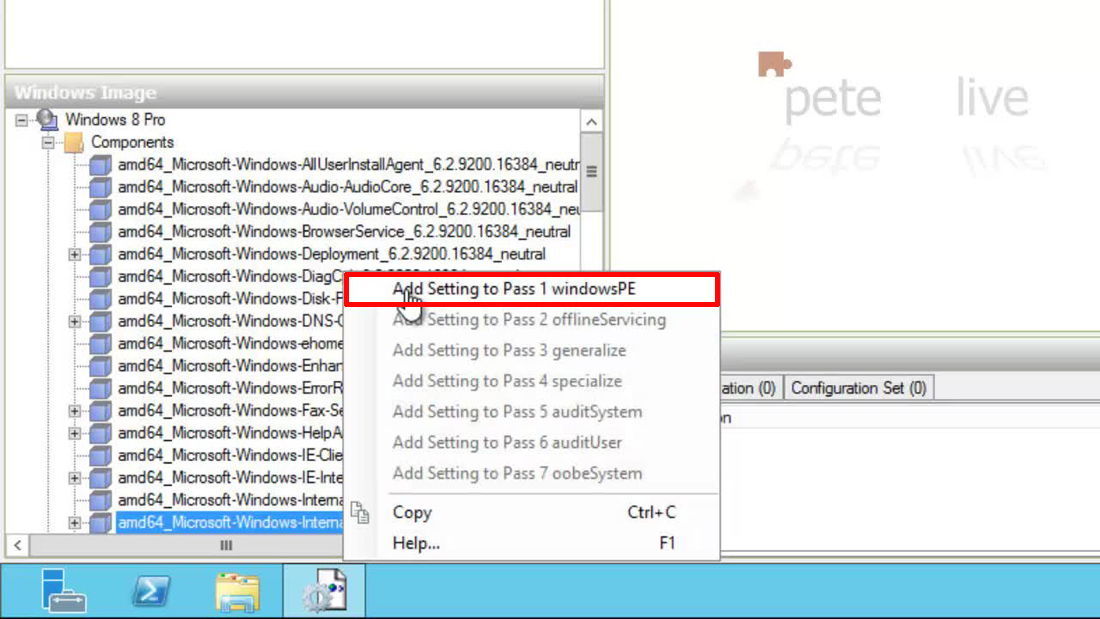
2. The components may not start amd64 (if you are deploying x86 images) and some of the numbers might be different on yours. But the main titles of the components will be the same. Locate Microsoft-Windows-Internationa-Core-WinPE.
3. Add it to Pass 1. If you are unfamiliar with SIM, you add a component (or a sub component) to one of the ‘Passes’ in the center, then you can select that component (or sub component) and set the values for its settings in the top right hand section. The SIM builds an XML file in the background which will become the unattended answer file.
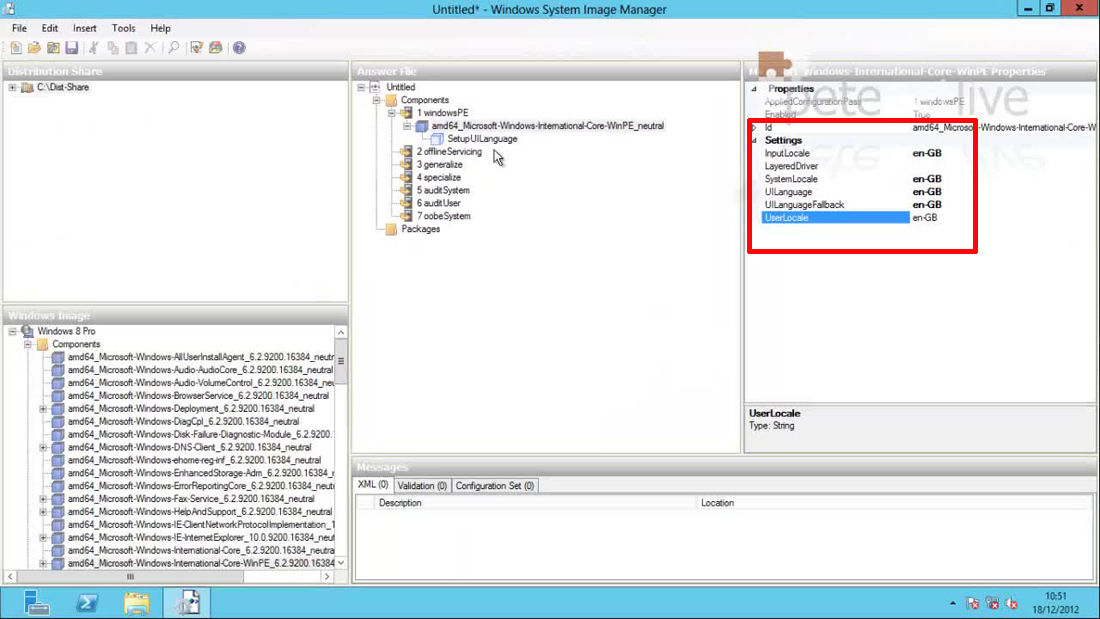
4. You will now see this component under pass 1, select it and set the following settings. (These are for my local English Great Britain settings, you may need to change your settings according to your locale).
InputLocale = en-GB SystemLocale = en-GB UILanguage = en-GB UILanguageFallback = en-GB UserLocale = en-GB
5. Select the SetupUILanguage sub component.
UILanguage = en-GB

Wiping the Targets Hard Drive and Partitions with WDS
6. Locate the Microsoft-Windows-Setup component > Disk Configuration sub component.

7. Add to Pass 1.
8. Right click > Insert New Disk.
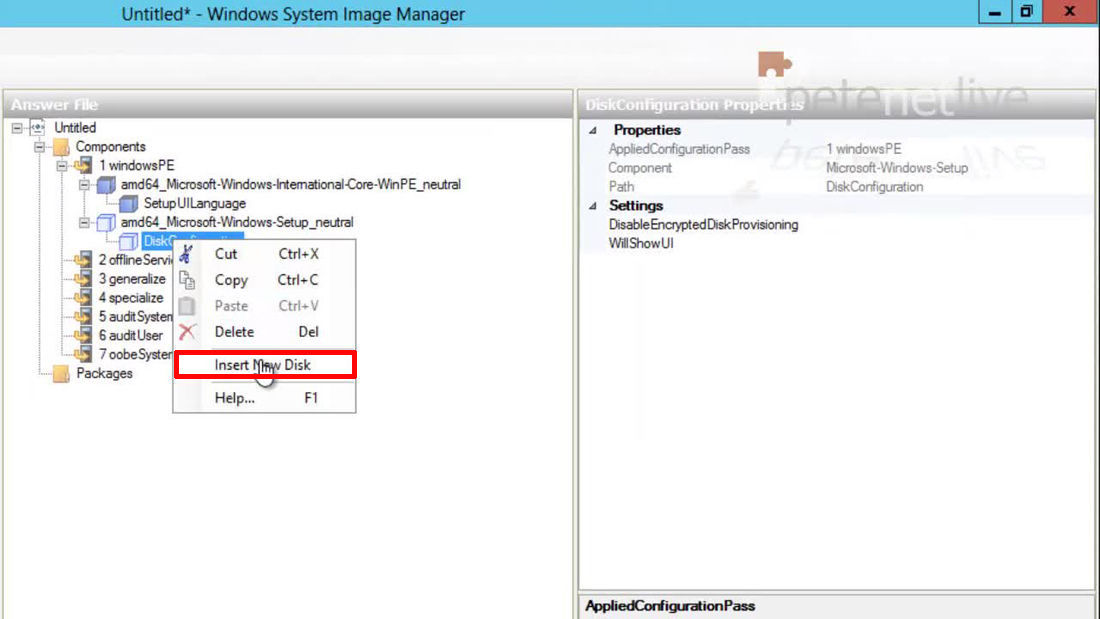
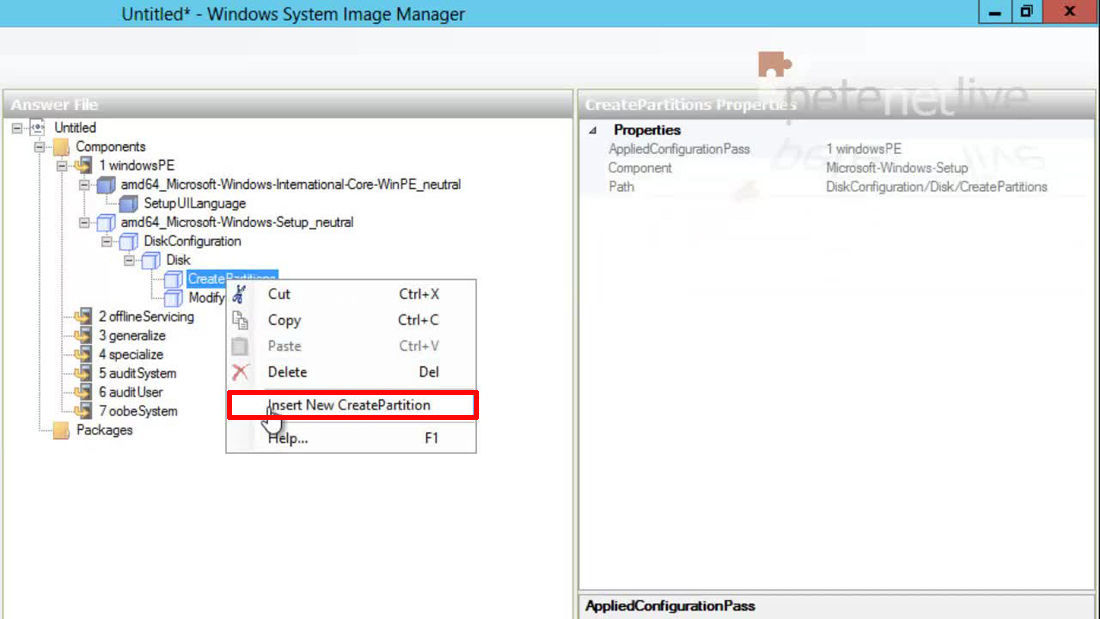
9. Expand > Disk > Create Partitions > Right click > ‘Insert New CreatePartition’.
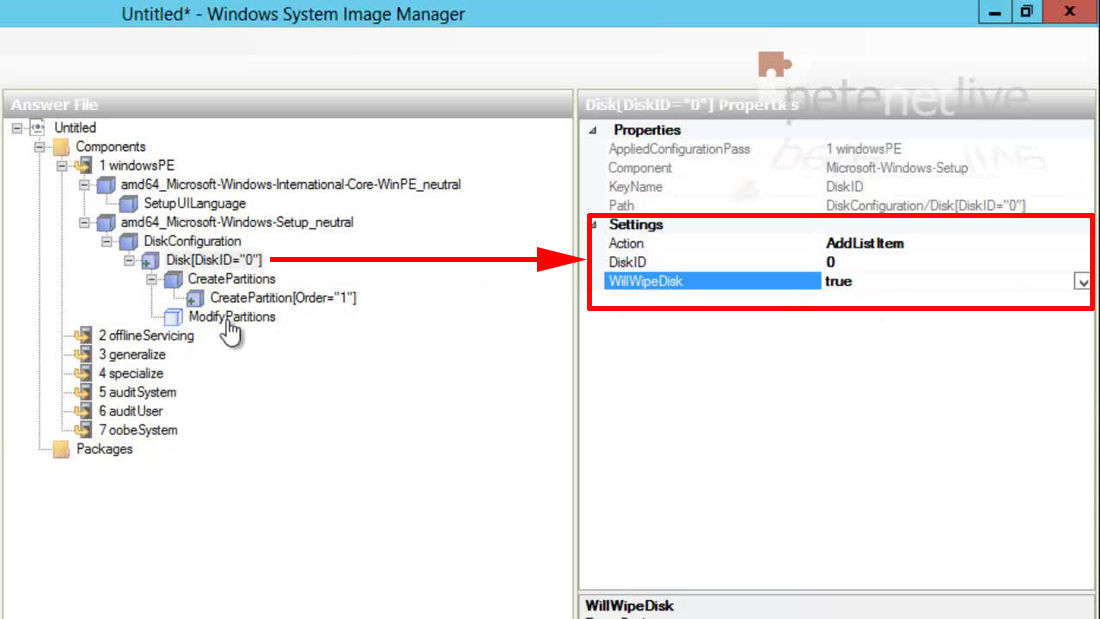
10. Select the DISK.
Disk ID = 0 WillWipeDisk = true
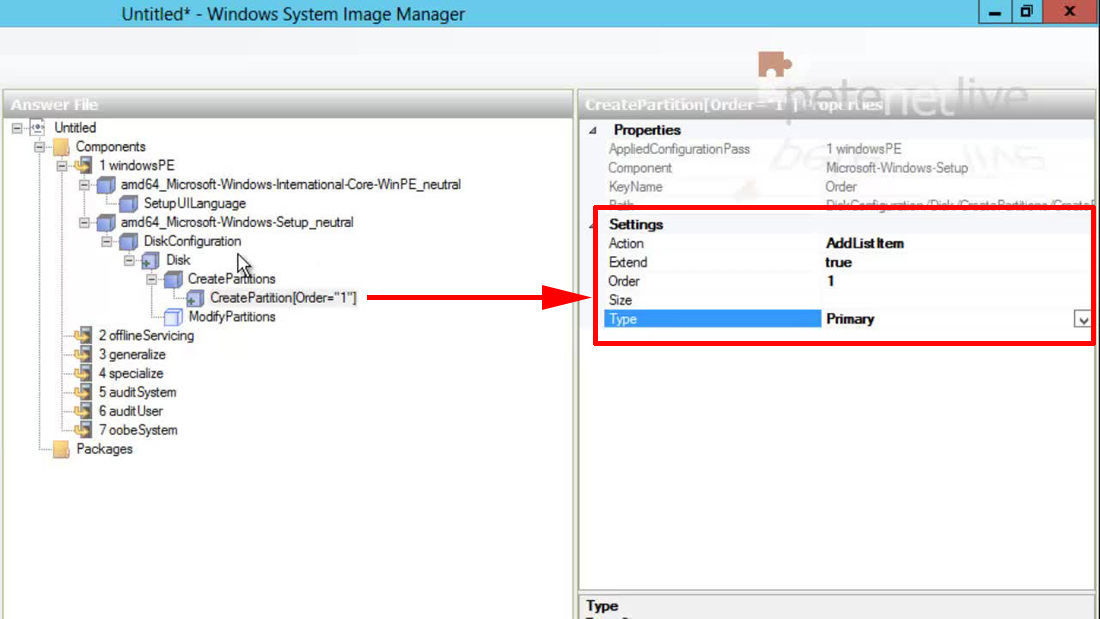
11. Select the Partition.
Extend = true Order = 1 Type = Primary
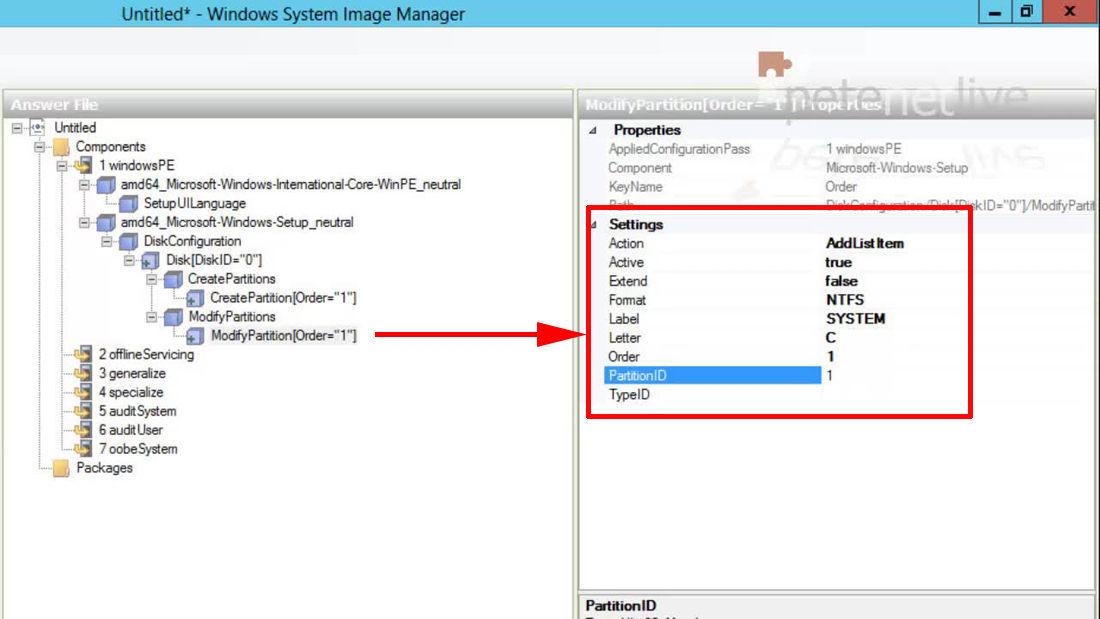
12. Right click ModifyPartition > Insert New ModifyPartition.

13. With the new ModifyPartition selected.
Action = AddlistItem Active = true Extend = false Format = NTFS Label = SYSTEM Letter = C Order = 1 PartitionID = 1
Select Partition to install Image to
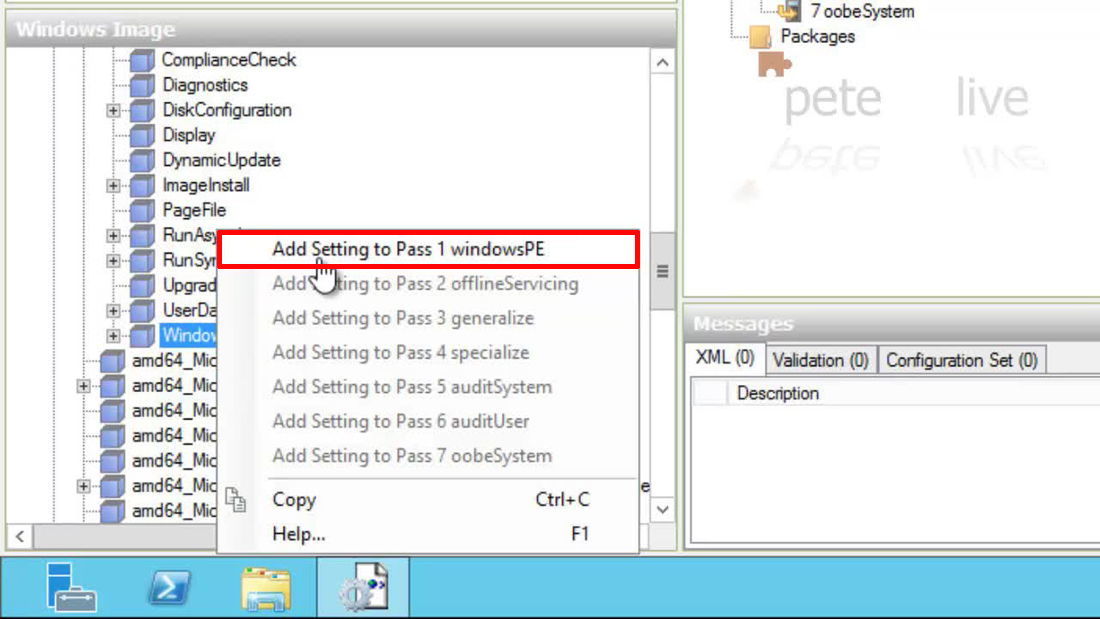
1. Locate the WindowsDeploymentService sub component, (also in Microsoft-Windows-Setup).
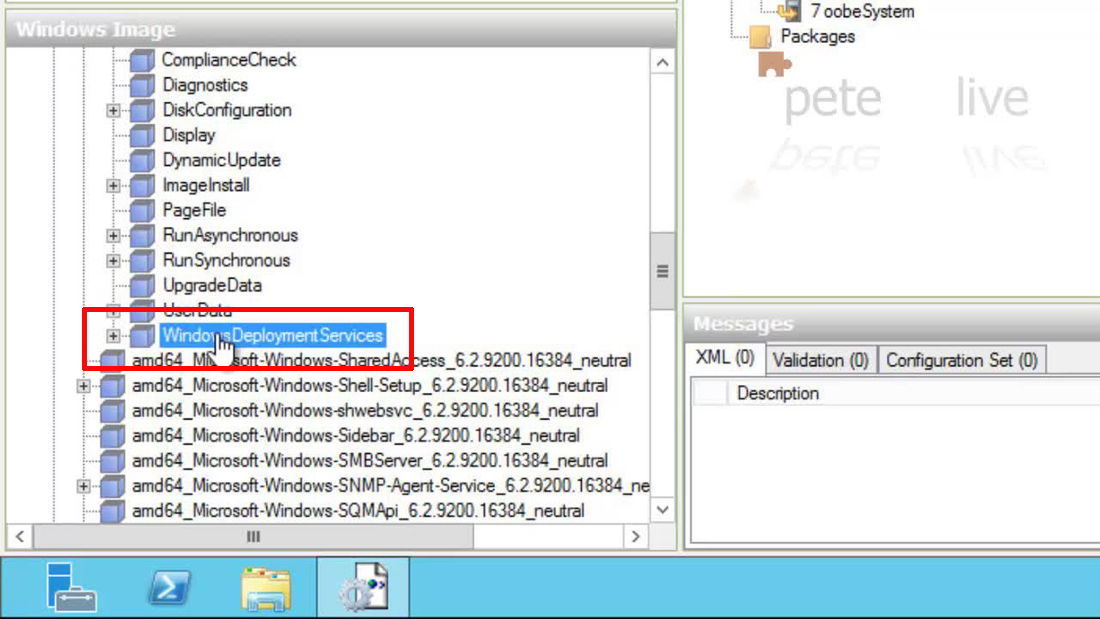
2. Add to Pass 1.
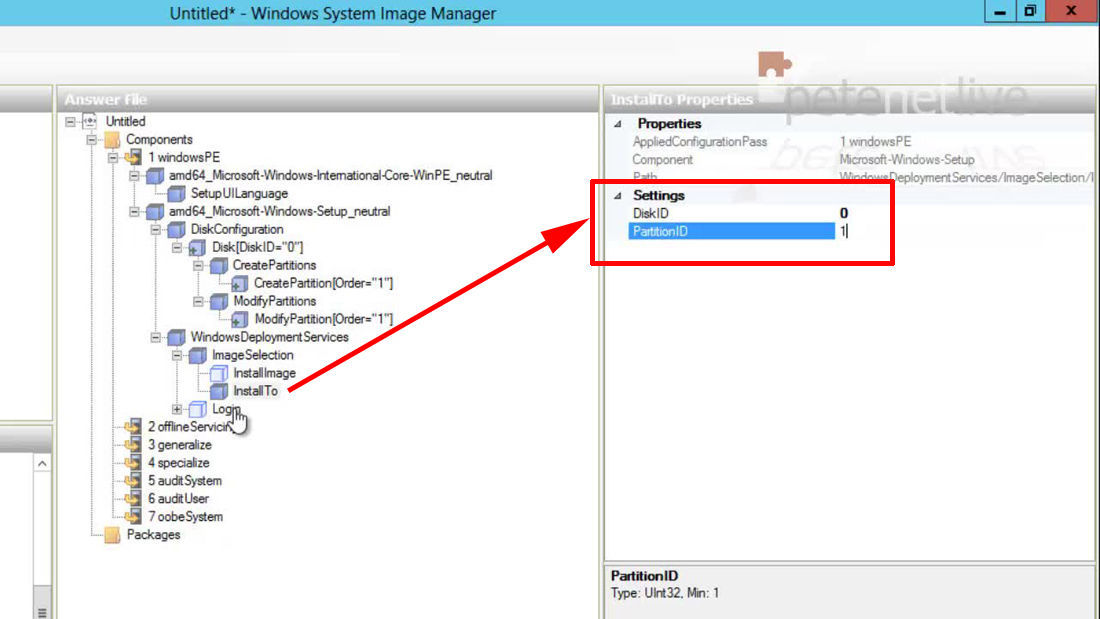
3. Expand Image Selection > Install To.
Disk ID = 0 PartitionID = 1
4. Expand Login > Credentials.
Domain = {Your domain name i.e. petenetlive.com would be PETENETLIVE). Password = {Of a user with administrative rights – IT WILL GET OBFUSCATED*). Username = {Of a user with administrative rights).
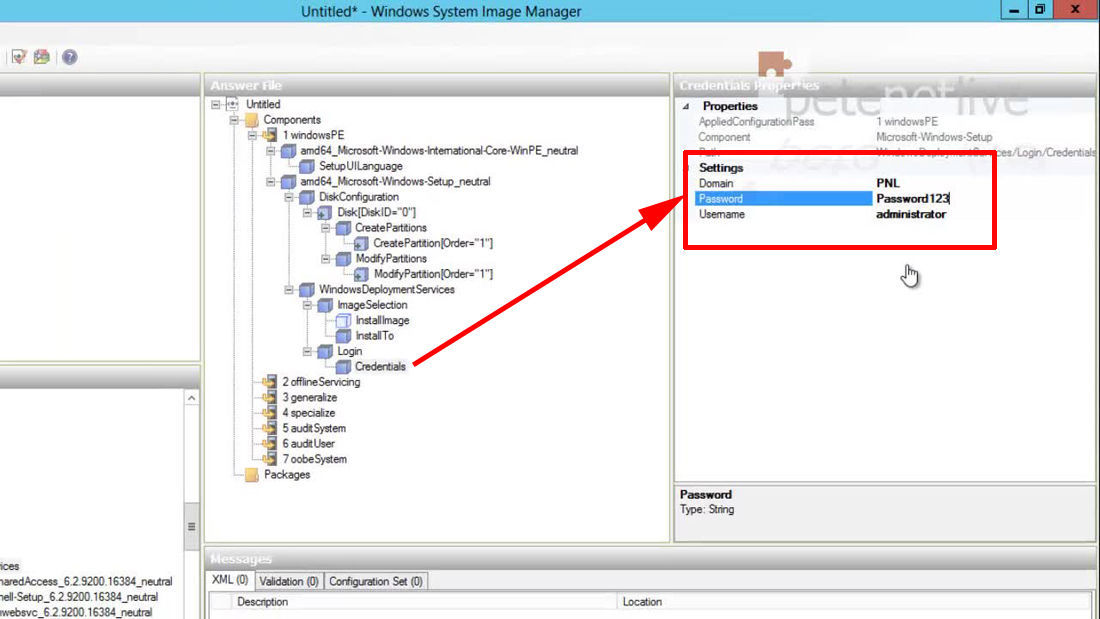
*I used to say ‘encrypted‘, but thats NOT the case, they are simply Base64 encoded.
Attach the Answerfile to the WDS Server
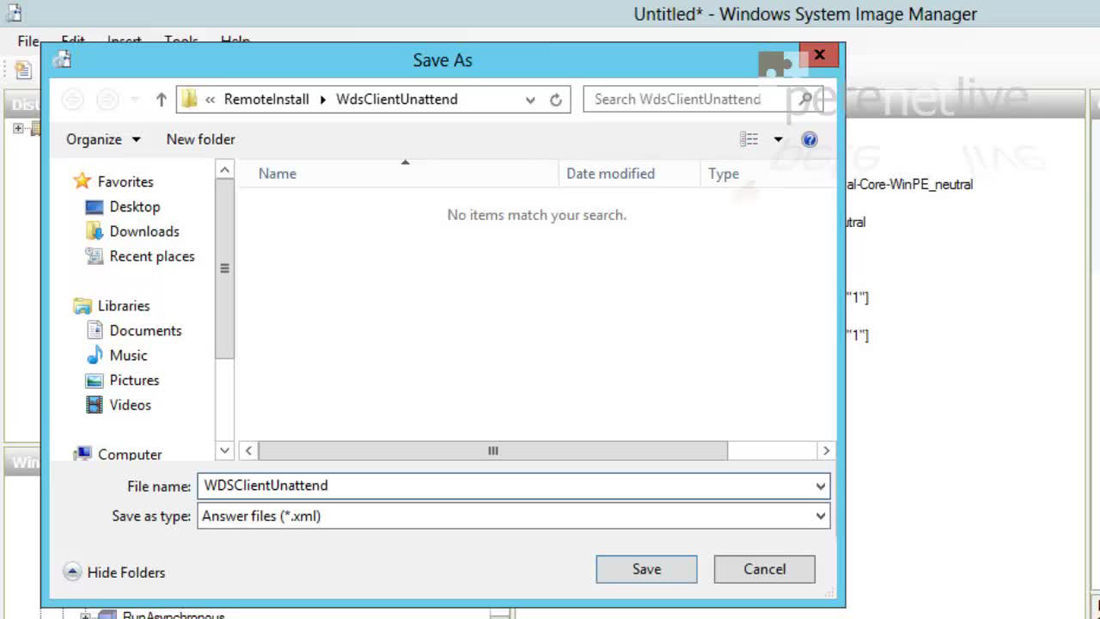
1. Save the file you have just created.
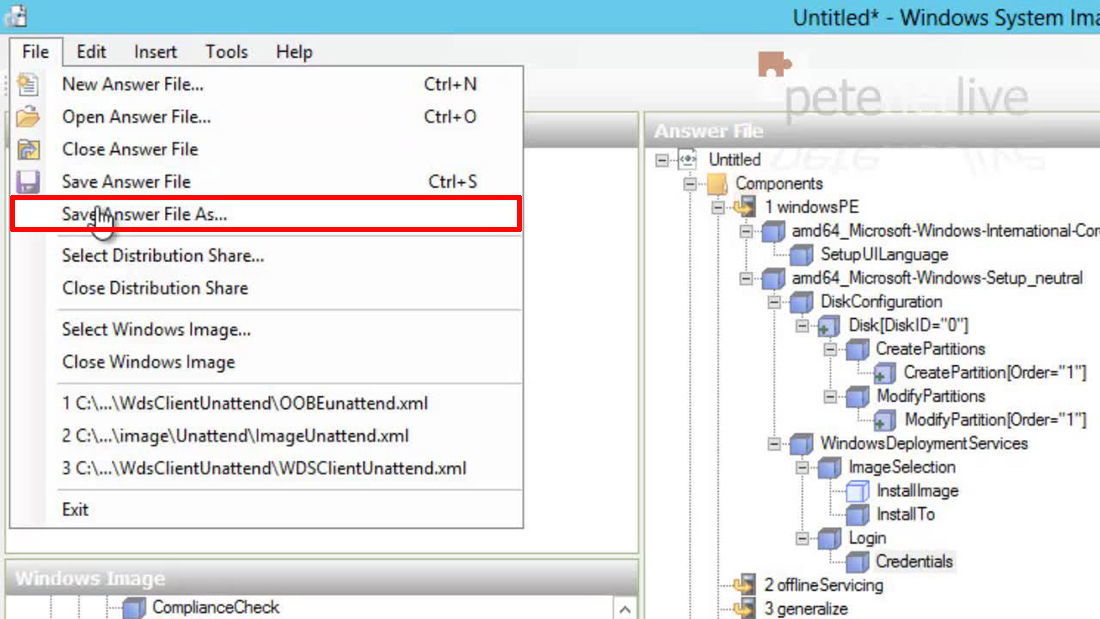
2. Place it in your Remoteinstall folder in the WdsClientUnattend sub folder.
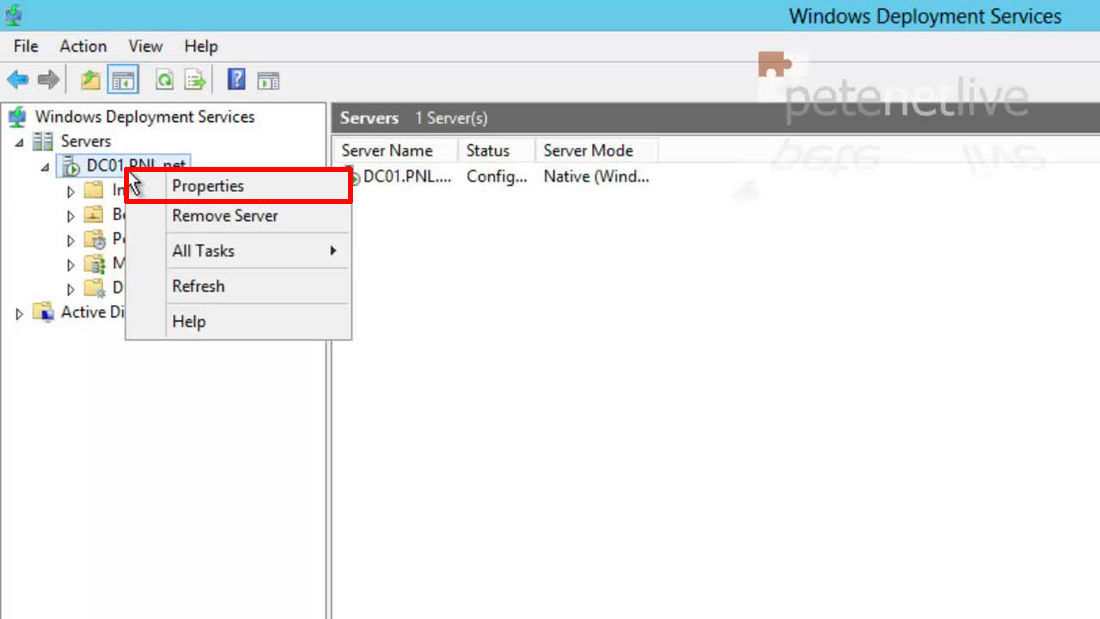
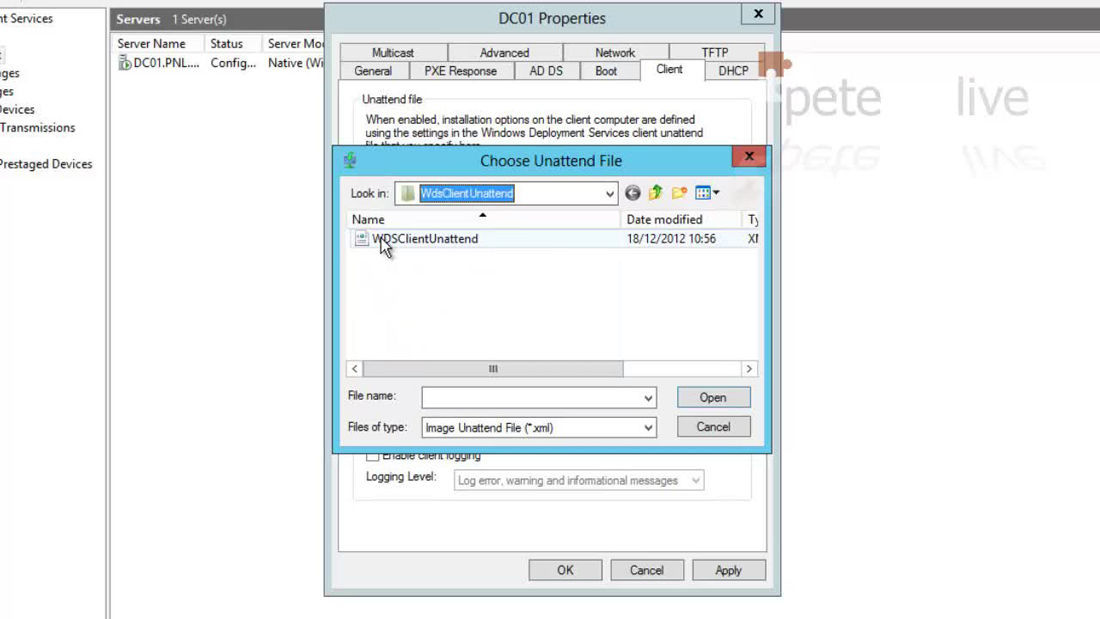
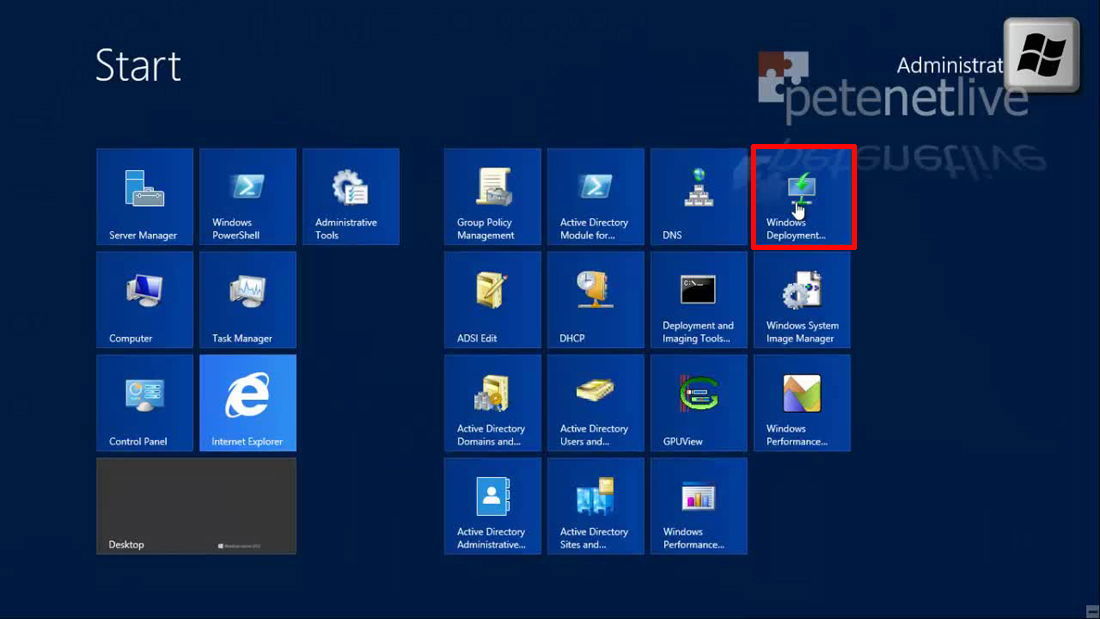
3. Launch the Windows Deployment Services management console > Expand Servers > Right click your server > Properties.
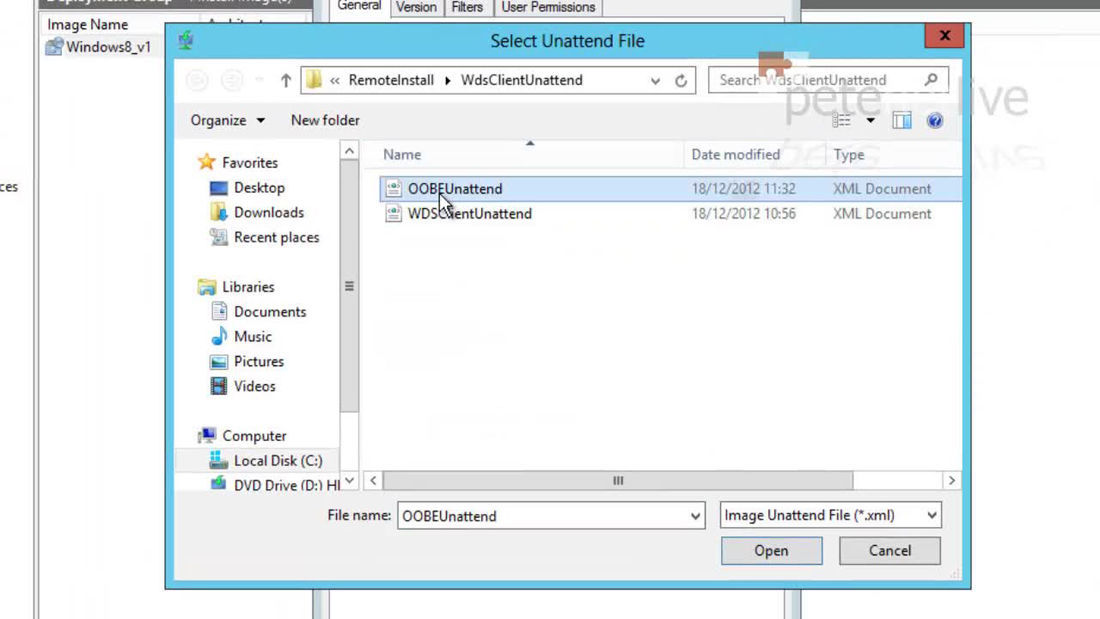
4. Client tab > Tick to enable unattended installation > I’m deploying x64 bit images so next to that option > Browse.
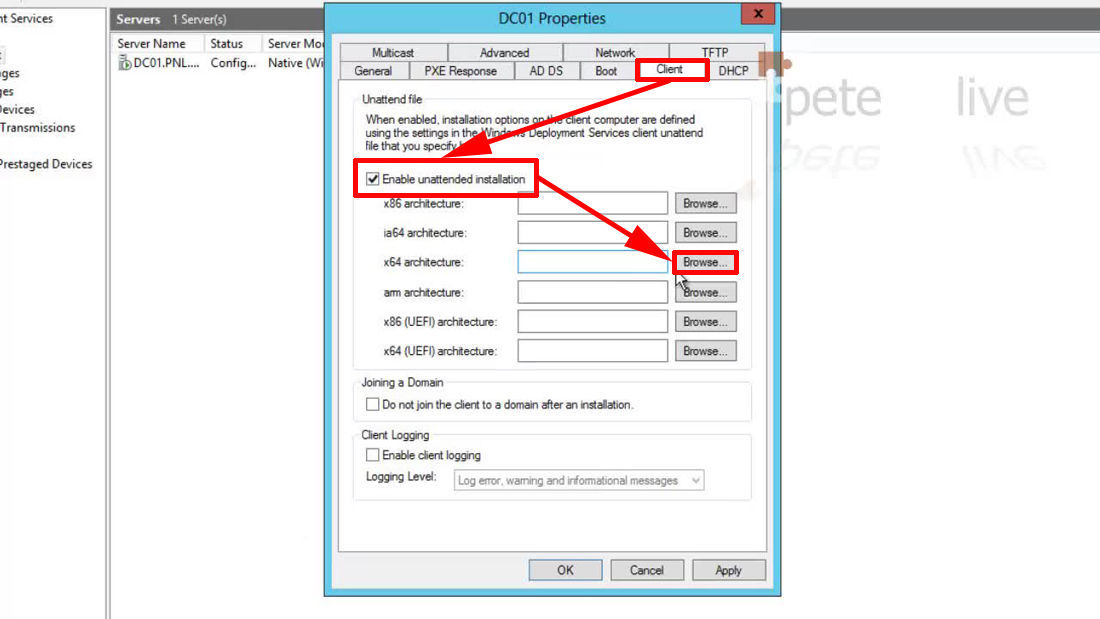
5. Navigate to and select the file you have just created > Open > Apply > OK.
Create the Unattended file for Your Image (OOBEUnattend.xml)
1. Create a new answer file.
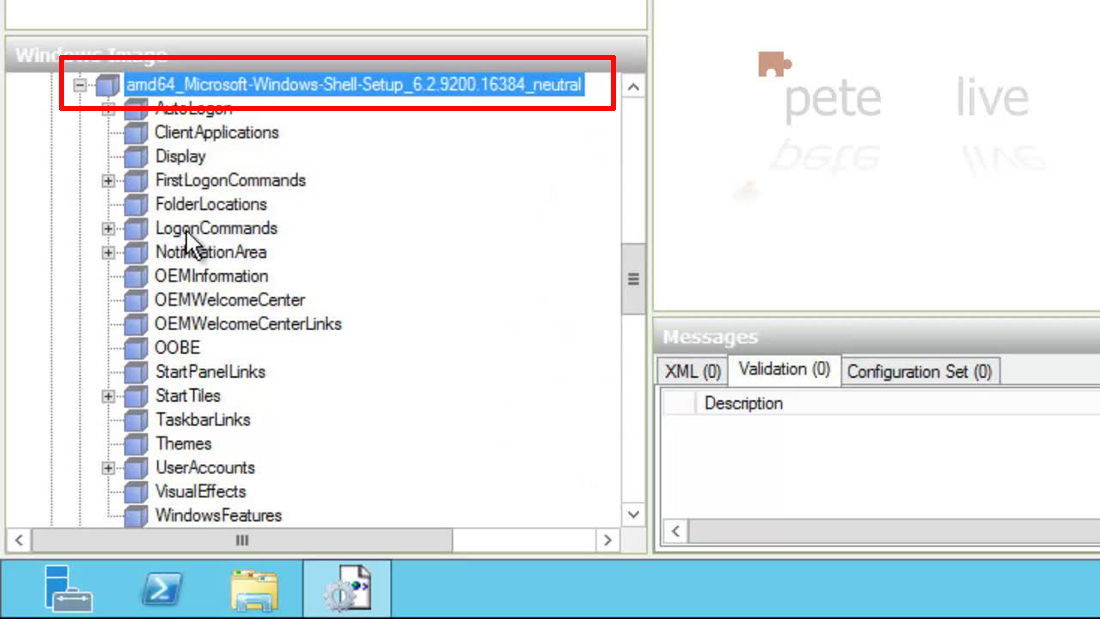
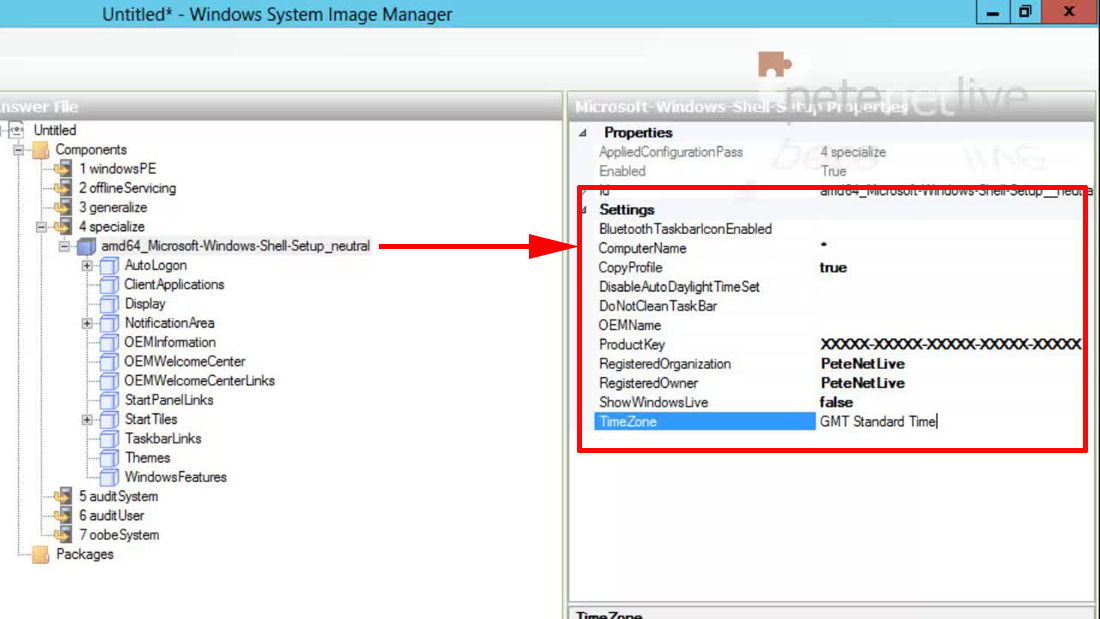
2. Locate the Microsoft-Windows-Shell-Setup component.
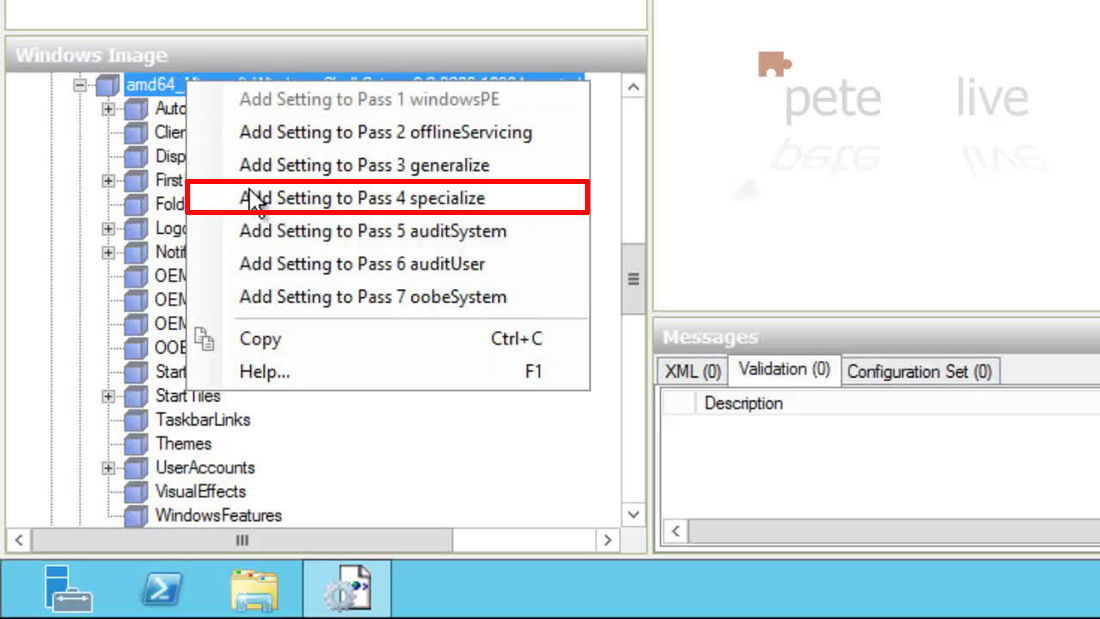
3. Add to Pass 4.
4. With the component selected.
ComputerName = * CopyProfile = true (Unless you don’t want to copy the profiles from your source image). ProductKey = Your 25 character Windows 8 unlock code Note: Only put in a code of you are deploying with MAK keys or Retail Keys, if you are planning on using KMS leave this option blank RegisteredOrganization = Your business name. RegisteredOwner = Your owners name. ShowWindowsLive = false {now depreciated for Windows 8} TimeZone = GMT Standard Time Note: For other time zones see here
Automatically Join the Domain
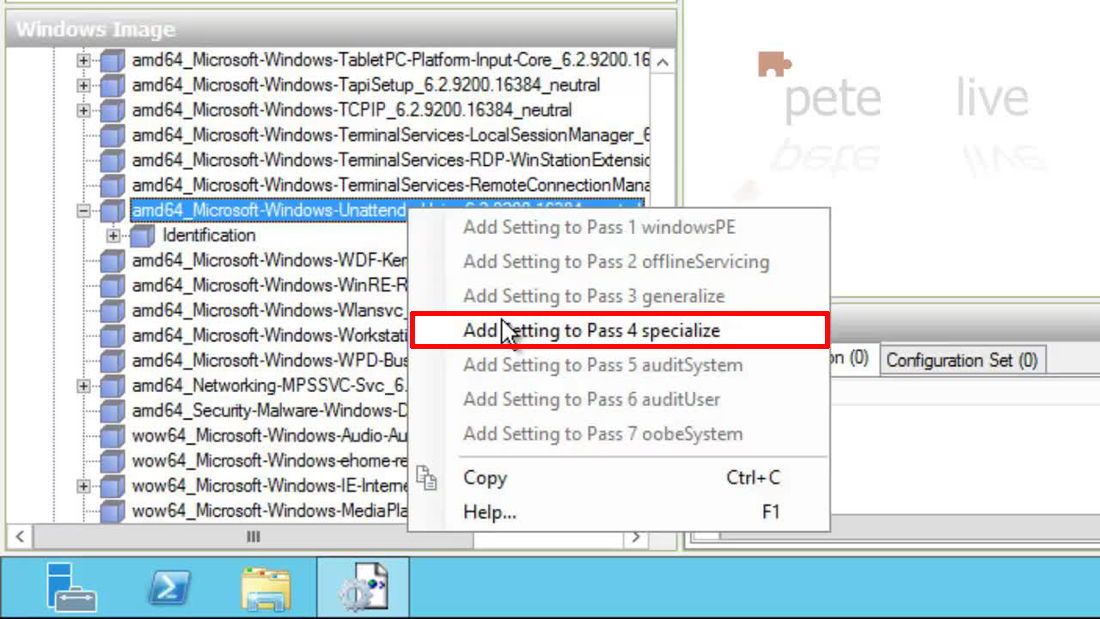
1. Locate the Microsoft-Windows-UnattendedJoin component
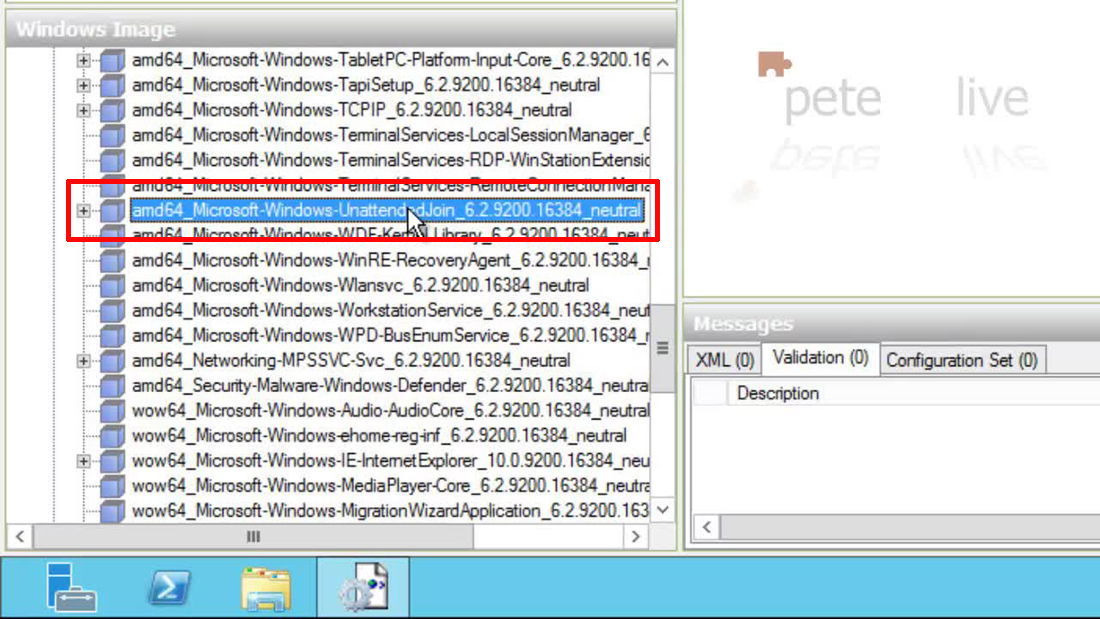
2. Add to Pass 4.
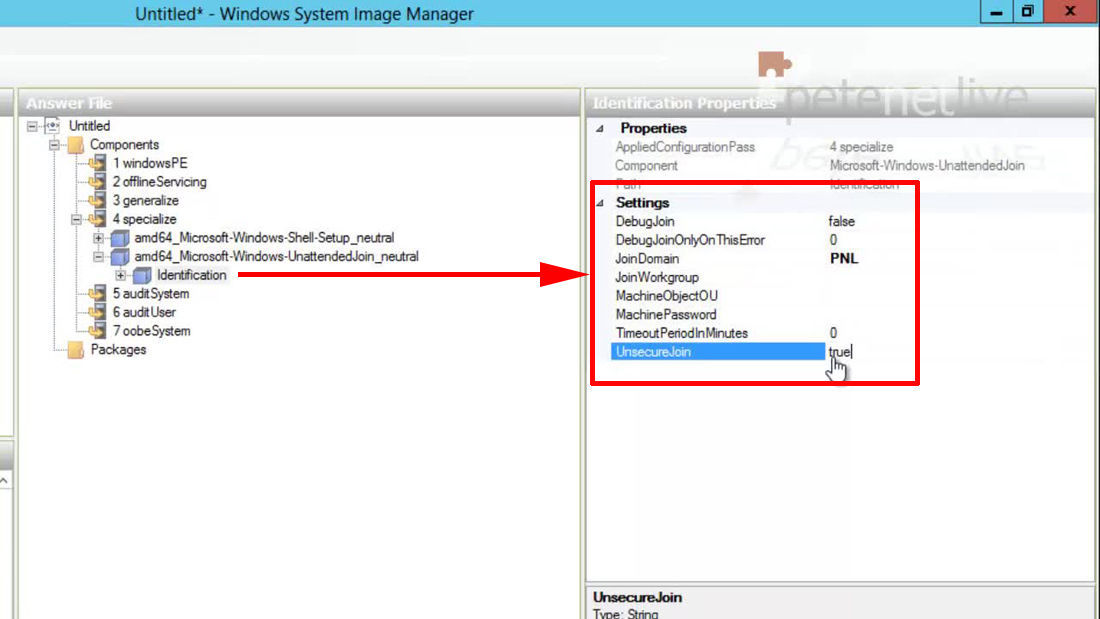
3. With Identification selected.
JoinDomain = {Your domain name i.e. petenetlive.com would be PETENETLIVE). UnsecureJoin = true
Set the Image Language and Keyboard Settings
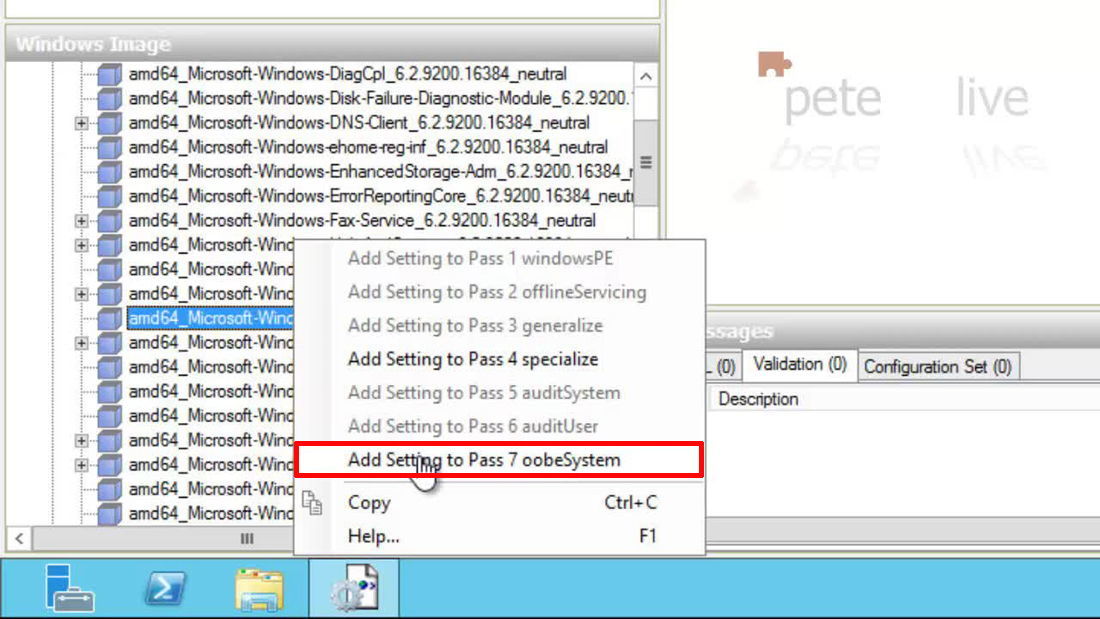
4. Locate the Microsoft-Windows-International-Core component.
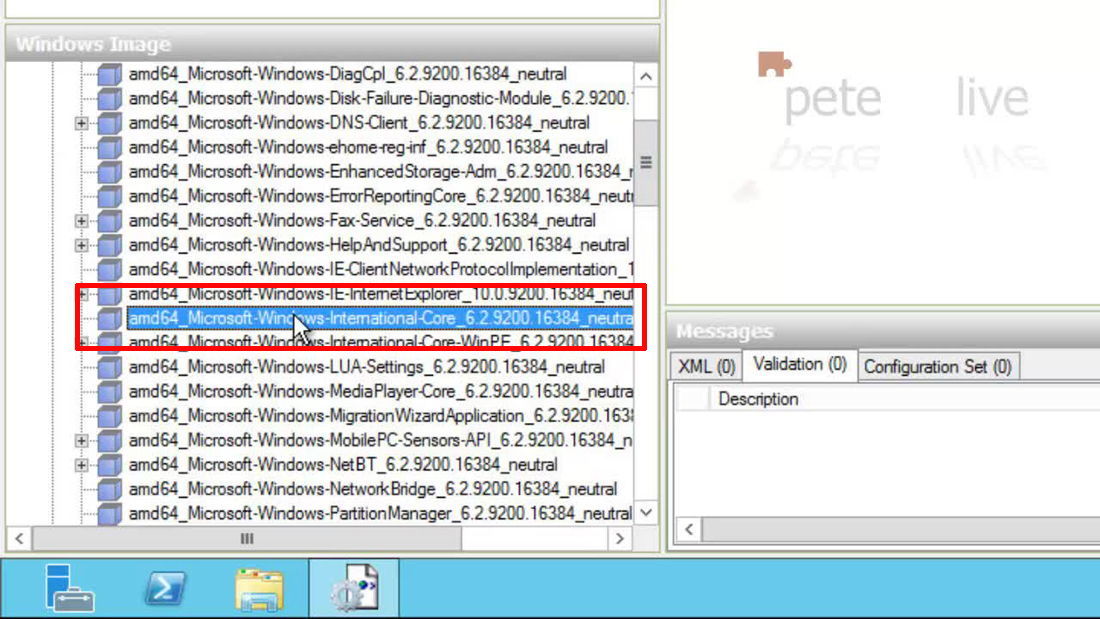
5. Add to Pass 7.
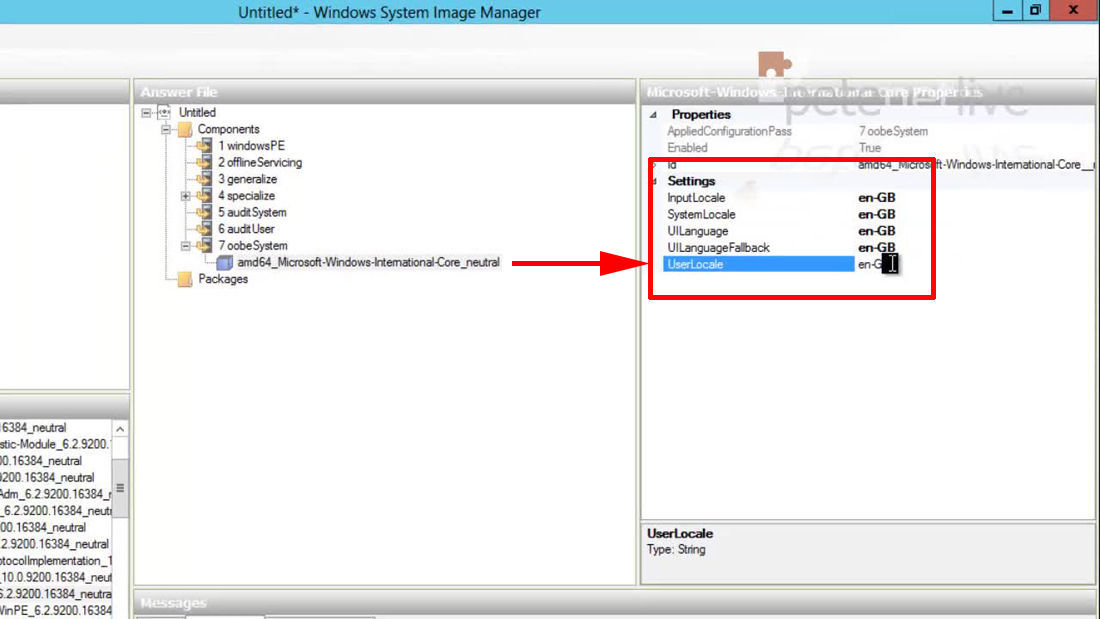
6. With the component selected.
InputLocale = en-GB SystemLocale = en-GB UILanguage = en-GB UILanguageFallback = en-GB UserLocale = en-GB
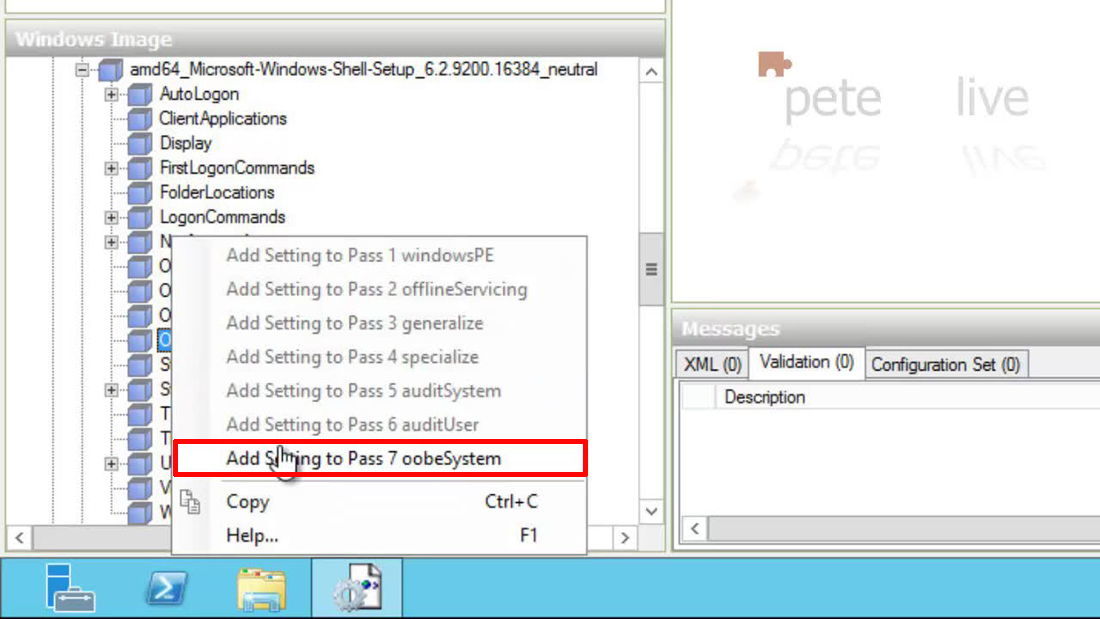
7. Locate the Microsoft-Windows-Shell-Setup component > OOBE sub component
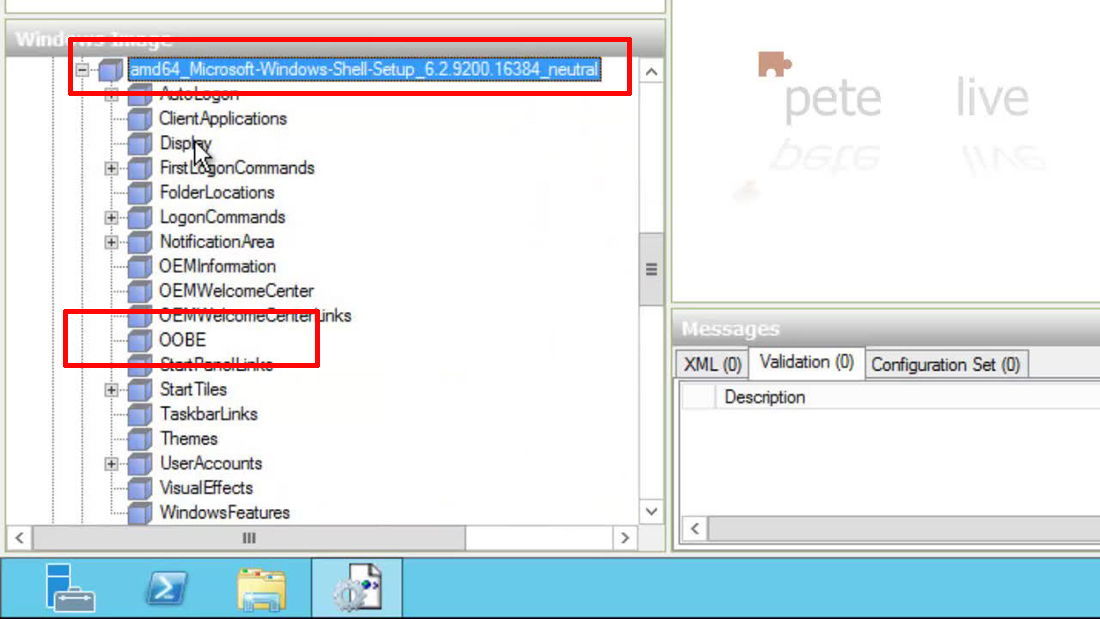
8. Add to Pass 7.
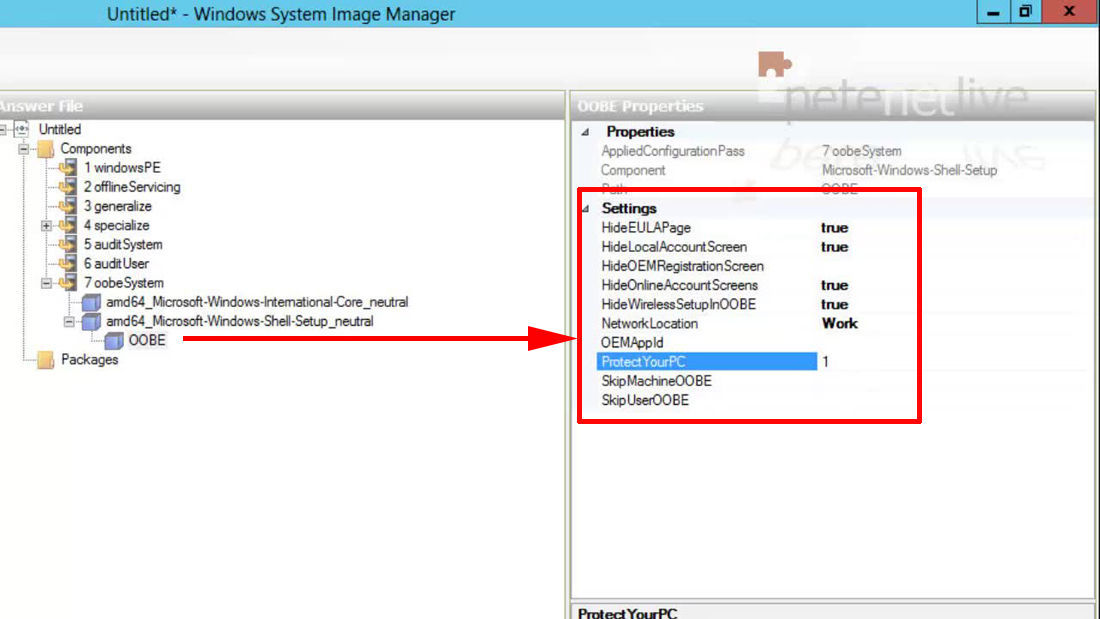
9. With the OOBE sub component selected.
HideEULAPage = true HideLocalAccountScreen = true HideOnlineAccountScreen =true HideWirelessSetupInOOBE = true NetworkLocation = Work {sets the firewall settings} ProtectYourPC = 1
Set the Local Administrator Password and Add a Local Administrator
Note: The local admin account is disabled by default, so here I’m setting the local admin’s password, and then creating a new local admin user called Sysadmin.
1. Locate the Microsoft-Windows-Shell-Setup component > UserAccounts sub component
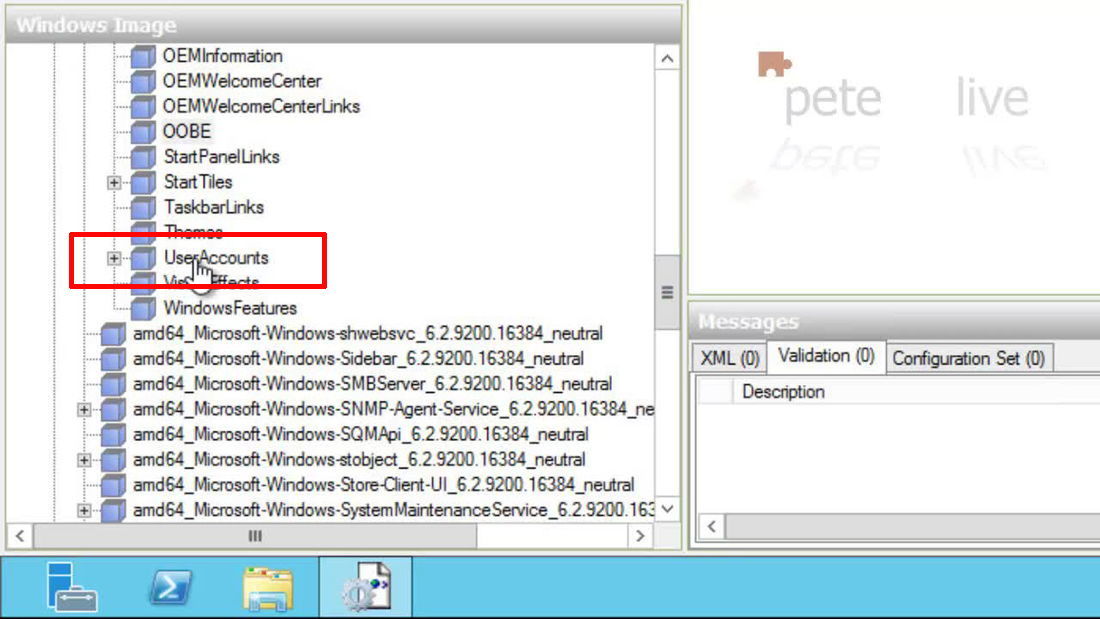
2. Add to Pass 7.

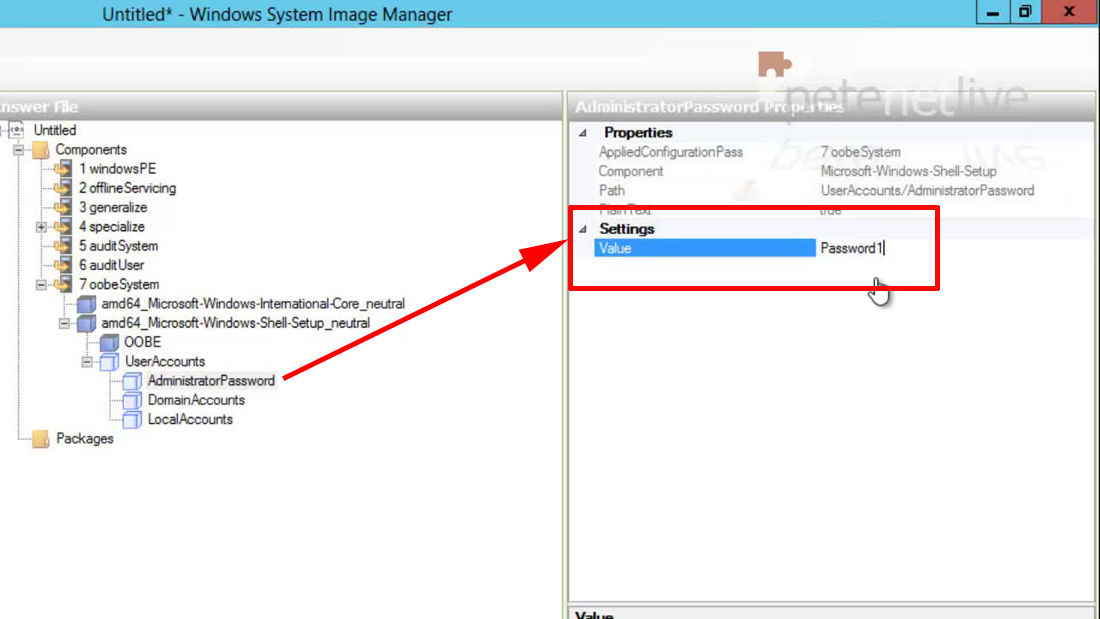
3. With AdmnistratorPassword selected set the password value.
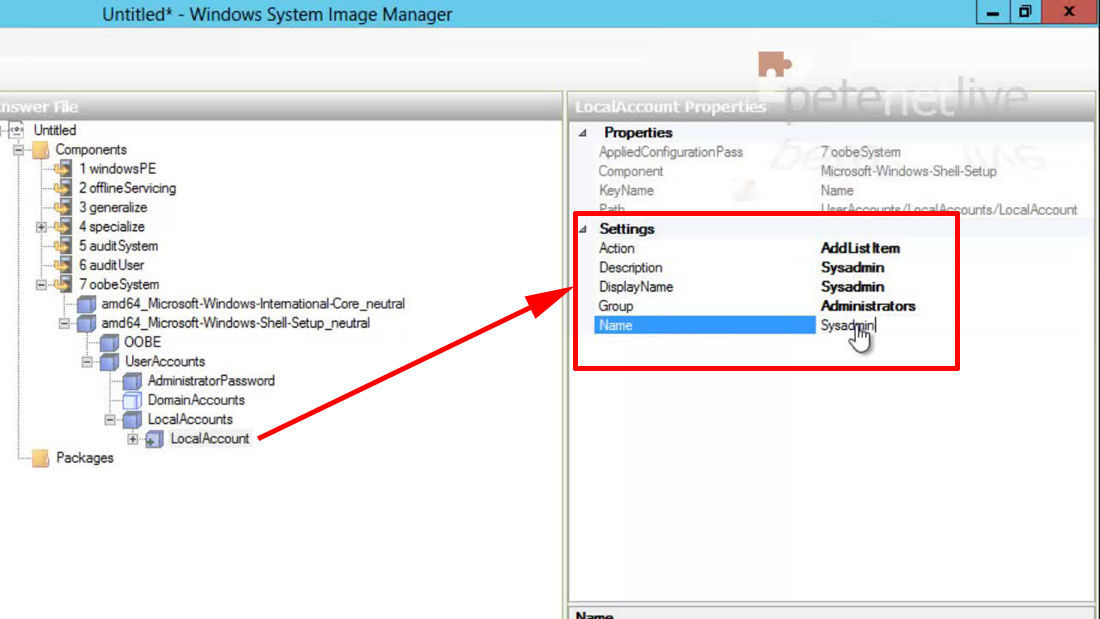
4. Right click LocalAccounts > Insert New LoacalAccount.

5. With LocalAccount selected.
Action = AddListItem Description = Sysadmin DisplayName = Sysadmin Group = Administrators Name = Sysadmin
6. Then set the password value.
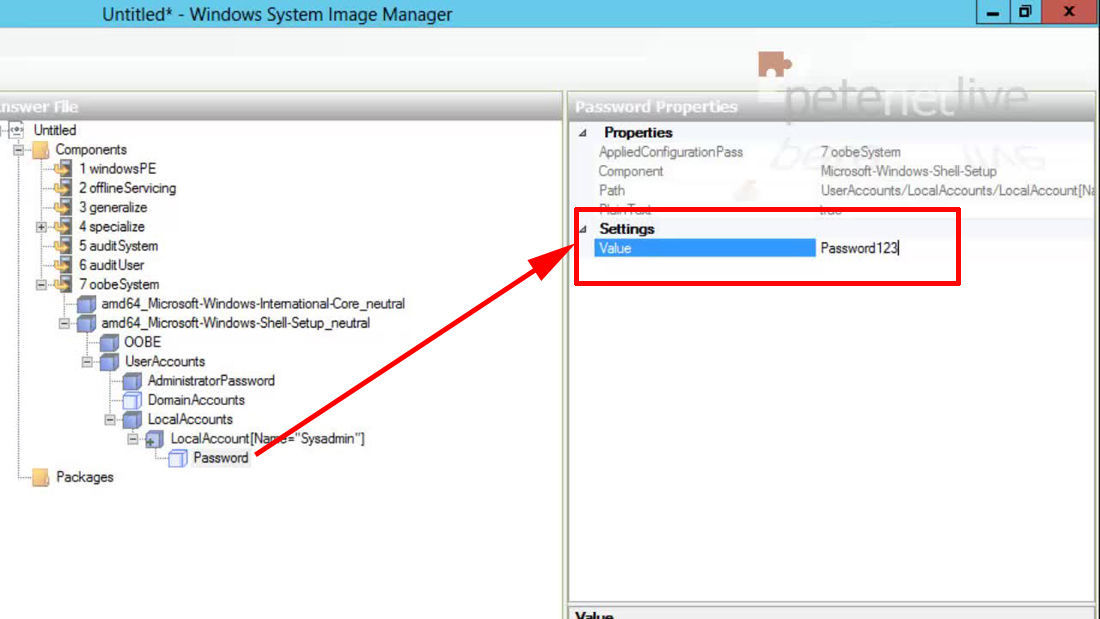
7. Save the answer file.
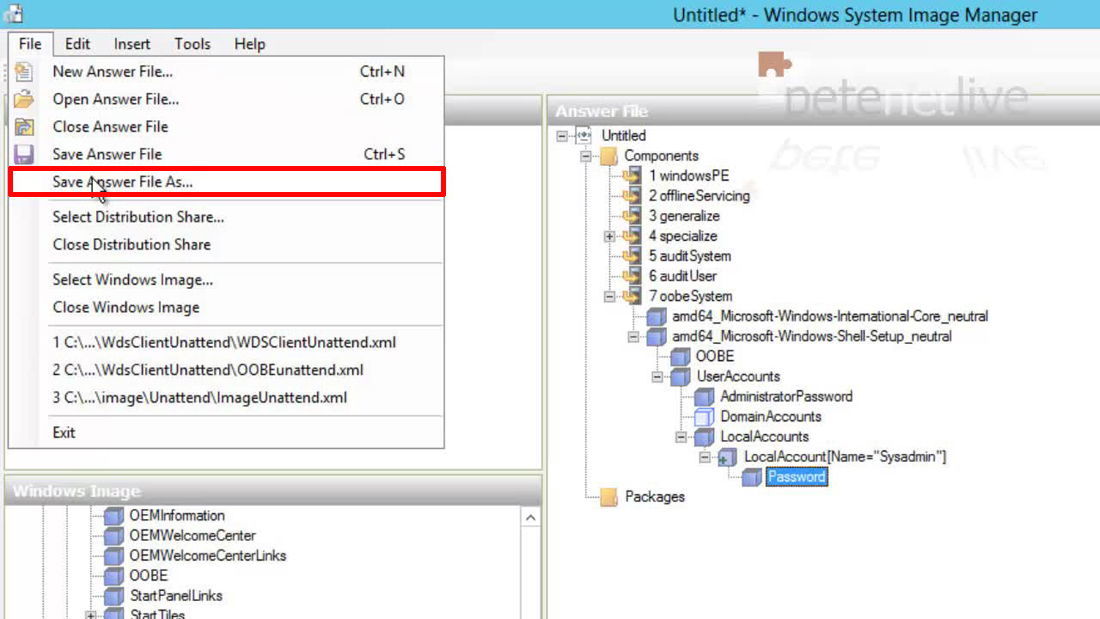
8. Save the file as OOBEUnattand.xml

Attach the Answer file to the Windows 8 Image
1. Launch the Windows Deployment Services Management console.
2. Locate the Windows 8 Image you are attaching the answer file to > Right click > Properties.
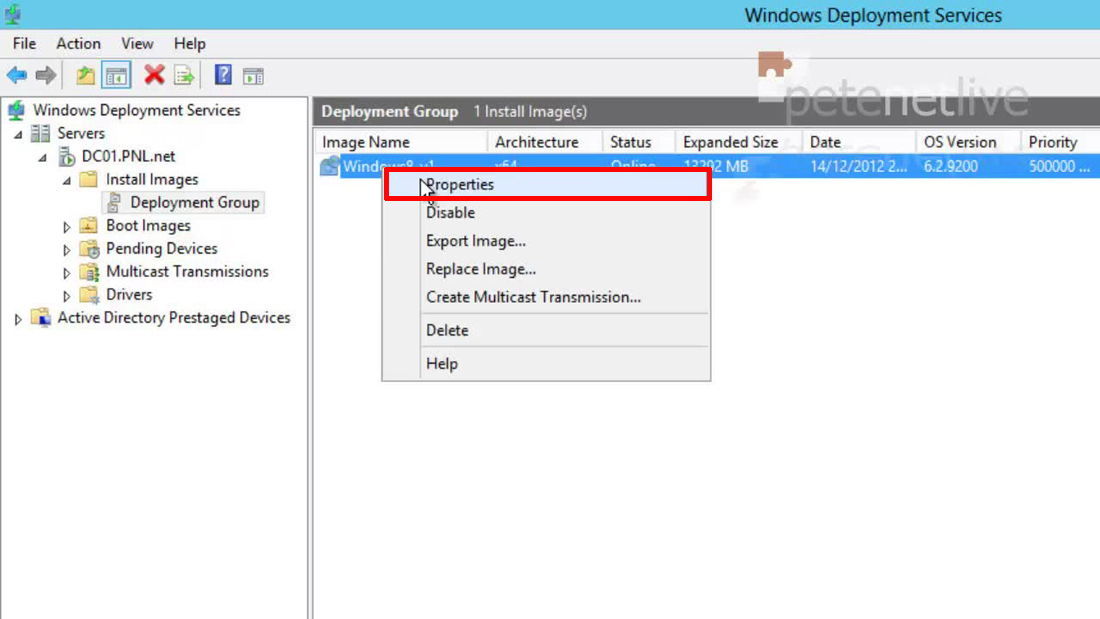
3. Tick the option ‘Allow image to install in unattended mode’ > Select File > Browse.

4. Select the OOBEUnattend.xml file you created earlier.
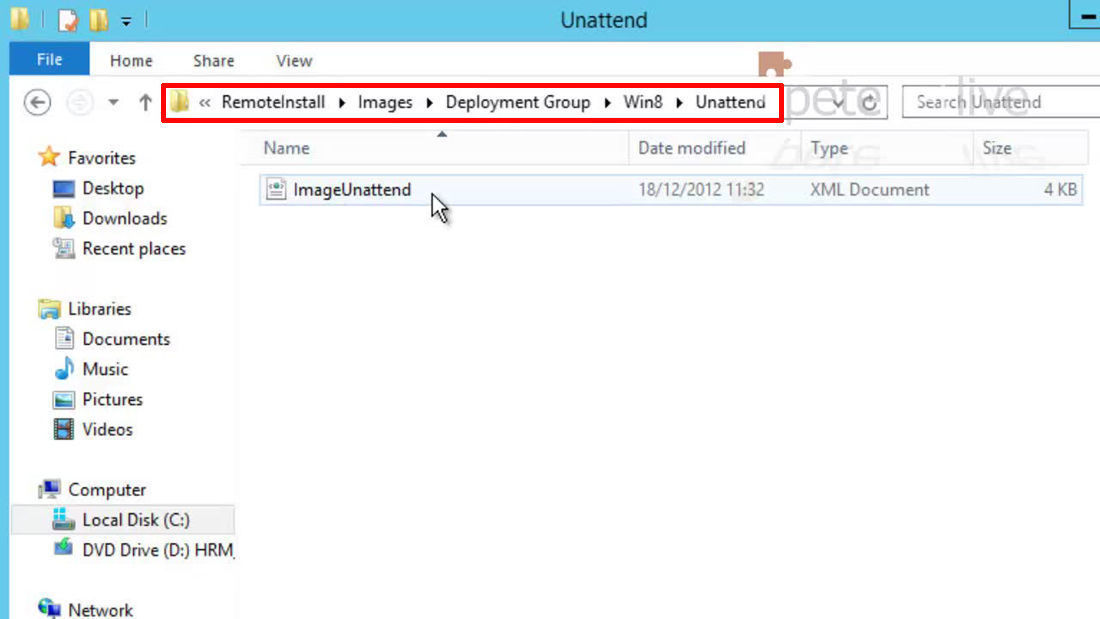
5. Note: It makes a copy of the file and stores it elsewhere calling it ImageUnattend.xml (watch out for this if you need to edit the answer file and nothing changes!)
Deploy Your Windows 8 Image.
1. Boot your target machine to the network via pXe > Press F12 to boot from the WDS.

2. Install an Image.
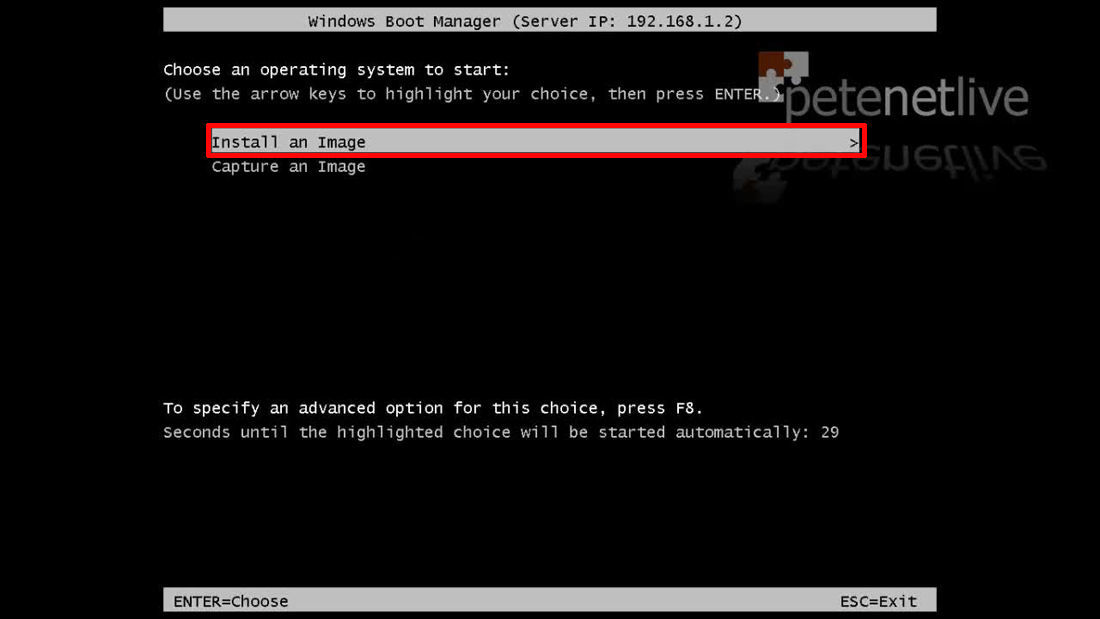
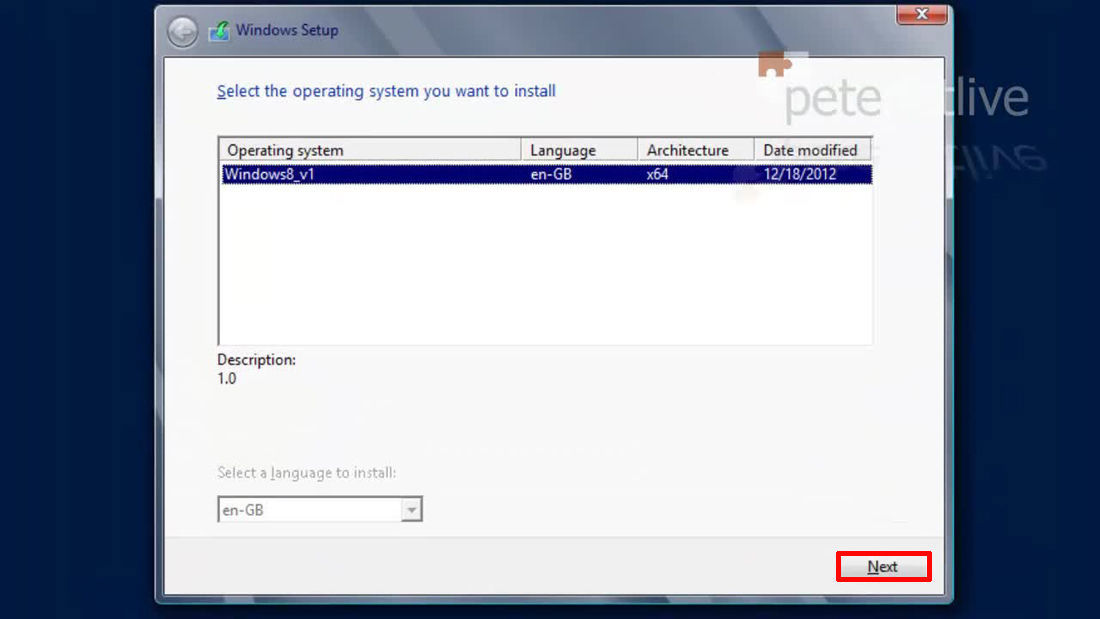
3. Select the image you want to deploy.
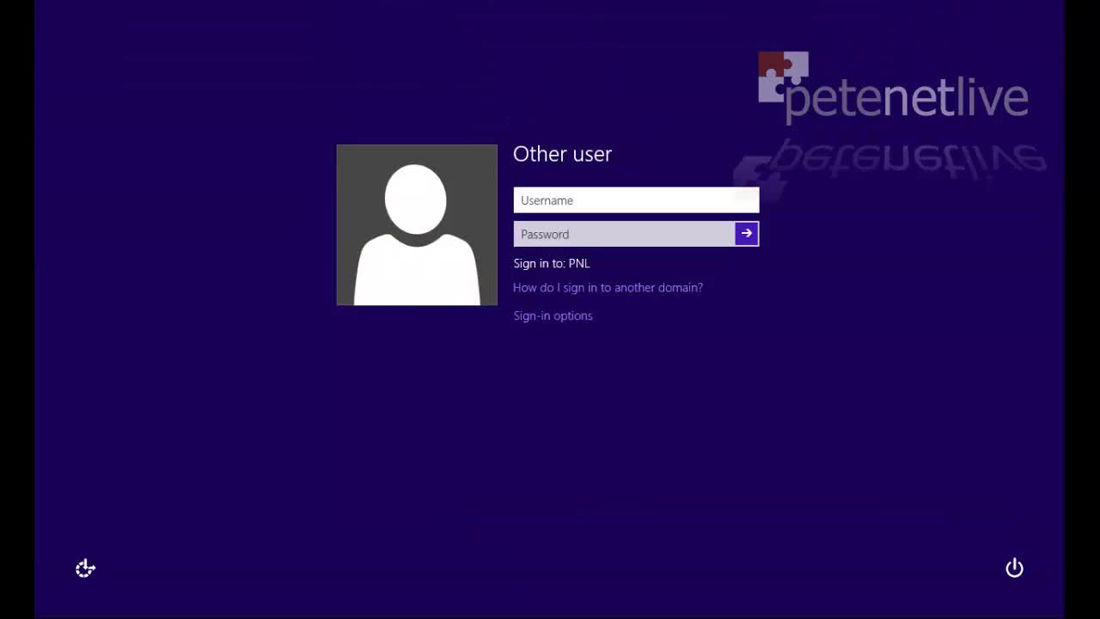
4. After the install, the machine should reboot and present you with a domain logon.
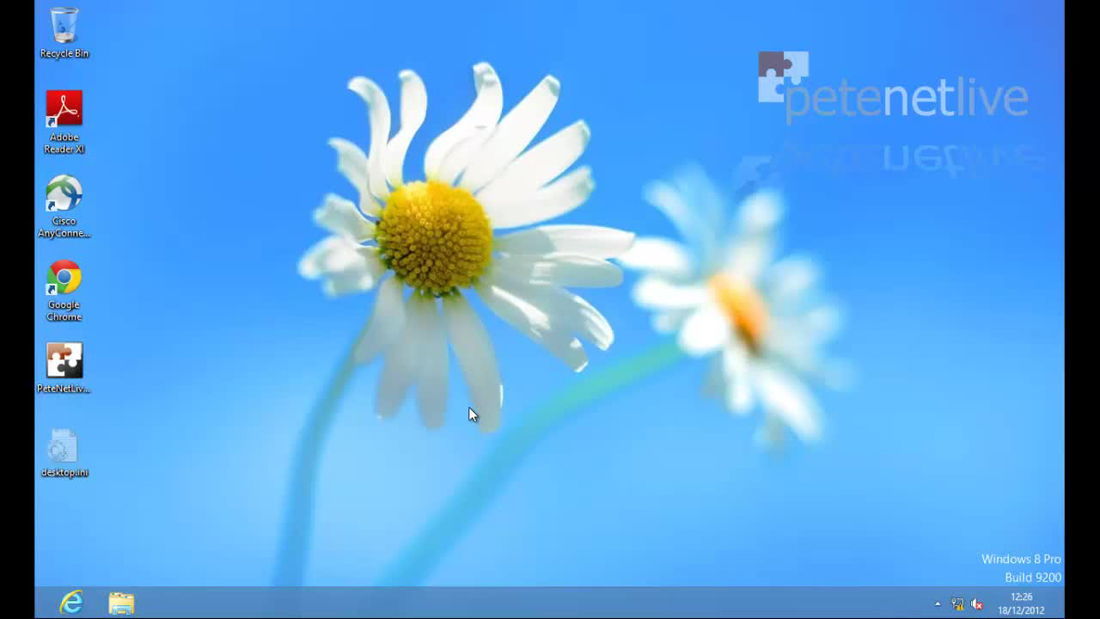
5. And your programs and settings will be pre-configured.
Related Articles, References, Credits, or External Links
2012 – WDS Deploying Windows 8 Part 2: Prepare Windows 8, and Capture to WDS