
Also see “Allow Remote Management“
KB ID 0000075
Problem
To connect to and manage a Cisco firewall you need three things,
- To be in possession of a password, (and in some cases a username).
- Have the ‘Method of Access granted to you’ (or have physical access to the firewall).
- Know a ‘Method of Access‘ to the firewall for management.
Cisco Firewall Passwords
Unless your firewall is brand new (in which case the passwords will either be {blank} or cisco), to access a Cisco firewall you will need a password, (this stands to reason it is a security device after all!).
Cisco Firewall Usernames
As for usernames, with a few exceptions, you do not USUALLY need a username. Those exceptions being;
- Access via SSH needs a username (before version 8.4 you could use the username pix, and the Telnet password, this no longer works).
- If you have set up authentication to be done by AAA.
Cisco Firewall Forgotten Password Recovery
If you do not know the password then you need to perform some password recovery.
Cisco ASA – Methods of Access.
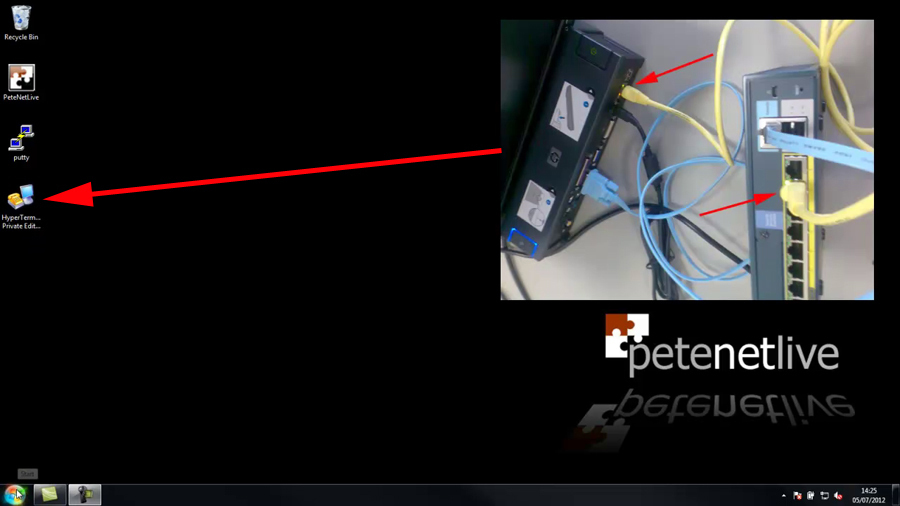
1. Console Cable: This uses the rollover cable that came with the firewall, They are usually pale blue in colour, and the more modern ones have a moulded serial socket on them. The older ones have a grey network to serial converter that plugs on the end. Access is via some Terminal Emulation Software, e.g. PuTTy or HyperTerminal. This method of access is enabled by default, but requires physical access to the devices console port.
2. Telnet: This simply allows connection via a telnet client, all versions of Windows have one, though Microsoft have done a good job of Hiding it in Windows 7. You can also use PuTTy, HyperTerminal, or another third party telnet client. This is considered the LEAST SECURE method of connection, (as passwords are sent in clear text). On a new firewall the telnet password is usually set to cisco (all lower case).
3. Web Browser: (How the vast majority of people access the firewall). Depending on the age and version of the firewall dictates what “Web Server” you are connecting to, devices running Version 7 and above use the “Adaptive Security Device Manager”. Cisco firewalls running an Operating system of version 6 and below use the “PIX Device Manager”. Both the ADSM and the PDM have a similar look and feel, and both require you have to Java installed and working.
4. SSH: Secure Sockets Handshake: This is sometimes called “secure telnet” as it does not send passwords and user names in clear text. It requires you supply a username and a password. Firewalls running an OS older than 8.4 can use the username of pix and the telnet password. After version 8.4 you need to enable AAA authentication and have a username and password setup for SSH access.
5. ASDM Client software: (Version 7 firewalls and above). You will need to have the software installed on your PC for this to work (you can download it from the firewall’s web interface, or install from the CD that came with the firewall).
Cisco ASA Remote Management via VPN
Even if you allow traffic for a remote subnet, there are additional steps you need to take to allow either a remote client VPN session, or a machine at another site that’s connected via VPN. Click here for details.
Solution
Connecting to a Cisco Firewall Using a Console Cable
Obviously before you start you will need a console cable, you CAN NOT use a normal network cable, OR a crossover cable as they are wired differently! They are wired the opposite way round at each end, for this reason some people (and some documentation) refer to them as rollover cables. They are usually Pale blue (or black). Note if you find your console cable is too short you can extend it with a normal network cable coupler and a standard straight through network cable.
On each end of the console cable the wiring is reversed.
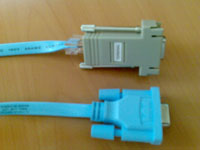
Old (Top) and New (Bottom) versions of the Console Cable.
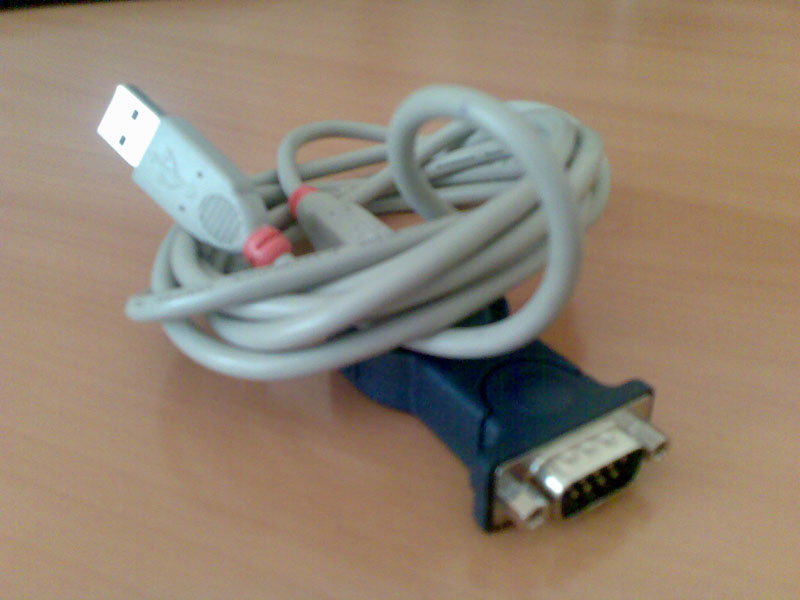
Note: If you don’t have a serial socket on your PC or Laptop you will need a USB to Serial converter (this will need a driver installing to add another COM Port to the PC).
Option 1 Using PuTTY for Serial Access.
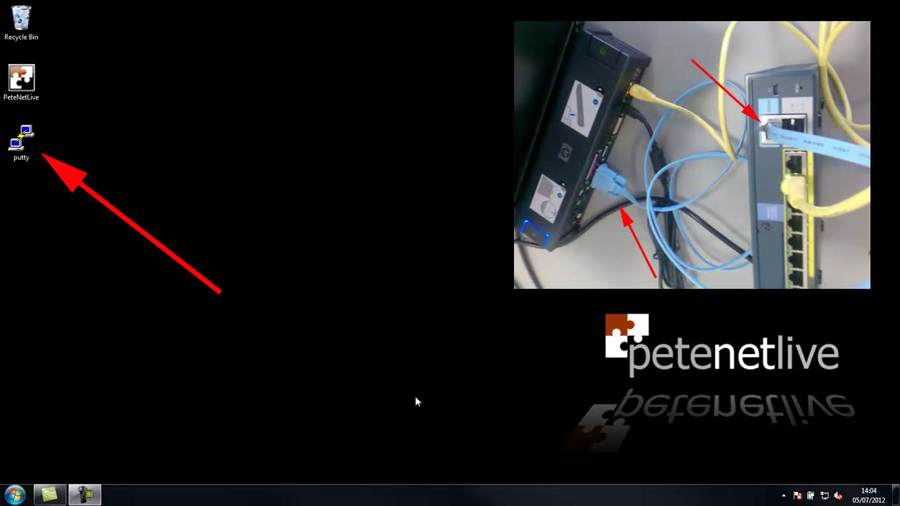
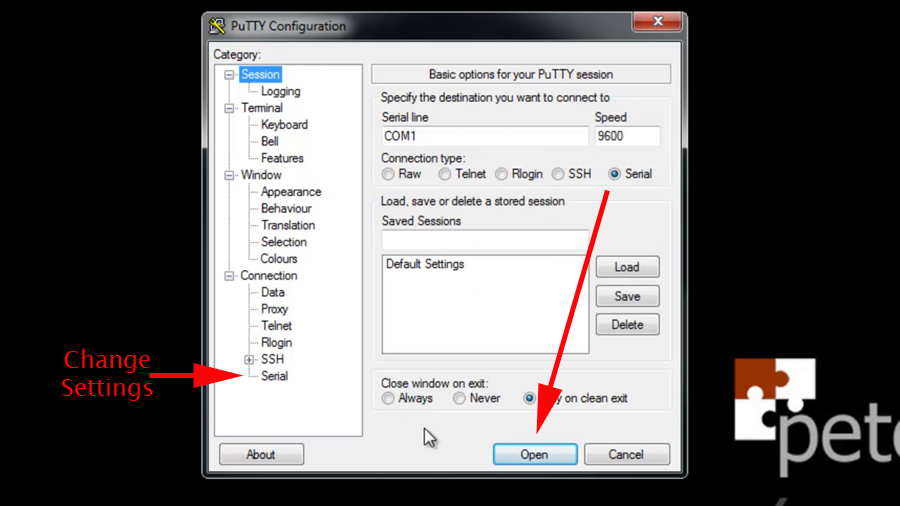
1. Connect your console cable, then download and run PuTTy. (I’m assuming you are using the COM1 socket on your machine, if you have multiple serial sockets then change accordingly).
2. By default PuTTy will connect with the correct port settings, if you want to change the settings see the option I’ve indicated below. Simply select Serial and then ‘Open’.
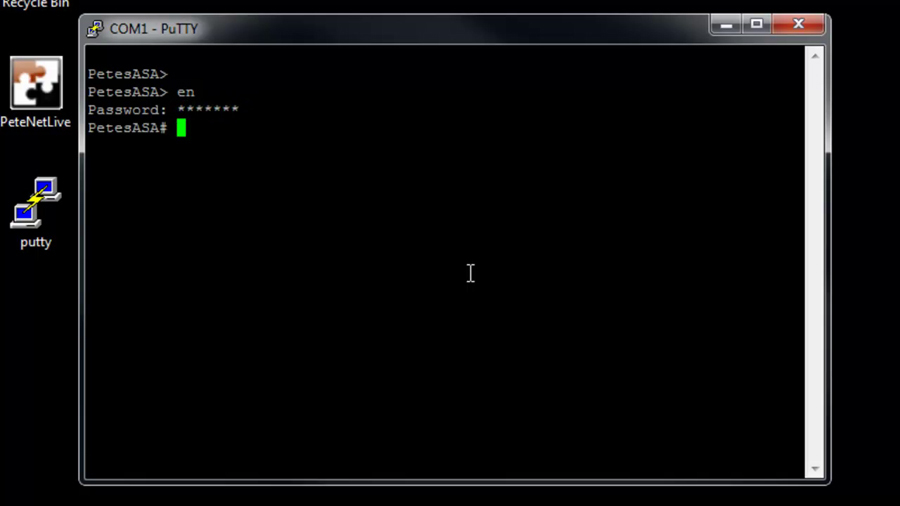
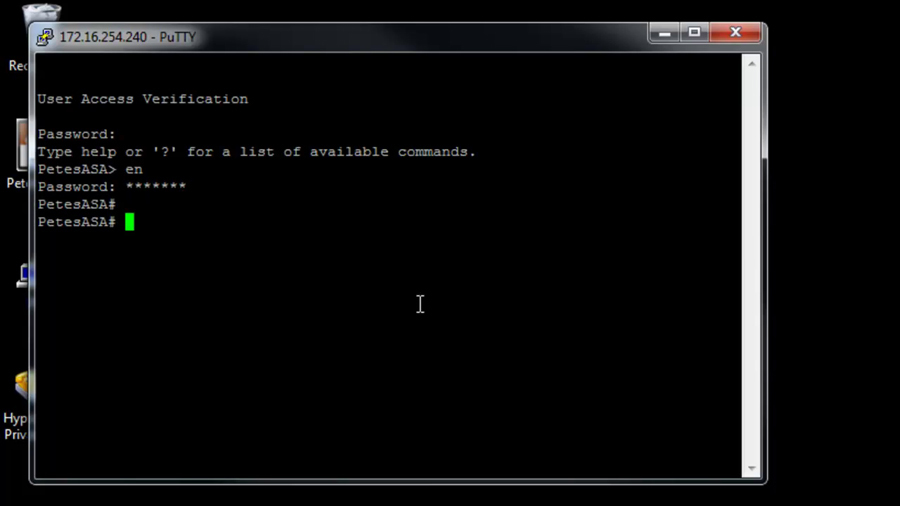
3. You will be connected. (Note: The password you see me entering below is the enable password).
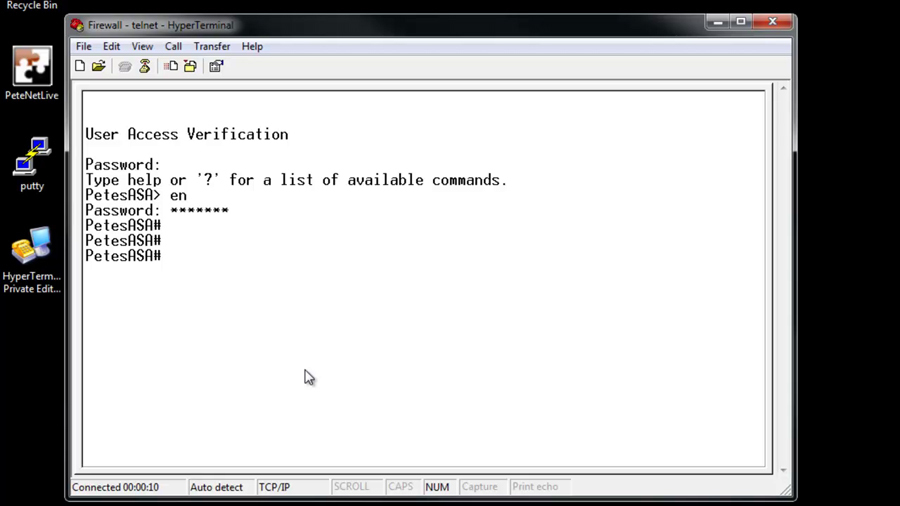
Option 2 Using HyperTerminal for Serial Access
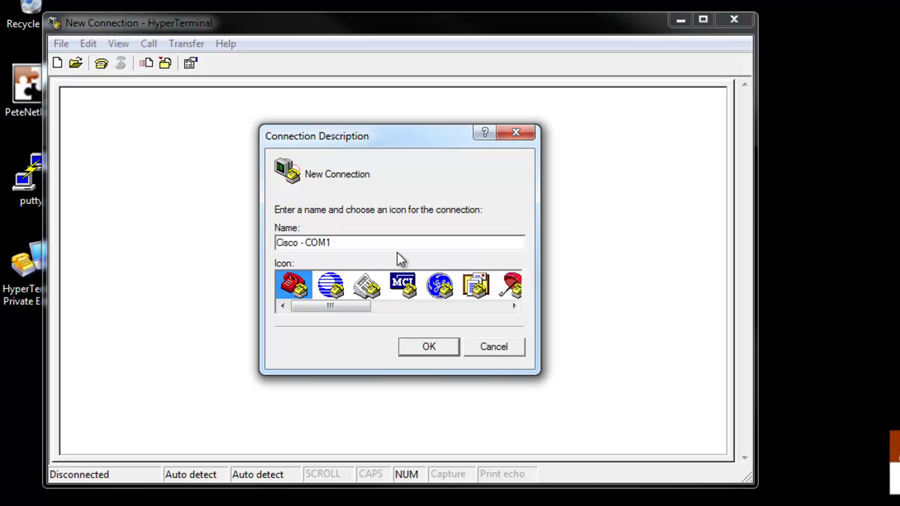
1. Connect your console cable, then download install and run HyperTerminal. (Note: With Windows XP and older it’s included with Windows, look in > All Programs > Communications). Give your connection a name > OK.
2. Change the ‘Connect Using’ option to COM1 > OK.

3. Set the connection port settings from top to bottom, they are, 9600, 8, None, 1, None > Apply > OK.

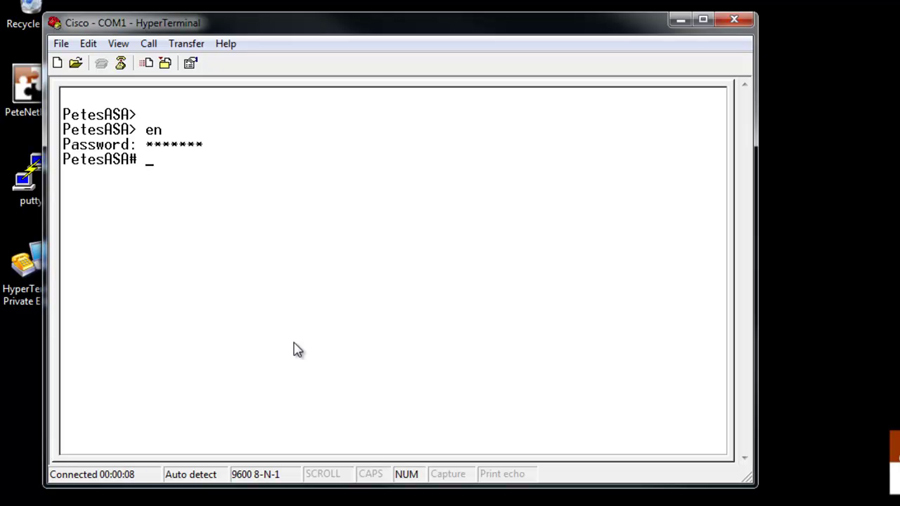
4. You will be connected. (Note: The password you see me entering below is the enable password).
Connecting to a Cisco Firewall via Telnet
To connect via telnet, the IP address you are connecting from (or the network you are in) has to have been granted access. If you cannot access the firewall using Telnet then you will need to connect via a console cable. Note Windows 7/2008/Vista needs to have telnet added.
Option 1 Use Windows Telnet Client for Firewall Access
1. Ensure you have a network connection to the firewall and you know its IP address > Start.

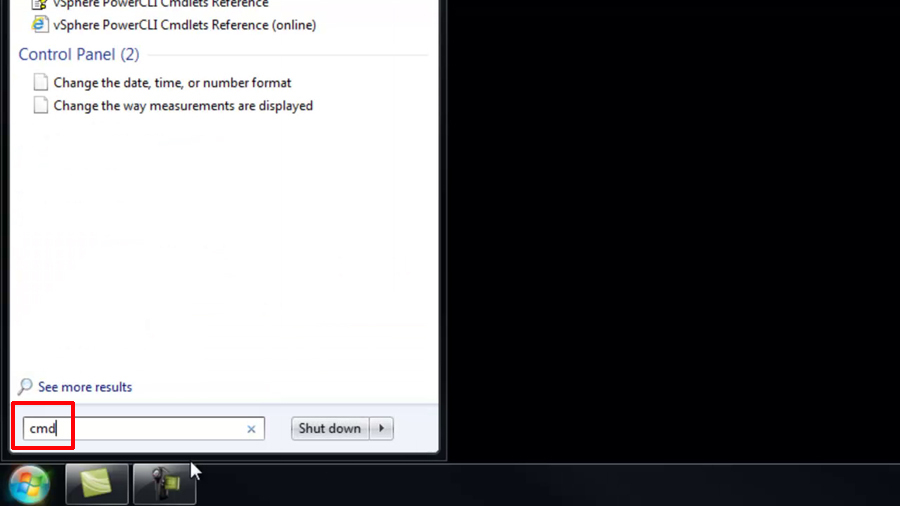
2. In the search/run box type cmd {enter}.
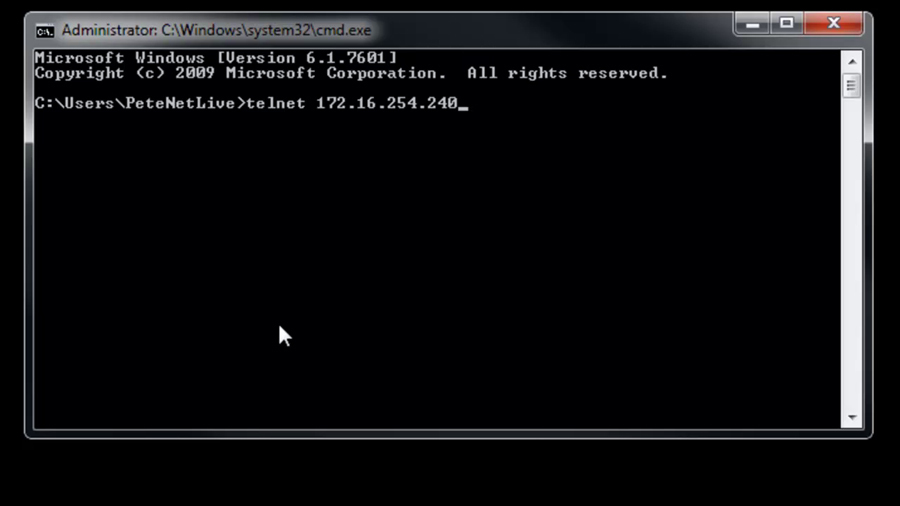
3. Execute the telnet command followed by the IP address of the firewall.
Windows – ‘Telnet’ is not recognized as an internal or external command
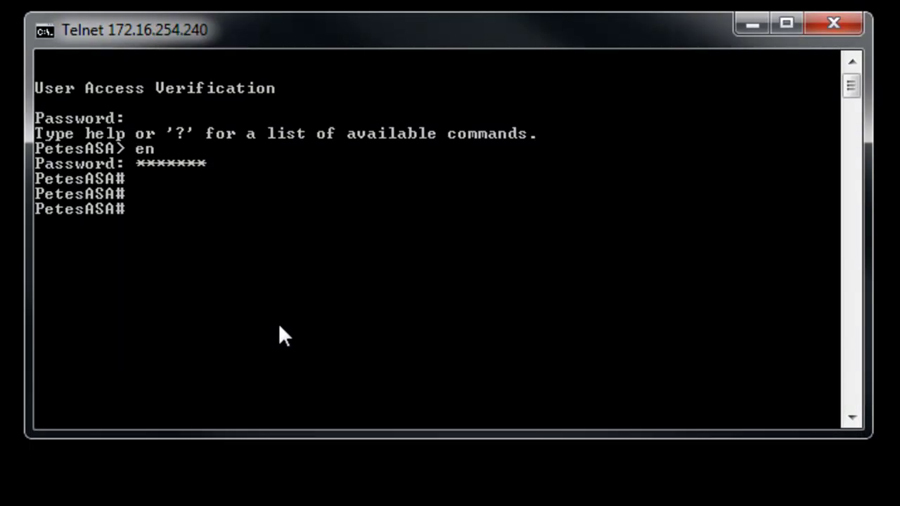
4. Enter the telnet password (default password is cisco).
Option 2 Use PuTTy for Telnet Firewall Access
1. Ensure you have a network connection to the firewall and you know its IP address > Launch PuTTy.

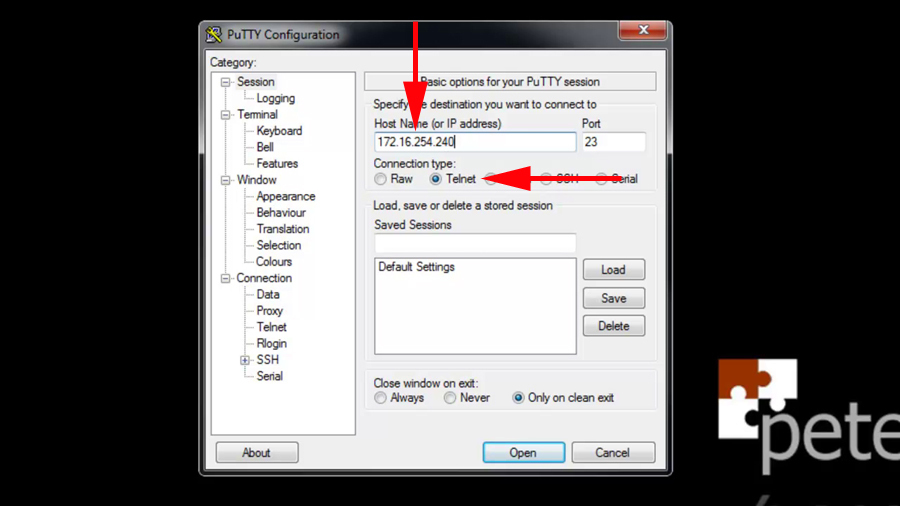
2. Select Telnet > Enter the IP address of the firewall > Open.
3. Enter the telnet password (default password is cisco).
Option 2 Use HyperTerminal for Telnet Firewall Access
1. Ensure you have a network connection to the firewall and you know its IP address > Launch HyperTerminal.
2. Give the connection a name > OK.

3. Change the ‘Connect using’ section to TCP/IP (Winsock) > Enter the IP address of the firewall > OK.

4. Enter the telnet password (default password is cisco).
Connect to to a Cisco Firewall via Web Browser
To connect via Web Browser – the firewall’s internal web server needs to be enabled in the firewall configuration, and the IP address of the machine you are on (or the network it is in, also needs to be allowed). If you cannot connect from your web browser you will need to establish a console cable connection.
Also to access via this method you need to know the firewall’s “Enable Password”. If you use a proxy server then you will need to remove it from the browser settings while you carry out the following. Ensure also that you have Java installed and working.
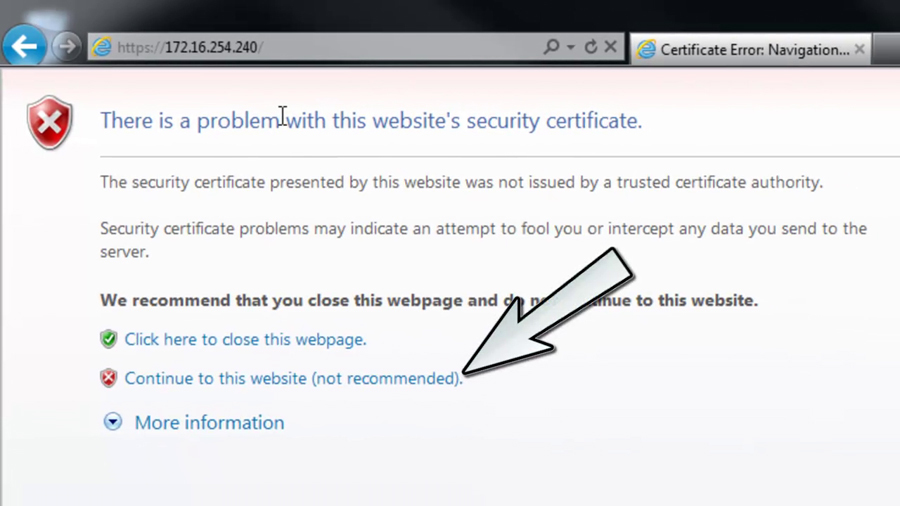
1. Ensure you have a network connection to the firewall and you know its IP address > launch your web browser.

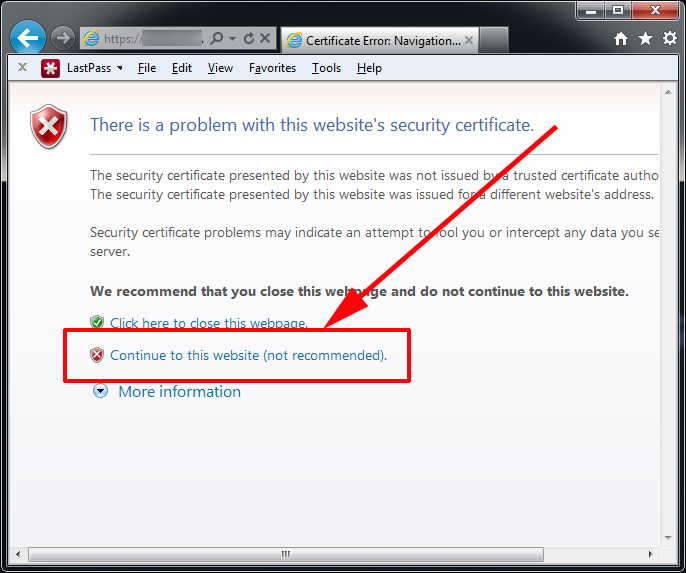
2. If you are using IE7 (or newer) you will need to click “Continue to this web site (not Recommended)”. IE6 Users will see this instead.
3. Click “Run ASDM” (older versions say ‘Run ADSM Applet’). Note: for information on the other option ‘Install ASDM launcher…’ see connecting via ASDM).
The Startup Wizard is for setting up a new firewall, I don’t recommend you ever use this unless you follow this guide.

4. You might receive a few Java warning messages, answer them in the affirmative.
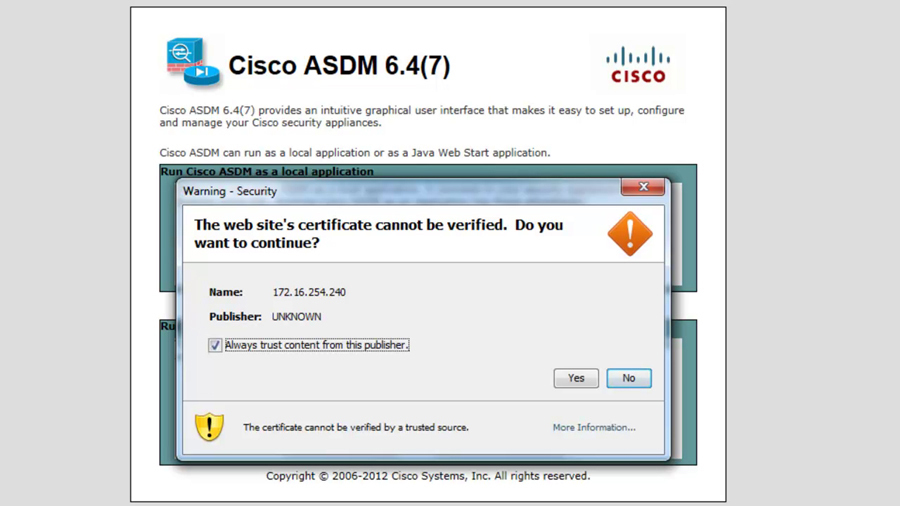
5. Run.

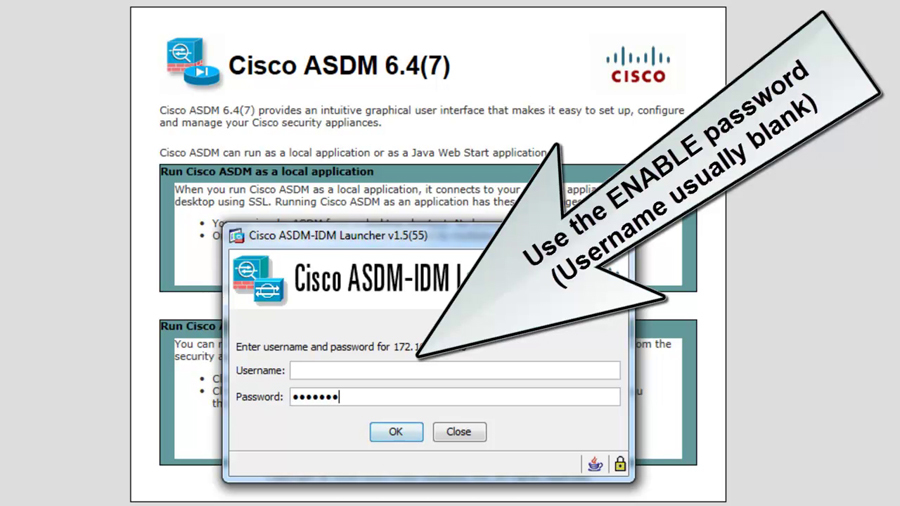
6. Enter the ‘Enable’ password > OK.
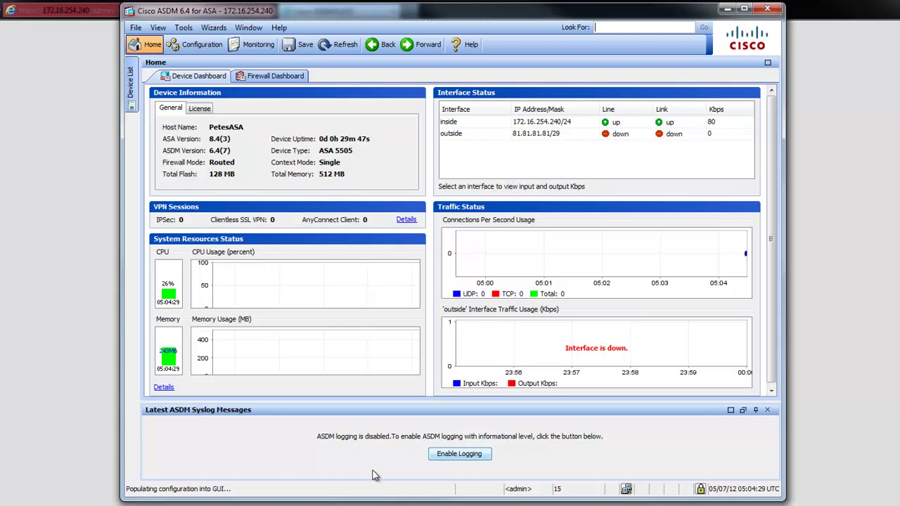
7. You will be connected.
Connecting to a Cisco Firewall via SSH
To connect via SSH the IP address of the PC you are on, (or the network it is in) needs to have been allowed SSH Access in the firewall’s configuration. You will also need an SSH Client, I prefer PuTTy because its free and works.
Note: After version 8.4 you can only access the Cisco ASA using AAA authentication, see here. Prior to version 8.4 you can use the username of ‘pix’ and the firewall’s telnet password.
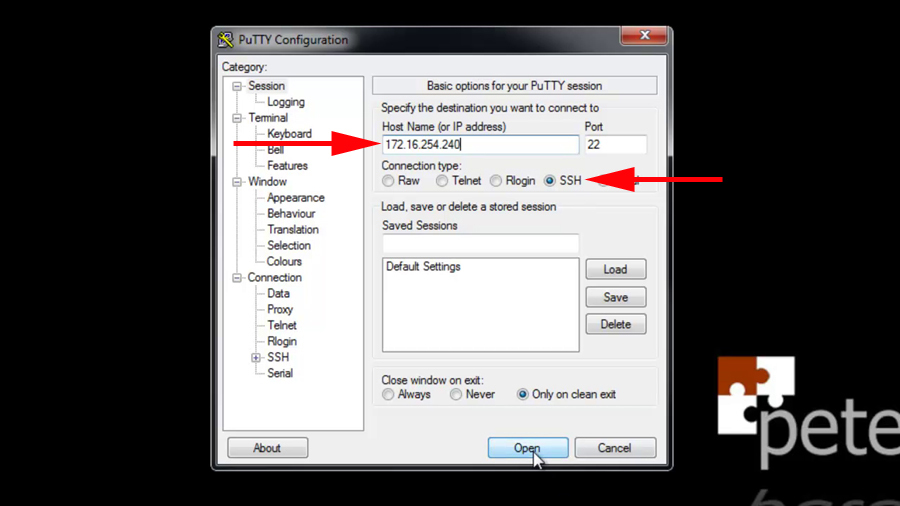
1. Ensure you have a network connection to the firewall and you know its IP address > Launch PuTTy.

2. Tick SSH > enter the IP address of the firewall > Open.
3. The first time you connect you will be asked to accept the certificate > Yes.
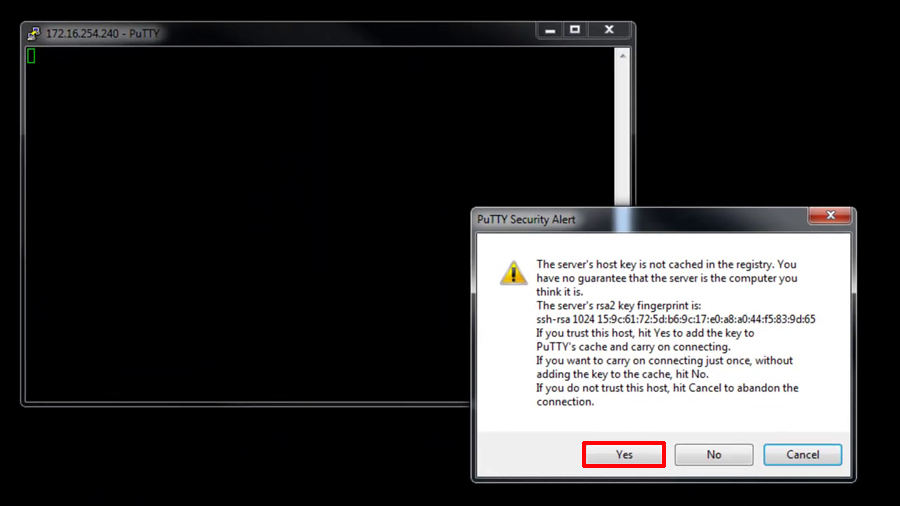
4. You will be connected, supply the username and password configured for AAA access., (or username pix and the telnet password if you are older than version 8.4).

Connecting to a Cisco Firewall via ASDM Client Software
As the name implies you need a v7 (or newer) firewall running ASDM for this to work 🙂 Essentially this is just a “Posh” front end for the firewall’s internal web server, so the same rules apply, the http server must be enabled, the PC you are on (or the network it’s in) need to be allowed https access to the firewall. Also you will need to know the enable password.
1. Ensure you have a network connection to the firewall and you know its IP address > launch your web browser.
2. If you are using IE7 (or newer) you will need to click “Continue to this web site (not Recommended)”. IE6 Users will see this instead.
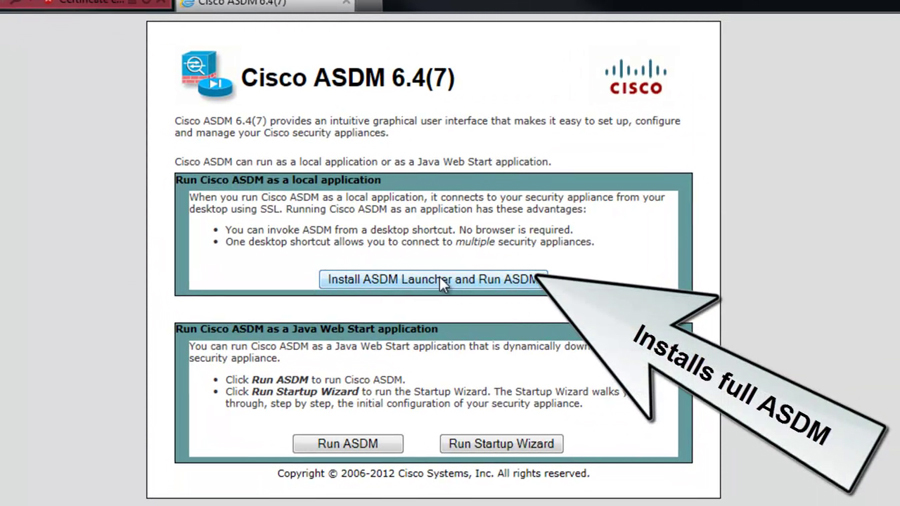
3. Select ‘Install ASDM Launcher and Run ASDM’.
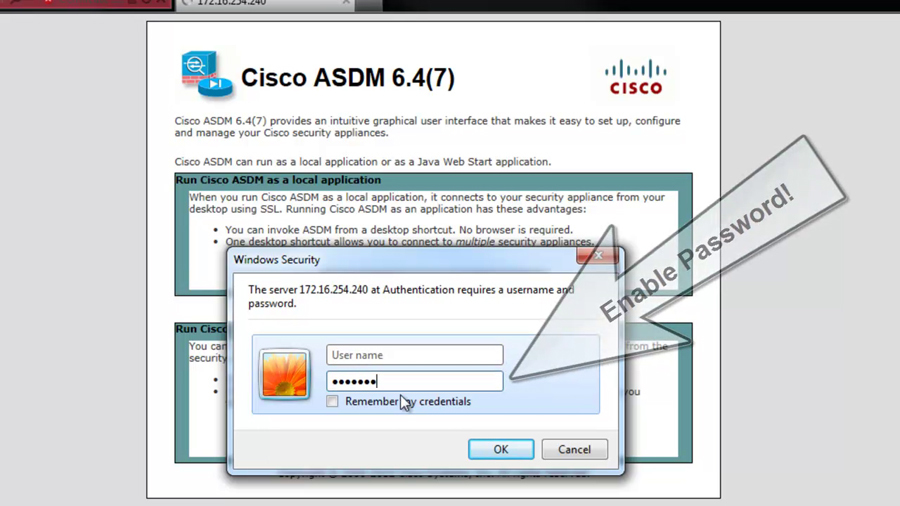
4. The username is usually blank (unless you are using AAA), and you will need to enter the enable password.
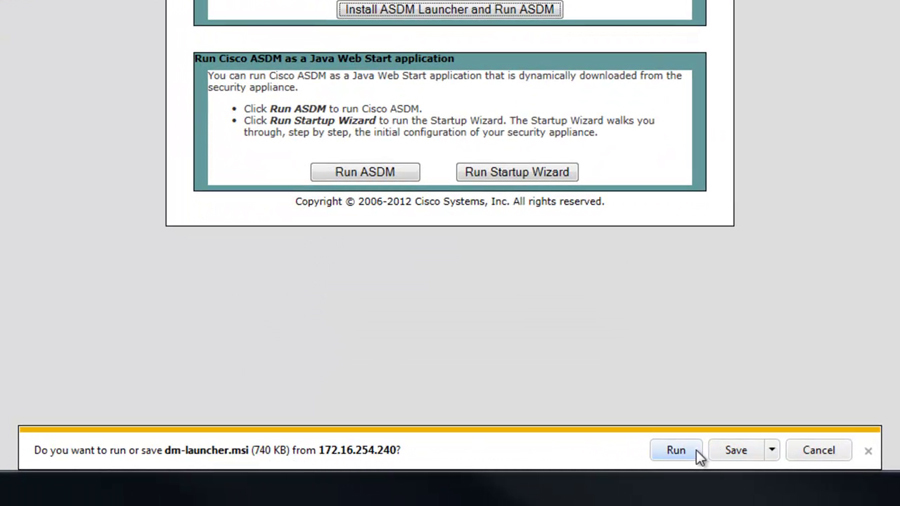
5. Run (or save if you want to install manually later).
6. Accept all the defaults.
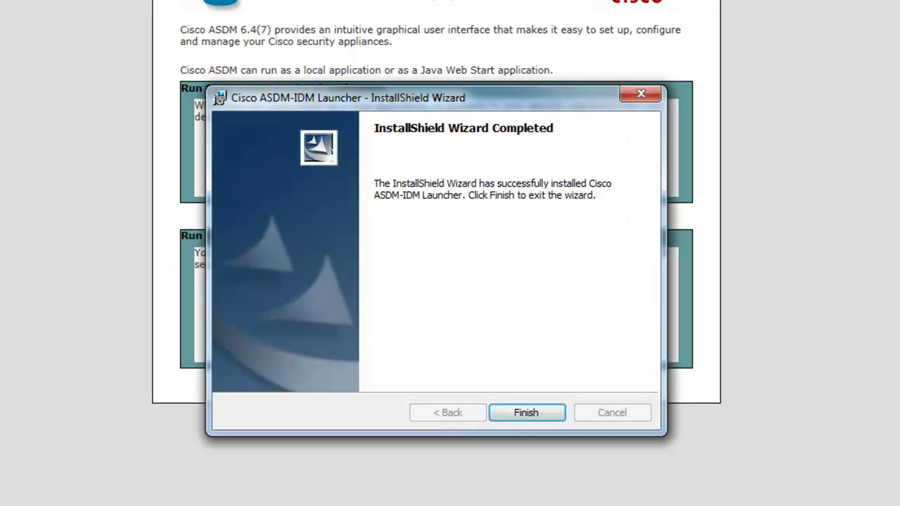
7. The ASDM, will once again ask for the password. (By default it will place a shortcut on the desktop for the next time you need to access the firewall).
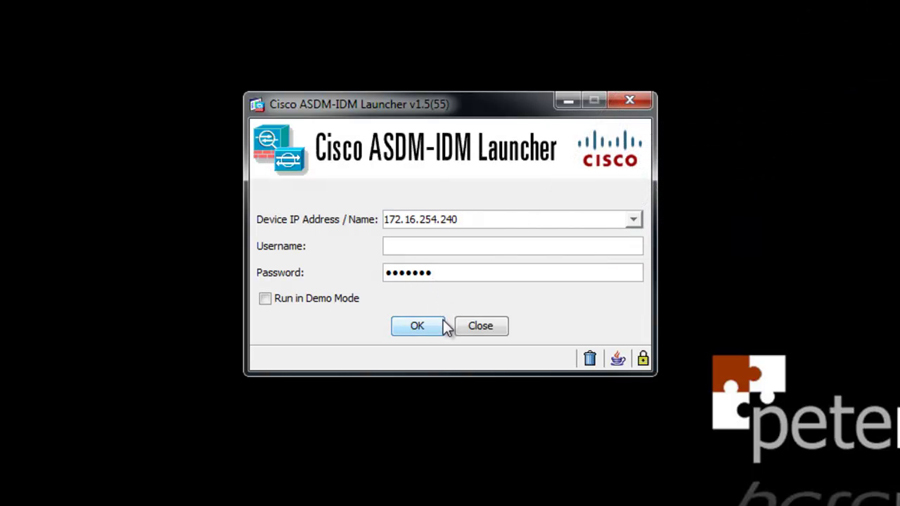
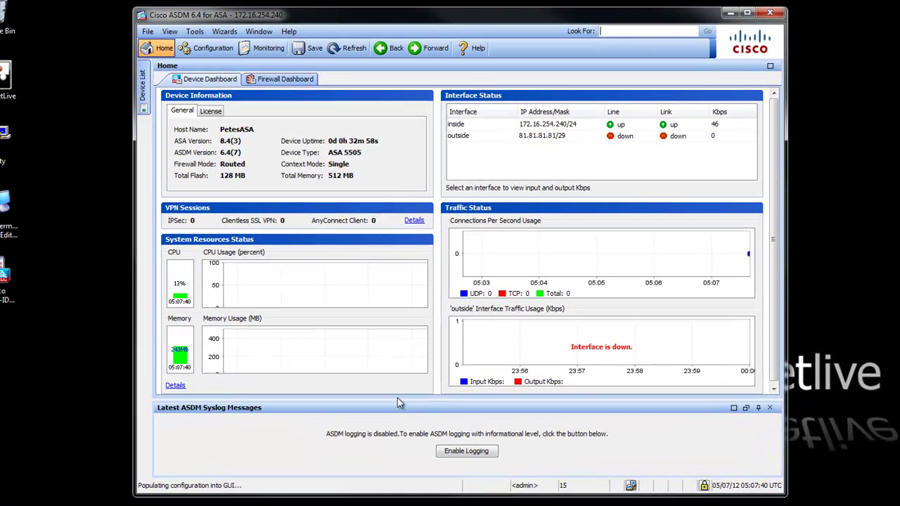
8. The ASDM will launch and you will be connected.
Connecting to a Cisco Firewall via Pix Device Manager
1. Open your web browser and navigate to the following,
https://{inside IP address of the firewall}
Note if you are using IE7 (or newer) you will need to click “Continue to this web site (not Recommended)”.
IE6 Users will see this instead
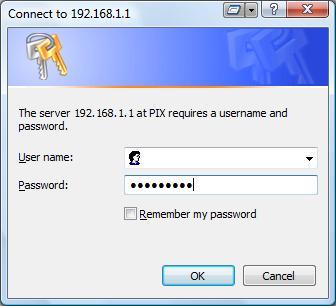
2. If Prompted leave the username blank, and the password is the firewall’s enable password.
Note if you are using AAA you might need to enter a username and password.
3. You will see this.
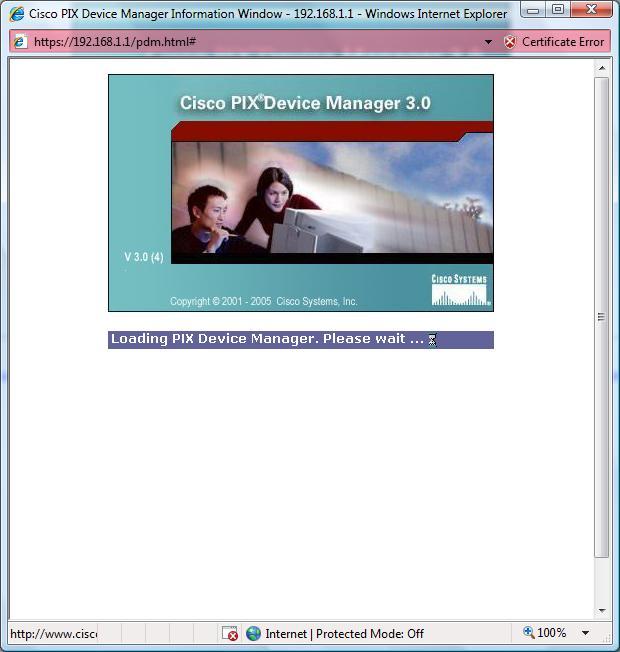
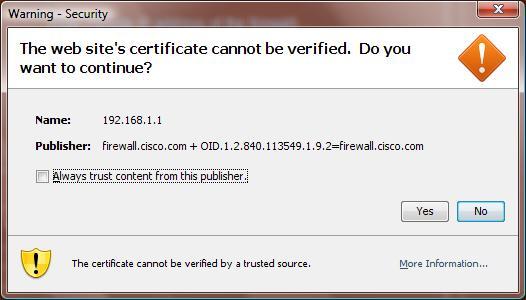
4.You might receive a few Java warning messages, answer them in the affirmative, on some newer versions of Java you may also need to enter the password a second time.
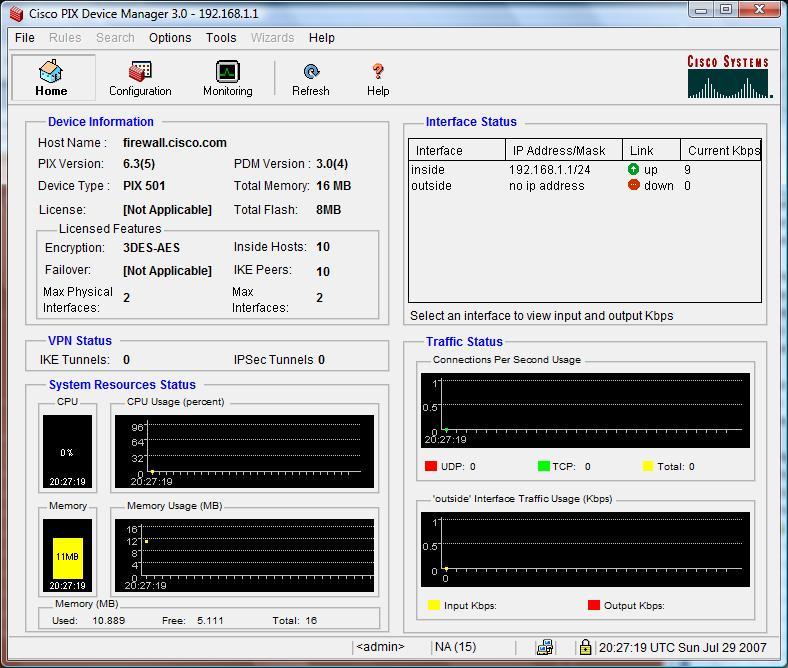
5. The PDM opens. You are successfully connected.
Related Articles, References, Credits, or External Links
Cisco ASA – Allow Remote Management
Manage your firewall form your Windows Mobile device
Cisco ASA 5500 – Remote Management via VPN
Originally Written 09/11/09