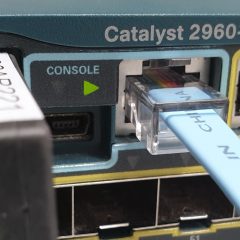
Cisco Catalist Upgrading 2900, 5500 and 3700 Stacks

KB ID 0001630

Problem

People are often nervous about doing this, I’m not sure why because Cisco have made it painfully simple now. That’s because instead of the old /bin files we used to use, you can now upgrade a switch (or a switch stack) using a .tar file with one command, (and it will also upgrade all the stack members and the firmware on any other network modules you have in the switches at the same time).

Yes it does take a while*, and for long periods of time theres no updated output on the screen, which is worrying if you’ve never done it before.

*Note: The procedure below was updating two 2960-X switches and took about 45-50 minutes. If anyone wants to post any further timings below as a help to others, state the switch types and quantities, and versions you used, etc.

Solution

First things first, BACK UP YOUR SWITCH CONFIG. I also have a habit of copying out the original .bin file from the flash to my TFTP server as an extra ‘belt and braces’ precaution, in case everything ‘Goes to hell in a hand cart!’

I find it easier to do this with the update file on a USB Drive, (format the drive as Fat32). If you dont have a USB Drive, or the switch does not have a working USB port then don’t panic, you can use ftp or tftp to upgrade also.

Place your new upgrade .tar file on your USB Drive and insert it into the master switch, you should see the following;

[box]

Dec 19 13:13:18.466: %USBFLASH-5-CHANGE: usbflash0 has been inserted!

[/box]

Note: If yours says usbflash1, or usbflash2 etc. Then that’s just the switch numbering in the stack, use the number it tells you!

Make sure the switch can see your upgrade file;

[box]

Petes-Switch# dir usbflash1:
Dec 19 16:56:45.712: %USBFLASH-5-CHANGE: usbflash0 has been inserted!

Directory of usbflash0:/
 -rw- 37488640 Nov 25 2019 10:08:34 +00:00 c2960x-universalk9-tar.152-7.E0a.tar

8036286464 bytes total (7997743104 bytes free)

[/box]

You can execute the entire upgrade with this one command;

[box]

Petes-Switch# archive download-sw /overwrite usbflash0:/c2960x-universalk9-tar.152-7.E0a.tar

[/box]

Note: If using tftp then use archive download-sw /overwrite tftp:/{ip-of-tftp-server}/{image-name}.tar instead.

It will take quite a long time, as soon as it says extracting xyz….go and have a coffee, wait until it says ‘All software images installed.’

[box]

---LOTS OF OUTPUT OMITTED FOR THE SAKE OF BREVITY---
New software image installed in flash2:/c2960x-universalk9-mz.152-7.E0a
Deleting old files from dc profile dir "flash:/dc_profile_dir"
extracting dc profile file from "flash:/c2960x-universalk9-mz.152-7.E0a/dc_default_profiles.txt" to "flash:/dc_profile_dir/dc_default_profiles.txt"
Deleting old files from dc profile dir "flash2:/dc_profile_dir"
extracting dc profile file from "flash2:/c2960x-universalk9-mz.152-7.E0a/dc_default_profiles.txt" to "flash2:/dc_profile_dir/dc_default_profiles.txt"
All software images installed.

[/box]

Now let’s do a couple of checks just for our ‘peace of mind‘, first make sure the images are in all the relevant switches flash storage;

[box]

Petes-Switch#dir flash1:
Directory of flash:/

    2  -rwx        5486  Dec 19 2019 16:55:40 +00:00  private-config.text
    3  -rwx          33   Aug 7 2019 08:28:12 +00:00  pnp-tech-time
    4  -rwx       11114   Aug 7 2019 08:28:14 +00:00  pnp-tech-discovery-summary
    5  -rwx        3096  Dec 19 2019 16:55:40 +00:00  multiple-fs
  699  drwx         512  Dec 19 2019 17:35:25 +00:00  c2960x-universalk9-mz.152-7.E0a
  480  drwx         512  Dec 19 2019 17:35:28 +00:00  dc_profile_dir
  696  -rwx         796   Aug 9 2019 09:48:30 +00:00  vlan.dat
  698  -rwx        7539  Dec 19 2019 16:55:40 +00:00  config.text

122185728 bytes total (84392960 bytes free)
Petes-Switch#dir flash2:
Directory of flash2:/

    2  -rwx        5486  Dec 19 2019 16:55:40 +00:00  private-config.text
    3  -rwx          33   Aug 7 2019 08:32:38 +00:00  pnp-tech-time
    4  -rwx       11126   Aug 7 2019 08:32:40 +00:00  pnp-tech-discovery-summary
    5  -rwx        7539  Dec 19 2019 16:55:40 +00:00  config.text
    6  drwx         512  Dec 19 2019 17:35:26 +00:00  c2960x-universalk9-mz.152-7.E0a
  481  drwx         512  Dec 19 2019 17:35:28 +00:00  dc_profile_dir
  696  -rwx        3096   Aug 8 2019 10:21:29 +00:00  multiple-fs
  697  -rwx         796  Dec 11 2019 10:55:22 +00:00  vlan.dat
  698  -rwx        7514  Dec 19 2019 16:55:40 +00:00  config.text.backup
  699  -rwx        5486  Dec 19 2019 16:55:40 +00:00  private-config.text.backup

122185728 bytes total (84378624 bytes free)

[/box]

Note: Repeat for each switch in the stack, if you have further switches.

Why does it not have .tar or .bin on the end? Because it’s a folder 🙂

The let’s make sure the ‘boot variable‘ in the device is set to use the new image;

[box]

Petes-Switch# show boot
BOOT path-list      : flash:/c2960x-universalk9-mz.152-7.E0a/c2960x-universalk9-mz.152-7.E0a.bin
Config file         : flash:/config.text
Private Config file : flash:/private-config.text
Enable Break        : yes
Manual Boot         : no
Allow Dev Key         : yes
HELPER path-list    :
Auto upgrade        : yes
Auto upgrade path   :
Boot optimization   : disabled
NVRAM/Config file
      buffer size:   524288
Timeout for Config
          Download:    0 seconds
Config Download
       via DHCP:       disabled (next boot: disabled)
-------------------
Switch 2
-------------------
BOOT path-list      : flash:/c2960x-universalk9-mz.152-7.E0a/c2960x-universalk9-mz.152-7.E0a.bin
Config file         : flash:/config.text
Private Config file : flash:/private-config.text
Enable Break        : yes
Manual Boot         : no
Allow Dev Key         : yes
HELPER path-list    :
Auto upgrade        : no
Auto upgrade path   :

[/box]

All looks good save the config and reload the stack.

[box]

Petes-Switch# write mem
Petes-Switch# reload
Proceed with reload? [confirm] {Enter}

Dec 19 17:38:50.952: %SYS-5-RELOAD: Reload requested by console. Reload Reason: Reload command.

[/box]

Time for another coffee while it’s reloading the stack, when it’s back up you can check it was successful like so;

[box]

Petes-Switch# show version
---LOTS OF OUTPUT OMITTED FOR THE SAKE OF BREVITY---
Switch Ports Model                     SW Version            SW Image
------ ----- -----                     ----------            ----------
*    1 54    WS-C2960X-48TS-L          15.2(7)E0a            C2960X-UNIVERSALK9-M
     2 54    WS-C2960X-48TS-L          15.2(7)E0a            C2960X-UNIVERSALK9-M

[/box]

Related Articles, References, Credits, or External Links

NA

Cisco ASA: Remove FTD and Return to ASA and ASDM

Remove FTD KB ID 0001496

Problem

A few weeks ago I posted an article about re-image your Cisco ASA to FTD (FirePOWER Threat Defence). Now you may find the the FTD is not as ‘Feature rich’ as your old firewall, or that there’s a ‘Lack of feature parity’, which are two polite ways of saying that it’s crap, (sorry it’s just awful, as usual Cisco should’ve spent a LOT longer developing this product, before they released it!)

So now you want to remove the FTD image and go back to good old fashioned ASA code, so you can use the ASDM to manage it, or (of course) command line.

Prerequisites : Remove FTD

You will need a few things to perform the re-image;

  • A copy of the Cisco ASA operating system downloaded from Cisco (requires an in date support contract)
  • A copy of the Cisco ADSM Image downloaded from Cisco (requires an in date support contract)
  • The Activation Code for your firewall (which if you followed my previous article, you kept safe) If you don’t have it you need to get the firewall serial number and go to Cisco licensing, start an online chat, and be polite!
  • A TFTP server, (you can set this up on your laptop) I used a mac so TFTP is built in, if you are a Windows user then go here.
  • A rollover/serial cable and some terminal software, see this post for details.

Re-Image Cisco ASA5500-X to Remove FTD

Connect to the firewall via console cable and login, then reboot the firewall.

[box]

PNL-FirePOWER login: admin
Password: {Enter your password}
Last login: Thu Dec 13 20:18:35 UTC 2018 from 10.254.254.49 on pts/0

Copyright 2004-2018, Cisco and/or its affiliates. All rights reserved.
Cisco is a registered trademark of Cisco Systems, Inc.
All other trademarks are property of their respective owners.

Cisco Fire Linux OS v6.2.3 (build 13)
Cisco ASA5506-X Threat Defense v6.2.3.6 (build 37)

> reboot
This command will reboot the system.  Continue?
Please enter 'YES' or 'NO': YES

Broadcast message from root@PNL-Stopping Cisco ASA5506-X Threat Defense...

[/box]

When the ASA reboots, Press ‘Break’ to interrupt the startup and boot int ROMMON mode.

[box]

Cisco Systems ROMMON, Version 1.1.8, RELEASE SOFTWARE
Copyright (c) 1994-2015  by Cisco Systems, Inc.
Compiled Thu 06/18/2015 12:15:56.43 by builders

Current image running: Boot ROM0
Last reset cause: PowerCycleRequest
DIMM Slot 0 : Present

Platform ASA5506 with 4096 Mbytes of main memory
MAC Address: 6c:b2:ae:de:01:06

Use BREAK or ESC to interrupt boot. {Break}
Use SPACE to begin boot immediately.
Boot interrupted.

rommon 1 >

[/box]

You need to erase the contents of the built in flash drive;

[box]

rommon 1 > erase disk0:
erase: Erasing 7515 MBytes ...................................................
..............................................................................
..............................................................................
..............................................................................
rommon 2 >

[/box]

I’m re-imaging an ASA5506-x, so I don’t need to specify an interface, (it will use the management interface so MAKE SURE that is connected to the same network as your TFTP Server. Note: If you are not re-imaging a 5506, 5508, 5516, then you can specify which interface to use, by using an ‘interface gigabitethernet0/1‘ command.

Give the ASA some IP details, tell it where the TFTP server is and what the update file is called. You can then view the settings with a ‘set‘ command;

[box]

rommon 2 > address 10.254.254.253
rommon 3 > server 10.254.254.106
rommon 4 > gateway 10.254.254.106
rommon 5 > file asa992-36-lfbff-k8.SPA
rommon 6 > set
    ADDRESS=10.254.254.253
    NETMASK=255.255.255.0
    GATEWAY=10.254.254.106
    SERVER=10.254.254.106
    IMAGE=asa992-36-lfbff-k8.SPA
    CONFIG=
    PS1="rommon ! > "

rommon 7 >

[/box]

Note: I set the default gateway to the same IP as the TFTP server, (that’s fine).

To initiate the download you need to execute a ‘tftpdnld‘ command;

[box]

rommon 7 > tftpdnld
             ADDRESS: 10.254.254.253
             NETMASK: 255.255.255.0
             GATEWAY: 10.254.254.106
              SERVER: 10.254.254.106
               IMAGE: asa992-36-lfbff-k8.SPA
             MACADDR: 6c:b2:ae:de:01:06
           VERBOSITY: Progress
               RETRY: 40
          PKTTIMEOUT: 7200
             BLKSIZE: 1460
            CHECKSUM: Yes
                PORT: GbE/1
             PHYMODE: Auto Detect
..
Receiving asa992-36-lfbff-k8.SPA from 10.254.254.106!!!!!
!!!!!!!!!!!!!!!!!!!!!!!!!!!!!!!!!!!!!!!!!!!!!!!!!!!!!!!!!
!!!!!!!!!!!!!!!!!!!!!!!!!!!!!!!!!!!!!!!!!!!!!!!!!!!!!!!!!
!
File reception completed.

[/box]

The firewall will startup running the correct ASA code. WARNING: At this point the operating system is NOT in the flash, and the firewall is running the factory default config, so don’t reboot it, before you have carried out the following procedures.

Once started go to enable mode (password will be blank), and configure terminal mode, and format the flash drive, (don’t worry, the OS is running in memory at this point, it wont break).

[box]

ciscoasa> enable
{Enter}
ciscoasa(config)# format disk0:

Format operation may take a while. Continue? [confirm] {Enter}

Format operation will destroy all data in "disk0:".  Continue? [confirm] {Enter}
Initializing partition - done!
Creating FAT32 filesystem
mkdosfs 2.11 (12 Mar 2005)

System tables written to disk

Format of disk0 complete

[/box]

Now you need to copy in the operating system (this time to flash memory), and set it as the boot image.

[box]

ciscoasa(config)# copy tftp disk0:

Address or name of remote host []? 10.254.254.106

Source filename []? asa992-36-lfbff-k8.SPA

Destination filename [asa992-36-lfbff-k8.SPA]? {Enter}

Accessing tftp://10.254.254.106/asa992-36-lfbff-k8.SPA...!!!!!!!!!!!!!!!!!!!!!!!!!!!!!!!!!!!!!!!!!!!!!!!!!
!!!!!!!!!!!!!!!!!!!!!!!!!!!!!!!!!!!!!!!!!!!!!!!!!!!!!!!!!!
!!
Verifying file disk0:/asa992-36-lfbff-k8.SPA...

Writing file disk0:/asa992-36-lfbff-k8.SPA...

111503184 bytes copied in 338.80 secs (329891 bytes/sec)
ciscoasa(config)# boot system disk0:/asa992-36-lfbff-k8.SPA

[/box]

Then repeat the procedure, but this time to copy over the ASDM image, and set it as default.

[box]

ciscoasa(config)# copy tftp disk0:

Address or name of remote host [10.254.254.106]? {Enter}

Source filename [asa992-36-lfbff-k8.SPA]? asdm-7101.bin

Destination filename [asdm-7101.bin]? {Enter}

Accessing tftp://10.254.254.106/asdm-7101.bin...!!!!!!!!!!!!!!!!!!!!!!!!!!!!!!!!!!!
Verifying file disk0:/asdm-7101.bin...

Writing file disk0:/asdm-7101.bin...

INFO: No digital signature found
34143680 bytes copied in 118.250 secs (289353 bytes/sec)
ciscoasa(config)# asdm image disk0:/asdm-7101.bin

[/box]

You now need to enter your activation key again, to unlock any licensed features you have.

[box]

ciscoasa(config)# activation-key 3602fa77 540a5abc 50c13234 a378e777 c839300a
Validating activation key. This may take a few minutes...
Failed to retrieve permanent activation key.
Both Running and Flash permanent activation key was updated with the requested key.
ciscoasa(config)#

[/box]

Then either configure the firewall manually, or restore from a backup, and save the changes!

Backup and Restore a Cisco Firewall

Backup and Restore a Cisco Router with TFTP

[box]

ciscoasa(config)# write memory
Building configuration...
Cryptochecksum: 849a4713 61a6532b 0eb6d7a5 92ff32c3

3879 bytes copied in 0.280 secs
[OK]
ciscoasa(config)#

[/box]


Related Articles, References, Credits, or External Links

Convert ASA 5500-X To FirePOWER Threat Defence

Install and Use a Windows TFTP Server

Windows TFTP KB ID 0000063 

Problem

Note: If you are using a mac, then seee the following link; MAC OS X TFTP Software

There are many free tftp applications, my personal favourite is 3Cdaemon, as it also has a built in syslog server and an FTP server. heres how to install it on your computer.

There are a number of places you can download 3CDeamon or just  CLICK HERE

Deploy a windows TFTP Server

Download the files and extract them to your PC, then run the setup.exe file > At the Welcome screen > Next.

At the license screen > Yes.

Either accept the default location or choose your own > Next.

5. Leave it on the default > Next.

When its done > OK.

Launch the application.

9.Ensure the “TFTP Server” section is selected > Click the “Pen knife” Icon labelled “Configure TFTP Server”.

10. Change the Upload / Download directory to something you will find easliy (I usually create a “TFTP Root” folder on the C: drive.

Related Articles, References, Credits, or External Links

Backup and Restore a Cisco Firewall with TFTP

FortiGate TFTP : Backup To & Restore From

Backup and Restore Cisco IOS (Switches and Routers)

Backup and Restore a Cisco Firewall

CentOS – Install and Configure a TFTP Server

MAC TFTP Software (OS X )

Mac TFTP KB ID 0001247

Problem

Every time I go to a networking event theres a sea of MacBooks in the audience, If techs like MacBooks so much why is there such a lack of decent Mac TFTP software?

Solution

The thing is, I’m looking at the problem with my ‘Windows User’ head on. When I have a task to perform I’m geared towards looking for a program do do that for me. OS X is Linux (There I said it!) Linux in a pretty dress, I’ll grant you, but scratch the surface a little bit and there it is.

Why is that important? Well your already holding a running TFTP server on your hand, your MAC is already running a TFTP server, you just need to learn how to use it.

MAC TFTP Server (OS X Native)

As I said it’s probably running anyway, but to check, open a Terminal window and issue the following command;

[box]netstat -atp UDP | grep tftp[/box]

If it’s not running you can manually start and stop the TFTP server with the following commands;

[box]Start TFTP

sudo launchctl load -F /System/Library/LaunchDaemons/tftp.plist

Stop TFTP

sudo launchctl unload -F /System/Library/LaunchDaemons/tftp.plist[/box]

Note: In macOS Catalina, it’s disabled by default, so if you don’t manually start it, you will see errors like;

[box]

%Error reading tftp://192.168.1.20/cisco-ftd-fp1k.6.6.0-90.SPA (Timed out attempting to connect)
[/box]

It would normally go without saying, but If I don’t say it, the post will fill up with comments! Make sure your Mac is physically connected to the same network as the network device, and has an IP address in the same range.

And make sure the device, and the Mac can ‘ping’ each other.

Use Mac TFTP Deamon To Copy a File To a Network Device

I’ve got a Cisco ASA 5505, but whatever the device is, does not really matter. You will have a file that you have downloaded, and you want to ‘send’ that file to a device. This file will probably be in your ‘downloads’ folder, the TFTP deamon uses the /private/tftpboot folder so we are going to copy the file there. Then set the correct permissions on the file.

[box]

cd ~/Downloads
cp FILENAME /private/tftpboot
cd /private/tftpboot
chmod 766 FILENAME

[/box]

Note: You can also use;

sudo chmod 777 /private/tftpboot
sudo chmod 777 /private/tftpboot/*

To set permissions on ALL files in this directory.

You can then execute the command on your device to copy the file across;

[box]

ciscoasa# copy tftp flash

Address or name of remote host []? 192.168.1.5

Source filename []? asa825-59-k8.bin

Destination filename [asa825-59-k8.bin]? {Enter}

Accessing tftp://192.168.1.5/asa825-59-k8.bin...!!!!!!!!!!!!!!!!!!!!!!!!!!!!
!!!!!!!!!!!!!!!!!!!!!!!!!!!!!!!!!!!!!!!!!!!!!!!!!!!!!!!!!!!!!!!!!!!!!!!!!!!!
!!!!!!!!!!!!!!!!!!!!!!!!!!!!!!!!!!!!!!!!!!!!!!!!!!!!!!!!!!!!!!
Writing file disk0:/asa825-59-k8.bin...
!!!!!!!!!!!!!!!!!!!!!!!!!!!!!!!!!!!!!!!!!!!!!!!!!!!!!!!!!!!!!!!!!!!!!!!!!!!!
!!!!!!!!!!!!!!!!!!!!!!!!!!!!!!!!!!!!!!!!!!!!!!!!!!!!!!!!!!!!!!!!!!!!!!!!!!!!
!!!!!!!!!!!!!!!!!!!!!!!!!!!!!!!!!!!!!!!!!!!!!!!!!!!!!!!!!!!!!!
15482880 bytes copied in 12.460 secs (1290240 bytes/sec)
ciscoasa#

[/box]

Use Mac TFTP Deamon To Copy a File From a Network Device

There is a gotcha with the TFTP daemon, which is you cant copy a file to the TFTP daemon if that file does not already exist there.  Which at first glance sort of defeats the object, but what it really means id you have to have a file there with the same name and the correct permissions on it. In Linux you can create a file with the ‘Touch’ command.

[box]

cd /private/tftpboot
touch FILENAME
chmod 766 FILENAME

[/box]

You can then sent the file to your Mac from the device;

[box]

ciscoasa# copy flash tftp

Source filename []? asa825-59-k8.bin

Address or name of remote host []? 192.168.1.5

Destination filename [asa825-59-k8.bin]? {Enter}

Writing file tftp://192.168.1.5/asa825-59-k8.bin...
!!!!!!!!!!!!!!!!!!!!!!!!!!!!!!!!!!!!!!!!!!!!!!!!!!!!!!!!!!!!!!!!!!!!!!!!!!!!
!!!!!!!!!!!!!!!!!!!!!!!!!!!!!!!!!!!!!!!!!!!!!!!!!!!!!!!!!!!!!!!!!!!!!!!!!!!!
!!!!!!!!!!!!!!!!!!!!!!!!!!!!!!!!!!!!!!!!!!!!!!!!!!!!!!!!!!!!!!!
15482880 bytes copied in 9.940 secs (1720320 bytes/sec)
ciscoasa#

[/box]

I Want Mac OS X TFTP Software!

Well you have a limited choice, if you don’t like using the Mac TFTP Daemon. You can install and use a GUI front end that uses the built in TFTP software. 

But if you want a ‘stand-alone’ piece of software then the only other one I’ve found is PumpKIN, you will need to disable the built in TFTP daemon or it will throw an error.

Related Articles, References, Credits, or External Links

FortiGate TFTP : Backup To & Restore From

Backup and Restore Cisco IOS (Switches and Routers)

Backup and Restore a Cisco Firewall

CentOS – Install and Configure a TFTP Server

Build a PIX Firewall for your test network

Working with GNS3 and PEMU – (Part 2)

KB ID 0000662 

Problem

In Part 1 we installed and Licensed our Virtual PIX, now we will give it an IP address and get the firewalls web management console running.

To complete this procedure you will need to,

1. Have a TFTP server up and running (CLICK HERE).

2. Know how to connect to a Cisco Firewall (CLICK HERE).

Solution

Step 1 (Add an interface to your host machine)

1. On your host PC/VM Click Start > Run > hdwwiz.cpl {enter} > At the “Add Hardware Wizard” click Next > Let it search > Tick “Yes I’ve allready connected the hardware > Next > Scroll to the bottom > Select “Add a new hardware Device > Next.

2. Select “Install the hardware that I manually select” > Next > Next > Select Network Adaptor > Next > Next > Finish.

3. Click Start > Run > ncpa.cpl > Right Click the new NIC and rename it to loopback adaptor > Then give it a valid IP on your test network. (Right click > properties > TCP/IP).

Step 2 (Configure the connection)

4. Connect to the PIX as shown in Part 1 > Give the PIX an IP address with the following commands;

[box]

enable
{Password} - Set blank by default
configure terminal
int e1
no shutdown
nameif inside
ip address {ip on test network}{subnet of test network}
write men

[/box]

5. To connect tie PIX to the Loopback adaptor you need to add some networking in the GNS3 console > Drag the cloud object into the work area > Right click > Configure.

6. Select C0.

7.Select the loopback adaptor > Add > Apply OK

Note: If you are presenting a real adaptor you will only see some uncomprehensable numbers – locate the “Network Device List” Batch file in the GNS3 directory and run it whis will de-cypher those numbers for you.

8. Drag a switch onto the workspace.

9. Click the connection tool and select “Fast Ethernet”.

10 Select the cloud (Loopback Adaptor) and drag a connection to the switch.

11. Select the PIX (Inteface e1) and drag a connection to the switch.

12. All green lights is good 🙂

13 From another machine on the network make sure you can ping the PIX to test connectivity.

Note: If you are using Microsoft Hyper-V server, you may find that the whole thing fails at this point, If thats the case, then close down the Guest machine and add and configure a “Legacy Network Card”. Bring the system back up and configure the new network card accordingly.

Also if you are in a virtual environment you can simply add another network card and get the cloud to use that instead of using a loopback adapter.

Step 3 Install and configure the ASDM (Web Inteface)

1. Set up your TFTP server and have the asdm image file ready in the TFTP servers root directory.

2. We are now going to allow connection to the PIX via Telnet – becaue the console can be a bit twichy in the GNS3 environment.

[box]

enable
{Password} <-blank be default
configure terminal
telnet 0.0.0.0 0.0.0.0 inside
passwd cisco <- sets telnet password to cisco
write men

[/box]

3. Now you can telnet to the PIX from another machine and copy the ASDM image from your TFTP server to the PIX.

[box]

enable
{Password} <-blank by default
copy tftp flash
{ip of the hosst running TFTP}
{filename of the asdm inage}
{Enter} to accept

[/box]

4. Once the file is copied over you need to let the Firewall know that its the one to use, turn on the internal http server and allow access.

[box]

enable
{Password} <-blank by default
conf t
asdm image flash:asdm-603.bin
http server enable
http 0.0.0.0 0.0.0.0 inside
write men

[/box]

The file will be copied over into the firewalls flash memory (Time for a coffee).

5. Now simply connect via the ADSM inteface – if your unsure how to do that see my article here

Using the information above you can present multiple network cards and clouds to the Virtual firewalls various interfaces (There are 5 interfaces on this firewall – its a PIX 525) – enjoy

NB Please dont email and ask me for PIX images and/or activation keys as refusal often offends – PL

Related Articles, References, Credits, or External Links

NA

Juniper SRX – Update the Operating System / Firmware

KB ID 0000989 

Problem

With two brand new SRX240 firewalls on the bench my first task was to get them updated to the latest operating system.

Solution

Before you start get the updated Juniper software.

Option 1 Update the SRX firewall via Command Line

1. Connect to the firewall via either Console cable, telnet, or SSH.

2. Log on and then go to CLI mode, and then configuration mode.

[box] login: root
Password: *******

— JUNOS 12.1X44-D30.4 built 2014-01-11 03:56:31 UTC

root@FW-02% cli
root@FW-02> configure
Entering configuration mode

[edit]
root@FW-02# [/box]

2. The more observant of you will have noticed that it has already shown you the OS version above, but in case there is any doubt.

[box] root@FW-02# show version
## Last changed: 2014-08-26 21:15:09 GMT
version 12.1X44-D30.4;

[edit]
root@FW-02# exit[/box]

3. I’ve always got 3CDeamon on my laptop so I’ll copy the update file over via FTP to the /var/tmp folder. (Note: We’re not at CLI or configure mode!)

[box]root@FW-02% ftp 10.5.0.2
Connected to 10.5.0.2.
220 3Com 3CDaemon FTP Server Version 2.0
Name (10.5.0.2:root): PeteLong
331 User name ok, need password
Password:********
230 User logged in
Remote system type is UNIX.
Using binary mode to transfer files.
ftp> lcd /var/tmp
Local directory now /cf/var/tmp
ftp> bin
200 Type set to I.
ftp> get junos-srxsme-12.1X47-D10.4-domestic.tgz
local: junos-srxsme-12.1X47-D10.4-domestic.tgz remote: junos-srxsme-12.1X47-D10.
4-domestic.tgz
200 PORT command successful.
150 File status OK ; about to open data connection
100% |**************************************************| 158 MB 00:00 ETA
226 Closing data connection; File transfer successful.
166060642 bytes
received in 64.50 seconds (2.46 MB/s)
ftp> bye
221 Service closing control connection
root@FW-02%[/box]

4. Now perform the upgrade.

[box] root@FW-02% cli
root@FW-02> request system software add no-copy /var/tmp/junos-srxsme-12.1X47-D10.4-domestic.tgz
NOTICE: Validating configuration against junos-srxsme-12.1X47-D10.4-domestic.tgz
.
NOTICE: Use the ‘no-validate’ option to skip this if desired.
Formatting alternate root (/dev/da0s2a)…
/dev/da0s2a: 627.4MB (1284940 sectors) block size 16384, fragment size 2048
using 4 cylinder groups of 156.86MB, 10039 blks, 20096 inodes.
super-block backups (for fsck -b #) at:
32, 321280, 642528, 963776
Extracting /var/tmp/junos-srxsme-12.1X47-D10.4-domestic.tgz …
Checking compatibility with configuration
Initializing…
Verified manifest signed by PackageProduction_12_1_0
Verified junos-12.1X44-D30.4-domestic signed by PackageProduction_12_1_0
Using junos-12.1X47-D10.4-domestic from /altroot/cf/packages/install-tmp/junos-1
2.1X47-D10.4-domestic
Copying package …
Verified manifest signed by PackageProduction_12_1_0
Hardware Database regeneration succeeded
Validating against /config/juniper.conf.gz
Usage: license-check -f “<features>” -m -p -q -M -u -U -V
Validation succeeded
Installing package ‘/altroot/cf/packages/install-tmp/junos-12.1X47-D10.4-domesti
c’ …
Verified junos-boot-srxsme-12.1X47-D10.4.tgz signed by PackageProduction_12_1_0
Verified junos-srxsme-12.1X47-D10.4-domestic signed by PackageProduction_12_1_0
JUNOS 12.1X47-D10.4 will become active at next reboot
WARNING: A reboot is required to load this software correctly
WARNING: Use the ‘request system reboot’ command
WARNING: when software installation is complete
Saving state for rollback …

root@FW-02> [/box]

5. Then reboot the firewall.

[box]

root@FW-02> request system reboot
Reboot the system ? [yes,no] (no) yes

Shutdown NOW!
[pid 2749]

root@FW-02>

*** FINAL System shutdown message from root@FW-02 ***

System going down IMMEDIATELY

[/box]

6. Post reboot, check the version again.

[box]

login: root
Password: ********

— JUNOS 12.1X47-D10.4 built 2014-08-14 22:21:50 UTC

root@FW-02% cli
root@FW-02> configure
Entering configuration mode

[edit]
root@FW-02# show version
## Last changed: 2014-08-26 21:51:09 GMT
version 12.1X47-D10.4;

[edit]
root@FW-02#

[/box]


Option 2 Update the SRX firewall via J-Web

1. To check the current version > Connect to the web console > Dashboard > Software Version.

2. Maintain > Software > Upload Package > Choose File > Browse to the file you downloaded earlier > Upload and Install Package.

Note: Here I have selected ‘Reboot Firewall’, in production you may NOT want to do that until later.

3. It can take a little while, (and look like nothing is happening), time for a coffee.

4. Post reboot, check the version again to make sure it has incremented.

Related Articles, References, Credits, or External Links

NA

Cisco Catalyst – Upgrading ‘Stacked’ Switches

KB ID 0001002

Problem

The following procedure was carried out on two Cisco Catalyst 3750 switches.

Solution

1. We can see (above) that we have two switches, but if your connected remotely, best make sure.

[box]

Petes-Stack#show switch
Switch/Stack Mac Address : 0018.7347.a000
                                           H/W   Current
Switch#  Role   Mac Address     Priority Version  State
----------------------------------------------------------
*1       Master 0018.7347.a000     1      0       Ready
 2       Member 0024.f79b.9b00     1      0       Ready

[/box]

2. Lets see what IOS files are in the flash memory on both switches.

[box]

Petes-Stack#dir flash1:
Directory of flash:/

    2  -rwx        5514  Sep 25 2014 14:28:06 +01:00  private-config.text
    3  drwx         192   Mar 1 1993 00:10:57 +00:00  c3750-ipservicesk9-mz.122-55.SE8
   84  -rwx         856  Sep 23 2014 13:24:52 +01:00  vlan.dat
   85  -rwx       15354  Sep 25 2014 14:28:06 +01:00  config.text
   87  -rwx        3096  Sep 25 2014 14:28:06 +01:00  multiple-fs

15998976 bytes total (2406400 bytes free)
Petes-Stack#dir flash2:
Directory of flash2:/

    2  -rwx        5514  Sep 25 2014 14:28:06 +01:00  private-config.text
    3  drwx         192   Mar 1 1993 00:23:02 +00:00  c3750-ipservicesk9-mz.122-55.SE8
   84  -rwx       15354  Sep 25 2014 14:28:06 +01:00  config.text
   85  -rwx        3096   Mar 1 1993 00:04:19 +00:00  multiple-fs
   86  -rwx         856  Sep 23 2014 13:24:52 +01:00  vlan.dat

15998976 bytes total (2406400 bytes free)
Petes-Stack#

[/box]

3. Well there’s only one IOS file in there but let’s make sure anyway, by seeing what version is loaded.

[box]

Petes-Stack#show version
----output ommitted for the sake of brevity----
Switch Ports Model              SW Version            SW Image
------ ----- -----              ----------            ----------
*    1 52    WS-C3750-48P       12.2(55)SE8           C3750-IPSERVICESK9-M
     2 52    WS-C3750-48P       12.2(55)SE8           C3750-IPSERVICESK9-M
----output ommitted for the sake of brevity----

[/box]

4. Lets delete the IOS file from flash1, and make sure it’s gone.

[box]

Petes-Stack#delete /f /r flash1:c3750-ipservicesk9-mz.122-55.SE8
Petes-Stack#dir flash1:
Directory of flash:/

    2  -rwx        5514  Sep 25 2014 14:28:06 +01:00  private-config.text
   84  -rwx         856  Sep 23 2014 13:24:52 +01:00  vlan.dat
   85  -rwx       15354  Sep 25 2014 14:28:06 +01:00  config.text
   87  -rwx        3096  Sep 25 2014 14:28:06 +01:00  multiple-fs

15998976 bytes total (15972352 bytes free)
Petes-Stack#

[/box]

5. Now I’ve setup my TFTP server and downloaded the new IOS file. I need to copy it into the flash1 memory.

[box]

Petes-Stack#copy tftp flash1:
Address or name of remote host? 192.168.1.38
Source filename? c3750-ipservicesk9-mz.122-55.SE9.bin
Destination filename? c3750-ipservicesk9-mz.122-55.SE9.bin
Accessing tftp://192.168.1.38/c3750-ipservicesk9-mz.122-55.SE9.bin...
Loading c3750-ipservicesk9-mz.122-55.SE9.bin from 192.168.1.38 (via Vlan1): !!!!!!!!!!!!!!!!!!!
!!!!!!!!!!!!!!!!!!!!!!!!!!!!!!!!
[OK - 13009047 bytes]

13009047 bytes copied in 214.044 secs (60777 bytes/sec)
Petes-Stack#

[/box]

6. Repeat the process of deleting the IOS, and copying the new one onto flash2. It will remember your answers from earlier so just hit enter.

[box]

Petes-Stack#delete /f /r flash2:c3750-ipservicesk9-mz.122-55.SE8
Petes-Stack#show flash2:

Directory of flash2:/

    2  -rwx        5514  Sep 25 2014 14:28:06 +01:00  private-config.text
   84  -rwx       15354  Sep 25 2014 14:28:06 +01:00  config.text
   85  -rwx        3096   Mar 1 1993 00:04:19 +00:00  multiple-fs
   86  -rwx         856  Sep 23 2014 13:24:52 +01:00  vlan.dat

15998976 bytes total (15972352 bytes free)
Petes-Stack#copy tftp flash2:
Address or name of remote host [192.168.1.38]? {Enter}
Source filename [c3750-ipservicesk9-mz.122-55.SE9.bin]? {Enter}
Destination filename [c3750-ipservicesk9-mz.122-55.SE9.bin]? {Enter}
Accessing tftp://192.168.1.38/c3750-ipservicesk9-mz.122-55.SE9.bin...
Loading c3750-ipservicesk9-mz.122-55.SE9.bin from 192.168.1.38 (via Vlan1): !!!!!!!!!!!!!!!!!!
!!!!!!!!!!!!!!!!!!!!!!!!!!!!!!!!!
[OK - 13009047 bytes]

13009047 bytes copied in 245.945 secs (52894 bytes/sec)
Petes-Stack#

[/box]

7. Now let’s make sure the new file is in both switches flash memory.

[box]

Petes-Stack#show flash1:

Directory of flash:/

    2  -rwx        5514  Sep 25 2014 14:28:06 +01:00  private-config.text
    3  -rwx    13009047  Sep 26 2014 15:46:10 +01:00  c3750-ipservicesk9-mz.122-55.SE9.bin
   84  -rwx         856  Sep 23 2014 13:24:52 +01:00  vlan.dat
   85  -rwx       15354  Sep 25 2014 14:28:06 +01:00  config.text
   87  -rwx        3096  Sep 25 2014 14:28:06 +01:00  multiple-fs

15998976 bytes total (2962944 bytes free)
Petes-Stack#show flash2:

Directory of flash2:/

    2  -rwx        5514  Sep 25 2014 14:28:06 +01:00  private-config.text
    3  -rwx    13009047  Sep 26 2014 15:52:03 +01:00  c3750-ipservicesk9-mz.122-55.SE9.bin
   84  -rwx       15354  Sep 25 2014 14:28:06 +01:00  config.text
   85  -rwx        3096   Mar 1 1993 00:04:19 +00:00  multiple-fs
   86  -rwx         856  Sep 23 2014 13:24:52 +01:00  vlan.dat

15998976 bytes total (2962944 bytes free)
Petes-Stack#

[/box]

8. Even though it’s been deleted, the boot variable will be set to the OLD version of the IOS, to demonstrate issue the following command.

[box]

Petes-Stack#show boot
BOOT path-list      : flash:/c3750-ipservicesk9-mz.122-55.SE8
Config file         : flash:/config.text
Private Config file : flash:/private-config.text
Enable Break        : no
Manual Boot         : no
HELPER path-list    :
Auto upgrade        : yes
Auto upgrade path   :
NVRAM/Config file
      buffer size:   524288
Timeout for Config
          Download:    0 seconds
Config Download
       via DHCP:       disabled (next boot: disabled)
-------------------
Switch 2
-------------------
BOOT path-list      : flash:/c3750-ipservicesk9-mz.122-55.SE8
Config file         : flash:/config.text
Private Config file : flash:/private-config.text
Enable Break        : no
Manual Boot         : no
HELPER path-list    :
Auto upgrade        : no
Auto upgrade path   :
Petes-Stack#

[/box]

9. So change the boot variable to the new one, and check again.

[box]

Petes-Stack# configure terminal
Enter configuration commands, one per line.  End with CNTL/Z.
Petes-Stack(config)# boot system switch all flash:c3750-ipservicesk9-mz.122-55.SE9.bin

Petes-Stack#show boot
BOOT path-list      : flash:c3750-ipservicesk9-mz.122-55.SE9.bin
Config file         : flash:/config.text
Private Config file : flash:/private-config.text
Enable Break        : no
Manual Boot         : no
HELPER path-list    :
Auto upgrade        : yes
Auto upgrade path   :
NVRAM/Config file
      buffer size:   524288
Timeout for Config
          Download:    0 seconds
Config Download
       via DHCP:       disabled (next boot: disabled)
-------------------
Switch 2
-------------------
BOOT path-list      : flash:c3750-ipservicesk9-mz.122-55.SE9.bin
Config file         : flash:/config.text
Private Config file : flash:/private-config.text
Enable Break        : no
Manual Boot         : no
HELPER path-list    :

Auto upgrade        : no
Auto upgrade path   :
Petes-Stack#

[/box]

10. Save the changes, and reload the switch.

[box]

Petes-Stack#write mem
Building configuration...
[OK]
Petes-Stack#reload
Proceed with reload? [confirm] {Enter}
Switch 2 reloading...

[/box]

11. Post reboot, log in and check that the stack is running the new code.

[box]

Petes-Stack#show version
Cisco IOS Software, C3750 Software (C3750-IPSERVICESK9-M), Version 12.2(55)SE9, RELEASE SOFTWARE
Technical Support: http://www.cisco.com/techsupport
Copyright (c) 1986-2014 by Cisco Systems, Inc.
Compiled Mon 03-Mar-14 22:45 by prod_rel_team
Image text-base: 0x01000000, data-base: 0x02F00000

ROM: Bootstrap program is C3750 boot loader
BOOTLDR: C3750 Boot Loader (C3750-HBOOT-M) Version 12.2(44)SE5, RELEASE SOFTWARE (fc1)

Petes-Stack uptime is 5 minutes
System returned to ROM by power-on
System image file is "flash:c3750-ipservicesk9-mz.122-55.SE9.bin"

[/box]

Option 2

You can also carry out the following procedure on the switch ‘stack master’ that will automate the entire procedure for you. Note: This requires the IOS in .tar format not .bin (as above);

[box]archive download-sw /safe /allow-feature-upgrade /reload tftp:{ip-of-TFTP-Server}/{IOS-File-Name.tar}[/box]

Related Articles, References, Credits, or External Links

NA

Cisco Catalyst – Upgrading IOS (via USB)

KB ID 0001056

Problem

Had a stack of 3560-X Switches to update today, and when I went looking for the notes I used last time, I could not find them. So This time I took the time to document the procedure.

Solution

Now I could load in the IOS image from TFTP like this, but last time I did this I used a spare USB drive and the image ‘tar’ file, and found it a lot less hassle.

1. Make sure you have formatted your dive at FAT32, download you image file to it and put it in the switch.

At console you should see something like this;

[box]Apr 22 13:13:18.466: %USBFLASH-5-CHANGE: usbflash0 has been inserted![/box]

2. Update the switch like so;

[box]

Petes-Switch#archive download-sw usbflash0:/c3560e-universalk9-tar.150-2.SE6.tar
examining image...
extracting info (110 bytes)
extracting c3560e-universalk9-mz.150-2.SE6/info (581 bytes)
extracting info (110 bytes)

System Type:             0x00000002
  Ios Image File Size:   0x0135B200
  Total Image File Size: 0x0187BA00
  Minimum Dram required: 0x08000000
  Image Suffix:          universalk9-150-2.SE6
  Image Directory:       c3560e-universalk9-mz.150-2.SE6
  Image Name:            c3560e-universalk9-mz.150-2.SE6.bin
  Image Feature:         IP|LAYER_3|PLUS|SSH|3DES|MIN_DRAM_MEG=128

Old image for switch 1: flash:/c3560e-universalk9-mz.122-55.SE8
  Old image will be deleted before download.

Deleting `flash:/c3560e-universalk9-mz.122-55.SE8' to create required space

————output removed for the sake of brevity————

extracting c3560e-universalk9-mz.150-2.SE6/dc_default_profiles.txt (66292 bytes)
extracting c3560e-universalk9-mz.150-2.SE6/c3560e-universalk9-mz.150-2.SE6.bin (20288000 bytes)
extracting info (110 bytes)

Installing (renaming): `flash:update/c3560e-universalk9-mz.150-2.SE6' ->
                                       `flash:/c3560e-universalk9-mz.150-2.SE6'
New software image installed in flash:/c3560e-universalk9-mz.150-2.SE6


All software images installed.
Petes-Switch#reload
Proceed with reload? [confirm]

*Mar  1 00:09:14.243: %SYS-5-RELOAD: Reload requested by console. Reload reason: Reload command

[/box]

3. At this point when the switch reloads, it will take a long time to boot as it performs a lot of updates and code rewrites when it restarts.

Upgrading The Catalyst Service Module

These switches have a 10Gb Service module in them that also needs updating, once the switch reboots you will have to wait a few minutes before the service module boots as well, if you don’t wait then you will see this; [box]

Petes-Switch#show switch service-modules
Switch/Stack supports service module CPU version: 03.00.76
                          Temperature                     CPU
Petes-Switch#  H/W Status       (CPU/FPGA)      CPU Link      Version
-----------------------------------------------------------------
 1             OK               48C/43C         notconnected  N/A

[/box]

You may also see an error like this (I’ve blogged this before).

[box]

Mar 30 01:29:55.128: POST: Macsec Uplink Loopback Tests : Passed Decryption Mode
Mar 30 01:29:57.594: POST: Macsec Uplink Loopback Tests : End
Mar 30 01:29:57.594: %PLATFORM-6-FRULINK_INSERTED: FRULink 10G SM module inserted.
Mar 30 01:32:13.188: %PLATFORM_SM10G-3-SW_VERSION_MISMATCH: The FRULink 10G Service Module
(C3KX-SM-10G) in switch 1 has a software version that is incompatible with the IOS software
 version. Please update the software. Module is in pass-thru mode.
Petes-Switch#show switch service-modules
Switch/Stack supports service module CPU version: 03.00.76
                          Temperature                     CPU
Petes-Switch#  H/W Status       (CPU/FPGA)      CPU Link      Version
-----------------------------------------------------------------
 1             OK               54C/54C         ver-mismatch  03.00.41

[/box]

Or it may simply look like this;

[box]

Mar 30 01:32:29.403: %PLATFORM_SM10G-6-LINK_UP: The FRULink 10G Service Module (C3KX-SM-10G)
communication has been established.
Petes-Switch#
Petes-Switch#show switch service-modules
Switch/Stack supports service module CPU version: 03.00.76
                          Temperature                     CPU
Petes-Switch#  H/W Status       (CPU/FPGA)      CPU Link      Version
-----------------------------------------------------------------
 1             OK               50C/48C         connected     03.00.76

[/box]

To perform the upgrade, you will need a matching image for the service module.

[box]

Petes-Switch#archive download-sw usbflash0:/c3kx-sm10g-tar.150-2.SE6.tar
examining image...
extracting info (100 bytes)
extracting c3kx-sm10g-mz.150-2.SE6/info (499 bytes)
extracting info (100 bytes)

System Type:             0x00010002
  Ios Image File Size:   0x017BDA00
  Total Image File Size: 0x017BDA00
  Minimum Dram required: 0x08000000
  Image Suffix:          sm10g-150-2.SE6
  Image Directory:       c3kx-sm10g-mz.150-2.SE6
  Image Name:            c3kx-sm10g-mz.150-2.SE6.bin
  Image Feature:         IP|LAYER_3|MIN_DRAM_MEG=128
  FRU Module Version:    03.00.76


Updating FRU Module on switch 1...
!!!!!!!!!!!!!!!!!!!!!!!!!!!!!!!!!!!!!!!!!!!!!!!!!!!!!!!!!!!!!!!!!!!!
Updating FRU FPGA image...

FPGA image update complete.

All software images installed.
Petes-Switch#reload
Proceed with reload? [confirm]

Mar 30 01:47:19.459: %SYS-5-RELOAD: Reload requested by console. Reload Reason: Reload command.

[/box]

Related Articles, References, Credits, or External Links

Cisco Catalyst – Upgrading ‘Stacked’ Switches

Backup and Restore Cisco IOS (Switches and Routers)

KB ID 0000538 

Problem

It’s been a long time since I ran through setting up a TFTP server, but I still use 3CDeamon. Below I’ll run though the simple commands to back up, and restore the devices configuration.

Solution

Backing up a Cisco IOS Device

1. First you have to setup a TFTP server, and know the IP address of the machine it’s on!

2. Connect to the device, either via console cable, Telnet or SSH.

3. Log in > Go to enable mode > issue a “copy running-config tftp”* command > Supply the IP address of the TFTP server > Give the backup file a name.

Note: You can also use startup-config to copy the config saved in NVRAM rather than the running-config.

[box]

User Access Verification

Username: username
Password:*******

PeteRouter#enable
PeteRouter#copy running-config tftp
Address or name of remote host []? 10.10.0.1
Destination filename [PeteRouter-confg]? PeteRouter_Backup
!!
7400 bytes copied in 0.548 secs (13504 bytes/sec)

PeteRouter#

[/box] 4. If you keep an eye on the TFTP server you can see the file coming in.

Restoring a Cisco Cisco IOS Device

1. As above have your TFTP server up and running with the file you want to restore in its root directory.

2. Connect to the device either via console cable, Telnet or SSH.

3. Log in > Go to enable mode > issue a “copy tftp running-config”* command > Supply the IP address of the TFTP server > Give the backup file a name.

Note: You can also use startup-config to restore the config saved in NVRAM rather than the running-config.

[box]

User Access Verification

Username: username
Password: *******

PeteRouter#enable
PeteRouter#copy tftp running-config
Address or name of remote host []? 10.10.0.1
Source filename []? PeteRouter_Backup
Destination filename [running-config]? {Enter}
Accessing tftp://10.10.0.1/PeteRouter_Backup...
Loading PeteRouter_Backup from 10.10.0.1 (via GigabitEthernet0/0): !
[OK - 7400 bytes]

7400 bytes copied in 0.440 secs (16818 bytes/sec)

PeteRouter#

[/box]

4. Remember you have restored the running-config you would need to issue a “copy run start” command to make this config persistent (i.e. after a restart or reload of the router). If you issued a “copy tftp startup-config”, you would need to reboot for the restored config to be loaded into memory.

Related Articles, References, Credits, or External Links

Install and Use a TFTP Server

Backup and Restore a Cisco Firewall

PIX 506E and 501 Firewall Image and PDM Upgrade

KB ID 0000065 

Problem

Note: PIX 515E and above, can still be upgraded to version 8.0(4) click here for details

Some people will wonder why I’m bothering to write this up, but the truth is, there are LOADS of older PIX firewalls out there in the wild, and all the PIX 501’s and 506E’s that are being retired from corporate use are being bought on ebay, or being put on IT departments test benches. This page deals with PIX version 6 if you are upgrading to version 7 or above,then you need to be on a PIX 515E (or a 525/535) and DO NOT follow these instructions, CLICK HERE. The “Smaller” PIX firewalls (501 and 506E) can only be upgraded to version 6.3(5) and the PDM can only be upgraded to 3.0(4).

Pre-Requisites

1. Before you do anything you will need a TFTP server and have it set up accordingly, for instructions CLICK HERE.

2. I suggest you backup your firewall configuration also, for instructions CLICK HERE.

3. You need to be able to get the Image and PDM versions from Cisco, you will need a valid support contract to be eligible for updates.

4. You will need a CCO Login to the Cisco Site (this is free to set up.

Solution

1. First things first; lets download the software you need CLICK HERE

2. Log in with your CCO username and password

Remember a CCO login is free of charge and simple to set up but to download software you need a valid Cisco contract or SmartNet.

3. For this example I’m upgrading a PIX 501 so I’m going to need a system image and a PDM file.

4. Download the files above and put then in your TFTP server root directory, then start your TFTP Server.

5. Log into your PIX firewall via the console cable, Telnet, or SSH, then enter enable mode, supply the firewall with the enable password. [box]

User Access Verification

Password:
Type help or '?' for a list of available commands.

Pix> enable

Password: ********

Pix#

[/box]

6. Now you need to copy in the new system file you do this with a “Copy tftp flash” command NOTE you can use copy tftp flash:image but it defaults to that anyway 🙂

[box]Pix# copy tftp flash[/box]

7. You will need to give it the IP address of your TFTP server and the name of the image file to copy over.

[box]

Address or name of remote host [0.0.0.0]? 10.254.254.51
Source file name [cdisk]? pix635.bin
copying tftp://10.254.254.51/pix635.bin to flash:image

[/box]

8. You will be asked to confirm, do so by typing yes and pressing enter, the file will then upload and the old image file will be erased from the firewalls memory.

[box]

[yes|no|again]? yes
!!!!!!!!!!!!!!!!!!!!!!!!!!!!!!!!!!!!!!!!!!!!!!!!!!!!!!!!!!!!!!!!!!!!!!!!!!!!!!!!
!!!!!!!!!!!!!!!!!!!!!!!!!!!!!!!!!!!!!!!!!!!!!!!!!!!!!!!!!!!!!!!!!!!!!!!!!!!!!!!!
!!!!!!!!!!!!!!!!!!!!!!!!!!!!!!!!!!!!!!!!!!!!!!!!!!!!!!!!!!!!!!!!!!!!!!!!!!!!!!!!
!!!!!!!!!!!!!!!!!!!!!!!!!!!!!!!!!!!!!!!!!!!!!!!!!!!!!!!!!!!!!!!!!!!!!!!!!!!!!!!!
!!!!!!!!!!!!!!!!!!!!!!!!!!!!!!!!!!!!!!!!!!!!!!!!!!!!!!!!!!!!!!!!!!!!!!!!!!!!!!!!
!!!!!!!!!!!
Received 2101248 bytes
Erasing current image
Writing 1978424 bytes of image
!!!!!!!!!!!!!!!!!!!!!!!!!!!!!!!!!!!!!!!!!!!!!!!!!!!!!!!!!!!!!!!!!!!!!!!!!!!!!!!!
!!!!!!!!!!!!!!!!!!!!!!!!!!!!!!!!!!!!!!!!!!!!!!!!!!!!!!!!!!!!!!!!!!!!!!!!!!!!!!!!
!!!!!!!!!!!!!!!!!!!!!!!!!!!!!!!!!!!!!!!!!!!!!!!!!!!!!!!!!!!!!!!!!!!!!!!!!!!!!!!!
!!!!!!!!!!!!!!!!!!!!!!!!!!!!!!!!!!!!!!!!!!!!!!!!!!!!!!!!!!!!!!!!!!!!!!!!!!!!!!!!
!!!!!!!!!!!!!!!!!!!!!!!!!!!!!!!!!!!!!!!!!!!!!!!!!!!!!!!!!!!!!!!!!!!
Image installed
Pix#

[/box]

9. The quickest way to load the new image into memory is to restart the firewall do this with a reload command, then press enter to confirm.

[box]

Pix# reload
Proceed with reload? [confirm]

[/box]

10 After the firewall has restarted log in, enter enable mode and issue a “show version” command, and you will see the new version displayed.

[box]

User Access Verification

Type help or '?' for a list of available commands. 
Pix> enable
Password: ******** 
Pix# show version

Cisco PIX Firewall Version 6.3(5) Cisco PIX Device Manager Version 3.0(2)

{{{rest of output omitted}}}}

[/box]

Upgrade Procedure Step 2 PDM Image

1. The procedure for upgrading the PDM is almost identical, again have the new PDM image on your TFTP server’s root directory, and the TFTP server running. Log into your PIX firewall via the console cable, Telnet or SSH, then enter enable mode, and then supply the firewall with the enable password.

[box]

User Access Verification
Password:
Type help or '?' for a list of available commands.
Pix> enable
Password: ********
Pix#

[/box]

2. This time the command is copy tftp flash:pdm

[box]Pix# copy tftp flash:pdm[/box]

3. You will need to give it the IP address of your TFTP server and the name of the file to copy over.

[box]

Address or name of remote host [0.0.0.0]? 10.254.254.51
Source file name [cdisk]? pdm-304.bin
copying tftp://10.254.254.51/pdm-304.bin to flash:pdm

[/box]

4. You will be asked to confirm, do so by typing yes and pressing enter, the file will then upload and the old pdm file will be erased from the firewalls memory.

[box]

[yes|no|again]? yes
Erasing current PDM file
Writing new PDM file
!!!!!!!!!!!!!!!!!!!!!!!!!!!!!!!!!!!!!!!!!!!!!!!!!!!!!!!!!!!!!!!!!!!!!!!!!!!!!!!!
!!!!!!!!!!!!!!!!!!!!!!!!!!!!!!!!!!!!!!!!!!!!!!!!!!!!!!!!!!!!!!!!!!!!!!!!!!!!!!!!
!!!!!!!!!!!!!!!!!!!!!!!!!!!!!!!!!!!!!!!!!!!!!!!!!!!!!!!!!!!!!!!!!!!!!!!!!!!!!!!!
!!!!!!!!!!!!!!!!!!!!!!!!!!!!!!!!!!!!!!!!!!!!!!!!!!!!!!!!!!!!!!!!!!!!!!!!!!!!!!!!
!!!!!!!!!!!!!!!!!!!!!!!!!!!!!!!!!!!!!!!!!!!!!!!!!!!!!!!!!!!!!!!!!!!!!!!!!!!!!!!!
!!!!!!!!!!!!!!!!!!!!!!!!!!!!!!!!!!!!!!!!!!!!!!!!!!!!!!!!!!!!!!!!!!!!!!!!!!!!!!!!
!!!!!!!!!!!!!!!!!!!!!!!!!!!!!!!!!!!!!!!!!!!!!!!!!!!!!!!!!!!!!!!!!!!!!!!!!!!!!!!!
!!!!!!!!!!!!!!!!!!!!!!!!!!!!!!!!!!!!!!!!!!!!!!!!!!!!!!!!
PDM file installed.
Pix#

[/box]

5. Unlike an Image file a PDM upgrade does not require a reboot you can check its worked straight away by issuing a show version command.

[box]

Pix# show version 
Cisco PIX Firewall Version 6.3(5) Cisco PIX Device Manager Version 3.0(4)

{{{rest of output omitted}}}}
[/box]

6. View of both files being copied out from your TFTP Server.

7. All done! – Time for a coffee – just make sure everything is up and working.

Related Articles, References, Credits, or External Links

NA