Configuring Cisco HSRP

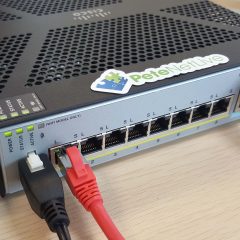
KB ID 0000946 

Problem

Cisco HSRP: Normally your client machines have one route off the network, (their default gateway). But what if that goes down? HSRP aims to solve this problem by assigning a ‘Virtual IP address’ to your default gateway (or default route). So that IP can be shared amongst two or more possible devices (routers, or layer 3 switches).

Above, we have a client 192.168.1.10 that has two possible routes off the network, (.254 and .253). We will setup a virtual IP of .250 and both routers can use that IP, (if they are the active gateway). Below is a brief overview of how to set it up.

Deploy Cisco HSRP

Setting up Cisco HSRP

1. On the first router (Router0), add the standby IP address (192.168.1.250) the ‘1’ denotes the standby group (a number from 0 to 4096). It comes up as standby, then after it has checked (via multicast address 224.0.0.2 on UDP port 1985). It finds no other live HSRP devices using that IP address so it becomes ‘Active’.

[box]

Router0>enable
Router0#configure terminal 
Enter configuration commands, one per line. End with CNTL/Z.
Router0(config)#interface GigabitEthernet0/0
Router0(config-if)#standby 1 ip 192.168.1.250
Router0(config-if)#

%HSRP-6-STATECHANGE: GigabitEthernet0/0 Grp 1 state Speak -> Standby

%HSRP-6-STATECHANGE: GigabitEthernet0/0 Grp 1 state Standby -> Active

Router0(config-if)#

[/box]

2. Repeat this on the second Router, this one discovers the ‘Active’ router and sets itself up as ‘Standby’.

[box]

Router1>
Router1>enable
Router1#configure terminal
Enter configuration commands, one per line. End with CNTL/Z.
Router1(config)#interface GigabitEthernet0/0
Router1(config-if)#standby 1 ip 192.168.1.250
Router1(config-if)#
%HSRP-6-STATECHANGE: GigabitEthernet0/0 Grp 1 state Speak -> Standby

Router1(config-if)#

[/box]

3. You can prove this by running show standby (or do show standby in configure terminal mode).

[box]

Router0

Router0#show standby
GigabitEthernet0/0 - Group 1 (version 2)
State is Active
8 state changes, last state change 00:02:02
Virtual IP address is 192.168.1.250
Active virtual MAC address is 0000.0C9F.F001
Local virtual MAC address is 0000.0C9F.F001 (v2 default)
Hello time 3 sec, hold time 10 sec
Next hello sent in 0.055 secs
Preemption disabled
Active router is local
Standby router is 192.168.1.253
Priority 100 (default 100)
Group name is hsrp-Gig0/0-1 (default)
Router0#

Router1

Router1#show standby
GigabitEthernet0/0 - Group 1 (version 2)
State is Standby
3 state changes, last state change 00:10:44
Virtual IP address is 192.168.1.250
Active virtual MAC address is unknown
Local virtual MAC address is 0000.0C9F.F001 (v2 default)
Hello time 3 sec, hold time 10 sec
Next hello sent in 2.125 secs
Preemption disabled
Active router is 192.168.1.254
Standby router is local
Priority 100 (default 100)
Group name is hsrp-Gig0/0-1 (default)
Router1#

[/box]

4. That is HSRP configured! However there are a few changes you might want to make, for example, what if one router had a 100MB leased line, and the other was a 2MB ADSL line, you would want the fastest one to be in use, (as long as it was up). To achieve that, give the router with the fastest connection a higher priority (you may notice above, that by default the priority is 100). Be aware, even if a router has the highest priority, it wont ‘seize’ the virtual IP, it just sits and waits until it’s available. For our 100MB and 2MB example that’s not good. We would want Router1 to seize the virtual IP as soon as it can. To do that we need to set it to preempt. (Note: This process is called ‘launching a coup’).

[box]

Router1(config)#interface GigabitEthernet0/0
Router1(config-if)#standby 1 priority 105
Router1(config-if)#standby 1 preempt

[/box]

5. At this point it’s important to say, that in our scenario we would also need to setup a virtual IP for the ‘other side’ of the routers (i.e their GigabitEthernet 0/1 interfaces), or the remote client (172.16.1.10) would not be able to return our ‘pings’ or get any traffic back to us. So lets setup a virtual HSRP address on that side as well. Notice I just use another standby group number.

Note: To work the remote host 172.16.1.10 will need its default gateway changing to the HSRP Virtual IP of 172.16.1.250.

[box]

Router0 

Router0(config)#interface GigabitEthernet0/1
Router0(config-if)#standby 2 ip 172.16.1.250
Router0(config-if)#

Router1

Router1(config)#interface GigabitEthernet0/1
Router1(config-if)#standby 2 ip 172.16.1.250
Router1(config-if)#

[/box]

6. Finally we have set Router0 with the highest priority and set it to seize the virtual IP as soon as it can. But what if another interface on Router1 goes down? e.g. If the GigabitEthernet 0/1 interface were to go down, HSRP would not do anything because it’s tracking both the GigabitEthernet 0/0 interfaces, so communications would fail.

To solve the problem we need to tell it which interfaces to ‘Track’. In our example we need to track GigabitEthernet 0/1, if that goes down we need to give the virtual IP address to the standby ‘router’. This works because once we tell it to ‘track’ the GigabitEthernet 0/1 interface, if that were to fail it will DECREMEMT the routers priority by 10. So for Router0 its priority would drop to 95, this is five less than the default value of 100 (on Router1). But Remember, at the moment that fail-over would still fail, unless you allow Router1 to preempt and launch a coup.

[box]

Router0 

Router0(config)#interface GigabitEthernet0/0
Router0(config-if)#standby 1 track GigabitEthernet0/1
Router0(config-if)#

Router1

Router1(config)#interface GigabitEthernet0/0
Router1(config-if)#standby 1 preempt
Router1(config-if)#

[/box]

7. We can see that by running a ‘show standby’ on Router0.

[box]

Router0#show standby
GigabitEthernet0/0 - Group 1 (version 2)
State is Active
7 state changes, last state change 00:00:31
Virtual IP address is 192.168.1.250
Active virtual MAC address is 0000.0C9F.F001
Local virtual MAC address is 0000.0C9F.F001 (v2 default)
Hello time 3 sec, hold time 10 sec
Next hello sent in 2.81 secs
Preemption enabled
Active router is local
Standby router is 192.168.1.253, priority 115 (expires in 7 sec)
Priority 115 (configured 115)
Track interface GigabitEthernet0/1 state Up decrement 10
Group name is hsrp-Gig0/0-1 (default)
GigabitEthernet0/1 - Group 2 (version 2)
State is Active
6 state changes, last state change 00:00:28
Virtual IP address is 172.16.1.250
Active virtual MAC address is 0000.0C9F.F002
Local virtual MAC address is 0000.0C9F.F002 (v2 default)
Hello time 3 sec, hold time 10 sec
Next hello sent in 0.81 secs
Preemption disabled
Active router is local
Standby router is 172.16.1.253
Priority 100 (default 100)
Group name is hsrp-Gig0/1-2 (default)
Router0#

[/box]

Related Articles, References, Credits, or External Links

NA

How Do I Find/Change My IP Address?

KB ID 0000208

What’s an IP address?

An IP address is the address used on a network to find your PC, Server, Laptop, or Printer etc. It’s the networking equivalent of your house number and post code (or Zip Code for visitors from over the pond).

Do you want your PUBLIC or PRIVATE IP address? As we started to run out of addresses, there were a number of solutions that we came up with, one you will see below (DHCP) the other is NAT (Network Address Translation) that lets many IPs on a network share one (or more) public IP addresses on the internet. If you want to know your PUBLIC address (your address in on the internet) then simply see below;

Your Public IP Address Is: [user_ip]

Where does my IP address come from?

You get an IP address by two methods,

1. Statically Assigned: Your address never changes and is allocated to you manually.

2. Dynamically Assigned: Your machine gets its IP address automatically via a system called DHCP.

What does an IP address look like?

Most IP addresses in use today are IP version 4 and consist of 4 numbers separated by three full stops (or once again, periods, for overseas visitors).

An IP address 192.168.1.100

Is that all my computer needs?

NO! You need FOUR pieces of information to access the internet and work properly;

1. The IP address itself (i.e. 192.168.1.100) this is unique to every machine on the network.

2. The Subnet Mask (i.e. 255.255.255.0) this tells the machine how big the network it is on, is.

3. The Default Gateway, this is another IP address on the network that you need to go through to get off the local network, i.e. to access the internet.

4. The DNS IP address, this is another IP address of a machine that can translate IP addresses into names (e.g. translate www.bbc.co.uk to 212.58.246.159).

What’s my IP address?

1. Windows Key + R > type ‘cmd’ {Enter}

2. A Command Window will open, click within the box and you can type in commands, the command to show your IP address is ipconfig, but this WONT show us the DNS settings as well, to do that the command is “ipconfig /all“.

Note: If you have many network connections you will get results for them all, you may need to scroll up and down to find the right one.>

IP Problems

Problem 1: My machine has got an IP address that is 169.254.x.y (where x and y can be any number from 1 to 254).

Answer: This machine is set to get its IP address automatically via DHCP but it cant speak to the DHCP server, because either the DHCP server is down or there is no connection between the DHCP server and you.

Problem 2: My IP address shows as 0.0.0.0

Answer: You have been given a static IP address and someone on the same network is using the same address, this causes an IP conflict, change one of the IP addresses.

Find out if your IP address is statically assigned of dynamically assigned

The more eagled eyed of you will see on the ipconfig /all results above that this machine is disabled for DHCP so its dynamically assigned however, on your Windows machine do the following.

1. Windows Key + R > Tyoe ‘ncpa.cpl’ {Enter}

2. Your network connections window should open and locate the connection you are connecting with (you might have many, be sure to select the right one, i.e. you might have one for dial up, one for wireless, one for a VPN to the office etc). Right click the connection and select properties.

3. On the window that appears you may have to scroll down the list, we are looking for its TCP/IP (on newer machines it will be called “Internet Protocol Version 4 (TCP/IPv4)”, Select it and click properties.

4. Now you can see if your addresses are set statically or dynamically.

How to change your IP address

To change your IP address you first need to know if you have a static IP address or a Dynamically assigned one. (That’s why this section is below the one above).

1. If you have a static IP address, simply change it on the screen shown (diagram above).

2. If you have a Dynamic IP address, you can either reboot the machine in question or Click Start > run > cmd {enter}

3. A Command Window will open, click within the box and you can type in commands, the command to release your IP address is ipconfig /release

Then to get a new address type in ipconfig /renew

Related Articles, References, Credits, or External Links

NA

Cisco Firepower Services – Change IP and DNS Addresses

KB ID 0001173 

Problem

If you change your internal LAN addresses its easy to re-ip the firewall but what about the FirePOWER module? If you manage your SFR from the ASDM it will tell you what the IP is, but it won’t let you change it?


Solution

Change the FirePOWER Module IP Address

Log into the firewall, then open a session with the SFR module. find the physical address of the module (usually eth0, but check).

[box]

Petes-ASA# session sfr
Opening command session with module sfr.
Connected to module sfr. Escape character sequence is 'CTRL-^X'.


GRAINGER-SFR login: admin
Password:{your password}
Last login: Thu Apr  7 08:11:00 UTC 2016 on pts/0

Copyright 2004-2015, Cisco and/or its affiliates. All rights reserved.
Cisco is a registered trademark of Cisco Systems, Inc.
All other trademarks are property of their respective owners.

Cisco Linux OS v5.4.1 (build 12)
Cisco ASA5506 v5.4.1 (build 211)

> show interfaces
--------------------[ outside ]---------------------
Physical Interface        : GigabitEthernet1/1
Type                      : ASA
Security Zone             : None
Status                    : Enabled
Load Balancing Mode       : N/A
---------------------[ inside ]---------------------
Physical Interface        : GigabitEthernet1/2
Type                      : ASA
Security Zone             : None
Status                    : Enabled
Load Balancing Mode       : N/A
---------------------[ cplane ]---------------------
IPv4 Address              : 127.0.2.1
----------------------[ eth0 ]----------------------
Physical Interface        : eth0
Type                      : Management
Status                    : Enabled
MDI/MDIX                  : Auto
MTU                       : 1500
MAC Address               : 00:C8:8B:C1:0E:0C
IPv4 Address              : 192.168.1.100
---------------------[ tunl0 ]----------------------
----------------------------------------------------
>

[/box]

To change the IP you need to supply the IP address, subnet mask, default gateway, and physical interface like so;

[box]

> configure network ipv4 manual 192.168.1.99 255.255.255.0 192.168.1.1 eth0
Setting IPv4 network configuration.
Network settings changed.

[/box]

You can check its worked with a ‘show interfaces command’.

[box]

> show interfaces
--------------------[ outside ]---------------------
Physical Interface        : GigabitEthernet1/1
Type                      : ASA
Security Zone             : None
Status                    : Enabled
Load Balancing Mode       : N/A
---------------------[ inside ]---------------------
Physical Interface        : GigabitEthernet1/2
Type                      : ASA
Security Zone             : None
Status                    : Enabled
Load Balancing Mode       : N/A
---------------------[ cplane ]---------------------
IPv4 Address              : 127.0.2.1
----------------------[ eth0 ]----------------------
Physical Interface        : eth0
Type                      : Management
Status                    : Enabled
MDI/MDIX                  : Auto
MTU                       : 1500
MAC Address               : 00:C8:8B:C1:0E:0C
IPv4 Address              : 192.168.1.99
---------------------[ tunl0 ]----------------------
----------------------------------------------------

>

[/box]

Or you can use the ‘show interfaces {interface-name}‘ command.

[box]

> show interfaces eth0
----------------------[ eth0 ]----------------------
Physical Interface        : eth0
Type                      : Management
Status                    : Enabled
MDI/MDIX                  : Auto
MTU                       : 1500
MAC Address               : 00:C8:8B:C1:0E:0C
IPv4 Address              : 192.168.1.99
IPv4 Broadcast            : 192.168.1.255
RX Packets                : 261
RX Errors                 : 0
RX Drops                  : 0
RX Overruns               : 0
RX Frame                  : 0
TX Packets                : 214
TX Errors                 : 0
TX Drops                  : 0
TX Overruns               : 0
TX Carrier                : 0
Collisions                : 0
----------------------------------------------------


[/box]

Change the FirePOWER Module IP Address

This is a little more convoluted, there is a command to do this, Note: You can enter multiple servers separated by commas.

[box]

> configure network dns servers 8.8.8.8,8.8.4.4

[/box]

But you also need to restart the nscd daemon in the underlying linux, to do that you need to get into ‘expert mode’.

[box]

> expert

admin@PETES-SFR:~$ sudo /etc/rc.d/init.d/nscd restart

Password:{Enter Your Password}

Stopping nscd…                                                     [  OK  ]

Starting nscd…                                                       [  OK  ]

admin@PETES-SFR:~$

[/box]

Related Articles, References, Credits, or External Links

Cisco FirePOWER – Adding a Static Route

VMware – {hostname} could not reach isolation address: none specified

KB ID 0000445 

Problem

Seen on vSphere:

Error Host {hostname} could not reach isolation address:none specified.

Solution

1. In my case the host did NOT have a default gateway, (this had occurred because the subnet mask of the server had been entered incorrectly when the server was built. So the default gateway appeared to be on a different network).

2. With the offending host selected, Configuration > DNS and Routing > Properties > Routing > Put in the correct default gateway > OK.


Related Articles, References, Credits, or External Links

NA

Windows Gets a 0.0.0.0 Default Gateway

KB ID 0000332 

Problem

Seen on Windows 7 but can also occur on Vista, I had this problem a while ago and fixed it then it reoccurred this morning (after I’d spent a morning on a client site changing my IP address a few times. As soon at I got back to the office the machine picked up an IP address form DHCP with the correct default gateway, but sat above that was a default gateway of 0.0.0.0

I could not ping anything outside my network either.

Solution

After some “Googling” it turns out this problem is caused the the Apple “Bonjour Service” as I detest iTunes and have no Apple software I was confused. It Seems that Adobe CS3 (Creative Studio) installs it, (Thought CS4 does not).

Quick Fix (though not permanent)

1. Start > Run > cmd {enter}

2. Issue the following command,

[box]route delete 0.0.0.0[/box]

Permanent Fix

1. Firstly make sure that Bonjour IS your problem look for the following,

C:Program FilesBonjourmDNSResponder.exe or C:Program Files (x86)BonjourmDNSResponder.exe (if your x64 bit I’m not sure?)

2.If is is there look to find the service that running it, (Start > Run > Services.msc).

In my case the service was called,

##Id_String2.6844F930_1628_4223_B5CC_5BB94B879762##

Catchy eh? I discovered that is caused by an install error.

This;

Is fixed with these commands;

3. Now I can see it correctly,

Note: Some forums report that the “National Instruments mDNS Responder Service” also used the same system and causes this problem.

4. You can simply stop and disable the service if you wish, or you can remove it by, running the following command,

x32 bit

[box]”C:Program FilesBonjourmDNSResponder.exe” -remove[/box]

x64 bit

[box]”C:Program Files (x86)BonjourmDNSResponder.exe” -remove[/box]

remove mdns responder

5. Navigate to, C:Program FilesBonjour OR C:Program Files (x86)Bonjour And rename mdnsNSP.dll to mdnsNSP.old

6. Reboot the affected machine.

7. Then delete the Bonjour folder.


Related Articles, References, Credits, or External Links

National Instruments Microsoft

GNS3 – Assign an IP Address to Linux Microcore QEMU Guest

KB ID 0000932 

Problem

The whole point of having these guest machines is for testing communications, putting an IP address on them so you can ping things, is a pretty basic step.

Solution

1. Console in, and execute the following commands, obviously change the IP addresses to the ones you require.

[box]

sudo su
ifconfig eth0 10.10.10.10 netmask 255.0.0.0 up
route add ip default gw 10.10.10.1
route add default gw 10.10.10.1

[/box]

Related Articles, References, Credits, or External Links

NA

Connecting GNS3 to VMware Workstation

KB ID 0000996 

Problem

A while back I got an email “Here is a suggestion for an article. ‘How to link GNS3 with VMware Workstation'”. Sorry it’s taken me so long to get round to it, here you go Daniel Newton.

Solution

Before we start I’m assuming you have installed VMware Workstation, and you’ve installed and configured GNS3.

1. Launch VMware Workstation > Edit > Virtual Network Editor > By default there will be three networks, the one we are concerned with is the ‘NAT‘ one. I change the default IP range, (in the example below to 123.123.123.123 255.255.255.0) > Apply > OK.

2. NAT Settings > Set the default gateway for the network (Tip: Don’t choose .1, I’ve had problems with that in the past) > OK.

3. DHCP Settings > Even if you’re not going to use DHCP, enter a range of IP addresses on your network > OK.

4. Windows Key + R > ncpa.cpl {Enter} > Notice there’s two new network connections, one for the NAT network, and one for the ‘Host only’ network.

5. To avoid confusion, I rename them.

6. So they are easily identifiable, (you will see why later).

7. In GNS3 drag a ‘Cloud’ onto your workspace.

8. Right click > Configure > NIO Ethernet > Select the Network drop-down box > Select your VMware NAT interface.

9. Add > Apply > OK.

10. Note: If you are working with Cisco ASA firewalls, you cannot simply connect it to the cloud, you need to put a hub/switch or router in between them, or you will see this error message;

Dynamips error
Device does not support this type of NIO. Use an ETHSW or
hub to bridge the connection to the NIO instead.

11. With a switch in between you can connect them together.

12. Now if you give the outside of the firewall an IP on the correct network range (you configure in step 1), and set its default route to point to the gateway address, (you configured in step 2). You will have public Internet access, (assuming the host computer has Internet access).

13 Working with routers (and switches) you can connect them directly to the cloud.

14. Again set the interface IP correctly, and the default route, and you will have public Internet access.


Related Articles, References, Credits, or External Links

NA

Cisco Catalyst Switches – Set a Management IP and Allow Telnet and Web Management

KB ID 0000614 

Problem

If you want to manage your Cisco Catalyst switch it’s not always practical to plug a console cable in to change its settings or monitor what it is doing. Putting an IP address on it and enabling remote management via Telnet or from your web browser is a better alternative, particularly if you have a lot of switches.

Solution

Enable Telnet Management on Cisco Catalyst Switch

1. Connect to the Switch using a terminal emulation program like HyperTerminal or Putty,

2. Issue the following commands;

[box]

enable
{enter enable password if prompted}
conf t
line vty 0 15
password {password required}
login
exit 

[/box]

Add a Management IP to a Cisco Catalyst Switch

3. Whilst still in configure terminal mode issue the following commands;

[box]

int vlan1
ip address {IP address required} {Subnet required}
no shutdown
exit

[/box]

Cisco Catalyst Set an Enable Password

4. If you telnet in you cant change any system settings without an enable password being set.

[box]enable password {Password required}[/box]

Optional : Set the Cisco Catalyst Switches Default Gateway

5. Just in case you need to manage the switch from another subnet, you will need to set a default gateway.

[box]ip default-gateway {IP address required}[/box]

Enable Web Management on Cisco Catalyst Switch

6. To connect to and manage the switch from a web browser execute the following command, and then exit configure terminal mode.

[box]

ip http server
exit 

[/box]

7. Finally save the changes with a “write mem” command.

[box]write mem[/box]

Testing the Configuration

8. From a machine on the same network segment make sure you can ping the switch on its new IP address.

9. Then make sure you can “telnet” into it.

10. Open a web browser and navigate the the switches IP > Select ‘Web Console’.

Note: You will require Java for this to work.

11. After entering the enable password you should see the following.

Related Articles, References, Credits, or External Links

Cisco Catalyst Password Recovery / Reset

Cisco IOS – Find The ‘Default Route’ For A VRF

KB ID 0001086 

Problem

Routing is one of my weaker subjects, and today I was trying to chase some routes though a network to locate all the firewalls. The core of the network has a bunch of 6500 Switches in various data centers. I tracked the network I was working on to an SVI on one of the core switches, that was in a VRF.

But how could I find the ‘next hop’, the routing table on these switches is very large.

Solution

Thankfully I’m surrounded by a team of routing ninjas, so I asked. The syntax is just;

[box]show ip route vrf {VRF Name}[/box]

Note: I you don’t know the name of the vrf;

[box]show running-config vrf

OR

show running-config vrf | incl <NAME>[/box]

Then as with any routing table, look for the default route.

For example;

[box]

Petes-Core-SW#show ip route vrf CORP:NET

Routing Table: CORP:NET
Codes: L - local, C - connected, S - static, R - RIP, M - mobile, B - BGP
       D - EIGRP, EX - EIGRP external, O - OSPF, IA - OSPF inter area
       N1 - OSPF NSSA external type 1, N2 - OSPF NSSA external type 2
       E1 - OSPF external type 1, E2 - OSPF external type 2
       i - IS-IS, su - IS-IS summary, L1 - IS-IS level-1, L2 - IS-IS level-2
       ia - IS-IS inter area, * - candidate default, U - per-user static route
       o - ODR, P - periodic downloaded static route, H - NHRP, l - LISP
       + - replicated route, % - next hop override

Gateway of last resort is 5.229.0.1 to network 0.0.0.0

S*    0.0.0.0/0 [1/0] via 5.229.0.1
      10.0.0.0/8 is variably subnetted, 13 subnets, 5 masks
B        10.1.0.0/16 [200/0] via 123.123.123.1, 3w5d
B        5.219.28.0/24 [200/0] via 123.123.123.1, 3w5d
B        5.219.40.0/24 [200/0] via 123.123.123.1, 3w5d
B        5.219.241.0/24 [200/0] via 123.123.123.1, 3w5d
B        10.220.50.0/24 [200/0] via 123.123.123.1, 3w5d
C        5.229.0.0/29 is directly connected, GigabitEthernet2/28
L        5.229.0.2/32 is directly connected, GigabitEthernet2/28
C        5.229.1.0/24 is directly connected, Vlan229
L        5.229.1.1/32 is directly connected, Vlan229
B        5.229.60.0/24 [200/0] via 123.123.123.16, 3w4d
B        5.229.61.0/24 [200/0] via 123.123.123.16, 3w4d
B        5.229.255.0/30 [200/0] via 123.123.123.1, 3w5d
B        5.229.255.4/30 [200/0] via 123.123.123.16, 3w4d
      172.100.0.0/24 is subnetted, 1 subnets
B        172.100.100.0 [200/0] via 123.123.123.1, 3w5d
Petes-Core-SW#

Lets test connectivity

Petes-Core-SW# ping vrf CORP:NET 5.229.0.1
Type escape sequence to abort.
Sending 5, 100-byte ICMP Echos to 5.229.0.1, timeout is 2 seconds:
!!!!!
Success rate is 100 percent (5/5), round-trip min/avg/max = 1/1/4 ms
Petes-Core-SW#

[/box]

Next hop is 5.229.0.1 (which turned out to be the firewall I was looking for).

To Ping Over a VFF

[box]ping vrf <VRF-NAME> <IP ADDRESS>

e.g.

ping vrf CORP:NET 192.168.1.100[/box]

To SSH Into Another IOS Device Over a VRF

[box]ssh -l <USER-NAME> -vrf <VRF_NAME> <IP-ADDRESS>

e.g.

ssh -l fredbloggs -vrf CORP:NET 192.168.1.123[/box]

Related Articles, References, Credits, or External Links

NA

Cisco ISE NFR Appliance Setup

KB ID 0001066

Problem

The Cisco ISE NFR appliance is for demos and test bench use, I’m currently building a test lab for ISE so I spun a copy up. I looked at the associated ReadMe.pdf for instructions on the basic setup, and found a hyper-link to the instructions, that didn’t work! bah.

Solution

The appliance comes as an OVA file for importation into vSphere/ESX, I’m assuming you have already imported the appliance.

VMware vSphere – How to Import and Export OVF and OVA Files

1. Default username and Password: Username admin Password ISEc0ld

Cisco ISE NFR Setup Basic IP Addressing.

2. By default the appliance has an IP address of 10.1.100.21, you can see that at CLI.

[box]ise/admin# show interface[/box]

3. Or here you can see the IP address in the vSphere console.

4. To change the IP (Note: The ISE appliance has two virtual NIC’s I’m just changing the default ones IP address).

[box]
ise/admin# configure
ise/admin(config)# interface GigabitEthernet 0
ise/admin(config-GigabitEthernet)# ip address 192.168.200.12 255.255.255.0

Enter ‘Y’ to restart the services.

[/box]

[box] ise/admin(config-GigabitEthernet)# exit
ise/admin(config)#
ip default-gateway 192.168.200.1[/box]

Cisco ISE NFR Set Hostname and DNS Information

6. To change the appliances default domain;

[box]
ise/admin(config)# ip domain-name pnltest1.com

Enter ‘Y’ to restart the services.

[/box]

7. To set the DNS server to use for local lookups;

[box]ise/admin(config)# ip name-server 192.168.200.10

Enter ‘yes’ to restart the services.

[/box]

8. To set the Hostname, simply use the following syntax;

[box]ise/admin(config)# hostname ISE-01 [/box]

Cisco ISE NFR Set NTP Information

9. To set the timezone;

[box]ise/admin(config)# clock timezone GB [/box]

10. To set the NTP servers it’s a little more convoluted, you can have up to three, two are already configured. If you try and delete the pre-configured ones it will error. So you need to add one, then delete the two factory ones, then you can add up to another two.

[box]

To Add an NTP Server

ise/admin(config)# ntp server 123.123.123.123
To Remove an NTP Server

ise/admin(config)# no ntp server 123.123.123.123

[/box]

11. As usual NTP can take a while to synchronise, I’d go and have a coffee at this point, to test;

[box]ise/admin(config)# show ntp [/box]

12. Save your changes.

13. At this point you should be able to get to the web console.

14. Logged in successfully.


Related Articles, References, Credits, or External Links

NA