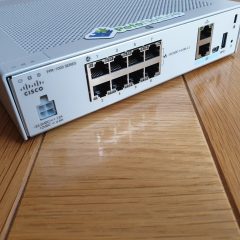
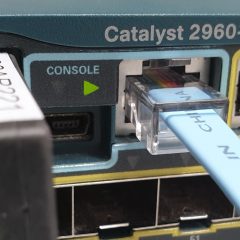
This page will be used as a central repository and ‘index’ for configuration on the Cisco Firepower 1010 series firewall. I intend to add to it as I test the capabilities and work out any problems whilst trialing/deploying and operating this platform.
This procedure was done on Cisco ASA (post) version 8.4, so it uses all the newer NAT commands. I’m also going to use self signed certificates so you will see this error when you attempt to connect.
Solution
1. The first job is to go get the AnyConnect client package(s), download them from Cisco, (with a current support agreement). Then copy them into the firewall via TFTP. If you are unsure how to do that see the following article.
2. Create a ‘pool’ of IP addresses that the ASA will allocate to the remote clients, also create a network object that covers that pool of addresses we will use later.
[box]
Petes-ASA(config)# ip local pool ANYCONNECT-POOL 192.168.100.1-192.168.100.254 mask 255.255.255.0
Petes-ASA(config)# object network OBJ-ANYCONNECT-SUBNET
Petes-ASA(config-network-object)# subnet 192.168.100.0 255.255.255.0
[/box]
3. Enable webvpn, set the package to the one you uploaded earlier, then turn on AnyConnect.
[box]
Petes-ASA(config)# webvpn
Petes-ASA(config-webvpn)# enable outside
INFO: WebVPN and DTLS are enabled on 'outside'.
Petes-ASA(config-webvpn)# tunnel-group-list enable
Petes-ASA(config-webvpn)# anyconnect image disk0:/anyconnect-win-4.8.02042-webdeploy-k9.pkg 1
Petes-ASA(config-webvpn)# anyconnect enable
[/box]
4. I’m going to create a LOCAL username and password, I suggest you do the same, then once you have proved it’s working OK, you can. change the authentication method, (see links below). I’m also going to create an ACL that we will use for split-tunneling in a minute.
Note: This is for Cisco ASA 5500, 5500-x, and Cisco Firepower devices running ASA Code.
You want a secure IPSECVPN between two sites using IKEv2.
Note: If the device you are connecting to does not support IKEv2 (i.e. it’s not a Cisco ASA, or it’s running code older than 8.4) then you need to go to the older version of this article;
Before you start – you need to ask yourself “Do I already have any IPSEC VPN’s configured on this firewall?” Because if it’s not already been done, you need to enable ISAKMP IKEv2 on the outside interface. To ascertain whether yours is on or off, issue a “show run crypto ” command and check the results, if you do NOT see “crypto ikev2 enable outside” then you need to issue that command.
[box]
PetesASA# show run crypto
crypto ikev2 enable outside << Mines already enabled and its IKE version 2
crypto ikev2 policy 10 encryption aes-256
integrity sha256
group 19
prf sha256
lifetime seconds 86400
crypto ikev2 enable outside
[/box]
1. I’m going to create access control lists next, one to tell the ASA what is “Interesting traffic”, that’s traffic that it needs to encrypt.
So below I’m saying “Don’t NAT Traffic from the network behind the ASA (10.254.254.0) that’s going to network behind the VPN device at the other end of the tunnel (172.16.254.0).
2. Now I’m going to create a “Tunnel Group” to tell the firewall it’s a site to site VPN tunnel “l2l”, and create a shared secret that will need to be entered at the OTHER end of the site to site VPN Tunnel. I also set a keep alive value.
Note: Ensure the Tunnel Group Name is the IP address of the firewall/device that the other end of the VPN Tunnel is terminating on.
3. Now we need to create a policy that will setup how “Phase 1” of the VPN tunnel will be established. It sets the encryption type (AES-256), the hashing/integrity algorithm (SHA-256), The Diffie Hellman group exchange version, and the Level of PRF (Pseudo Random Function). Finally it sets the timeout before phase 1 needs to be re-established. It sets the timeout value to 86400 seconds (That’s 1440 Minutes – or 24 hours if your still confused 🙂 ).
5. Finally we need to create a “Cryptomap”, this is the ‘thing’ that fires up the tunnel, when the ACL INTERESTING TRAFFIC is used, it also defines the transform set for “Phase 2” of the VPN Tunnel, that will also use 3DES and SHA and PFS. And last of all we apply that Cryptomap to the outside interface.
5. Don’t forget to save your hard work with a “write mem” command.
[box]
PetesASA(config)#
PetesASA(config)# write mem
Building configuration...
Cryptochecksum: 5c8dfc45 ee6496db 8731d2d5 fa945425
8695 bytes copied in 3.670 secs (2898 bytes/sec)
[OK]
PetesASA(config)#
[/box]
6. Simply configure the other end as a “Mirror Image” of this one.
ASA 5500 Site to Site IKEv2 VPN Copy and Paste Config
Note: This uses AES-256 and SHA-256. It also assumes your outside interface is called ‘outside’. Check! I’ve seen them called Outside (capital O), wan, and WAN.
This covers the, (more modern) Route based VPN to a Cisco ASA that’s using a VTI (Virtual Tunnel Interface).
Virtual Network Gateway Options
With VPN’s into Azure you connect to a Virtual Network Gateway, of which there are TWO types Policy Based, and Route Based. This article will deal with Route Based, for the older Policy Based option, see the following link;
These were typically used with routers, because routers used Virtual Tunnel Interfaces to terminate VPN tunnels, that way traffic can be routed down various different tunnels based on a destination, (which can be looked up in a routing table). Cisco ASA now supports Virtual Tunnels Interfaces (After version 9.7(1)).
Advantages
Can be used for VPNs to multiple sites.
Disadvantages
Requires Cisco ASA OS 9.7(1) So no ASA 5505, 5510, 5520, 5550, 5585 firewalls can use this.
Policy Based
These came first, essentially they work like this, “If traffic is destined for remote network (x) then send the traffic ‘encrypted’ to local security gateway (y).” Note: Where Local Security Gateway is a firewall at YOUR site, NOT in Azure! This is the way traditionally VPNs have been done in Cisco ASA, in Cisco Firewall speak it’s the same as “If traffic matches the interesting traffic ACL, then send the traffic ‘encrypted’ to the IP address specified in the crypto map”.
Advantages:
Can be used on older Cisco Firewalls (ASA 5505, 5510, 5520, 5550, 5585).
Can be used on newer Cisco Firewalls (ASA 5506-x, 5508-X, 5512-x, 5515-x, 5516-x, 5525-X, 5545-X, 5555-x, 5585-X)
Can be used with Cisco ASA OS (pre 8.4) IKEv1 only.
Disadvantages
Can only be used for ONE connection from your Azure Subnet to your local subnet. Note: You could ‘hairpin’ multiple sites over this one tunnel, but that’s not ideal.
Configure Azure for ‘Route Based’ IPSec Site to Site VPN
You may already have Resource Groups and Virtual Networks setup, if so you can skip the first few steps.
Sign int0 Azure > All Services > Resource Groups > Create Resource Group > Give your Resource Group a name, and select a location > Create.
OK, if you’re used to networking this can be a little confusing, we are going to create a virtual network, and in it we are going to put a virtual subnet, (yes I know this is odd, bear with me!) It’s the ‘Subnet Name‘and ‘address range‘ that things will actually connect to, (10.0.0.0/24).
All Services > Virtual Networks > Create Virtual Network > Give the Virtual Network a name, a subnet, select your resource group > Then create a Subnet, give it a name and a subnet > Create.
To further confuse all the network engineers, we now need to add another subnet, this one will be used by the ‘gateway’. If you are a ‘networking type’ it’s part of the virtual network, but is more specific than the subnet you already created.
With your virtual network selected >Subnets > +Gateway Subnet.
You can’t change the name, (you could before, then it wouldn’t work, which was strange, but I suppose it’s fixed now) > put in another network that’s part of the Virtual-Network, but does not overlap with the subnet you created in the previous step > OK.
All Services > Virtual Network Gateways > Create Virtual Network Gateway > Name it > Route Based > Create New Public IP > Give it a Name > Create.
Note: This will take a while, go and put the kettle on! Make sure all running tasks and deployments are complete before continuing.
You can do the next two steps together, but I prefer to do then separately, or it will error if the first one does not complete!
Now you need to create a Local Security Gateway. (To represent your Cisco ASA). All Services > Local Security Gateway > Create Local Security Gateway > Name it > Supply the public IP > Supply the Subnet(s) ‘behind’ the ASA > Select your Resource Group > Create.
Finally create the VPN > Select your Virtual Network Gateway > Connections > Add.
Give the tunnel a name > Site-to-Site IPSec > Select your Local Network Gateway (ASA) > Create a pre-shared-key (you will need this for the ASA config!) > Select your Resource Group > OK.
Configure the Cisco ASA for ‘Policy Based’ Azure VPN
I’m using 9.9(2)36, VTIs are supported on 9.7, but as with all new things, I’d assume that was buggy and go for 9.8 or above.
To Avoid Emails:
What IP do I put on my Tunnel interface / Where do I get that from? Use whatever you want, NO it does not have to be on the same network as something in Azure, in fact I’m using an APIPA 169.254.x.x. address, and it works fine, (think of it like a local loopback address, though do note the difference to the last octet in the route statement!)
Where’s the Crypto Map? It doesn’t need one.
Do I need to do NAT Exemption? NO (Unless you were hair pinning a traditional VPN from another ASA into this tunnel, or an AnyConnect client VPN session.)
There’s No ACL to Allow the Traffic, or an Interesting Traffic ACL? That’s correct, you don’t need any, (unless you apply an access-list to the the tunnel interface).
There are a couple of extra commands you will need, these are sysops commands. Their purpose is to set things globally, and are generally hidden from the config, (i.e ‘show run’ wont show them). These are recommendations from Azure. The first one drops the maximum segment size to 1350.The second command keeps the TCP session information even if the VPN tunnel drops.
The last thing to do, is tell the firewall to ‘route’ the traffic for Azure though the VTI. Note: The last octet in the destination IP is different from the VTI IP!
To test we usually use ‘ping’, the problem with that is, if you are using Windows Servers they will have their Windows firewall on by default, which blocks pings, (bear this in mind when testing). Also your ASA needs to be setup to allow pings, (try pinging 8.8.8.8 that usually responds), if yours doesn’t then configure your ASA to allow ping traffic.
As mentioned above, you might want to turn the firewalls off to test.
On the ASA the first thing to make sure is that the Tunnel Interface is up!
[box]
Petes-ASA# show interface tunnel 1
Interface Tunnel1 "AZURE-VTI01", is up, line protocol is up
Hardware is Virtual Tunnel MAC address N/A, MTU 1500
IP address 169.254.225.1, subnet mask 255.255.255.252
Tunnel Interface Information:
Source interface: outside IP address: 126.63.123.43
Destination IP address: 40.115.49.202
Mode: ipsec ipv4 IPsec profile: AZURE-PROFILE
[/box]
You can also use the following;
[box]
Petes-ASA# show crypto ikev2 sa
IKEv2 SAs:
Session-id:2, Status:UP-ACTIVE, IKE count:1, CHILD count:1
Tunnel-id Local Remote Status Role
268975001 123.123.12.1/500 40.115.49.202/500 READY INITIATOR
Encr: AES-CBC, keysize: 256, Hash: SHA96, DH Grp:2, Auth sign: PSK, Auth verify: PSK
Life/Active Time: 28800/814 sec
Child sa: local selector 0.0.0.0/0 - 255.255.255.255/65535
remote selector 0.0.0.0/0 - 255.255.255.255/65535
ESP spi in/out: 0x7b10e41a/0xfcb4576a
[/box]
Thats Phase 1 connected, you will also need to check Phase 2
[box]
Petes-ASA(config)# show crypto ipsec sa
interface: AZURE-VTI01
Crypto map tag: __vti-crypto-map-11-0-1, seq num: 65280, local addr: 82.21.58.194
local ident (addr/mask/prot/port): (0.0.0.0/0.0.0.0/0/0)
remote ident (addr/mask/prot/port): (0.0.0.0/0.0.0.0/0/0)
current_peer: 40.115.49.202
#pkts encaps: 32, #pkts encrypt: 32, #pkts digest: 32
#pkts decaps: 33, #pkts decrypt: 33, #pkts verify: 33
#pkts compressed: 0, #pkts decompressed: 0
#pkts not compressed: 32, #pkts comp failed: 0, #pkts decomp failed: 0
#pre-frag successes: 0, #pre-frag failures: 0, #fragments created: 0
#PMTUs sent: 0, #PMTUs rcvd: 0, #decapsulated frgs needing reassembly: 0
#TFC rcvd: 0, #TFC sent: 0
#Valid ICMP Errors rcvd: 0, #Invalid ICMP Errors rcvd: 0
#send errors: 0, #recv errors: 0
local crypto endpt.: 123.123.123/500, remote crypto endpt.: 40.115.49.202/500
path mtu 1500, ipsec overhead 74(44), media mtu 1500
PMTU time remaining (sec): 0, DF policy: copy-df
ICMP error validation: disabled, TFC packets: disabled
current outbound spi: DA3A1C28
current inbound spi : B562D9C6
inbound esp sas:
spi: 0xB562D9C6 (3043154374)
SA State: active
transform: esp-aes-256 esp-sha-hmac no compression
in use settings ={L2L, Tunnel, IKEv2, VTI, }
slot: 0, conn_id: 11, crypto-map: __vti-crypto-map-11-0-1
sa timing: remaining key lifetime (kB/sec): (3962877/28755)
IV size: 16 bytes
replay detection support: Y
Anti replay bitmap:
0x000003FF 0xFFFFFFFF
outbound esp sas:
spi: 0xDA3A1C28 (3661241384)
SA State: active
transform: esp-aes-256 esp-sha-hmac no compression
in use settings ={L2L, Tunnel, IKEv2, VTI, }
slot: 0, conn_id: 11, crypto-map: __vti-crypto-map-11-0-1
sa timing: remaining key lifetime (kB/sec): (4193277/28755)
IV size: 16 bytes
replay detection support: Y
Anti replay bitmap:
0x00000000 0x00000001
Petes-ASA(config)#
[/box]
Related Articles, References, Credits, or External Links
The Internet is full of sites that have something like the tool below, tap your ‘encrypted’ password in and it will reveal the Cisco password.
As you can see I’ve specifically written ‘obfuscated’ above, because the password isn’t actually encrypted at all. All that happens is the Vigenere algorithm is used to obfuscate the password. While tools like the one above are all well and good, your Cisco router will do exactly the same for you, to demonstrate, paste the following into the tool above.
107D1C09560521580F16693F14082026351C1512
Hopefully you will get the password Sup3rS3cr#tP@ssword.
Your router can also convert that to clear text for you;
[box]
Petes-Router#
Petes-Router#configure terminal
Enter configuration commands, one per line. End with CNTL/Z.
Petes-Router(config)#key chain decrypt
Petes-Router(config-keychain)#key 0
Petes-Router(config-keychain-key)#key-string 7 107D1C09560521580F16693F14082026351C1512
Petes-Router(config-keychain-key)#exit
Petes-Router(config-keychain)#exit
Petes-Router(config)#exit
Petes-Router#
*Mar 1 00:04:48.691: %SYS-5-CONFIG_I: Configured from console by console
Petes-Router#show key chain decrypt
Key-chain decrypt:
key 0 -- text "Sup3rS3cr#tP@ssword"
accept lifetime (always valid) - (always valid) [valid now]
send lifetime (always valid) - (always valid) [valid now]
Petes-Router#configure terminal
Enter configuration commands, one per line. End with CNTL/Z.
Petes-Router(config)#no key chain decrypt
[/box]
So whats the point of these type 7 passwords? Well the only real benefit of them is if someone is looking over your shoulder while you are looking at the config, they can’t see actual passwords in the config.
The passwords in my config are in clear text? That’s because there are three levels of password storage 0 (not encrypted), 7 (weakly encrypted), and (5 strongly encrypted). If you want to convert your config to display them as 7 you need to enter the service password-encryption command;
[box]
Petes-Router#configure terminal
Enter configuration commands, one per line. End with CNTL/Z.
Petes-Router(config)#service password-encryption
Petes-Router(config)#
Before
username pete password 0 Password123
After
username pete password 7 142713181F13253920796166
[/box]
If Type 7 passwords are so weak, how do I use Type 5 passwords? When creating accounts use the secret command like so;
[box]
Petes-Router#configure terminal
Enter configuration commands, one per line. End with CNTL/Z.
Petes-Router(config)#username petelong secret Password123
Petes-Router(config)#
Decrypting a Type 5 Cisco password is an entirely different ball game, they are considered ‘secure’ because they are ‘salted’ (have some random text added to the password to create an MD5 hash) however that random salt is shown in the config.
Well armed with the salt and the hash, we can use exactly the same method that Cisco use to create the encrypted password, by brute force attacking the password, this might sound like a difficult piece of hacking ninja skill, but we simply use openssl on a Linux box (here I’m using CentOS 6.5), all you need is a wordlist.txt file (search the Internet).
Feed openssl the salt, and a piece of the hash (see the example above), and it will run through, (grep) the wordlist until it finds a match, where it spits out the decrypted password an the original hash like so;
Note: The limitation here is the password has to be in the wordlist.txt file,but if you are adept at searching the Internet there are some impressive wordlist files out there, just make sure you use one that has full line breaks. Also remember, the longer the wordlist, the longer it takes.
Related Articles, References, Credits, or External Links
I needed to back up a Cisco firewall, and perform an upgrade remotely, despite my best efforts to use the ASDM and update via http, I had to go ‘old school’ and bring up a TFTP server on one of my CentOS Linux servers.
Solution
1. Log onto the server and install the xinetd TFTP Server. Execute the following command and follow the on-screen prompts.
[box]Using username “root”.
Last login: Thu Aug 7 17:58:10 2014 from midd-8.cable.virginm.net
[root@Web-Test ~]# yum install tftp tftp-server xinetd[/box]
2. Now you need to edit the config file, here I’m using nano, but you could use vi as well.
# default: off
# description: The tftp server serves files using the trivial file transfer
# protocol. The tftp protocol is often used to boot diskless
# workstations, download configuration files to network-aware printers,
# and to start the installation process for some operating systems.
service tftp
{
socket_type = dgram
protocol = udp
wait = yes
user = root
server = /usr/sbin/in.tftpd
server_args = -s /var/lib/tftpboot
disable = yes
per_source = 11
cps = 100 2
flags = IPv4
}
[/box]
4. Edit the file and save it, so it looks like this;
[box]
# default: off
# description: The tftp server serves files using the trivial file transfer
# protocol. The tftp protocol is often used to boot diskless
# workstations, download configuration files to network-aware printers,
# and to start the installation process for some operating systems.
service tftp
{
socket_type = dgram
protocol = udp
wait = yes
user = root
server = /usr/sbin/in.tftpd
server_args = -c -s /var/lib/tftpboot
disable = no
per_source = 11
cps = 100 2
flags = IPv4
}
Note: if you run SELinux you may also need to execute the following command, ‘setsebool -P tftp_anon_write 1‘.
WARNINIG: This enables anonymous access on the TFTP root folder, if your server is public facing and not firewalled, then I would suggest you do what I do, (stop and start the service manually, and only open the firewall for TFTP when you need to use it – see below).
6. If you use iptables as a firewall, you will need to open the TFTP port (UDP Port 69).
10. I could SSH into the server and change to the /var/lib/tftpboot directory and see the file. But I’ve got WinSCP installed so I can view the backup with that.
11. Let’s see if we can copy a file off the TFTP server back to the firewall.
[box]
Petes-ASA# copy tftp flash
Address or name of remote host []? 123.123.123.123
Given the amount of ASA work I do it’s surprising that the first time I saw an ASA 5506-X was last week (I’ve been working on larger firewalls for a while). I’m probably going to have to do a few of these over the next couple of years so I’ll update this article as things surface.
Solution
Q: Can I just copy the config from an ASA 5505 to an ASA 5506-X?
A: No, that would be nice, truth be told if the 5505 is running an OS newer than 8.3, about 90% of the config can be copy/pasted if you know what you are doing.
The ASA 5506 Interfaces are different.
Unlike its predecessor (and just about all other Cisco equipment), the interfaces start at number 1 (the 5505 starts at 0).
The 5506 Interfaces are the opposite way round (left to right).
The 5506 has IP addresses applied to its physical interfaces. Where as the 5505 had IP addresses applied to VLANs and then the physical interfaces were added to the appropriate VLAN. Note: the 5506 still supports VLANs, (5 or 30 with a security plus license).*
*UPDATE: After version 9.7 This has changed (on the 5506-X) See the following article for an explanation;
So let’s say your 5505 has three interfaces called inside, outside, and DMZ, (yours might have different names, and you may only have two,) the relevant parts of the 5505 config would be;
VLAN Note: You might be wondering why no ports have been put into VLAN 1? By default all ports are in VLAN 1, So above, ports 0/1 and 0/3 to 0/7 are all in VLAN 1.
Outside IP Note: Yours may say ‘dhcp setroute’ if it does not have a static IP , that’s fine.
To convert that (Assuming you are NOT going to use the BVI interface, (see link above!);
If you use AnyConnect then prepare for a little hand wringing. The 5505 could support up to 25 SSLVPN connections. On a 5506 they are actually called AnyConnect now, and it supports up to 50.
There is no Essentials license for a 5506-X! Don’t bother looking, you need to get your head into AnyConnect 4 licensing, I’ve already written about that at length.
Q: Does this mean I can’t use my AnyConnect 3 (or earlier) packages in the new 5506?
A: Yes you can, but you will only get two connections, unless you purchase additional Apex/Plus licensing.
I’m working on the assumption that we are going to load in the AnyConnect 4 packages and use those. With that in mind if anyone manages to get them added to their Cisco profile without the ‘Additional Entitlement Required’ then contact me, and let me know how, (link at bottom). I have to ring Cisco and use my employers partner status to get the client software 🙁
In addition to getting new AnyConnect Packages and loading them into the new 5506. If you have an anyconnect XML profile, that will also need copying into the new firewalls flash drive before you can paste the AnyConnect settings in.
Below you can see I’ve got a profile on my 5505.
Tools > File Transfer > File Transfer > Between Local PC and Flash. (Do the reverse to get the file(s) into the new 5506).
Note: You can also do this from CLI by copying the file to a TFTP server.
Below is a typical AnyConnect config from an ASA 5505, I’ve highlighted the lines that will cause you problems.
[box]
ip local pool ANYCONNECT-POOL 192.168.100.1-192.168.100.254 mask 255.255.255.0
object network OBJ-ANYCONNECT-SUBNET
subnet 192.168.100.0 255.255.255.0
!
webvpn
enable outside
anyconnect-essentials<-REMOVE THIS IT'S OBSOLETEanyconnect-win-3.1.05152-k9.pkg 1 <-REPLACE WITH ANYCONNECT 4anyconnect image disk0:/anyconnect-macosx-i386-3.1.04063-k9.pkg 2<-REPLACE WITH ANYCONNECT 4 anyconnect profiles SSL-VPN-POLICY disk0:/PeteNetLive-Profile.xml<-COPY OVER FIRST
anyconnect enable
tunnel-group-list enable
!
access-list SPLIT-TUNNEL standard permit 10.0.0.0 255.255.255.0
!
group-policy GroupPolicy_ANYCONNECT-PROFILE internal
group-policy GroupPolicy_ANYCONNECT-PROFILE attributes
vpn-tunnel-protocol ssl-client
dns-server value 10.0.0.10 10.0.0.11
wins-server none
split-tunnel-policy tunnelspecified
split-tunnel-network-list value SPLIT-TUNNEL
default-domain value petenetlive.com
split-tunnel-all-dns enable
webvpn
anyconnect profiles value SSL-VPN-POLICY type user
!
tunnel-group ANYCONNECT-PROFILE type remote-access
tunnel-group ANYCONNECT-PROFILE general-attributes
default-group-policy GroupPolicy_ANYCONNECT-PROFILE
address-pool ANYCONNECT-POOL
tunnel-group ANYCONNECT-PROFILE webvpn-attributes
group-alias ANYCONNECT-PROFILE enable
!
nat (inside,outside) 2 source static any any destination static OBJ-ANYCONNECT-SUBNET
OBJ-ANYCONNECT-SUBNET no-proxy-arp route-lookup
!
[/box]
ASA Transferring Certificates From One ASA to Another
I appreciate a lot of you wont be using certificates, and even if you use AnyConnect you just put up with the certificate error. That’s fine, but do me a favor? Before you do anything else go and generate the RSA keys on your new 5506 before you do anything else, (people forgetting to do this has cause me a LOT of grief over the years). So set the host name, domain-name, and then generate the keys like so;
[box]
ciscoasa# configure terminal
Petes-ASA(config)# hostname Petes-ASA
Petes-ASA(config)# domain-name petenetlive.com
Petes-ASA(config)# crypto key generate rsa modulus 2048
INFO: The name for the keys will be: <Default-RSA-Key>
Keypair generation process begin. Please wait...
Petes-ASA(config)#
[/box]
OK, so if you are still reading this section, then you have at least one certificate, that you need to move to the new firewall. For each scenario here’s what I recommend you do;
Self Signed Certificate from your own PKI / CA Server : Just generate a new cert for the new firewall and import it the same as you did on the old firewall
Externally / Publicly signed certificate that you have paid for: This we will need to export then import onto the new 5506. (Note: If there’s not much time left to run on the validity, it may be easier to get onto the certificate vendor and have a new one reissued to save you having to replace it in a couple of months – just a thought).
If you have purchased a certificate you will have already gone though the process below;
The easiest option for you is to go where you purchased the cert, download it again, and import it into the new firewall. But here’s where you find out you forgot the username and password you used, or the guy who sorted this out has left the company etc. If that is the case all is not lost. You can export an identity certificate, either from the ADSM;
Cisco ASA Export Certificates From ASDM
Configuration > Device Management > Certificate Management > Identity Certificates > Select the certificate > Export > Choose a location and a ‘pass-phrase’.
Cisco ASA Export Certificates From Command Line.
To do the same at CLI the procedure is as follows;
[box]
Get Your Trustpoint(s) Names
Petes-ASA# show crypto ca trustpoints
Trustpoint ASDM_TrustPoint0:
Not authenticated.
Trustpoint PNL-Trustpoint-1:
Subject Name:
cn=PNL-DC-PROD-CA
dc=petenetlive
dc=com
Serial Number: 5ec427e4910fa2bf47e1269e7fdd7081
Certificate configured.
Then Export the Certificate(s) for that Trustpoint
Petes-ASA# configure terminal
Petes-ASA(config)# crypto ca export PNL-Trustpoint-1 pkcs12 Password123
Exported pkcs12 follows:
-----BEGIN PKCS12-----
MIISXwIBAzCCEhkGCSqGSIb3DQEHAaCCEgoEghIGMIISAjCCEf4GCSqGSIb3DQEH
BqCCEe8wghHrAgEAMIIR5AYJKoZIhvcNAQcBMBsGCiqGSIb3DQEMAQMwDQQId/f5
{{{{{{{LOTS OF OUTPUT REMOVED FOR THE SAKE OF BREVITY}}}}}}}}}}}
mLt/6QKDVig6ofxrnvP0tbh9Jmjwe4NkTsJUb+H+7JGvJoUsMD0wITAJBgUrDgMC
GgUABBRCPROoZsdSBfIpwVmvfSSoOxzNCAQUWJ/J9hTkuNd92u4Z3owgrrO3cYIC
AgQA
-----END PKCS12-----
Petes-ASA(config)#
[/box]
Cisco ASA Import Certificates From ASDM
Configuration > Device Management > Certificate Management > Identity Certificates > Add > Use the same Trustpoint name as the source firewall > Browse the file you exported earlier > Enter the passphrase > Add Certificate.
Cisco ASA Import Certificates From Command Line.
To do the same at CLI the procedure is as follows, Note: You need to paste in the text from the output.
[box]
Petes-ASA# configure terminal
Petes-ASA(config)# crypto ca import PNL-Trustpoint-1 pkcs12 Password123
Enter the base 64 encoded pkcs12.
End with the word "quit" on a line by itself:
-----BEGIN PKCS12-----
MIISXwIBAzCCEhkGCSqGSIb3DQEHAaCCEgoEghIGMIISAjCCEf4GCSqGSIb3DQEH
BqCCEe8wghHrAgEAMIIR5AYJKoZIhvcNAQcBMBsGCiqGSIb3DQEMAQMwDQQId/f5
{{{{{{{LOTS OF OUTPUT REMOVED FOR THE SAKE OF BREVITY}}}}}}}}}}}
mLt/6QKDVig6ofxrnvP0tbh9Jmjwe4NkTsJUb+H+7JGvJoUsMD0wITAJBgUrDgMC
GgUABBRCPROoZsdSBfIpwVmvfSSoOxzNCAQUWJ/J9hTkuNd92u4Z3owgrrO3cYIC
AgQA
-----END PKCS12-----
quit
INFO: Import PKCS12 operation completed successfully
Petes-ASA(config)#
[/box]
Assorted Firewall Migration ‘Gotchas’
Time (Clock Setting)
If you do any AAA via Kerberos or LDAP, then not having the time correct on the new ASA might get you locked out of it. I would always suggest setting up NTP so do that before you restart.
Not on the ASA, but on the devices the ASA is connecting to, (routers and switches etc). Unplug an ASA 5505 and plug in an ASA 5506, and nine times out of ten you will not get comms. This is because the device you are connecting to has cached the MAC address of the old firewall in its ARP cache. So either reboot the device, (or it thats not practical, lower the ARP cache to about 30 seconds).
ASA 5505 to 5506 Config To Copy And Paste
Below I’ll put a full config for an ASA 5505. If the text is normal,the commands can be copy and pasted directly into the new firewall. If the text is RED, then you can NOT, and I will have outlined the problems above.