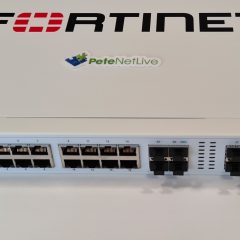
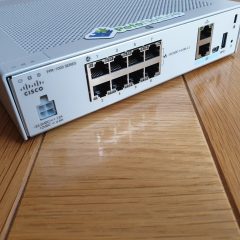
Replacing Cisco Firewalls with Fortinet Firewalls

KB ID 0001741

Replacing Cisco

If you’ve been following articles on the site you will know that the focus of the firewall related output is shifting from Cisco ASA / Cisco FirePOWER to Fortinet (FortiGate) firewalls.

This article is so you can make an informed choice about what you want to replace your Cisco firewall with.

Note: I’m starting with SOHO and Small Business sized firewalls, but I will extend this to ‘Enterprise sized’ firewalls as I have the time.

Replacing Cisco SOHO Small Business Firewalls with FortiGate

If ever there was something that was incorrectly sold it was likely a SOHO Cisco firewall. The problem was, back in the day of the ASA5505 the only alternative was a ASA5510 and that was four times the price, plus the 5505 had a built in switch which saved you having to buy one of those as well. Even now (in 2021) these things are ubiquitous, I see them balanced in wall mounted comms cabinets, and sat in data centres and popped under peoples desks.

To make matters worse it’s replacement the ASA5506-X was a decent firewall but it wasn’t also a switch! (Cisco half heartedly tried to fix this and made it worse). To add insult to injury if you paid for the NGFW Firepower option Cisco just disabled it without warning in version 9.10.(1)

Then we got the FPR1010 this comes in two flavours, the ASA Code version which I deploy, and the FDM version which is bobbins! (I get 10 questions a day on the site to help people set them up). This (at time of writing) is a relatively new firewall but I’ll include it for completeness, (and article longevity).

High Availability: Seriously? I see this more often than I should! Don’t be deploying home sized firewalls and wanting Enterprise solutions! Stop it now. On a serous note, all the little ASA/FPR support it, but they all need additional licensing to do so. 

Stats: Remember when comparing the stats, we are comparing (mostly) old hardware against brand new (purpose built) hardware so the FortiGates will always look better on paper.

Cisco ASA5505, 5506-X and FPR1010 Specifications

Fortigate 40F, 60F, and 80F Specifications

Replacing Cisco SOHO Firewalls Conclusion

  • Unless you need 10Gb connectivity (on your WAN) then go for the 60F, if you need all those 1Gb ports and you want it to function as a switch.
  • If you don’t need so many LAN ports then go for the 40F (Note: even with 1x WAN port you can deploy SDWAN by using another interface!)

Replacing Cisco Medium Business / Small enterprise Firewalls with FortiGate

This is a difficult one to call, you can’t really say FortiGate model X is a direct comparison for Cisco model Y. To size a FortiGate firewall you need to 

First: Decide what throughput you need (remember to factor in NGFW/IDS/ATP and possibly HTTPS Throughput this will be LOWER than the max throughput!)

Second: Decide what connectivity you want.

FortiGate throughput for these classes of firewalls falls into roughly three different categories;

  1. 10Gbps Throughput (1Gbps HTTPS Inspection throughput) to 27Gbps Throughput (4Gbps HTTPS throughput) = 100 and 200 Series.
  2. 32Gbps Throughput (3.9Gbps HTTPS Inspection throughput) to 36Gbps Throughput (5.7Gbps HTTPS throughput) = 300, 400 and 500 Series.
  3. 36Gbps Throughput (8Gbps HTTPS Inspection throughput) to 52Gbps Throughput (3.9Gbps HTTPS throughput) = 600, 800 and 900 Series.

Note: If the figures dont overlap neatly, thats because these are a mixture of D, E and F Releases.

Cisco ASA5500 and 5500-X  Specifications

Cisco Firepower 1100 to 2100 Series Specifications

Fortigate 100 to 900 Series Specifications

Replacing Cisco Bonuses

  • Remote VPN: You don’t need to buy additional remote VPN (AnyConnect) licences any more. With FortiGate remote SSL VPN is built in, and the client numbers are impressive.
  • Failover: Is supported even for Active / Active and good old Active / Passive. and Clustering.
  • SDWAN: You now have this capability if you require it.
  • Redundant Power Supply: Is on all FortiGate models in this class.

If anyone wants to add any real world experiences or comments, please do so below.

Related Articles, References, Credits, or External Links

NA

Cisco ASA to Fortigate VPN (Properly!)

KB ID 0001721

Problem

A while ago I did a run through on site to site VPNs from Cisco ASA to Fortigate firewalls. Back then I said that the default settings were a bit ‘shoddy‘ and that I’d revisit it once I had more time.

What do you mean shoddy? Well, Cisco and Fortinet are both guilty of enabling ‘Everything’ to make the tunnel come up, so people can just use a wizard and not put to much thought into the process, for most people thats absolutely fine. However I’ve found ‘Many Times‘ I’ve been trying to put a VPN into third party and it’s like a game of ‘Encryption Bingo‘ e.g. ‘Can you change it from AES128 to AES256 and change the hash to SHA512‘, or ‘Do you not support elliptical curve’. Who are these people? Do they expect Tom Cruise  to come rappelling out of a skylight to steal the details of their 2016 Christmas golf event!

I digress, so here’s how to set up a site to site VPN using IKEv2 with some weapons grade encryption. Here’s a pretty picture of what it will look like;

And here’s what my test bench topology looks like in EVE-NG.

Configuring the Fortigate for Site to Site VPN

After saying don’t use the wizard, I’m going to use the wizard to do the Fortigate end, then I’ll edit the tunnel it creates and make it a bit more ‘fit for purpose’.

From the web management portal > VPN > IPSec Wizard  > Give the tunnel a name > Change the remote device type to Cisco > Next.

Give it the ‘public’ IP of the Cisco ASA > Set the port to the ‘outside’ port on the Fortigate > Enter a pre-shared key, (text string, you will need to enter this on the Cisco ASA as well, so paste it into Notepad or something for later) > Next.

Local interface will be in the ‘inside’ interface on the Fortigate > Enter the local subnet(s) > Enter the remote (behind the ASA) subnet(s) > Next.

Review the settings > Create.

Select IPSec Tunnels > Select the new tunnel  > Edit.

In the Authentication Section > Edit > Change the IKE Version to 2 > Edit the Phase 1 Proposal.

Note: If you can’t see this option, change the tunnel type to custom.

Delete all the factory ones and add one for;

Then under Phase 2 Selectors click the pencil icon to edit.

Advanced.

Remove any existing Phase 2 proposals, add a new one

Encryption: AES256GCM 

Click OK to close.

Manually Configuring the Cisco ASA For Site to Site VPN

Manual VPN via CLI

We all know real men work at command line, paste this in, boom done!

WARNING: If your ASA already has a crypto map then use the name of that map rather than CRYPTO-MAP (as below) or all your existing VPNs will break!

[box]

!
crypto ikev2 policy 5
 encryption aes-gcm-256
 integrity null
 group 21
 prf sha512
 lifetime seconds 86400
crypto ikev2 enable outside
!
object network OBJ-SITE-B
subnet 172.16.1.0 255.255.255.0
object network OBJ-SITE-A
subnet 192.168.1.0 255.255.255.0
!
access-list VPN-INTERESTING-TRAFFIC extended permit ip object OBJ-SITE-B object OBJ-SITE-A
!
nat (inside,outside) source static OBJ-SITE-B OBJ-SITE-B destination static OBJ-SITE-A OBJ-SITE-A no-proxy-arp route-lookup
!
tunnel-group 192.168.100.100 type ipsec-l2l
tunnel-group 192.168.100.100 ipsec-attributes
ikev2 remote-authentication pre-shared-key 123456
ikev2 local-authentication pre-shared-key 123456
isakmp keepalive threshold 10 retry 2
!
crypto ipsec ikev2 ipsec-proposal VPN-FORTIGATE
 protocol esp encryption aes-gcm-256
 protocol esp integrity null
!
crypto map CRYPTO-MAP 1 match address VPN-INTERESTING-TRAFFIC
crypto map CRYPTO-MAP 1 set peer 192.168.100.100
crypto map CRYPTO-MAP 1 set ikev2 ipsec-proposal VPN-FORTIGATE
crypto map CRYPTO-MAP interface outside
!

[/box]

Manual VPN via ASDM

You can do the first couple of steps together, but I like to do the Phase1 and Phase 2 proposals first, then tie it all up at the end. Configuration > Site to Site VPN > Advanced > IKE Policies > IKEv2 Policies > Add.

  • Priority: 5
  • D-H Group: 21
  • Encryption: AES-GCM-256 
  • Integrity Hash: null (GCM protocols don’t need an integrity hash)
  • Pseudo Random Function (PRF) Hash: sha512

OK > Apply

Now for Phase 2 (On a Cisco ASA that’s defined with a ‘transform  set’). IPsec  Proposals (Transform Sets)  > IKEv2 > Add.

OK > Apply

Connection Profiles > Tick IKEv2 on the OUTSIDE interface to enable it.

Connection Profile > Add

  • Peer IP: (Public address of the Fortigate)
  • Local Network: Add in the network behind the ASA.
  • Remote Network: You may need to add an object-group for the remote network (behind the Fortigate).
  • Group Policy Name: FORTIGATE_VPN
  • Local Passphrase: An alphanumeric string of characters (it’s a pre-shared key it must match the one you set on the Fortigate).
  • Remote Passphrase: Set the same at the local passphrase.

Scroll down.

Make sure your IKE  Phase 1 policy is in the list, (you may have many) > IPSec proposal > Select > locate yours and add it in > OK > OK > Apply.

The last thing to do is make sure that the traffic travelling over the VPN DOES NOT get NAT translated > Firewall > NAT Rules > Select the top one > Add  >Add Nat Rule Before.

  • Source Interface: inside
  • Destination Interface: outside
  • Source Address: any
  • Destination Address: {The group you created above for the network address behind the Fortinet}
  • Source NAT Type: Static
  • Disable Proxy ARP :  Tick
  • Lookup Route Table: Tick

OK > Apply

Don’t forget to save the changes > File > Save Running configuration to flash

Finally send some interesting traffic across the VPN to bring up the tunnel.

Related Articles, References, Credits, or External Links

NA

Cisco ASA: Received a DELETE PFKey message from IKE

KB ID 0001720

Problem

I was debugging a VPN tunnel today. (From a Fortigate to a Cisco ASAv). I was messing around with the encryption and hashing, when the tunnel fell over. Phase 1 was establishing fine but not Phase 2 (IPSEC). 

I’ve got better skills on the ASA, so that’s where I was debugging;

[box]

IPSEC: Received a PFKey message from IKE
IPSEC: Parsing PFKey GETSPI message
IPSEC: Creating IPsec SA
IPSEC: Getting the inbound SPI
IPSEC DEBUG: Inbound SA (SPI 0x00000000) state change from inactive to embryonic
IPSEC: New embryonic SA created @ 0x00007fc98613ea60,
    SCB: 0x85567700,
    Direction: inbound
    SPI      : 0x3B5A332E
    Session ID: 0x00004000
    VPIF num  : 0x00000002
    Tunnel type: l2l
    Protocol   : esp
    Lifetime   : 240 seconds
IPSEC: Received a PFKey message from IKE
IPSEC DEBUG: Received a DELETE PFKey message from IKE for an inbound SA (SPI 0x3B5A332E)
IPSEC DEBUG: Inbound SA (SPI 0x3B5A332E) destroy started, state embryonic
IPSEC: Destroy current inbound SPI: 0x3B5A332E
IPSEC DEBUG: Inbound SA (SPI 0x3B5A332E) free started, state embryonic
IPSEC DEBUG: Inbound SA (SPI 0x3B5A332E) state change from embryonic to dead
IPSEC DEBUG: Inbound SA (SPI 0x3B5A332E) free completed
IPSEC DEBUG: Inbound SA (SPI 0x3B5A332E) destroy completed

[/box]

Solution

Google that error and you get some posts about NAT, that we’re  not applicable to me. I took a look on the Fortigate and the only clue there was;

[box]

Forti-FW # diagnose vpn tunnel list
list all ipsec tunnel in vd 0
------------------------------------------------------
name=Tunnel-To-SiteB ver=2 serial=1 192.168.100.100:0->192.168.100.111:0 dst_mtu=1500
bound_if=4 lgwy=static/1 tun=intf/0 mode=auto/1 encap=none/512 options[0200]=frag-rfc  run_state=0 accept_traffic=0 overlay_id=0

proxyid_num=1 child_num=0 refcnt=14 ilast=1 olast=782 ad=/0
stat: rxp=0 txp=0 rxb=0 txb=0
dpd: mode=on-demand on=1 idle=20000ms retry=3 count=0 seqno=0
natt: mode=none draft=0 interval=0 remote_port=0
proxyid=Tunnel-To-SiteB proto=0 sa=0 ref=1 serial=2
  src: 0:192.168.1.0/255.255.255.0:0
  dst: 0:172.16.1.0/255.255.255.0:0
run_tally=1

[/box]

There’s not much I can discern from that either; 

sa=0 There is a mismatch between selectors (or no traffic is being initiated).
sa=1 IPsec SA is matching and there is traffic between the selectors.
sa=2 Only seen during IPsec SA rekey

So I went back to basics and checked the Phase 2 on BOTH, firstly the Fortigate;

For the uninitiated: GCM Protocols DON’T require a hashing algorithm, (that’s why you can’t see SHA or MD5 on there), they disappear when a GCM protocol is selected.

Then on the Cisco ASA;

[box]

Cisco-ASA(config-ipsec-proposal)# show run crypto ipsec
crypto ipsec ikev2 ipsec-proposal FORTIGATE
 protocol esp encryption aes-gmac-256
 protocol esp integrity null <--Note: This can say anything it gets ignored!

[/box]

Or if you prefer the ASDM;

THE ANSWER IS STARING YOU/ME IN THE FACE. I just didn’t realise yet, I changed the phase 2 protocols to DES/MD5 and the tunnel came up, I walked up through the protocols and options and discovered what I’d done wrong.

Root Cause: The ASA is set to use AES-GMAC-256 that’s a DIFFERENT PROTOCOL to the AES256GCM configured on the Fortigate! The ASA should be set to AES-GCM-256! (So the Phase 2 proposals didn’t match).

[box]

Cisco-ASA(config)# crypto ipsec ikev2 ipsec-proposal FORTIGATE
Cisco-ASA(config-ipsec-proposal)# protocol esp encryption aes-gcm-256
WARNING: GCM\GMAC are authenticated encryption algorithms.esp integrity config is ignored

[/box]

Or, via ASDM (from the same location as above);

Problem solved!

Related Articles, References, Credits, or External Links

NA

AnyConnect Error: Unable To Verify IP Forwarding Table Modifications

KB ID 0001646

Problem

While attempting to connect to a clients AnyConnect, this happened;

The VPN client was unable to successfully verify the IP forwarding table modifications. A VPN connection will not be established.

Or on older clients, you may see;

The VPN client was unable to modify the IP forwarding table. A VPN connection will not be established. Please restart your computer or device, then try again.

Solution

I was trying to connect from my house, I’d used this connection before from work and it was fine. I worked my way round the problem got my work finished, then re-looked at it the next time I was working from home.

The problem is actually quite simple, take a look at the IP I was using in my house.

Then take a look at the VPN Pool addresses that get allocated to the remote VPN clients (they overlap);

[box]

show run | incl pool

[/box]

Note: This assumes you are using an ‘IP Pool’, If you are using an external DHCP server at the ‘Head end’ then you will need to check/change the scope there.

AnyConnect – Using a Windows DHCP Server to Lease IP Addresses to the Remote Clients

I fixed the problem by simply changing the ‘pool’ so it didn’t overlap.

WARNING: If you have any routing going on behind your firewall (i.e you have layer 3 switches internally, routing between networks or VLANS) you may need to change them to route the ‘new’ AnyConnect subnet back to the firewall.

Update: Solution Windows 10

If you are experiencing this problem on Windows 10, and the above solution is not applicable, consider deleting the following two files;

C:\ProgramData\Cisco\Cisco AnyConnect Secure Mobility Client\routechangesv4.bin
C:\ProgramData\Cisco\Cisco AnyConnect Secure Mobility Client\routechangesv6.bin

Related Articles, References, Credits, or External Links

NA

Fortigate to Cisco ASA Site to Site VPN

KB ID 0001717

Problem

Continuing with my ‘Learn some Fortigate‘ theme’. One of the basic requirements of any edge firewall is site to site VPN. As the bulk of my knowledge is Cisco ASA it seems sensible for me to work out how to VPN both those firewalls together, like so;

Well that’s the pretty picture, I’m building this EVE-NG so here’s what my workbench topology looks like;

Disclaimer (Read First! Especially before posting any comments!)

Fortinet prides itself on you not needing to use the CLI, (until you actually need to use the CLI of course!) But both ends are configured using the GUI and ASDM. This is designed for the ‘Let’s just make it work, who cares what’s going on under the hood‘ generation. Which means it enables IKEv1 NOT IKEv2 on the Fortigate, and BOTH IKEv1 and IKEv2 gets enabled on the Cisco ASA. Couple that with all the weak Crypto sets that get enabled, because someone might have a hardware firewall from 1981 or something! So in production I’d consider doing things a little more manually. I will post another article on the same subject, but then I’ll make the tunnel as secure as I can, (watch this space). This is an exercise in getting the tunnel up and making it work.

Tech Note: If you just use both wizards it wont work, thankfully I could debug the tunnel on the Cisco ASA to work out why. Fortinet sets all the DH groups to 5, and Cisco sets them all to 2. And Fortinet enables PFS and Cisco don’t. (They do on older versions of the OS, but not on the newer ones).

Create IKE/IPSec VPN Tunnel On Fortigate

From the web management portal > VPN > IPSec Wizard  > Give the tunnel a name > Change the remote device type to Cisco > Next.

Give it the ‘public’ IP of the Cisco ASA > Set the port to the ‘outside’ port on the Fortigate > Enter a pre-shared key, (text string, you will need to enter this on the Cisco ASA as well, so paste it into Notepad or something for later) > Next.

Local interface will be in the ‘inside’ interface on the Fortigate > Enter the local subnet(s) > Enter the remote (behind the ASA) subnet(s) > Next.

Review the settings > Create.

Select IPSec Tunnels > Select the new tunnel  > Edit.

Convert to Custom Tunnel.

Phase 1 Proposal > Edit.

Add in Diffie Hellman Group 2

Phase 2 Selectors > Edit > Advanced > Untick Enable Perfect Forward Secrecy > OK.

Create IKE/IPSec VPN Tunnel On Cisco ASA (ASDM)

Connect to the ASDM > Wizards  > VPN Wizards > Site-to-Site VPN Wizard > Next.

You should already have an object for your Local Network add that in > Then add in a new Network Object for the remote (behind the Fortigate) subnet. MAKE SURE that the new object is selected as the Remote Network > Next.

Enter the Pre-Shared key you used (above)  > Next > Tick to DISABLE NAT > Next > Finish.

Tech Note: Look at all those Ciphers/Hashing/Additional Protocols that are about to be turned on! 🙁 That’s why I work at command line.

Finally you will need to send some traffic over the tunnel to ‘bring it up’.

If you have a problem, see the debugging/troubleshooting links below.

Related Articles, References, Credits, or External Links

Troubleshooting Phase 1 Cisco Site to Site (L2L) VPN Tunnels

Troubleshooting Phase 2 Cisco Site to Site (L2L) VPN Tunnels

Which Firepower To Replace Your ASA 5500-X?

KB ID 0001705

Problem

Well  the ASA5516-X was the last one to go end of sale. You may be able to get stock of the remainder of the ASA5500-X series as people clear their shelves, or they may be available as ‘refurb’ stock but they are disappearing.

So you would think that the replacements would be better documented? Well it’s sketchy at best, and when you look a the data sheets for the new FPR range the links on Cisco website go to the wrong place, or give you little or no guidance 🙁

Solution

I’ve put together the following to help, it’s not sanctioned by Cisco, (though I did engage Cisco Partner GVE to assist me. The following table shows FPR models that run ASA code, (not FTD code). I’m not a fan personally of the FTD solution, and I wont be deploying it anywhere for a client. But Standard Asa code keeps my support and network techs happy.

If you disagree with any of my recommendations, please post below, and (providing your objection is valid,) and I’ll update it accordingly.

Related Articles, References, Credits, or External Links

NA

AnyConnect: ‘Quick and Dirty’ Duo 2FA

KB ID 0001701

Problem

Normally if I were deploying Duo 2FA with AnyConnect I’d deploy a Cisco RADIUS VPN on my LAN, (usually on my Duo Authentication Proxy). See the following article;

AnyConnect: Enable Duo 2Factor Authentication

However, last time I set this up, a colleague said ‘Oh by the way, you don’t need to do that, you can just point the firewall directly at Duo‘. I was initially skeptical but I tried it, and it worked. I thought no more about it until this week when another colleague asked me to help him setup Duo for AnyConnect.

As you can see the firewall queries Duo using LDAPS, but the Duo product I’m using is called ‘Cisco RADIUS VPN’. This makes my networking OCD itch tremendously! (RADIUS and LDAPS are completely different protocols!) But it works, so here we go.

Solution

Note: For this solution you don’t even need to sync your users to Duo, (but it’s OK if you do)! As long as the users exist there.

With Duo, you need to select ‘protect an application‘ and select ‘Cisco RADIUS VPN‘. If you are unfamiliar with Duo you need to take a copy of the Integration Key, the Secret Key and the API Hostname. (Note: Don’t try using these ones, they have been changed!)

On the Firewall > Configuration > Device Management > Users/AAA > AAA Server Groups > AAA Server Groups > Add > Call it ‘DUO-EXTERNAL’ > Select LDAPS > OK.

With your DUO-EXTERNAL group selected > In the bottom window > Add.

  • Interface Name: {Your outside interface name}
  • Servername: {Your Duo API Hostname}
  • Timeout: 60 
  • Enable LDAP over SSL: Enabled
  • BaseDN: dc={Your Integration Key},dc=duosecurity,dc=com
  • Naming Attribute: cn
  • Login DN: dc={Your Integration Key},dc=duosecurity,dc=com
  • Login Password: {Your Secret Key}

OK > Apply.

TO TEST: Press Test > Select Authentication > Use the username displayed in Duo > Type push into the password box, and your phone should then prompt for 2fa authentication. (If it fails: Make sure the time is correct on the ASA, and at least do some debugging before posting below!)

Now either create a new AnyConnect profile, and use this new AAA method, or simply change the AAA method for an existing AnyConnect profile, (like below).

A word of warning, when I did this, (both in production and on my test ASA,) I got a strange error, I’ve documented that and the fix, below.

AnyConnect: Unauthorized Connection Mechanism

Related Articles, References, Credits, or External Links

NA

AnyConnect: Unauthorized Connection Mechanism

KB ID 0001699

Problem

I was assisting a colleague to setup some AnyConnect for a client this afternoon, when all of a sudden I was met with this;

VPN

Logon denied, unauthorised connection mechanism, contact your administrator

Solution

This was a confusing one, I replicated the problem on my own test firewall. All I had done was change the AAA method from LOCAL to LDAP? It took me a while to figure out what was going on?

The reason why this is happening is because the GROUP POLICY your AnyConnect PROFILE is using does not have SSL enabled. (This makes no sense as it was working with LOCAL authentication, but this is how I fixed it).

You will be either using a specific group policy or the DfltGrpPolicy

[box]

IF USING THE DEFAULT GROUP POLICY
Petes-ASA(config)# group-policy DfltGrpPolicy attributes
Petes-ASA(config-group-policy)# vpn-tunnel-protocol ssl-client ssl-clientless

IF USING A SPECIFIC GROUP POLICY (Remember to include any, that already exist! e.g. l2tp-ipsec)

Petes-ASA(config)# group-policy PNL-GP-ANYCONNECT-ACCESS attributes
Petes-ASA(config-group-policy)# vpn-tunnel-protocol ssl-client ssl-clientless l2tp-ipsec 

[/box]

Or, if you really HAVE TO use the ASDM.

Configuration > RemoteAccess VPN > Network (Client) Access > Group Policies > Select the Group Policy you are using > Edit.

General > More Options > Tick the SSL Options > OK > Apply.

Don’t forget to save your changes! Then try connecting again.

Related Articles, References, Credits, or External Links

NA

AnyConnect: Allow ‘Local’ LAN Access

KB ID 0001689

Problem

Note: This WONT WORK if you ‘force-tunnel’ or ‘tunnel-all’ remote VPN traffic, (if you are unsure Google ‘what’s my ip’ > Take note of it > Connect to AnyConnect and repeat the procedure, if your public IP address has changed to the IP address of the ASA then you force-tunnel/tunnel-all traffic).

With more people remote working now, I’m getting a lot more questions about RA-VPN and particularly AnyConnect. By default when connecting to any Cisco remote access VPN, it pretty much stops you connecting to anything outside the VPN tunnel, (unless you enable Split Tunnelling). This includes stopping you talking to assets on your remote network also.

This is basically ‘Good practice’, as a corporate entity you have authenticated a remote machine NOT the entire network it is on! But what happens when your MD want to print a work document on his/her home printer? Or you have a NAS drive at home with documents on it you can access while connected to the VPN?

Well, then you can ‘make a judgement call’ to whether or not you want to enable ‘Local LAN Access’ for your remote clients.

Full Disclosure: While this does not let everything on the remote clients LAN connect to the corporate network. If another client on a remote network was infected and compromised, and it proliferated its infection via the LAN,  (to your authenticated remote client), then that client could infect the corporate network. This is what’s known as a ‘pivot attack’.

Solution

Assuming you are happy to enable local LAN access its a TWO STEP procedure. Firstly you enable Local LAN Access on the AnyConnect Client Profile, then you enable split tunnelling and allow all networks, (because you don’t know what all the remote network addresses may be). 

Step 1: Add Local LAN Access to the AnyConnect Client Profile

If you are unfamiliar with ‘AnyConnect Client profiles’, they are simply XML files that are applied to to an AnyConnect Connection Profile, I already have one so I just need to edit it, And tick ‘Local LAN Access’.

What If you Don’t Already Have One? Not a problem. In the ASDM > Configuration > Remote Access VPN > Network (Client) Access > AnyConnect Client Profile > Add > Give it a name > Set the Group Policy to your AnyConnect Group Policy > OK > Apply > Edit.

What Does User Controllable Mean? It means your users can enable or disable it, (see below.) If you untick this then they wont have that option.

Step 2: Add 0.0.0.0/32 to Split Tunnelling

You configure split tunnelling in your AnyConnect Group-Policy (ASDM > Configuration > Remote Access VPN > Network (Client) Access > Group Policies) Locate yours and edit it, navigate to Advanced > Split Tunnelling > Policy: Untick inherit, and set to Exclude Network List Below > Network List: Untick Inherit and click Manage.

Firstly: Create an ACL and call it “ACL-Local-LAN-Access’ > OK

Secondly: Select the ACL you just created and add an ACE to it > permit 0.0.0.0/32 > OK > OK > OK > Apply > File > Save Running Configuration to Flash.

Your remote workers will need to disconnect and reconnect before it will take effect. In some cases with older clients they need to reboot, (or have the AnyConnect service stopped  and restarted.) If you experience problems make sure your clients have got the new XML file with;

<LocalLanAccess UserControllable="true">true</LocalLanAccess>

inside it, to find out where those files are stored see THIS POST.

Related Articles, References, Credits, or External Links

NA

Cisco FTD (and ASA) Creating AnyConnect Profiles

KB ID 0001685

Problem

A few days ago I did an article on Deploying Cisco AnyConnect with the Cisco FTD, there I glossed over the AnyConnect profile section. For a long time now, we have been able to edit the AnyConnect profile from within the firewall (if we are running ASA code!) But for the FTD we need to take a step backwards and go back to using the ‘offline’ AnyConnect profile editor.

Solution

Firstly you need to download the offline profile editor, you will find it on the Cisco AnyConnect Mobility Client download page;

I wont insult your intelligence, the setup is straight forward;

Launch the editor, and the screen you will see is exactly the same as you would normally see while using the profile editor in a Cisco ASA, (when launched from within the ASDM).

Note: I’m not going to go though all the settings, (this post would become immense!) Typically I allow remote (RDP) connections, and set the public FDQN for my AnyConnect profile.

Once you have finished, you can simply save the settings as an XML file.

Import an AnyConnect ‘Profile XML File’ into Cisco ASA

As mentioned above with all ‘modern’ versions of the ASDM/AnyConnect client you can create and edit an AnyConnect profile directly from within the ASDM. But (for completeness) here’s how to import one you created externally, (or exported form another firewall).

Configuration >Remote Access VPN > Network (Client) Access > AnyConnect Client Profile > Import.

Import an AnyConnect ‘Profile XML File’ into Cisco FTD

Objects > AnyConnect Client Profiles > Create AnyConnect Client Profile > Give it a name > Upload.

Browse to, and select the previously created XML file > Open.

Then save and deploy the changes (this takes ages!).

You can now select this ‘profile file’ when setting up AnyConnect, or edit any existing AnyConnect Remote Access VPN configuration, and add this profile to it.

Related Articles, References, Credits, or External Links

Cisco Firepower 1010 Configuration