
KB ID 0001510
Problem
Last time we looked at migrating from vCenter to Hyper-V, now we will use the MVMC (Microsoft Virtual Machine Converter) to take a VMware (vCenter) virtual machine and convert/upload it to Microsoft Azure.
Note: MVMC is not ‘officially’ supported and this procedure requires you to create some ‘legacy’ (for legacy in Azure read ‘classic’) ways of doing things. So this might not be the tool for you. But if you want to go down this route, this is what you need to do.
The best approach is to use Azure Site Recovery (ASR)
A better option might be to use Veeam?
Solution
To connect the MVMC to Azure you need a ‘Management Certificate’ This can be a self generated (self signed) certificate. To create it on your MVMC machine execute the following commands;
Import-Module PKI

New-SelfSignedCertificate -DnsName "MVMC" -CertStoreLocation "Cert:\CurrentUser\My"

Export-Certificate -Cert (Get-ChildItem Cert:\CurrentUser\My\ -DnsName MVMC) -FilePath $env:TEMP\MVMC.cer
Import-Certificate -FilePath $env:TEMP\MVMC.cer -CertStoreLocation Cert:\CurrentUser\Root
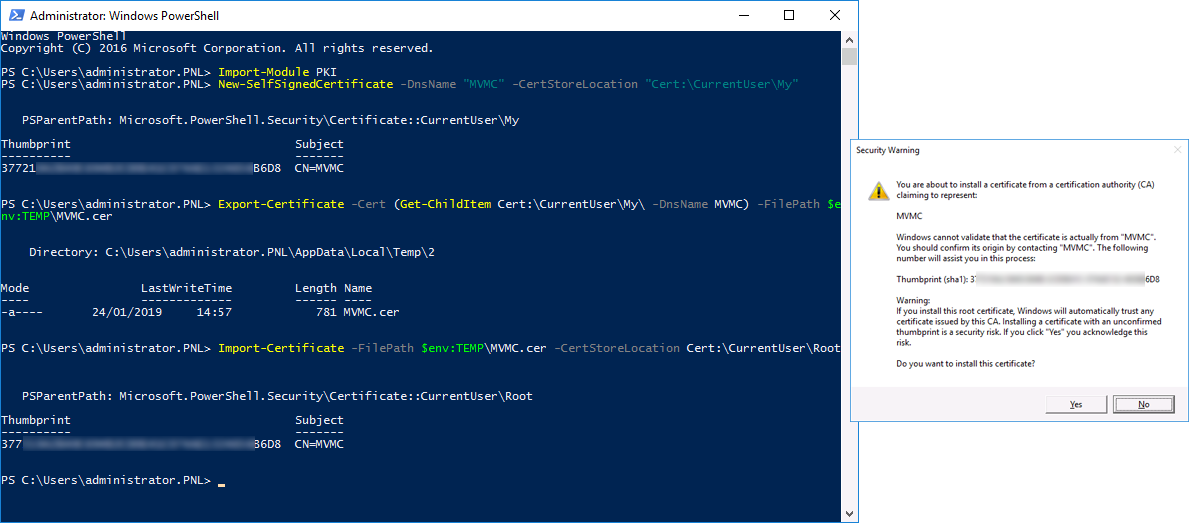
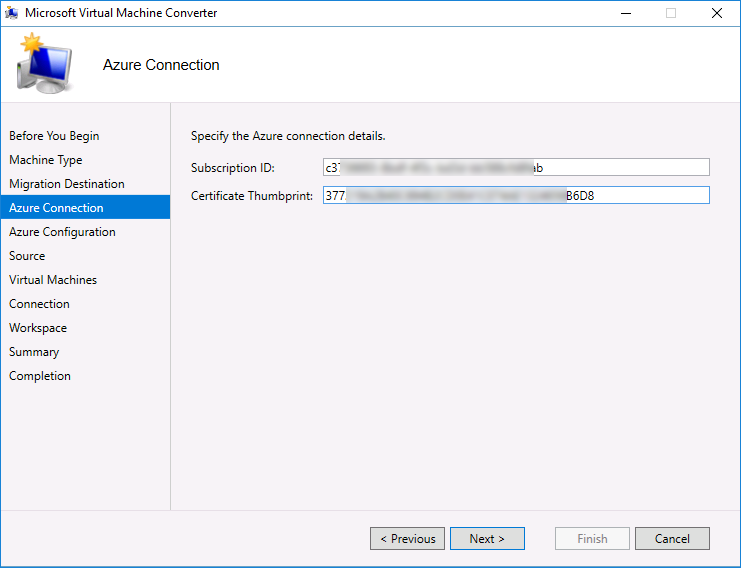
Take a note of the Thumbprint. You will need this certificate thumbprint, and your Subscription ID. Once you have uploaded the certificate you’ve just created, to connect with MVMC. So now you need to connect to you Azure subscription.
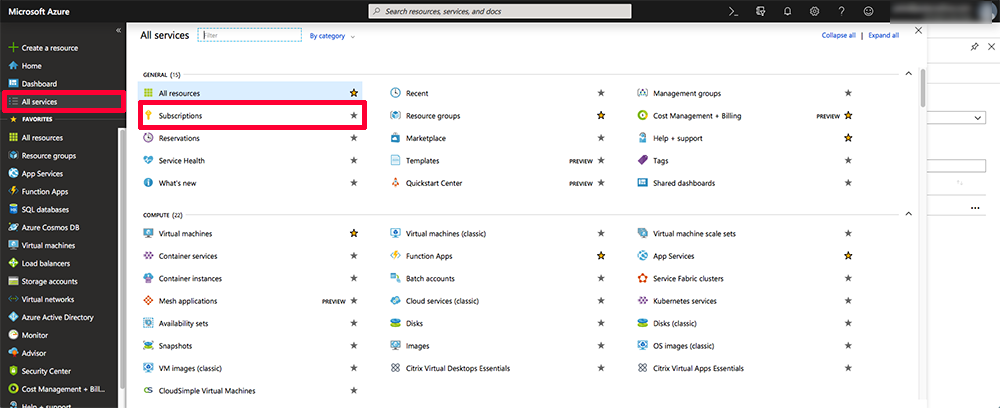
All Services > Subscriptions.
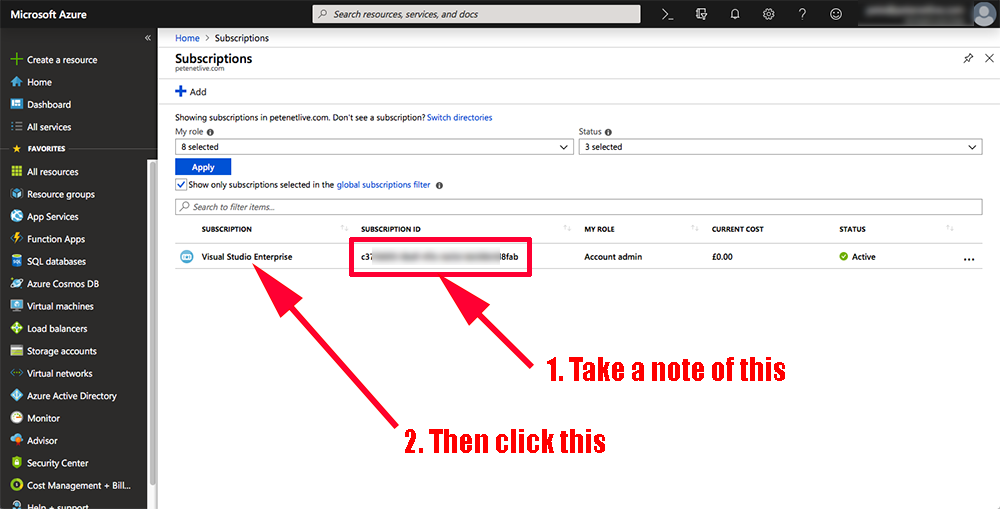
Take a note of your subscription ID, then click the subscription.
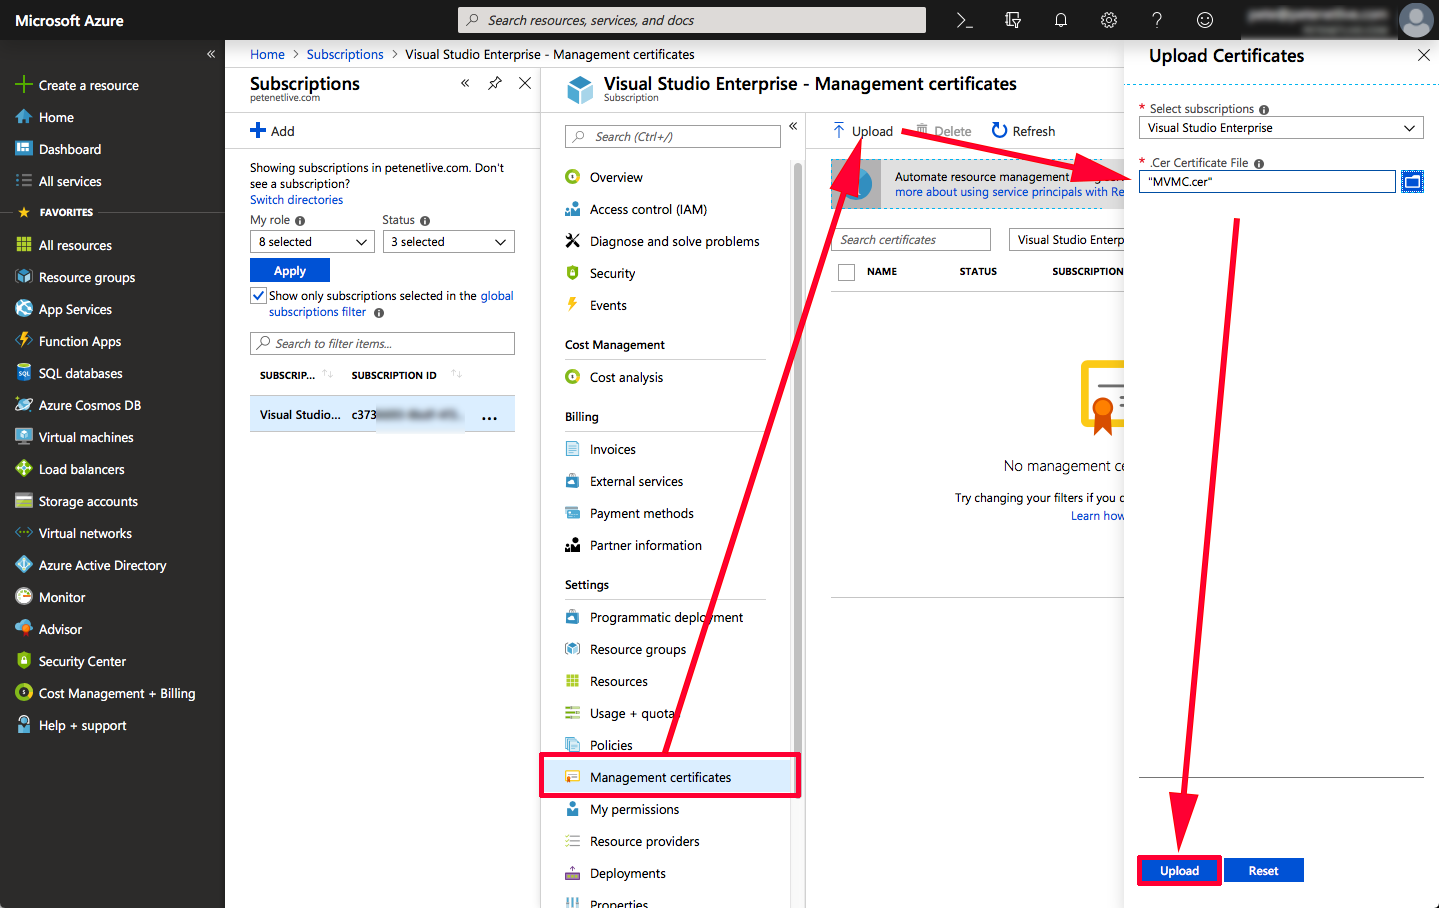
Management Certificates > Upload > Location ether certificate in your temp directory, and upload it.
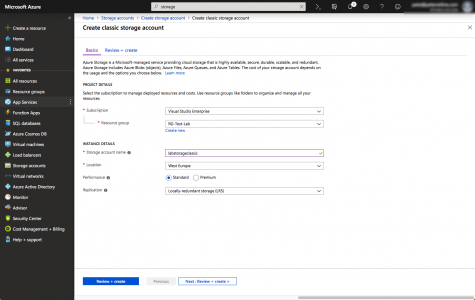
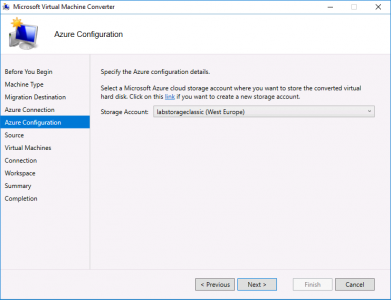
You need to create a ‘Classic’ Storage account > All Services > Storage Account (Classic) > Create Storage Account (Classic) > Choose classic deployment model (They hid that well!)
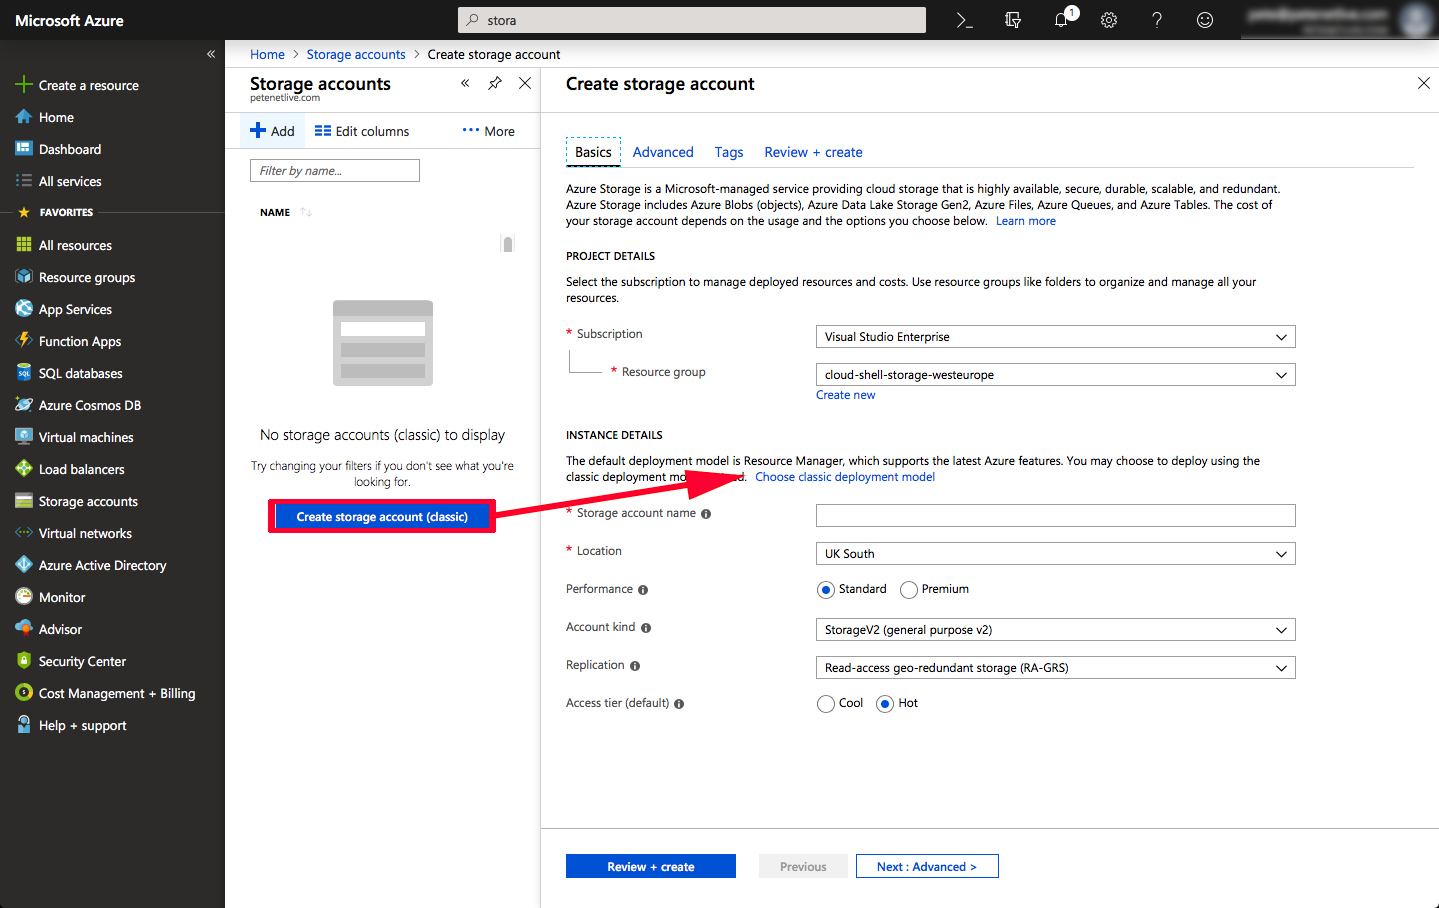
In case you are unfamiliar with Azure, you need a Resource group, in which the place this storage group, if you don’t already have one you can simply click ‘Create new’. Give your storage account a name > set the other values as shown. (Note: Not all locations support classic storage accounts) > Review and Create > Create.
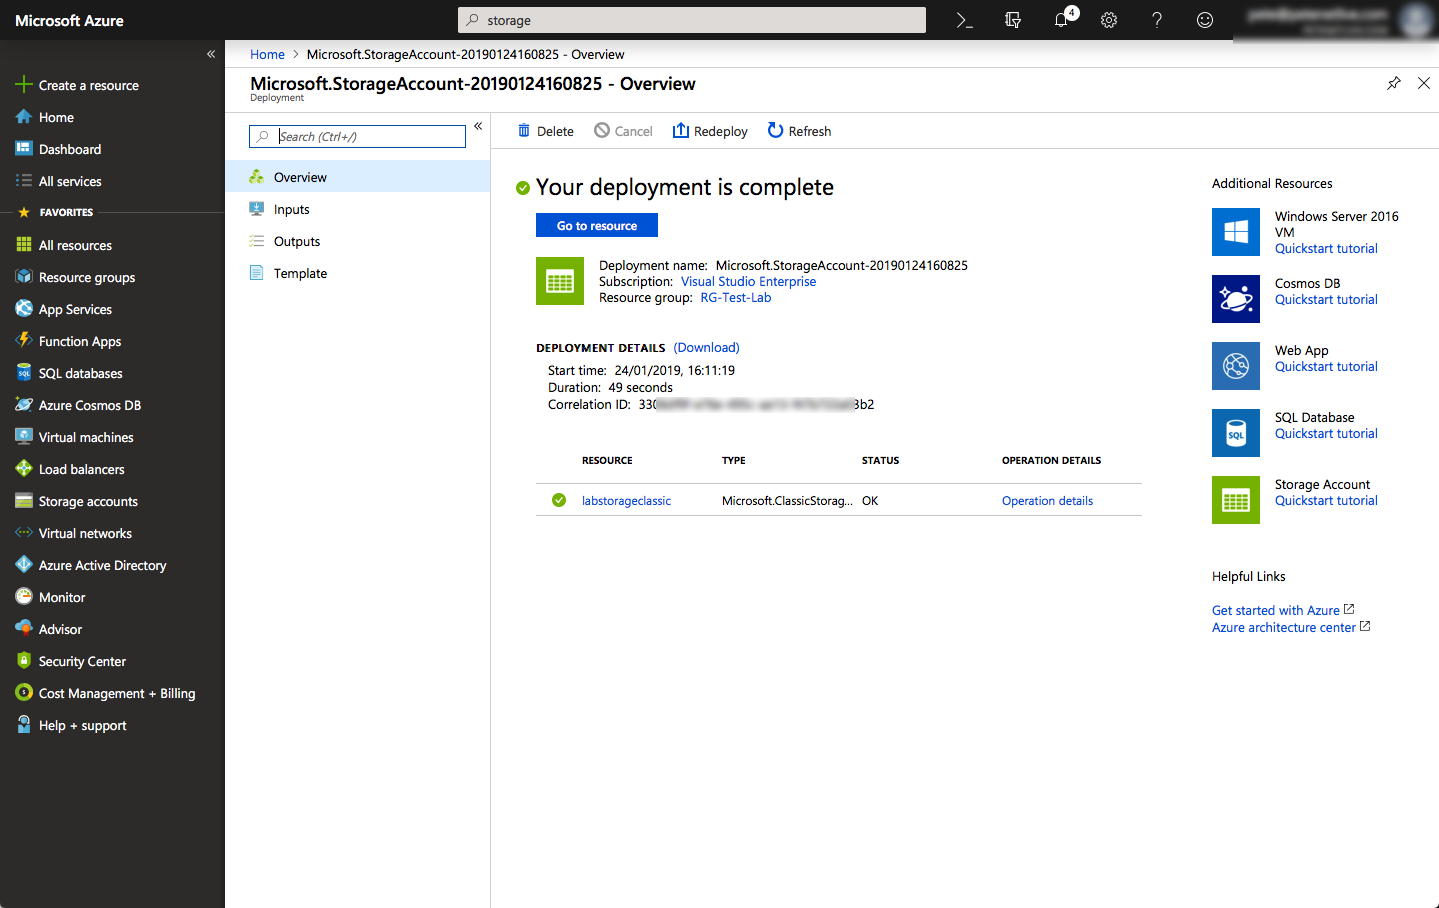
It may take a few minutes.
Convert VMware VM and Upload to Azure
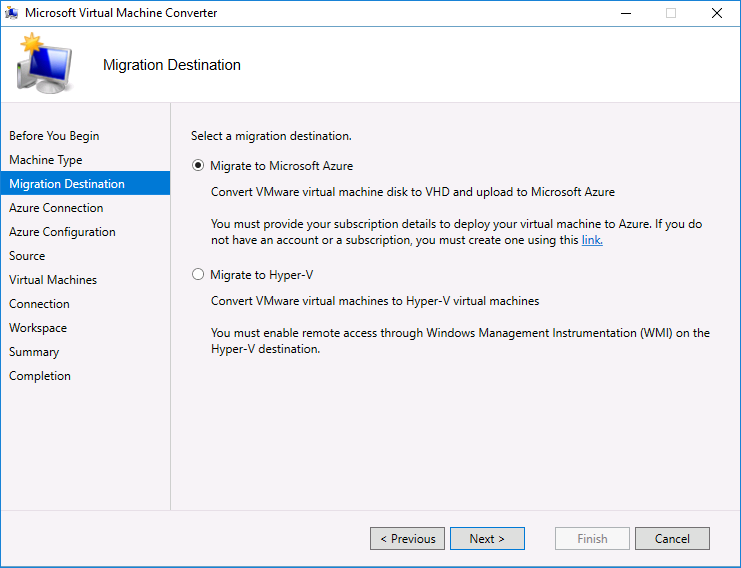
Launch MCVM > Set Virtual Machine Conversion > Next > Migrate to Microsoft Azure > Next.
Enter the Subscription ID and Thumbprint you made a note of earlier > Next.
Select your Storage Account > Next.
Note: If there is no option to select, you either didn’t create ‘classic’ storage, or you didn’t apply the ‘cup of coffee rule’. Go have a brew then try again.
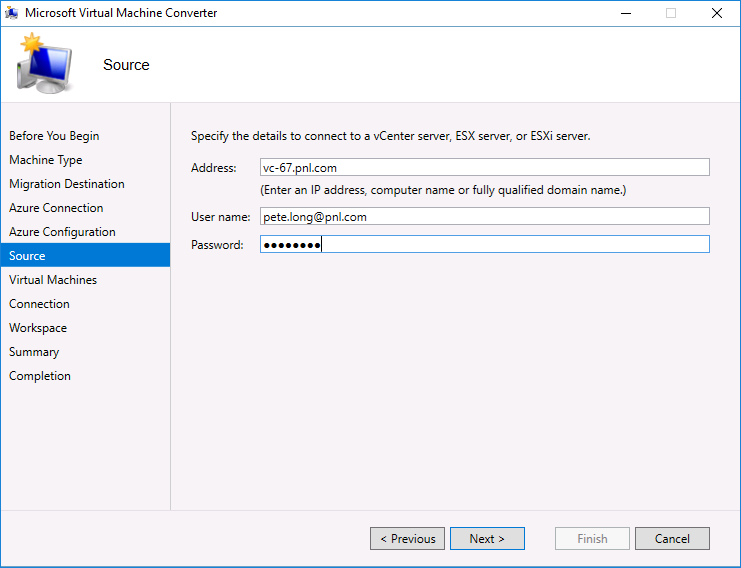
Provide your vCenter Details > Next.
Select your VM to convert/upload > Next.
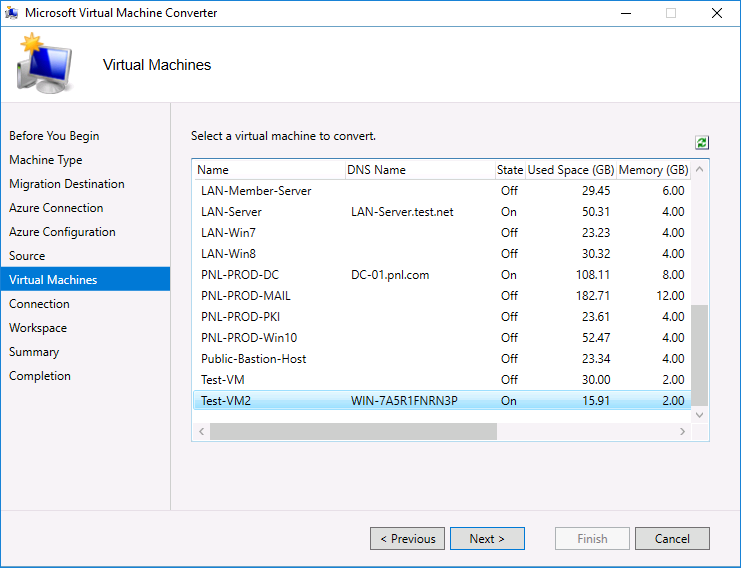
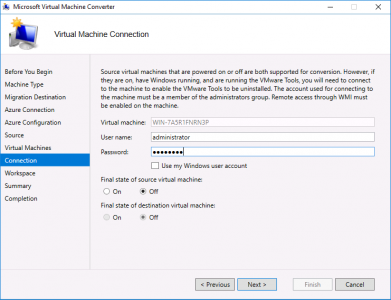
My VM is not a domain member so I’m supplying the local administrator credentials > I want to power the source VM off when conversion is done, the converted VM will simply be a new virtual disk in Azure so that will be off also > Next.
Warning: At this point the VM being converted needs to have its windows firewall off, and be able to be resolved in DNS (or when you click next it will error!)
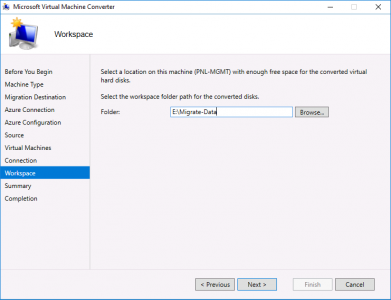
Supply a folder with sufficient capacity, (twice the site of the source VM) in which to perform the migration > Next.
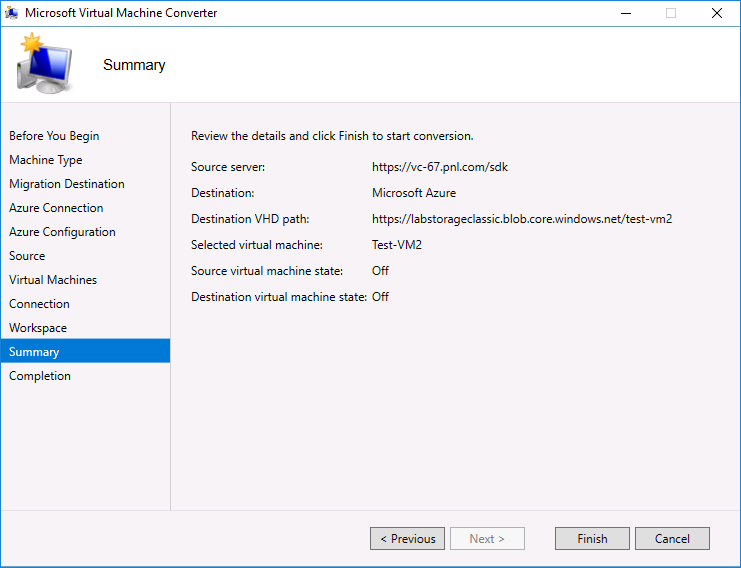
Check the details > Finish.
Note: If it fails with a descriptor error see the following article;
Conversion Error ‘Unsupported Disk Database Entry’
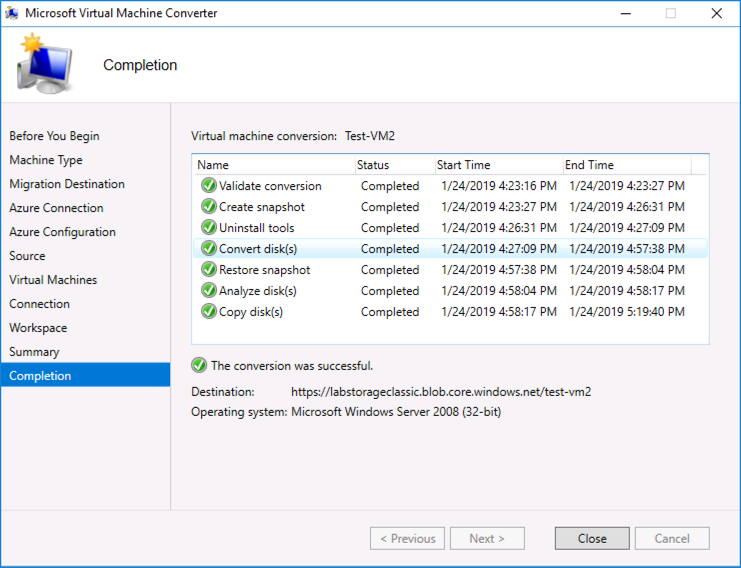
The conversion and upload should progress like so;
Back in Azure > All Resources > Select your storage account > Storage Explorer > Blob Containers > Theres our virtual disk.

All Services > Disks (classic) > Select your disk > Create VM.

Name the VM > Select the Resource group you used above > Next.

Choose a VM size > Select.

Give the VM a domain name, (you will use this to access the VM via RDP) > Next.
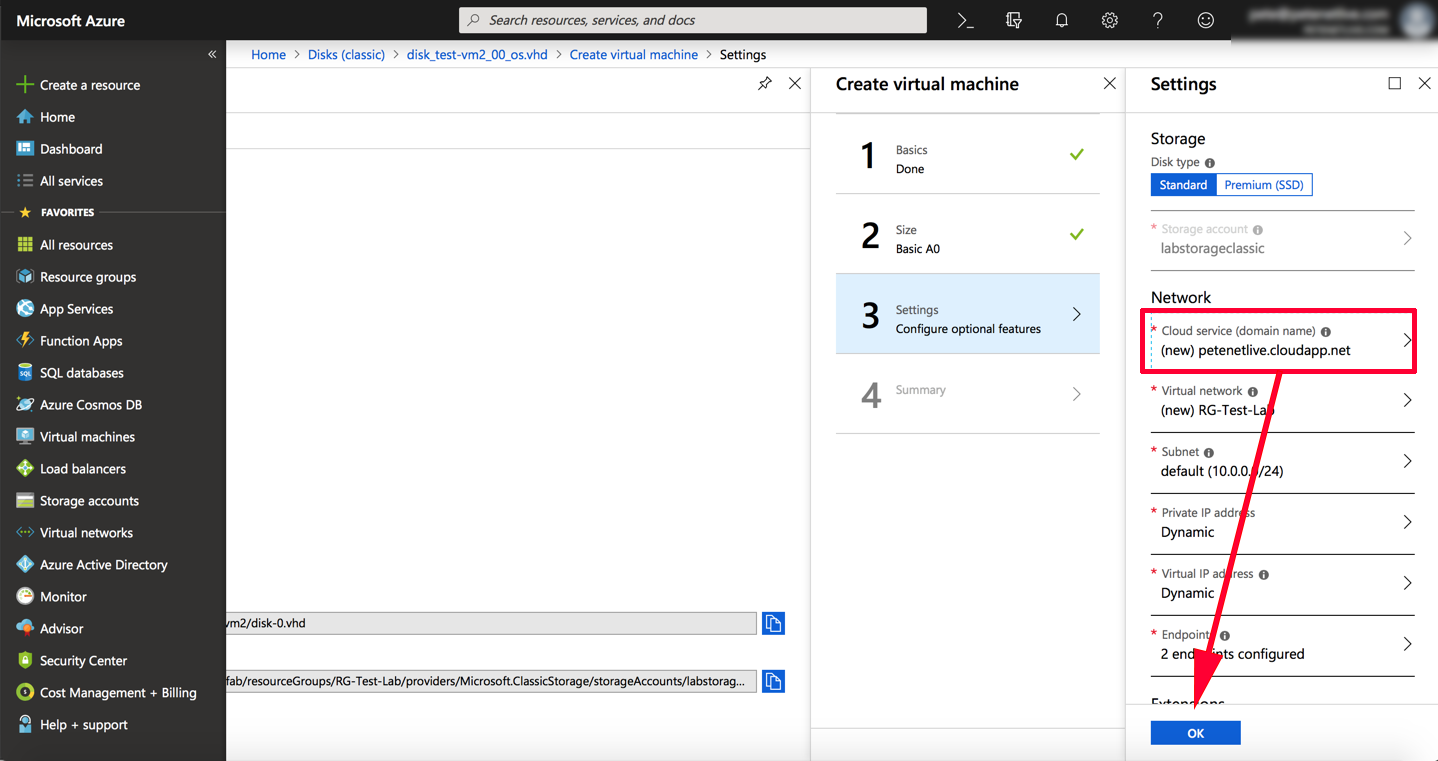
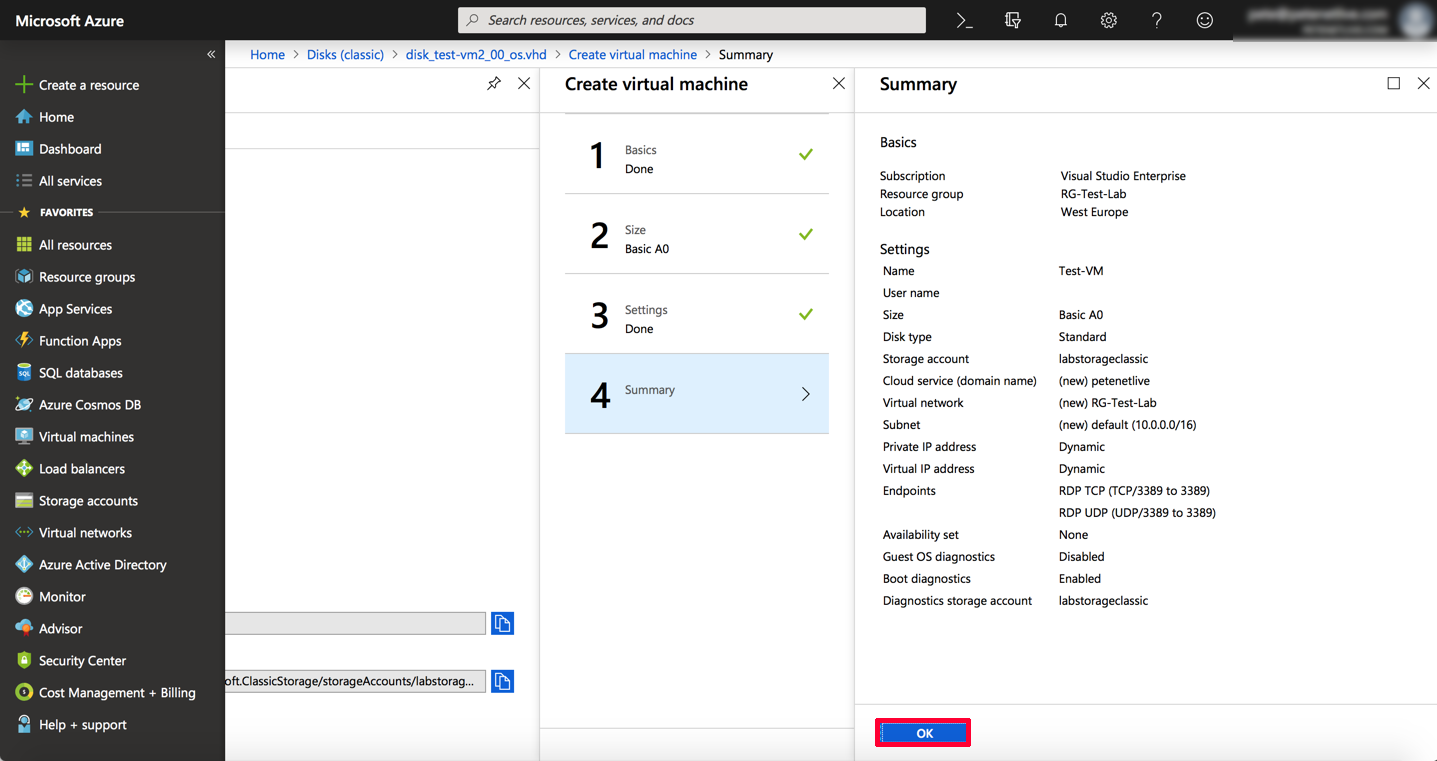
Review the details > OK.
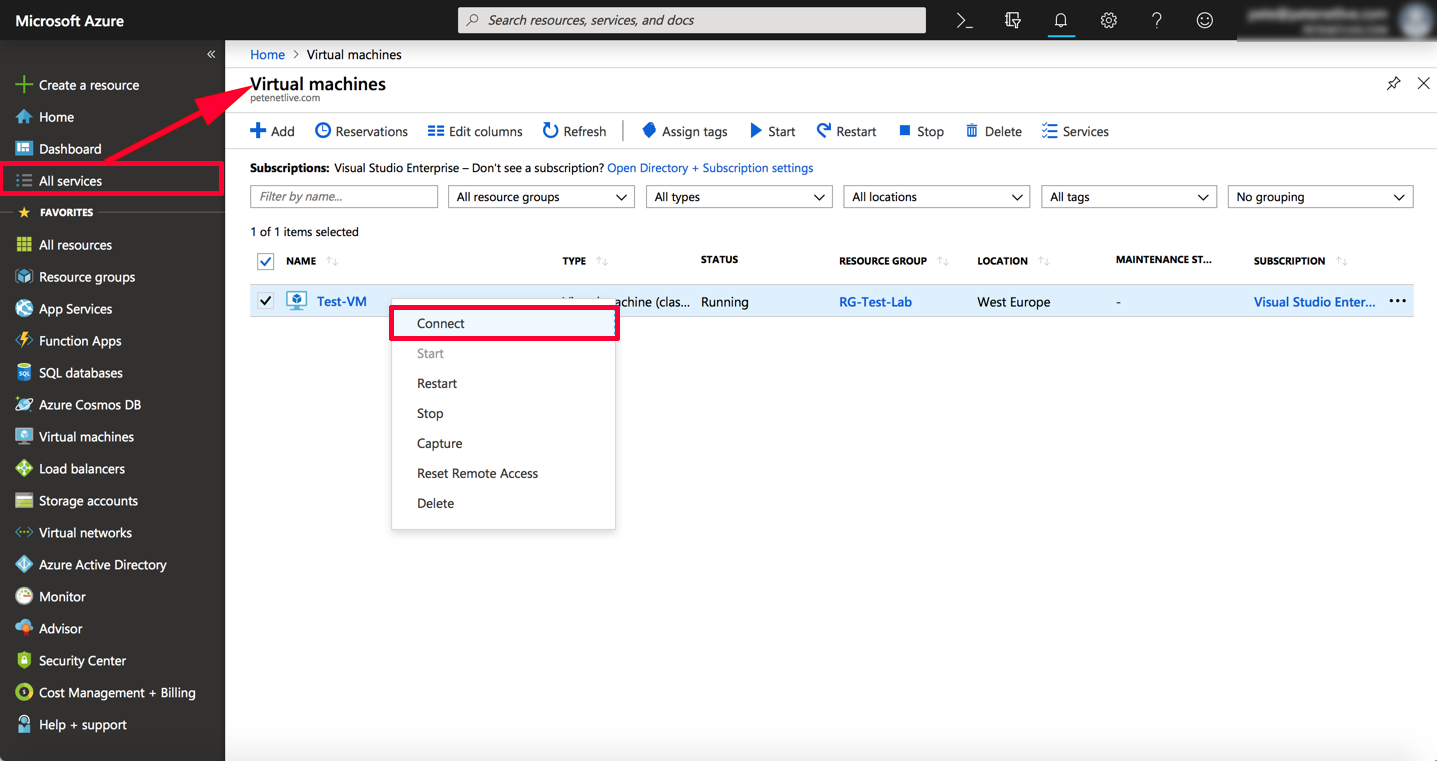
All Services > Virtual Machines > Select your VM > Connect > This should download a rdp file which you can use to connect to the converted VM.
Related Articles, References, Credits, or External Links
NA