
KB ID 0001407
Problem
I got asked if I’d ever had to do this today, I vaguely remember having this problem in the past, but I can’t remember how I solved it. You set the ‘Partition Table Type‘ on a disk in Windows, when the drive is first initialised, like so;
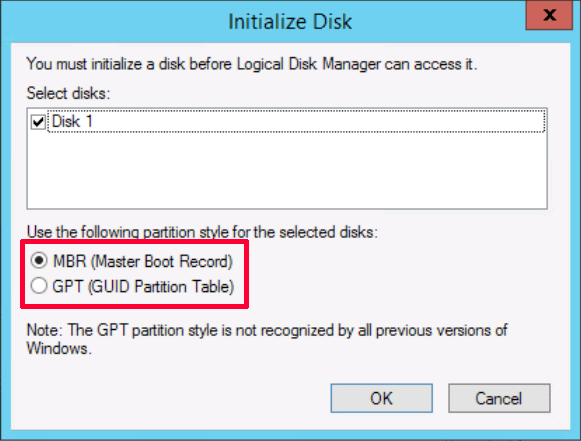
And the default is MBR, so that usually gets ticked, the problem is MBR only supports disks up to 2TB in size. Now if it’s just a new disk, with no partitions on it, you can simply change it;
![]()
But if it’s got a partition on it, (and probably some live data) you cant!
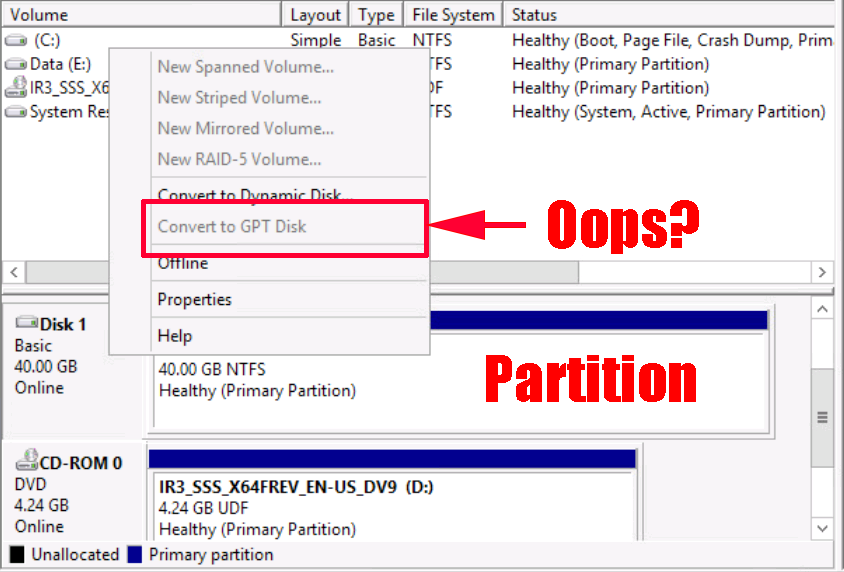
Previously, (before Windows 10, and Server 2016,) The Microsoft solution was to delete the partitions and create a new one, which can be a little time consuming, especially if you have live data on it! So can you convert it to GPT Live with no data loss?
Solution
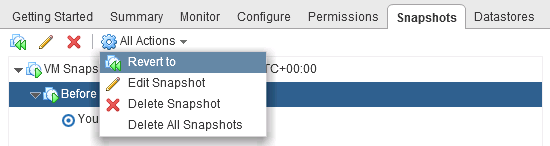
Yes! As usual, make sure you have a decent backup first, and if you are using a virtual environment, you can snapshot the virtual machine before hand, (I tested this in the lab, by taking a snapshot, converting a drive from MBR to GPT, then reverting to the snapshot, and it flipped back to MBR with no loss of data).

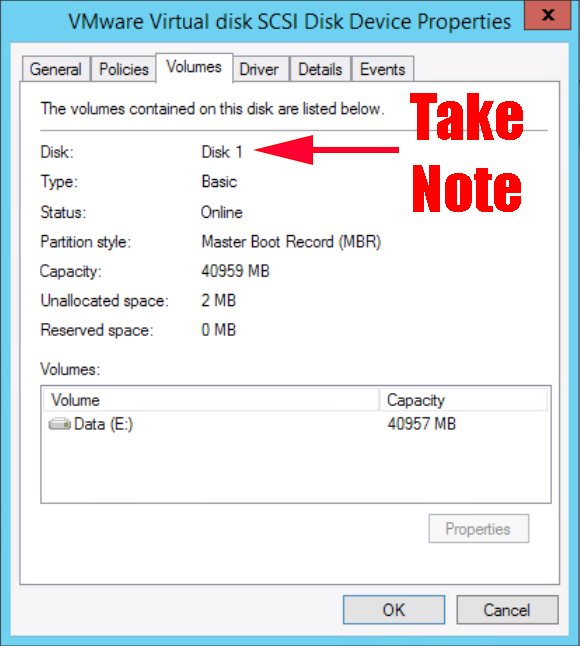
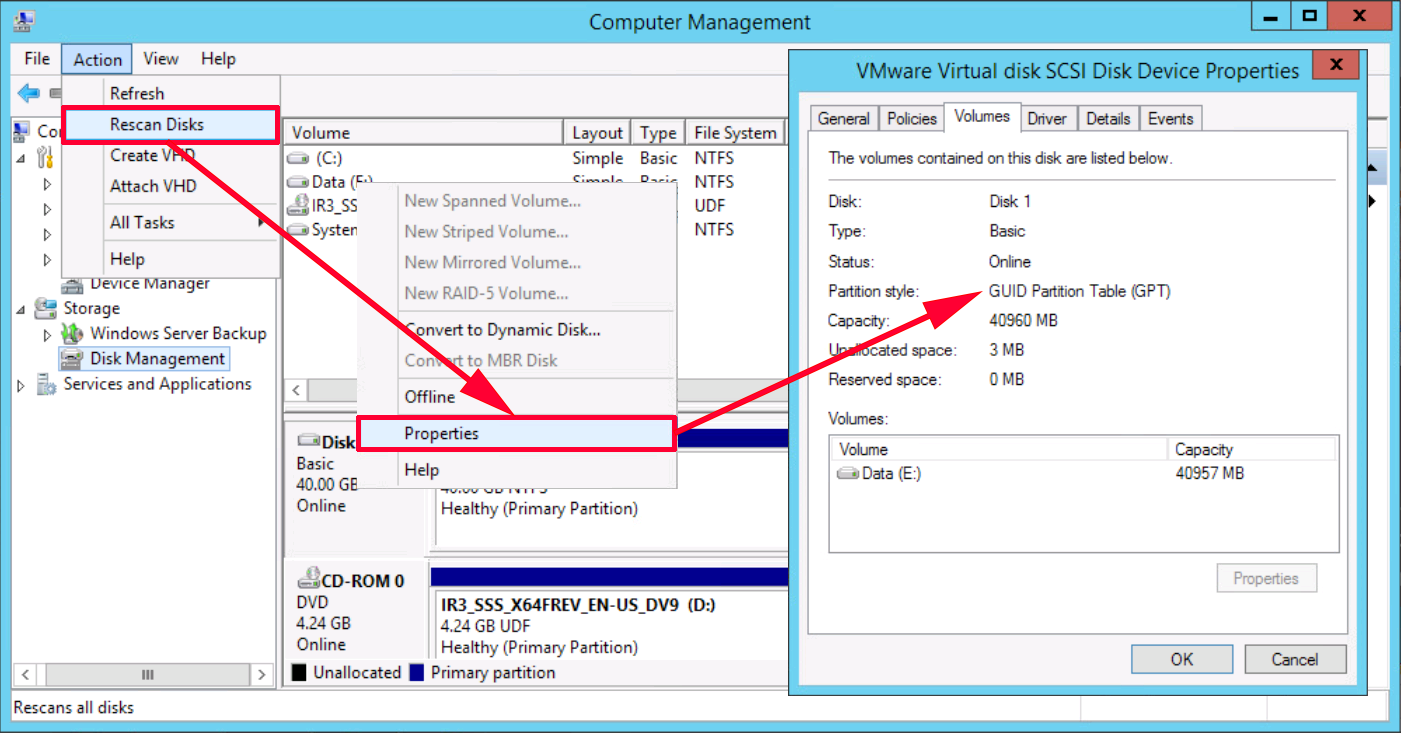
You need to know what disk number Windows has assigned to the drive, in disk management right click the drive, and select properties.
Windows 10 and Windows Server 2016
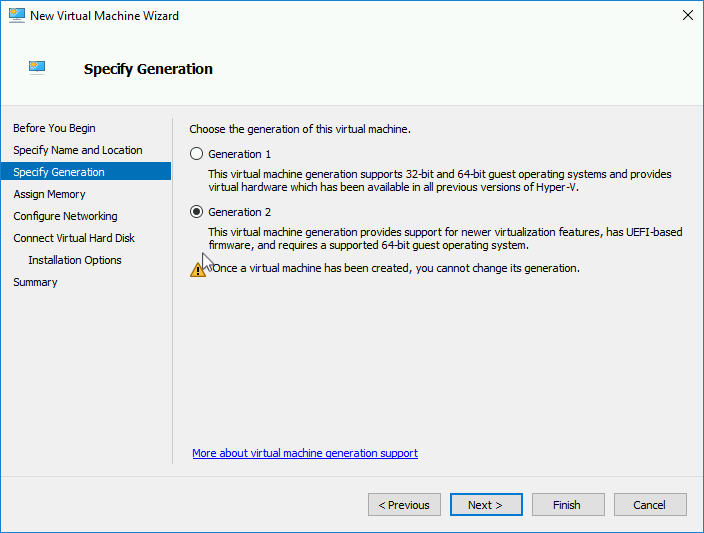
Using this method will require (after you have finished) you machine. is set to UEFI boot, otherwise it will work fine until you try and reboot, then the machine won’t boot! So if you are doing this on a Virtual Machine in Hyper-V MAKE SURE it’s a generations 2 VM!
You will find MBR2GPT.exe in C:\Windows\System32, if it’s not there do a full round of Windows updates! Simply open an Administrative command window and run the following commands;
cd c:\windows\system32
mbr2gpt /convert /disk:1 /allowfullOS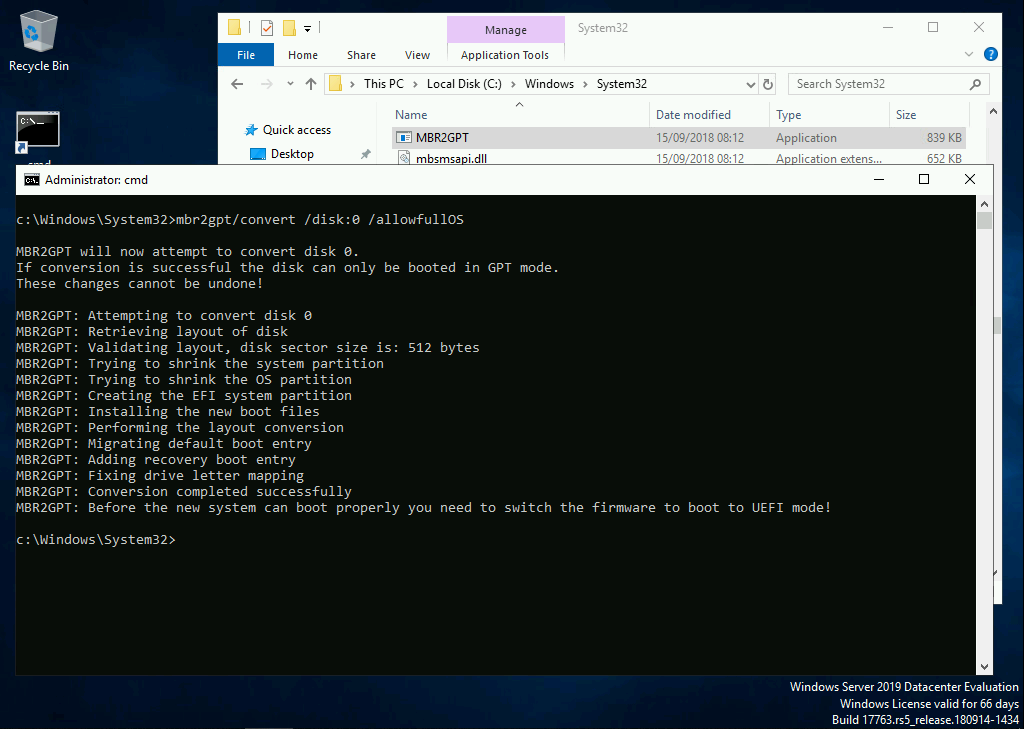
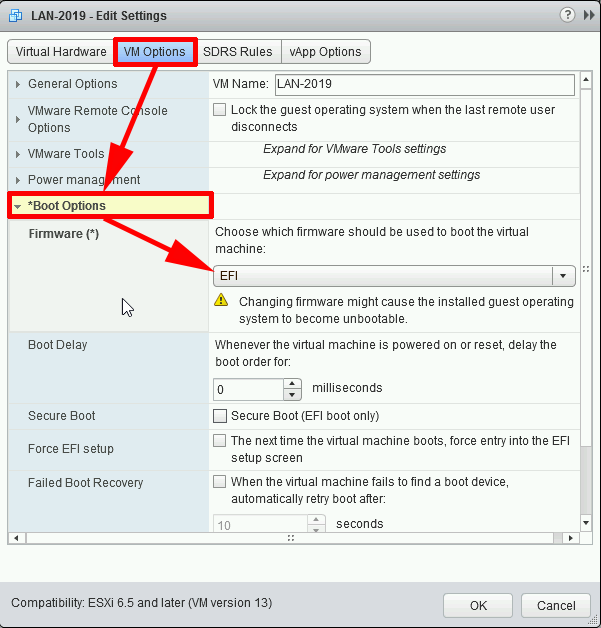
Take note of the warning the machine should now be set to UEFI boot mode, so if its a VMware VM, then change this value;
For OLDER Vesions of Windows
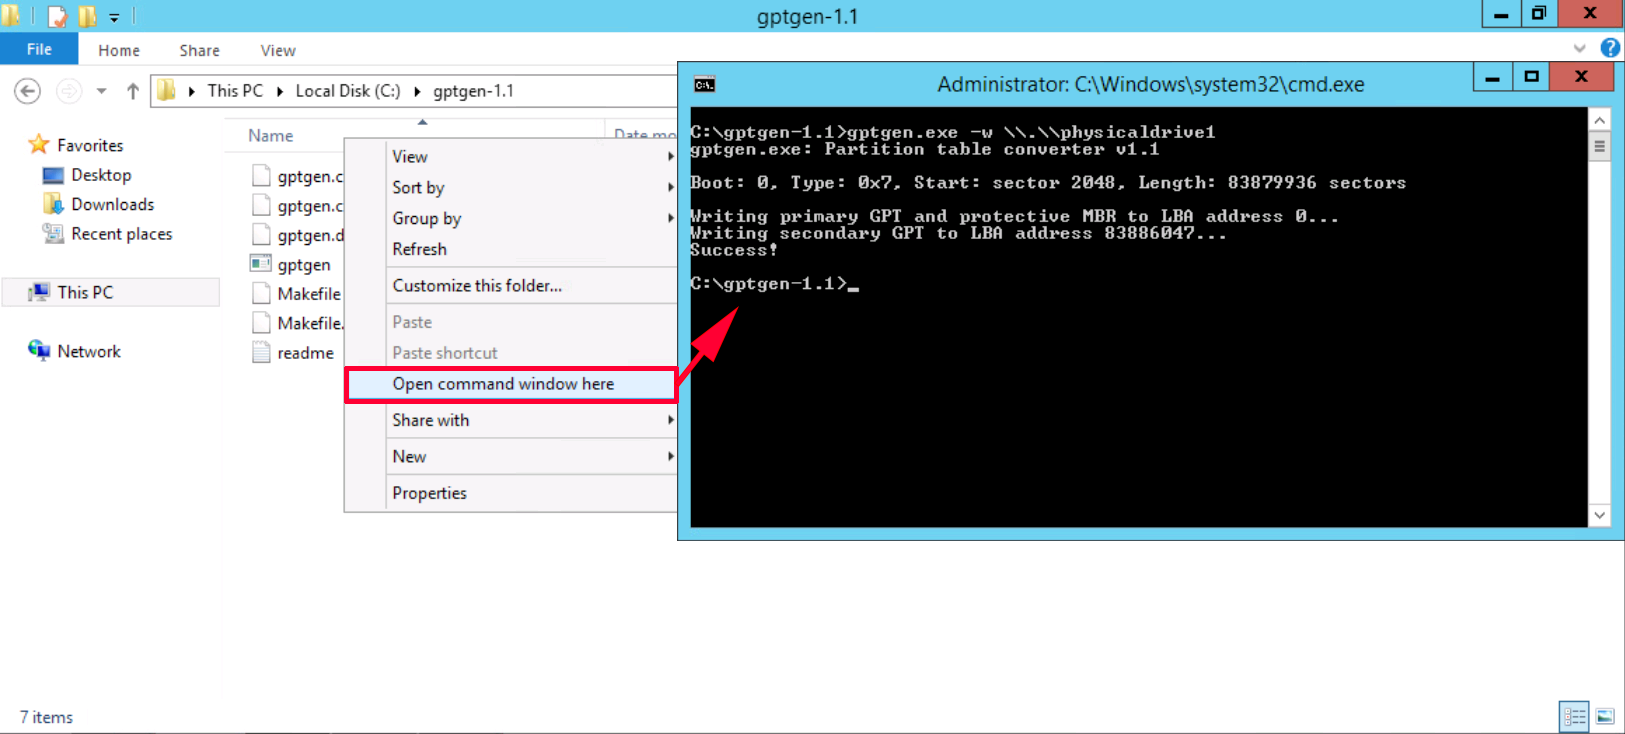
Download and extract gptgen-1.1 then run the following command;
Note: Where ‘1‘ is the disk number you took note of above.
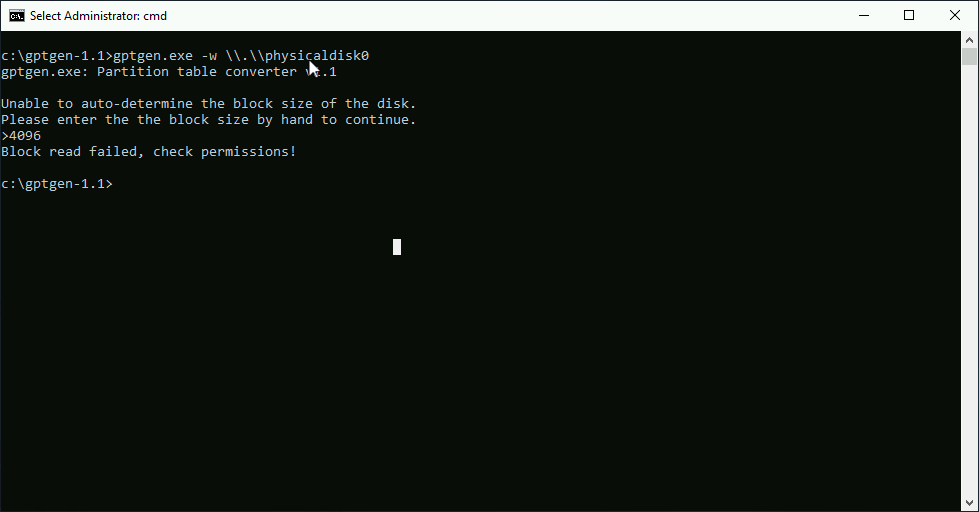
Note: If you see “Block read failed, check permissions!” Then you might want to use MBR2GPT {above} instead.
That’s it done! In ‘disk management’ you will need to ‘Rescan Disks’ to see the change.
In the unlikely event that something exploded, you can ‘roll-back‘ to your snapshot.
Related Articles, References, Credits, or External Links
NA
10/10/2019
Hi I lost hours trying to find out how to overcome the “Block read failed, check permissions!”. I finally notice you had the wrong command displayed in your instructions. It should not be gptgen.exe -w \\.\\physicaldisk1 but gptgen.exe -w \\.\\physicaldrive1.
10/10/2019
Awesome spot!Updated Thank you.
01/03/2024
I tried both solutions but failed. MBR2GPT, it shows error Disk layout validation failed for disk 3, and in GPTGEN, it shows Block read failed, Check permissions!