
KB ID 0001253
Problem
This is the process for setting up both physical and virtual Barracuda Email Security Gateway Appliances, (formally Barracuda Spam Firewall).
Note: This walk though sets out the basic functions to get your appliance working and inspecting email, it’s not an exhaustive list of all the features of the appliance.
Solution
Before you start, I’m making the assumption if you have a physical appliance, it’s racked and connected to the correct network. Or if you are using a virtual appliance it’s been deployed from OVA and connected to the correct network.
Barracuda Email Gateway Initial Setup
To get access to the appliance the default username password is admin and admin.

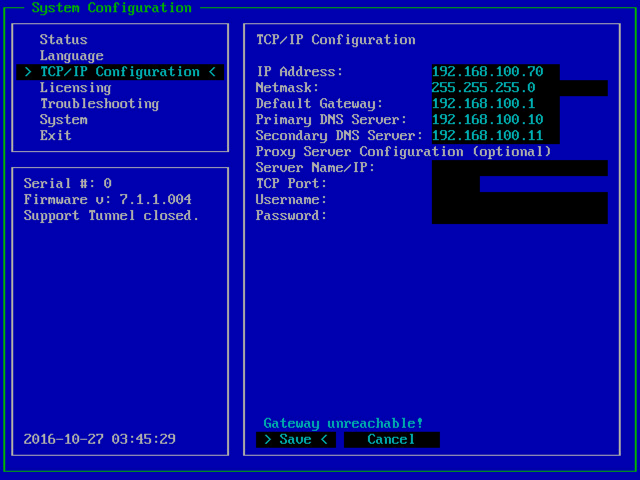
Navigate to TCP/IP Configuration > Enter the IP addressing information, then ensure you SAVE the config.
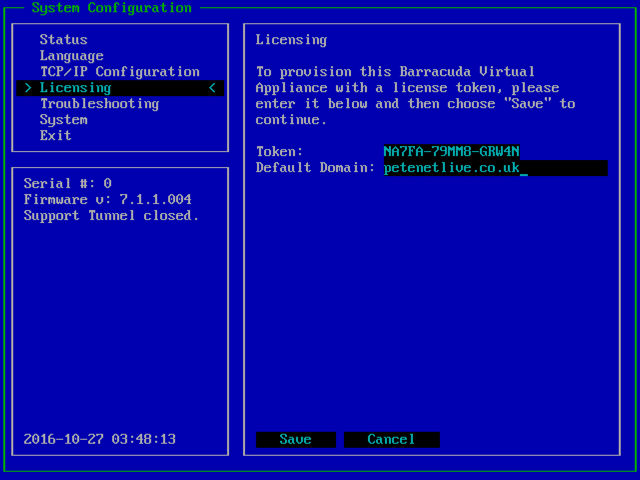
You will also need to enter the licence token, that was supplied to you from your reseller, again make sure you SAVE the configuration.
Exit, and you are prompted to type YES, the system will reboot.

Barracuda Email Gateway Mail Configuration.
Once the appliance has rebooted, you can connect to it though a web browser (via https). The username and password will still be admin/admin. First task is to update the appliance to the latest version. (Advanced > Firmware Update) You may need to do this a few times and each update will require a reboot of the appliance.

Basic > Administration > Email Notifications: Setup an email address for system alerts, and a system contact email address. Save the changes.

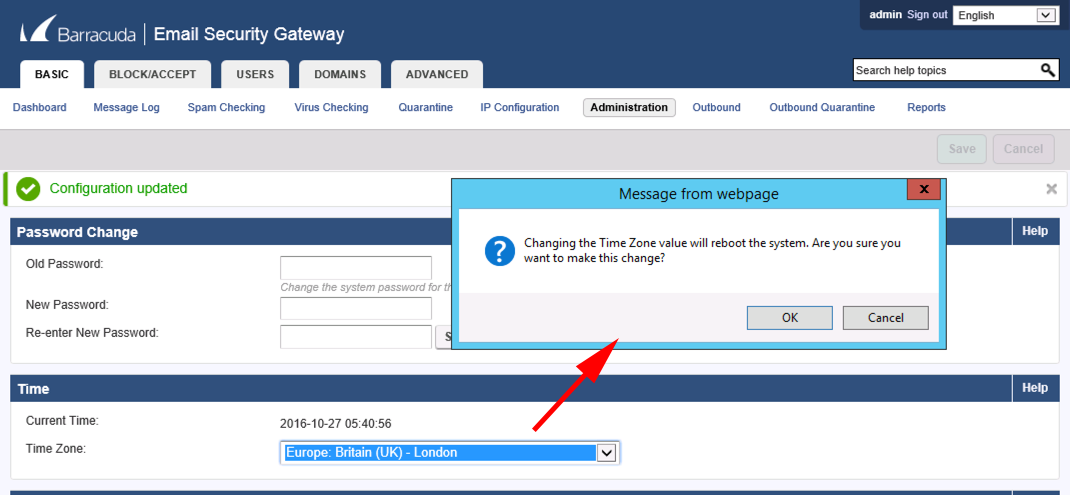
On the same tab > Change the tine zone > (This may require another reboot).
Basic > IP Configuration: Destination Mail Serber TCP/IP Configuration > Enter the details of your exchange server (MS Exchange Note: that already has a configured receive connector). Use the ‘Test Email Connection’ button to make sure it’s working. Also set a local hostname and domain name, WARNING don’t use the default one of Barracuda, as this is displayed to the outside world, (best not to advertise, your email filter vendor).

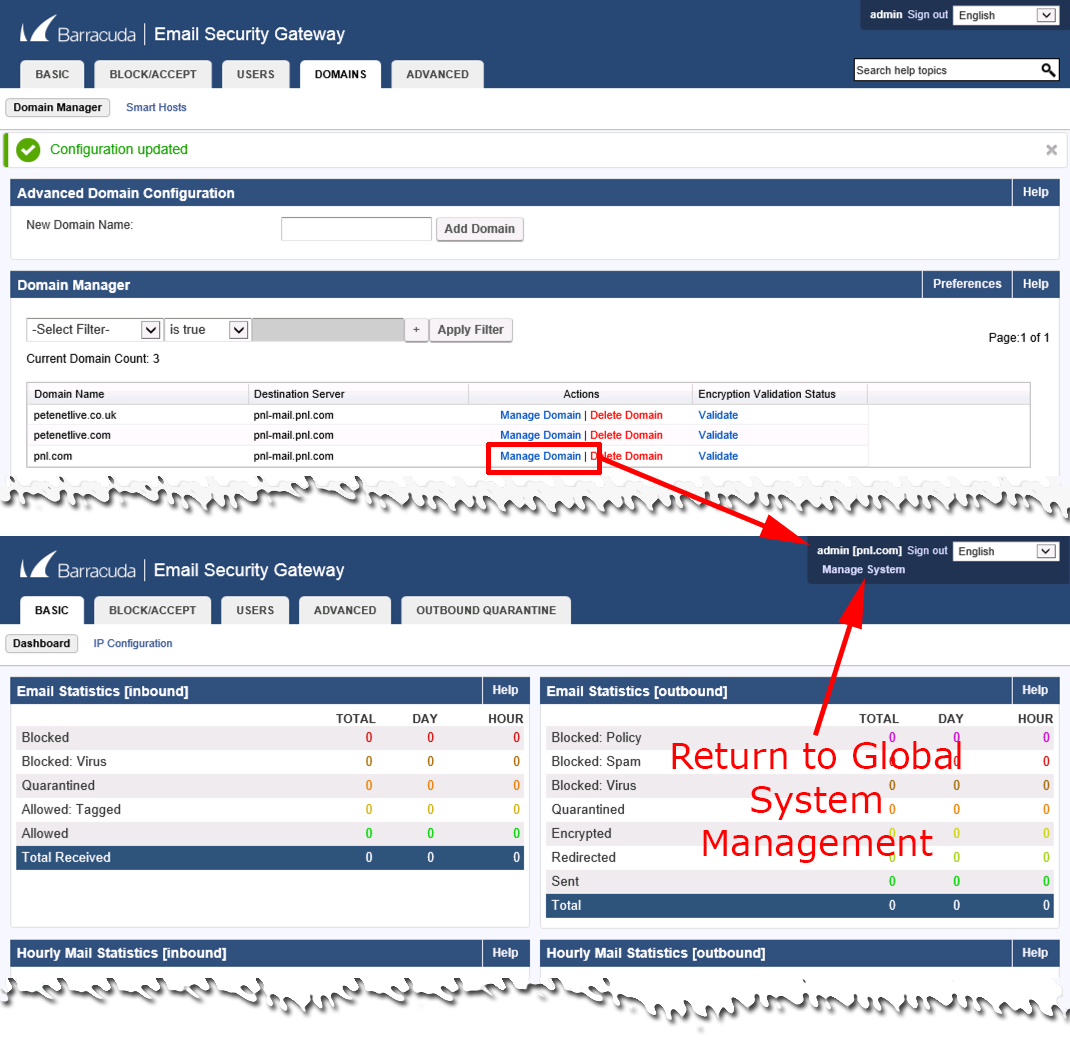
Domains > Domain Manager: Add in all the domains the you want to filter email for

Barracuda Manage Domains or Manage Globally
IMPORTANT: You can change settings for each individual domain, (handy if you filter email domains for a lot of different customers). Or you change settings globally. To manage an individual domain, navigate to Domain > Domain Manager > Select the domain and click Manage Domain. From this point forward you are only changing settings for this managed domain. You return to global configuration by clicking ‘Manage System“.
I’ve mentioned this now, because the next steps are carried out ‘per domain’.
For each Exchange Managed (i.e. Active Directory Domain.) Users > LDAP Configuration > Change Exchange Accelerator /LDAP Verification to “Yes” > Enter the FQDN of one of your domain controllers > LDAP Port (use 389 or 3268) > Then enter the ‘Distinguished Name’ and password for a domain user. Make sure the test passes before you proceed.
How to Find a Distinguished Name? Run the following dsquery command;
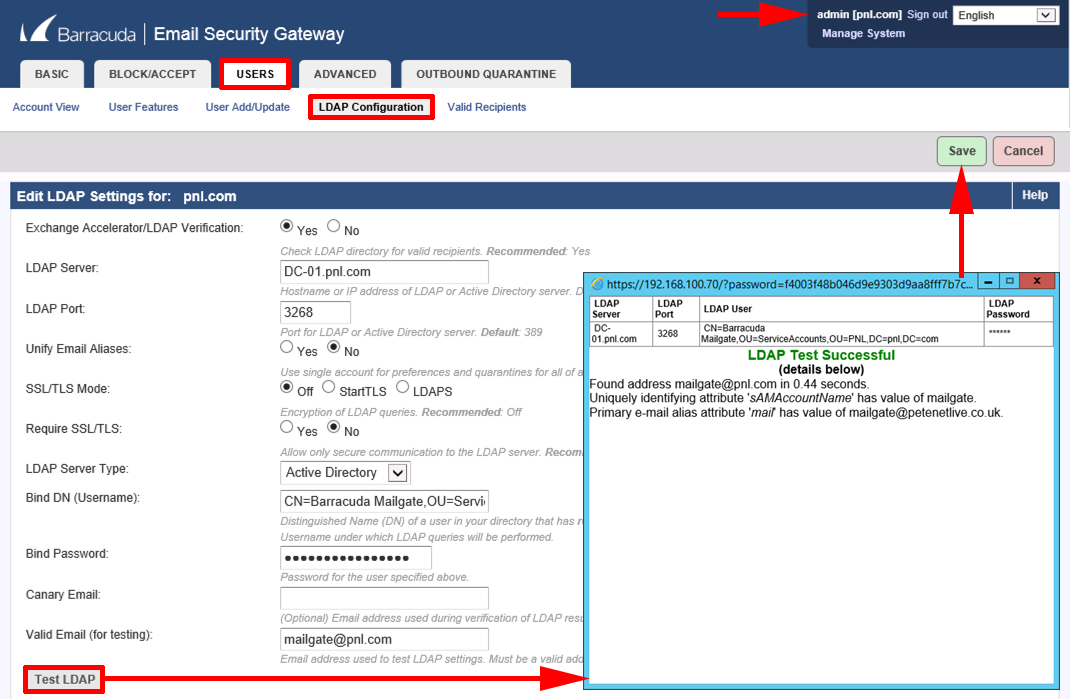
Why Have you just done this? Because now Barracuda will reject all mail sent to this domain, for users that do not exist. This is because spammers will bulk mail known good domain names with random names in the hope of getting lucky. Repeat for any other domains you are authoritative for. But Ensure you use a machine email address of the domain you are protecting like so;

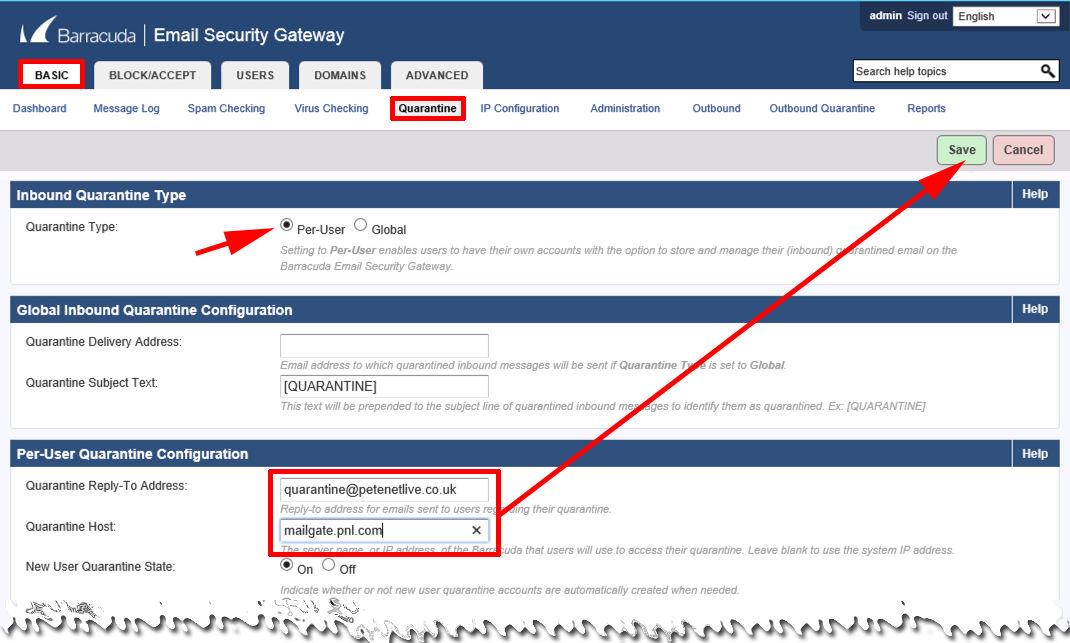
Back in global configuration > I’m going to set Quarantine, on a user by user basis (rather than globally). Basic > Quarantine enable per-user, then enter an email and the FQDN of the Barracuda appliance > Save.
Basic > Spam Checking: The actual levels you want may require some tuning, this is a good place to start. You would normally use either Quarantine or Tagging, Im setting the appliance to block at level 6 and quarantine at level 3. (Note: These levels are scores that Barracuda assigns to the emails, that grade the likelihood of them being spam).

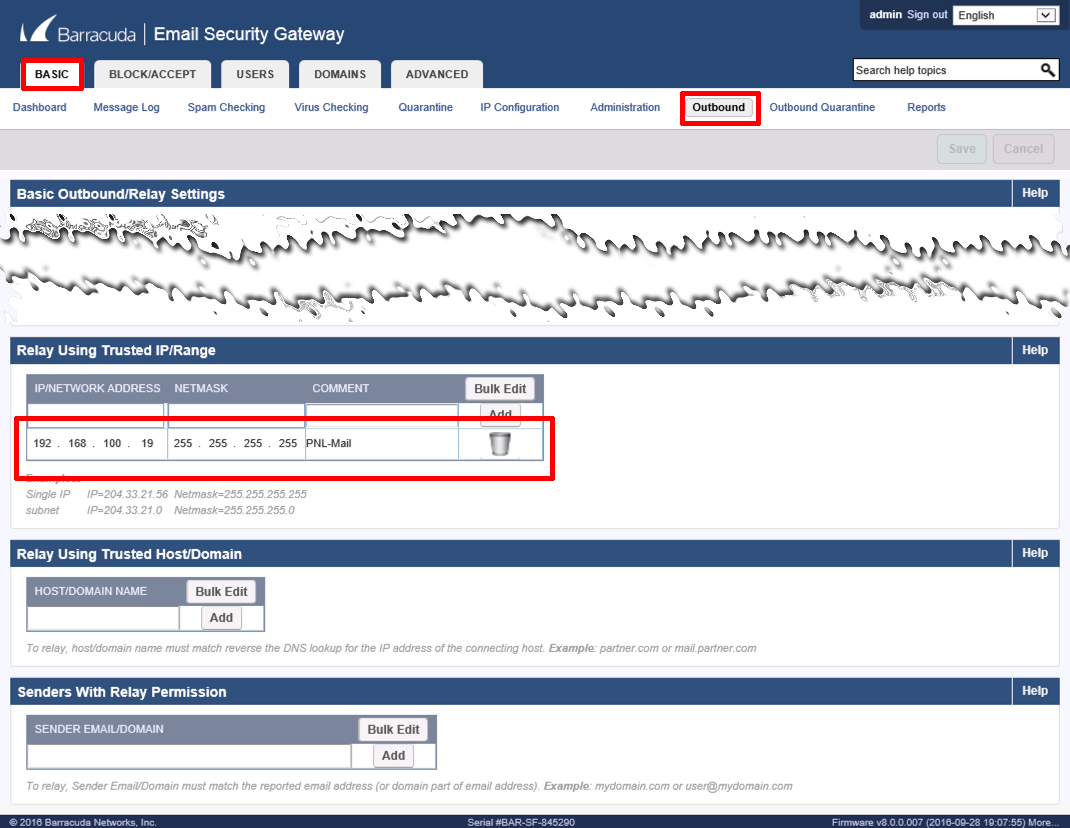
The Barracuda, (like most email platforms) wont accept email from any ip/host/subnet unless you allow it. So that your email server can send mail though the Barracuda you need to add it in. Basic > Outbound > Relay Using Trusted IP/Range >Enter either the IP addresses of your mail servers, or the subnet they are on.
Configure Exchange 2013/2016 To Send Mail via Barracuda
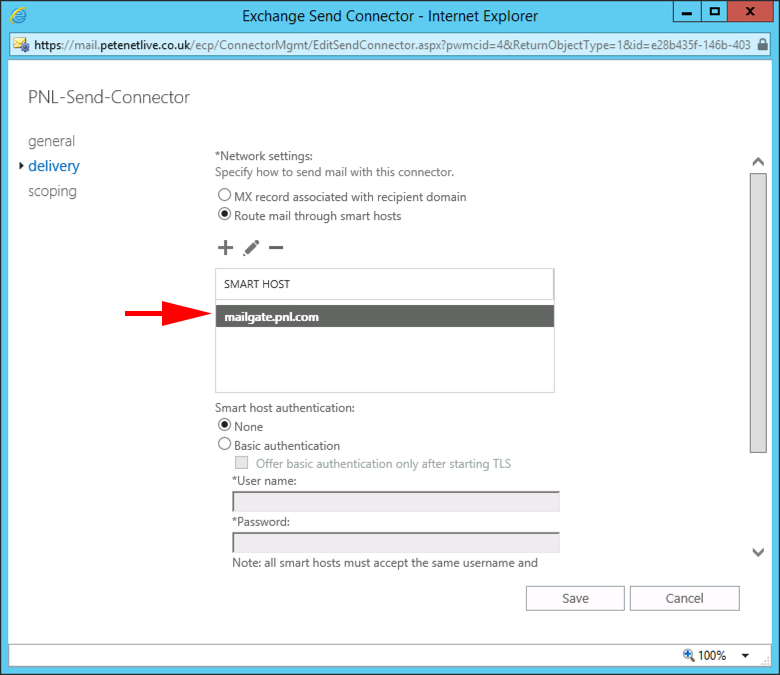
I know there are many Email platforms but I’m using Exchange 2016, to send email via this appliance you need to add it as a “Smart Host” on the Exchange Organisations ‘Send Connector’. Log into Exchange Admin Center > Mail Flow > Send Connector > Select the connector > Edit.
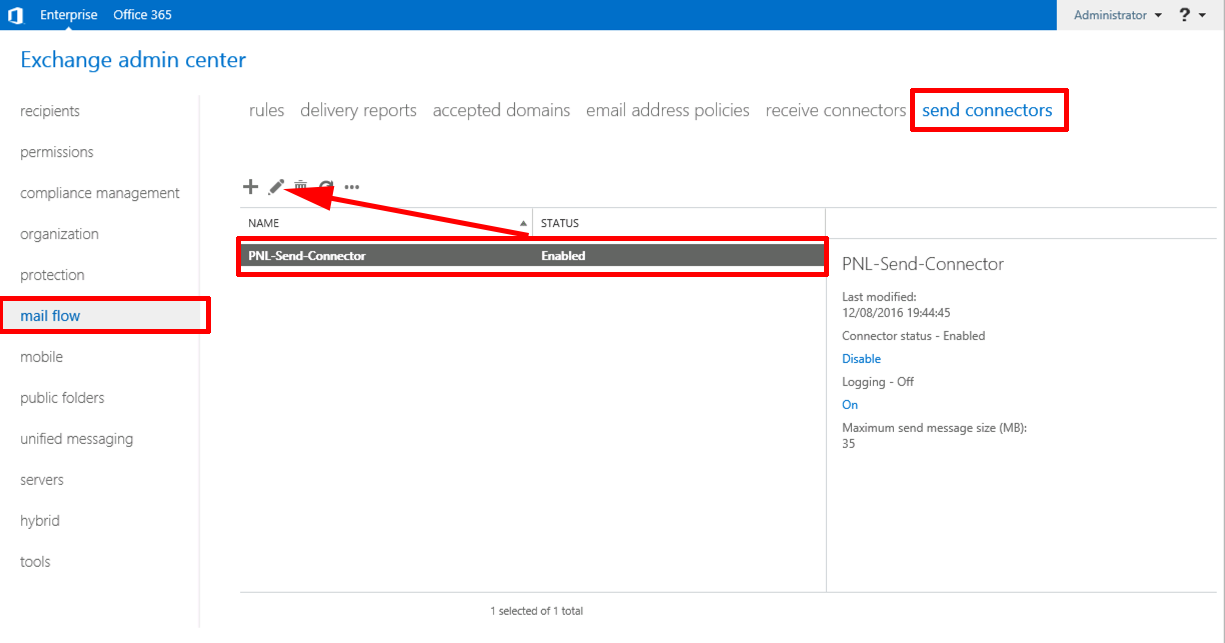
Delivery Tab > Enter the FQDN or IP of the Barracuda > Save.
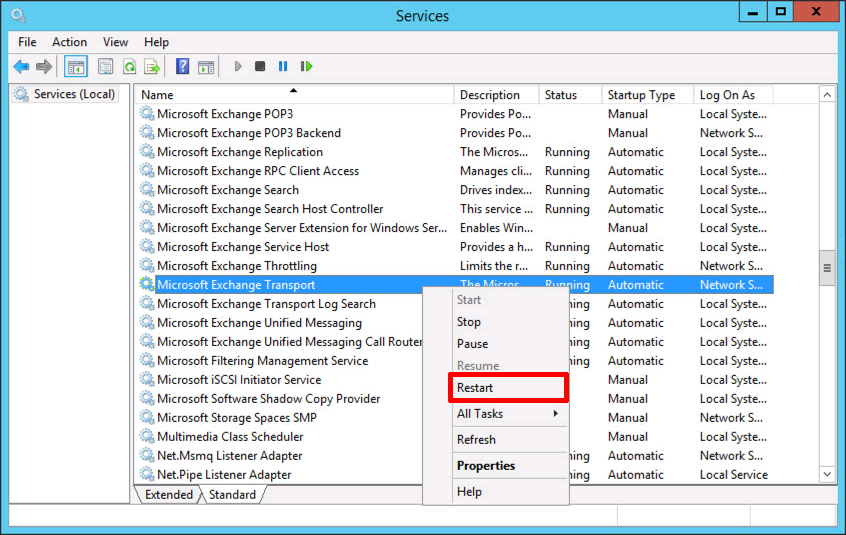
Then restart the Microsoft Exchange Transport Service.
Exchange Receive Connector: You probably already have a receive connector, configured for internet email (i.e set to anonymous, for port 25). In some Exchange deployments, you may need to add a connector for the Barracuda and allow it to relay mail through Exchange.
Repoint Mail ‘Feed’ To Barracuda
How you do this depends on your network setup, and firewall vendor. If you already have mail coming into your mail server then you are probably doing one of the following;
- Port Forwarding SMTP (TCP Port 25) from your public IP, to the internal IP of the mail server.
- Statically NATTED a public IP address, to the internal/private IP of the Mail server, and opened SMTP (TCP Port 25) to that IP.
In either case, you need to change the private IP address that mail is pointing to from your mail server to the Barracuda IP. If you are using a Cisco Firewall or Router, Ive already written some articles that may help, take a look at the following.
Cisco PIX / ASA Port Forwarding
Add a Static (One to One) NAT Translation to a Cisco ASA 5500 Firewall
Juniper (JUNOS) SRX – Static ‘One-to-One’ NAT
Cisco Routers – Port Forwarding
Changing Pubic IP Address Warning
Be aware if you change the public IP address that you accept mail on, you need to change your DNS MX Records to match, (if you use SPF records those may also need changing). See the following article;
Setting up the Correct DNS Records for your Web or Mail Server
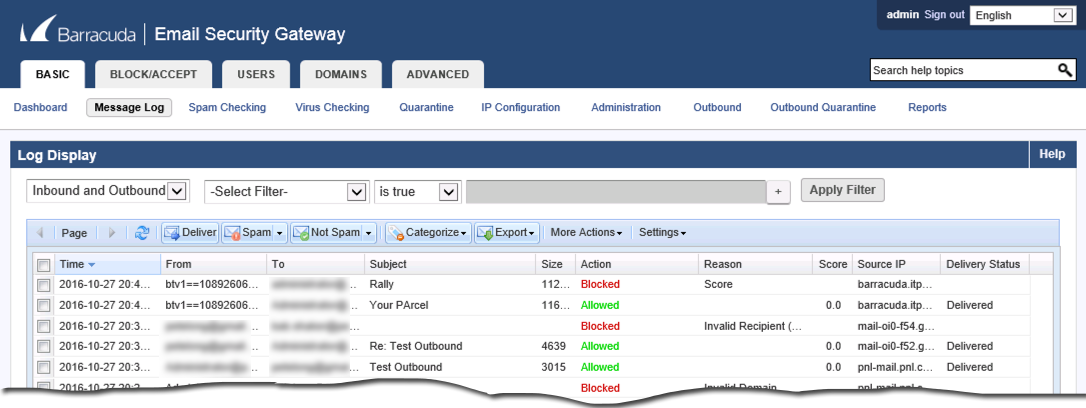
All being well, you should now see mail flowing through the Barracuda (Massage Log).
Related Articles, References, Credits, or External Links
NA