
KB ID 0001318
Problem
At the time of writing this site is running on CentOS7 LAMP (Linux Apache MySQL and PHP). Well I’m actually using MariaDB not MySQL as it’s ‘supposed’ to be a little faster, but they are similar enough to be accepted. I’m planning to migrate to Ubuntu 17 LEMP (Linux ‘EnginX’ MySQL and PHP) again with MariaDB. As the site is getting more traffic I want to utilise the better performance of nginx (I know I called it EnginX above but LNMP stack doesn’t sound so good, and nginx is ‘pronounced ‘engine x’).
So the following series of articles will be how to install nginx, MariaDB, PHP and WordPress.
Solution
Installing Linux
You have essentially two choices, do what most people do and go to a hosting company and rent a VPS, (virtual private server) for a monthly fee. Then when you set it up you can select what flavour of Linux you require, press go, and by the time you have had a coffee, they will have emailed you the IP and logon details, and Linux is already installed for you. You can of course install linux on your own server, and as long as you can make it publicly available use that.
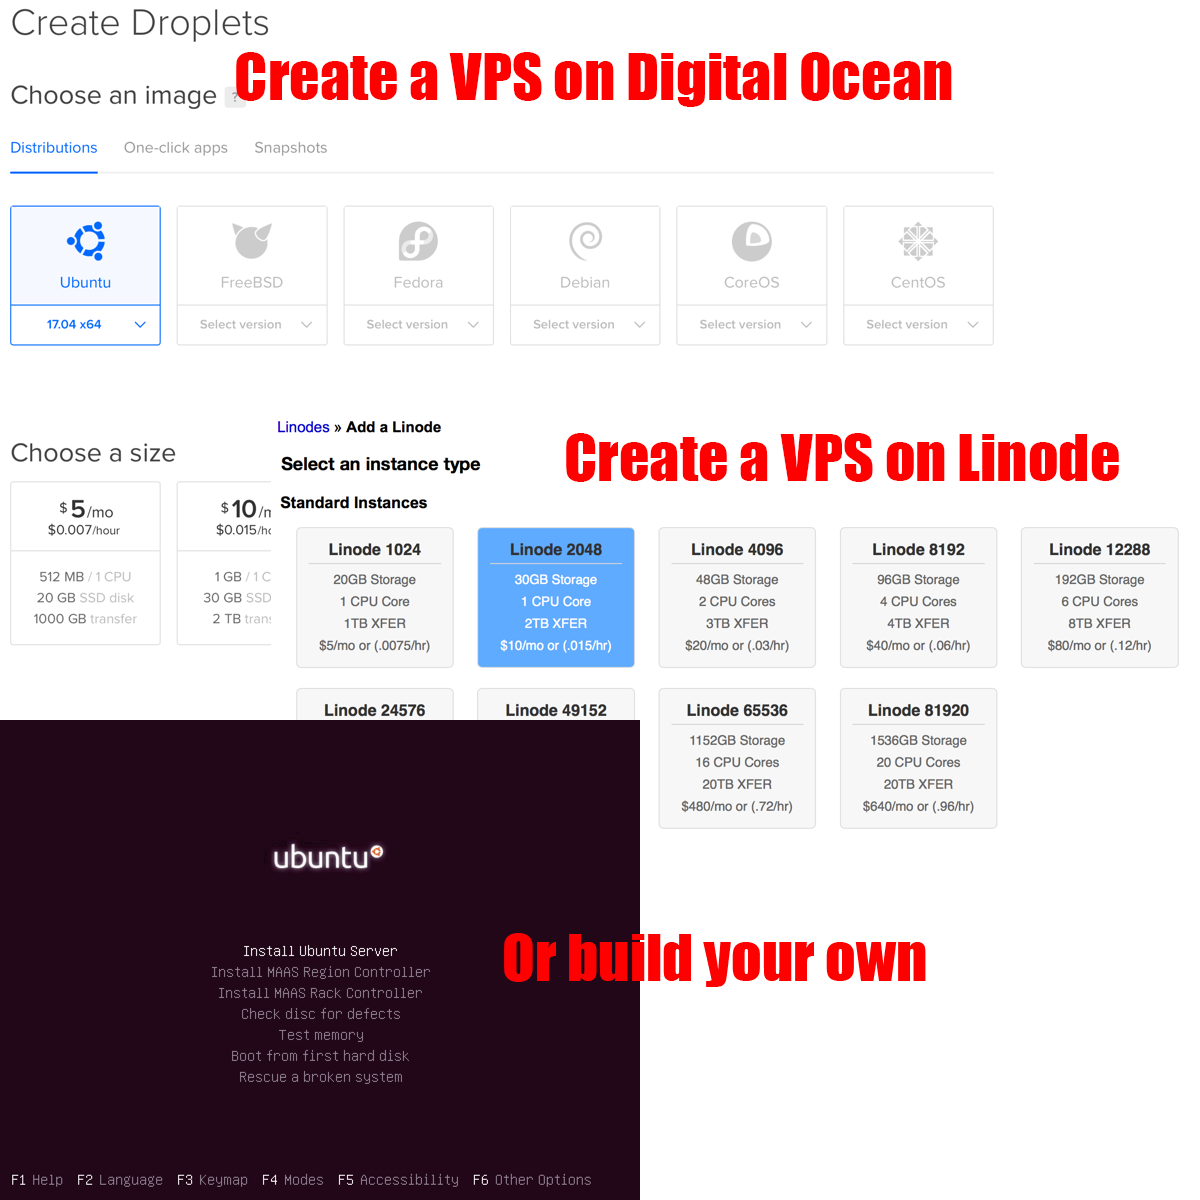
The main difference is, if your hosting company build it for you, the root user will be enabled and you will connect with the root user and password. If you build your own server you will connect with user account and root will be disabled. If you know nothing about Linux that means to execute any system level commands you need to prefix them with ‘sudo’ (or type su and enter the root password). If you are logged in as root and use sudo it does not make any difference so I will prefix all the commands I use below with sudo to make things easier, just remember the first time you use sudo it will ask for your password again.
Why Ubuntu? Well I use CentOS presently, but while doing research there was little information on getting nginx and PHP7 running on CentOS, but there was for Ubuntu that’s the only reason I’m switching OS.
Update The Server
It might have been built from an image, but that does not mean that the image was up to date, thankfully that’s simple to do, run the following command to see if there’s any updates.
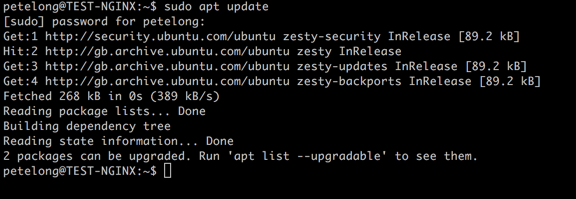
In my example theres two updates, I can upgrade to them with the following command, (you may be asked to answer ‘y’ for yes);

Change the Linux SSH Port
Note: If you built the server, you may need to install openssh server.
I’ve had servers compromised in the past so let’s start with some basic security, I always change the default SSH port, in this example I’ll use 2223 (instead of the default SSH port of 22).
Edit the SSH config file;
Uncomment and change the Port number to something other than 22, (make it above 1024 to be on the safe side, I’m using 2223).
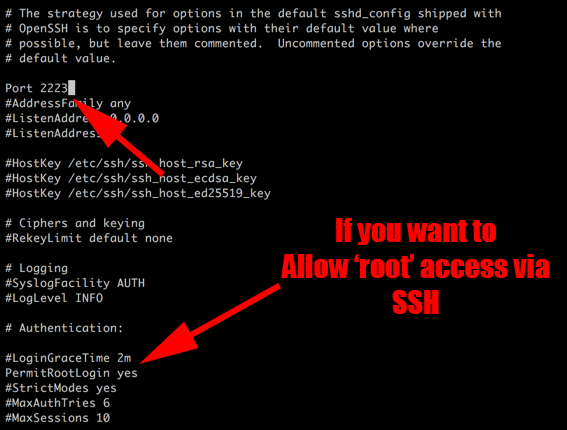
Note: If you built your own server, and you are allowing root access to SSH you may want to see the following article;
Ubuntu: Allow SSH access for ‘root’ user
Don’t forget to restart the service;
Protect Your Web Server With a Firewall
Traditionally Linux uses iptables, (or FirewallD for CentOS.) I like iptables, because like all things Linux I worked out how to set it up, and wrote it down. Ubuntu has a ‘front-end’ to iptables thats still command driven, it’s called UFW (uncomplicated firewall). Which I didn’t want to learn about because I use iptables! But in all honestly UFW is so simple it’s painfully easy.
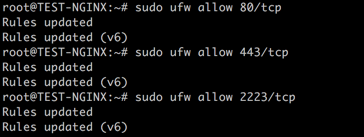
I want to allow TCP 80 (http), TCP 443 (https), and TCP 2223 (for my SSH server). And that’s it, block everything else incoming, allow the server to speak out, and secure the server.
Run the following commands;
sudo ufw default allow outgoing
sudo ufw default deny incoming
sudo ufw allow 80/tcp
sudo ufw allow 443/tcp
sudo ufw allow 2223/tcp
Then enable the firewall, and set it so that it starts when the server reboots, you can also check its status for peace of mind;
sudo ufw enable
sudo ufw status

Install and Configure MariaDB
Like most things Linux, installing MariaDB is simple, run the following command;
Then make sure it’s up and running;
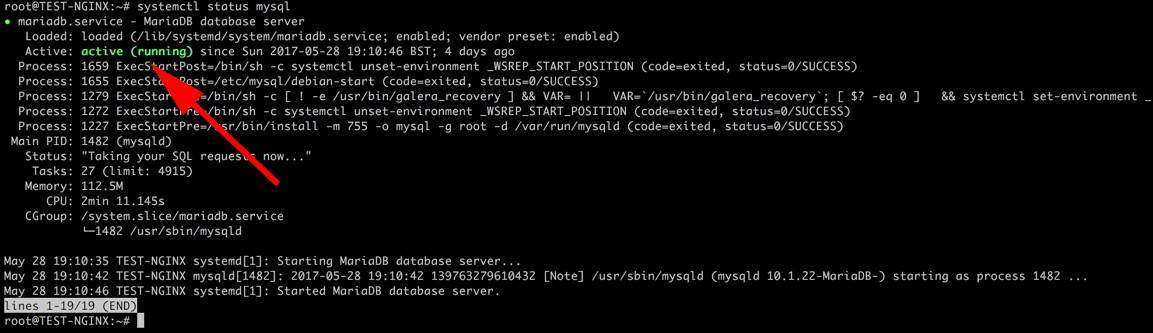
Note: If it looks like it’s frozen, press Ctrl+C to get the cursor back
Set MariaDB to start when the server restarts;
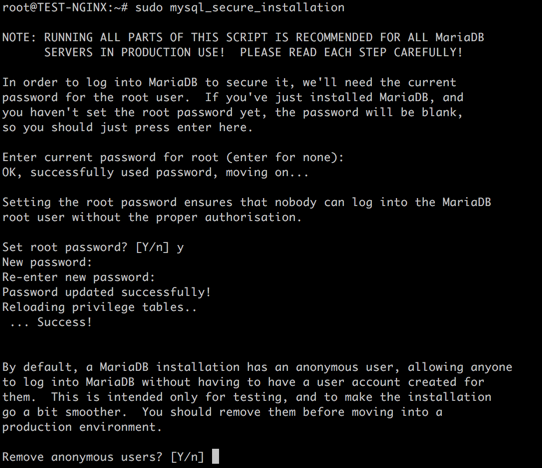
Secure MariaDB: At the moment MariaDB will have a blank root password, (it has its own root user). So to secure it you simply run;
Note: It immediately asks for a password, (it will be blank so hit (Enter},) answer ‘Y’ to set a root password, set a fresh one (you will need it in a minute, so remember what it is!) Then accept all the defaults by just pressing {Enter}.
Create Your WordPress Database
WordPress needs a database, to get WordPress talking to MariaDB (or MySQL) you need three things;
- A database name.
- A username to access the database.
- A password for that user.
So in the following example I will use;
- Database Name: PETESDATABASE
- Username: petesuser
- Password: P@ssword12345
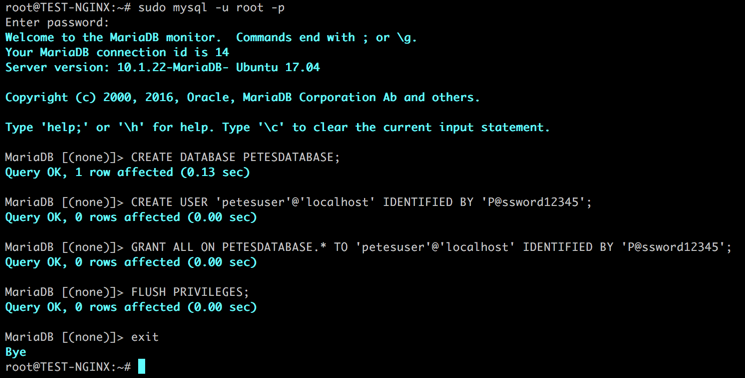
Execute the following commands one by one;
sudo mysql -u root -p
{Enter the root password you just set for MariaDB}
CREATE DATABASE PETESDATABASE;
CREATE USER 'petesuser'@'localhost' IDENTIFIED BY 'P@ssword12345';
GRANT ALL ON PETESDATABASE.* TO 'petesuser'@'localhost' IDENTIFIED BY 'P@ssword12345';
FLUSH PRIVILEGES;
exit
In Part Two, we will install nginx and PHP.
Related Articles, References, Credits, or External Links
NA
04/06/2017
This is great. Thank you. Cannot wait for part 2.
04/06/2017
Wait no more 🙂 http://www.petenetlive.com/KB/Article/0001319
P