
KB ID 0001285
Problem
I don’t often use Nortel (now Avaya) switches, I know they are decent, but in my day job I usually work on Cisco, occasionally HP, and other cheap assorted nastiness switches.
I was replacing an old 10/100 Cisco 3750 switch with a Nortel 4526GTX this week, and thought I’d take some notes for the common things I do, just in case I have to do another.
So this post is an eclectic collection of the various things I had to do, and worked out for the future.
Solution
I’m carrying the following out via console cable, the settings are the same as you would expect for a Cisco/HP switch, i.e.
- 9600 Baud
- 8 bits
- 1 stop bit
- No Parity
WARNING: The console cable is NOT the same pinout as a normal console cable, it’s a straight through cable, (not a rollover cable). Though I did discover that the Cisco SMB switches also use the same cable.
Console: When connected it may look like nothing is happening, pressing enter etc shows no output. This is normal, you need to press CTRL+Y before you will get to command prompt.
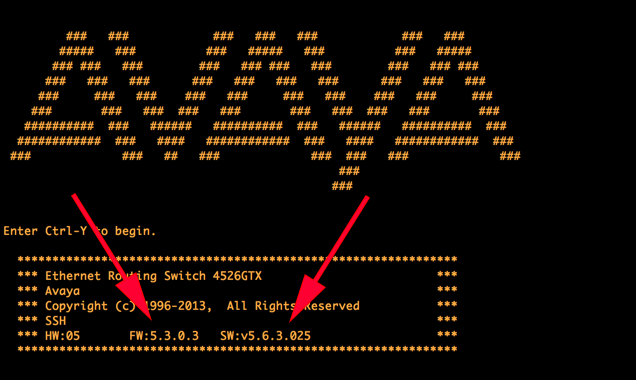
Nortel / Avaya Switches Update the Firmware / Software
WARNING: Requires downtime, (2x reboots).
Nortel / Avaya switches have a software image and a firmware file. ALWAYS update the firmware first! I’ve got a TFTP server setup on my laptop (see links below). With the firmware and software image files ready.
CTRL+Y
enable
download address {IP-address-of-TFTP-Server} diag {xxxx_xxxx_diag.bin}
The switch will download the firmware, upgrade it and perform a reboot. When it’s back online perform the same procedure for the software image.
CTRL+Y
enable
download address {IP-address-of-TFTP-Server} image {xxxx_xxxxxxx_.img}
Once again the switch will reboot, when it’s back online check the firmware, and software versions are correct on the welcome screen.
Backing up and Restoring Nortel / Avaya Switches via TFTP
I’m usually doing this for other switch vendors and for those I will backup the config to a readable text file, that I can also revert to to see how things are configured. You can do the same thing on a Nortel / Avaya switch, but YOU CANT restore the firewall from that ‘readable’ backup, (unless you copy and paste the commands back in). To backup to a human readable file use the following command;
copy running-config tftp address {IP-address-of-TFTP-Server} filename {File-Name}
Well that’s all well and good, but to produce a file you can ‘restore’ the firewall from, you need to backup and restore the ‘code’.
Backup Nortel / Avaya
copy config tftp address {IP-address-of-TFTP-Server} filename {File-Name}
![]()
Restore Nortel / Avaya
This reboots the switch!
copy tftp config address {IP-address-of-TFTP-Server} filename {File-Name}
![]()
Factory Reset Nortel Avaya Switches
As I mentioned above, I’m working on a 4526GTX switch, but the procedure is the same for;
- 400 Series, (450, 460, 470.)
- 2500 Series.
- 4500 Series.
- 5500 Series, ( 5510, 5520, 5530.)
Connect to the switch using a serial connection (settings above), then reboot the switch. If you watch the boot text, eventually it will say “Press Control C to Enter Diag” > Press Control+C > Choose option ‘i’ initiate config flash.

Then choose option ‘a’ to run agent code > The switch will now boot up.

Press CTRL+Y and the switch will have a blank, (factory reset) config.
Nortel / Avaya Set a Management IP (and Default Route)
Like other vendors, if you are going to deploy the switch in a ‘flat’ network (i.e. all ports in VLAN 1) then you only need to set up an IP address for for VLAN1.
By default the switch will be on 192.168.1.1 which you can see with the following command;
4526GTX(config-if)#show ip
Bootp/DHCP Mode: Disabled

                      Configured        In Use         Last BootP/DHCP
                    --------------- --------------- --------------------
Stack IP Address:   192.168.1.2                       0.0.0.0
Switch IP Address:  192.168.1.1     192.168.1.1    0.0.0.0
Switch Subnet Mask: 255.255.255.0   255.255.255.0  0.0.0.0
Default Gateway:    0.0.0.0
To change that, first I’m going to rename VLAN, then remove that IP, and finally, set a new one.
4526GTX(config)#vlan name 1 Default-VLAN
4526GTX(config)#interface vlan 1
4526GTX(config-if)#no ip address 192.168.1.1 255.255.255.0
4526GTX(config-if)#ip address 192.168.254.1 255.255.255.0
To set the default route, first I’m enabling routing, then setting the default route;
4526GTX(config)#ip routing
4526GTX(config)#ip route 0.0.0.0 0.0.0.0 192.168.254.254 1
Nortel / Avaya Allowing Remote Management
This looks a little ‘Juniper SRX ‘ish”. Below the usernames will remain RW and RO.
DONT set the RO and RW passwords the same!
To set the passwords;
4526GTX(config)#username RO Re@d0nly ro
4526GTX(config)#username RW P@ssw0rd123 rw
Then to enable telnet, (and SSH strangely), using local authentication’
4526GTX(config)#cli pass telnet local
Note: I didn’t have to add any extra commands to enable web management via the GUI.
Nortel / Avaya Assigning Ports to VLANS
At command line this can get a little confusing, my colleagues point out that it’s much simpler to do in the web interface. But at PNL we don’t work on the web interface.
To understand how it works, you need to remember; ‘Any port can be ‘tagged’ in a vlan, (or any number of vlans). but a port can only be untagged in one vlan‘. This is the same for all vendors, they just use different terminology i.e. HP=Tagged and Untagged, (simple). Cisco=Access Port and Trunk, (simple if you are used to it).
Unlike ‘modern‘ Cisco switches, if you reference a VLAN that does not exist, it will just error, like older switches you need to create the VLAN and add it to the VLAN database first.
Creating and Naming a VLAN
Here I create VLAN 100, and call it PROD-NW.
4526GTX(config)#vlan create 100 name PROD-NW type portAssign an IP Address (SVI) to a VLAN
Using the VLAN I created above, I’m adding ip address 192.168.100.1/24 to it.
4526GTX(config)#interface vlan 100
4526GTX(config-if)#ip address 192.168.100.1 255.255.255.0
Adding Ports to VLANS
Remember what I said above about VLANs, (a port can be tagged in multiple VLANS.) If you are a Cisco-head a port with multiple VLAN tags is a trunk. (If all the HP engineers are confused at this point, read the link a the bottom of the page).
So you need to ‘Remove’ a port from VLAN1 (or the VLAN it is in) then make it a member of your new VLAN, and finally you need to assign the PVID of your new VLAN to the port!
So below I’m moving ports 1 to 4 into VLAN 100 from VLAN 1;
4526GTX(config)#vlan members remove 1 1-4
4526GTX(config)#vlan members add 100 1-4
4526GTX(config)#vlan ports 1-4 pvid 100
Note: If you do it in the wrong order and get a warning you can stop the warnings with a ‘vlan configcontrol flexible‘ command.
To prove it worked;
4526GTX(config)#show vlan int info
      Filter     Filter
     Untagged Unregistered
Port  Frames     Frames    PVID PRI    Tagging    Name
---- -------- ------------ ---- --- ------------- --------------
1    No       Yes          100  0   UntagAll      Port 1
2    No       Yes          100  0   UntagAll      Port 2
3    No       Yes          100  0   UntagAll      Port 3
4    No       Yes          100  0   UntagAll      Port 4
5    No       Yes          1    0   UntagAll      Port 5
6    No       Yes          1    0   UntagAll      Port 6
7    No       Yes          1    0   UntagAll      Port 7
8    No       Yes          1    0   UntagAll      Port 8
9    No       Yes          1    0   UntagAll      Port 9
10   No       Yes          1    0   UntagAll      Port 10
11   No       Yes          1    0   UntagAll      Port 11
12   No       Yes          1    0   UntagAll      Port 12
-----------Config Removed for the Sake of Brevity----------
You can also use the following command;
4526GTX(config)#show vlan
Id  Name                 Type     Protocol         PID      Active IVL/SVL Mgmt
--- -------------------- -------- ---------------- -------- ------ ------- ----
1   Default-VLAN         Port     None             0x0000   Yes    IVL     Yes
        Port Members: 5-26
100 PROD-NW              Port     None             0x0000   Yes    IVL     No
        Port Members: 1-4
Total VLANs: 2
Or if you are running a newer version of the code;
4526GTX(config)#show run mod vlan
! Embedded ASCII Configuration Generator Script
! Model = Ethernet Routing Switch 4526GTX
! Software version = v5.6.3.025
!
! Displaying only parameters different to default
!================================================
enable
configure terminal
!
! *** VLAN ***
!
vlan create 100 type port 1
vlan name 1 "Default-VLAN"
vlan name 100 "PROD-NW"
vlan configcontrol flexible
vlan members 1 5-26
vlan members 100 1-4
vlan ports 1-4 pvid 100
no auto-pvid
!
! *** VLAN Phase 2***
!
Other Quick Examples
Create VLAN 200 named 8021x-NW, with SVI of 192.68.100.1 and add ports 13 to 16

vlan create 200 name 8021x-NW type port
vlan members remove 1 13-16
vlan members add 200 13-16
vlan ports 13-16 pvid 200
int vlan 200
 ip address 192.168.200.1 255.255.255.0
 exit

Create a VLAN 101 named DMZ-NW, and add ports 7 to 10

vlan create 101 name DMZ-NW type port
vlan members remove 1 7-10
vlan members add 101 7-10
vlan ports 7-10 pvid 101

Add Ports 5 and 6 to (Existing) VLAN 100

vlan members remove 1 5-6
vlan members add 100 5-6
vlan ports 5-6 pvid 100
Related Articles, References, Credits, or External Links
Special thanks for Kevin Almond, for his assistance.
CentOS – Install and Configure a TFTP Server
HP and Cisco – VLANs and Trunks Confusion!
24/11/2019
Hi Pete, Thanks for the article. I try to add an IPv6 management address to my 5520-48T-PWR and it comes up with the following:
5520-48T-PWR(config)#ipv6 add switch 2001:44b8:4121:xx60::26/64
% IPV6 management interface does not exist
How does one go about adding a management interface? I was able to add an IPv4 address without any problems.
Cheers,
Matt.
25/11/2019
Hi Matt, I don’t know but I’ll post this so people can follow up 🙂