
KB ID 0000598
Problem
Note: This is an old post for VMware view version 5, you might want to read Deploying VMware Horizon View instead.
In Part 2 we got our machine ready to be delivered via VMware View. Now we need to create a ‘Pool’, grant users access to that pool, and finally connect to it from a VMware View Client.
Solution
VMware View – Creating a Manual Pool
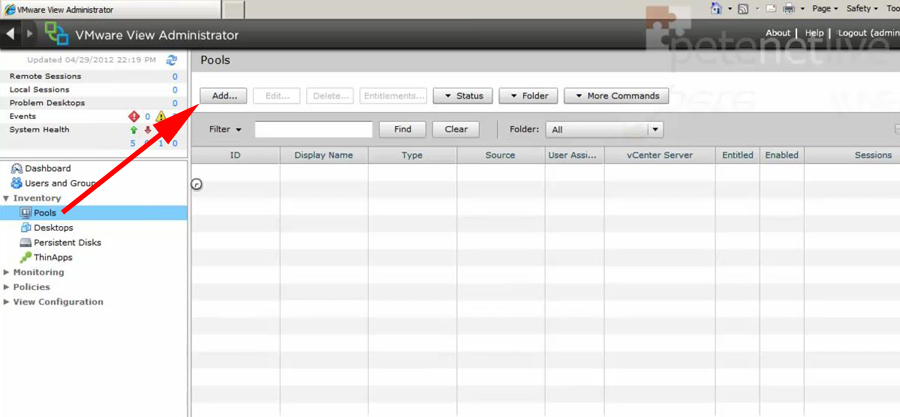
1. Open a connection to your VMware View Administrator console (https://{connection-server-name}admin). Log in and navigate to Inventory > Pools > Add.
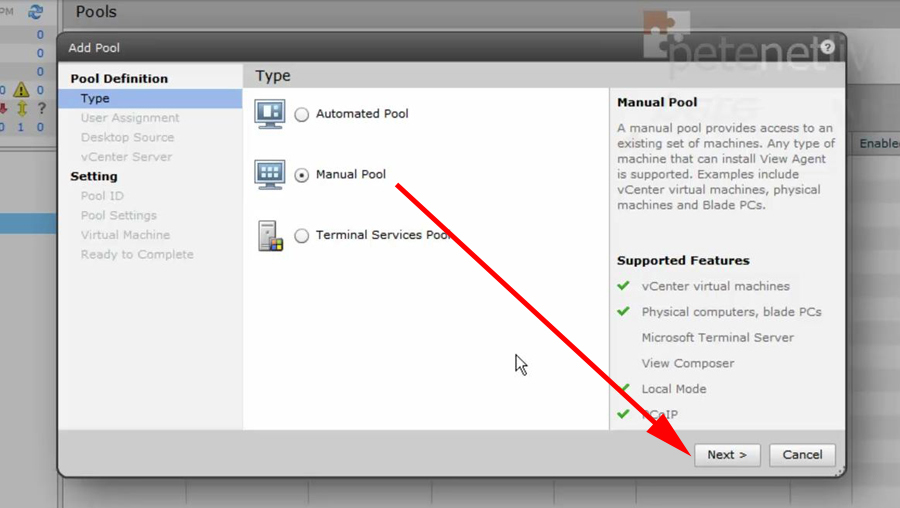
2. We are going to create a manual pool (Note: An automated pool will create machines dynamically as required).
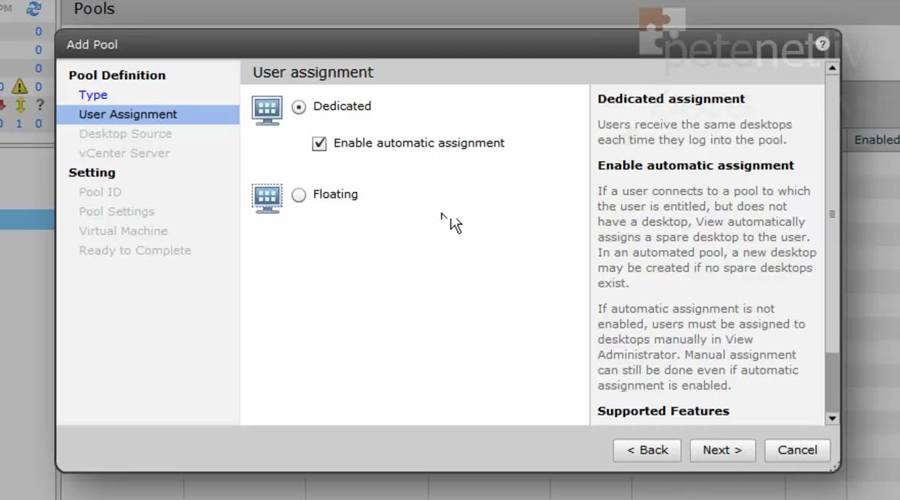
3. I’m selecting dedicated (the machine will get allocated to the first user that connects to it, and remains theirs). With a floating Pool machines are returned to the pool after they are finished with to be given to the next user that requires a machine.
4. My machine is in vCenter.

5. And there’s my vCenter

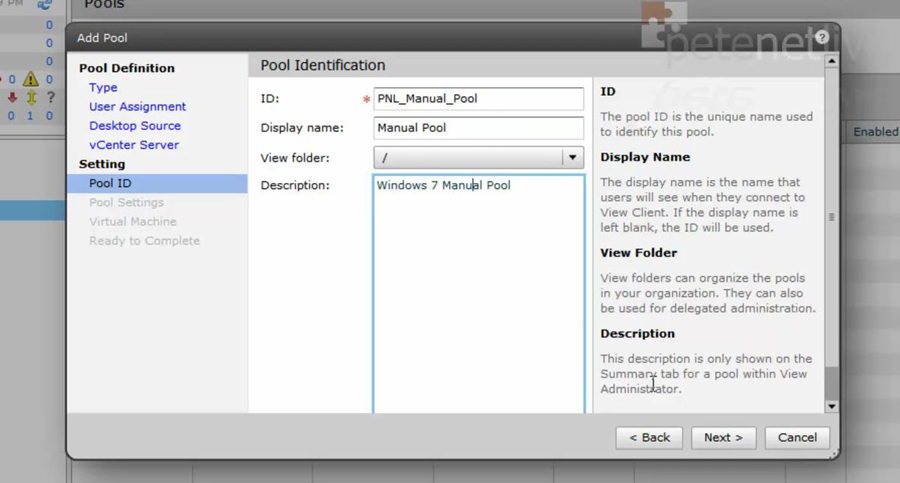
6. Give the new pool a sensible name.
7. Change the settings for the pool as required, I pretty much accept the defaults, but I allow the users to “reset” their desktop.

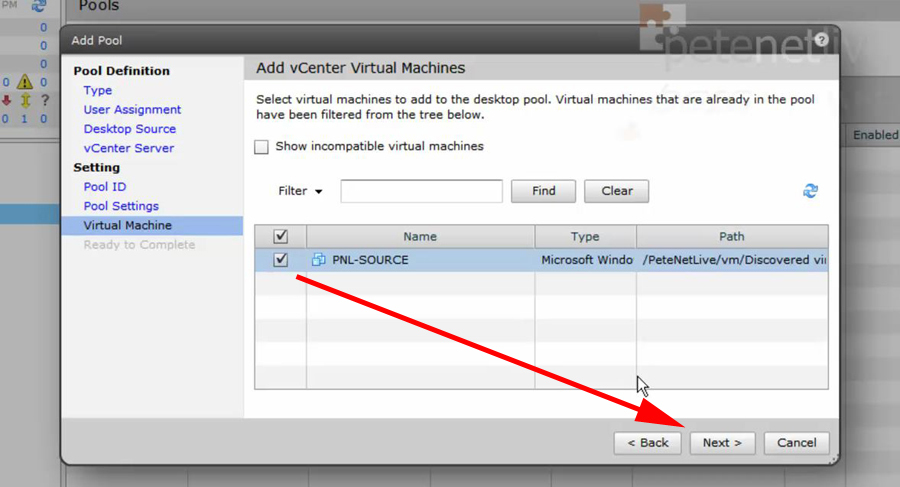
8. Select the machine(s) you are going to add to the pool, and complete the wizard.
9. Now you have a new pool, you need to grant users/groups an ‘entitlement’ to use it.
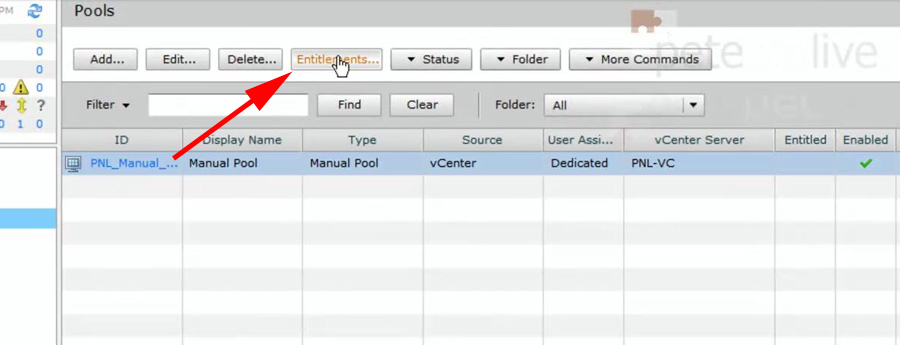
10. Simply add in the users or groups from Active Directory as required.

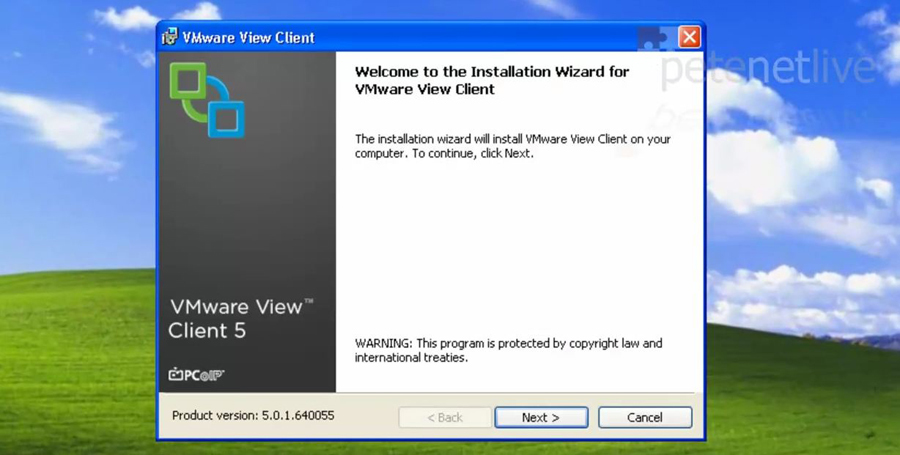
VMware View – Installing the VMware View Client
11. You will find that there are x32 and x64 bit VMware client software installs. There are available in two flavours, (with local mode, or without local mode).
Note: Local Mode: This is a mechanism where users can ‘check out’ their virtual machines and work on them remotely, then ‘sync’ them back to the network when they return, it requires a VMware Transport Server (use the connection server install media and change the server type to Transport Server).
12. During setup it will ask you the name of your connection server.

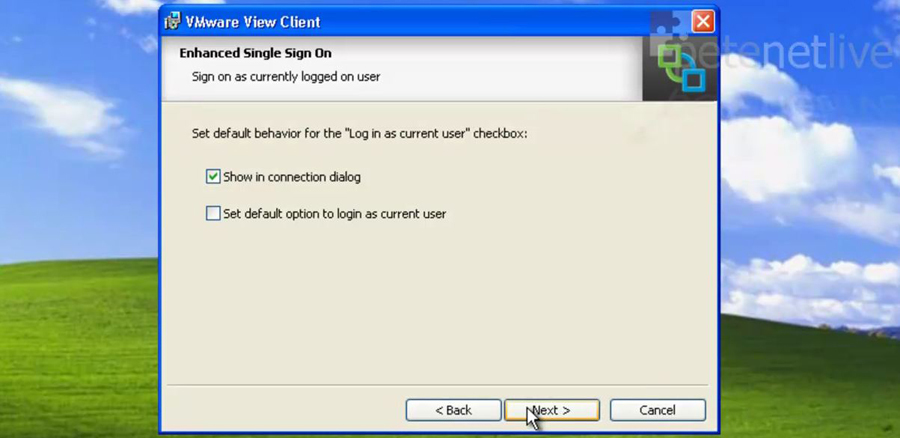
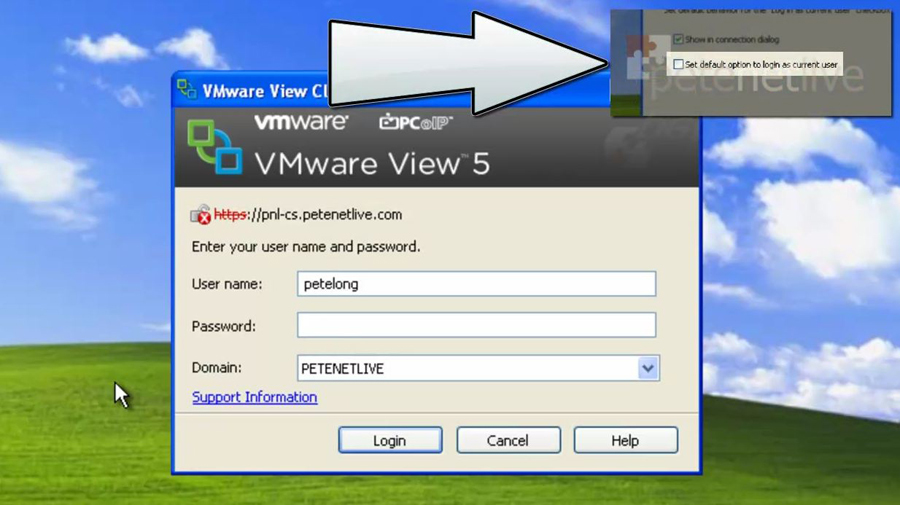
13. Normally you would tick “Set default option to login as current user”. If not you will see the login option in step 16 below.
14. When you launch the software, you may want to change the certificate options. The Connection server will have installed with a ‘self signed’ certificate, (which is fine) but you might want to change the ‘Configure SSL” options.
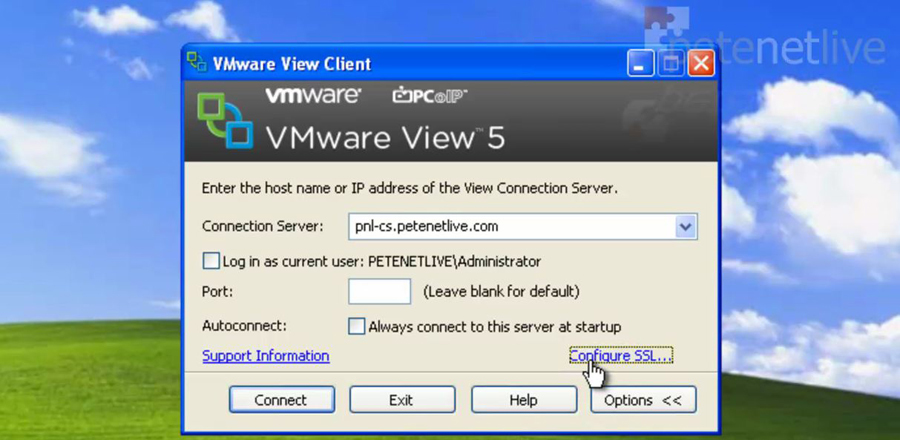
15. Here I’ve set them to allow, it says not secure – but its still encrypted, it should really say ‘least secure’.

16. If you didn’t tick the box in step 13 above you will need to login again.
17. Now you will see all the pools you have an entitlement to, select as appropriate and click connect.

18. All being well the desktop will connect and dynamically resize to fit.

19. Whist connected you will can control your connection with the menu on the view client bar at the top of the screen, also here you will see options for connecting USB Devices (Note: USB will only be available if you had it selected when you installed the client, it IS selected by default).

Related Articles, References, Credits, or External Links
VMware View 5 – Part 4 Installing and Configuring SQL 2008 R2 and VMware Composer