
KB ID 0000069
Problem
Note: This is for Cisco ASA 5500, 5500-x, and Cisco Firepower devices running ASA Code.
Below is a walk through for setting up a client to gateway VPN Tunnel using a Cisco Firepower ASA appliance. This was done via the ASDM console. The video was shot with ASA version 9.13(1) and ASDM 7.13(1).
Suggestion: If you are setting this up for the first time, I would suggest setting it up to use the ASA’s LOCAL database for usernames and passwords, (as shown in the video). Then once you have it working, you can change the authentication (AAA) to your preferred method (see links at bottom of page).
The original article was written with ASA version 8.0(4) and ASDM 6.1(3), which was a little more difficult so I will leave that procedure at the end just in case 🙂
Note: The ASDM cannot be used on the normal port (https) on the outside interface when using AnyConnect, because HTTPS or TCP port 443 needs to be free (and also IMPORTANTLY NOT ‘port-forwarded’ to a web server / Exchange server etc. for this to work). To fix that, either change the port that AnyConnect is using (not the best solution!) Or, (a much better solution) Change the port ASDM is using.
Solution
Setup AnyConnect From ASDM (Local Authentication)
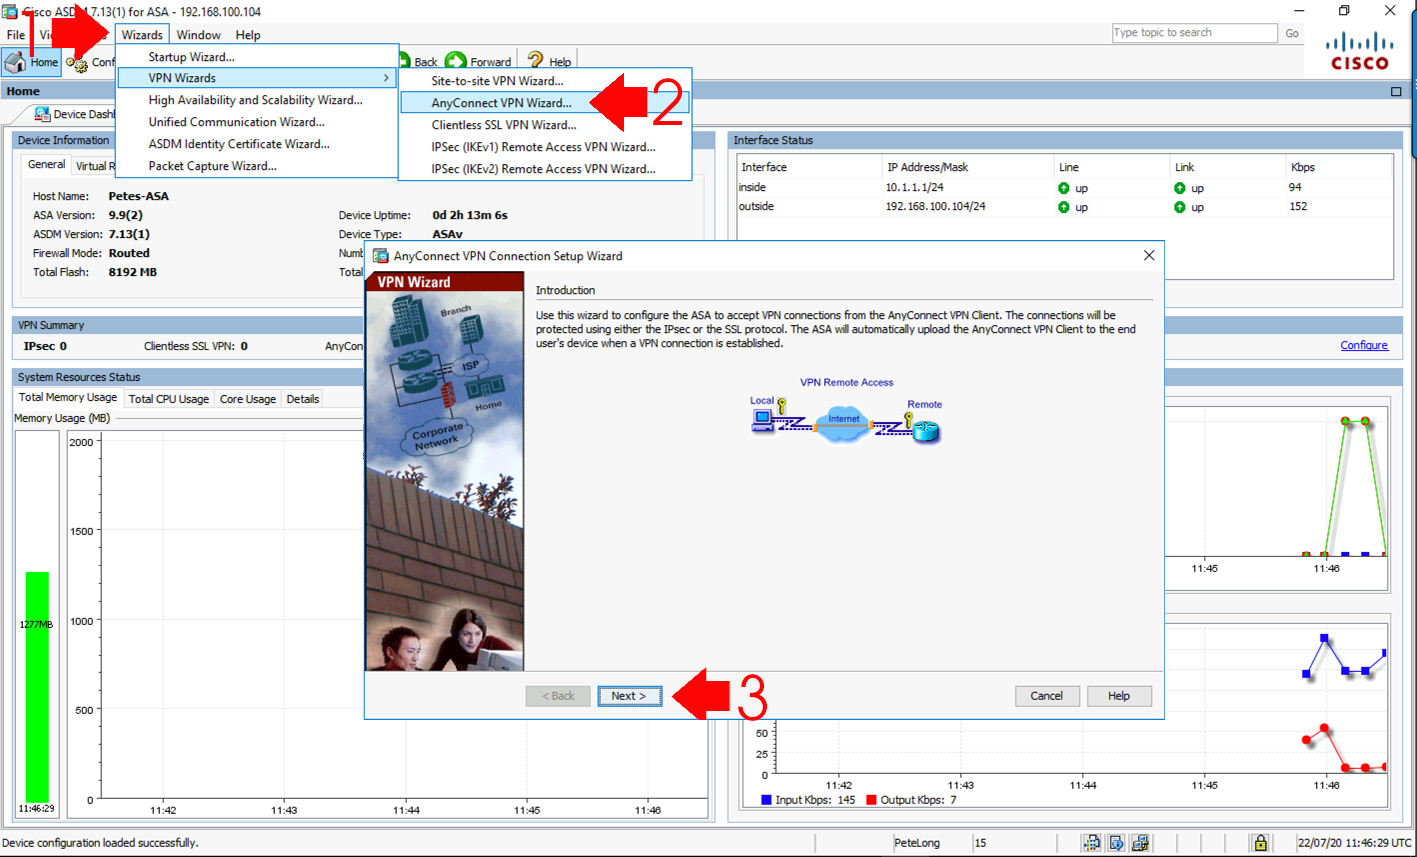
In case you don’t want to watch a video! Launch the ASDM > Wizards > VPN Wizards > AnyConnect VPN Wizard > Next.
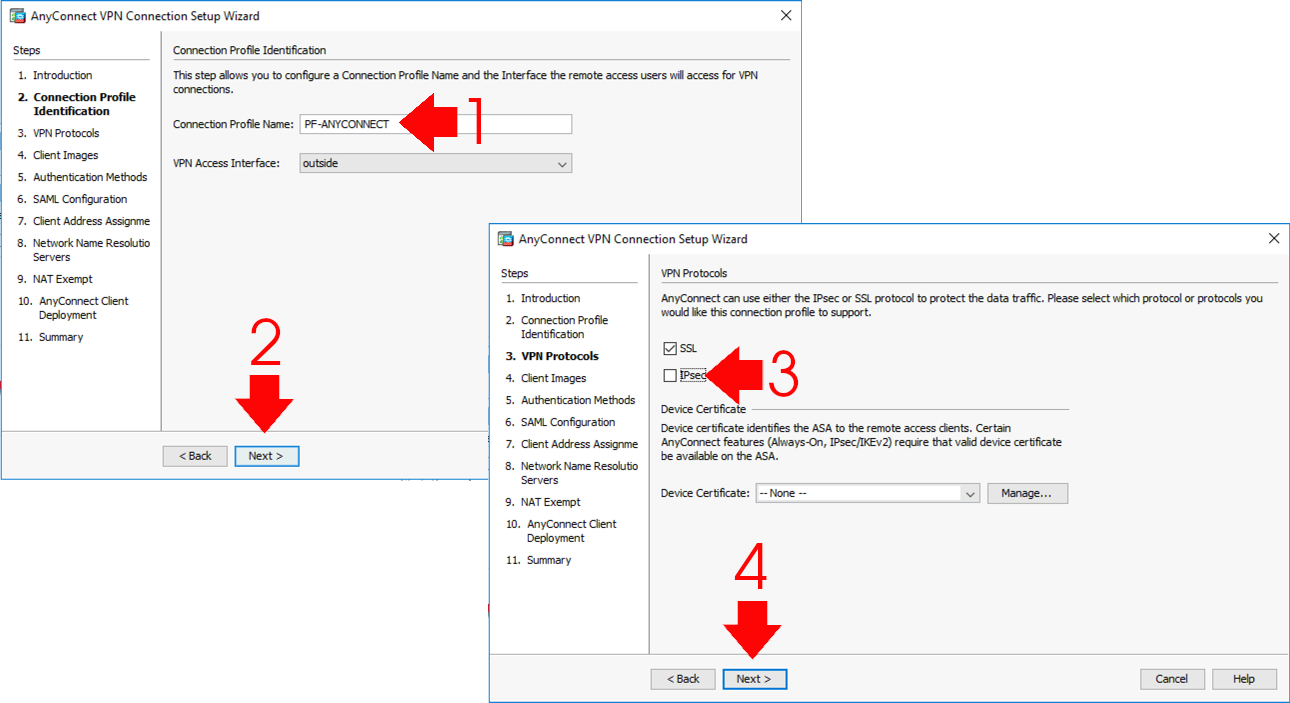
Give the AnyConnect profile a name i.e PF-ANYCONNECT, (I capitalise any config that I enter, so it stands out when I’m looking at the firewall configuration). >Next > Untick IPSec > Next.
Note: You can use IPSec if you want, but you will need a Certificate pre-installed to do so!
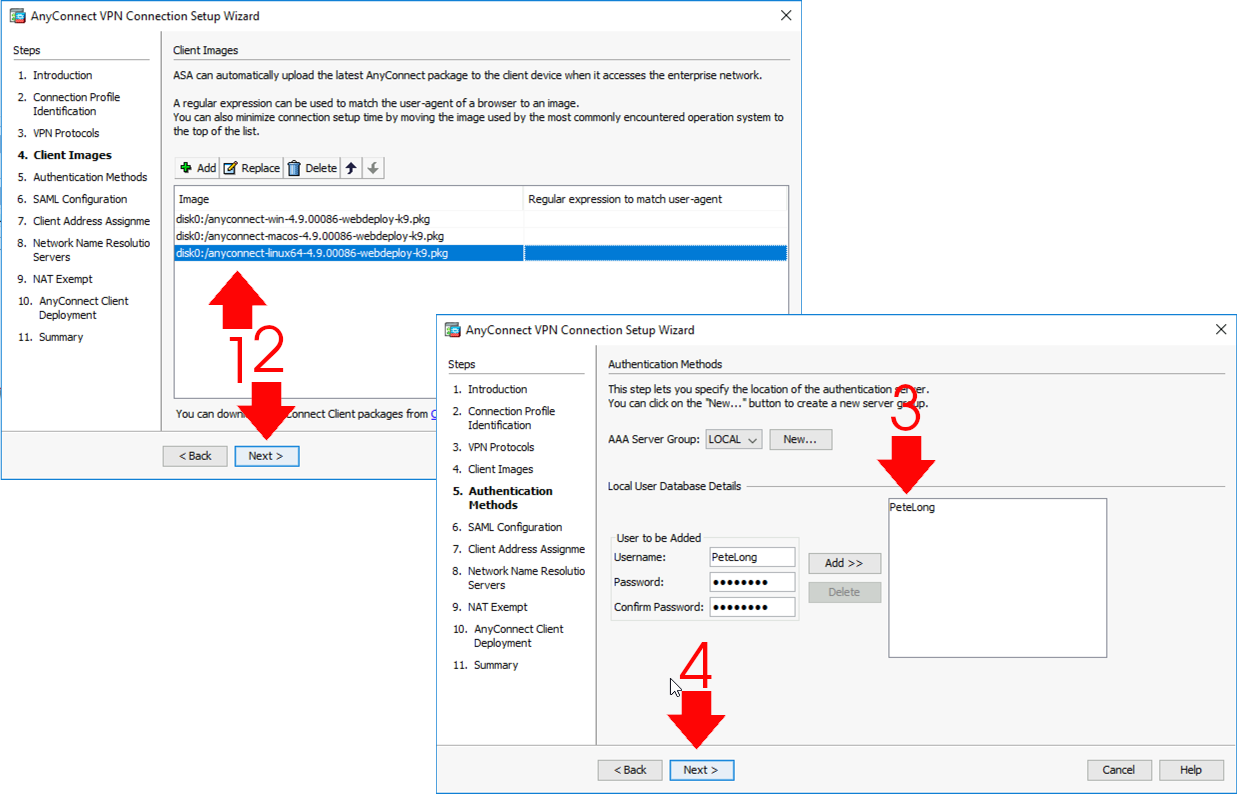
Now you need to upload the AnyConnect client packages for each operating system that is going to want to connect,
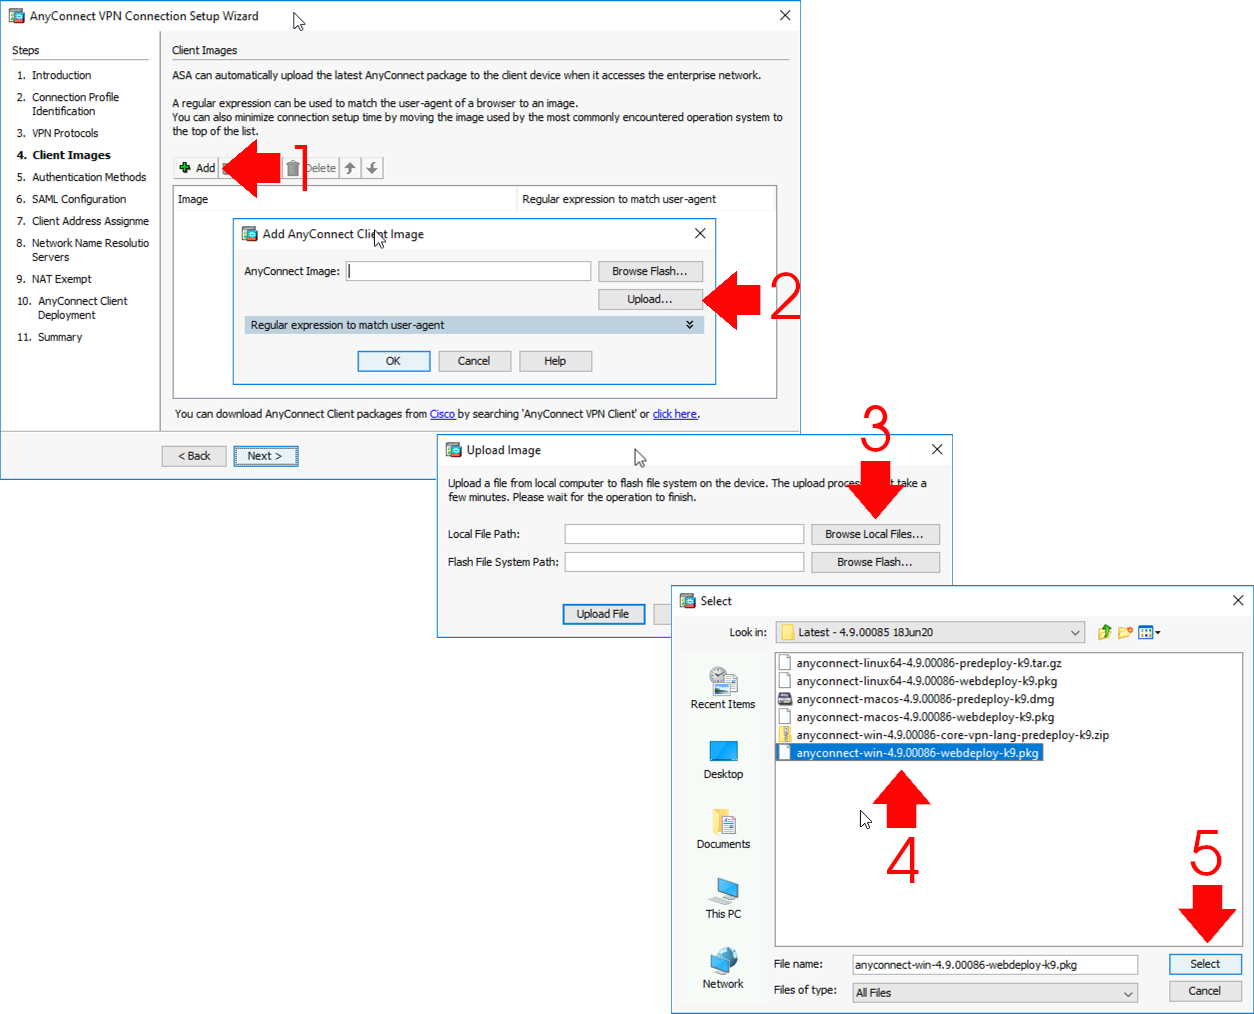
Once the package (with a pkg extension) is located, you can upload it directly into the firewalls flash memory.
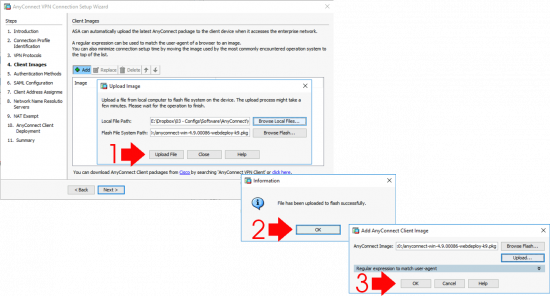
Repeat the process for each OS that will be connecting. (PLEASE! Don’t forget to add the macOS package! or your users will see THIS ERROR) > Next > As mentioned above I’m using LOCAL (on the ASA) authentication. I always set this up first, then test it, then if required, change the authentication method > If you don’t already have a LOCAL user created then add a username and password for testing > Next.
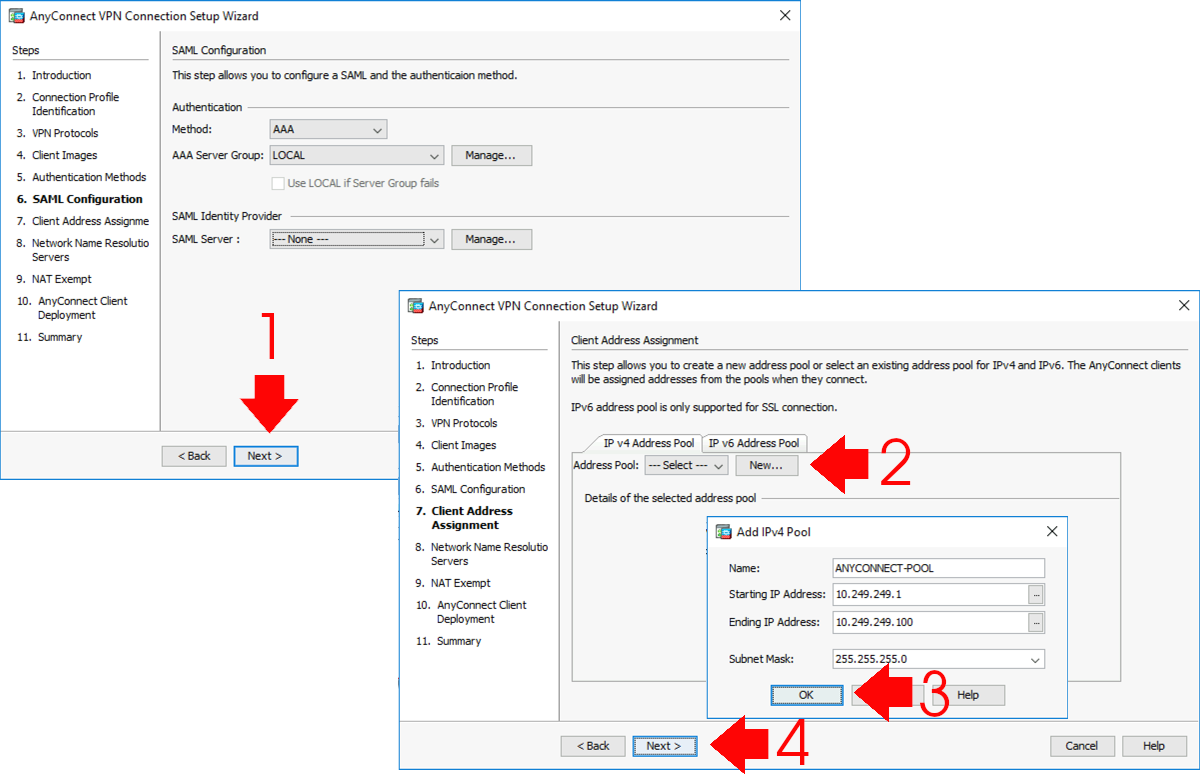
Next (Unless you want to setup SAML) > Here I’ll create a new ‘Pool’ of IP addresses for my remote clients to use. You can also use an internal DHCP server for remote clients, again I normally setup and test with a Pool from the ASA, then if I need to use a DHCP server, I swap it over once I’ve tested AnyConnect. If that’s a requirement, see the following article;
AnyConnect – Using a Windows DHCP Server
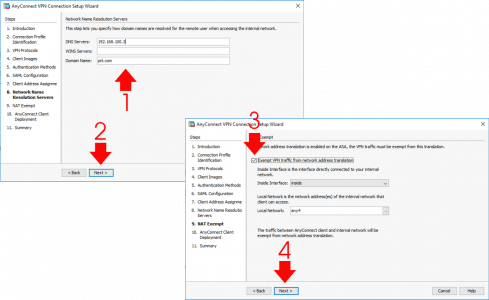
Enter the DNS server(s) details for you remote clients > WINS? Who is still using WINS! > Domain name > Next > Tick ‘Exempt VPN traffic from network address translation’ > Next.
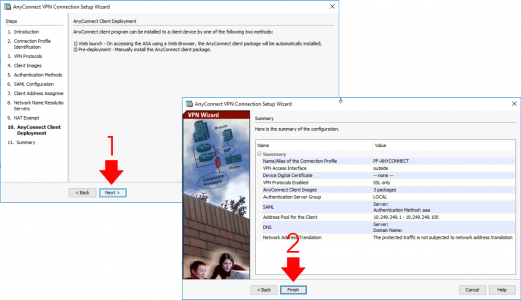
Next > Finish
DON’T FORGET TO SAVE THE CHANGES!! (File > Save Running Configuration to Flash)
Now any remote client attempting to connect to AnyConnect can install the client software directly from the firewall, (This is assuming you have not already installed it for them beforehand).

For Older Versions of the ASA/ASDM
Note: The information below is OBSOLETE, I only leave it here in case someone is running some VERY old versions of the ASDM and AnyConnect
1. Open up the ADSM console. > Click Wizards >SSL VPN Wizard.
2. Select “Both Options”. > Next.
3. Enter a connection name > If you have a certificate already select it here or simply leave it on” -None-” and the ASA will generate an un trusted one. > Next.
4. For this example we are going to use the ASA’s Local database to hold our user database, however, if you want to use RADIUS/Windows IAS select those options and accordingly, and then follow the instructions. Note: To set up IAS read my notes HERE > Enter a username and password.
5. Add. > Next
6. We are going to create a new policy in this case called SSL Users > Next.
7. You can now add bookmarks (Links on the VPN portal page) > Manage > Add > Type in a name > Add. > OK.
8. Give it a name and subtitle (look at step 18 to see how that displays) > Enter the internal URL for the web site > OK.
9. Add > OK.
10. OK.
11. Next.
12. Create an IP Pool (IP range to be leased to the VPN clients that is DIFFERENT to your LAN IP range) > New > enter a name, IP addresses, and the subnet mask > OK.
13. Point the ASA to the Anyconnect client you want to use (Note you can upload a software image from your PC here as well) Next > Accept the warning about NAT Exemptions (Note if you do get a warning to add a NAT Exemption see the note at the end).
14. Finish.
15. Before it will work you need to Select Configuration > Remote Access VPN > Network (Client) Access > AnyConnect Connection Profiles > Double click the Connection profile you created earlier in step 3 > Enter a name in the Aliases section i.e. AnyConnect > OK. > Tick the box that says “Allow user to select connection profile by its alias………” > Apply.
16. File > Save running configuration to flash.
17. Connect externally to https://{public_IP} (Note this has to be in the browsers trusted site list) > Enter a username and password > Login
18. You are now on the “Portal” site any bookmarks created above will be visible > Click the AnyConnect Tab.
19. Double click to launch AnyConnect.
20. The Anyconnect client will install if not used previously (User needs to be local admin) and connects.
NAT Exemptions: Note if you received a warning about needing to add the remote VPN pool as a NAT Exemption (After step 13) you will need to add the following lines to the ASA
Syntax;
access-list {name} extended permit ip {LAN behind ASA} {Subnet behind ASA} {VPN Pool Range} {VPN Pool Subnet}

nat (inside) 0 access-list {name}

Working example

access-list nonat extended permit ip 10.254.254.0 255.255.255.0 10.254.253.0 255.255.255.0

nat (inside) 0 access-list nonatWARNING: Make sure the name matches any existing no NAT ACLs or your IPsec vpns will fail!
Related Articles, References, Credits, or External Links
Cisco ASA 5500 AnyConnect Setup From Command Line
AnyConnect: Allow ‘Local’ LAN Access
AnyConnect 4 – Plus and Apex Licensing Explained
Cisco AnyConnect – Essentials / Premium Licences Explained
AnyConnect (AAA) Authentication Methods
Kerberos Authentication (Cisco ASA)
LDAP Authenticaiton (Cisco ASA)
RADIUS Authentication(Cisco ASA)
Duo 2FA Authentication (Cisco ASA)
Cisco – Testing AAA Authentication (Cisco ASA and IOS)