
KB ID 0000071
Problem
Below is a walkthrough for setting up a client to gateway VPN Tunnel using a Cisco ASA appliance.This is done via the ASDM console. Though if (Like me) you prefer using the Command Line Interface I’ve put the commands at the end.
You will need a RADIUS server, WIndows Server (2000 and 2003) Has its own RADIUS bolt on called Windows IAS Step 1 Below is a walkthrough on how to set this up.
It also uses the Cisco VPN client – the version used is v5 which is still in beta at the time of writing.
Solution
Note: This is an old post and covers setup on Server 2003, for a more modern version, (Server 2012/2016/2019) of this procedure, see the following article;
Windows Server Setup RADIUS for Cisco ASA 5500 Authentication
Step 1 Install RADIUS (Server 2003 Windows IAS)
Note: for Server 2008 go here and for Server 2012 go here.
1. Assuming you don’t already have IAS installed, Click Start > Control Panel > Add Remove Programs.
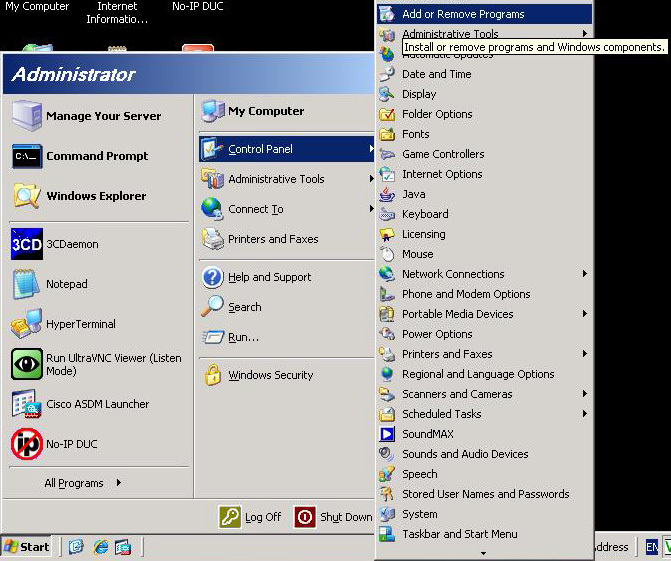
2. Add/Remove Windows Components.

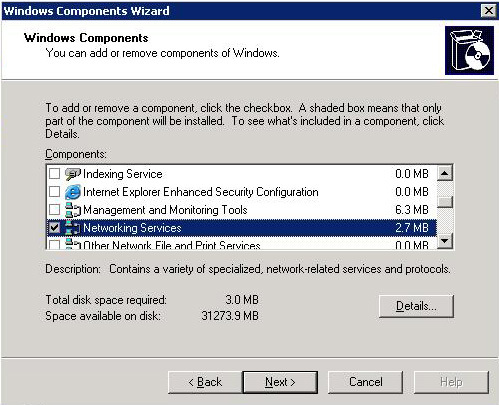
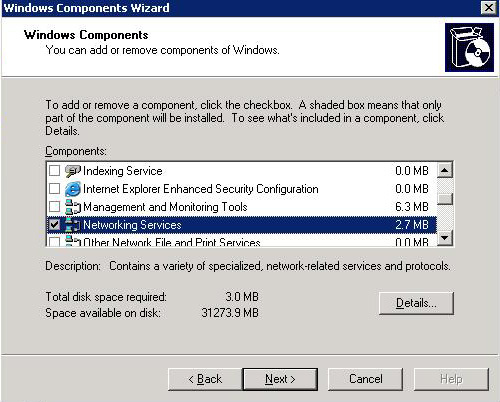
3. Double Click “Networking Services”.
4. Tick Internet Authentication Service.

5. Next
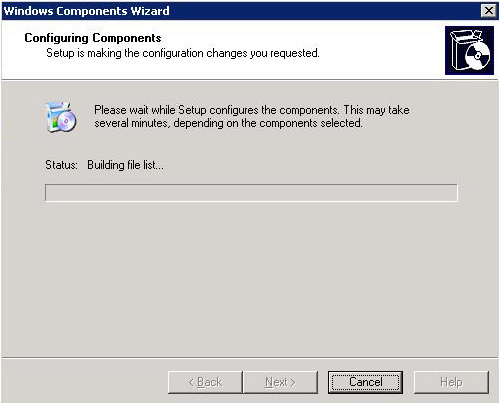
6. The Service will install, NOTE it may ask you for the Windows CD, if you have already copied the i386 directory to a hard drive on the server, point it there instead.
7. When its done click Finish.

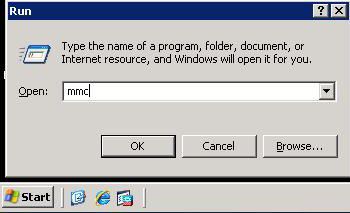
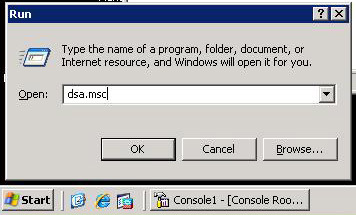
8. Click Start > Run.
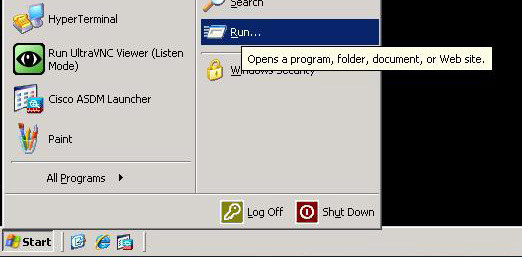
9. Type mmc > OK.
10. An Empty MMC Console will open.
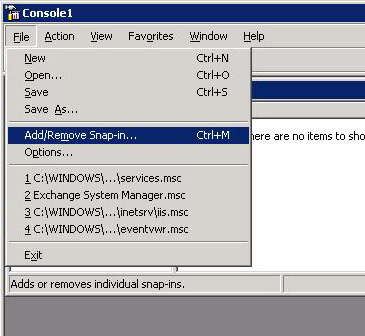
11. Click File > AddRemove Snap-in.
12. Click Add

13 Scroll down to Internet Authentication Service (IAS), Select it > Add.
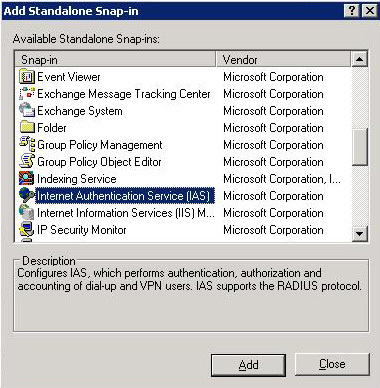
14. Finish
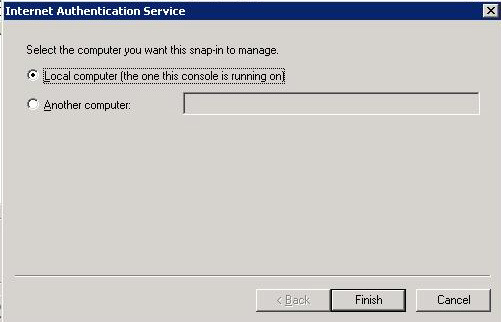
15. Close.
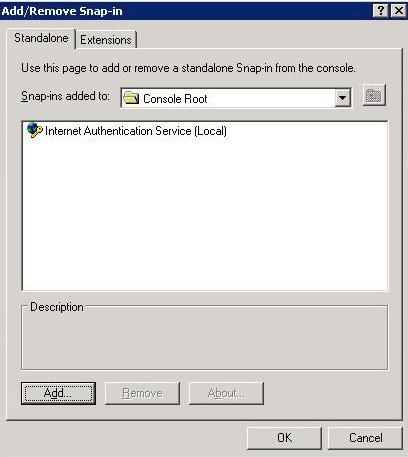
16 OK.
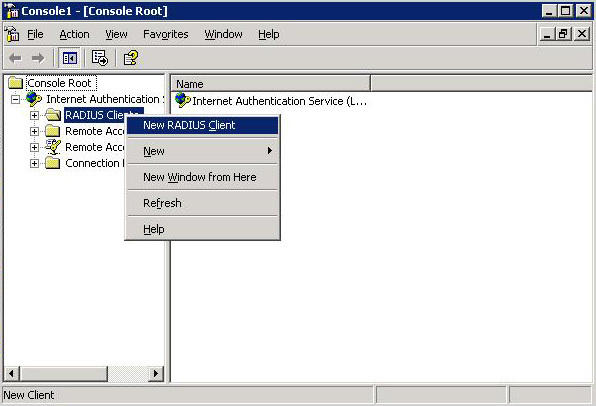
17 Right Click “RADIUS Clients” > New RADIUS Client.
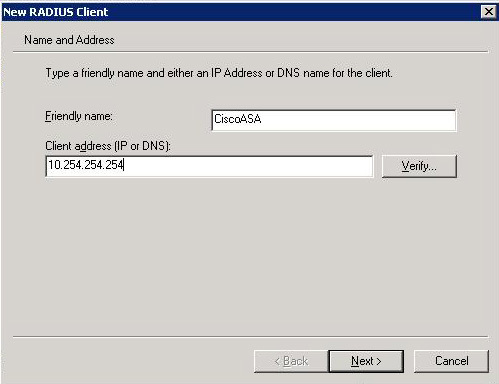
18 Give it a sensible name like “CiscoASA” > Enter its IP address > Next.
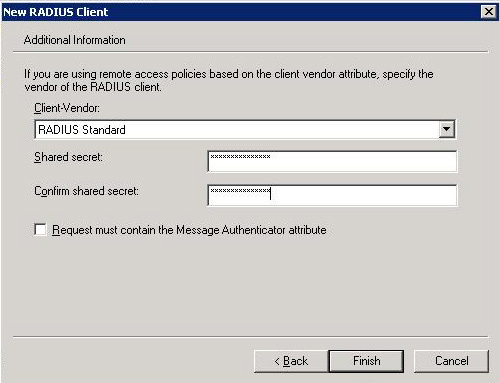
19 Client vendor set to “RADIUS Standard” > Enter a shared secret to use in this example I’ll use 123456 I suggest you use something more secure 🙂 > Finish.
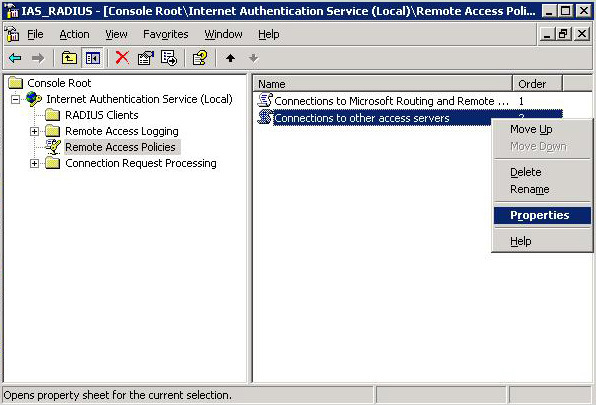
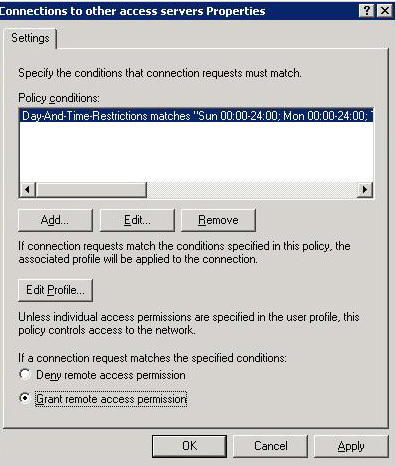
20 Back at the main console > Select “Remote Access Policies” > Right Click “Connections to other Access Servers” > Properties.
21 Tick “Grant remote access permissions”. > Press the Edit Profile button.
22. On the Authentication tab, tick Unencrypted authentication (PAP SPAP)
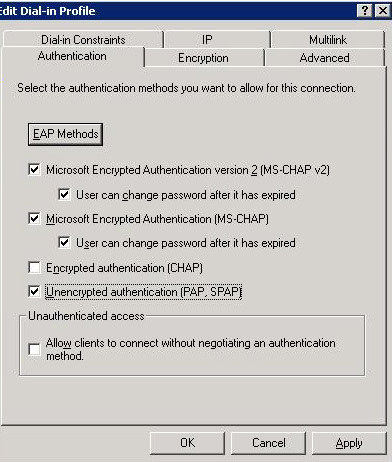
23. On the Encryption tab ensure “No Encryption” is ticked.

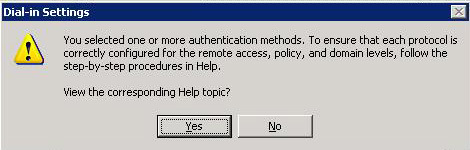
24. Pah! Reading help files is for the weak > No.
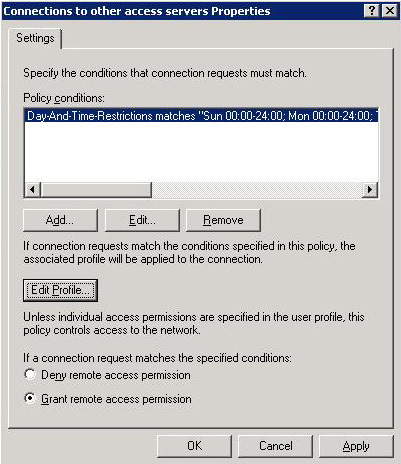
25. Apply > OK.
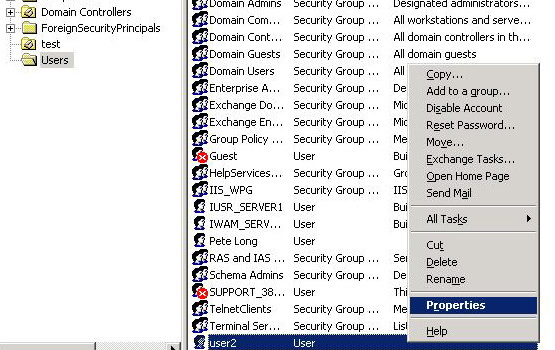
26. We will now create a new user to use the RADIUS. Click Start > dsa.msc > OK. Active Directory Users and COmputers will open.
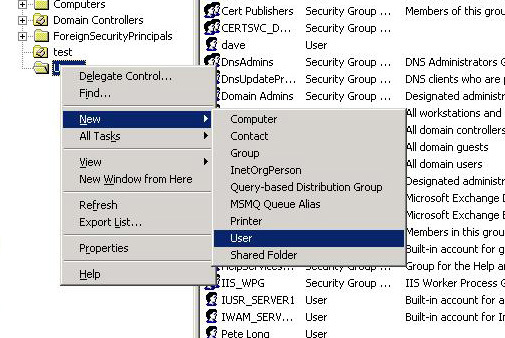
27 Right click the OU you want your user created inside > New > User.
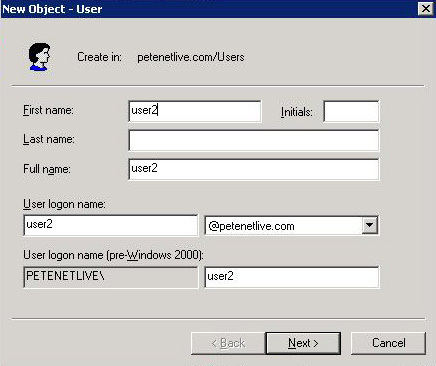
28. Give the user a name and logon name, e.g. user2 > Next > Enter and confirm a password and tick Password Never Expires > Next.
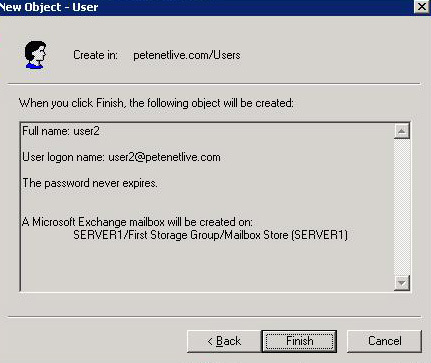
29. If you have Microsoft Exchange you will see this next if you don’t see it don’t panic > Next

30. Finish
31. Locate the user > Right Click > Properties.
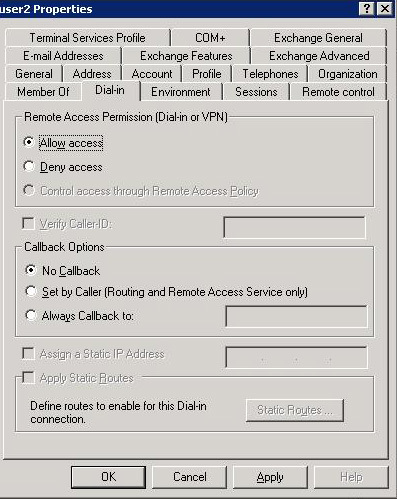
32. On the Dial in Tab select “Allow Access” > Apply > OK. Then close all the open windows.
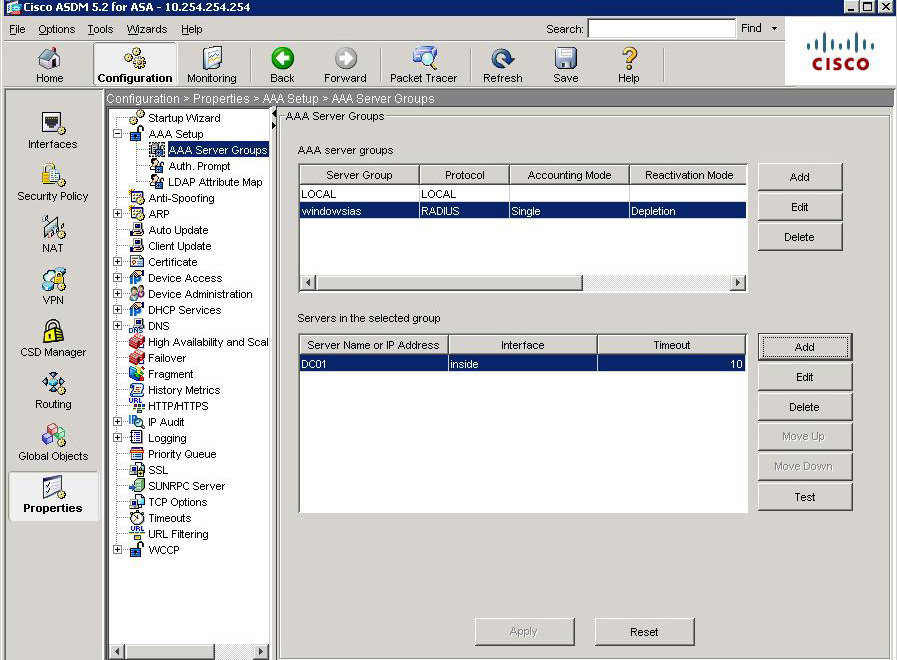
Step 2 Add the RADIUS server to the ASA5500 as an AAA Server.
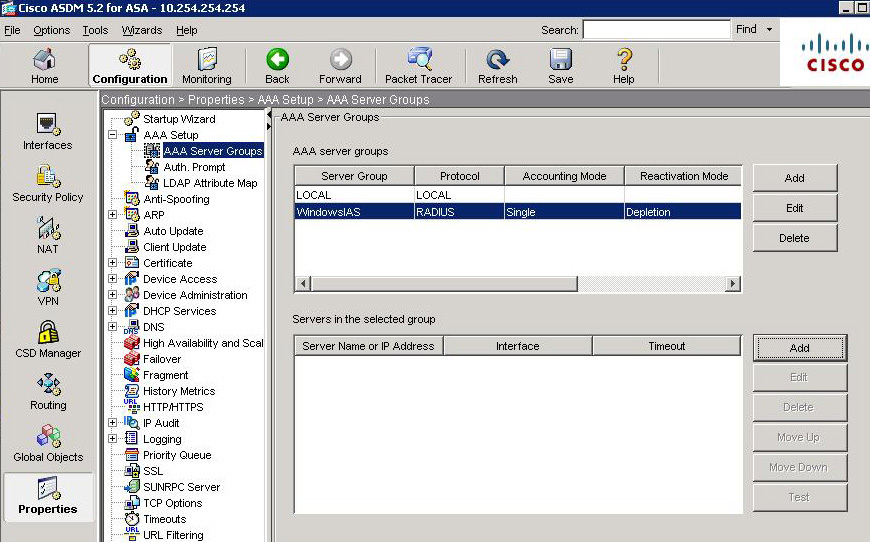
1. Open the ASDM > Configuration > Properties >AAA Setup > AAA Server Groups > Add.

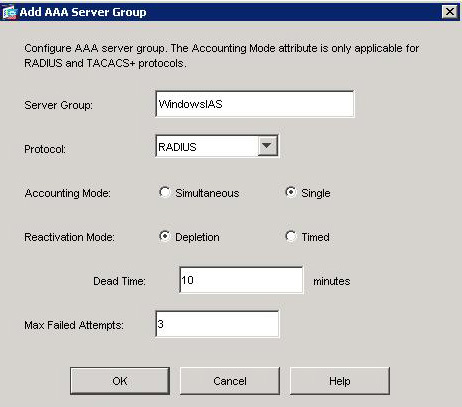
2. Give the Server group a name e,g “WindowsIAS” > Select RADIUS > OK.
3. In the bottom section titled “Servers in the selected group” Click Add.
4. Set interface name to “Inside” > Enter the IP Address of the Windows server > Enter the “Server Secret Key” (you specified above in Step1 Number 19) > Re-enter the same one next to “Common Password.” > OK.

5. Click Apply > Test.
6. Select Authentication > Enter the username and password you created earlier (Step 1 Numbers 28,29 and 30) > OK.

7. If it fails recheck all your previous settings. > OK.

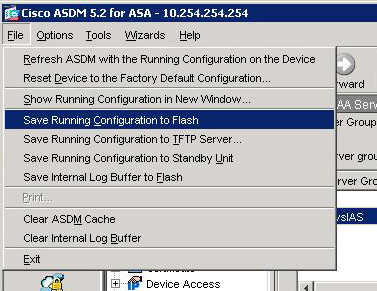
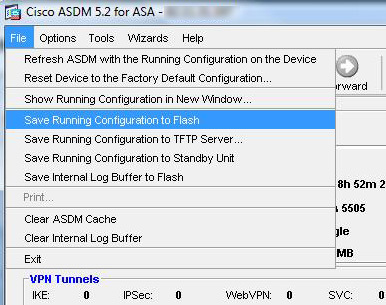
8. Back at the ASDM > File > Save Running Configuration to Flash”.
Step 2 Configure the ASA for Client VPN Access.
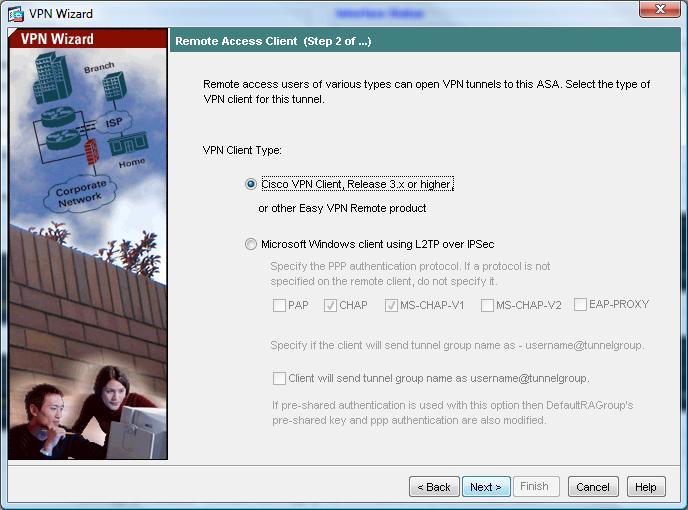
1. Open up the ADSM console. > Click Wizards > VPN Wizard.

2. Select “Remote Access”. > Next.

3. Select Cisco VPN Client. > Next.
4. Enter a Pre Shared Key e.g. thisisthepresharedkey > And then give the Tunnel group a name e.g. “RemoteVPN”. > Next.
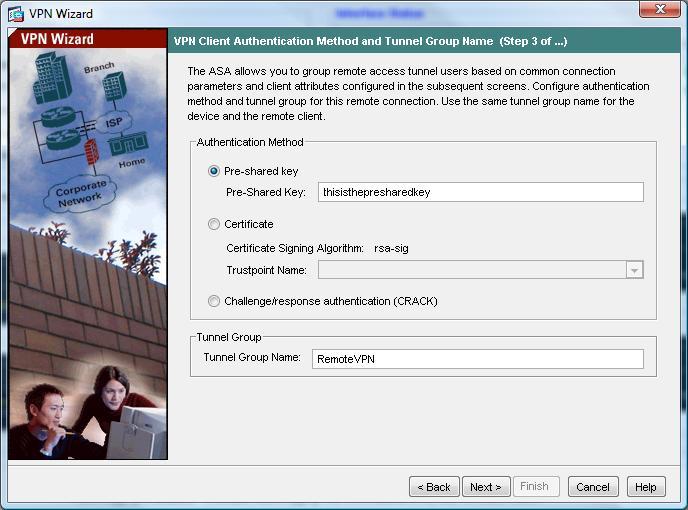
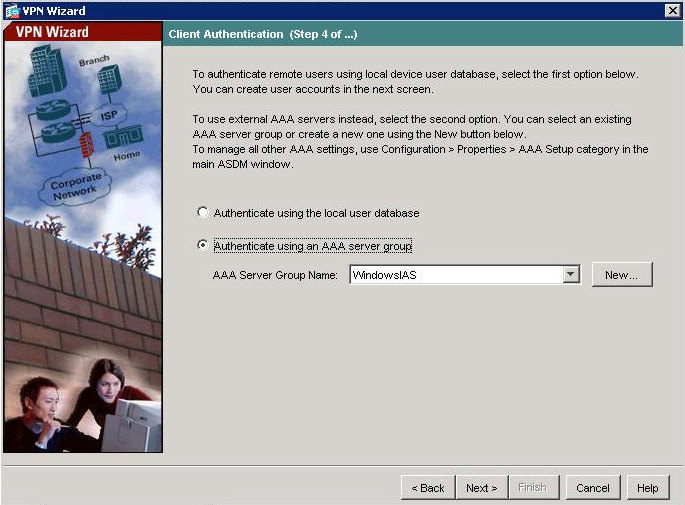
5. Select “Authenticate using an AAA Server Group “. > Select The Server Group you created in Step 2 > Next.
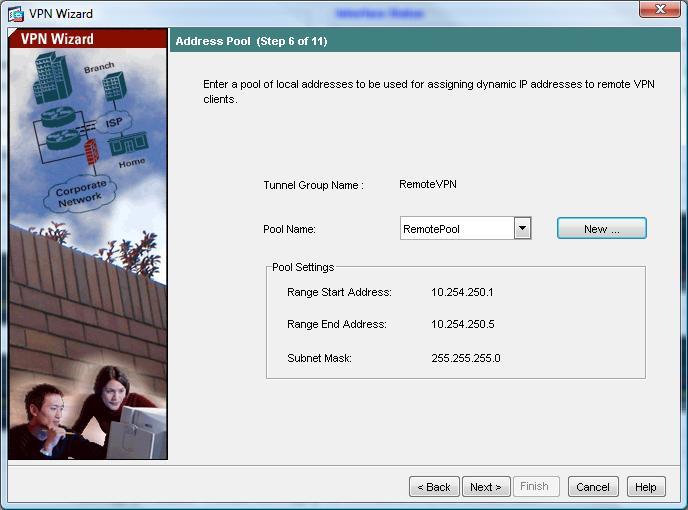
6. Now we need to create some IP addresses that the remote clients will use when connected. > Click New.

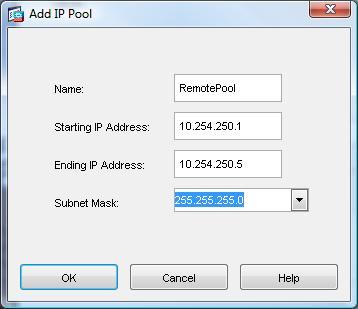
7. Give the Pool a name e.g. RemotePool and set the start and end IP addresses you want to lease (note these DONT have to be on the same network as your internal IP’s – In fact, for auditing its good practice to make them different). > Enter a Subnet Mask. > OK.
8. Click Next.
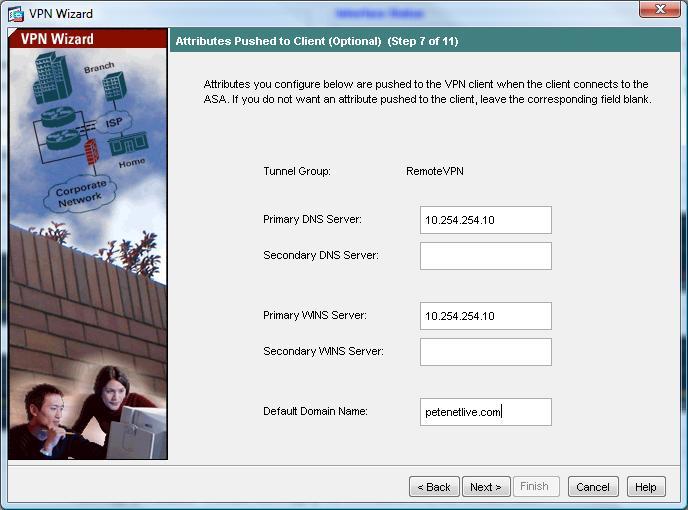
9. Enter the details you want the remote clients to use while connected, DNS servers, WINS Servers and domain name. > Next.
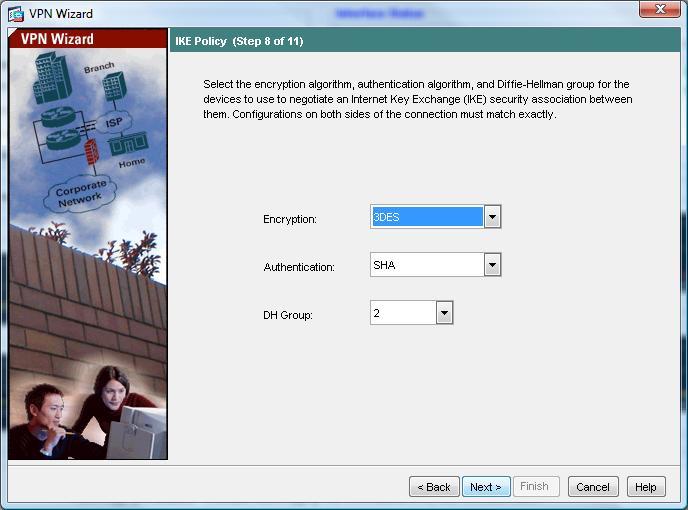
10. Leave it on the defaults of 3DES, SHA and DH Group 2 (Note some Cisco VPN clients will not support AES). > Next
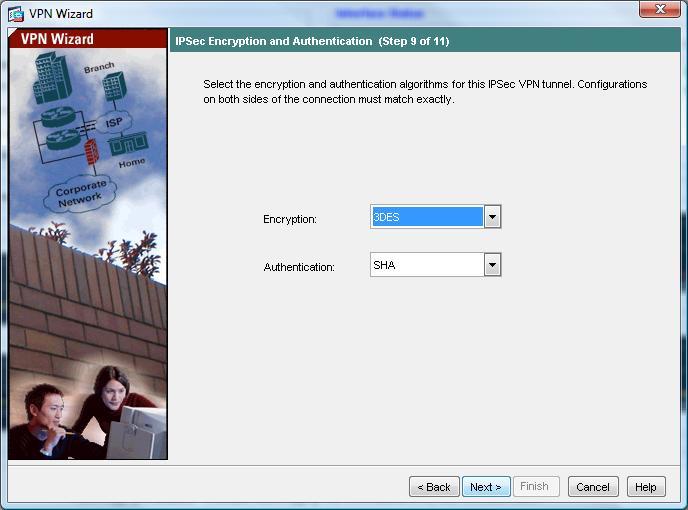
11. Again leave it on the default of 3DES and SHA. > Next.
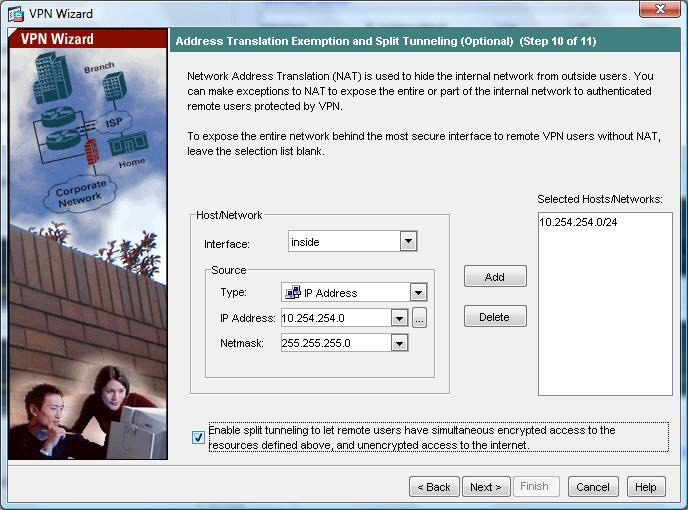
12. You can choose what IP addresses you want the remote VPN clients to have access to, first change the drop down to “Inside”, here I want them to have access to the entire network behind the ASA so I will choose 10.254.254.0 with a mask of 255.255.255.0 > Click Add. > Next.
NOTE If you do not tick the box to enable “Split Tunneling” then the client cannot browse the internet etc while connected via VPN.
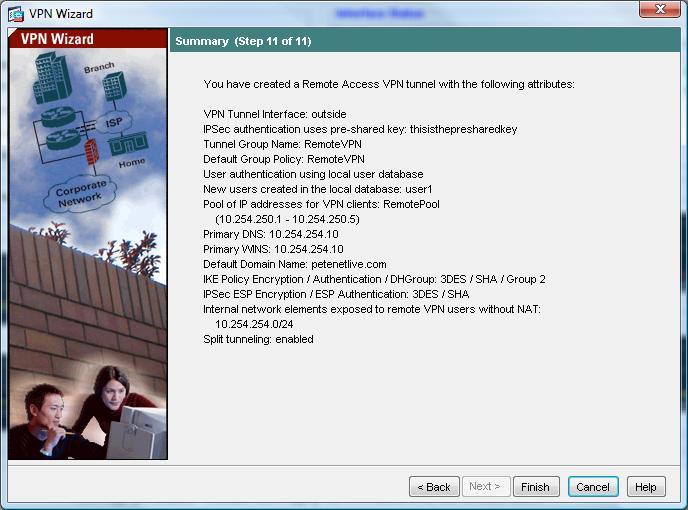
13 Review the information at the end of the wizard. > Finish
14 Now you need to save the changes you have just made, From the ASDM Select File > “Save running configuration to flash”
Step 2 Configure the Client VPN Software on the remote client.
Also See THIS VIDEO
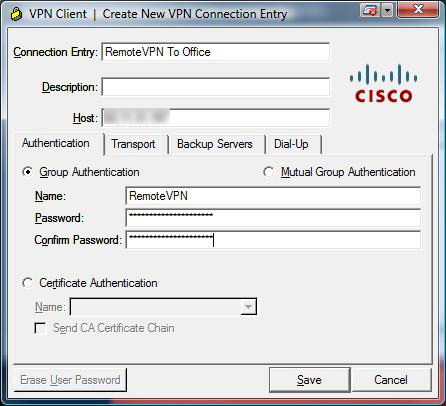
1. I’ll assume you have the software installed you can get it from two places, On the CD that came with the ASA, or download it direct from Cisco (NOTE this needs a valid Cisco CCO account and a service contract). > Click New.
2. Under connection entry give the connection a name e.g. “Remote VPN to Office” > Under “Host” enter the Public IP of the ASA (NOTE I’ve blurred this one out to protect my IP address). > Under “Name” enter the name you created earlier (Step 1 number 4) > Under Password use the password you created earlier (Step 1 number 4) and enter it a second time to confirm. NOTE these are NOT the usernames and passwords you created in Step 1 number 6. > Click Transport Tab.
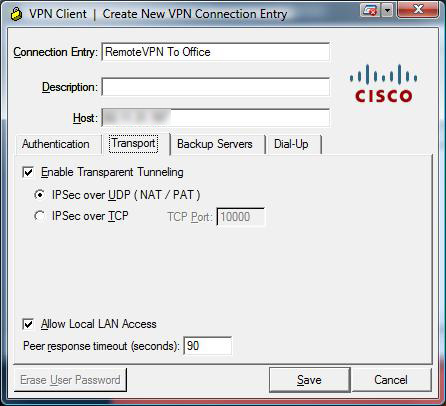
3 Accept the defaults but tick “Allow LAN access if you want to be able to access YOUR drives etc from the network behind the ASA” > Save.
4. Select the Connection you have just created. > Connect.

5. Enter the username and password you created earlier (Step 1 Number 6) of user1 and password1. > OK.

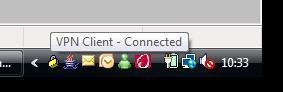
6 After a few seconds (provided the details were all right) it will connect, hover over the padlock in your task tray and it should say “VPN Client – Connected”.
Do the same thing from command line
access-list remotevpn_splitTunnelAcl standard permit 10.254.254.0 255.255.255.0
access-list inside_nat0_outbound extended permit ip 10.254.254.0 255.255.255.0 10.254.250.0 255.255.255.0
ip local pool vpnpool 10.254.250.1-10.254.250.254 mask 255.255.255.0
nat (inside) 0 access-list inside_nat0_outbound
aaa-server windowsias protocol radius
aaa-server windowsias host 10.254.254.10
key 123456
radius-common-pw 123456
group-policy remotevpn internal
group-policy remotevpn attributes
dns-server value 10.254.254.10
vpn-tunnel-protocol IPSec
split-tunnel-policy tunnelspecified
split-tunnel-network-list value remotevpn_splitTunnelAcl
default-domain value petenetlive.com
crypto ipsec transform-set ESP-3DES-SHA esp-3des esp-sha-hmac
crypto dynamic-map outside_dyn_map 20 set pfs
crypto dynamic-map outside_dyn_map 20 set transform-set ESP-3DES-SHA
crypto map outside_map 65535 ipsec-isakmp dynamic outside_dyn_map
crypto map outside_map interface outside
crypto isakmp enable outside
crypto isakmp policy 10
authentication pre-share
encryption 3des
hash sha
group 2
lifetime 86400
tunnel-group remotevpn type ipsec-ra
tunnel-group remotevpn general-attributes
address-pool vpnpool
authentication-server-group windowsias
default-group-policy remotevpn
tunnel-group remotevpn ipsec-attributes
pre-shared-key thisisthepresharedkey
Related Articles, References, Credits, or External Links
NA