
Exchange 2013 to 2019 Upgrade KB ID 0001808
Exchange 2013 to 2019 Upgrade
With Exchange 2013 going end of support (11 Apr 2023) you should be migrating away from it as soon as you can, (as it’s only supported on up to Server 2012 R2), so you should have migrated off it already! It’s been some time since Exchange had any ‘major’ redesigns, 2013 was version 15, 2016 was version 15.1, and 2019 is Version 15.2.
So the Exchange 2013 > 2019 Migration is pretty much the same as it was from 2013 > 2016, or even 2016 > 2019.
- There should be NO Exchange 2010 servers in existence before deploying Exchange 2019. You would need to upgrade to 2013 (CU21 minimum)/2016 (CU 11 minimum) first.
- There’s no Unified Comms Role with Exchange any more! If you need to upgrade look at Microsoft Teams.
- Forest Functional Levels should be, (at least) Server 2012 R2.
- WARNING: Memory recommendations are 128GB (Mailbox server) and 64GB (Edge Transport server). Make sure you have enough compute!
- Edge Server Role is still supported.
- Windows Server Core (2019/2022) is supported with Exchange 2019.
- Windows Server Nano is NOT supported.
- Windows Server 2019 (Standard or Datacenter) and Windows Server 2022 (Standard or Datacenter) Note: Exchange 2019 CU 12 minimum, are supported host Operating systems.
- Outlook 2013 (and newer), and Outlook for mac 2016 (and newer) is supported.
Exchange 2013 to 2019 Upgrade: Solution
As with all Exchange migrations make sure your Active Directory Domain/DNS/Existing Exchange organisation is healthy before you start. Then upgrade the existing Exchange to the latest cumulative update.
Exchange 2013 to 2019 Upgrade Prerequisites
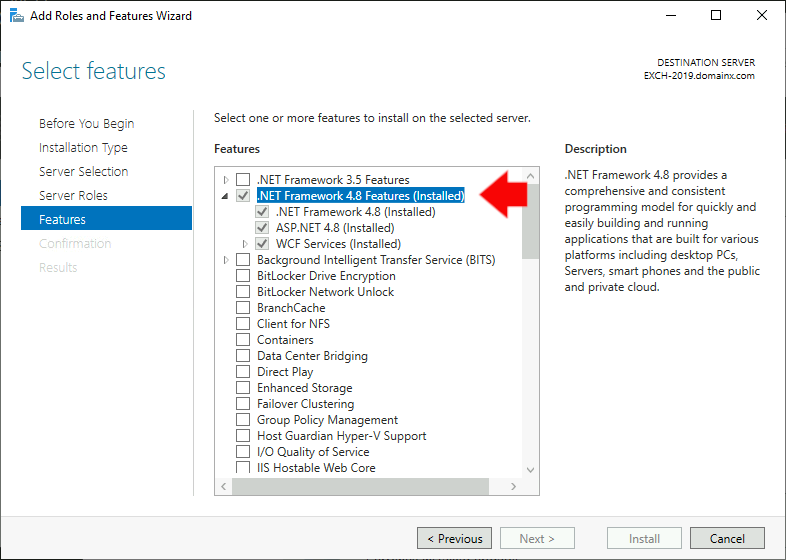
You will need your Server 2019 or Server 2022 server fully updated and added to your domain, then to add the required roles and services use the following Powershell commands;
Exchange 2013 to 2019 Upgrade: Adding Exchange Server Roles

Note: Now Required on Server 2019: You will need to install .Net 4.8 (link)
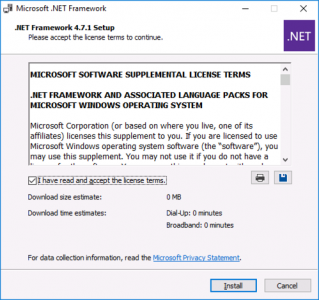
For Server 2022: You DON’T need to do this, (it’s already installed).
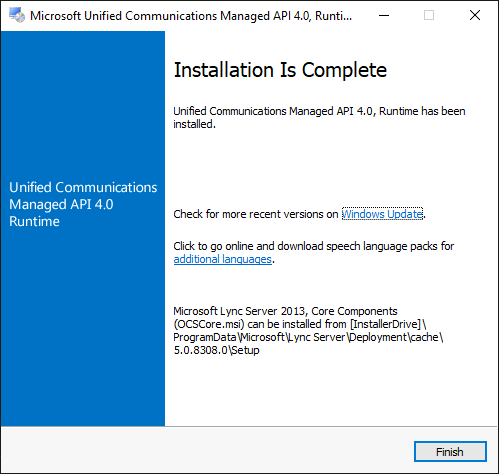
You need to install the Microsoft Unified Communications API 4.0 (link)
You will also need to install Microsoft Visual C++ (link)
You will also now have to install the ‘IIS Rewrite Module’ (link)
Either download the Exchange 2019 install media, or insert the Exchange 2019 DVD, and launch setup.exe > Next > Next > Files will be copied over.
Don’t I need to extend the schema, forest or domain? The setup does all this for you, you don’t need to do this manually anymore, (yes you can manually do this before installing, if you want to, but unless your schema master is in a different root domain, or you’re not a schema admin, then I don’t see the point!)

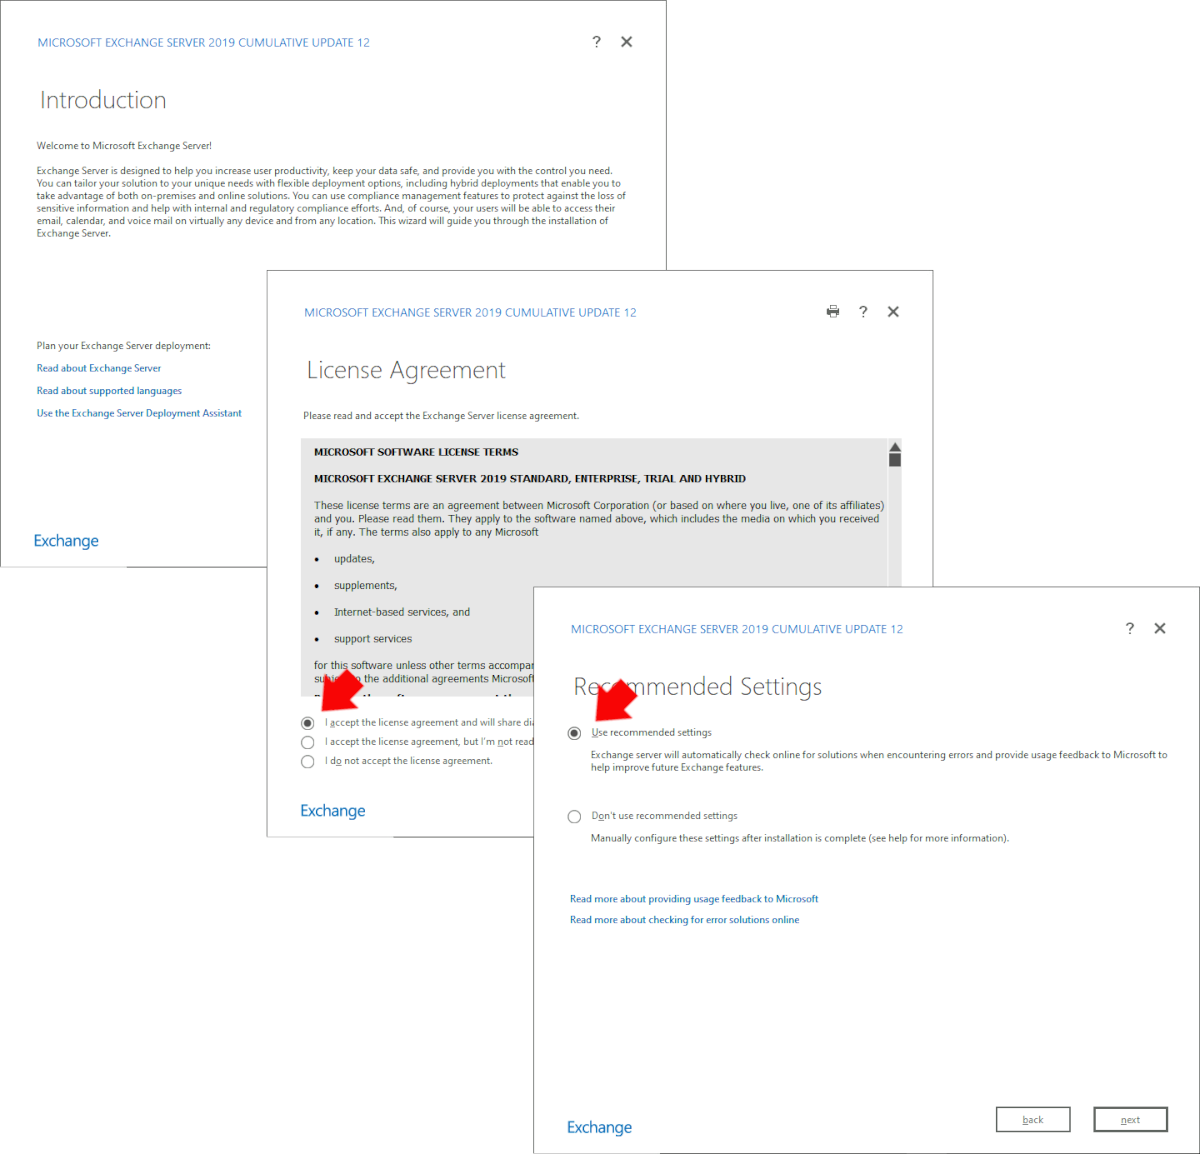
Introduction Page > Next > At the EULA tick “I Accept…” > Next > Tick “Use Recommended settings” > Next.
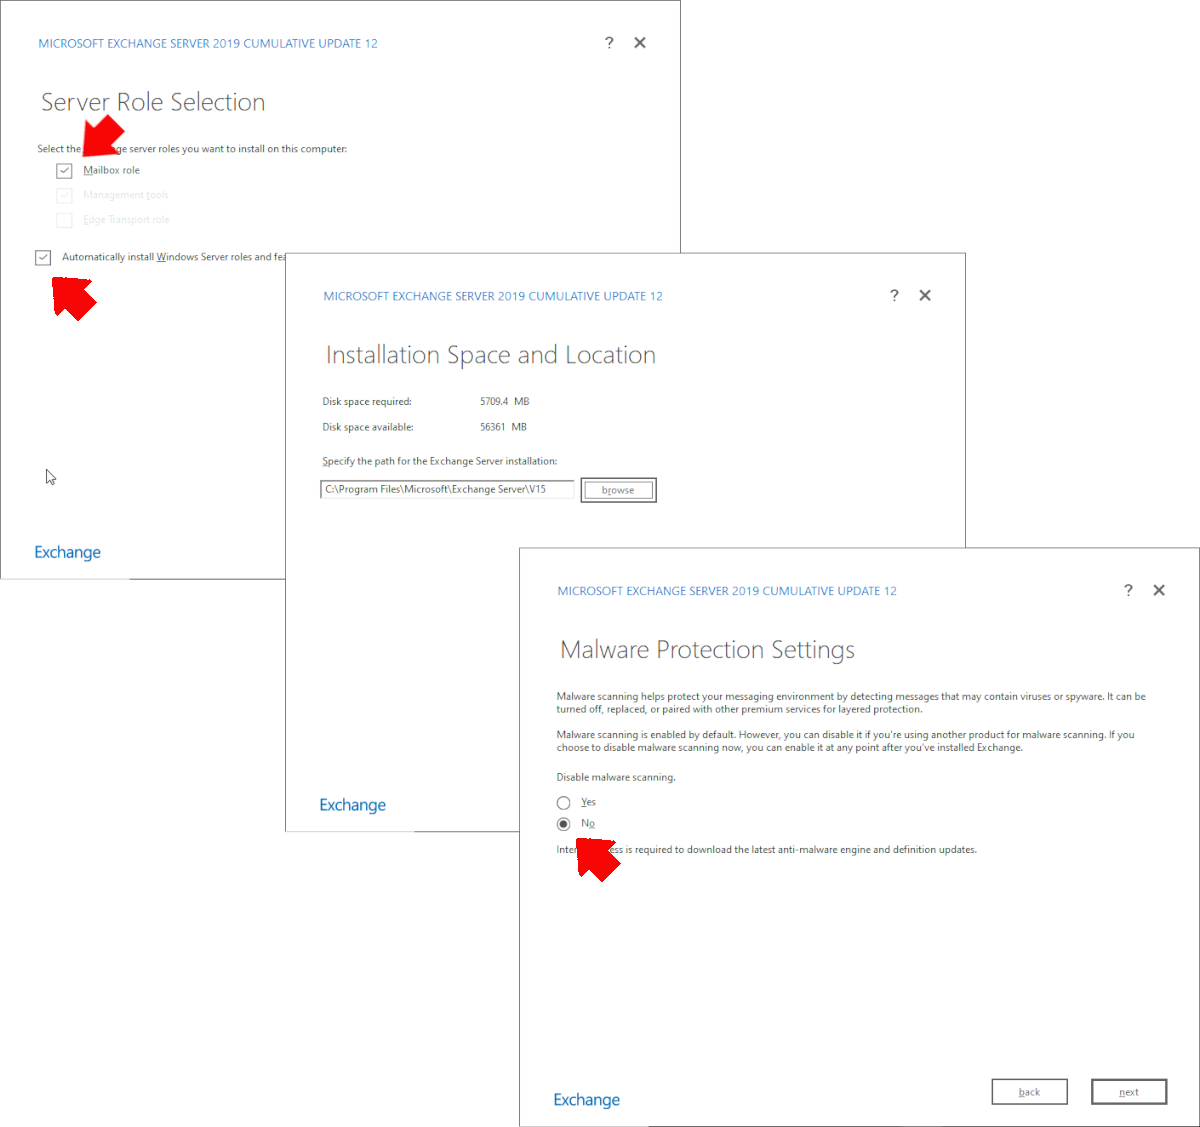
Select ‘Mailbox role’, and ‘Automatically install Windows Server roles and features…” > Next > Select the install directory, Note: In production you probably DON’T want this on the Windows System drive > Next > Unless you have a reason to disable Malware scanning then select ‘No’ > Next.
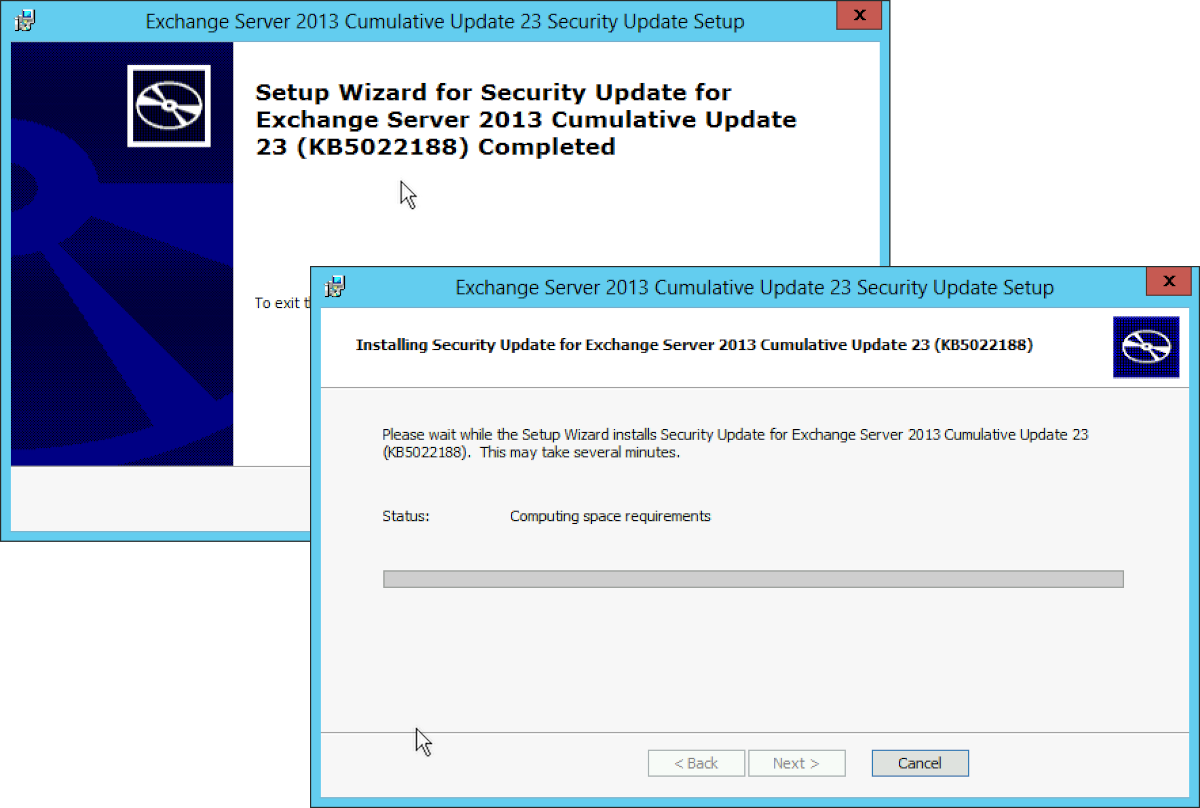
Readiness Checks > Fix any Errors and heed any warnings > Install > The product will install, this will take a long time!

Finish > Reboot the server.
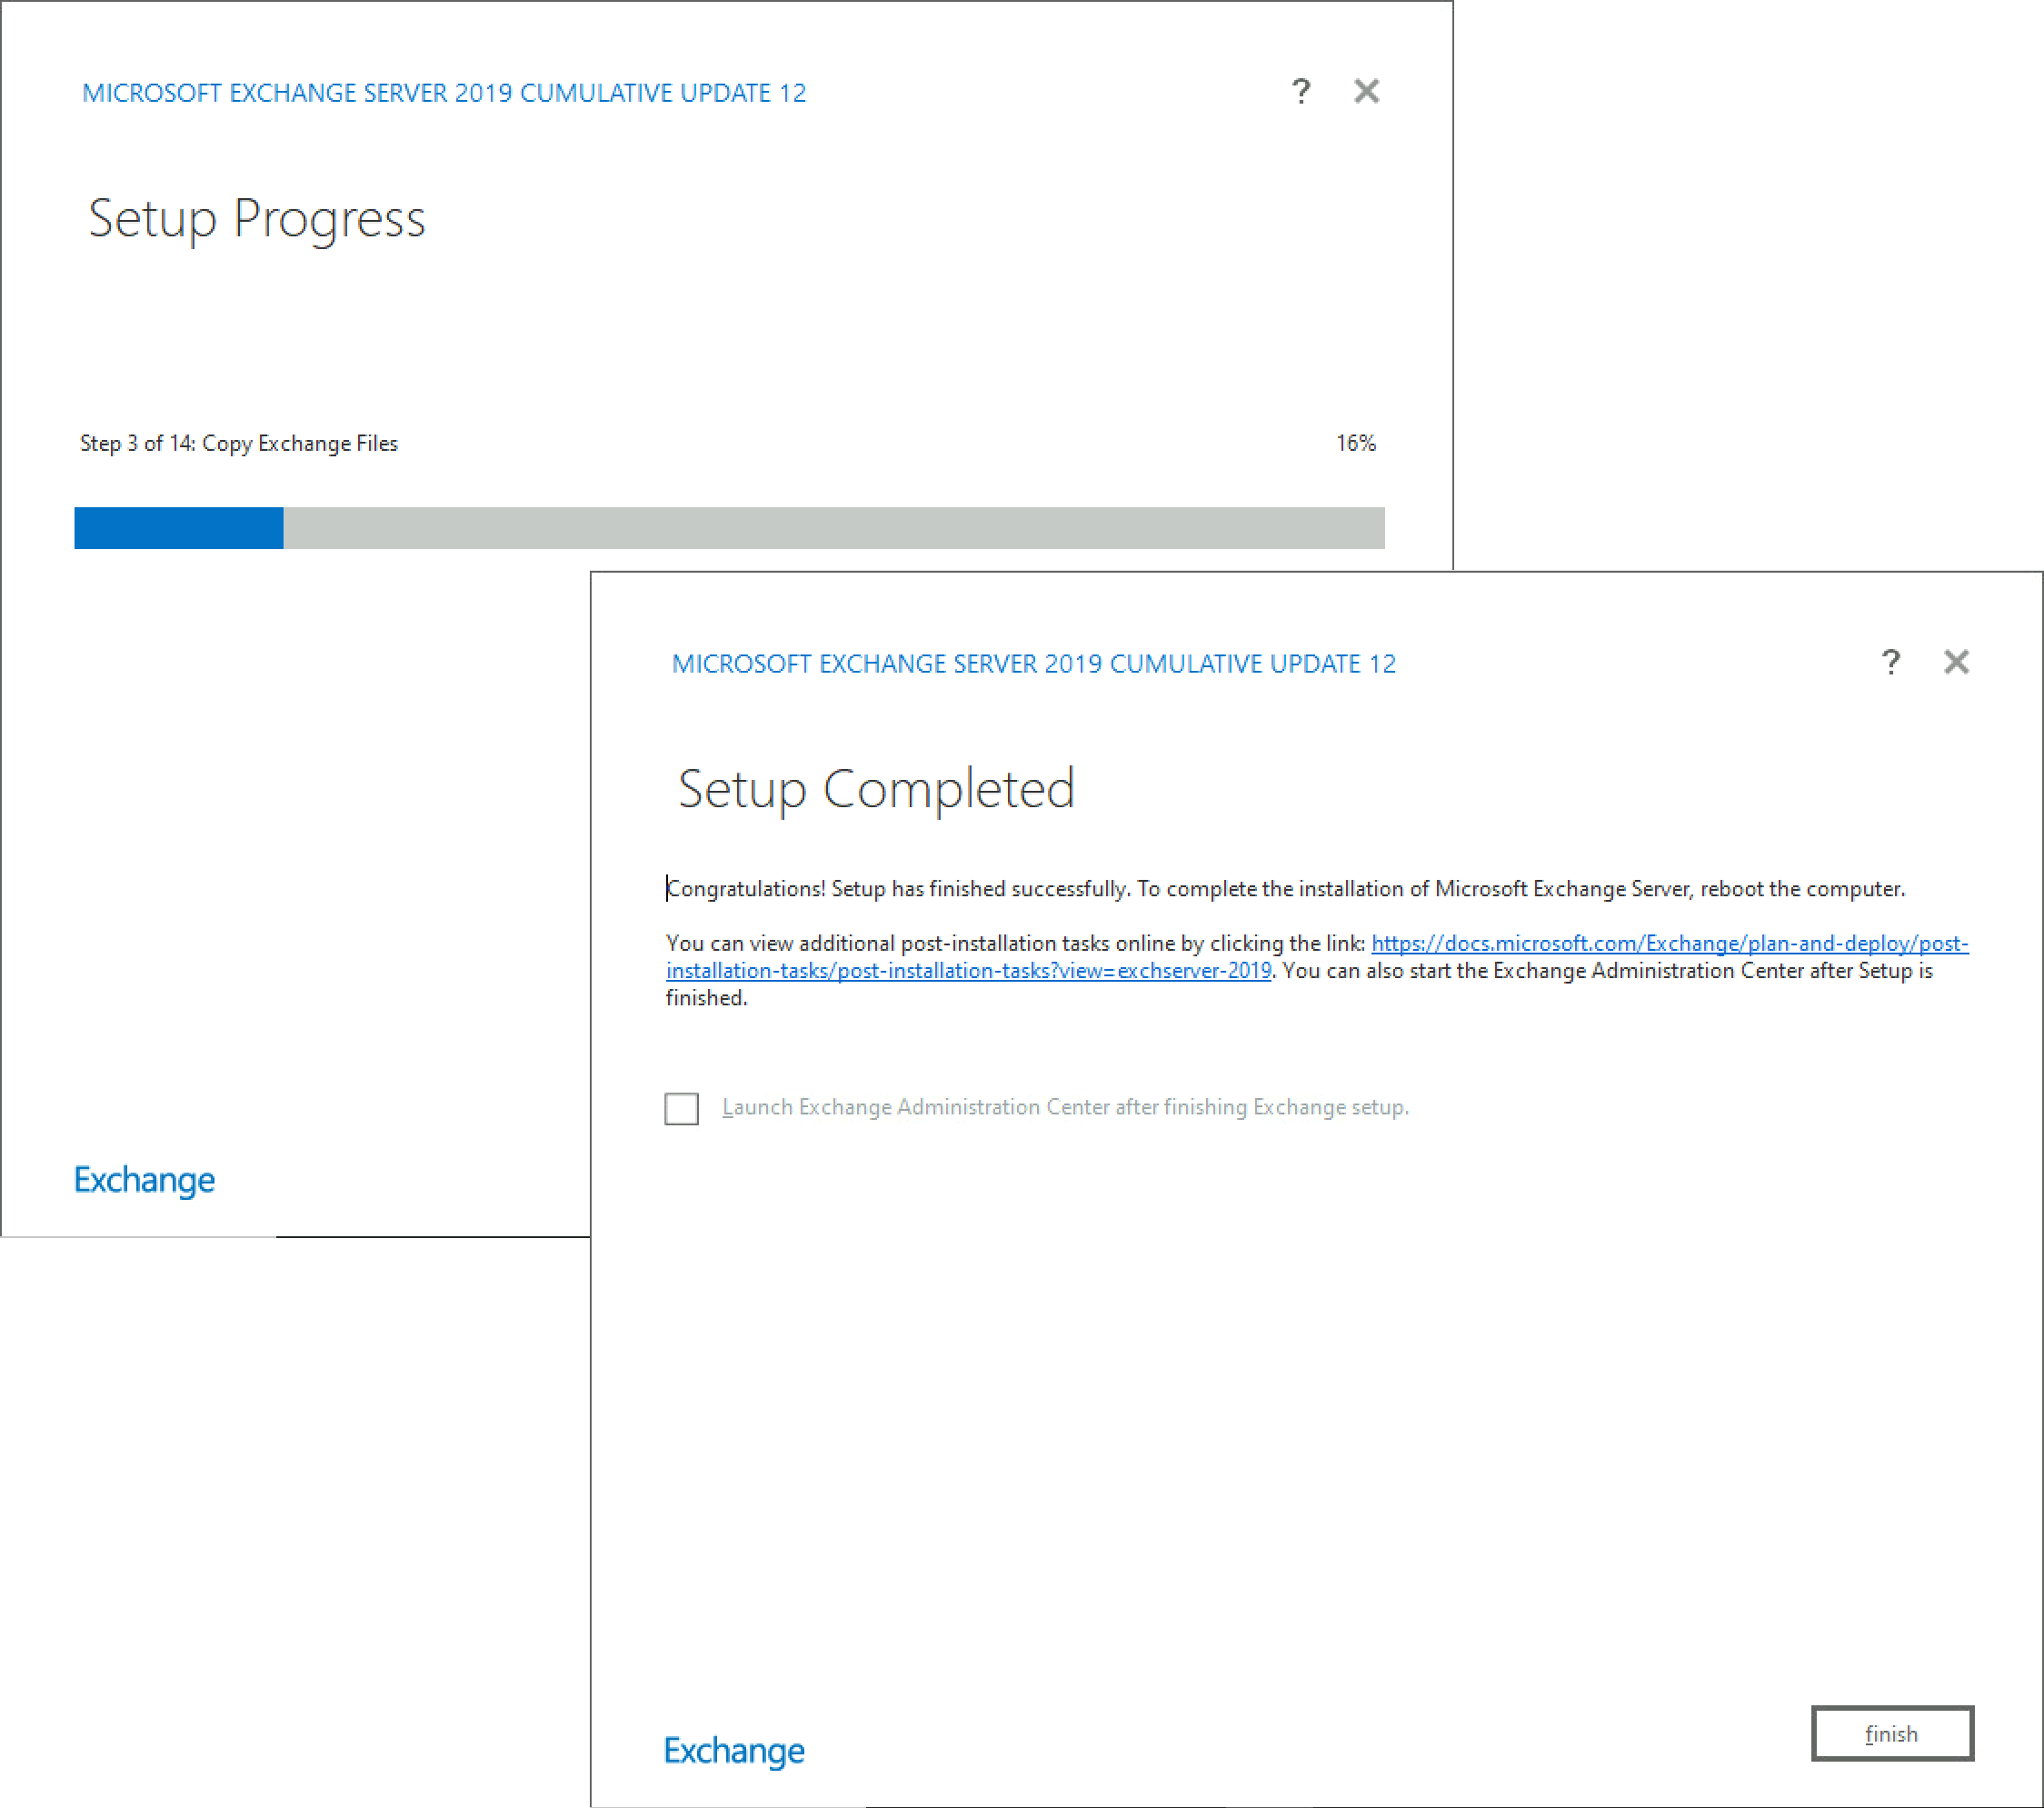
And there’s our new Exchange 2019 Server.
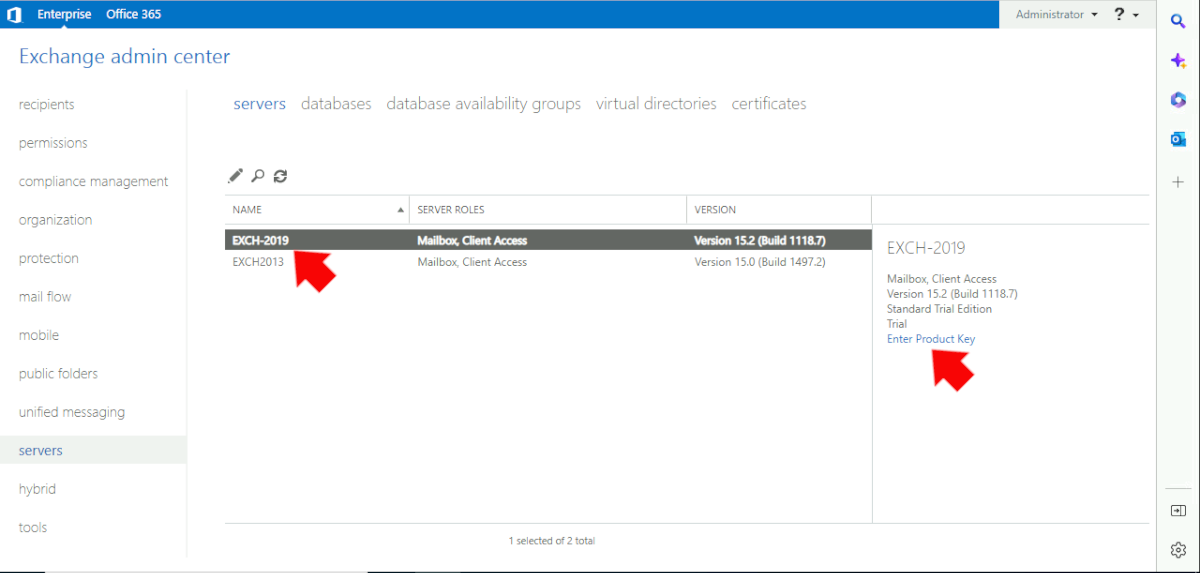
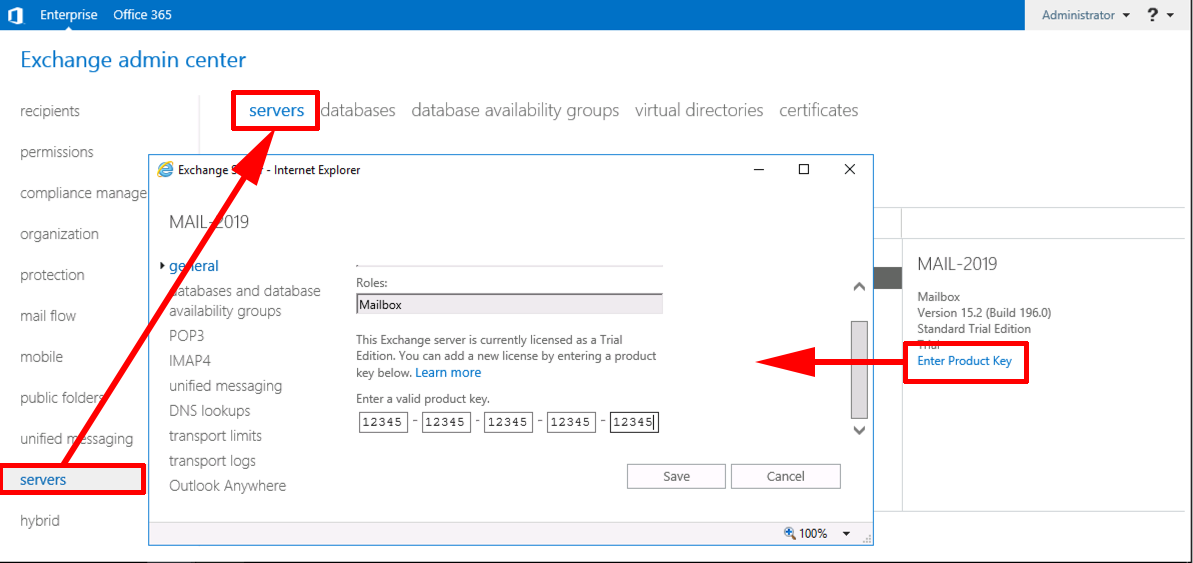
Exchange 2019 EnterProduct Key
Servers > Servers > Select the 2019 Exchange Server > Enter Product Key > Save
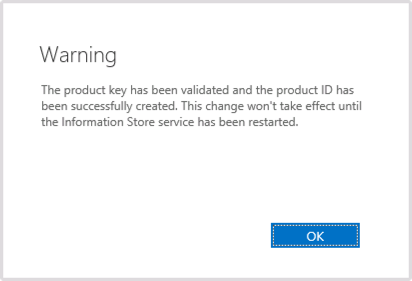
At the warning click OK.
Note: You can also enter the product key using the PoweShell ‘Command Shell’, if you prefer.
Set-ExchangeServer {Host-name} -ProductKey 12345-12345-12345-12345-12345
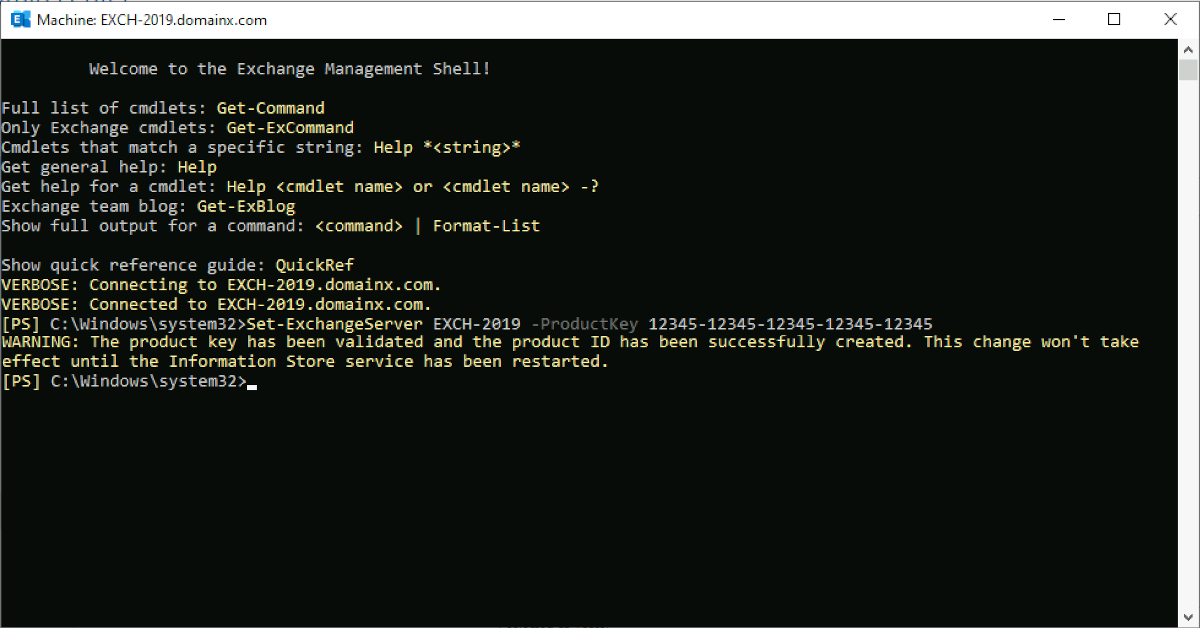
As directed Restart the ‘Microsoft Exchange Information Store‘ service.
Restart-Service MSExchangeIS

Transfer Exchange Certificate to Exchange 2019
Note: The ability to Export, Import & Renew certificates and creation/completion of certificate requests has been removed from the Exchange Admin Center. These changes will affect all cumulative update (CU) releases of Microsoft Exchange Server 2019 (CU12 and later) and Microsoft Exchange Server 2016 (CU23 and later).
I will leave the older (GUI) method, below for completeness – but all modern Exchange builds will need you to Open the Exchange Management Shell and perform the certificate migration via PowerShell
Transfer Certificates (PowerShell)
On your C: drive create a new folder called CERT > Open an Administrative Exchange Managment Shell window on the SOURCE Exchange server.
Get-ExchangeCertificate -Server {Server-Name}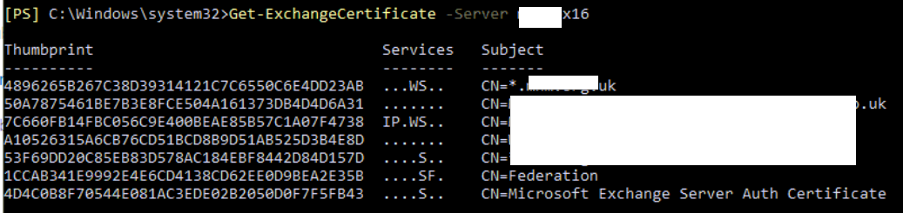
Identify the certificate you require (by Subject) > Copy the Thumbprint text > Replace the thumbprint in this text with your thumbprint, then execute the following two commands.
$Cert = Export-ExchangeCertificate -Thumbprint 4896265B267C38D39314121C7C6550C6E4DD23AB -BinaryEncoded -Password (ConvertTo-SecureString -String 'PASSWORD' -AsPlainText -Force)

[System.IO.File]::WriteAllBytes('\\New-Server-Name\C$\CERT\CertEx.pfx', $Cert.FileData)

Remeber you will need to enable the certificate for the correct services also e.g.
Get-ExchangeCertificate -Server {New-Server-Name}

COPY the THUMBPRINT

Enable-Exchange Certificate –Thumbprint {Thumb-Print} -Service IIS,SMTP
Transfer Certificates (ExchangeAdmin Centre {Older build versions only})
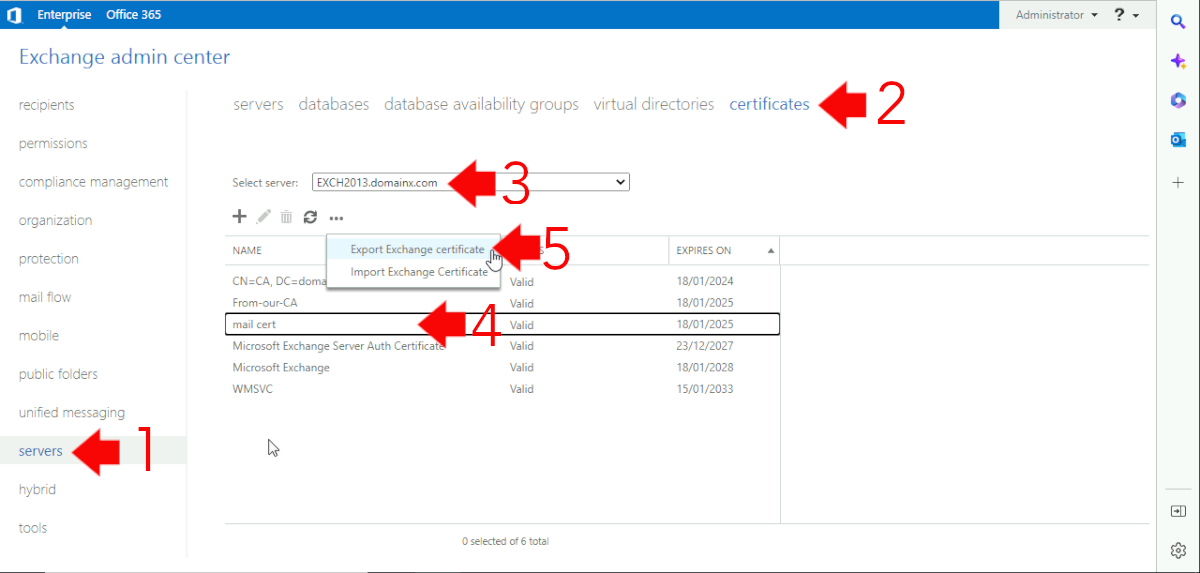
I’m using a wildcard certificate so I want to export the cert form my Exchange 2013 server and import it onto my new Exchange 2019 Server. You will want to do the same if you have a certificate with your public domain name on it and this will be your ‘internet facing’ Exchange server. Servers > Certificates > Select the Exchange 2013 Server, in the drop down menu > Select The Certificate > Click the ellipsis (three dots) > Export Exchange Certificate > Supply a UNC path and password > OK.
Change the Dropdown to the Exchange 2019 Server > Click the ellipsis > Import Exchange Certificate > Supply the UNC path and password you used (above) > Next.

Add in the Exchange 2019 Server > Finish.

Exchange 2013 to 2019 Upgrade Exchange 2019 Assign Services to Certificate
Select the newly imported certificate> Edit > Services > Select the services > Save > Note: Here I’m selecting SMTP and IIS. (You can’t use a wildcard cert for IMAP,POP).
Exchange 2019 Changing the Exchange Web Services URLs
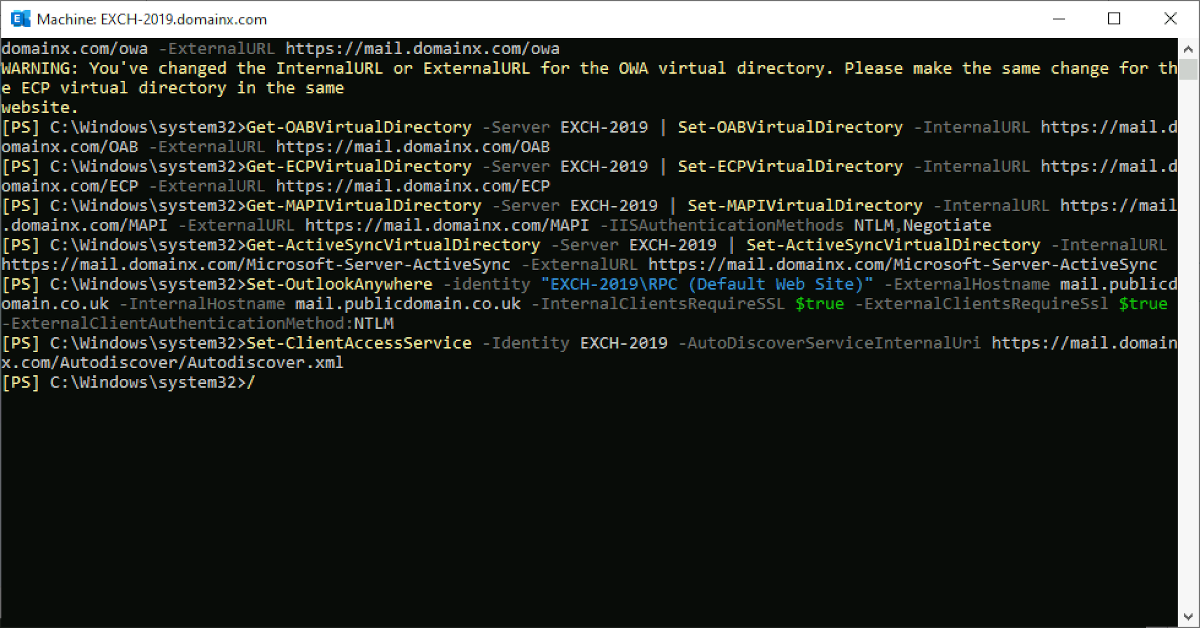
Exchange relies heavily on web based services, and it needs the URLs setting accordingly (remember for Outlook Anywhere/OWA etc you might need to change firewall settings or repoint load balancers WAP server etc to the NEW 2019 server (and let it proxy these connections to the older Exchange servers, while they still exist).
Get-WebServicesVirtualDirectory -Server EXCH-2019 | Set-WebServicesVirtualDirectory -InternalUrl https://mail.domainx.com/ews/exchange.asmx -ExternalURL https://mail.domainx.com/ews/exchange.asmx

Set-OWAVirtualDirectory -identity "EXCH-2019\owa (Default Web Site)" -InternalURL https://mail.domainx.com/owa -ExternalURL https://mail.domainx.com/owa

Get-OABVirtualDirectory -Server EXCH-2019 | Set-OABVirtualDirectory -InternalURL https://mail.domainx.com/OAB -ExternalURL https://mail.domainx.com/OAB

Get-ECPVirtualDirectory -Server EXCH-2019 | Set-ECPVirtualDirectory -InternalURL https://mail.domainx.com/ECP -ExternalURL https://mail.domainx.com/ECP

Get-MAPIVirtualDirectory -Server EXCH-2019 | Set-MAPIVirtualDirectory -InternalURL https://mail.domainx.com/MAPI -ExternalURL https://mail.domainx.com/MAPI -IISAuthenticationMethods NTLM,Negotiate

Get-ActiveSyncVirtualDirectory -Server EXCH-2019 | Set-ActiveSyncVirtualDirectory -InternalURL https://mail.domainx.com/Microsoft-Server-ActiveSync -ExternalURL https://mail.domainx.com/Microsoft-Server-ActiveSync

Set-OutlookAnywhere -identity "EXCH-2019\RPC (Default Web Site)" -ExternalHostname mail.domainx.com -InternalHostname mail.domainx.com -InternalClientsRequireSSL $true -ExternalClientsRequireSsl $true -ExternalClientAuthenticationMethod:NTLM

Set-ClientAccessService -Identity EXCH-2019 -AutoDiscoverServiceInternalUri https://mail.domainx.com/Autodiscover/Autodiscover.xml
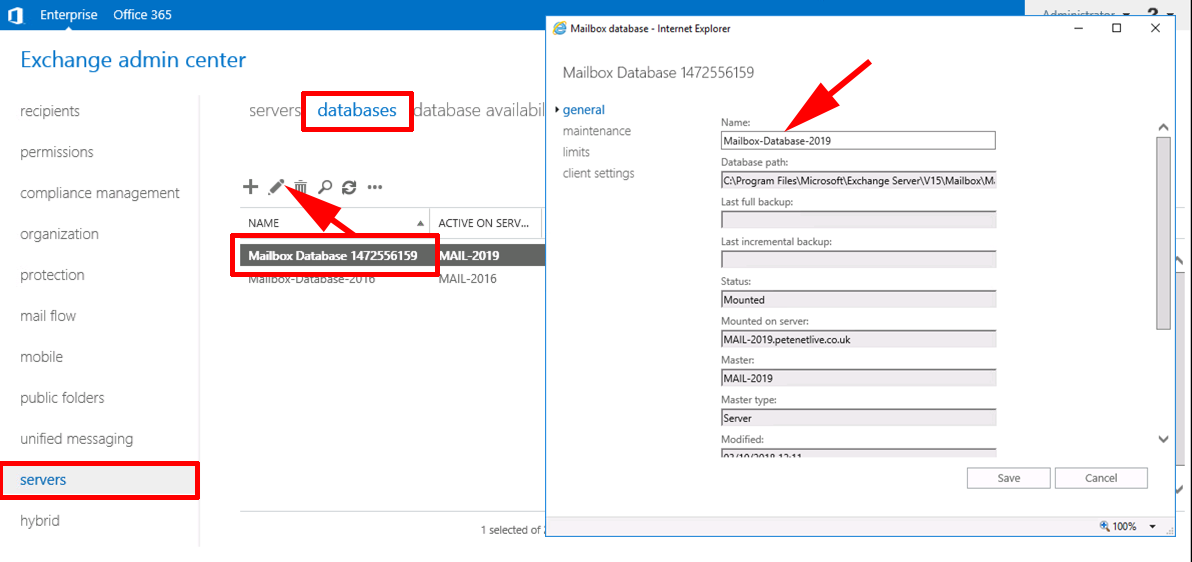
Exchange 2019 Rename Mailbox Database
Servers > Databases > Exchange always gives databases annoying names > Select the Database on the 2019 Exchange Server > Edit > Rename it > Save.
Note: The path to the Database retains the original name (we will fix that in the next step).
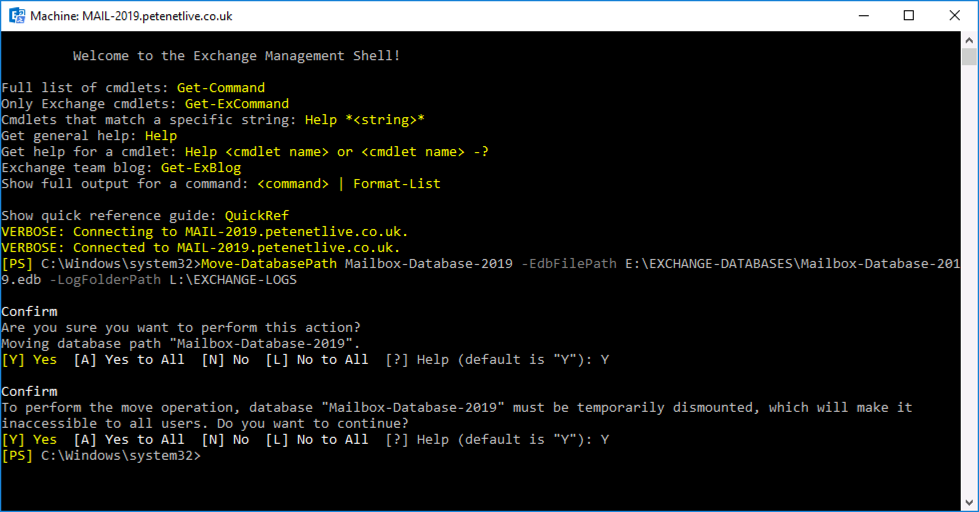
Exchange 2013 to 2019 Upgrade: Move Mailbox Database
I’m pretty old school, I like my Exchange databases on their own drive/partition, and I like the logs on another drive/partition. To move both the Database and the Logs;
Move-DatabasePath -Identity Database-Name -EdbFilePath X:\Folder\Database\Database-Name.edb -LogFolderPath L:\Folder\Log-Folder\
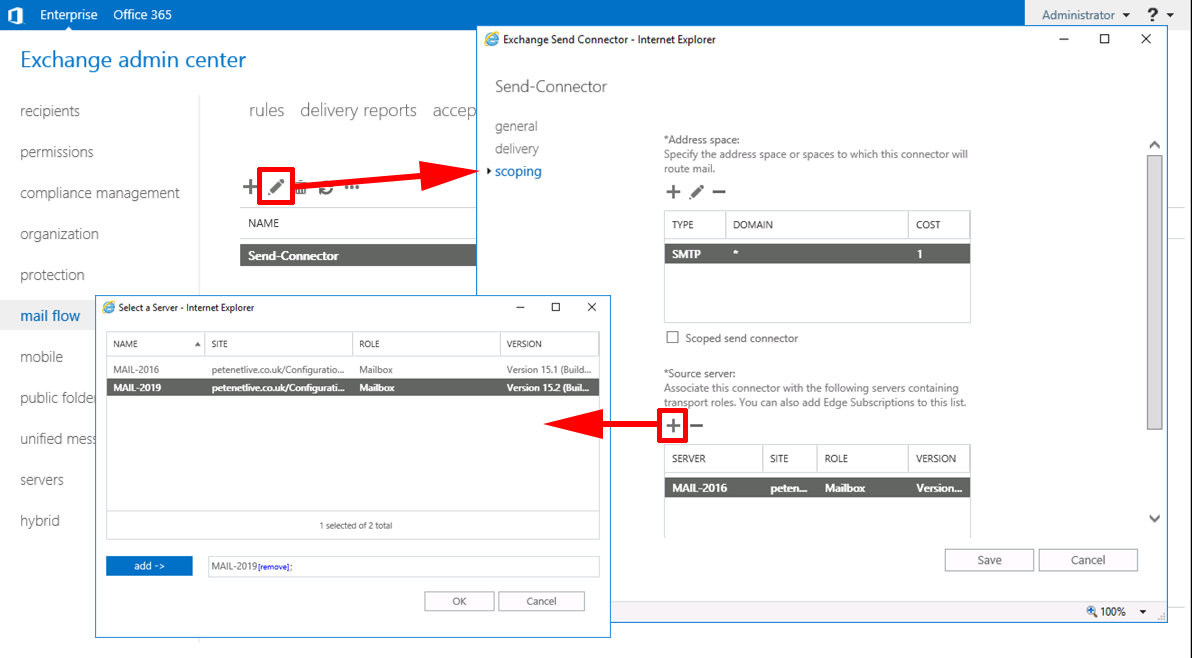
Add Exchange 2019 to the Send Connector
Mail Flow > Send Connectors > Select your mail SMTP connector(s) > Edit > Scoping > Source Server section > Add > Add in the new server > OK > Save.
Note: The Exchange server will now need to have TCP port 25 (SMTP) open outbound on your corporate firewall.
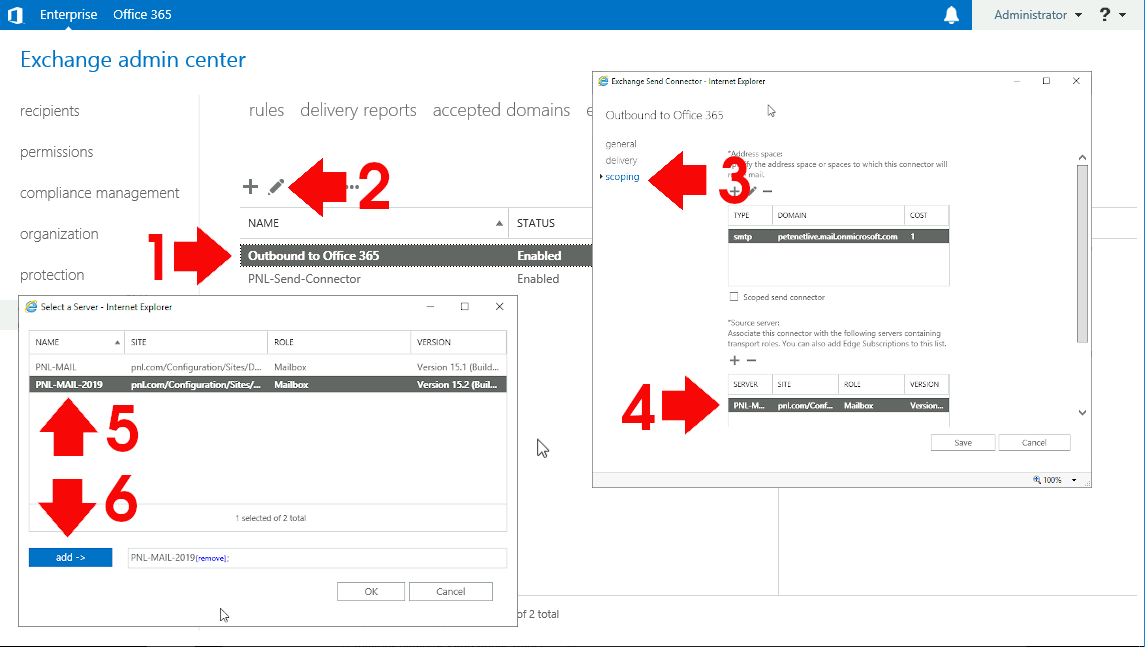
Hybrid (On-Prem) Exchange Migration Note
If your on-premise Exchange is part of an Office 365 Hybrid deployment you will need to add the new server to the ‘scope’ for that connector also!
Exchange 2013 to 2019 Upgrade: Decommission Exchange 2013
From this point forward we are going to start getting rid of our Exchange 2013 server, they can of course coexist, (if you wanted to wait a while).
For that reason I change the ‘mail flow’ on the firewall to point to the new Exchange server at this point, and the HTTP access for OWA, Outlook Anywhere, and Phone/Tablet access.
Exchange 2013 to 2019 Upgrade Exchange 2013 Mailbox Migration
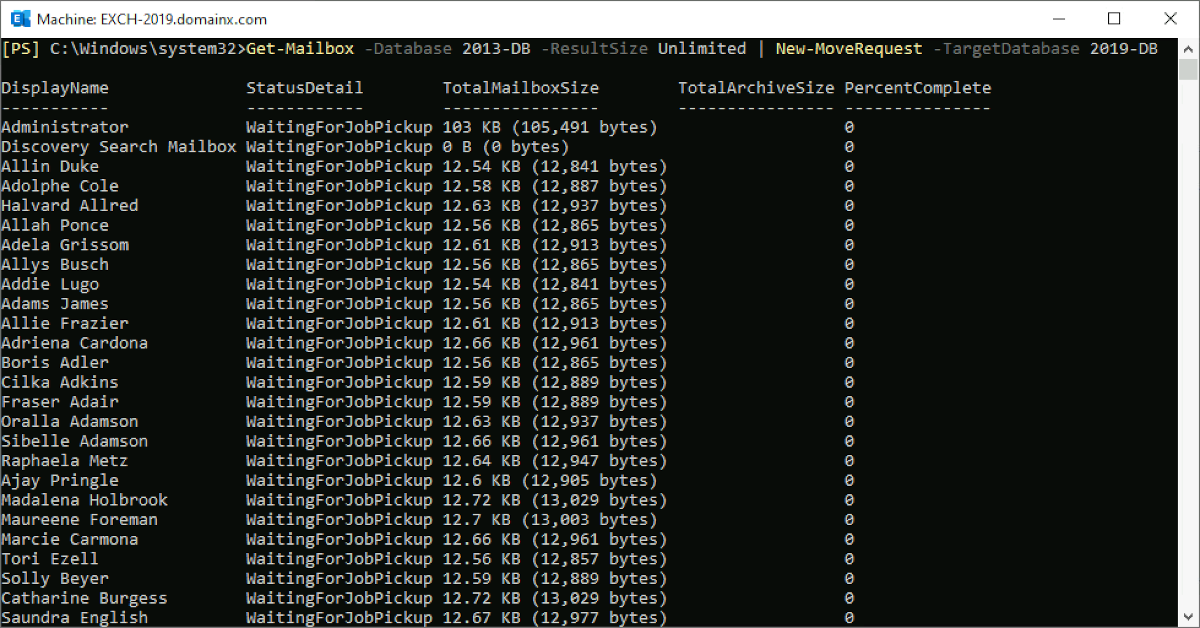
Yes you can do this in the Exchange Admin Center (GUI), but I prefer to do this in PowerShell. But if I don’t put this here, I’ll get emails! Recipients > Migration > Add > Move to a different Database > Add in the mailboxes/users > Next.
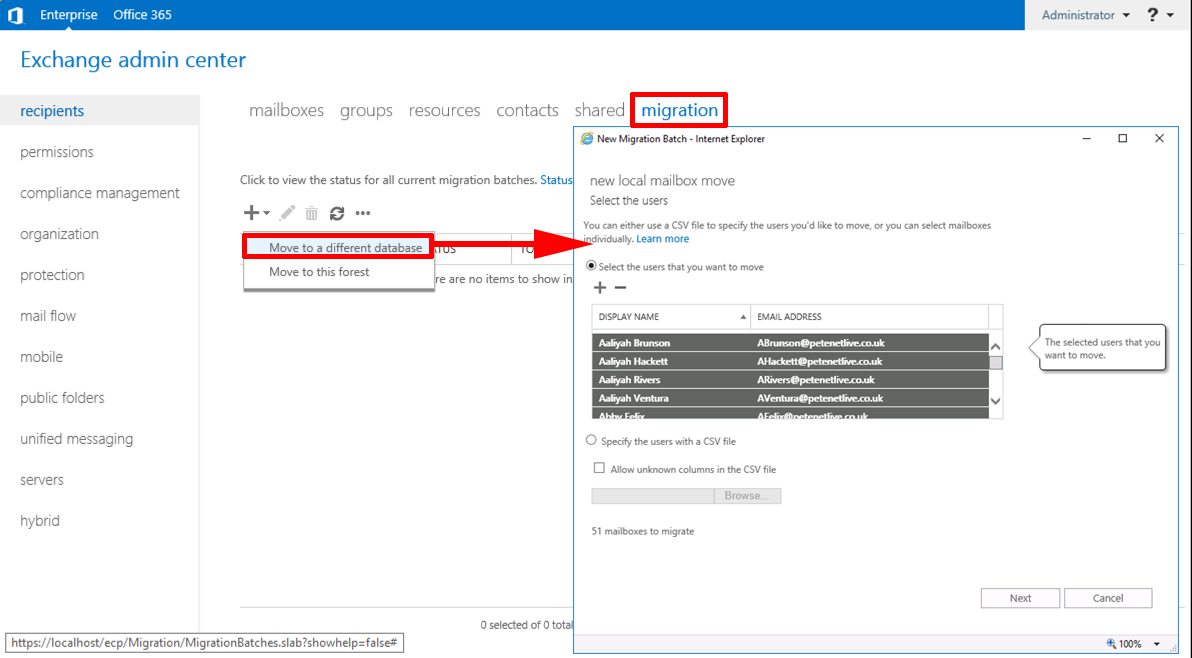
Give the ‘Batch’ a name > Select to move Archive mailboxes (if you have them) > Select the destination (Exchange 2019) Database > Again if using archive mailboxes, select the target archive mailbox database > Set the bad Item limit to 99 > Next > Select Automatically Start > Select Automatically Finish > New.

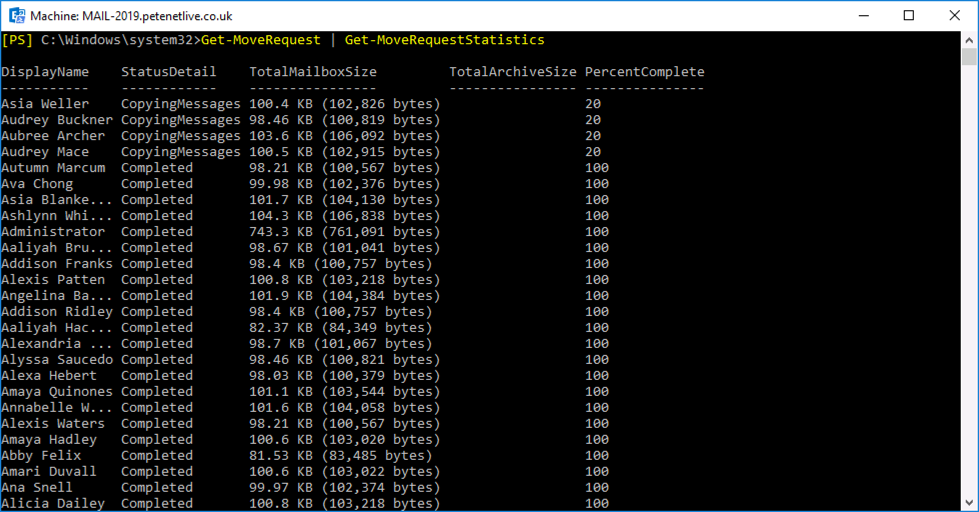
From this point, this is where I don’t like the EAC it takes AGES to update with progress! From the Exchange Shell you can get an up to date view of that is going on!
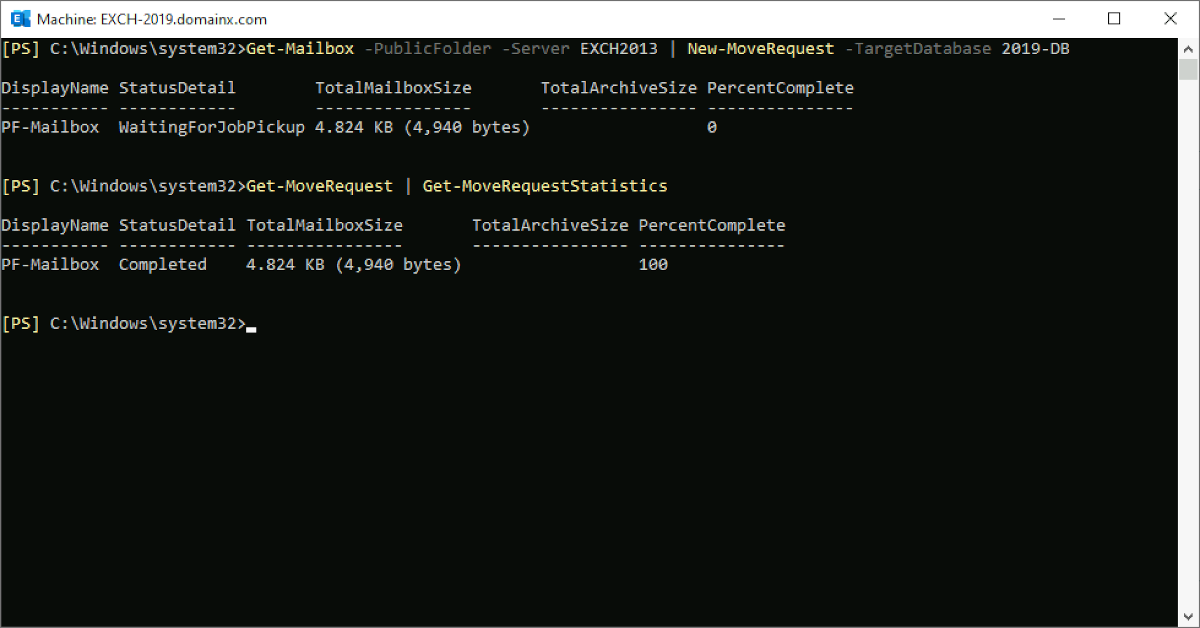
Get-MoveRequest | Get-MoveRequestStatistics
For a better list of commands for moving user mailboxes, monitoring the migration, (and removing the move requests when you are finished). See the following article;
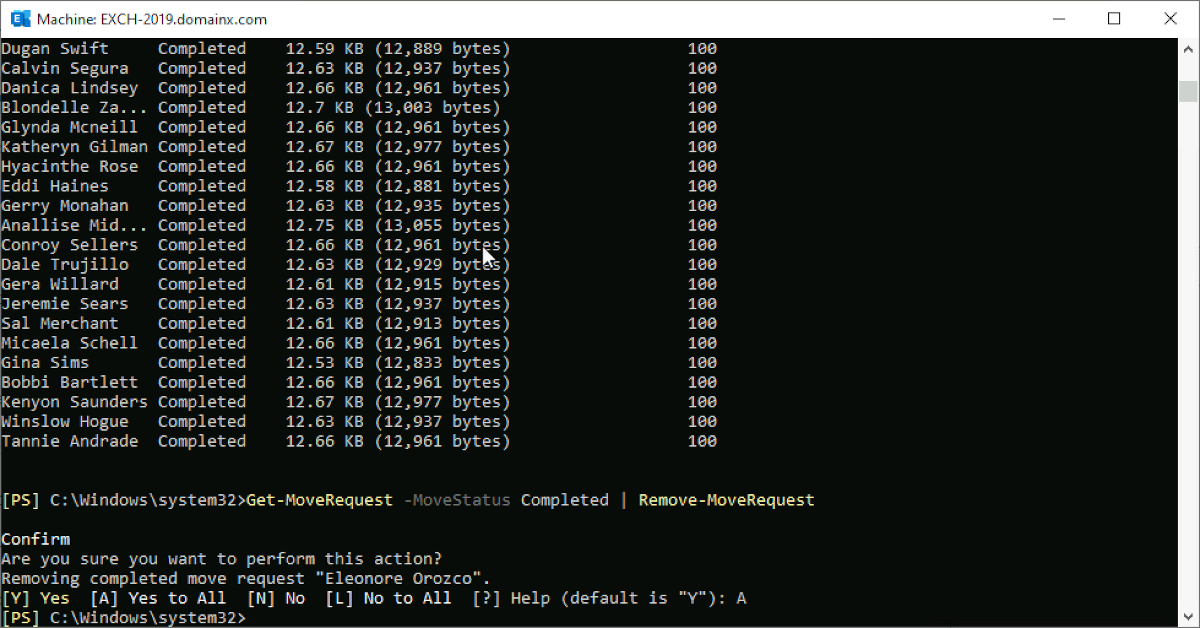
With ALL Mailboxes migraitons, DON’T FORGET that on sucessfull completion, you need to remove the move requests. (If somehting fails, or displays an error, don’t forget to search for that error (above) before going to Google!
Exchange 2013 to 2019 Upgrade: Migrating Exchange System Mailboxes
Before you start issue the following command;
Set-AdServerSettings -ViewEntireForest $true
In addition to the user mailboxes there are a multitude of different ‘System mailboxes’ that might be hanging around, before we can get rid of the Exchange 2013 Database(s) we need to migrate those.
Firstly AuditLog Mailboxes
Get-Mailbox -AuditLog -Database "Mailbox-Database-2013"
If there are any!
Get-Mailbox -AuditLog -Database "Mailbox-Database-2013" | New-MoveRequest -TargetDatabase "Mailbox-Database-2019"

Then Arbitration Mailboxes
Get-Mailbox -AuditLog -Database "Mailbox-Database-2013" -Arbitration
If there are any!
Get-Mailbox -AuditLog -Database "Mailbox-Database-2013" -Arbitration | New-MoveRequest -TargetDatabase "Mailbox-Database-2019"

Then Monitoring Mailboxes
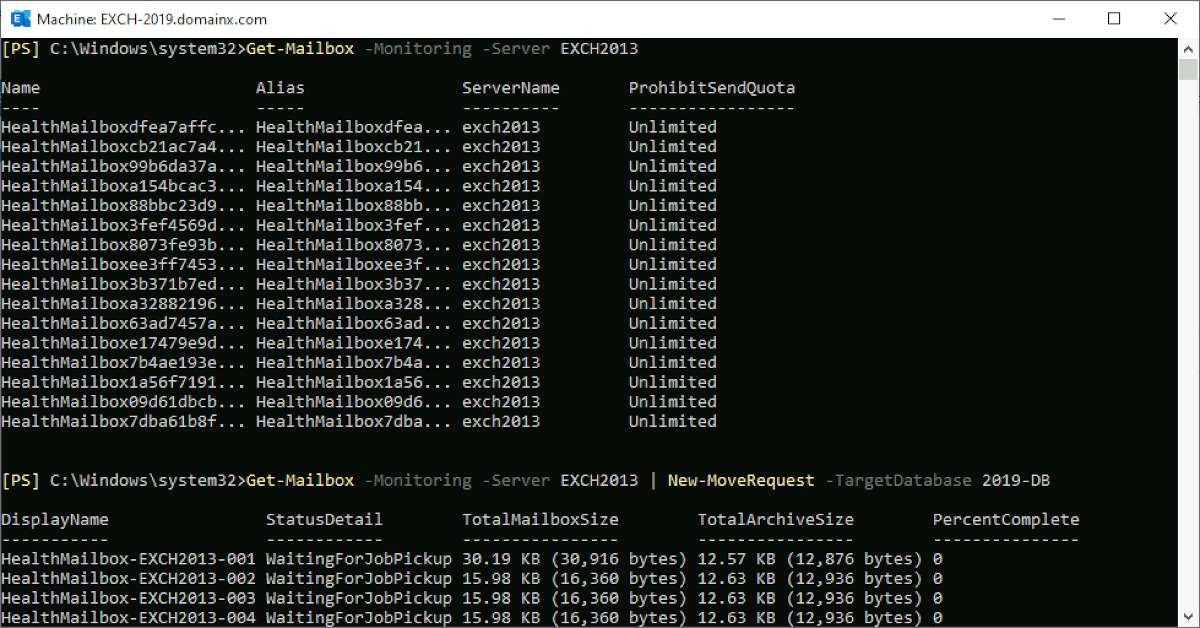
Get-Mailbox -Monitoring -Server "Mail-2013"
If there are any!
Get-Mailbox -Monitoring -Server "Mail-2013" | New-MoveRequest -TargetDatabase "Mailbox-Database-2019"
Make sure there are no archive mailboxes;
Get-Mailbox -Auditlog -Database “Database-Name” -Archive
If there are, move them, (as above).
Also move any Discovery mailboxes, and move them to 2019;
Get-Mailbox DiscoverySearchMailbox* | New-MoveRequest -TargetDatabase “Mailbox-Database-2019“
Exchange 2013 to 2019 Upgrade Migrating Public Folders
Remember after Exchange 2013 these are just mailboxes! You can move them like any other mailbox 🙂
Delete Exchange 2016 Database(s)
When you are 100% sure there’s nothing left on the old database(s) remove them;
Get-MailboxDatabase -Identity "Mailbox-Database-2013" | Remove-MailboxDatabase

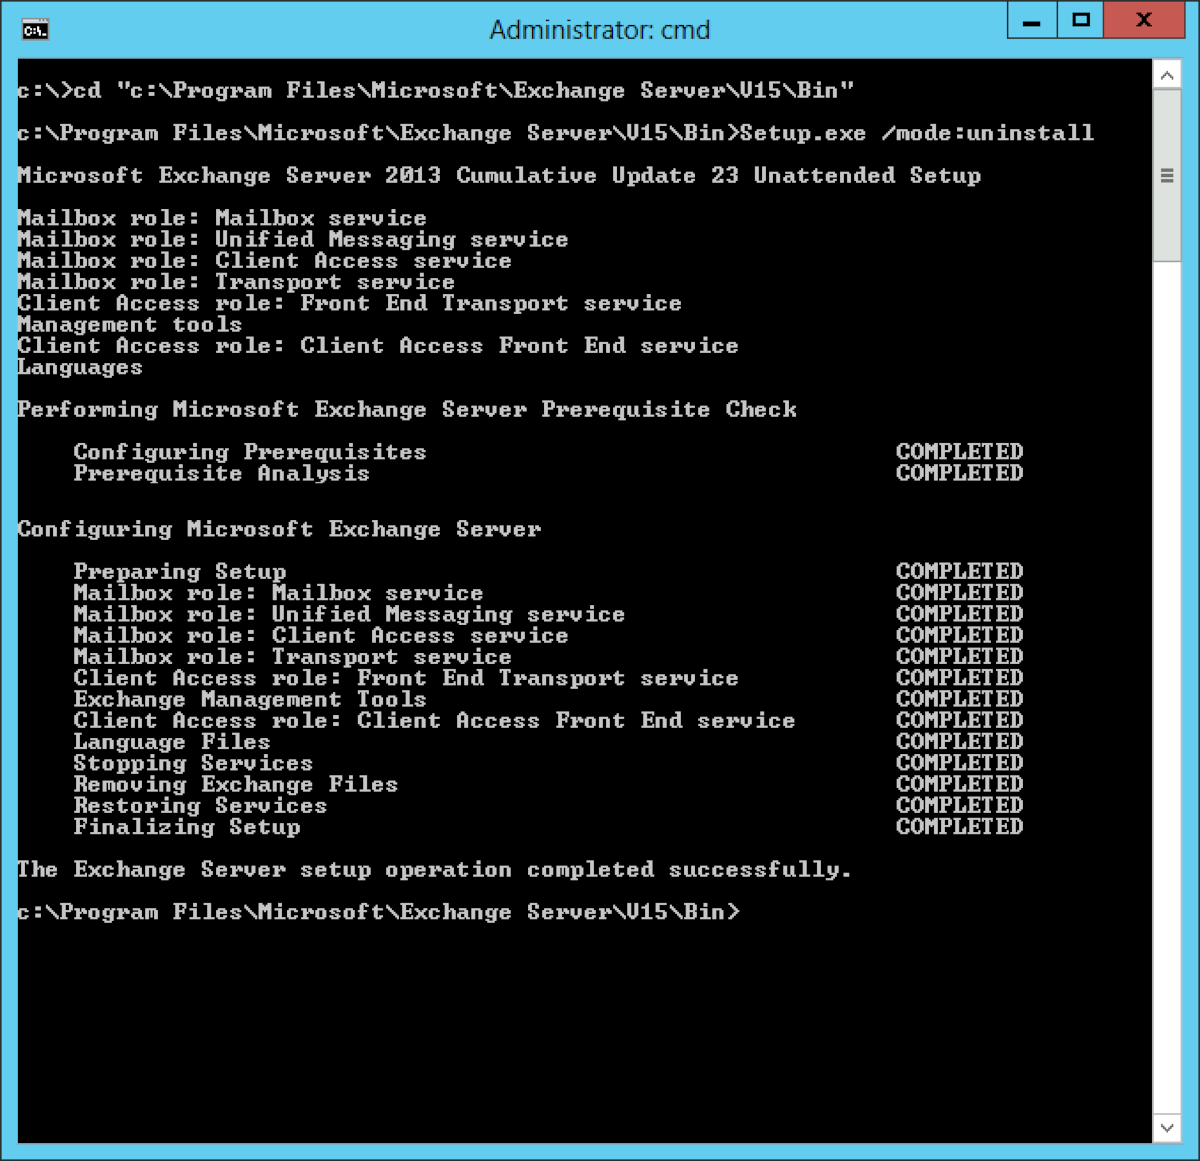
Uninstall Exchange 2013
Your install directory may not be on the C: drive so change your path accordingly;
cd "C:\Program Files\Microsoft\Exchange Server\V15\Bin
setup.exe /mode:uninstall
At this point make sure your backup/replication software is pointed to the new Exchange 2019 Server.
Note: If you are running an On-Premise Exchange in Hybrid mode, and post migration if you have any mail flow problems see the following article;
No Mail Flow On-Premise To/From Office 365
Related Articles, References, Credits, or External Links
Exchange 2019 Migration from Exchange 2016
21/03/2024
Something that has bitten me twice so far because I forgot to write it down the first time: plan for massive amounts of log files on the initial move! Either set Circular Logging for the import, or set aside copious disk space because those two Veep mailboxes with over 40GB of data will swamp your logs and halt mailflow until you clear the logjam.
18/06/2024
Quick question, and I think what applies in this instance. I have a server called exchange2013.corp.contoso.com but have a wild card cert for *.contoso.com. On my existing 2013 virtual directories I use the same URL of email.contoso.com for internal and external, and I use the wildcard cert for this. I have set up a 2019 server (exchange2019.corp.contoso.com) but want to retain the URLs of email.contoso.com for my virtual directories in my server 2019 instance. I presume I need to update the virtual directories and Outlook anywhere on my existing exchange 2013 server to something such as old-email.contoso.com so I can still manage this and utilise my existing wildcard cert.
Great blog post btw, really handy and covers other features that others don’t.
18/06/2024
Yes! Do it for the OLD and NEW servers – that’s why you specify the server name in the command 😊
27/08/2025
Hello. First of all, congratulations on your articles, which I have been reading for years. I have a small problem. I’m trying to upgrade my Exchange 2013 server to a newly installed 2019 server. Everything seems to be going well, but the users I migrated to the 2019 server can’t log in via Outlook or OWA. They can only log in when I open OWA on the 2019 server and send and receive emails. What do you think is missing?
Translated with DeepL.com (free version)
27/08/2025
This usually means one or more of the Client Access URLs and certificates are not configured on the 2019 server.
Get-ClientAccessService -Identity EX2019 | fl AutoDiscoverServiceInternalUri
Get-OwaVirtualDirectory -Server EX2019 | fl InternalUrl,ExternalUrl
Get-EcpVirtualDirectory -Server EX2019 | fl InternalUrl,ExternalUrl
Get-WebServicesVirtualDirectory -Server EX2019 | fl InternalUrl,ExternalUrl
Get-MapiVirtualDirectory -Server EX2019 | fl InternalUrl,ExternalUrl
Get-OutlookAnywhere -Server EX2019 | fl InternalHostname,ExternalHostname
Make sure these match the same namespaces you used on Exchange 2013 (e.g. mail.domain.com).
Then ensure your SSL certificate (covering mail/autodiscover namespaces) is:
Imported on Exchange 2019
Assigned to IIS, SMTP, IMAP, POP as needed
P