
KB ID 0001762
Problem
I’ve been getting through my NSE4, and one of todays topics was NAT, just as an offhand comment the ‘narrator‘ (I say narrator because it’s a monotonous robot AI voice,) mentioned Fortigate Load Balancing.
In the past (with my Cisco hat on) when I’ve been asked about load balancing, I’ve said ‘If you want to load balance, buy a load balancer‘. But the Fortigate does try to be ‘all things to all men‘ so I wondered just how good a load balancer can it be?
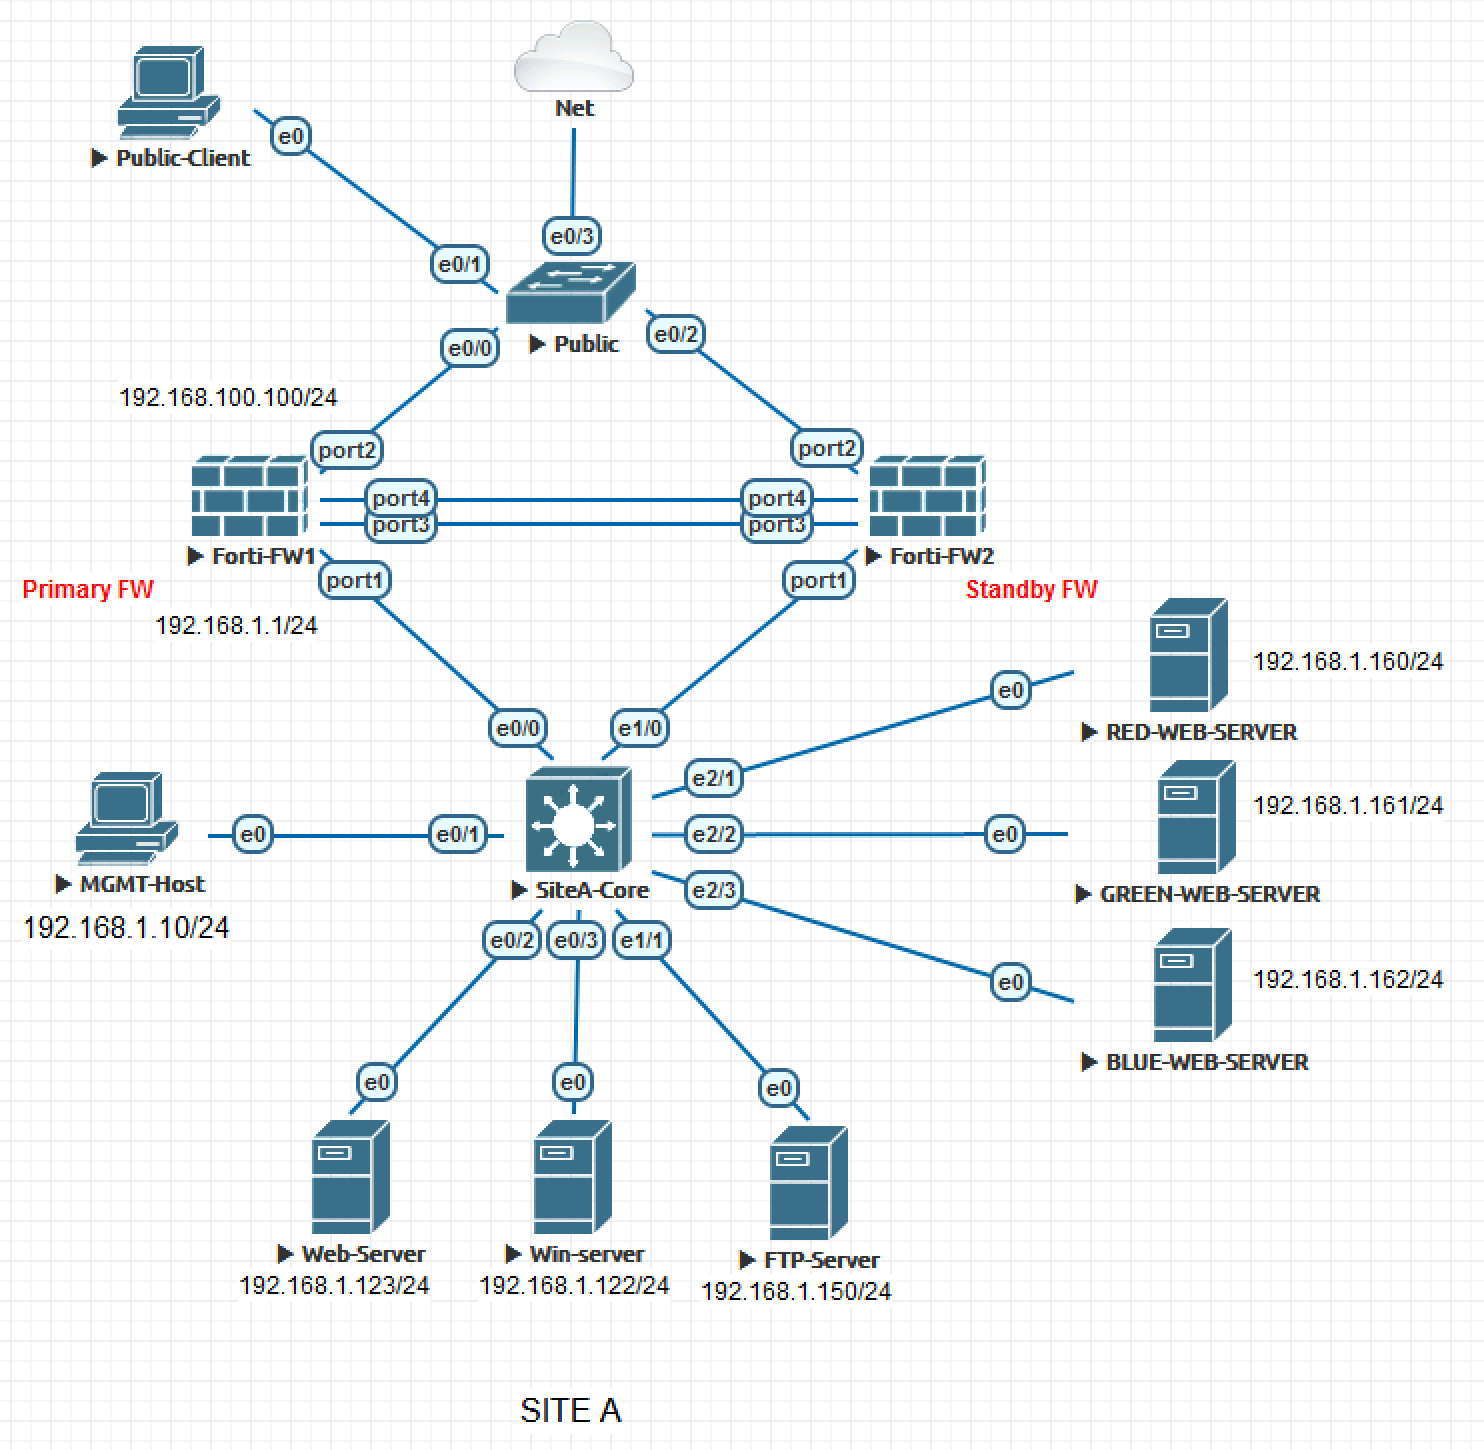
Turns out, quite a decent one, if you just want simple http round robin, it does that, it you want weighted traffic routing, or host health monitoring, or HTTP cookie persistence, and even SSL offload. It’s as good as anything I’ve ever worked on before. Here’s my Fortigate ‘Test Bench‘, you will see I’ve added three web servers (on the right) called Red, Green, and Blue (the significance of which will become apparent). Note: Yes there’s another web server at the bottom, (I’m too lazy to remove it from the lab!)
I’m going to setup simple round robin load balancing between these three web servers, and I’m going to get the Fortigate to monitor their health by simply making sure they respond to ping packets. (Note: it can monitor http availability or something a little better if you wish).
Solution
This tripped me up for a while! Load balancing is a feature, you need to turn it on first, System > Feature Visibility > Load Balancing > Enable.

FortiGate Load Balancing: Create a Health Check
Cisco Types: Think of this as a tracked SLA
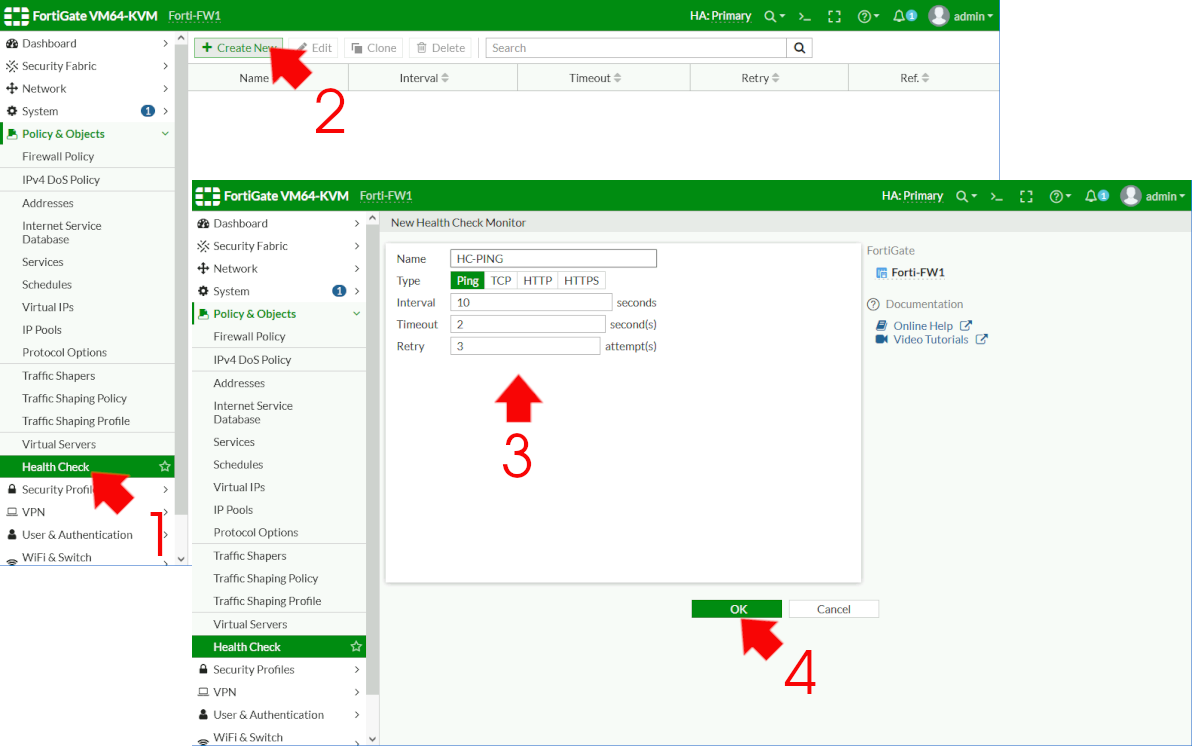
Policy & Objects > Health Check > Create New > Give it a name > Type = Ping > Interval = 10 > Timeout = 2 > Retry = 3 > OK
Now create a Virtual Server (not a VIP!) Policy & Objects > Virtual Servers > Create New > Name = Give it a sensible name > Type = HTTP > Interface = Your Outside/WAN interface > Virtual Server IP (Externally!) > Virtual Server Port = 80 > Load Balancing method = Round Robin > Persistence = HTTP cookie > Heath Check = Select the one you created above.
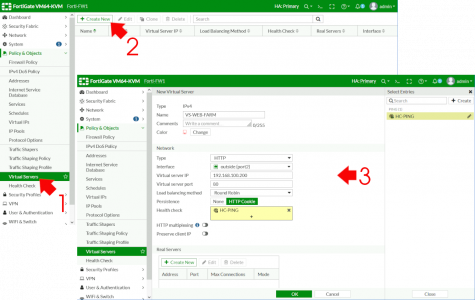
Scroll down > Real Servers > Create New.

Add in the first (internal server IP) > Port = 80 > Max connections = 0 (that’s unlimited) > OK.

Repeat the process to add the remaining servers > OK.

FortiGate Load Balancing: Enable Firewall Policy
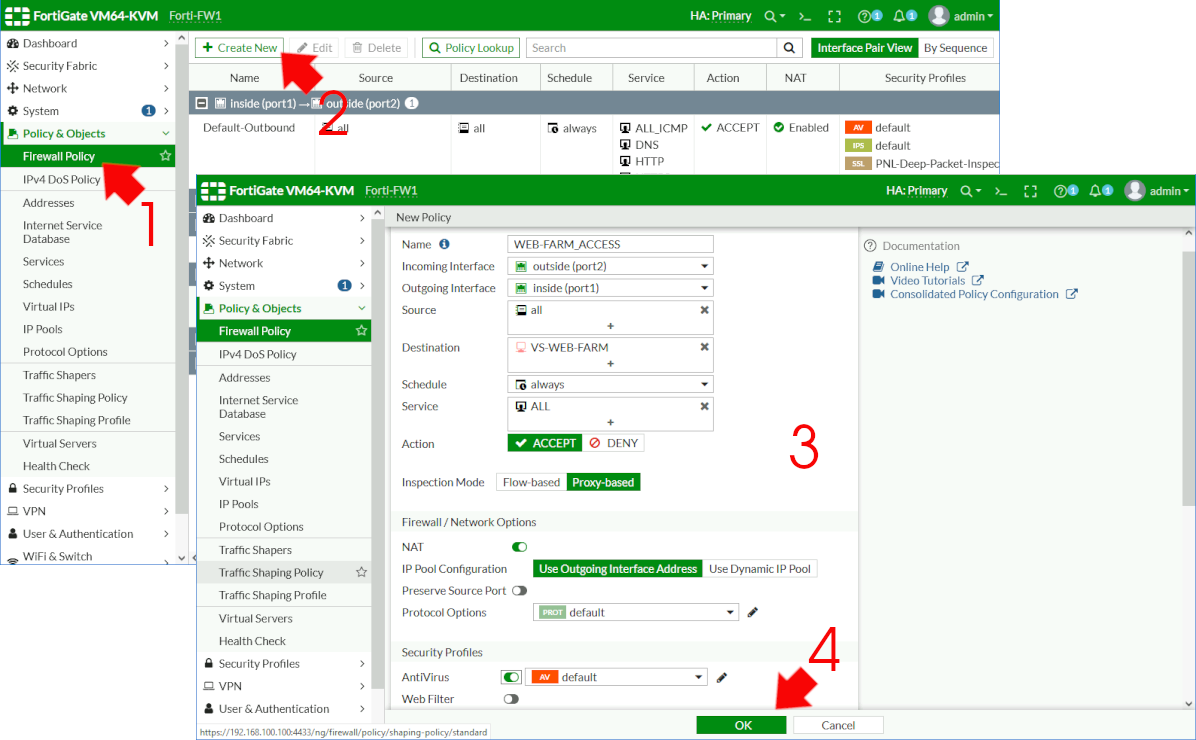
Now you need to ‘allow’ traffic in (it is a firewall after all!) Policy & Objects > Firewall Policy (or IPv4 policy on older firewalls) > Create New > Name = Give it a sensible name > Incoming Interface = Outside > Outgoing Interface = Inside > STOP Change Inspection Mode to PROXY Based > Destination = Your Virtual Server (it’s not visible unless you have enabled proxy based!) > Schedule = Always > Service = All > Action = Accept > NAT = Enabled > You may also enable AV inspection > OK.
FortiGate Load Balancing:Testing and Tweaking
So from ‘Outside’ let’s hit our load balanced page.
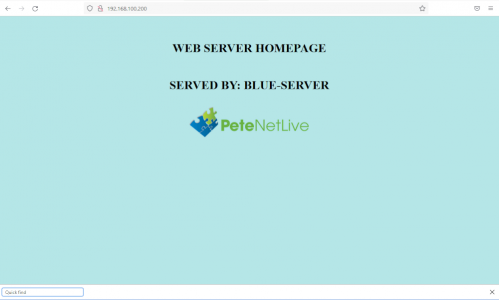
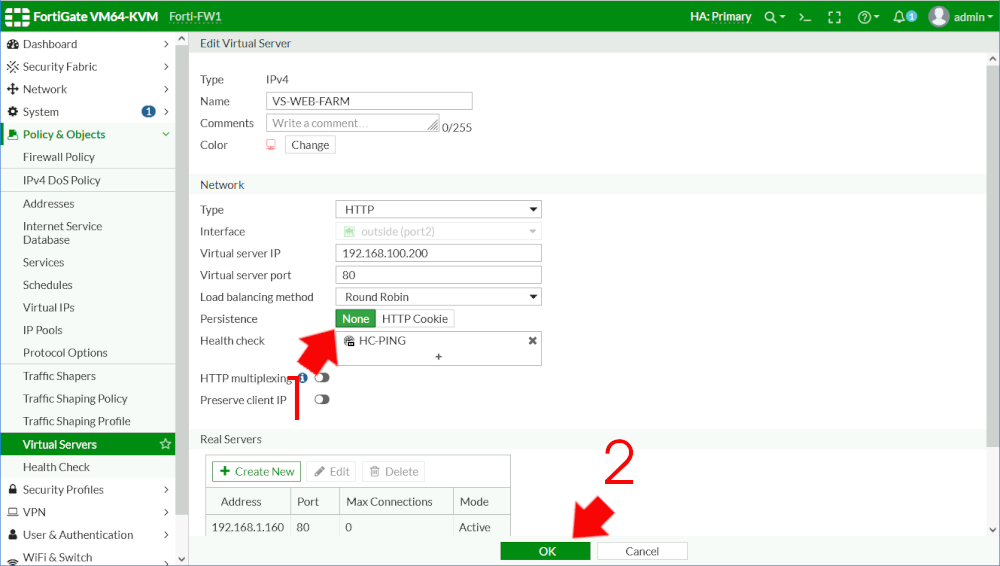
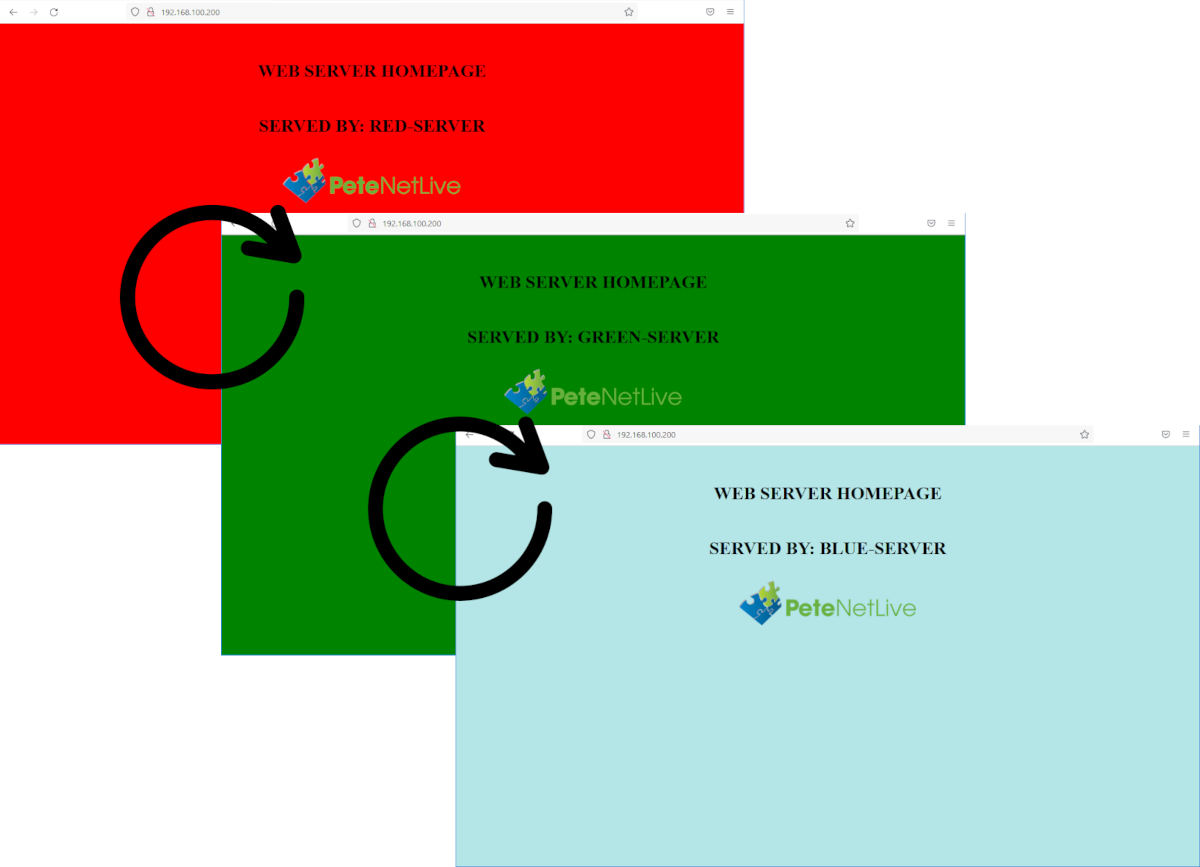
That’s great but if you hit refresh a few times nothing changes (in production nothing would change anyway, but to prove my back end servers are getting used and load balanced, each of mine serves a different coloured page (hence the red, green and blue server names). The reason I’m only seeing the blue one, is because we enabled ‘HTTP cookie Persistence‘ let’s just nip back onto the firewall and disable that (set it to None > OK).
Now when I refresh by browser I can see it cycling though the back end servers.
FortiGate SSL Offload
To use and process SSL requires some CPU power, some websites (like this one) serve their webpages protected by https and the certificate that enables that lives on the web server, for sites like mine that are getting about 12k hits a day that’s fine but if you are getting hundreds of thousands of hits a minute that’s a MASSIVE drain on CPU resources. That’s what SSL offload is all about, getting another device (in this case the Fortigate) to do all the heavy lifting for you. Then the back end servers can get on with the job of serving web pages.
Upload the Certificate to the FortiGate
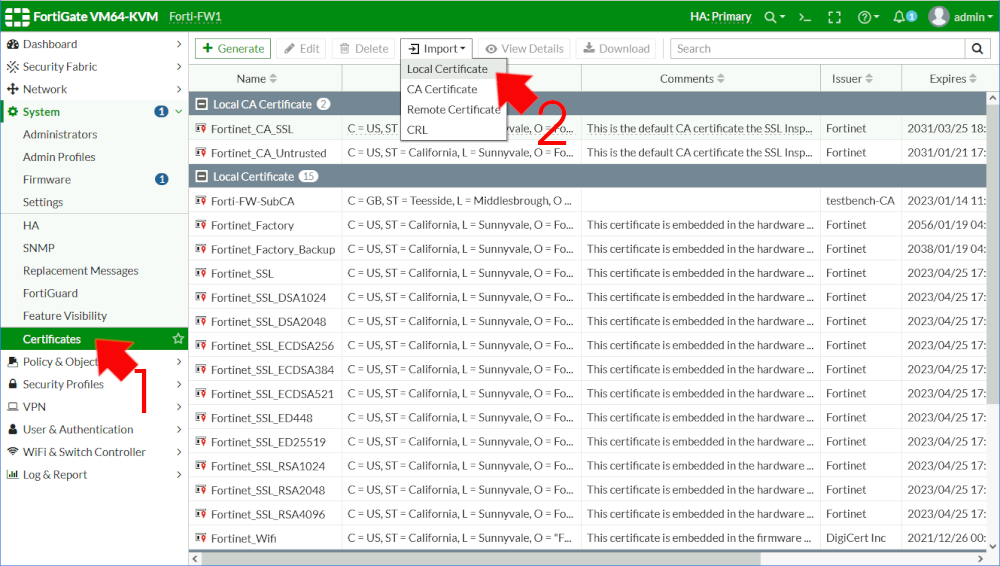
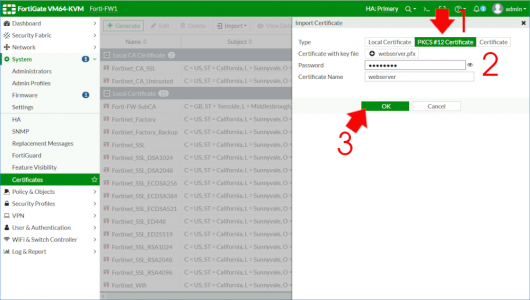
For HTTPS you will need a web certificate that will be trusted by your visitors. I’m lazy and tight so I’ll just create one in Microsoft Certificate Services, but in Production you will need Publicly Signed Certificate. System > Certificates (if you can’t see certificates) > Import > Local Certificate.
Mine’s in PFX format so I need to select PKCS#12 > upload the certificate and supply a password > OK
FortiGate: Enable SSL Offload
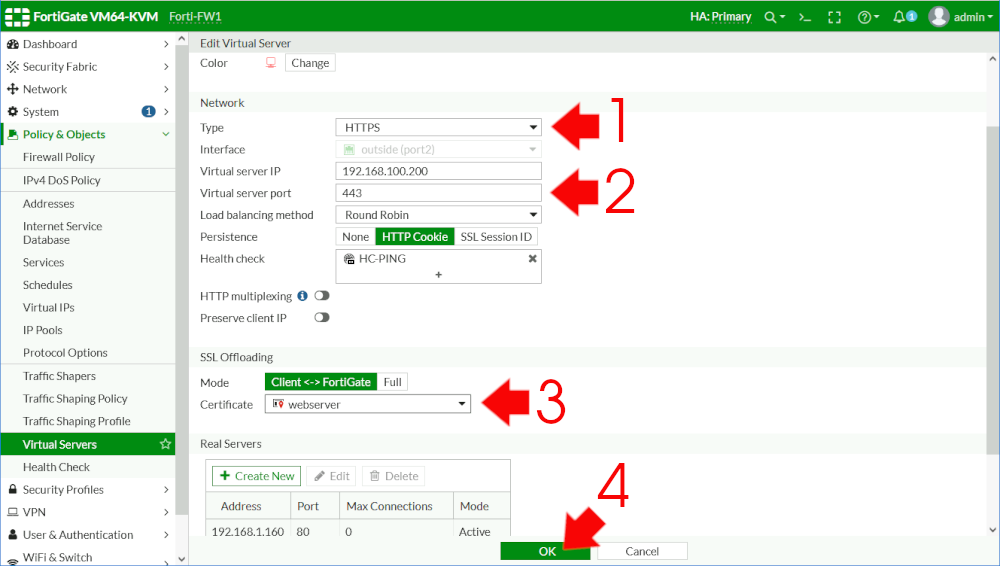
On your Virtual Server, change the Type to HTTPS > Virtual ServerPort to 443 > Certificate to the one you just uploaded > OK.
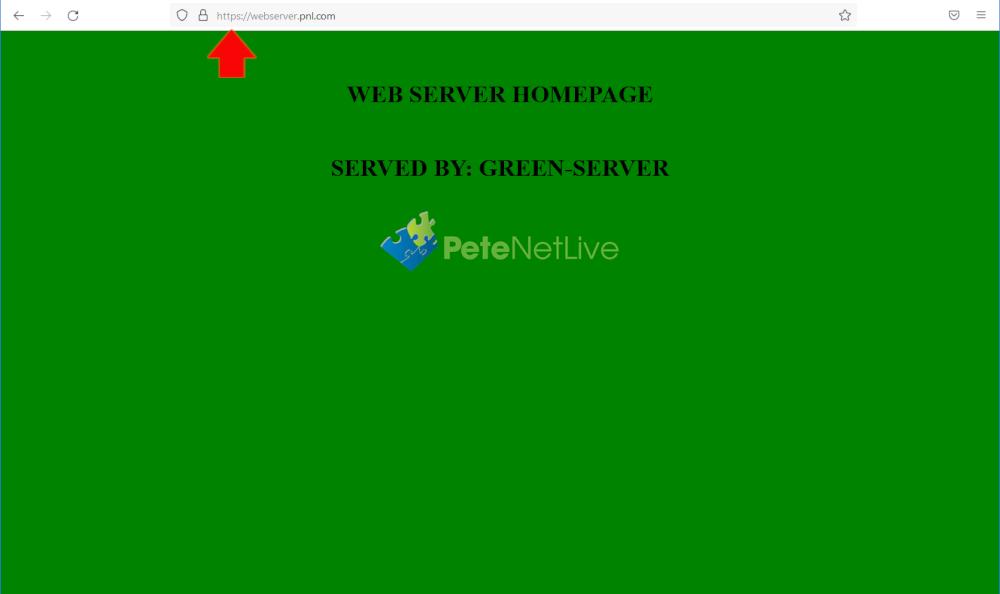
We are now serving pages securely even though the web servers are not configured for https.
Related Articles, References, Credits, or External Links
NA