KB ID 0001730
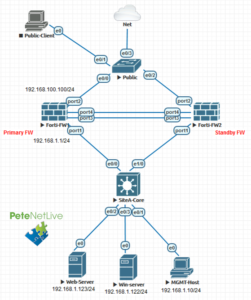
So my aim was to setup FortiGate High Availability failover in Active / Passive mode. I’m setting this up in EVE-NG and here’s what my lab looks like;
Note: Im using TWO connections for Heartbeat/Failover, you can simply use one if you prefer.
FortiGate High Availability (Pre-Requisites)
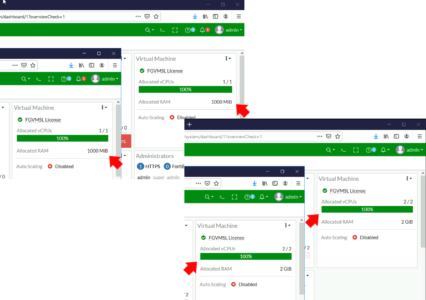
Obviously the firewalls need to be the same! For physical firewalls that’s straightforward, but be careful if you are using virtual FortiGates, make sure they are the same hardware and licence versions!
As you can see in my topology (above), each port needs to be connected to the same network on BOTH firewalls.
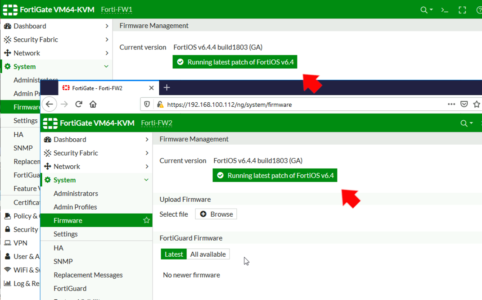
Make sure both firewalls are running the SAME firmware.
Make sure the interfaces are not getting their IP addresses from DHCP, or PPPoE.
I’m assuming the primary firewall is all setup and configured properly, the secondary firewall then needs to be built, licensed, and internet connected (so it can update etc). Note: It will take it’s config from the primary firewall when configured.
FortiGate High Availability (Active Passive) From Command Line
I know, Fortinet like to say that there’s no need to be working at command line these days, but when you see how easy it is to setup from CLI, you might choose to do it that way instead.
Primary FortiGate High Availability Setup
FortiGate uses priority to set the primary firewall, by default it sets the value to 128. So I’m going to set my Primary firewall to 200 and my Secondary firewall to 100.
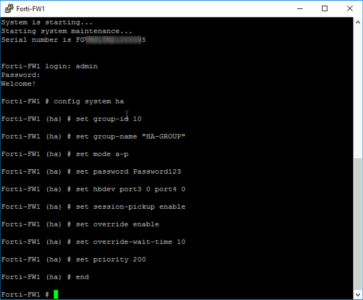
Here are the commands you can simply copy and paste;
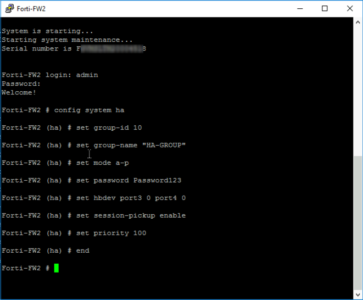
config system ha
set group-id 10
set group-name HA-GROUP
set mode a-p
set password Password123
set hbdev port3 0 port4 0
set session-pickup enable
set override enable
set override-wait-time 10
set priority 200
end
What does all that mean? The Group ID and Group Name, are shared by all firewalls in the cluster. (Yes cluster, you can scale this up to more firewalls). Mode simply sets the mode to a-p (active passive). Hbdev denotes the interfaces used for the heartbeat network, (the zeros denote that they will be used equally). Session-pickup allows the firewalls to share the session state table for your clients, (i.e. provides seamless TCP session failover). Override is enabled, this will fail back the the primary firewall when it becomes available. Note: wait-time is enabled and set to 10 seconds to avoid any ‘flap / stutter’ that may cause disconnections when executing the override. Then finally the priority is set to 200.
Secondary FortiGate Hight Availability Setup
Practically the same, but you don’t need to set override, and the priority will be lower (100).
config system ha
set group-id 10
set group-name HA-GROUP
set mode a-p
set password Password123
set hbdev port3 0 port4 0
set session-pickup enable
set priority 100
end
FortiGate HA Monitor and TroubleShooting
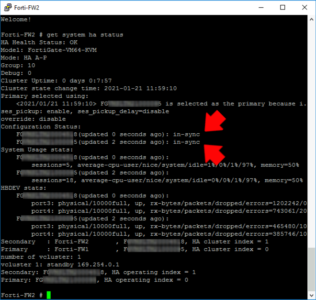
At this point go and have a coffee, the config needs replicating from the primary to the secondary, and this can take a few minutes. Use the following command to check;
get system ha status
You want to see them both ‘in-sync‘.
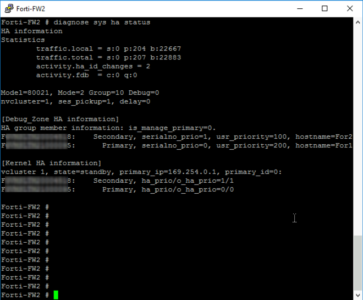
To troubleshoot, use;
diagnose system ha status
FortiGate Failover (Active Passive) From GUI
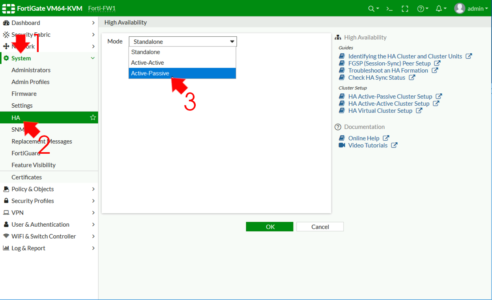
On the Primary (pre configured) firewall, System > HA > Change the drop down to Active-Passive.
- Device Priority: 200
- Group name: HA-GROUP {or something sensible}.
- Password: {needs to match on both firewalls}.
- Sesión pickup: Enabled {replicates client session data}.
- Monitor Interfaces: {you can leave this blank, unless you only want to monitor certain interfaces}.
- Heartbeat Interfaces: {enter one or more interfaces}.
What’s Management interface Reservation? : You can use this to have separate management for each firewall, (usually you can’t get to the standby/secondary firewall for GUI/SSH management etc).
Clock OK when complete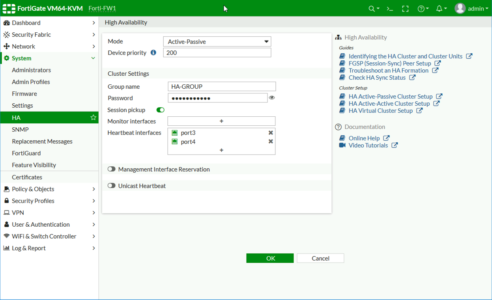
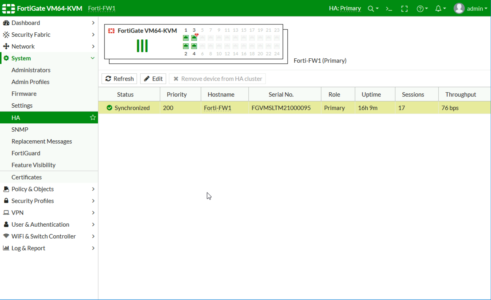
You should see something like this;
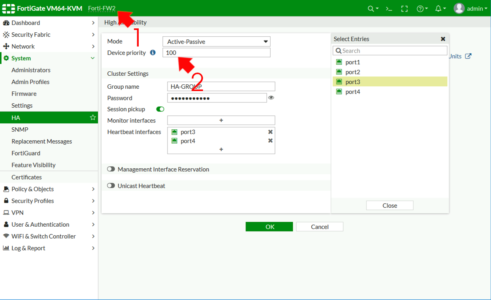
Jump onto the Secondary firewall, and set it the same, (with the exception of the priority).
Note: Override (Fail Back) cannot currently be set in the GUI.
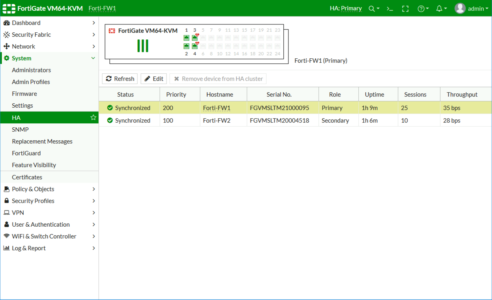
Wait a while and hit refresh, you should see both firewalls in Sync
Possible Bug in 6.4.4 build 1803 (GA)
When carrying out the above procedure (from the web management console), my firewalls did not sync, while trouble shooting at command line they were both set as primary and appeared not to be able to see the other, they were saying;
{Firewall Serial Number}is selected as the master because it’s the only member in the cluster.
Despite many hours of troubleshooting/rebuilding, this kept happening, it worked fine when configured from command line, but not from the GUI. When I checked the commands after using the GUI I noticed that “set group-id {number}” was missing from the config. If I added this manually it started syncing straight away?
Related Articles, References, Credits, or External Links
Thanks to the good folk at Fortinet for sending me some licences to test this (much appreciated).

