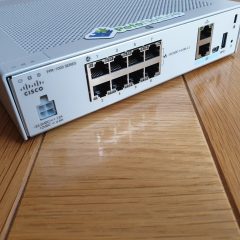
Cisco FPR – Re-image from FTD to ASA Code

KB ID 0001766

Problem

Note: This procedure is to re-image a Cisco Firepower device from FTD to ASA code, (in this example a Cisco FPR 1010). 

Why would you want to do this? Well to be frank FTD is bobbins, so if you have a device running FTD code you might want to ‘convert’ it to ASA code. If you tried to do this with an older firewall (ASA 5500-X) then you needed to go to Cisco TAC and try and get them to give you an activation code for the ASA. But if you are using an FPR device then YOU DON’T NEED TO DO THAT.

You might also want to do this because, (at time of writing) buying a Cisco FPR device running ASA code, the lead times in the UK are eye wateringly long (200-300 days!) But you can buy a chassis running FTD code and then convert that to ASA code with the following procedure.

Solution

Connect to your FPR device with a console cable, and log on as admin (the default password is Admin123, unless you have changed it of course!) Download the latest version of ASA code for your device from Cisco, in my case (at time of writing) that’s cisco-asa-fp1k.9.14.3.15.SPA. Copy that onto a USB drive (WARNING: The drive needs to be formatted with FAT32, the firewall will not recognise or mount the drive unless it is!) Finally insert the USB drive into the firewall, and issue the following commands.

[box]

FTD-1# scope firmware
FTD-1 /firmware # download image usbA:/cisco-asa-fp1k.9.14.3.15.SPA
Please use the command 'show download-task' or 'show download-task detail' to check download progress.
FTD-1 /firmware # show download-task

Download task:
    File Name Protocol Server          Port       Userid          State
    --------- -------- --------------- ---------- --------------- -----
    cisco-asa-fp1k.9.14.3.15.SPA
              Usb A                             0                 Downloading

% Download-task cisco-asa-fp1k.9.14.3.15.SPA : completed successfully.

[/box]

Note: If it says, ‘failed. Download failure – USB drive is not mounted‘ the drive is probably formatted incorrectly. If it says ‘Download-task failed. Failed signature validation‘, then the image is probably corrupt, try again, or use a different version.

Verify the file has downloaded correctly.

[box]

show download-task

Download task:
    File Name Protocol Server          Port       Userid          State
    --------- -------- --------------- ---------- --------------- -----
    cisco-asa-fp1k.9.14.3.15.SPA
              Usb A                             0                 Downloaded

[/box]

Then make sure the package is listed with a show package command.

[box]

FTD-1 /firmware # show package
Name                                          Package-Vers
--------------------------------------------- ------------
cisco-asa-fp1k.9.13.1.2.SPA                   9.13.1.2
cisco-asa-fp1k.9.14.3.15.SPA                  9.14.3.15
cisco-ftd-fp1k.6.6.0-90.SPA                   6.6.0-90

[/box]

Note: You can see (above) there’s an ASA code version from a previous install and it shows the current running FTD code also. To re-image the firewall execute the following commands. (Note: you enter the VERSION NOT THE FILENAME!)

[box]

FTD-1 /firmware # scope auto-install
FTD-1 /firmware/auto-install # install security-pack version 9.14.3.15

The system is currently installed with security software package 6.6.0-90, which has:
   - The platform version: 2.8.1.105
   - The CSP (ftd) version: 6.6.0.90
If you proceed with the upgrade 9.14.3.15, it will do the following:
   - upgrade to the new platform version 2.8.1.172
During the upgrade, the system will be reboot

Do you want to proceed ? (yes/no):yes {Enter}

This operation upgrades firmware and software on Security Platform Components
Here is the checklist of things that are recommended before starting Auto-Install
(1) Review current critical/major faults
(2) Initiate a configuration backup

Do you want to proceed? (yes/no):yes {Enter}

Triggered the install of software package version 9.14.3.15
Install started. This will take several minutes.
For monitoring the upgrade progress, please enter 'show' or 'show detail' command.
FTD-1 /firmware/auto-install #

[/box]

Now go and have a coffee, it will take 20 minutes, and a few reboots before it’s finished. When completed you should see a login prompt, login with admin/Admin123 and reset the password. 

[box]

firepower-1010 login: admin
Password: Admin123
Successful login attempts for user 'admin' : 1
Last failed login: Sun Nov 21 16:55:16 UCT 2021 on ttyS0
There was 1 failed login attempt since the last successful login.
Hello admin. You must change your password.
Enter new password: password123
Confirm new password: password123
Your password was updated successfully.

[/box]

Then connect to the ASA CLI with the connect asa command. Go to enable mode, and set the enable password. Finally, save the config.

[box]

firepower-1010# connect asa
firepower-1010# Verifying signature for cisco-asa.9.14.3.15 ...
Verifying signature for cisco-asa.9.14.3.15 ... success
ciscoasa>
ciscoasa> enable
The enable password is not set.  Please set it now.
Enter  Password: password123
Repeat Password: password123
Note: Save your configuration so that the password can be used for FXOS failsafe access and persists across reboots
("write memory" or "copy running-config startup-config").
ciscoasa# write memory
Building configuration...
Cryptochecksum: a607255a a64f2898 97bb6b40 9a8ff25c

[/box]

You will now be running ASA code with the factory settings (Inside 192.168.1.1/24, Management 192.168.45.1/24 (with DHCP enabled), Outside set to get IP dynamically, and all traffic allowed out).

Remember if you’re a ‘light weight’ and cant use command line, then you will need to install and configure the ASDM 🙂 

Related Articles, References, Credits, or External Links

Reimage Cisco 1010 ASA to FTD

Convert ASA 5500-X To FirePOWER Threat Defence

Cisco Catalist Upgrading 2900, 5500 and 3700 Stacks

KB ID 0001630

Problem

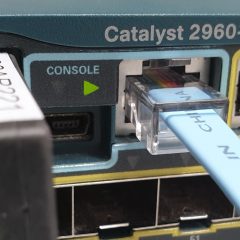
People are often nervous about doing this, I’m not sure why because Cisco have made it painfully simple now. That’s because instead of the old /bin files we used to use, you can now upgrade a switch (or a switch stack) using a .tar file with one command, (and it will also upgrade all the stack members and the firmware on any other network modules you have in the switches at the same time).

Yes it does take a while*, and for long periods of time theres no updated output on the screen, which is worrying if you’ve never done it before.

*Note: The procedure below was updating two 2960-X switches and took about 45-50 minutes. If anyone wants to post any further timings below as a help to others, state the switch types and quantities, and versions you used, etc.

Solution

First things first, BACK UP YOUR SWITCH CONFIG. I also have a habit of copying out the original .bin file from the flash to my TFTP server as an extra ‘belt and braces’ precaution, in case everything ‘Goes to hell in a hand cart!’

I find it easier to do this with the update file on a USB Drive, (format the drive as Fat32). If you dont have a USB Drive, or the switch does not have a working USB port then don’t panic, you can use ftp or tftp to upgrade also.

Place your new upgrade .tar file on your USB Drive and insert it into the master switch, you should see the following;

[box]

Dec 19 13:13:18.466: %USBFLASH-5-CHANGE: usbflash0 has been inserted!

[/box]

Note: If yours says usbflash1, or usbflash2 etc. Then that’s just the switch numbering in the stack, use the number it tells you!

Make sure the switch can see your upgrade file;

[box]

Petes-Switch# dir usbflash1:
Dec 19 16:56:45.712: %USBFLASH-5-CHANGE: usbflash0 has been inserted!

Directory of usbflash0:/
 -rw- 37488640 Nov 25 2019 10:08:34 +00:00 c2960x-universalk9-tar.152-7.E0a.tar

8036286464 bytes total (7997743104 bytes free)

[/box]

You can execute the entire upgrade with this one command;

[box]

Petes-Switch# archive download-sw /overwrite usbflash0:/c2960x-universalk9-tar.152-7.E0a.tar

[/box]

Note: If using tftp then use archive download-sw /overwrite tftp:/{ip-of-tftp-server}/{image-name}.tar instead.

It will take quite a long time, as soon as it says extracting xyz….go and have a coffee, wait until it says ‘All software images installed.’

[box]

---LOTS OF OUTPUT OMITTED FOR THE SAKE OF BREVITY---
New software image installed in flash2:/c2960x-universalk9-mz.152-7.E0a
Deleting old files from dc profile dir "flash:/dc_profile_dir"
extracting dc profile file from "flash:/c2960x-universalk9-mz.152-7.E0a/dc_default_profiles.txt" to "flash:/dc_profile_dir/dc_default_profiles.txt"
Deleting old files from dc profile dir "flash2:/dc_profile_dir"
extracting dc profile file from "flash2:/c2960x-universalk9-mz.152-7.E0a/dc_default_profiles.txt" to "flash2:/dc_profile_dir/dc_default_profiles.txt"
All software images installed.

[/box]

Now let’s do a couple of checks just for our ‘peace of mind‘, first make sure the images are in all the relevant switches flash storage;

[box]

Petes-Switch#dir flash1:
Directory of flash:/

    2  -rwx        5486  Dec 19 2019 16:55:40 +00:00  private-config.text
    3  -rwx          33   Aug 7 2019 08:28:12 +00:00  pnp-tech-time
    4  -rwx       11114   Aug 7 2019 08:28:14 +00:00  pnp-tech-discovery-summary
    5  -rwx        3096  Dec 19 2019 16:55:40 +00:00  multiple-fs
  699  drwx         512  Dec 19 2019 17:35:25 +00:00  c2960x-universalk9-mz.152-7.E0a
  480  drwx         512  Dec 19 2019 17:35:28 +00:00  dc_profile_dir
  696  -rwx         796   Aug 9 2019 09:48:30 +00:00  vlan.dat
  698  -rwx        7539  Dec 19 2019 16:55:40 +00:00  config.text

122185728 bytes total (84392960 bytes free)
Petes-Switch#dir flash2:
Directory of flash2:/

    2  -rwx        5486  Dec 19 2019 16:55:40 +00:00  private-config.text
    3  -rwx          33   Aug 7 2019 08:32:38 +00:00  pnp-tech-time
    4  -rwx       11126   Aug 7 2019 08:32:40 +00:00  pnp-tech-discovery-summary
    5  -rwx        7539  Dec 19 2019 16:55:40 +00:00  config.text
    6  drwx         512  Dec 19 2019 17:35:26 +00:00  c2960x-universalk9-mz.152-7.E0a
  481  drwx         512  Dec 19 2019 17:35:28 +00:00  dc_profile_dir
  696  -rwx        3096   Aug 8 2019 10:21:29 +00:00  multiple-fs
  697  -rwx         796  Dec 11 2019 10:55:22 +00:00  vlan.dat
  698  -rwx        7514  Dec 19 2019 16:55:40 +00:00  config.text.backup
  699  -rwx        5486  Dec 19 2019 16:55:40 +00:00  private-config.text.backup

122185728 bytes total (84378624 bytes free)

[/box]

Note: Repeat for each switch in the stack, if you have further switches.

Why does it not have .tar or .bin on the end? Because it’s a folder 🙂

The let’s make sure the ‘boot variable‘ in the device is set to use the new image;

[box]

Petes-Switch# show boot
BOOT path-list      : flash:/c2960x-universalk9-mz.152-7.E0a/c2960x-universalk9-mz.152-7.E0a.bin
Config file         : flash:/config.text
Private Config file : flash:/private-config.text
Enable Break        : yes
Manual Boot         : no
Allow Dev Key         : yes
HELPER path-list    :
Auto upgrade        : yes
Auto upgrade path   :
Boot optimization   : disabled
NVRAM/Config file
      buffer size:   524288
Timeout for Config
          Download:    0 seconds
Config Download
       via DHCP:       disabled (next boot: disabled)
-------------------
Switch 2
-------------------
BOOT path-list      : flash:/c2960x-universalk9-mz.152-7.E0a/c2960x-universalk9-mz.152-7.E0a.bin
Config file         : flash:/config.text
Private Config file : flash:/private-config.text
Enable Break        : yes
Manual Boot         : no
Allow Dev Key         : yes
HELPER path-list    :
Auto upgrade        : no
Auto upgrade path   :

[/box]

All looks good save the config and reload the stack.

[box]

Petes-Switch# write mem
Petes-Switch# reload
Proceed with reload? [confirm] {Enter}

Dec 19 17:38:50.952: %SYS-5-RELOAD: Reload requested by console. Reload Reason: Reload command.

[/box]

Time for another coffee while it’s reloading the stack, when it’s back up you can check it was successful like so;

[box]

Petes-Switch# show version
---LOTS OF OUTPUT OMITTED FOR THE SAKE OF BREVITY---
Switch Ports Model                     SW Version            SW Image
------ ----- -----                     ----------            ----------
*    1 54    WS-C2960X-48TS-L          15.2(7)E0a            C2960X-UNIVERSALK9-M
     2 54    WS-C2960X-48TS-L          15.2(7)E0a            C2960X-UNIVERSALK9-M

[/box]

Related Articles, References, Credits, or External Links

NA

VMware ESXi Syslog Errors – ‘System logs on host {host-name} are stored on non-persistent storage.’

KB ID 0000456 

Problem

Syslog Error Seen on ESXi 6.0 and 6.5

System logs on host {host-name} are stored on non-persistent storage.

Syslog Error Seen on ESXi 5.1

Error Configuration Issues System logs on host {host-name} are stored on non-persistent storage.

Syslog Error Seen on ESXi 5

Error Configuration Issues System logging is not configured on host {host-name}.

Syslog Error Seen on ESXi 4

Error Configuration Issues Issue detected on {host-name}: Warning: Syslog not configured. Please check Syslog options under Configuration.Software.Advanced Settings.

Solution

Seen on ESXi hosts that boot from an internal SD card, (or USB Drive.)  ESXi likes to have some persistent storage to keep its logs on.

To stop this error you need to give it a location for the logs. That location is setup as follows;

ESXi (Post Version 6) Setting a Syslog Location

First, create a folder on some shared storage to save you logs into, below you can see my datastore name is [iSCSI-RAID5-SAS], and Ive created a folder called ‘Logs’

Select the host with the error > Configure > Advanced System Settings > Type ‘Global’ in the search criteria > Locate Syslog.Global.LogDir > Select it > Edit.

Once again, search for Global and change the location to [DATASTORE-NAME]Logs\HOST-NAME > OK.

The error should cease immediately, without the need to restart anything.

ESXi (Pre Version 6) Setting a Syslog Location

With an ESXi host selected, Configuration > Advanced Settings > Syslog > Syslog.global.logDir.

Here you have two options,

Option 1 Store the Syslogs on the SD Card

Note: If you have built the ESXi Server from a manufacturers ESXi DVD (the HP build for example) there may not be enough room on the SD card for the logs.

In the example below, I’ve got an ESXi host, that’s running ESXi from an SD card (4GB) and I’ve put the syslog on there by using the default entry of;

[box][]/scratch/log[/box]

Click OK > After a couple of seconds the alert will disappear (without the need to reboot).

Option 2 Store the Syslogs on Local or Shared Storage.

ESXi 5 Putting the syslog onto a DataStore

With an ESXi host selected, Configuration > Storage > On a datastore, right click > Browse Datastore > Select the new folder icon > call the folder LOGS > OK.

Note: In this example I’m storing the syslog on local storage (on the ESXi host) if you have shared storage , i.e. a SAN or NAS, I suggest you create a sub-folder for each ESXi host within the LOGS directory and set the path on each host accordingly. This will take effect without a reboot and the error should cease.

ESXi 4 Putting the syslog onto a DataStore

In this case I created a syslog area on one of the shared data stores.

With an ESX host selected, Configuration > Storage > On a datastore, right click > Browse Datastore > Select the new folder icon > call the folder syslog > OK.

Then select Advanced Settings > Syslog > Enter a value in the following format:

[datastore]/syslog/hostname.log

i.e. [Volume 3]/syslog/esx2.log

3. Click OK, you should not need to reboot, the error should cease straight away.

Related Articles, References, Credits, or External Links

Original Article Written 22/11/12

HP Intelligent Provisioning Cant See USB Media?

KB ID 0001555

Problem

Life was simpler when we had DVD Drives and a wallet full of CD/DVDs! I was building an HP DL360 This morning and needed to install Windows. I created a bootable USB with Unetbootin and selected a Windows Server ISO, it wouldn’t boot. So I thought ‘Fine I’ll play the game” I pressed F10 for Intelligent Provisioning.

After selecting USB media – the system could not see my USB Drive? 

After a couple of seconds head scrathing the penny dropped, it wants the iso not a bootable drive, (doofus!) So I used a FAT formatted USB and that didn’t work either?

Option 1: Use iLO

Before you all start emailing me, you can install an operating system from virtual media WITHOUT and advanced iLO licence! Annoyingly I was building the server on the bench, so I had to connect my laptop into the iLO with a crossover cable but, here’s me proving it works.

Option 2: Use ExFAT

Format your USB drive using ExFAT, luckily I use macOS and Disk Utility will format a drive using ExFAT for me.

Note: Windows will also format as ExFAT 🙂

Then simply put your install .iSO file(s) on the media.

Now you can see your install media.

Option 3: Use the HP Media Creator

I didn’t try this option, but feel free to download it and give it a try, comment below to let me know how you get on.

HP USB Key Utility for Windows v3.0.0

Related Articles, References, Credits, or External Links

NA

Event ID 7026

KB ID 0000143 

Problem

Event ID 7026

Following boot-start system-start driver(s) failed to load: i8042prt

PS2 Mouse Driver – Booting a machine without a keyboard, or with a USB keyboard can cause this problem.

Solution

Stop this Service from starting – Note this SHOULDN’T affect your keyboard but if it does have a USB keyboard handy and DON’T disable the PS2 Ports in the machines BIOS

Start > Run > Regedit {enter} Navigate to, HKEY LOCAL MACHINESYSTEMCURRENTCONTROLSETSERVICESi8042prt On the right hand pane change Start from 1 to 4 (disabled).


Related Articles, References, Credits, or External Links

NA

XBMC ‘Gotham’ – Network Manager is Incompatible

KB ID 0001014 

Problem

I’ve just replaced my XBMCbuntu media PC (an Acer Revo 3700) with a newer machine, and I was rebuilding the old one for my neighbour. I’m not sure if he has a wired connection where his TV is so I wanted to use Network Manager to setup the wireless connection. But when I tried to add it, this happened;

XBMC 13.0 (Compiled May 4 2014)

Solution

1. To get round this you need to install the add-on from a .zip file, so download the following file and put it on a USB drive.

NetworkManager-0.1.4.zip

2. Present your USB drive to the XBMC machine > System > Settings > Add-ons > Install from zip File.

3. Your USB drive should be listed, double click it.

4. Select NetworkManager-0.1.4.zip and it will be installed and enabled.

5. Now when you go to ‘Programs’, you will see Network Manager.

Related Articles, References, Credits, or External Links

NA

Deploying VMware View 5 – Part 3: Creating a ‘Manual Pool’ and Connecting a View Client

KB ID 0000598

Problem

Note: This is an old post for VMware view version 5, you might want to read Deploying VMware Horizon View instead.

In Part 2 we got our machine ready to be delivered via VMware View. Now we need to create a ‘Pool’, grant users access to that pool, and finally connect to it from a VMware View Client.

Solution

VMware View – Creating a Manual Pool

1. Open a connection to your VMware View Administrator console (https://{connection-server-name}admin). Log in and navigate to Inventory > Pools > Add.

2. We are going to create a manual pool (Note: An automated pool will create machines dynamically as required).

3. I’m selecting dedicated (the machine will get allocated to the first user that connects to it, and remains theirs). With a floating Pool machines are returned to the pool after they are finished with to be given to the next user that requires a machine.

4. My machine is in vCenter.

5. And there’s my vCenter

6. Give the new pool a sensible name.

7. Change the settings for the pool as required, I pretty much accept the defaults, but I allow the users to “reset” their desktop.

8. Select the machine(s) you are going to add to the pool, and complete the wizard.

9. Now you have a new pool, you need to grant users/groups an ‘entitlement’ to use it.

10. Simply add in the users or groups from Active Directory as required.

VMware View – Installing the VMware View Client

11. You will find that there are x32 and x64 bit VMware client software installs. There are available in two flavours, (with local mode, or without local mode).

Note: Local Mode: This is a mechanism where users can ‘check out’ their virtual machines and work on them remotely, then ‘sync’ them back to the network when they return, it requires a VMware Transport Server (use the connection server install media and change the server type to Transport Server).

12. During setup it will ask you the name of your connection server.

13. Normally you would tick “Set default option to login as current user”. If not you will see the login option in step 16 below.

14. When you launch the software, you may want to change the certificate options. The Connection server will have installed with a ‘self signed’ certificate, (which is fine) but you might want to change the ‘Configure SSL” options.

15. Here I’ve set them to allow, it says not secure – but its still encrypted, it should really say ‘least secure’.

16. If you didn’t tick the box in step 13 above you will need to login again.

17. Now you will see all the pools you have an entitlement to, select as appropriate and click connect.

18. All being well the desktop will connect and dynamically resize to fit.

19. Whist connected you will can control your connection with the menu on the view client bar at the top of the screen, also here you will see options for connecting USB Devices (Note: USB will only be available if you had it selected when you installed the client, it IS selected by default).

Related Articles, References, Credits, or External Links

VMware View 5 – Part 4 Installing and Configuring SQL 2008 R2 and VMware Composer

Creating and Deploying USB Portable Applications with VMware ThinApp

KB ID 0000616 

Problem

The last time I wrote about deploying applications with ThinApp, it was geared towards getting standalone applications onto client PC’s for non admins to run, or putting them in a network share. But if you have a portable application the advantage is you can run it from portable media (Like a USB drive).

Like before I’ll convert Google Chrome to a ThinApp, but the difference is I will set the applications ‘sandbox’ to live in the same location (on the USB). Then I’ll try it out on a different machine.

Solution

1.  It’s recommended that you create your ThinApp on the oldest operating system that it might be deployed on, so here I’m creating a virtual machine in VMware workstation that’s running Windows XP.

2.  When built remove any hardware that will not be needed, like the floppy drive, and the USB Controller (Edit > Settings).

3. Installing ThinApp is pretty straightforward, simply run the executable and follow the on screen prompts the only thing to note is; when you enter your licence key, be aware that the name you enter will display on the “splash screen” as your ThinApp loads.

4. Once your reference machine is setup, take a snapshot of it, so you can roll back to this point to create further ThinApps on this clean machine (VM > Snapshot > Take Snapshot).

5. Run the ThinApp Setup Capture > Next.

6. Prescan > This will take a few minutes > When finished simply minimise the window you are finished with it for now. Note: Don’t worry if the application you are installing requires a reboot, ThinApp is clever enough to cope with that.

7. Now install and configure the application you require, in this case Google Chrome. I’m also installing Java, and setting the default homepage to the Google search page.

8. When the application is installed to your liking, maximise (or open the capture if you’ve rebooted) and select ‘Postscan’ > OK.

Note: Before running Postscan make sure you delete any installer files downloaded, any icons from the desktop you do not want deployed in the ThinApp, and empty the recycle bin (you don’t want all that stuff captured, when creating your ThinApp).

9. Make sure only the executable you require is ticked as an entry point > Next.

10. At the Horizon App Manage Page > Next.

11. In a domain environment you can restrict ThinApp access to particular users or groups > Next.

12. Set the isolation mode as required, for most cases it will be ‘Full’ > Next.

13. As you are storing the App on USB I’d suggest (though you don’t have to) set the application to save its sandbox in the same directory.

14. Select whether you want to provide statistics to VMware > Next.

15. You will see this screen ONLY if you are capturing a browser. This is used if you have a particular website that will only run in IE6, or Firefox etc. So that only when URL’s entered, listed here, are accessed (either directly or from a hyper link) the ThinApp browser will open them, all other URL’s will be opened by the default browser. It’s a cool feature but not one I’m using > Next.

16. Give your ThinApp a name > Next.

17. I’m choosing the option to embed everything into my executable, selecting this may cause a warning about icons, but I ignored and deployed with no problems > Save.

18. After ThinApp generates the files it needs > Build.

19. Finish.

20. Heres my ThinApp executable file.

21. Which I’ve copied to my USB Drive.

22. So when use the drive in another machine.

23. You can simply run the executable.

24. While the app loads it will show a splash screen like this.

25. And should load pre-configured.


Related Articles, References, Credits, or External Links

NA

ESXi Error “HA agent must have userworld swap enabled”.

KB ID 0000045

Problem

Seen on diskless ESXi Servers, this happens because, to perform HA, the server needs some swap space, and a diskless server has none.

Solution

1. Using your VI client log into your Virtual Center Server.
2. Select the first ESXi host > Configuration > Advanced Settings
3. Select ScratchConfig > Type in a directory with at least 1GB of free storage e.g

/vmfs/volumes/SAS1_V1/Scratch/ESXi1

Note: I’ve read various posts that say – all hosts can use the same folder, but I’ve seen that not work, create a folder for each ESXi host.
Note2: You can create folders using the datastore browser.

4. Tick the Box that says “ScratchConfig.ConfiguredSwapState”
5. Reboot the ESXi host.

On reboot you may notice that the path has changed to something like “/vmfs/volumes/4b689385-77e74be9-dc10-002581e88ad4/Scratch/ESXi1” this is normal.

6. Right click each ESXi host and select “Reconfigure for HA”.


Related Articles, References, Credits, or External Links

NA