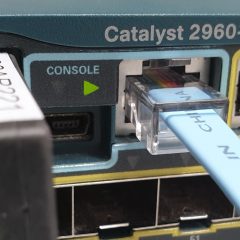
Connecting to and Managing Cisco Firewalls

Also see “Allow Remote Management

KB ID 0000075

Problem

To connect to and manage a Cisco firewall you need three things,

  1. To be in possession of a password, (and in some cases a username).
  2. Have the ‘Method of Access granted to you’ (or have physical access to the firewall).
  3. Know a ‘Method of Access‘ to the firewall for management.

Cisco Firewall Passwords

Unless your firewall is brand new (in which case the passwords will either be {blank} or cisco), to access a Cisco firewall you will need a password, (this stands to reason it is a security device after all!).

Cisco Firewall Usernames

As for usernames, with a few exceptions, you do not USUALLY need a username. Those exceptions being;

  1. Access via SSH needs a username (before version 8.4 you could use the username pix, and the Telnet password, this no longer works).
  2. If you have set up authentication to be done by AAA.

Cisco Firewall Forgotten Password Recovery

If you do not know the password then you need to perform some password recovery.

Cisco ASA – Methods of Access.

1. Console Cable: This uses the rollover cable that came with the firewall, They are usually pale blue in colour, and the more modern ones have a moulded serial socket on them. The older ones have a grey network to serial converter that plugs on the end. Access is via some Terminal Emulation Software, e.g. PuTTy or HyperTerminal. This method of access is enabled by default, but requires physical access to the devices console port.

2. Telnet: This simply allows connection via a telnet client, all versions of Windows have one, though Microsoft have done a good job of Hiding it in Windows 7. You can also use PuTTy, HyperTerminal, or another third party telnet client. This is considered the LEAST SECURE method of connection, (as passwords are sent in clear text). On a new firewall the telnet password is usually set to cisco (all lower case).

3. Web Browser: (How the vast majority of people access the firewall). Depending on the age and version of the firewall dictates what “Web Server” you are connecting to, devices running Version 7 and above use the “Adaptive Security Device Manager”. Cisco firewalls running an Operating system of version 6 and below use the “PIX Device Manager”. Both the ADSM and the PDM have a similar look and feel, and both require you have to Java installed and working.

4. SSH: Secure Sockets Handshake: This is sometimes called “secure telnet” as it does not send passwords and user names in clear text. It requires you supply a username and a password. Firewalls running an OS older than 8.4 can use the username of pix and the telnet password. After version 8.4 you need to enable AAA authentication and have a username and password setup for SSH access.

5. ASDM Client software: (Version 7 firewalls and above). You will need to have the software installed on your PC for this to work (you can download it from the firewall’s web interface, or install from the CD that came with the firewall).

Cisco ASA Remote Management via VPN

Even if you allow traffic for a remote subnet, there are additional steps you need to take to allow either a remote client VPN session, or a machine at another site that’s connected via VPN. Click here for details.

Solution

Connecting to a Cisco Firewall Using a Console Cable

Obviously before you start you will need a console cable, you CAN NOT use a normal network cable, OR a crossover cable as they are wired differently! They are wired the opposite way round at each end, for this reason some people (and some documentation) refer to them as rollover cables. They are usually Pale blue (or black). Note if you find your console cable is too short you can extend it with a normal network cable coupler and a standard straight through network cable.

On each end of the console cable the wiring is reversed.

Old (Top) and New (Bottom) versions of the Console Cable.

Note: If you don’t have a serial socket on your PC or Laptop you will need a USB to Serial converter (this will need a driver installing to add another COM Port to the PC).


Option 1 Using PuTTY for Serial Access.

1. Connect your console cable, then download and run PuTTy. (I’m assuming you are using the COM1 socket on your machine, if you have multiple serial sockets then change accordingly).

2. By default PuTTy will connect with the correct port settings, if you want to change the settings see the option I’ve indicated below. Simply select Serial and then ‘Open’.

3. You will be connected. (Note: The password you see me entering below is the enable password).

Option 2 Using HyperTerminal for Serial Access

1. Connect your console cable, then download install and run HyperTerminal. (Note: With Windows XP and older it’s included with Windows, look in > All Programs > Communications). Give your connection a name > OK.

2. Change the ‘Connect Using’ option to COM1 > OK.

3. Set the connection port settings from top to bottom, they are, 9600, 8, None, 1, None > Apply > OK.

4. You will be connected. (Note: The password you see me entering below is the enable password).

Connecting to a Cisco Firewall via Telnet

To connect via telnet, the IP address you are connecting from (or the network you are in) has to have been granted access. If you cannot access the firewall using Telnet then you will need to connect via a console cable. Note Windows 7/2008/Vista needs to have telnet added.

Option 1 Use Windows Telnet Client for Firewall Access

1. Ensure you have a network connection to the firewall and you know its IP address > Start.

2. In the search/run box type cmd {enter}.

3. Execute the telnet command followed by the IP address of the firewall.

Windows – ‘Telnet’ is not recognized as an internal or external command

4. Enter the telnet password (default password is cisco).

Option 2 Use PuTTy for Telnet Firewall Access

1. Ensure you have a network connection to the firewall and you know its IP address > Launch PuTTy.

2. Select Telnet > Enter the IP address of the firewall > Open.

3. Enter the telnet password (default password is cisco).

Option 2 Use HyperTerminal for Telnet Firewall Access

1. Ensure you have a network connection to the firewall and you know its IP address > Launch HyperTerminal.

2. Give the connection a name > OK.

3. Change the ‘Connect using’ section to TCP/IP (Winsock) > Enter the IP address of the firewall > OK.

4. Enter the telnet password (default password is cisco).

Connect to to a Cisco Firewall via Web Browser

To connect via Web Browser – the firewall’s internal web server needs to be enabled in the firewall configuration, and the IP address of the machine you are on (or the network it is in, also needs to be allowed). If you cannot connect from your web browser you will need to establish a console cable connection.

Also to access via this method you need to know the firewall’s “Enable Password”. If you use a proxy server then you will need to remove it from the browser settings while you carry out the following. Ensure also that you have Java installed and working.

1. Ensure you have a network connection to the firewall and you know its IP address > launch your web browser.

2. If you are using IE7 (or newer) you will need to click “Continue to this web site (not Recommended)”. IE6 Users will see this instead.

3. Click “Run ASDM” (older versions say ‘Run ADSM Applet’). Note: for information on the other option ‘Install ASDM launcher…’ see connecting via ASDM).

The Startup Wizard is for setting up a new firewall, I don’t recommend you ever use this unless you follow this guide.

4. You might receive a few Java warning messages, answer them in the affirmative.

5. Run.

6. Enter the ‘Enable’ password > OK.

7. You will be connected.

Connecting to a Cisco Firewall via SSH

To connect via SSH the IP address of the PC you are on, (or the network it is in) needs to have been allowed SSH Access in the firewall’s configuration. You will also need an SSH Client, I prefer PuTTy because its free and works.

Note: After version 8.4 you can only access the Cisco ASA using AAA authentication, see here. Prior to version 8.4 you can use the username of ‘pix’ and the firewall’s telnet password.

1. Ensure you have a network connection to the firewall and you know its IP address > Launch PuTTy.

2. Tick SSH > enter the IP address of the firewall > Open.

3. The first time you connect you will be asked to accept the certificate > Yes.

4. You will be connected, supply the username and password configured for AAA access., (or username pix and the telnet password if you are older than version 8.4).

Connecting to a Cisco Firewall via ASDM Client Software

As the name implies you need a v7 (or newer) firewall running ASDM for this to work 🙂 Essentially this is just a “Posh” front end for the firewall’s internal web server, so the same rules apply, the http server must be enabled, the PC you are on (or the network it’s in) need to be allowed https access to the firewall. Also you will need to know the enable password.

1. Ensure you have a network connection to the firewall and you know its IP address > launch your web browser.

2. If you are using IE7 (or newer) you will need to click “Continue to this web site (not Recommended)”. IE6 Users will see this instead.

3. Select ‘Install ASDM Launcher and Run ASDM’.

4. The username is usually blank (unless you are using AAA), and you will need to enter the enable password.

5. Run (or save if you want to install manually later).

6. Accept all the defaults.

7. The ASDM, will once again ask for the password. (By default it will place a shortcut on the desktop for the next time you need to access the firewall).

8. The ASDM will launch and you will be connected.

Connecting to a Cisco Firewall via Pix Device Manager

1. Open your web browser and navigate to the following,

https://{inside IP address of the firewall}

Note if you are using IE7 (or newer) you will need to click “Continue to this web site (not Recommended)”.

IE6 Users will see this instead

2. If Prompted leave the username blank, and the password is the firewall’s enable password.

Note if you are using AAA you might need to enter a username and password.

3. You will see this.

4.You might receive a few Java warning messages, answer them in the affirmative, on some newer versions of Java you may also need to enter the password a second time.

5. The PDM opens. You are successfully connected.

Related Articles, References, Credits, or External Links

Cisco ASA – Allow Remote Management

Manage your firewall form your Windows Mobile device

Cisco ASA 5500 – Remote Management via VPN

Originally Written 09/11/09

Ubuntu – Managing Cisco Devices via Serial / Rollover Cable

KB ID 0000400 

Problem

A while back I ran though “Managing Cisco ASA devices via the ASDM with Ubuntu“, I prefer to work at command line, with a new firewall my only choice is via the console port, In a windows environment I can fire up Hyperterminal and I’m away. With Linux there a couple of things to do first.

Solution

Step 1 (Get the Serial / RS232 / COM Port working)

As pictured above, this is being done on my Acer Netbook so I don’t have a serial port. I need to use a USB to Serial converter, If your machine has a serial port then simply skip this section.

1. Plug in your serial converter and wait a few seconds, open a terminal window (Applications > Accessories > Terminal) and issue the following command,

[box]dmesg[/box]

2. Amazingly it looks like been installed with the correct driver, without any effort by me at all! Lets make sure, unplug the USB to serial converter then issue the following command,

[box]lusb[/box]

Then plug the device back in and run the same command, notice the serial port has popped onto the list.

Note: If you not as lucky as me follow the excellent advice here to install the drivers you need.

Step 2 Install and Configure Minicom

1. Open a terminal window and issue the following command,

[box]sudo apt-get install minicom[/box]

Tap in your password, then enter “Y” for yes when prompted.

4. We need to know the connection name for the USB to Serial converter, issue the following command (See mines called ttyUSB0).

[box]dmesg | grep tty[/box]

5. Now lets fire up Minicom with the following command,

[box]sudo minicom[/box]

Tap in your password again, then as requested press CTRL+A, then Z.

6. To configure the serial settings press O (that’s O for Oscar not zero).

7. Select “Serial Port Setup”.

8. Press A to set the device.

9. As we discovered (above) ours is called ttyUSB0, so change the device to /dev/ttyUSB0.

10. Press C to change the connection speed to 9600 baud, Press Q (to set 8 bits, no stop bit, and 1 parity bit. On mine this was set by default), press {enter} to exit.

11. Press F to turn off hardware flow control (Some posts will say leave it on, I generally turn if off and I’ve never seen anything break!). Press G to disable software flow control (if enabled).

12. Then Select “Save setup as..”, and give is a sensible name. (If you went back too far simply press O again to get back here).

13. Now the settings are saved you can launch them at anytime with,

[box]sudo minicom {filename}[/box]

Note: Sometimes your serial drive gets locked up but a reboot will solve the problem.

14. Here’s me connected to an ancient old catalyst switch.

15. And the baby PIX on my test network.

Note: If your keystrokes are not getting sent: From the main menu (CTRL+A then Z) Press E to turn on local echo.


Related Articles, References, Credits, or External Links

NA

Cisco Catalyst Password Recovery / Reset

KB ID 0000496 

Problem

The title is a bit of a misnomer, we are not going to recover the password, we are simply going to change the password to one we know.

Solution

Note: This procedure works on models, 2900, 2940, 2950, 2955, 3500XL, and 3550. Before you start connect the the device with a console cable and terminal emulation software, the procedure is the same as the one I’ve outlined here.

1. Power the switch off >press and hold the “Mode” button > Power on the switch.

2. For 2900, 3500XL and 3550 Switches release the mode button when the 1x LED light goes out (all the other port lights will remain lit). For a 2940 and 2950 Switch release the mode button after the “Stat” LED goes out. For a 2955 switch press CTRL+BREAK.

3. On screen you should see the following.

[box]

Base ethernet MAC Address: 00:0b:be:78:a2:00
Xmodem file system is available.
The password-recovery mechanism is enabled.

The system has been interrupted prior to initializing the
flash filesystem. The following commands will initialize
the flash filesystem, and finish loading the operating
system software:

flash_init
boot

[/box]

4. Type “flash_init” then when it has ran type “load_helper”

[box]

switch: flash_init
Initializing Flash...
flashfs[0]: 18 files, 3 directories
flashfs[0]: 0 orphaned files, 0 orphaned directories
flashfs[0]: Total bytes: 15998976
flashfs[0]: Bytes used: 4386304
flashfs[0]: Bytes available: 11612672
flashfs[0]: flashfs fsck took 17 seconds.
...done Initializing Flash.
Boot Sector Filesystem (bs:) installed, fsid: 3
switch: load_helper

[/box]

5. Next we need to make sure that the config.text file is in flash memory type “dir flash:”

Note: don’t forget the colon on the end or it will error and say “Permission Denied”.

[box]

switch: dir flash:
Directory of flash:/

2 drwx 192 <date> c3550-i9q3l2-mz.121-11.EA1a
17 -rwx 255 <date> info
18 -rwx 255 <date> info.ver
19 -rwx 5448 <date> config.text
20 -rwx 5 <date> private-config.text
21 -rwx 2364 <date> vlan.dat

11612672 bytes available (4386304 bytes used)

[/box]

6. We are now going to change the name of the config file so when the switch boots it will start with no configuration, then we can boot the switch.

[box]

switch: rename flash:config.text flash:config.backup
switch: boot

[/box]

7. Eventually when the switch boots it will ask if you want to configure it, say no.

[box]

Model revision number: G0
Motherboard revision number: A0
Model number: WS-C3550-24-SMI
System serial number: CAT0650Y1VR

--- System Configuration Dialog ---

Would you like to enter the initial configuration dialog? [yes/no]: no

[/box]

8. At this point we can go to enable mode, change the name of the config.text file back again, and load it into memory (press Enter to accept the default filenames).

[box]

Switch>enable
Switch#rename flash:config.backup config.text
Destination filename [config.text]?
Switch#copy flash:config.text system:running-config
Destination filename [running-config]?
5448 bytes copied in 0.728 secs

[/box]

9. Finally you can remove the password, and reset it to whatever you want, and save the new config.

[box]

HostName#conf t
Enter configuration commands, one per line. End with CNTL/Z.
HostName(config)#no enable secret
HostName(config)#enable password thisisthenewpassword
HostName#wr mem
Building configuration...
[OK]
HostName#

[/box]  

Related Articles, References, Credits, or External Links

Cisco ASA – Password Recovery / Reset

Cisco PIX (500 Series) Password Recovery / Reset

Cisco Router – Password Recovery /Bypass

Cisco Catalyst Switches – Set a Management IP and Allow Telnet and Web Management

KB ID 0000614 

Problem

If you want to manage your Cisco Catalyst switch it’s not always practical to plug a console cable in to change its settings or monitor what it is doing. Putting an IP address on it and enabling remote management via Telnet or from your web browser is a better alternative, particularly if you have a lot of switches.

Solution

Enable Telnet Management on Cisco Catalyst Switch

1. Connect to the Switch using a terminal emulation program like HyperTerminal or Putty,

2. Issue the following commands;

[box]

enable
{enter enable password if prompted}
conf t
line vty 0 15
password {password required}
login
exit 

[/box]

Add a Management IP to a Cisco Catalyst Switch

3. Whilst still in configure terminal mode issue the following commands;

[box]

int vlan1
ip address {IP address required} {Subnet required}
no shutdown
exit

[/box]

Cisco Catalyst Set an Enable Password

4. If you telnet in you cant change any system settings without an enable password being set.

[box]enable password {Password required}[/box]

Optional : Set the Cisco Catalyst Switches Default Gateway

5. Just in case you need to manage the switch from another subnet, you will need to set a default gateway.

[box]ip default-gateway {IP address required}[/box]

Enable Web Management on Cisco Catalyst Switch

6. To connect to and manage the switch from a web browser execute the following command, and then exit configure terminal mode.

[box]

ip http server
exit 

[/box]

7. Finally save the changes with a “write mem” command.

[box]write mem[/box]

Testing the Configuration

8. From a machine on the same network segment make sure you can ping the switch on its new IP address.

9. Then make sure you can “telnet” into it.

10. Open a web browser and navigate the the switches IP > Select ‘Web Console’.

Note: You will require Java for this to work.

11. After entering the enable password you should see the following.

Related Articles, References, Credits, or External Links

Cisco Catalyst Password Recovery / Reset

Cisco – Using a Mini USB Console Cable

KB ID 0001073 

Problem

A colleague asked me if I had a USB console cable, because the switch he was working on had a failed RJ45 console port. I thought it was just the same cable that charged my phone (USB A to micro USB). But it isn’t, it’s mini USB.

I thought, that might happen to me at some point, and rather than carry yet another cable I got onto eBay and got a female micro USB to male mini USB converter for about 99p. Then all I needed to do was test it.

Solution

Use Cisco USB Console Cable on Mac OSX

1. Just plug it in and the Mac detects it without the need for drivers, (providing the other end is plugged into a device!). You may see something like the following popup, if you run VMware Fusion;

Note: if you want to find out what device it is being called by macOS, simply issue the following command;

[box]ls -ltr /dev/*usb*[/box]

2. You can then can connect directly to it (using 9600 baud as usual), with the following command (your device name in red will differ);

[box]screen /dev/tty.usbmodem1411 9600[/box]

3. Or if you use an application;

RoyalTSX

Using SecureCRT

4. And we are in.

Use Cisco USB Console Cable on Windows

Things are a little more convoluted on Windows, you need to install a driver (which involves a reboot).

1. Download the Windows Cisco USB Console Cable Driver.

2. When installed and connected to a Cisco device, you should see something like the following in device manager (devmgmt.msc).

3. Now using your preferred terminal emulation software (below I’m using PuTTY) connect using the COM port you identified above.


Related Articles, References, Credits, or External Links

NA