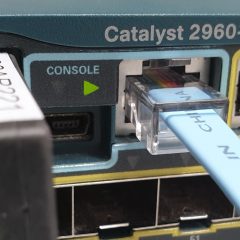
Cisco Catalyst 9200 / 9300 DNA Licensing

KB ID 0001750

Problem

I get asked this at least once a month, “What’s the score with this DNA Licensing?” It took long enough for everyone to get used to Lan Base, IP Base, and IP Services!

The cynic in me would say, Cisco have learned from Meraki that selling subscription licences is much better than selling products that you don’t get any recurring revenue from. But I’ll try an give you the short answer so you can get the correct license. 

Solution: Buying Cisco Catalyst 9K Switches

Firstly: Not sure who decided that Cisco would release 9000 series Catalyst switches, when they had 9000 series Nexus switches? (Thanks for that!)

Catalyst 9200 or 9300?

As a rule of thumb 9200 series are typically used as access switches i.e. replacements for things like the Catalyst 2960, 2960-X, and 2960-XR). And the 9300 series are a replacement for things like Cisco Catalyst 3750G, 3750-X, and 3850.

Note: There’s also a Catalyst 9400 switch, which is a modular (line card) based chassis switch to replace the Catalyst 4500 and 6000 series.
Note2: There’s also a Catalyst 9500 switch that replaced the 10Gbps catalyst 3850 models (traditional 1U size).
Note3: There’s also a Catalyst 9600 switch which is modular (line card) based chassis switch to replace the Catalyst 6000 Series.
Note4: There’s also a Catalyst 9800 series which, just to confuse everyone further, is a range of wireless controllers?

So which switch to buy? Cisco keep adding models to both ranges so the first thing to do is decide 9200 or 9300, then look at the current Cisco Data Sheet for that range.

9200 Series Data Sheet

9300 Series Data Sheet

Then decide

  1. How many ports (access/downlink) do you need, and what speed/type do they need to be?
  2. Do you need PoE?
  3. What uplink ports do you need? (Some models have fixed (built in) uplinks, others need a network module (modular) uplink. Remember modular uplinks have their own part number (SKU), and will need to be ordered separately. (Note: 9200L and 9300L have fixed uplinks)
  4. Do you need additional (redundant) power supplies? 
  5. Do you need to ‘Stack’ your switches, if so don’t forget to get a stack cable (theres no separate stacking modules).

They were cheaper than you expected right?

That’s because now we need to add on a DNA licence as well.

DNA Licensing

Cisco DNA (Digital Network Architecture) is the name given collectively to a suite of products that are aimed towards being software driven, automated, with built in security.

There’s three types;

  • DNA Essentials: (Lan Base in old money) Basically Layer 2 functionality and static routing.
  • DNA Advantage:  (Combines IP Base and IP Services in old money) Basically full Layer 3 functionality, (and all the functionality of DNA Essentials).
  • DNA Premier: Combines all the functionality of DNA Essentials and DNA Advantage, and adds on ISE integration and Cisco Secure Network Analytics (formerly Stealthwatch) support.

Each licence comes in either a 3 Year, 5 Year, or 7 Year subscription model.

Example DNA Licensing SKU: C9200- DNA-E-24-3Y

C9200  – for a Cisco Catalyst 9200 series switch.

DNA – Digital Network Architecture licence.

E – Essentials (A would be advantage, and P would be premier).

24 – For a 24 port switch

3Y – 3 Year Subscription

Related Articles, References, Credits, or External Links

NA

Deploying Applications with VMware ThinApp

KB ID 0000612

Problem

ThinApp is an “Odd” VMware product, insofar as it’s got nothing to do with virtual machines or virtual technology. It’s a product that turns applications into “Stand alone” thin applications, that can be sent to a user and ran without the need for that user to have administrative access, or the need to install anything.

ThinApp was a product called Thinstall that VMware purchased and “re-badged”, you get a free copy with VMware View 5 (Premier Edition). And it ships with a copy of VMware workstation. (Not because it needs a copy, but VMware recommends you use a clean virtual machine to create your ThinApps on).

If you’ve ever used sysdiff in the past or Novell Zenworks for Desktops, you will be familiar with the process, take a ‘scan’ of a clean machine, then install application(s), then carry out another ‘scan’. The software then works out the ‘difference’ and uses that information to build a software package.

In the example below I’m going to create a stand alone version of Google Chrome, that is pre configured, and has Java already installed, and finally deploy that as a single executable file.

Solution

1. It’s recommended that you create your ThinApp on the oldest operating system that it might be deployed on, so here I’m creating a virtual machine in VMware workstation that’s running Windows XP.

2. When built remove any hardware that will not be needed, like the floppy drive, and the USB Controller (Edit > Settings).

3. Installing ThinApp is pretty straightforward, simply run the executable and follow the on screen prompts the only thing to note is; when you enter your licence key, be aware the name you enter will display on the “splash screen” as your ThinApp loads (as shown).

4. Once your reference machine is setup, take a snapshot of it, so you can roll back to this point to create further ThinApps on this clean machine (VM > Snapshot > Take Snapshot).

5. Run the ThinApp Setup Capture > Next > Prescan > This will take a few minutes > When finished simply minimise the window you are finished with it for now. Note: Don’t worry if the application you are installing requires a reboot, ThinApp is clever enough to cope with that.

6. Now install and configure the application you require, in this case Google Chrome. I’m also installing Java, and setting the default homepage to the Google search page.

7. When the application is installed to your liking, maximise (or open the capture if you’ve rebooted) and select ‘Postscan’ > OK.

Note: Before running Postscan make sure you delete any installer files downloaded, any icons from the desktop you do not want deployed in the ThinApp, and empty the recycle bin (you don’t want all that stuff captured, when creating your ThinApp).

8. Make sure only the executable you require is ticked as an entry point > Next > At the Horizon App Manage Page > Next.

9. In a domain environment you can restrict ThinApp access to particular users or groups > Next.

10. Set the isolation mode as required, for most cases it will be ‘Full’ > Next.

11. Select the option to store the sandbox in the user profile > Next > Select whether you want to provide statistics to VMware > Next.

12. You will see this screen ONLY of you are capturing a browser. This is used if you have a particular website that will only run in IE6, or Firefox etc. So that only when URL’s enters listed here are accessed (either directly or from a hyper link) the ThinApp browser will open them, all other URL’s will be opened by the default browser. It’s a cool feature but not one I’m using > Next.

13. Give your ThinApp a name > Next.

14. I’m choosing the option to embed everything into my executable, selecting this may cause a warning about icons, but I ignored and deployed with no problems > Save.

Note: You can use this page to create an MSI file to deploy via group policy if you wish.

15. After ThinApp generates the files it needs > Build.

16. Finish

17. Heres my ThinApp executable file.

18. To test I’ve copied it to a Windows 7 machine.

19. While it’s loading this is what you will see.

20. And here is my ThinApp version of Google Chrome running and pre configured.

Related Articles, References, Credits, or External Links

NA

Creating and Deploying USB Portable Applications with VMware ThinApp

KB ID 0000616 

Problem

The last time I wrote about deploying applications with ThinApp, it was geared towards getting standalone applications onto client PC’s for non admins to run, or putting them in a network share. But if you have a portable application the advantage is you can run it from portable media (Like a USB drive).

Like before I’ll convert Google Chrome to a ThinApp, but the difference is I will set the applications ‘sandbox’ to live in the same location (on the USB). Then I’ll try it out on a different machine.

Solution

1.  It’s recommended that you create your ThinApp on the oldest operating system that it might be deployed on, so here I’m creating a virtual machine in VMware workstation that’s running Windows XP.

2.  When built remove any hardware that will not be needed, like the floppy drive, and the USB Controller (Edit > Settings).

3. Installing ThinApp is pretty straightforward, simply run the executable and follow the on screen prompts the only thing to note is; when you enter your licence key, be aware that the name you enter will display on the “splash screen” as your ThinApp loads.

4. Once your reference machine is setup, take a snapshot of it, so you can roll back to this point to create further ThinApps on this clean machine (VM > Snapshot > Take Snapshot).

5. Run the ThinApp Setup Capture > Next.

6. Prescan > This will take a few minutes > When finished simply minimise the window you are finished with it for now. Note: Don’t worry if the application you are installing requires a reboot, ThinApp is clever enough to cope with that.

7. Now install and configure the application you require, in this case Google Chrome. I’m also installing Java, and setting the default homepage to the Google search page.

8. When the application is installed to your liking, maximise (or open the capture if you’ve rebooted) and select ‘Postscan’ > OK.

Note: Before running Postscan make sure you delete any installer files downloaded, any icons from the desktop you do not want deployed in the ThinApp, and empty the recycle bin (you don’t want all that stuff captured, when creating your ThinApp).

9. Make sure only the executable you require is ticked as an entry point > Next.

10. At the Horizon App Manage Page > Next.

11. In a domain environment you can restrict ThinApp access to particular users or groups > Next.

12. Set the isolation mode as required, for most cases it will be ‘Full’ > Next.

13. As you are storing the App on USB I’d suggest (though you don’t have to) set the application to save its sandbox in the same directory.

14. Select whether you want to provide statistics to VMware > Next.

15. You will see this screen ONLY if you are capturing a browser. This is used if you have a particular website that will only run in IE6, or Firefox etc. So that only when URL’s entered, listed here, are accessed (either directly or from a hyper link) the ThinApp browser will open them, all other URL’s will be opened by the default browser. It’s a cool feature but not one I’m using > Next.

16. Give your ThinApp a name > Next.

17. I’m choosing the option to embed everything into my executable, selecting this may cause a warning about icons, but I ignored and deployed with no problems > Save.

18. After ThinApp generates the files it needs > Build.

19. Finish.

20. Heres my ThinApp executable file.

21. Which I’ve copied to my USB Drive.

22. So when use the drive in another machine.

23. You can simply run the executable.

24. While the app loads it will show a splash screen like this.

25. And should load pre-configured.


Related Articles, References, Credits, or External Links

NA