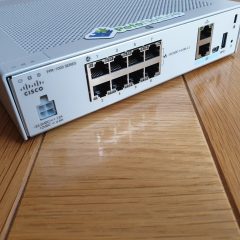
Cisco Firewall Port Forwarding

KB ID 0000077

Problem

Note: This is for Cisco ASA 5500, 5500-x, and Cisco Firepower devices running ASA Code.

Note2: If your firewall is running a version older than 8.3 you will need to scroll down the page.

Port forwarding on Cisco firewalls can be a little difficult to get your head around, to better understand what is going on remember in the “World of Cisco” you need to remember two things…..

1. NAT Means translate MANY addresses to FEW Addresses

2. PAT Means translate MANY addresses to ONE Address.

Why is that important you ask? Well most networking types assume NAT is translating one address to many, BUT on a Cisco device this is PAT, and it uses (as the name implies) port numbers to track everything. e.g. the first connection outbound might be seen on the firewall as 123.123.123.123:1026 and the second connection outbound might be seen as 123.123.123.123:2049 so when the traffic comes back the firewall knows where to send it.

Fair enough but what has that got to do with Port Forwarding? Well you can use the exact same system to lock a port to an IP address – so if only one port can go to one IP address then that’s going to give you port forwarding 🙂

To make matters more confusing (sorry) you configure PAT in the NAT settings, for this very reason it confuses the hell out of a lot of people, and the GUI is not intuitive for configuring port forwarding, (the ADSM is better than the old PIX PDM) but most people, (me included,) prefer to use command line to do port forwarding.

Below you will find;

Option 1 (Use ASDM)
Option 2 Use Command Line Interface
Option 3 Use PDM (PIX v6 Only)

Option 1: Port Forwarding Using ASDM

Note: This option uses ASDM Version 7.9(2) If yours is older see below;

Connect to the ASDM, Configuration > Firewall > NAT Rules > Right Click ‘Network Object Nat Rules’ > Add ‘Network Object’ Nat Rule.

Name = “Give the internal server/host a sensible name” > Type = Host > IP Address = The internal / private IP address > Type = Static > Translated address = Outside > Advanced > Source Interface = Inside > Destination Interface = Outside > Protocol = TCP  > Real port = http > Mapped Port = http > Ok > OK > Apply.

Note: This assumes your Outside interface is called outside, Inside interface is called inside and you want to port TCP port 80 (http).

Configuration > Firewall > Access Rules > Right Click ‘Outside Interface” > Add Access Rule.

Interface = Outside > Action = Permit > Source = Any > Destination {Browse}  > Locate the object you created earlier > Add to Destination > OK.

Service {Browse} > Select the Port you require (i.e. http) > OK.

OK > Apply > When you have tested it works, save the changes.


Using Older ASDM (PIX V7 and ASA5500) 1 Port to 1 IP Address

1. As above you will need to know the port and the IP to forward it to, Launch the ASDM, Select Configuration > Security Policy > Then either Rule Add, or right click the incoming rules and select “Add Access Rule.”

2. Interface = Outside > Direction = Incoming > Action = Permit > Source = Any > Destination, Type = Interface IP, Interface = Outside > Protocol = TCP > Destination Port Source = smtp (for example) > OK > Apply.

3. Back at the main screen select Configuration > NAT > Add, or Right Click an Existing mapping and click “Add Static NAT Rule.”

4. Real Address Interface = Inside > IP Address = 10.254.254.1 > Netmask = 255.255.255.255 > Static Translation Interface = outside > IP Address = (Interface IP) > Tick “Enable Port Translation (PAT) > Protocol = TCP > Original Port = smtp > Translated Port = smtp (for example) > OK > Apply.

5. File > “Save Running Configuration to Flash.”

Option 2 Use the Command Line to Port Forward (Post Version 8.3)

Note: Port forwarding changed on PIX/ASA devices running OS 8.3 and above, in regards to port forwarding. There is no longer a global command, for a full run-down of the changes click here.

If you issue a global command after version 8.3 you will see this error,

ERROR: This syntax of nat command has been deprecated.
Please refer to “help nat” command for more details.

1. First things first, you will need to know what port you want to forward, and where you want to forward it, for this example We will assume I’ve got a server at 10.254.254.5 and it’s a mail server so I want to Forward all TCP Port 80 traffic (HTTP) to it. Connect to the Firewall via Console/Telnet or SSH.

[box]

Warning Notice
User Access Verification#
Password:********
Type help or '?' for a list of available commands.
Petes-ASA>

[/box]

2. Enter enable mode, and enter the enable mode password.

[box]

Petes-ASA> enable
Password:********
Petes-ASA#

[/box]

3. Now we need to go to configuration mode.

[box]

Petes-ASA# configure terminal
Petes-ASA(config)#

[/box]

4. Create an object for the web server that the traffic is going to be forwarded to.

[box]

Petes-ASA(config)# object network Internal_Web_Server
Petes-ASA(config-network-object)# host 10.254.254.5

[/box]

5. Then create a NAT translation for the port to be forwarded. Then you can exit the network object prompt.

[box]

Petes-ASA(config-network-object)# nat (inside,outside) static interface service tcp http http
Petes-ASA(config-network-object)# exit

[/box]

6. Now you need to allow the http traffic in. Before you can add an ACL you need to see if you already have one. We are applying an ACL to the outside interface for traffic going in (I call this inbound for obvious reasons). To see if you already have an ACL applied, issue the following command;

[box]

Petes-ASA# show run access-group
access-group inbound in interface outside
access-group outbound in interface inside

[/box]

Note: In the example above we have an ACL called inbound that we MUST use. (If you added a new one, all the access list entries for the old one get ‘Un-applied’). If yours has a different name (e.g. outside_access_in then use that instead of the ACL name I’m using here). If you DONT have an access-group entry for inbound traffic then we will do that at the end!

[box]

Petes-ASA(config)# access-list inbound permit tcp any object Internal_Web_Server eq http

[/box]

7. Then: Only carry out the following command if you DO NOT HAVE an ACL applied for incoming traffic.

[box]

Petes-ASA(config)# access-group inbound in interface outside
Petes-ASA(config)#

[/box]

8. Don’t forget to save your hard work. (write memory).

[box]

Petes-ASA(config)# write memory
Building configuration...
Cryptochecksum: aab5e5a2 c707770d f7350728 d9ac34de
[OK]
Petes-ASA(config)#

[/box]

All the commands to Copy & Paste (Post v 8.3);

[box]

object network Internal_Web_Server
 host 10.254.254.5
nat (inside,outside) static interface  service tcp http http
access-list inbound permit tcp any object Internal_Web_Server eq http
access-group inbound in interface outside 

[/box]

Use the Command Line to Port Forward (pre version 8.3) 1 Port to 1 IP Address

1. First things first, you will need to know what port you want to forward, and where you want to forward it, for this example we will assume I’ve got a server at 10.254.254.1 and it’s a mail server so I want to forward all TCP Port 25 traffic to it. Connect to the Firewall via Console/Telnet or SSH.

[box]

Warning Notice

User Access Verification
Password:*******

Type help or '?' for a list of available commands.
Petes-ASA>

[/box]

2. Enter enable mode, and enter the enable mode password.

[box]

Petes-ASA> enable
Password: ********
Petes-ASA#

[/box]

3. Now we need to go to configuration mode.

[box]

Petes-ASA# configure terminal
Petes-ASA(config)#

[/box]

4. Now you need to allow the http traffic in. Before you can add an ACL you need to see if you already have one. We are applying an ACL to the outside interface for traffic going in (I call this inbound for obvious reasons). To see if you already have an ACL applied, issue the following command;

[box]

Petes-ASA#show run access-group
access-group inbound in interface outside
access-group outbound in interface inside

[/box]

Note: In the example above we have an ACL called inbound that we MUST use. (If you added a new one, all the access list entries for the old one get ‘Un-applied’). If yours has a different name (e.g. outside_access_in then use that instead of the ACL name I’m using here). If you DON’T have an access-group entry for inbound traffic then we will do that at the end!

5. Then: Only carry out the following command if you DO NOT HAVE an ACL applied for incoming traffic.

[box]

Petes-ASA(config)# access-group inbound in interface outside
Petes-ASA(config)#

[/box]

6. Lastly the command that actually does the port forwarding, (static command). And allow the traffic in.

[box]

Petes-ASA(config)# static (inside,outside) tcp interface smtp 10.254.254.1 smtp netmask 255.255.255.255
Petes-ASA(config)# access-list inbound extended permit tcp any interface outside eq smtp

[/box]

7. Don’t forget to save your hard work. (write memory).

[box]

Petes-ASA(config)# write memory
Building configuration...
Cryptochecksum: aab5e5a2 c707770d f7350728 d9ac34de
[OK]
Petes-ASA(config)#

[/box]

Option 3 Use the PIX Device Manager (PIX Version 6 Only)1 Port to 1 IP Address

1. As above you will need to know the port and the IP to forward it to, Launch the PIX Device manager, Select Configuration > Access Rules > Then either click “Rule”s > Add or Right click an incoming rule and select > “Insert Before” or “Insert After”.

2. Under the “Action” select “Permit”, Under Source Host/Network Select “Outside”, and all the zeros, Under Destination Host/Network Select “Inside” and all the zeros then set the “Destination Port” to smtp > OK > Apply.

3, Now select the “Translation Rules” tab, Rules Add or Right click a rule and select “Insert before” or “Insert After”.

4. In this example I’ve set it to forward all TCP Port 25 traffic to 10.254.254.10 (NOTE: I’ve blurred out the public IP Address you will need to add this also) > OK > Apply.

5. Finally save your work > File > “Save Running Configuration to Flash.” > Exit.

Related Articles, References, Credits, or External Links

ASA 5500 – Port Forwarding To A Different Port

Cisco ASA – Port Forward a ‘Range of Ports’

Add a Static (One to One) NAT Translation to a Cisco ASA 5500 Firewall

Cisco ASA AnyConnect VPN ‘Using CLI’

KB ID 0000943

Problem

Note: This is for Cisco ASA 5500, 5500-x, and Cisco FTD running ASA Code.

Also See Cisco ASA AnyConnect VPN ‘Using ASDM’

This procedure was done on Cisco ASA (post) version 8.4, so it uses all the newer NAT commands. I’m also going to use self signed certificates so you will see this error when you attempt to connect.

Solution

1. The first job is to go get the AnyConnect client package(s), download them from Cisco, (with a current support agreement). Then copy them into the firewall via TFTP. If you are unsure how to do that see the following article.

Install and Use a TFTP Server

[box]

Petes-ASA(config)# copy tftp flash

Address or name of remote host [10.254.254.183]? 192.168.80.1

Source filename []?anyconnect-win-4.7.02036-webdeploy-k9.pkg

Destination filename [anyconnect-win-4.7.02036-webdeploy-k9.pkg]? {Enter}

Accessing tftp://192.168.80.1/anyconnect-win-4.7.02036-webdeploy-k9.pkg
.........!!!!!!!!!!!!!!!!!!!!!!!!!!!!!!!!!!!!!!!!!!!!!!!!!!!!!!!!!!!!!!!
!!!!!!!!!!!!!!!!!!!!!!!!!!!!!!!!!!!!!!!!!!!!!!!!!!!!!!!!!!!!!!!!!!!!!!!!
!!!!!!!!!!!!!!!!!!!!!!!!!!!!!!!!!!!!!!!!!!!!!!!!!!!!!!!!!!!!!!!!!!!!!!!!
!!!!!!!!!!!!!!!!!!!!!!!!!!!!!!!!!!!!!!!!!!!!!!!!!!!!!!!!!!!!!!!!!!!!!!!!
!!!!!!!!!!!!!!!!!!!!!!!!!!!!!!!!!!!!!!!!!!!!!!!!!!!!!!!!!!!!!!!!!!!!!!!!
Writing file disk0:/anyconnect-win-4.7.02036-webdeploy-k9.pkg...
!!!!!!!!!!!!!!!!!!!!!!!!!!!!!!!!!!!!!!!!!!!!!!!!!!!!!!!!!!!!!!!!!!!!!!!!
!!!!!!!!!!!!!!!!!!!!!!!!!!!!!!!!!!!!!!!!!!!!!!!!!!!!!!!!!!!!!!!!!!!!!!!!
!!!!!!!!!!!!!!!!!!!!!!!!!!!!!!!!!!!!!!!!!!!!!!!!!!!!!!!!!!!!!!!!!!!!!!!!
!!!!!!!!!!!!!!!!!!!!!!!!!!!!!!!!!!!!!!!!!!!!!!!!!!!!!!!!!!!!!!!!!!!!!!!!
!!!!!!!!!!!!!!!!!!!!!!!!!!!!!!!!!!!!!!!!!!!!!!!!!!!!!!!!!!!!!!!!!!!!!!!!

4807912 bytes copied in 549.790 secs (8757 bytes/sec)
Petes-ASA(config)#

[/box]

2. Create a ‘pool’ of IP addresses that the ASA will allocate to the remote clients, also create a network object that covers that pool of addresses we will use later.

[box]

Petes-ASA(config)# ip local pool ANYCONNECT-POOL 192.168.100.1-192.168.100.254 mask 255.255.255.0
Petes-ASA(config)# object network OBJ-ANYCONNECT-SUBNET
Petes-ASA(config-network-object)# subnet 192.168.100.0 255.255.255.0

[/box]

3. Enable webvpn, set the package to the one you uploaded earlier, then turn on AnyConnect.

[box]

Petes-ASA(config)# webvpn
Petes-ASA(config-webvpn)# enable outside
INFO: WebVPN and DTLS are enabled on 'outside'.
Petes-ASA(config-webvpn)# tunnel-group-list enable
Petes-ASA(config-webvpn)# anyconnect image disk0:/anyconnect-win-4.8.02042-webdeploy-k9.pkg 1 
Petes-ASA(config-webvpn)# anyconnect enable

[/box]

4. I’m going to create a LOCAL username and password, I suggest you do the same, then once you have proved it’s working OK, you can. change the authentication method, (see links below). I’m also going to create an ACL that we will use for split-tunneling in a minute.

[box]

Petes-ASA(config)# username PeteLong password Password123
Petes-ASA(config)# access-list SPLIT-TUNNEL standard permit 10.0.0.0 255.255.255.0

[/box]

5. Create a group policy, change the values to match your DNS server(s), and domain name accordingly.

[box]

Petes-ASA(config)# group-policy GroupPolicy_ANYCONNECT-PROFILE internal
Petes-ASA(config)# group-policy GroupPolicy_ANYCONNECT-PROFILE attributes
Petes-ASA(config-group-policy)# vpn-tunnel-protocol ssl-client
Petes-ASA(config-group-policy)# dns-server value 10.0.0.10 10.0.0.11
Petes-ASA(config-group-policy)# split-tunnel-policy tunnelspecified
Petes-ASA(config-group-policy)# split-tunnel-network-list value SPLIT-TUNNEL
Petes-ASA(config-group-policy)# default-domain value petenetlive.com

[/box]

6. Create a matching tunnel-group that ties everything together.

[box]

Petes-ASA(config-group-policy)# tunnel-group ANYCONNECT-PROFILE type remote-access
Petes-ASA(config)# tunnel-group ANYCONNECT-PROFILE general-attributes
Petes-ASA(config-tunnel-general)# default-group-policy GroupPolicy_ANYCONNECT-PROFILE
Petes-ASA(config-tunnel-general)# address-pool ANYCONNECT-POOL
Petes-ASA(config-tunnel-general)# tunnel-group ANYCONNECT-PROFILE webvpn-attributes
Petes-ASA(config-tunnel-webvpn)# group-alias ANYCONNECT-PROFILE enable

[/box]

7. Then stop any traffic that is going to, (or coming from) the remote clients from being NATTED.

[box]

Petes-ASA(config)# nat (inside,outside) 2 source static any any destination static OBJ-ANYCONNECT-SUBNET OBJ-ANYCONNECT-SUBNET no-proxy-arp route-lookup

[/box]

8. Save the changes.

[box]

PetesASA(config)# write mem
Building configuration...
Cryptochecksum: 5c8dfc45 ee6496db 8731d2d5 fa945425

8695 bytes copied in 3.670 secs (2898 bytes/sec)
[OK]
PetesASA(config)#

[/box]

9. Give it a test from a remote client.

AnyConnect Commands to Copy and Paste

Simply change the values shown in red;

[box]

!
ip local pool ANYCONNECT-POOL 192.168.100.1-192.168.100.254 mask 255.255.255.0
!
object network OBJ-ANYCONNECT-SUBNET
 subnet 192.168.100.0 255.255.255.0
!
webvpn
enable outside
tunnel-group-list enable
anyconnect image disk0:/anyconnect-win-4.7.02036-webdeploy-k9.pkg 1
anyconnect enable
!
username PeteLong password Password123
!
access-list SPLIT-TUNNEL standard permit 10.0.0.0 255.0.0.0
!
group-policy GroupPolicy_ANYCONNECT-PROFILE internal
group-policy GroupPolicy_ANYCONNECT-PROFILE attributes
vpn-tunnel-protocol ssl-client
dns-server value 10.0.0.10 10.0.0.11
wins-server none
split-tunnel-policy tunnelspecified
split-tunnel-network-list value SPLIT-TUNNEL
default-domain value petenetlive.com
!
tunnel-group ANYCONNECT-PROFILE type remote-access
tunnel-group ANYCONNECT-PROFILE general-attributes
default-group-policy GroupPolicy_ANYCONNECT-PROFILE
address-pool ANYCONNECT-POOL
tunnel-group ANYCONNECT-PROFILE webvpn-attributes
group-alias ANYCONNECT-PROFILE enable
!
nat (inside,outside) source static any any destination static OBJ-ANYCONNECT-SUBNET OBJ-ANYCONNECT-SUBNET no-proxy-arp route-lookup
!

[/box]

Related Articles, References, Credits, or External Links

Cisco ASA AnyConnect VPN ‘Using ASDM’

AnyConnect: Allow ‘Local’ LAN Access

Cisco AnyConnect – Essentials / Premium Licences Explained

Cisco AnyConnect – PAT External VPN Pool To An Inside Address

AnyConnect (AAA) Authentication Methods

Kerberos Authentication (Cisco ASA)

LDAP Authenticaiton (Cisco ASA)

RADIUS Authentication(Cisco ASA)

Duo 2FA Authentication (Cisco ASA)

Cisco – Testing AAA Authentication (Cisco ASA and IOS)

Microsoft Azure To Cisco ASA Site to Site VPN

KB ID 000116

Problem

The one reason I prefer Cisco over Microsoft is they rarely change things, you learn how to do something and it’s learned. This is the second time have had to write this article purely because the Azure UI has changed!


Virtual Network Gateway Options

With VPN’s into Azure you connect to a Virtual Network Gateway, of which there are TWO types Policy Based, and Route Based. This article will deal with Policy Based, for the more modern Route based option, see the following link;

Microsoft Azure ‘Route Based’ VPN to Cisco ASA

Policy Based

These came first, essentially they work like this, “If traffic is destined for remote network (x) then send the traffic ‘encrypted’ to local security gateway (y).”  Note: Where Local Security Gateway is a firewall at YOUR site, NOT in Azure! This is the way traditionally VPNs have been done in Cisco ASA, In Cisco Firewall speak it’s the same as “If traffic matches the interesting traffic ACL, then send the traffic ‘encrypted’ to the IP address specified in the crypto map”. 

Advantages:

  • Can be used on older Cisco Firewalls (ASA 5505, 5510, 5520, 5550, 5585).
  • Can be used on newer Cisco Firewalls (ASA 5506-x, 5508-X, 5512-x, 5515-x, 5516-x, 5525-X, 5545-X, 5555-x, 5585-X)
  • Can be used with Cisco ASA OS (pre 8.4) IKEv1 only,

Disadvantages

  • Can only be used for ONE connection from your Azure Subnet to your local subnet. Note: You could ‘hairpin’ multiple sites over this one tunnel, but that’s not ideal.

Route Based

These were typically used with routers, because routers use Virtual Tunnel Interfaces to terminate VPN tunnels, that way traffic can be routed down various different tunnels based on a destination, (which can be looked up in a routing table). But Cisco ASA now supports Virtual Tunnels Interfaces (After version 9.7(1))

Advantages

  • Can be used for VPNs to multiple sites.

Disadvantages

  • Requires Cisco ASA OS 9.7(1) So no ASA 5505, 5510, 5520, 5550, 5585 firewalls can use this.

Configure Azure for ‘Policy Based’ IPSec Site to Site VPN

You may already have Resource Groups and Virtual Networks setup, if so you can skip the first few steps.

Sign int0 Azure > All Services > Resource Groups > Create Resource Group > Give your Resource Group a name, and select a location > Create.


OK, if you’re used to networking this can be a little confusing, we are going to create a virtual network, and in it we are going to put a virtual subnet, (yes I know this is odd, bear with me!) It’s the ‘Subnet Name ‘and ‘address range‘ that things will actually connect to, (10.0.0.0/24).

All Services > Virtual Networks > Create Virtual Network > Give the Virtual Network a name, a subnet, select your resource group > Then create a Subnet, give it a name and a subnet > Create.

To further confuse all the network engineers, we now need to add another subnet, this one will be used by the ‘gateway’. If you are  a ‘networking type’ it’s part of the virtual network, but is more specific than the subnet you already created. 

With your virtual network selected >Subnets > +Gateway Subnet.

You can’t change the name, (you could before, then it wouldn’t work, which was strange, but I suppose it’s fixed now) >  put in another network that’s part of the Virtual-Network, but does not overlap with the subnet you created in the previous step > OK.

All Services > Virtual Network Gateways > Create Virtual Network Gateway > Name it > Policy Based (Note: This will change the SKU to Basic) > Create New Public IP > Give it a Name > Create.

Note: This will take a while, go and put the kettle on! Make sure all running tasks and deployments are complete before continuing.

You can do the next two steps together, but I prefer to do then separately, or it will error if the first one does not complete!

Now you need to create a Local Security Gateway. (To represent your Cisco ASA). All Services > Local Security Gateway > Create Local Security Gateway > Name it > Supply the public IP > Supply the Subnet(s) ‘behind’ the ASA > Select your Resource Group > Create.

Finally create the VPN > Select your Virtual Network Gateway > Connections > Add.

Give the tunnel a name > Site-to-Site IPSec > Select your Local Network Gateway (ASA) > Create a pre-shared-key (you will need this for the ASA config!) > Select your Resource Group > OK.

Configure the Cisco ASA for ‘Policy Based’ Azure VPN

I read somewhere that the ASA had to be at 9.1? That’s not true, I’ve done it with a firewall running 8.3, and I’ve read blog posts from people who have done this with a Cisco PIX (running version 6). But the firewall does have to support AES encryption (‘show version’ will tell you). There are some subtle differences in the code which I will point out below, but essentially you should be running an OS newer than 8.4 for this config to work. (As I’ve said I’ll address 8.4, and 8.3 (or earlier) below).

Connect to the ASA and create an object group for your local subnet, and the subnet that you are using in Azure, (Called Azure-SN above).

[box]

Type help or '?' for a list of available commands.
Petes-ASA> enable
Password: ********
Petes-ASA# configure terminal
Petes-ASA(config)# object-group network OBJ-AZURE-SN
Petes-ASA(config-network-object-group)# description Azure Subnet
Petes-ASA(config-network-object-group)# network-object 10.0.0.0 255.255.255.0
Petes-ASA(config-network-object-group)# exit
Petes-ASA(config)# object-group network OBJ-LOCAL-SN
Petes-ASA(config-network-object-group)# description Local Subnet
Petes-ASA(config-network-object-group)# network-object 192.168.100.0 255.255.255.0
Petes-ASA(config-network-object-group)# exit 

[/box]

Then create an access-list, this will alert the firewall that there is some ‘interesting traffic’ that needs to be encrypted (we will call this ACL later on, from the crypto-map). Then create a NAT rule that stops traffic that’s going over the VPN tunnel from being NATTED.

[box]

Petes-ASA(config)# access-list ACL-AZURE-VPN extended permit ip object-group OBJ-LOCAL-SN object-group OBJ-AZURE-SN
Petes-ASA(config)# nat (inside,outside) 1 source static OBJ-LOCAL-SN OBJ-LOCAL-SN destination static OBJ-AZURE-SN OBJ-AZURE-SN no-proxy-arp route-lookup

[/box]

Our VPN is going to use a pre-shared-key, (you created in Azure above). It will use AES-256 for encryption, SHA for hashing, and Diffie Hellman version 2 for key exchange. So we need to have a matching ‘phase 1’ (that’s ISAKMP) policy.

[box]

Petes-ASA(config)# crypto ikev1 policy 5
Petes-ASA(config-ikev1-policy)# authentication pre-share
Petes-ASA(config-ikev1-policy)# encryption aes-256
Petes-ASA(config-ikev1-policy)# hash sha
Petes-ASA(config-ikev1-policy)# group 2
Petes-ASA(config-ikev1-policy)# lifetime 28800
Petes-ASA(config-ikev1-policy)# exit

[/box]

Enable ISAKMP (version 1) on the outside interface, then configure the parameters that will be used in ‘phase 2’ (that’s IPSEC). Note: If your outside interface is called something else like Outside or WAN substitute that!

[box]

Petes-ASA(config)# crypto ikev1 enable outside 
Petes-ASA(config)# crypto ipsec ikev1 transform-set AZURE-TRANSFORM  esp-aes-256 esp-sha-hmac
Petes-ASA(config)# crypto ipsec security-association lifetime seconds 3600
Petes-ASA(config)# crypto ipsec security-association lifetime kilobytes 102400000

[/box]

Next, you need a tunnel-group, in this case the only job of the tunnel group has is to keep  the pre-shared-key (PSK) to the peer you specify. Which in this case is the Azure Gateway.

[box]

Petes-ASA(config)# tunnel-group 40.113.16.195 type ipsec-l2l
Petes-ASA(config)# tunnel-group 40.113.16.195 ipsec-attribute
Petes-ASA(config-tunnel-ipsec)#  ikev1 pre-shared-key supersecretpassword
Petes-ASA(config-tunnel-ipsec)# exit

[/box]

The thing that ties it all together is the crypto map. Here I’ve called it “AZURE-CRYPTO-MAP”, WARNING if you already have a crypto map, use the name of that one, or all your existing VPNS will stop working, (show run crypto will tell you). This is because, you can only have one crypto map applied to an interface, but you can have many crypto map numbers, i.e crypto map {NAME} {NUMBER} {COMMAND}. And each VPN tunnel has its own number.

[box]

Petes-ASA(config)# crypto map AZURE-CRYPTO-MAP 1 match address ACL-AZURE-VPN
Petes-ASA(config)# crypto map AZURE-CRYPTO-MAP 1 set peer 40.113.16.195
Petes-ASA(config)# crypto map AZURE-CRYPTO-MAP 1 set ikev1 transform-set AZURE-TRANSFORM
Petes-ASA(config)# crypto map AZURE-CRYPTO-MAP interface outside

[/box]

There are a couple of extra commands you will need, these are sysops commands. Their purpose set things globally, and are generally hidden from the config, (i.e ‘show run’ wont show them). These are recommendations from Azure. The first one drops the maximum segment size to 1350.The second command keeps the TCP session information even if the VPN tunnel drops.

[box]

Petes-ASA(config)# sysopt connection tcpmss 1350
Petes-ASA(config)# sysopt connection preserve-vpn-flows
Petes-ASA(config)# exit

[/box]

Testing Azure to Cisco ASA VPN

To test we usually use ‘ping’, the problem with that is, if you are using Windows Servers they will have their Windows firewall on by default, which blocks pings, (bear this in mind when testing). Also your ASA needs to be setup to allow pings, (try pinging 8.8.8.8 that usually responds), if yours doesn’t then configure your ASA to allow ping traffic.

As mentioned above, you might want to turn the firewalls off to test.

On the Cisco ASA you can see the tunnel is established at Phase 1 (ISAKMP)

[box]

Petes-ASA# show cry isa               

IKEv1 SAs:

   Active SA: 1
    Rekey SA: 0 (A tunnel will report 1 Active and 1 Rekey SA during rekey)
Total IKE SA: 1

1   IKE Peer: 40.113.16.195
    Type    : L2L             Role    : initiator 
    Rekey   : no              State   : MM_ACTIVE 

[/box]

If yours says something else, (or nothing at all) then phase 1 has not established. You need to Troubleshoot phase 1 of the VPN tunnel. (Probably: Public IP is wrong, or pre-shared-key (shared secret) has been mistyped, check these first).

Assuming that’s working, your next test is to make sure that Phase 2 has established. You should see packets encrypting and decrypting.

[box]

Petes-ASA(config)# show cry ipsec sa
interface: outside
    Crypto map tag: AZURE-CRYPTO-MAP, seq num: 1, local addr: 128.65.98.43

      access-list ACL-AZURE-VPN extended permit ip 192.168.100.0 255.255.255.0 10.0.0.0 255.255.255.0 
      local ident (addr/mask/prot/port): (192.168.100.0/255.255.255.0/0/0)
      remote ident (addr/mask/prot/port): (10.0.0.0/255.255.255.0/0/0)
      current_peer: 40.113.16.195


      #pkts encaps: 2, #pkts encrypt: 2, #pkts digest: 2
      #pkts decaps: 3, #pkts decrypt: 3, #pkts verify: 3
      #pkts compressed: 0, #pkts decompressed: 0
      #pkts not compressed: 2, #pkts comp failed: 0, #pkts decomp failed: 0
      #pre-frag successes: 0, #pre-frag failures: 0, #fragments created: 0
      #PMTUs sent: 0, #PMTUs rcvd: 0, #decapsulated frgs needing reassembly: 0
      #TFC rcvd: 0, #TFC sent: 0
      #Valid ICMP Errors rcvd: 0, #Invalid ICMP Errors rcvd: 0
      #send errors: 0, #recv errors: 0

      local crypto endpt.: 128.65.98.43/0, remote crypto endpt.: 40.113.16.195/0
      path mtu 1500, ipsec overhead 74(44), media mtu 1500
      PMTU time remaining (sec): 0, DF policy: copy-df
      ICMP error validation: disabled, TFC packets: disabled
      current outbound spi: 97624DA8
      current inbound spi : D7705547
              
    inbound esp sas:
      spi: 0xD7705547 (3614463303)
         transform: esp-aes-256 esp-sha-hmac no compression 
         in use settings ={L2L, Tunnel, IKEv1, }
         slot: 0, conn_id: 335872, crypto-map: AZURE-CRYPTO-MAP
         sa timing: remaining key lifetime (kB/sec): (97199999/3556)
         IV size: 16 bytes
         replay detection support: Y
         Anti replay bitmap: 
          0x00000000 0x0000000F
    outbound esp sas:
      spi: 0x97624DA8 (2539802024)
         transform: esp-aes-256 esp-sha-hmac no compression 
         in use settings ={L2L, Tunnel, IKEv1, }
         slot: 0, conn_id: 335872, crypto-map: AZURE-CRYPTO-MAP
         sa timing: remaining key lifetime (kB/sec): (97199999/3556)
         IV size: 16 bytes
         replay detection support: Y
         Anti replay bitmap: 
          0x00000000 0x00000001

Petes-ASA(config)# 

[/box] If phase 2 did not connect, then you need to troubleshoot phase 2 of the VPN tunnel. (Probably: Transform set is wrong, or routing being the ASA is not working).

Azure to Cisco VPN ‘Policy Based’ IKEv1 Complete Code Snippets to Copy and Paste

(Change the values highlighted in red) WARNING: re-read the warning about crypto map names above! [box]

VERSION 8.4 AND NEWER
!
object-group network OBJ-AZURE-SN
 description Azure Subnet
 network-object 10.0.0.0 255.255.255.0
exit
 object-group network OBJ-LOCAL-SN
 description Local Subnet
 network-object 192.168.100.0 255.255.255.0
exit 
!
access-list ACL-AZURE-VPN extended permit ip object-group OBJ-LOCAL-SN object-group OBJ-AZURE-SN
!
nat (inside,outside) 1 source static OBJ-LOCAL-SN OBJ-LOCAL-SN destination static OBJ-AZURE-SN OBJ-AZURE-SN
!
crypto ikev1 policy 5
authentication pre-share
encryption aes-256
hash sha
group 2
lifetime 28800
!
crypto ikev1 enable outside   
!
crypto ipsec ikev1 transform-set AZURE-TRANSFORM esp-aes-256 esp-sha-hmac
crypto ipsec security-association lifetime seconds 3600
crypto ipsec security-association lifetime kilobytes 102400000
!
tunnel-group 40.113.16.195 type ipsec-l2l
tunnel-group 40.113.16.195 ipsec-attribute
 ikev1 pre-shared-key 1234567890asdfg
!
crypto map AZURE-CRYPTO-MAP 1 match address ACL-AZURE-VPN
crypto map AZURE-CRYPTO-MAP 1 set peer 40.113.16.195
crypto map AZURE-CRYPTO-MAP 1 set ikev1 transform-set AZURE-TRANSFORM
!
crypto map AZURE-CRYPTO-MAP interface outside
!
sysopt connection tcpmss 1350
!
sysopt connection preserve-vpn-flows


VERSION 8.4 (BEFORE IKEv2 WAS INTRODUCED)

!
object-group network OBJ-AZURE-SN
 description Azure Subnet
 network-object 10.0.0.0 255.255.255.0
exit
 object-group network OBJ-LOCAL-SN
 description Local Subnet
 network-object 192.168.100.0 255.255.255.0
exit 
!
access-list ACL-AZURE-VPN extended permit ip object-group OBJ-LOCAL-SN object-group OBJ-AZURE-SN
!
nat (inside,outside) 1 source static OBJ-LOCAL-SN OBJ-LOCAL-SN destination static OBJ-AZURE-SN OBJ-AZURE-SN
!
crypto isakmp policy 5
authentication pre-share 
encryption aes-256 
hash sha 
group 2 
lifetime 28800
!
crypto isakmp enable outside 
!
crypto ipsec transform-set AZURE-TRANSFORM esp-aes-256 esp-sha-hmac 
crypto ipsec security-association lifetime seconds 3600 
crypto ipsec security-association lifetime kilobytes 102400000
!
tunnel-group 40.113.16.195 type ipsec-l2l 
tunnel-group 40.113.16.195 ipsec-attribute 
pre-shared-key 1234567890asdfg
!
crypto map AZURE-CRYPTO-MAP 1 match address ACL-AZURE-VPN 
crypto map AZURE-CRYPTO-MAP 1 set peer 40.113.16.195 
crypto map AZURE-CRYPTO-MAP 1 set ikev1 transform-set AZURE-TRANSFORM !
crypto map AZURE-CRYPTO-MAP interface outside 
!
sysopt connection tcpmss 1350
!
sysopt connection preserve-vpn-flows


OLDER THAN VERSION 8.3 (BEFORE NAT SYNTAX CHANGED)

!
name 10.0.0.0 OBJ-AZURE-SN
name 192.168.100.0 OBJ-LOCAL-SN
!
access-list ACL-AZURE-VPN extended permit ip OBJ-LOCAL-SN 255.255.255.0 OBJ-AZURE-SN 255.255.0.0 
!
access-list NO-NAT-TRAFFIC extended permit ip OBJ-LOCAL-SN 255.255.255.0 OBJ-AZURE-SN 255.255.0.0 
nat (inside) 0 access-list NO-NAT-TRAFFIC
!
crypto isakmp policy 5
authentication pre-share 
encryption aes-256 
hash sha 
group 2 
lifetime 28800 
!
crypto isakmp enable outside 
!
crypto ipsec transform-set AZURE-TRANSFORM esp-aes-256 esp-sha-hmac 
crypto ipsec security-association lifetime seconds 3600 
crypto ipsec security-association lifetime kilobytes 102400000 
!
tunnel-group 40.113.16.195 type ipsec-l2l 
tunnel-group 40.113.16.195 ipsec-attribute 
pre-shared-key 1234567890asdfg
!
crypto map AZURE-CRYPTO-MAP 1 match address ACL-AZURE-VPN 
crypto map AZURE-CRYPTO-MAP 1 set peer 40.113.16.195 
crypto map AZURE-CRYPTO-MAP 1 set transform-set AZURE-TRANSFORM 
!
crypto map AZURE-CRYPTO-MAP interface outside 
!
sysopt connection tcpmss 1350
!
sysopt connection preserve-vpn-flows

[/box]

Related Articles, References, Credits, or External Links

Microsoft Azure To Cisco ISR Router Site to Site VPN

Azure to Cisco VPN – ‘Failed to allocate PSH from platform’

Unable to Access ASDM – “Unable to launch device manager from…”

KB ID 0000915

Problem

A colleague of mine was trying to connect to a firewall via ASDM last week, and was greeted by an error like this.

Now this is a pretty standard error, and usually means you haven’t been allowed access, or there isn’t a firewall at that address, but in this case I knew that a) he did have access, b) that was the correct IP address, and c) it worked fine on my machine, so it was setup correctly.

As I said above this is a pretty generic error make sure your ASDM is configured correctly. If no one else can access it then run though the article below.

Cannot Access / Open ASDM

Solution 1 (Oct 2018)

This stung me once again today! Windows 10, latest version of Java 8, and ASDM version 7.6(1) and 7.9(2). In the debug I was seeing;

[box]%ASA-7-725014: SSL lib error. Function: SSL3_SEND_SERVER_KEY_EXCHANGE Reason: missing tmp dh key[/box]

Fixed by running;

[box]ssl encryption aes256-sha1[/box]

Solution 2 (circa 2015)

I saw this very problem again today, while hardening a firewall I had disabled some SSL encryption ciphers, I had left aes256-sha1 active, and removed the others. Took me a while to realise, but if you only have one (or both), of the following ciphers enabled, ASDM won’t load;

  • aes-256-sha1
  • dhe-aes256sha1

If you have any of the following ASDM should load normally;

  • aes128-sha1
  • dhe-aes128-sha1
  • rc4-sha1
  • 3des-sha1

At this point I would consider the problem ‘fixed’ and move on, but the client I’m installing the firewall for wanted some clarification as to why it would not work. “Was it a bug?” So I opened a TAC call, and did some Googling. I came across an excellent article. And found I could replicate it exactly;

Log output

[box]%ASA-6-302013: Built inbound TCP connection 2698 for inside:192.168.100.10/52674 (192.168.100.10/52674) to identity:192.168.100.1/2456 (192.168.100.1/2456)
%ASA-6-725001: Starting SSL handshake with client inside:192.168.100.10/52674 for TLS session.
%ASA-7-725010: Device supports the following 1 cipher(s).
%ASA-7-725011: Cipher[1] : AES256-SHA
%ASA-7-725008: SSL client inside:192.168.100.10/52674 proposes the following 14 cipher(s).
%ASA-7-725011: Cipher[1] : AES128-SHA256
%ASA-7-725011: Cipher[2] : DHE-RSA-AES128-SHA256
%ASA-7-725011: Cipher[3] : DHE-DSS-AES128-SHA256
%ASA-7-725011: Cipher[4] : AES128-SHA
%ASA-7-725011: Cipher[5] : DHE-RSA-AES128-SHA
%ASA-7-725011: Cipher[6] : DHE-DSS-AES128-SHA
%ASA-7-725011: Cipher[7] : AES128-GCM-SHA256
%ASA-7-725011: Cipher[8] : DHE-RSA-AES128-GCM-SHA256
%ASA-7-725011: Cipher[9] : DHE-DSS-AES128-GCM-SHA256
%ASA-7-725011: Cipher[10] : DES-CBC3-SHA
%ASA-7-725011: Cipher[11] : EDH-RSA-DES-CBC3-SHA
%ASA-7-725011: Cipher[12] : EDH-DSS-DES-CBC3-SHA
%ASA-7-725011: Cipher[13] : RC4-SHA
%ASA-7-725011: Cipher[14] : RC4-MD5
%ASA-7-725014: SSL lib error. Function: SSL3_GET_CLIENT_HELLO Reason: no shared cipher
%ASA-6-302014: Teardown TCP connection 2695 for inside:192.168.100.10/52671 to identity:192.168.100.1/2456 duration 0:00:00 bytes 7 TCP FINs[/box]

Note: the Client (My machine running ASDM) offers 14 cipher sets and theres no match.

By this time I had reply from TAC

————————————–

“The ciphers depends on the client, which in this case is ASDM launcher. ASDM launcher depends on ASDM version installed, latest available launcher is 1.5(73) – ASDM 7.4.1.
I did some tests with the latest software (ciphers741.png) but AES256 was still not proposed by the launcher.

I found a bug opened back in 2012 for exactly same issue, which was closed due to inactivity. Developers mentioned there that launcher is using all the ciphers supported by Java installed on client PC.
https://tools.cisco.com/bugsearch/bug/CSCtx78540/

Please refer to:
https://en.wikipedia.org/wiki/Java_Cryptography_Extension

JCE adds additional ciphers support for a Java client.
I downloaded the JCE for Java 7 

Then I copied local_policy.jar and US_export_policy.jar to the $JAVA_HOME/jre/lib/security (these jars were already there so I had to overwrite them).

After that I tried once again and it worked.

————————————–

OK, that seems fair enough, and Kudos to the TAC engineer who had really gone the extra mile. So I thought I’d try and replicate it on the test bench.

Then it worked fine, so I logged the results once again;

[box] %ASA-6-302013: Built inbound TCP connection 2900 for inside:192.168.100.10/63760 (192.168.100.10/63760) to identity:192.168.100.1/2456 (192.168.100.1/2456)
%ASA-6-725001: Starting SSL handshake with client inside:192.168.100.10/63760 for TLS session.
%ASA-7-725010: Device supports the following 1 cipher(s).
%ASA-7-725011: Cipher[1] : AES256-SHA
%ASA-7-725008: SSL client inside:192.168.100.10/63760 proposes the following 23 cipher(s).
%ASA-7-725011: Cipher[1] : AES256-SHA256
%ASA-7-725011: Cipher[2] : DHE-RSA-AES256-SHA256
%ASA-7-725011: Cipher[3] : DHE-DSS-AES256-SHA256
%ASA-7-725011: Cipher[4] : AES256-SHA
%ASA-7-725011: Cipher[5] : DHE-RSA-AES256-SHA
%ASA-7-725011: Cipher[6] : DHE-DSS-AES256-SHA
%ASA-7-725011: Cipher[7] : AES128-SHA256
%ASA-7-725011: Cipher[8] : DHE-RSA-AES128-SHA256
%ASA-7-725011: Cipher[9] : DHE-DSS-AES128-SHA256
%ASA-7-725011: Cipher[10] : AES128-SHA
%ASA-7-725011: Cipher[11] : DHE-RSA-AES128-SHA
%ASA-7-725011: Cipher[12] : DHE-DSS-AES128-SHA
%ASA-7-725011: Cipher[13] : AES256-GCM-SHA384
%ASA-7-725011: Cipher[14] : DHE-RSA-AES256-GCM-SHA384
%ASA-7-725011: Cipher[15] : DHE-DSS-AES256-GCM-SHA384
%ASA-7-725011: Cipher[16] : AES128-GCM-SHA256
%ASA-7-725011: Cipher[17] : DHE-RSA-AES128-GCM-SHA256
%ASA-7-725011: Cipher[18] : DHE-DSS-AES128-GCM-SHA256
%ASA-7-725011: Cipher[19] : DES-CBC3-SHA
%ASA-7-725011: Cipher[20] : EDH-RSA-DES-CBC3-SHA
%ASA-7-725011: Cipher[21] : EDH-DSS-DES-CBC3-SHA
%ASA-7-725011: Cipher[22] : RC4-SHA
%ASA-7-725011: Cipher[23] : RC4-MD5
%ASA-7-725012: Device chooses cipher : AES256-SHA for the SSL session with client inside:192.168.100.10/63760
%ASA-6-725002: Device completed SSL handshake with client inside:192.168.100.10/63760
[/box]

Note: We now have 23 cipher proposals from the client.

Solution 3

Java 7 Update 51

Java Version 7 update 51 (Released Jan 2014) does not play nice with the Cisco ASDM.

Note: This is NOT the case if the ASDM presents a known, trusted, (not self signed) digital certificate.

Option 1

The easiest option is simply remove Java and downgrade to Java Version 7 Update 45

OR

You can also upgrade your ASDM to version 7.1(5.100) or later, and use the Java Web Start Option.

java

OR

Create a Java site exception. Note: This DID NOT WORK for me with Java version 7 update 51 to both ASDM Versions 7.1(1) and 7.1(5.100). I only put it here for completeness, because Cisco say it’s a solution.

Related Articles, References, Credits, or External Links

Original Article Written 11/02/14

Kudos and thanks to Michal Kunikowski from Cisco TAC for his assistance.


Updating the AnyConnect client for Deployment from the Cisco ASA 5500

KB ID 0000704 

Problem

Your ASA will (by default) update your AnyConnect clients to the latest client software when they connect. However you need to supply the ASA with the updated packages first.

Solution

1. Download the latest AnyConnect client package, from Cisco. The one you want will have a file extension of .pkg

AnyConnect 4

AnyConnect 3

2. Connect to the ASDM > Configuration > Remote Access VPN > Network (Client) access > AnyConnect Client Software > Add.


Note: On older versions of the ASDM you will find the option under > Network (Client) access > Advanced > SSL VPN > Client Settings > Add.

3. Select Upload > Browse to the software you downloaded > Select.


4. The file should upload to flash memory.


5. And it will tell you if it has been successful.


6. Select the new software and, using the ‘up arrow’ move it to the top of the list > Apply.

Note: At this point I also delete the old software packages.

7. Don’t forget to upload the packages for Linus and MacOS of you may see the following error;

The AnyConnect package on the secure gateway could not be located.


8. Remember to save the changes. File > Save running configuration to flash.

Related Articles, References, Credits, or External Links

Cisco ASA5500 AnyConnect SSL VPN 

Original article written: 02/11/12

ASA Setup FirePOWER Services (for ASDM)

KB ID 0001107 

Problem

Both the 5506-X (rugged version and wireless), and 5508-X now come with a FirePOWER services module inside them. This can be managed from either ASDM* (with OS and ASDM upgraded to the latest version), and via the FireSIGHT management software/appliance.

Related Articles, References, Credits, or External Links

*UPDATE: All ASA ‘Next-Gen’ firewalls can now have their Firepower Service Module managed from the ASDM.

Solution

1. The first thing to do is cable the management interface and the interface you are going to use as the ‘inside’ (LAN) into the same network (VLAN).

2. The next step might seem strange if you are used to working with Cisco firewalls, but you need to make sure there is no IP address configured on the management interface. Try to think of it as just the hole that the FirePOWER services module (which will get its own IP) speaks out though.

[box]

Petes-ASA# configure terminal
Petes-ASA(config)# interface Management1/1
Petes-ASA(config-if)# no nameif
WARNING: DHCPD bindings cleared on interface 'management', address pool removed
Petes-ASA(config-if)# no security-level
Petes-ASA(config-if)# no ip address 

[/box]

3. So it should look like this;

[box]

Petes-ASA(config-if)# show run
: Saved

ASA Version 9.3(2)2
!
----Output removed for the sake of brevity----
!
interface Management1/1
management-only
no nameif
no security-level
!
----Output removed for the sake of brevity---- 

[/box]

4. Lets make sure the FirePOWER service module is ‘up’ and healthy.

[box]

Petes-ASA(config)# show module 


Mod  Card Type                                    Model              Serial No.

---- -------------------------------------------- ------------------ -----------

   1 ASA 5506-X with FirePOWER services, 8GE, AC, ASA5506            JAD19090XXX

 sfr FirePOWER Services Software Module           ASA5506            JAD19090XXX


Mod  MAC Address Range                 Hw Version   Fw Version   Sw Version

---- --------------------------------- ------------ ------------ ---------------

   1 a46c.2a99.eec5 to a46c.2a99.eece  1.0          1.1.1        9.3(2)2

 sfr a46c.2a99.eec4 to a46c.2a99.eec4  N/A          N/A          5.4.1-211


Mod  SSM Application Name           Status           SSM Application Version

---- ------------------------------ ---------------- --------------------------

 sfr ASA FirePOWER                  Up               5.4.1-211


Mod  Status             Data Plane Status     Compatibility

---- ------------------ --------------------- -------------

   1 Up Sys             Not Applicable

 sfr Up                 Up

[/box]

5. The SFR module is actually a Linux box that’s running within the firewall, to connect to it you issue a ‘session sfr’ command.

  • Default Username: admin
  • Default Password: Sourcefire (capital S)
  • Default Password (after version 6.0.0): Admin123 (capital A)

As this is the first time you have entered the SFR you need to page down (press space) though the sizable EULA, then accept it.

[box]

Petes-ASA(config)# session sfr
Opening command session with module sfr.
Connected to module sfr. Escape character sequence is 'CTRL-^X'.
Cisco ASA5506 v5.4.1 (build 211)

Sourcefire3D login: admin

Password: Sourcefire

Copyright 2004-2015, Cisco and/or its affiliates. All rights reserved.
Cisco is a registered trademark of Cisco Systems, Inc.
All other trademarks are property of their respective owners.

Cisco Linux OS v5.4.1 (build 12)

Cisco ASA5506 v5.4.1 (build 211)

You must accept the EULA to continue.

Press <ENTER> to display the EULA:

END USER LICENSE AGREEMENTIMPORTANT: PLEASE READ THIS END USER LICENSE AGREEMENT CAREFULLY. IT IS VERY

----Output removed for the sake of brevity---- 

Product warranty terms and other information applicable to Cisco products are

available at the following URL: http://www.cisco.com/go/warranty.
----Output removed for the sake of brevity---- 

Please enter 'YES' or press <ENTER> to AGREE to the EULA: YES

[/box]

6. Set a new password.

[box]

System initialization in progress. Please stand by.
You must change the password for 'admin' to continue.

Enter new password: Password123

Confirm new password: Password123

[/box]

7. Set up all the IP and DNS settings, then exit from the module session.

[box]

You must configure the network to continue.
You must configure at least one of IPv4 or IPv6.

Do you want to configure IPv4? (y/n) [y]: y
Do you want to configure IPv6? (y/n) [n]: n
Configure IPv4 via DHCP or manually? (dhcp/manual) [manual]: manual
Enter an IPv4 address for the management interface [192.168.45.45]: 192.168.100.22
Enter an IPv4 netmask for the management interface [255.255.255.0]: 255.255.255.0
Enter the IPv4 default gateway for the management interface []: 192.168.100.1
Enter a fully qualified hostname for this system [Sourcefire3D]: SFire
Enter a comma-separated list of DNS servers or 'none' []: 192.168.100.10,192.168.100.11
Enter a comma-separated list of search domains or 'none' [example.net]: petenetlive.com,pnl.net

If your networking information has changed, you will need to reconnect.

For HTTP Proxy configuration, run 'configure network http-proxy'

Applying 'Default Allow All Traffic' access control policy.
You can register the sensor to a Defense Center and use the Defense Center

----Output removed for the sake of brevity---- 

sensor to the Defense Center.

> exit

Remote card closed command session. Press any key to continue.

[/box]

8. Now you need to ‘send’ traffic though the module, in this case I’m going to send all IP traffic though, I’m also going to set it to ‘fail open’, If you set it to fail closed then traffic will cease to flow though the firewall if the FirePOWER services module goes off-line. I’m making the assumption you have a default policy-map applied.

[box]

Petes-ASA(config)# access-list SFR extended permit ip any any
Petes-ASA(config)# class-map SFR
Petes-ASA(config-cmap)# match access-list SFR
Petes-ASA(config-cmap)# exit

[/box]

9. Add that new class-map to the default policy-map.

WARNING: If you are going to set ‘fail-close‘ then make sure your SFR module is operating normally, or you will cause downtime, best to do this in a maintenance window!)

[box]

Petes-ASA(config)# policy-map global_policy 
Petes-ASA(config-pmap)# class SFR
Petes-ASA(config-pmap-c)# sfr fail-open
Petes-ASA(config-pmap-c)# exit
Petes-ASA(config-pmap)# exit

[/box]

10. Save the changes.

[box]

Petes-ASA(config)# write mem
Building configuration...

Cryptochecksum: 72c138e3 1fa6ec32 31c35497 621cff02

35819 bytes copied in 0.210 secs

[OK]

[/box]

11. At this point the firewall should be able to ping the management IP of the SFR module.

[box]

Petes-ASA# ping 192.168.100.22
Type escape sequence to abort.
Sending 5, 100-byte ICMP Echos to 192.168.100.22, timeout is 2 seconds:
!!!!!
Success rate is 100 percent (5/5), round-trip min/avg/max = 1/2/10 ms
Petes-ASA#

[/box]

12. Now when you connect to the ASDM you can manage the FirePOWER services module.Note: I have seen some firewalls that flatly refuse to connect to the Firepower Services Module, and give an error ‘unable to connect on port 443’ every time you launch ASDM. I just re-image the module and load in a fresh install (40 mins to an hour), and start again.

Code to Copy & Paste

If you are lazy like me!

[box]

access-list ACL-FirePOWER extended permit ip any any
 class-map CM-SFR
 match access-list ACL-FirePOWER
 exit
policy-map global_policy 
 class CM-SFR
 sfr fail-open
 exit
 exit
write mem

[/box]

Note If you get an unable to connect error see the following article;

Cisco – Cannot Connect to the ASA FirePOWER Module

13. I suggest you update everything first, the ASA will configure an access control policy set to allow and inspect all traffic by default, which we will edit, set everything to update on a schedule, (rule updates and geolocation info).

Cisco FirePOWER Services Adding Licences (ASDM)

In the box with the firewall, you will have an envelope, you don’t need to open it (as below) because the PAK number you need is printed on the outside anyway. This is the firewalls CONTROL LICENCE, it allows it to be managed, we will install it into the ASDM, if you have a SourceFIRE appliance to manage the firewall you would install it there. You need two  bits of information the PAK and the LICENCE KEY of the FirePOWER module, (See Below).

The Licence Key is the MAC address of the Module, (Not the ASA). You can find it at Configuration > ASA FirePOWER Configuration > Licence. This is also where you will add all the licences. Go to www.cisco.com/go/licence and register the licence (and any additional licences i.e. AMP, Web filtering, etc.)

The Licence(s) will be emailed to you open them in a text editor and copy the text of each licence. You can see I’ve indicated below what you should be copying.

Paste that into the ASDM > Submit Licence.

It should say success, if it fails you’ve pasted to much text, or there’s a problem with the licence.

Review you licences, here Ive added AMP and web filtering but Ive yet to add the control licence. If you don’t add the control licence then when you try and edit the access control policy it will say you need a PROTECTION LICENCE (confusingly!)

FirePOWER Services Setup IPS

Disclaimer: These settings, (and allotters below,) are to get you up and running, As with any security device, you need to tune settings accordingly. Please don’t follow these instructions, then email me with complaints that you been attacked by ISIS/Scammers/Bots etc.

You get an IPS/IDS Licence with any of the subscription based licences, its less hassle to set this up before the the access control policy. Configuration > ASA FirePOWER Configuration  > Policies > Intrusion Policy  > Create Policy > Give it a name > I tend to use ‘Balanced Security and connectivity’ look at the other options and choose whichever you prefer > Create and Edit Policy.

Give the policy a name > Commit changes (I accept all the defaults).

FirePOWER Services Enable Malware Inspection and Protection

Note: Obviously this needs you to have added an AMP Licence!

 Configuration > ASA FirePOWER Configuration  > Policies > Intrusion Policy  > Files > New File Policy > Give it a name > Store FirePOWER Changes.

Add new file rule > I add everything  > and Set it to ‘Block Malware’ > Store FirePOWER Changes.

“Store ASA FirePOWER Changes”.

Warning: Nothing will be inspected, until you add this file policy to an access control policy.

ASA FirePOWER Services Edit / Create Access Control Policy

I renamed the default policy, Note: Even though I’ve called it ‘Base-Access-Control-Policy’ you can only apply one policy, you just add different rules to the policy as required. Add Rule.

In Source Networks > Add in ‘Private Networks’ (See Warning Below).

Inspection Tab > Add in the IPS and file policy you created above (That’s why I’ve done it in this order).

I set it to log at the end of the connection  > Add.

“Store ASA FirePOWER Changes”.

FirePOWER Private Networks Warning

Private networks only cover RFC1918 addresses, if you LAN/DMZ etc subnets are different you should create a new Network object, then add the subnets for your network. If you do this, then substitute your network object every time I mention the Private Networks object.

Blocking a Particular URL with FirePOWER Services

Even if you don’t have a Web Filtering licence you can block particular URL’s here Im going to block access to Facebook.  Configuration > ASA FirePOWER Configuration  > Object Management > URL > Individual Objects > Add URL > Note Im adding http and https.

Then add a rule to your existing access control policy ABOVE the permit all rule, (they are processed like ACLS from the top down). Set the source network to your private subnets.

On the URLs tab add in your URL objects and set the action to block with reset, or Interactive block with reset if you want to let the users proceed to Facebook after a warning.

Note: If you have a Web filtering Licence you can select ‘Social Networking’ from the Categories tab, and that would also block Facebook, and Twitter etc.

ASA FirePOWER Services Commit and Deploy The Changes

FirePOWER services behaves the same on-box as it does when you use the SourceFIRE Appliance, you can make changes but nothing gets deployed until you commit the changes. If you have made a change then there will be a ‘Store ASA FirePOWER services button active. Then you need to select File > Deploy FirePOWER Changes.

Note: You will only see the Deploy option on SFR modules running 6.0.0 or newer.

Deploy.

Even now its not deployed, it takes a while, to see progress navigate to Monitoring > ASA FirePOWER Monitoring > Task Status > It will probably have a ‘running’ task.

Wait until the policy deployment says completed before testing.

Related Articles, References, Credits, or External Links

Originally Published 17/11/15

Thanks to Eli Davis for the feedback.

Cisco ASA 5506-X / 5508-X Restart the FirePOWER Service Module

Cisco ASA – Active / Active Failover

KB ID 0001114

Usually when I’m asked to setup Active/Active I cringe, not because its difficult, its simply because people assume active/active is better than active/standby. I hear comments like ‘we have paid for both firewalls lets use them’, or ‘I want to sweat both assets’.

The only real practical use cases I can think of for Active /Active are;

  • You have a multi-tenancy environment and want to offer your tenants failover firewall capability.
  • You have multiple LAN subnets and what to split them though different firewalls.

What Active/Active Wont Give You

Load balancing: It’s a firewall! If you want load balancing buy a load balancer! People assume because both firewalls are passing traffic, they must load balance, they don’t, in fact they don’t even pass traffic from the same subnet.

VPNS: Yes theres no VPNs with Active Active. (This is 100% the case up to an including version 9.0, after version 9.0 they have stopped saying it’s not supported, but don’t say it’s supported).

Deploy Cisco ASA in Active/Active Failover

Here’s what Im going to setup;

For a more ‘logical’ view heres what is actually being setup;

1. Make sure the Licences are on the firewalls allow multiple contexts. and Active/Active, for 5510, 5512-X, and 5508-X that means Security Plus, for all other models a ‘base’ licence is required. (Note: This CANNOT be done on an ASA 5505 or 5506-X).

[box]

ciscoasa(config)# show version

Cisco Adaptive Security Appliance Software Version 8.4(2) 

——OUTPUT REMOVED FOR THE SAKE OF BREVITY—

Failover                          : Active/Active  perpetual
VPN-DES                           : Enabled        perpetual
VPN-3DES-AES                      : Disabled       perpetual
Security Contexts                 : 5              perpetual
GTP/GPRS                          : Disabled       perpetual

——OUTPUT REMOVED FOR THE SAKE OF BREVITY—

Configuration last modified by enable_15 at 08:04:40.249 UTC Wed Oct 14 2015
ciscoasa(config)#

[/box]

2. Put the firewalls in Multiple context mode.

[box]

ciscoasa(config)# mode multiple 
WARNING: This command will change the behavior of the device
WARNING: This command will initiate a Reboot
Proceed with change mode? [confirm] 
Convert the system configuration? [confirm] 
!
The old running configuration file will be written to flash

Converting the configuration - this may take several minutes for a large configuration

The admin context configuration will be written to flash

The new running configuration file was written to flash
Security context mode: multiple 

[/box]

3. Let it reboot.

4. Make sure the firewall is in routed mode, and multiple context mode, repeat on the other firewall.

[box]

ciscoasa> enable
Password: *********
ciscoasa# show mode
Security context mode: multiple 
ciscoasa# show firewall
Firewall mode: Router
ciscoasa#

[/box]

5. Once ASA1 is backup give it a sensible hostname, and ensure all the physical interfaces (and any sub interfaces) are NOT shutdown, and add then to the relevant VLAN (they are shut down by default).

[box]

ciscoasa(config)# hostname PHYSICAL-ASA    
PHYSICAL-ASA(config)# interface gigabitEthernet 0
PHYSICAL-ASA(config-if)# no shut
PHYSICAL-ASA(config)# interface gigabitEthernet 0.1
PHYSICAL-ASA(config-subif)# no shut
PHYSICAL-ASA(config-subif)# vlan 800
PHYSICAL-ASA(config)# interface gigabitEthernet 0.2
PHYSICAL-ASA(config-subif)# no shut
PHYSICAL-ASA(config-subif)# vlan 900
PHYSICAL-ASA(config)# interface gigabitEthernet 1
PHYSICAL-ASA(config-if)# no shut
PHYSICAL-ASA(config-if)# interface gigabitEthernet 1.1
PHYSICAL-ASA(config-subif)# no shut
PHYSICAL-ASA(config-subif)# vlan 100
PHYSICAL-ASA(config-subif)# interface gigabitEthernet 1.2
PHYSICAL-ASA(config-subif)# no shut
PHYSICAL-ASA(config-subif)# vlan 200
PHYSICAL-ASA(config-subif)# exit
PHYSICAL-ASA(config)# exit
PHYSICAL-ASA# 

[/box]

6. Failover link NEEDS to be configured and used by the SYTEM Context, so its configured here. (Note: I’m using the same physical interface for LAN and Stateful failover information).

[box]

PHYSICAL-ASA(config)# failover lan unit primary
PHYSICAL-ASA(config)# failover lan interface FAILOVER GigabitEthernet2
INFO: Non-failover interface config is cleared on GigabitEthernet2 and its sub-interfaces
PHYSICAL-ASA(config)# failover link FAILOVER GigabitEthernet2
PHYSICAL-ASA(config)# failover interface ip FAILOVER 172.16.1.1 255.255.255.0 standby 172.16.1.2
PHYSICAL-ASA(config)#

[/box]

7. You can only have TWO failover groups (you can have many contexts, depending on the licence on your firewall).

[box]

PHYSICAL-ASA(config)# failover group 1
PHYSICAL-ASA(config-fover-group)# polltime interface msec 500 holdtime 5
PHYSICAL-ASA(config-fover-group)# primary 
PHYSICAL-ASA(config-fover-group)# preempt 100
PHYSICAL-ASA(config-fover-group)# exit
PHYSICAL-ASA(config)# failover group 2
PHYSICAL-ASA(config-fover-group)# polltime interface msec 500 holdtime 5
PHYSICAL-ASA(config-fover-group)# secondary 
PHYSICAL-ASA(config-fover-group)# preempt 200

[/box]

Note: Unlike Active/Passive the ASA can preempt and ‘fail-back’ automatically.

8. Setup and assign your CONTEXTS (virtual firewalls), to these groups.

[box]

PHYSICAL-ASA(config)# admin-context admin    
PHYSICAL-ASA(config)# context admin
PHYSICAL-ASA(config-ctx)# config-url disk0:/admin.cfg

Cryptochecksum (changed): d9951253 3b82d2ce 840166f8 ccd3d7f1 
INFO: Context admin was created with URL disk0:/admin.cfg
INFO: Admin context will take some time to come up .... please wait.
PHYSICAL-ASA(config-ctx)# context vASA1
Creating context 'vASA1'... Done. (2)
PHYSICAL-ASA(config-ctx)# allocate-interface GigabitEthernet1.1 inside_vASA1
PHYSICAL-ASA(config-ctx)# allocate-interface GigabitEthernet0.1 outside_vASA1
PHYSICAL-ASA(config-ctx)# config-url disk0:/vASA1.cfg

WARNING: Could not fetch the URL disk0:/vASA1.cfg
INFO: Creating context with default config
PHYSICAL-ASA(config-ctx)# join-failover-group 1
PHYSICAL-ASA(config-ctx)# context vASA2
Creating context 'vASA2'... Done. (3)
PHYSICAL-ASA(config-ctx)# allocate-interface GigabitEthernet1.2 inside_vASA2 
PHYSICAL-ASA(config-ctx)# allocate-interface GigabitEthernet0.2 outside_vASA2
PHYSICAL-ASA(config-ctx)# config-url disk0:/vASA2.cfg                        

WARNING: Could not fetch the URL disk0:/vASA2.cfg
INFO: Creating context with default config
PHYSICAL-ASA(config-ctx)# join-failover-group 2

[/box]

The following will show you a summary of the contexts.

[box]

PHYSICAL-ASA(config)# show run | b context
admin-context admin
context admin
  config-url disk0:/admin.cfg
!

context vASA1
  allocate-interface GigabitEthernet0.1 outside_vASA1 
  allocate-interface GigabitEthernet1.1 inside_vASA1 
  config-url disk0:/vASA1.cfg
  join-failover-group 1
!

context vASA2
  allocate-interface GigabitEthernet0.2 outside_vASA2 
  allocate-interface GigabitEthernet1.2 inside_vASA2 
  config-url disk0:/vASA2.cfg
  join-failover-group 2
!

[/box]

10. Now configure vASA1.

[box]

PHYSICAL-ASA(config)# changeto context vASA1
PHYSICAL-ASA/vASA1(config)# interface outside_vASA 1
PHYSICAL-ASA/vASA1(config-if)# nameif outside
INFO: Security level for "outside" set to 0 by default.
PHYSICAL-ASA/vASA1(config-if)# ip address 123.123.123.123 255.255.255.0 standby 123.123.123.124
PHYSICAL-ASA/vASA1(config-if)# no shut
PHYSICAL-ASA/vASA1(config)# interface inside_vASA 1
PHYSICAL-ASA/vASA1(config-if)# nameif inside
INFO: Security level for "inside" set to 100 by default.
PHYSICAL-ASA/vASA1(config-if)# ip address 10.5.100.1 255.255.255.0 standby 10.5.200.2
PHYSICAL-ASA/vASA1(config-if)# no shut
PHYSICAL-ASA/vASA1(config-if)# exit
PHYSICAL-ASA/vASA1(config)# route outside 0.0.0.0 0.0.0.0 123.123.123.1
PHYSICAL-ASA/vASA1(config)# monitor-interface inside 
PHYSICAL-ASA/vASA1(config)# monitor-interface outside
PHYSICAL-ASA/vASA1(config)# object network obj_any
PHYSICAL-ASA/vASA1(config-network-object)# subnet 0.0.0.0 0.0.0.0
PHYSICAL-ASA/vASA1(config-network-object)# nat (inside,outside) dynamic interface
PHYSICAL-ASA/vASA1(config-network-object)# exit
PHYSICAL-ASA/vASA1(config)# exit
PHYSICAL-ASA/vASA1# 

[/box]

11. Now configure vASA2.

[box]

PHYSICAL-ASA/vASA1(config)# changeto context vASA2
PHYSICAL-ASA/vASA2(config)# interface inside_vASA 2
PHYSICAL-ASA/vASA2(config-if)# nameif inside
INFO: Security level for "inside" set to 100 by default.       
PHYSICAL-ASA/vASA2(config-if)# ip address 10.6.200.1 255.255.255.0 standby 10.6.200.2
PHYSICAL-ASA/vASA2(config-if)# no shut              
PHYSICAL-ASA/vASA2(config)# interface outside_vASA 2
PHYSICAL-ASA/vASA2(config-if)# nameif outside
INFO: Security level for "outside" set to 0 by default.
PHYSICAL-ASA/vASA2(config-if)# ip address 120.120.120.120 255.255.255.0 standby 120.120.120.122
PHYSICAL-ASA/vASA2(config-if)# exit
PHYSICAL-ASA/vASA2(config)# route outside 0.0.0.0 0.0.0.0 120.120.120.1
PHYSICAL-ASA/vASA2(config)# object network obj_any
PHYSICAL-ASA/vASA2(config-network-object)# subnet 0.0.0.0 0.0.0.0
PHYSICAL-ASA/vASA2(config-network-object)# nat (inside,outside) dynamic interface
PHYSICAL-ASA/vASA2(config-network-object)# exit
PHYSICAL-ASA/vASA2(config)# 

[/box]

12. Go back the the System context and save ALL the changes.

[box]

PHYSICAL-ASA/vASA2(config)# changeto system 
PHYSICAL-ASA(config)# wr mem all
Building configuration...
Saving context :           system : (000/003 Contexts saved) 
Cryptochecksum: e63d00e3 18224da1 be9d77c6 27c6e54d 

2109 bytes copied in 0.300 secs
Saving context :            admin : (001/003 Contexts saved) 
Cryptochecksum: f2f07827 f2784851 89925ac1 86c1e96f 

974 bytes copied in 0.330 secs
Saving context :            vASA1 : (002/003 Contexts saved) 
Cryptochecksum: 037e3a39 fe10e4d0 ff72d306 36fcf1ed 

1930 bytes copied in 0.330 secs
Saving context :            vASA2 : (003/003 Contexts saved) 
Cryptochecksum: e9024f22 53ad6316 70f7ccad 4394c81c 

1879 bytes copied in 0.230 secs
[OK]                                                         
PHYSICAL-ASA(config)# 

[/box]

Note: Configuration on the main (physical) firewall is complete, the ‘failover’ configuration needs to now be setup on the second physical ASA.

13. On the ’Secondary’ Physical ASA.

[box]

ciscoasa# configure terminal 
ciscoasa(config)# interface gigabitEthernet 0
ciscoasa(config-if)# no shut
ciscoasa(config-if)# interface gigabitEthernet 0.1
ciscoasa(config-subif)# no shut
ciscoasa(config-subif)# vlan 800
ciscoasa(config-subif)# interface gigabitEthernet 0.2
ciscoasa(config-subif)# no shut
ciscoasa(config-subif)# vlan 900
ciscoasa(config-subif)# interface gigabitEthernet 1
ciscoasa(config-if)# no shut
ciscoasa(config-if)# interface gigabitEthernet 1.1
ciscoasa(config-subif)# no shut
ciscoasa(config-subif)# vlan 100
ciscoasa(config-subif)# interface gigabitEthernet 1.2
ciscoasa(config-subif)# no shut
ciscoasa(config-subif)# vlan 200
ciscoasa(config-subif)# exit
ciscoasa(config)# failover lan unit secondary 
ciscoasa(config)# failover lan interface FAILOVER GigabitEthernet2       
INFO: Non-failover interface config is cleared on GigabitEthernet2 and its sub-interfaces
ciscoasa(config)# failover link FAILOVER GigabitEthernet2                     
ciscoasa(config)# failover interface ip FAILOVER 172.16.1.1 255.255.255.0 standby 172.16.1.2
ciscoasa(config)# 

[/box]

14. Remember failover is off by default, and we have not switched it on, this needs to be done on both of the physical ASA’s (primary and secondary). Note: Make sure the ‘failover’ interface is NOT in a shut down state first!

[box]

Secondary


ciscoasa(config)# interface GigabitEthernet2
ciscoasa(config)# no shut
ciscoasa(config)# failover
ciscoasa(config)# 

Primary

PHYSICAL-ASA(config)# int gigabitEthernet 2
PHYSICAL-ASA(config-if)# no shut
PHYSICAL-ASA(config)# failover
PHYSICAL-ASA(config)#

[/box]

Note: If building in GNS3 sometimes you need to put a switch in the middle of the ‘backup link’ or the firewalls don’t detect each other!

17. Top Tip: Remember that you need to make the changes on the active firewall context in the correct failover group. Change the firewall prompt to show you all this information.

[box]

PHYSICAL-ASA# conf t
PHYSICAL-ASA(config)# prompt hostname context priority state
PHYSICAL-ASA/pri/act(config)# 

[/box]

Testing Active/Active Failover

If you change to vASA1 (notice it’s active).

[box]

PHYSICAL-ASA/pri/act(config)# changeto context vASA1
PHYSICAL-ASA/vASA1/pri/act(config)# 

[/box]

Now change to vASA2, (This ones in standby so DONT make changes here or they wont get replicated / saved).

[box]

PHYSICAL-ASA/vASA1/pri/act(config)# changeto context vASA2
PHYSICAL-ASA/vASA2/pri/stby(config)# 

[/box]

Note: Moral of the story is you need to be aware what physical firewall you are on (primary or secondary) what mode you are in (active or standby) and what context you are in (vASA1 or vASA2). So in this example to make a change to vASA2 you would need to go to Secondary/Standby/vASA2 to edit the active firewall, (confusing eh! That’s why I change the firewall prompt).

Now you will want to test things, probably by pinging, don’t forget ICMP is not enabled by default an you will need to enable it, (in each context).

[box]

vASA1 (as specified above), make sure it says ‘act’ on the end of the prompt.

PHYSICAL-ASA/pri/act(config)# changeto context vASA1
PHYSICAL-ASA/vASA1/pri/act(config)# policy-map global_policy
PHYSICAL-ASA/vASA1/pri/act(config-pmap)# class inspection_default
PHYSICAL-ASA/vASA1/pri/act(config-pmap-c)# inspect icmp
PHYSICAL-ASA/vASA1/pri/act(config-pmap-c)# exit
PHYSICAL-ASA/vASA1/pri/act(config-pmap)# exit
PHYSICAL-ASA/vASA1/pri/act(config)# exit
PHYSICAL-ASA/vASA1/pri/act# 

vASA2 (as specified above), make sure it says ‘act’ on the end of the prompt.

PHYSICAL-ASA/sec/stby# changeto context vASA2
PHYSICAL-ASA/vASA2/sec/act# conf t
PHYSICAL-ASA/vASA2/sec/act(config)# policy-map global_policy
PHYSICAL-ASA/vASA2/sec/act(config-pmap)# class inspection_default
PHYSICAL-ASA/vASA2/sec/act(config-pmap-c)# inspect icmp
PHYSICAL-ASA/vASA2/sec/act(config-pmap-c)# exit
PHYSICAL-ASA/vASA2/sec/act(config-pmap)# exit
PHYSICAL-ASA/vASA2/sec/act(config)# exit

[/box]  

Ubuntu – Managing Cisco Devices via Serial / Rollover Cable

KB ID 0000400 

Problem

A while back I ran though “Managing Cisco ASA devices via the ASDM with Ubuntu“, I prefer to work at command line, with a new firewall my only choice is via the console port, In a windows environment I can fire up Hyperterminal and I’m away. With Linux there a couple of things to do first.

Solution

Step 1 (Get the Serial / RS232 / COM Port working)

As pictured above, this is being done on my Acer Netbook so I don’t have a serial port. I need to use a USB to Serial converter, If your machine has a serial port then simply skip this section.

1. Plug in your serial converter and wait a few seconds, open a terminal window (Applications > Accessories > Terminal) and issue the following command,

[box]dmesg[/box]

2. Amazingly it looks like been installed with the correct driver, without any effort by me at all! Lets make sure, unplug the USB to serial converter then issue the following command,

[box]lusb[/box]

Then plug the device back in and run the same command, notice the serial port has popped onto the list.

Note: If you not as lucky as me follow the excellent advice here to install the drivers you need.

Step 2 Install and Configure Minicom

1. Open a terminal window and issue the following command,

[box]sudo apt-get install minicom[/box]

Tap in your password, then enter “Y” for yes when prompted.

4. We need to know the connection name for the USB to Serial converter, issue the following command (See mines called ttyUSB0).

[box]dmesg | grep tty[/box]

5. Now lets fire up Minicom with the following command,

[box]sudo minicom[/box]

Tap in your password again, then as requested press CTRL+A, then Z.

6. To configure the serial settings press O (that’s O for Oscar not zero).

7. Select “Serial Port Setup”.

8. Press A to set the device.

9. As we discovered (above) ours is called ttyUSB0, so change the device to /dev/ttyUSB0.

10. Press C to change the connection speed to 9600 baud, Press Q (to set 8 bits, no stop bit, and 1 parity bit. On mine this was set by default), press {enter} to exit.

11. Press F to turn off hardware flow control (Some posts will say leave it on, I generally turn if off and I’ve never seen anything break!). Press G to disable software flow control (if enabled).

12. Then Select “Save setup as..”, and give is a sensible name. (If you went back too far simply press O again to get back here).

13. Now the settings are saved you can launch them at anytime with,

[box]sudo minicom {filename}[/box]

Note: Sometimes your serial drive gets locked up but a reboot will solve the problem.

14. Here’s me connected to an ancient old catalyst switch.

15. And the baby PIX on my test network.

Note: If your keystrokes are not getting sent: From the main menu (CTRL+A then Z) Press E to turn on local echo.


Related Articles, References, Credits, or External Links

NA

RSA SecurID Error – ‘106: The Web server is busy. Please try again later’

KB ID 0000975 

Problem

Not the most descriptive of errors! In fact this has got nothing to do with the busyness of the web server at all.

Solution

What’s actually happening is the RSA agent on this machine (in this case a web server) cannot communicate with the RSA Authentication Manager. In my case the web server was in a DMZ, and the RSA Authentication Manager Appliance was in another DMZ. The ports required (TCP 5500, UDP 5500, and TCP 5580). were not open from the agent to the appliance. Once I fixed that, we were up and running.

Related Articles, References, Credits, or External Links

NA

BT Business Hub 3 – And Cisco ASA 5500

KB ID 0000762 

Problem

Warning: If your ASA is running version 8.3(4) or above you are going to have problems assigning public IP addresses from your allocated BT Range (jump to the bottom of the article for a resolution).

You have a pool of public IP addresses and you wish to allocate one of these IP addresses to your Cisco ASA Firewall. Note: This is for customers using BOTH ADSL and BT Infinity

Solution

For this procedure I was running an ASA5505 (Unlimited) with version 8.4(5). You will need to know the public IP address range allocated to you by BT (and the IP allocated to the router/hub).

Allocating a Public IP address to an Internal Client with the BT Business Hub

1. Log into the router, (the password initially is on the pull out plastic tab on top of the router). Set the IP to the one allocated to the router by BT (from the IP range they have given you). Note: The router actually gets a different IP address externally, this is normal, don’t panic.

2. Apply > Wait for the changes to apply.

3. Under business Network > Devices> You should see your device listed > Select it.

4. Assign the public IP as shown, you need to select the two radio buttons before the drop-down list of IP addresses will work > Apply.

5. Note: additionally if you are installing a firewall you might want to disable the Business Hubs internal firewall. Settings >Port Forwarding > Firewall > “Allow all traffic…” > Apply.

Problem with Cisco ASA (Now Resolved: See below)

My firewall (after a reload) picked up the correct IP address, but was unable to connect to the internet. My laptop (also connected to the BT Business Hub) connected fine to the internet (both with an allocated public address, and using the public address of the router). The ASA could not get out at all, nor could it ping the IP address of the Business Hub. The ASA showed as disconnected for a while, then disappeared from the ‘Devices’ tab, even though it continued to get the correct IP address leased to it from the Business Hub, this persisted after a reload of the firewall – so the hub COULD see it. I tried giving the ASA the correct IP address statically, I also locked the speed and duplex of the ethernet interface (in case it was simply an auto-negotiation error), this did not resolve the problem. BT told me they had no record of anyone having the same problem, but that they would take a note in case it came up again. Luckily the client had his old 2Wire router as soon as I plugged that in everything worked fine.  


Update 210414 (and resolution)

Got an email from Nate Morris this week who had been working on this very problem, while debugging the ARP traffic he saw;

[box]

arp-in: request at external from 192.168.1.254 c0ac.54e4.d8d8 for 123.123.123.123 
0000.0000.0000 arp-in: Arp packet received from 192.168.1.254 which is in different subnet 
than the connected interface 123.123.123.123/255.255.255.248 

[/box]

This pointed to a known problem with Cisco ASA introduced in version 8.3(4). Cisco identified this as bug CSCty95468 (Cisco CCO Login required to view). To resolve this problem you need to allow the ASA to populate its ARP table from a non connected subnet. To do this you need to issue an arp permit-nonconnected command.

[box]

User Access Verification Password: 
Type help or '?' for a list of available commands. 
Petes-ASA> enable 
Password: ******** 
Petes-ASA# configure terminal 
Petes-ASA(config)# arp permit-nonconnected 
Petes-ASA(config)# exit 
Petes-ASA# write mem 
Building configuration... Cryptochecksum: 28790e0e 91da681e 7cf92e8a 85efb7ea 9449 bytes copied in 1.310 secs (9449 bytes/sec) [OK] 
Petes-ASA# 

[/box]

Update 260213

Got an Email from Andrew Joubert, to say that he had the same problem, and he was using the BT business hub via BT Infinity not ADSL.

Related Articles, References, Credits, or External Links

Original Article Written 26/02/13

Credit to: Nate Morris, for finding the resolution to the original problem.

Special thanks to Steve at BT, who rang me back on my mobile so I didn’t have wait in a queue, and then followed up afterwards to see what the outcome was, if I knew his surname I would publish it! He did a grand job, and does not get paid enough!

Also thanks to Chris at BT who pitched in and did as much as he could.