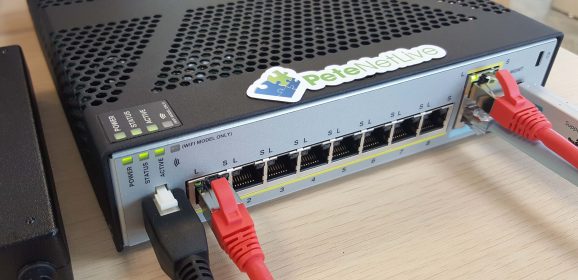
Cisco CSC Module – Stop it scanning its own update traffic

KB ID 0000156 

Problem

The CSC module when it’s installed in your firewall and running, by default scans all traffic in and out including all its own updates and web traffic, this can cause quite a performance hit, to stop this happening exempt the CSC modules traffic from being scanned.

NOTE: your access-lists and port groups may well have different names, so I’ll list all the commands to chase them though the firewall’s running config.

Before you start you will need to know the IP address of your CSC module, in the following example it is 10.1.0.253

Solution

Bypass the Cisco CSC Module for 1 IP address

1. Log into the firewall > Go to enable mode.

[box]

Petes-ASA> enable
Password: *********
Petes-ASA#

[/box]

2. Show the firewall’s policy map “show run policy-map”.

[box]

Petes-ASA1# show run policy-map
!
policy-map type inspect dns preset_dns_map
parameters
message-length maximum 512
policy-map global_policy
class inspection_default
inspect dns preset_dns_map
inspect ftp
inspect h323 h225
inspect h323 ras
inspect rsh
inspect rtsp
inspect sqlnet
inspect skinny
inspect sunrpc
inspect xdmcp
inspect sip
inspect netbios
inspect tftp
inspect icmp
class global-class <<< This is what we are looking for!!
csc fail-open
!
Petes-ASA#

[/box]

3. Show the firewall’s class maps with “show run class-map”, to see what “global-class” is doing.

[box]

Petes-ASA# show run class-map
!
class-map global-class
match access-list global_mpc
class-map inspection_default
match default-inspection-traffic
!
Petes-ASA#

[/box]

4. Now we know “global-class” is matching all traffic in a access-list called “global_mpc” to see what that’s doing issue a “show run access-list global_mpc” command.

[box]

Petes-ASA#
Petes-ASA# show run access-list global_mpc
access-list global_mpc extended permit tcp any any object-group DM_INLINE_TCP_1
Petes-ASA#

[/box]

5. To see what protocols the CSC is scanning issue a “show run object-group id DM_INLINE_TCP_1” command.

[box]

Petes-ASA# show run object-group id DM_INLINE_TCP_1
object-group service DM_INLINE_TCP_1 tcp
port-object eq ftp
port-object eq www
port-object eq pop3
port-object eq smtp
Petes-ASA#

[/box]

6. Now we are sure that’s our CSC scanning 🙂 we need to exclude the CSC from the access list.

[box]

Petes-ASA# configure terminal
Petes-ASA(config)# access-list global_mpc line 1 deny ip host 10.1.0.253 any
Petes-ASA(config)#

[/box]

7. To make sure look at the access-list again.

[box]

Petes-ASA(config)# show run access-list global_mpc
access-list global_mpc extended deny ip host 10.1.0.253 any
access-list global_mpc extended permit tcp any any object-group DM_INLINE_TCP_1
Petes-ASA(config)#

[/box]

At this point you can check web traffic is flowing with a “sh conn | i x” command (Note that’s a pipe symbol).

Check Traffic is Bypassing the Cisco CSC Module

You can do this with a simple packet-tracer command, in the SSM-DIVERT section look for deny=true.

[box]

Petes-ASA(config)# packet-tracer input inside tcp 10.1.0.253 www 123.123.123.123 www
-----------Output Removed to Save Space-----------

Phase: 7
Type: SSM-DIVERT
Subtype:
Result: ALLOW
Config:
Additional Information:
Forward Flow based lookup yields rule:
in  id=0xadccb148, priority=51, domain=ssm-isvw, deny=true
hits=1, user_data=0xae658708, cs_id=0x0, use_real_addr, flags=0x0, protocol=6
src ip/id=0.0.0.0, mask=0.0.0.0, port=0, tag=0
dst ip/id=0.0.0.0, mask=0.0.0.0, port=80, tag=0 dscp=0x0
input_ifc=inside, output_ifc=any

-----------Output Removed to Save Space-----------

[/box]

Related Articles, References, Credits, or External Links

Cisco CSC Module Error – Activation Warning

Original article written: 07/12/09

Cisco CSC Module Error – Activation Warning

KB ID 0000392 

Problem

You try to connect to your Cisco CSC module, and see the following error.

Error: Activation Warning CSC is not activated. Please run setup wizard under Configuration > Trend Micro Content Security > CSC Setup > Wizard Setup to perform setup process. Click OK button to to to Trend Micro Content Security Setup wizard.

Naturally if you’ve never setup the CSC you are going to see this, but what if it suddenly starts doing this?

Solution

1. Connect to the ASA that the CSC module is in.

2. Issue the following command,

[box]sh modu 1 det[/box]

3. This ones unresponsive, it probably just need restarting, to do that issue the following command.

[box]hw-module module 1 reset[/box]

4. They can take a little while to come up (apply the cup of coffee rule). Then to see if it’s back up again use the same command you used earlier.

[box]sh mod 1 det[/box]

That didn’t work! Sometimes CSC modules do fail!, I had one client go through three in a year, If doing the above or running through the setup wizard (you did write down the licence numbers that came with the CSC didn’t you?) doesn’t work then you need to log a call to TAC.


Related Articles, References, Credits, or External Links

Cisco CSC Module stop it scanning its own update traffic

Outlook Error 0x800CCC0F – Using POP3 To Exchange – Behind a Cisco CSC (Trend InterScan) Module

KB ID 0000642 

Problem

I upgraded a clients firewall and CSC software a couple of weeks ago, and ever since “some” users saw the following errors,

Error 0x800CCC0F

Task ‘{email address} – Sending’ reports error (0x800CCC0F): #The connection to the server was interrupted. If the problem continues, contact your server administrator or Internet service provider (ISP).’

Eventually it would time out altogether with the following error,

Error 0x800CCC0B

Task ‘{email address} – Sending’ reported error (0x800CCC0B): ‘Unknown Error 0x800CCC0B’

Solution

All I could discern from Googling the error, was that the AV (In this case the Trend Micro InterScan for Cisco CSC SSM), in the Cisco CSC Module) was probably the culprit.

I tried stopping the POP3 Service on the CSC that did NOT fix the error.

I confirmed that the CSC module was the root cause of the problem, by disabling the entire module with the following command on the Cisco ASA firewall;

[box]hw-module module 1 shutdown[/box]

Warning: If you do this, your CSC settings must be set to “csc fail-open” or web and email traffic will stop! Once you have confirmed this IS the problem you can re-enable the module with the following command.

[box]hw-module module 1 reset[/box]

I tried from my office and it worked fine, I could not replicate the error, I tried from various servers and Citrix box’s from other clients who kindly let me test from their network. Still I could not replicate the error! I went home and that was the first time I could see the same error their users were seeing. Sadly this led me on a wild goose chase, (I use Outlook 2007 at home and Outlook 2010 everywhere else so I (wrongly) assumed that was the problem).

Breakthrough!

As I could now replicate the error, I could at least do some testing, I attempted a send/receive and looked at the CSC Logging.

Note: To view CSC Logging, connect to the ASDM > Monitoring > Logging > Trend Micro Content Security > Continue > Enter the password > OK > View.

Every time it failed, I saw my public IP being logged with a RejectWithErrorCide-550 and RBL-Fail,QIL-NA. At last something I could work with.

This error indicates a problem with the Email Reputation system, I logged into the CSC web management console > and located this.

Then I disabled the ‘SMTP Anti-spam (Email Reputation)’, and everything started to work.

Conclusion

I understand the need for this system, but the nature of POP3 email clients, dictates they can connect in from anywhere, usually from a home ISP account on a DHCP address. I know from experience that major ISP’s IP ranges get put in RBL block lists (I checked by popping my IP in here, and sure enough it was blocked).

If you are going to use POP3 then you need to leave this system disabled, but to be honest, if you have Exchange, simply swap over to Outlook Anywhere and stop using POP3.

Related Articles, References, Credits, or External Links

Special thanks to Jenny Ames for her patience while I fought with this over a number of days.

Cisco ASA 5500 – Install and Configure a CSC Module

KB ID 0000731 

Problem

The Cisco CSC module provides ‘in line’ scanning of POP3, SMTP, HTTP and FTP traffic, to protect against viruses but also for anti spam and anti phish (with the correct licensing).

If you are familiar with Trend products, you will like it, (because that’s what it runs), and the interface is much the same as Trend IWSS.

It is a hardware device that plugs into the back of the ASA, and comes in two flavours.

1. CSC-SSM-10 (50 to 500 users, depending on licenses) for ASA 5510 and 5520.

2. CSC-SSM-20 (500 to 100 users, depending on licenses) for ASA 5510, 5520, and 5540.

In addition to licensing the amount of users, you can also buy a Plus License, this enables anti-spam, anti-phish, URL filtering, and blocking control. Note: This license expires and must be renewed annually).

Solution

Some licenses on the CSC are time specific, I would consider setting the ASA’s internal clock before you start.

Set the ASA to get time from an External NTP Server

Step 1: License the Cisco CSC Module

1. Connect to the ASA via command line, go to enable mode and issue the following command;


From the output you should be able to get the serial number of the CSC module (write it down).

2. In the box with the CSC/ASA should be an envelope containing the PAK for the CSC module, write that number down as well.

3. Go to the Cisco license portal here, Note: If you do not have a Cisco CCO account you may need to create one. Enter your PAK code > Fulfill Single PAK.

Note: If you have multiple PAK codes, you can do them at once with the ‘Load more PAK’s’ button, this may be the case if you also have a ‘plus’ license to add.

4. Enter the serial number of your CSC module and the person/company from whom you bought it > Next.

5. It should display your valid email address (from your CCO account). Tick the box to accept the terms and conditions > Get License.

6. Scroll down and accept, then select DOWNLOAD, (that way you wont have to wait for it to be emailed to you).

7. Open the license file (will have a .lic extension) with notepad and you should see two keys.

Step 2: Setup the CSC Module

Note: Here I’m going to simply set up inspection of everything on all interfaces, this might not be what you want, i.e. if theres no mail server in the DMZ why would you want to inspect all DMZ traffic for SMTP.

1. Connect to the firewall’s ASDM console > Trend Micro Content Security > It should point you straight to the setup wizard.

9. Enter the base and plus license codes. Note: The plus license code that comes with the CSC is just an evaluation one, if you have purchased a plus license separately, then paste THAT code in instead.

10. Enter the network settings you require for the CSC (it requires its own network connection). it has a single RJ45 network socket on the CSC modules back plane, connect that to your LAN > Next.

11. Supply a name for the CSC module and details of your email server (if you require email notification) > Next > enter the IP addresses that will be allowed access to the CSC web console > Next > Change the password Note: The original password will be cisco > Next.

12. Select what traffic you want to inspect, here I’ve selected all traffic all interfaces > Ive set the CSC to fail open (if theres a problem it simply passes traffic, if you have it on fail close and the CSC encounters a problem all http, smtp, ftp, and pop traffic will be blocked until the problem is resolved) > OK > Next.

13. Review the settings > Finish.

Note: You may get a warning if you set ‘fail open’ above that’s OK.

Connecting to and Managing the Cisco CSC Module

Although you can access the CSC settings via the ASDM, the easiest way is via its web interface, you set the IP address in step 2 number 10 above, navigate to
https://{ip-address}:8443

Note: You should now set the CSC module so that is DOES NOT scan its own update traffic, see the following article.

Cisco CSC Module – Stop it scanning its own update traffic

Adding a ‘PLUS’ License to a Cisco CSC

If you add the plus license later, you will obtain the code in the same manner as you did above (put the PAK and the CSC Serial number into the licensing portal and have it sent to you.

1. Once you have the code, open a web session to the CSC management interface https://{ip-address}:8443 > Administration > Licensing > Enter a new code.

2. Paste in the new code > Activate.

3. It may look like it has hung, wait a minuter or so, and check the licensing tab again.

Related Articles, References, Credits, or External Links

Cisco CSC Module Error – Activation Warning

Apple Devices will not Update Though Cisco ASA and CSC Module

Outlook Error 0x800CCC0F – Using POP3 To Exchange – Behind a Cisco CSC (Trend InterScan) Module

Changing the IP Address / Subnet Mask of a Cisco CSC Module

KB ID 0000781 

Problem

I had a client re-address their network this weekend, I was asked to make the relevant changes on the firewall. I know the CSC has a web interface, but as I usually work at command line I wanted to work out how to do it that way.

Solution

In the example below I will change the CSC module form 192.168.1.254/24 to 172.16.1.254/16.

1. Connect to the ASA, and check that the CSC module is up and healthy.

Note: Due the the limitations of HTML the output on you ASA will look a little neater like this.

[box]

User Access Verification

Password:
Type help or '?' for a list of available commands.
Petes-ASA> enable
Password: *******
Petes-ASA# show module 1 detail
Getting details from the Service Module, please wait...
ASA 5500 Series Content Security Services Module-10
Model: ASA-SSM-CSC-10-K9
Hardware version: 1.0
Serial Number: JAF1443AXXX
Firmware version: 1.0(11)5
Software version: CSC SSM 6.6.1125.0
MAC Address Range: d0d0.fdfe.a557 to d0d0.fdfe.a557
App. name: CSC SSM
App. Status: Up
App. Status Desc: CSC SSM scan services are available
App. version: 6.6.1125.0
Data plane Status: Up
Status: Up
HTTP Service: Up
HTTPS Service: Up
Mail Service: Up
FTP Service: Up
Activated: Yes
Mgmt IP addr: 192.168.1.254
Mgmt web port: 8443
Peer IP addr: <not enabled>

[/box]

2. Connect to the CSC module and choose option 1 (Network Settings). Note: the username is cisco and the password will be the password you use to log onto the CSC web console.

[box]

Petes-ASA# session 1
Opening command session with slot 1.
Connected to slot 1. Escape character sequence is 'CTRL-^X'.

login: cisco
Password:*******
***NOTICE***
This product contains cryptographic features and is subject to United States
and local country laws governing import, export, transfer and use. Delivery
of Cisco cryptographic products does not imply third-party authority to import,
export, distribute or use encryption. Importers, exporters, distributors and
users are responsible for compliance with U.S. and local country laws. By using
this product you agree to comply with applicable laws and regulations. If you
are unable to comply with U.S. and local laws, return this product immediately.

A summary of U.S. laws governing Cisco cryptographic products may be found at:
http://www.cisco.com/wwl/export/crypto/tool/stqrg

If you require further assistance please contact us by sending email to
export@cisco.com.


Trend Micro InterScan for Cisco CSC SSM Setup Main Menu
---------------------------------------------------------------------

1. Network Settings
2. Date/Time Settings
3. Product Information
4. Service Status
5. Password Management
6. Restore Factory Default Settings
7. Troubleshooting Tools
8. Reset Management Port Access Control List
9. Ping
10. Exit ...

Enter a number from [1-10]: 1

[/box]

3. Enter ‘y’ for yes to change the settings > Type in the new details (just press enter to proceed without changing any of the options).

[box]

Network Settings
---------------------------------------------------------------------

IP 192.168.1.254
Netmask 255.255.255.0
Hostname CSC
Domain name petenetlive.com
MAC address D0:D0:FD:FE:A5:57

Primary DNS 192.168.1.3

Gateway 192.168.1.1
No Proxy

Do you want to modify the network settings? [y|n] y

Network Settings
---------------------------------------------------------------------

Enter the SSM card IP address: (default:192.168.1.254)172.16.1.254
Enter subnet mask: (default:255.255.255.0) 255.255.0.0
Enter host name: (default:CSC)
Enter domain name: (default:petenetlive.com)
Enter primary DNS IP address: (default:192.168.0.3)172.16.1.10
Enter optional secondary DNS IP address:
Enter gateway IP address: (default:192.168.0.254)172.16.1.1
Do you use a proxy server? [y|n] (default:no)
Stopping services:
OK
Applying network settings ...
Starting services: OK

[/box]

4. Press Enter to return to the main menu, you can check the change was successful by selecting option 1 again, but this time enter ‘n’ when asked if you want to change anything.

[box]

Press Enter to continue ...

Trend Micro InterScan for Cisco CSC SSM Setup Main Menu
---------------------------------------------------------------------

1. Network Settings
2. Date/Time Settings
3. Product Information
4. Service Status
5. Password Management
6. Restore Factory Default Settings
7. Troubleshooting Tools
8. Reset Management Port Access Control List
9. Ping
10. Exit ...

Enter a number from [1-10]: 1

Network Settings
---------------------------------------------------------------------

IP 172.16.1.254
Netmask 255.255.0.0
Hostname CSC
Domain name petenetlive.com
MAC address D0:D0:FD:FE:A5:57

Primary DNS 172.16.1.10

Gateway 172.16.1.1
No Proxy

Do you want to modify the network settings? [y|n] n

[/box]

5. Exit the main menu, then choose reboot (Note: This reboots the module NOT the ASA.)

[box]

Trend Micro InterScan for Cisco CSC SSM Setup Main Menu
---------------------------------------------------------------------

1. Network Settings
2. Date/Time Settings
3. Product Information
4. Service Status
5. Password Management
6. Restore Factory Default Settings
7. Troubleshooting Tools
8. Reset Management Port Access Control List
9. Ping
10. Exit ...

Enter a number from [1-10]: 10

Exit Options
---------------------------------------------------------------------

1. Logout
2. Reboot
3. Return to Main Menu

Enter a number from [1-3]: 2
Please wait while rebooting.
Remote card closed command session. Press any key to continue.
Command session with slot 1 terminated.

[/box]

6. You can check its status, for a while it will say its ‘unresponsive’. Eventually it will say all services are ‘up’

[box]

Petes-ASA# show module 1 detail
Getting details from the Service Module, please wait...
Unable to read details from slot 1
ASA 5500 Series Content Security Services Module-10
Model: ASA-SSM-CSC-10-K9
Hardware version: 1.0
Serial Number: JAF1443AXXX
Firmware version: 1.0(11)5
Software version: CSC SSM 6.6.1125.0
MAC Address Range: d0d0.fdfe.a557 to d0d0.fdfe.a557
App. name: CSC SSM
App. Status: Not Applicable
App. Status Desc: Not Applicable
App. version: 6.6.1125.0
Data plane Status: Not Applicable
Status: Unresponsive <<<<

Petes-ASA# show module 1 detail
Getting details from the Service Module, please wait...
ASA 5500 Series Content Security Services Module-10
Model: ASA-SSM-CSC-10-K9
Hardware version: 1.0
Serial Number: JAF1443AXXX
Firmware version: 1.0(11)5
Software version: CSC SSM 6.6.1125.0
MAC Address Range: d0d0.fdfe.a557 to d0d0.fdfe.a557
App. name: CSC SSM
App. Status: Up
App. Status Desc: CSC SSM scan services are available
App. version: 6.6.1125.0
Data plane Status: Up
Status: Up
HTTP Service: Up
HTTPS Service: Up
Mail Service: Up
FTP Service: Up
Activated: Yes
Mgmt IP addr: 172.16.1.254
Mgmt web port: 8443
Peer IP addr: <not enabled>
Petes-ASA#

[/box]

7. Finally you can check the IP address, from the web console.

Related Articles, References, Credits, or External Links

NA

Cisco CSC – Upgrade the Operating System

KB ID 0000807 

Problem

Upgrading the operating system on the CSC module is pretty straight forward, as long as you have a valid support agreement for your hardware and a CCO account you can download the updates straight from Cisco (here).

Solution

WARNING: It’s rare that you can update straight to the latest version, by all means try, and the CSC module will simply error if it will not accept the version you are trying to update to.

WARNING 2: This may involve some downtime, especially if your CSC module is configured to fail-closed, you may wish to set it to fail-open during the upgrade to minimise disruption. Unless you have a dual failover firewall solution, in which case scroll down.

You can do this via command line if you wish, but it’s a lot simpler to do via the web console. You will need to download your updated software (with the .pkg extension NOT the .bin extension).

Once downloaded, log into the web portal of the CSC module https://{IP-Address}:8443 > Administration > Product Upgrade > Browse > Locate your update > Upload > Go an have a coffee, it will take a while.

Upgrading CSC Modules in a Failover Pair

If you have firewalls deployed in failover, then you will have two CSC modules to upgrade.

1. Just for ease I’m showing the command line and the web console view. Start by upgrading the CSC module in the Secondary Standby firewall, here I’m upgrading 6.3.1172.0 to 6.3.1172.4.

2. Now I take the same module to 6.6.1125.0.

3. Once I know the system has updated and is back online, I jump onto the Primary Active firewall and force a failover to the Secondary Standby firewall.

Check module status with;

[box]
show module 1 detail
[/box]

To force failover, on the Primary Active firewall.

[box]

configure terminal
no failover active

[/box]

4. Note: At this point the screen looks the same as above, but ‘physically’ the firewalls have swapped over, the Primary is now Standby and can be updated. Below I’m upgrading from 6.2.1599.0 to 6.2.1599.6.

5. Now we can see both modules are running the latest (at time of writing), product version.

6. Now to fail back simply issue the following command an the Secondary Active firewall;

[box]

configure terminal
no failover active

[/box]

7. You can also check the versions match with the following command;

[box]
show failover
[/box]

Related Articles, References, Credits, or External Links

NA

Apple Devices will not Update Though Cisco ASA and CSC Module

KB ID 0000575 

Problem

I had a client with this problem the other week, we tracked the problem to the ASA&CSC by simply bypassing the CSC module for the the IP address of the device.

So I knew the problem WAS the CSC but not why, or how to fix it. The client in question had a valid SmartNet so they called TAC for a resolution.

Solution

It turns out that this is a bug, that was first found in CSC version 6.3.1172.4 (at time of writing we are on version 6.6.1125.0). It does not mention Apple devices, it’s a problem with downloading .tgz files. If you want to go and hunt the bug report it’s (CSCtq46443). But there is a work around.

1. Connect to the web management console of the CSC module (port 8443 by default).

2. Navigate to > Web (HTTP) > Scanning.

3. Place a tick in the “Enable deferred scanning for files larger than” > And set the value to 2MB > Save.


Related Articles, References, Credits, or External Links

Thanks to David Mulholland.

Cisco CSC Module – Stop it scanning its own update traffic