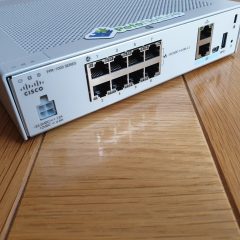
Like all firewalls that have ‘web management’ the default ports are 80 and 443 for insecure and secure management. IF you have secure (https) management on the outside interface of your firewall on the normal TCP port of 443. Then you can’t use the same interface to terminal SSL–VPNs. So you will need to change the FortiGate Management Port.
You can set SSL-VPN to use a different port of course, but for your remote workers who may be in hotels, or in locations where only web (port 80) and secure web/HTTP (port 443) are only allowed that’s going to be a problem.
The lesser of the two evils is to change the secure web management port to something that is not 443!
Changing the Fortigate Management Port (HTTPS)
Note: I’m talking about changing the TCP port, NOT the physical management port, if that’s what you are trying to do, then you simply enable that on the INTERFACE on the firewall like so;
FortiGate Change Management Port via CLI
Firstly to find out/check the port that https is currently configured on use;
[box]
show full | grep admin-sport
[/box]
Then to change the port number (in this case to 4433) use;
[box]
config system global
set admin-sport 4433
[/box]
FortiGate Change Management Port via GUI
System > Settings > Administration Settings > HTTPS Port.
Change the port number accordingly > Apply >After a while it will try and reconnect and probably fail, (that’s OK).
Reconnect to the firewall using https://{IP-or-Hostname}:{Port-Number}
Related Articles, References, Credits, or External Links
Wow! Who at Microsoft Teams thought that enabling that by default was a good idea? I was on a large conference call this morning, (about 150 people). Every message to the message feed was spewing onto my screen and making a noise during the meeting!
Thought: Why do ALL developers think it’s a good idea to have pop-up banner massages appear top right of the screen, (where your windows control buttons and things live), why not bottom right?
Anyway, I want them off completely, (if I want to read the messages I’ll open the message feed window!)
Microsoft Teams Notifications
Click your picture/Initials > Settings.
Chat > Edit.
Set as shown > Back to settings.
You may also want to alter, Notifications Section > Custom.
I’ve disabled ‘Banner’ for EVERYTHING and set them to only show in the feed.
Related Articles, References, Credits, or External Links
A while ago I did a run through on site to site VPNs from Cisco ASA to Fortigate firewalls. Back then I said that the default settings were a bit ‘shoddy‘ and that I’d revisit it once I had more time.
What do you mean shoddy? Well, Cisco and Fortinet are both guilty of enabling ‘Everything’ to make the tunnel come up, so people can just use a wizard and not put to much thought into the process, for most people thats absolutely fine. However I’ve found ‘Many Times‘ I’ve been trying to put a VPN into third party and it’s like a game of ‘Encryption Bingo‘ e.g. ‘Can you change it from AES128 to AES256 and change the hash to SHA512‘, or ‘Do you not support elliptical curve’. Who are these people? Do they expect Tom Cruise to come rappelling out of a skylight to steal the details of their 2016 Christmas golf event!
I digress, so here’s how to set up a site to site VPN using IKEv2 with some weapons grade encryption. Here’s a pretty picture of what it will look like;
And here’s what my test bench topology looks like in EVE-NG.
Configuring the Fortigate for Site to Site VPN
After saying don’t use the wizard, I’m going to use the wizard to do the Fortigate end, then I’ll edit the tunnel it creates and make it a bit more ‘fit for purpose’.
From the web management portal > VPN > IPSec Wizard > Give the tunnel a name > Change the remote device type to Cisco > Next.
Give it the ‘public’ IP of the Cisco ASA > Set the port to the ‘outside’ port on the Fortigate > Enter a pre-shared key, (text string, you will need to enter this on the Cisco ASA as well, so paste it into Notepad or something for later) > Next.
Local interface will be in the ‘inside’ interface on the Fortigate > Enter the local subnet(s) > Enter the remote (behind the ASA) subnet(s) > Next.
Review the settings > Create.
Select IPSec Tunnels > Select the new tunnel > Edit.
In the Authentication Section > Edit > Change the IKE Version to 2 > Edit the Phase 1 Proposal.
Note: If you can’t see this option, change the tunnel type to custom.
You can do the first couple of steps together, but I like to do the Phase1 and Phase 2 proposals first, then tie it all up at the end. Configuration > Site to Site VPN > Advanced > IKE Policies > IKEv2 Policies > Add.
Local Passphrase: An alphanumeric string of characters (it’s a pre-shared key it must match the one you set on the Fortigate).
Remote Passphrase: Set the same at the local passphrase.
Scroll down.
Make sure your IKE Phase 1 policy is in the list, (you may have many) > IPSec proposal > Select > locate yours and add it in > OK > OK > Apply.
The last thing to do is make sure that the traffic travelling over the VPN DOES NOT get NAT translated > Firewall > NAT Rules > Select the top one > Add >Add Nat Rule Before.
Source Interface: inside
Destination Interface: outside
Source Address: any
Destination Address: {The group you created above for the network address behind the Fortinet}
Source NAT Type: Static
Disable Proxy ARP : Tick
Lookup Route Table: Tick
OK > Apply
Don’t forget to save the changes > File > Save Running configuration to flash
Finally send some interesting traffic across the VPN to bring up the tunnel.
Related Articles, References, Credits, or External Links
I was debugging a VPN tunnel today. (From a Fortigate to a Cisco ASAv). I was messing around with the encryption and hashing, when the tunnel fell over. Phase 1 was establishing fine but not Phase 2 (IPSEC).
I’ve got better skills on the ASA, so that’s where I was debugging;
[box]
IPSEC: Received a PFKey message from IKE
IPSEC: Parsing PFKey GETSPI message
IPSEC: Creating IPsec SA
IPSEC: Getting the inbound SPI
IPSEC DEBUG: Inbound SA (SPI 0x00000000) state change from inactive to embryonic
IPSEC: New embryonic SA created @ 0x00007fc98613ea60,
SCB: 0x85567700,
Direction: inbound
SPI : 0x3B5A332E
Session ID: 0x00004000
VPIF num : 0x00000002
Tunnel type: l2l
Protocol : esp
Lifetime : 240 seconds
IPSEC: Received a PFKey message from IKE
IPSEC DEBUG: Received a DELETE PFKey message from IKE for an inbound SA (SPI 0x3B5A332E)
IPSEC DEBUG: Inbound SA (SPI 0x3B5A332E) destroy started, state embryonic
IPSEC: Destroy current inbound SPI: 0x3B5A332E
IPSEC DEBUG: Inbound SA (SPI 0x3B5A332E) free started, state embryonic
IPSEC DEBUG: Inbound SA (SPI 0x3B5A332E) state change from embryonic to dead
IPSEC DEBUG: Inbound SA (SPI 0x3B5A332E) free completed
IPSEC DEBUG: Inbound SA (SPI 0x3B5A332E) destroy completed
[/box]
Solution
Google that error and you get some posts about NAT, that we’re not applicable to me. I took a look on the Fortigate and the only clue there was;
sa=0 There is a mismatch between selectors (or no traffic is being initiated). sa=1 IPsec SA is matching and there is traffic between the selectors. sa=2 Only seen during IPsec SA rekey
So I went back to basics and checked the Phase 2 on BOTH, firstly the Fortigate;
For the uninitiated: GCM Protocols DON’T require a hashing algorithm, (that’s why you can’t see SHA or MD5 on there), they disappear when a GCM protocol is selected.
Then on the Cisco ASA;
[box]
Cisco-ASA(config-ipsec-proposal)# show run crypto ipsec
crypto ipsec ikev2 ipsec-proposal FORTIGATE
protocol esp encryption aes-gmac-256
protocol esp integrity null <--Note: This can say anything it gets ignored!
THE ANSWER IS STARING YOU/ME IN THE FACE. I just didn’t realise yet, I changed the phase 2 protocols to DES/MD5 and the tunnel came up, I walked up through the protocols and options and discovered what I’d done wrong.
Root Cause: The ASA is set to use AES-GMAC-256 that’s a DIFFERENT PROTOCOL to the AES256GCMconfigured on the Fortigate! The ASA should be set to AES-GCM-256! (So the Phase 2 proposals didn’t match).
While attempting to connect to a clients AnyConnect, this happened;
The VPN client was unable to successfully verify the IP forwarding table modifications. A VPN connection will not be established.
Or on older clients, you may see;
The VPN client was unable to modify the IP forwarding table. A VPN connection will not be established. Please restart your computer or device, then try again.
Solution
I was trying to connect from my house, I’d used this connection before from work and it was fine. I worked my way round the problem got my work finished, then re-looked at it the next time I was working from home.
The problem is actually quite simple, take a look at the IP I was using in my house.
Then take a look at the VPN Pool addresses that get allocated to the remote VPN clients (they overlap);
[box]
show run | incl pool
[/box]
Note: This assumes you are using an ‘IP Pool’, If you are using an external DHCP server at the ‘Head end’ then you will need to check/change the scope there.
I fixed the problem by simply changing the ‘pool’ so it didn’t overlap.
WARNING: If you have any routing going on behind your firewall (i.e you have layer 3 switches internally, routing between networks or VLANS) you may need to change them to route the ‘new’ AnyConnect subnet back to the firewall.
Update: Solution Windows 10
If you are experiencing this problem on Windows 10, and the above solution is not applicable, consider deleting the following two files;