
KB ID 0001573
Problem
If you have a lot of IIS servers, and want to load balance between them, then you can either buy a load balancer, or use Microsoft ARR (Application Request Routing). Note: ARR does a lot more than simply load balancing, e.g. it can perform caching, and complex web routing, and even SSL offloading. Here we are just looking at load balancing.
I’m going to deploy TWO ARR servers in my DMZ, here I’ve got two ‘back-end’ IIS web servers, (you may have many more.)
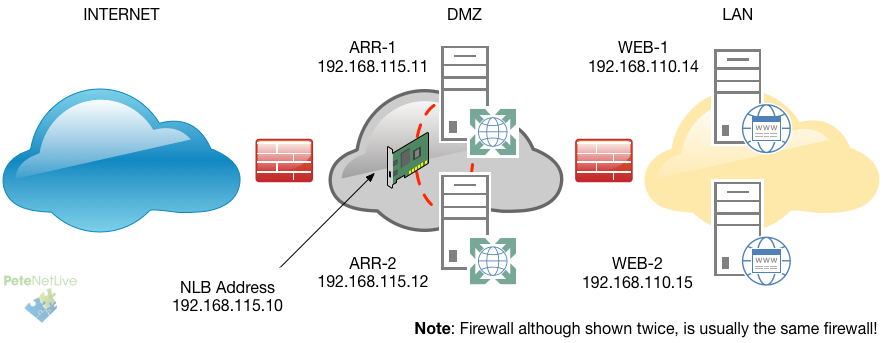
WHY ARR?: Rather than use WAP (Web Application Proxy,) or a connection broker, ARR is application aware, i.e. it WONT attempt to serve pages from a broken IIS server, e.g. if the host server is online, but the site to IIS is broken for instance.
WHY TWO?: Well we are talking about balancing and availability, I’m deploying two so the event one fails, the other one will still be online, you can have these running on different hypervisors, or even in different datacenters, for added resiliency.
Deploy Network Load Balancing (NLB)
Our first task is to deploy NLB this will create a ‘Virtual IP’ for both of the ARR servers to use.
NLB is a ‘Feature‘ to enable it, launch Server Manager > Manage > Add Roles and Features > Next > Next > Next > Next > Tick ‘Network Load Balancer‘ > Next > Next > Finish.

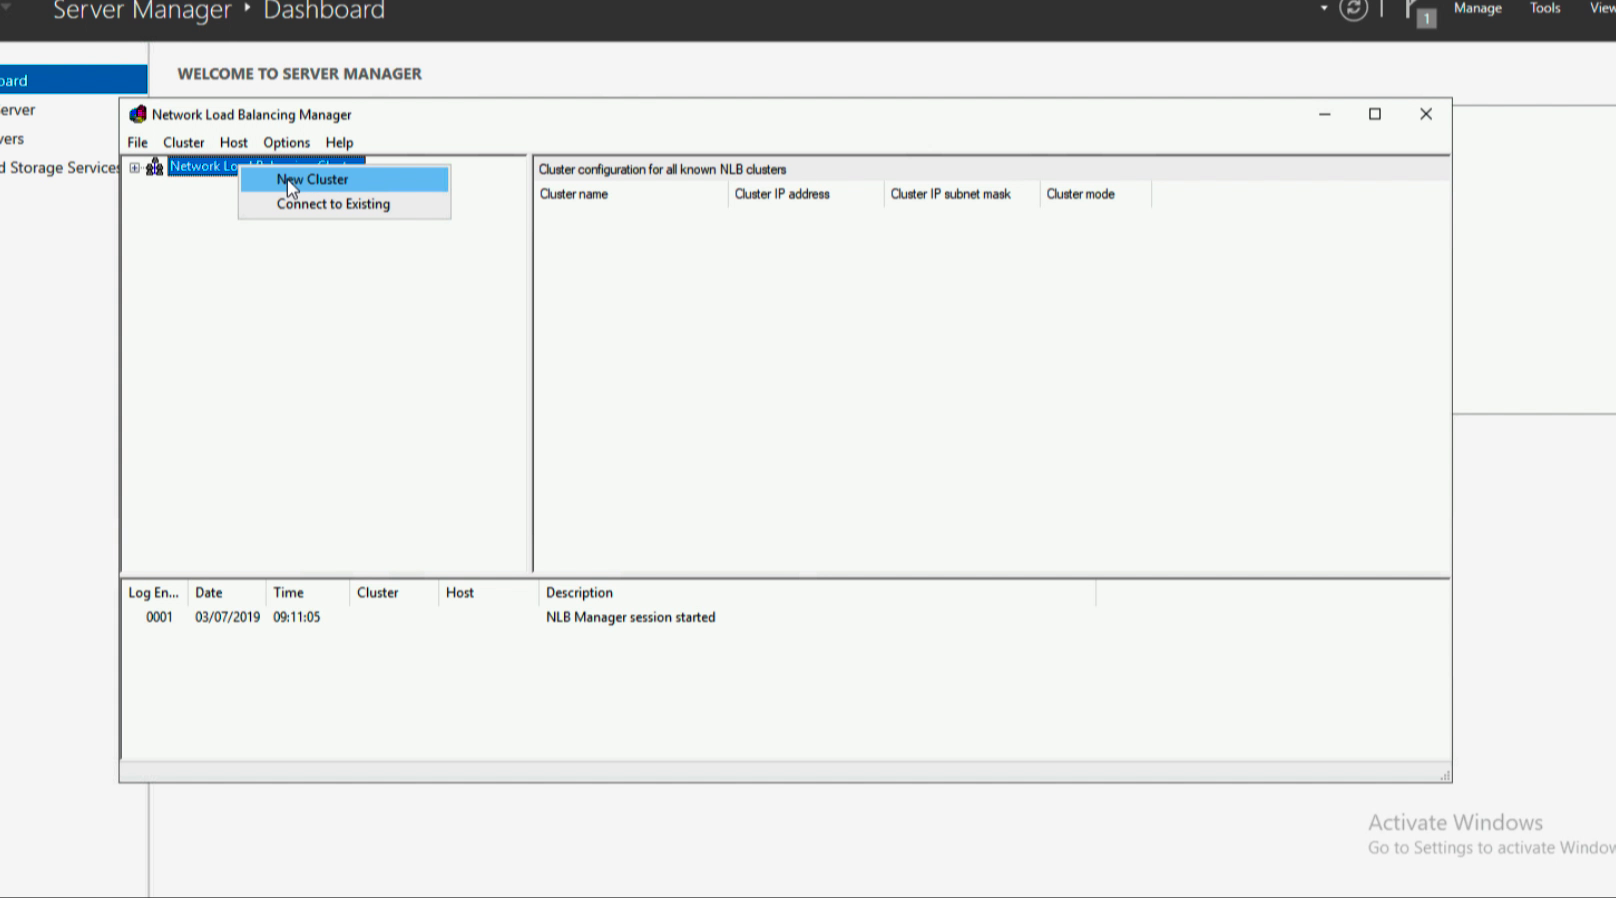
Launch ‘Network Load Balancing Manager’.

New Cluster.
Add in the first host > Connect > Next.
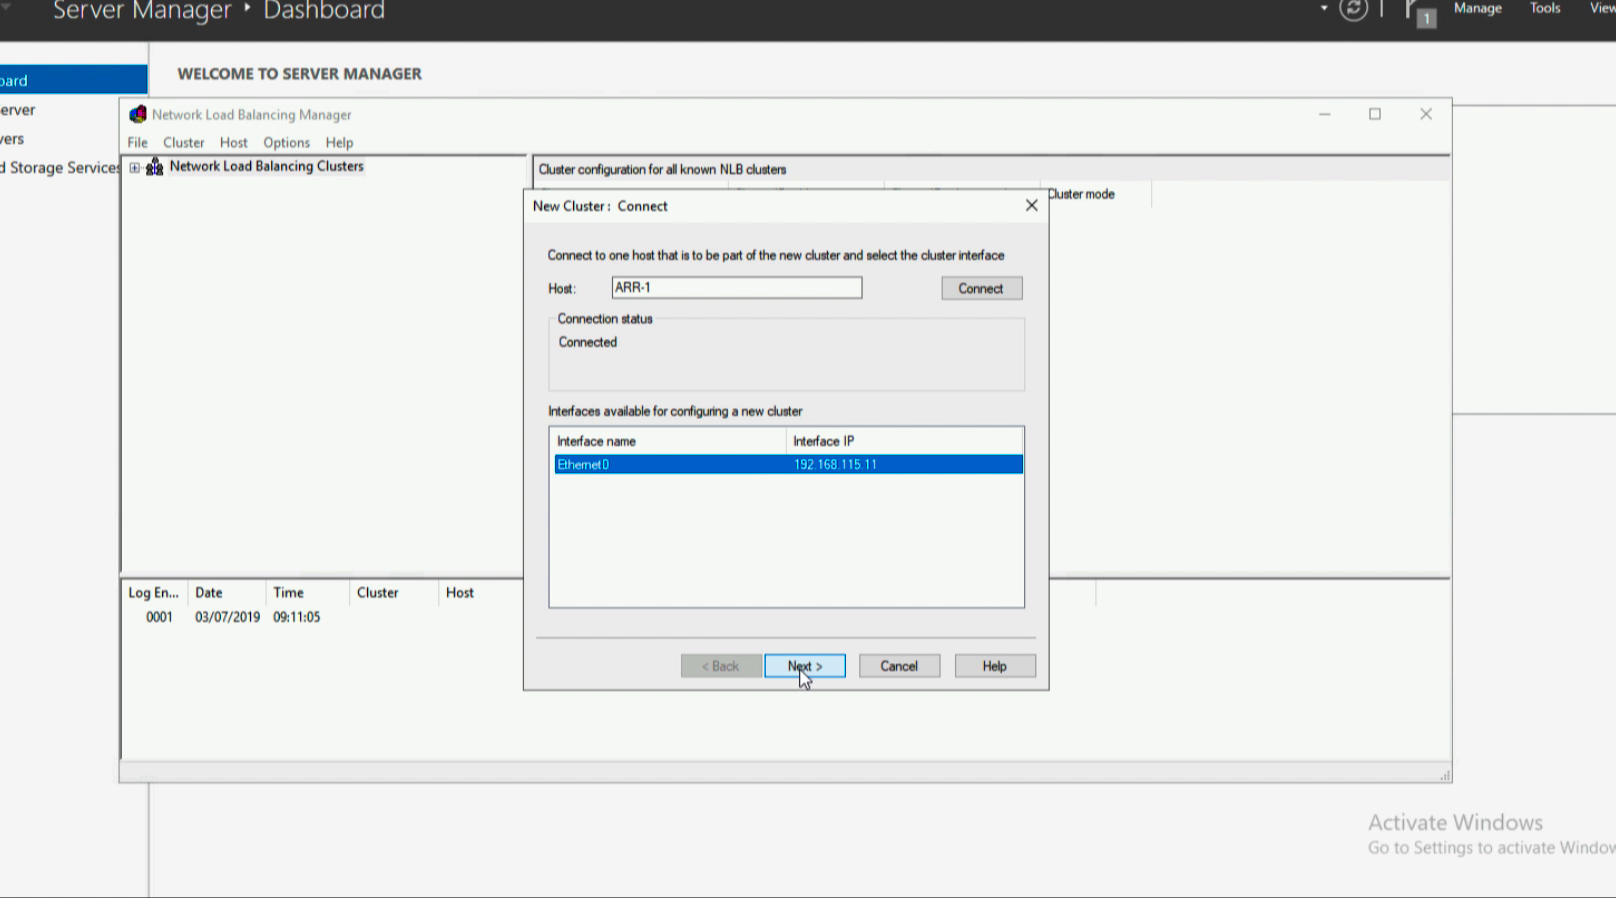
Check the IP > Next.
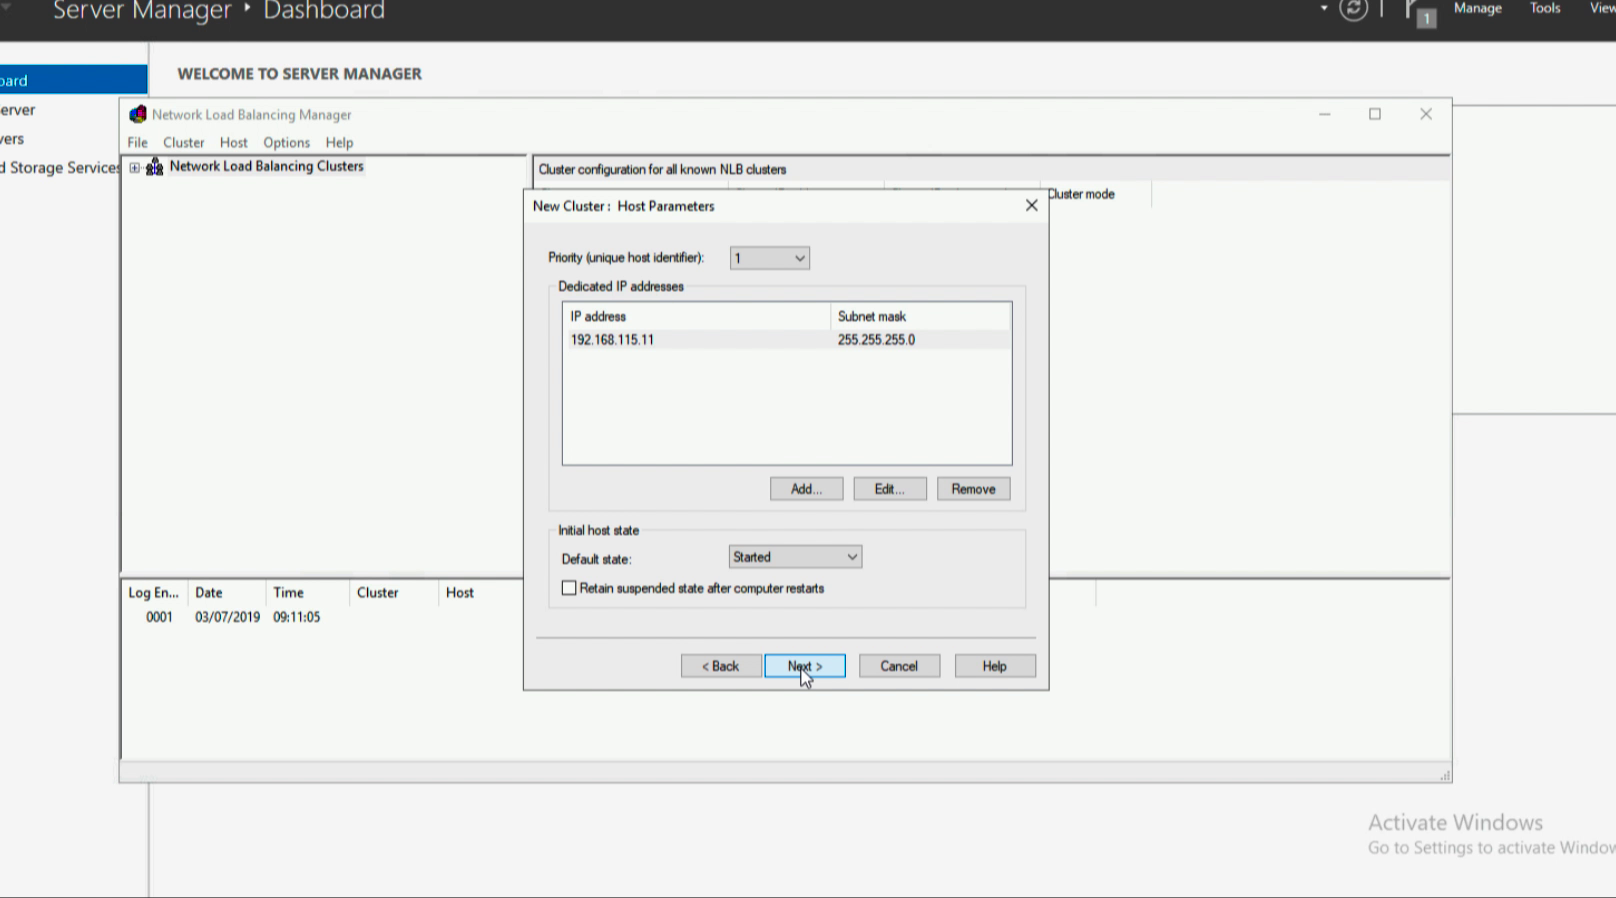
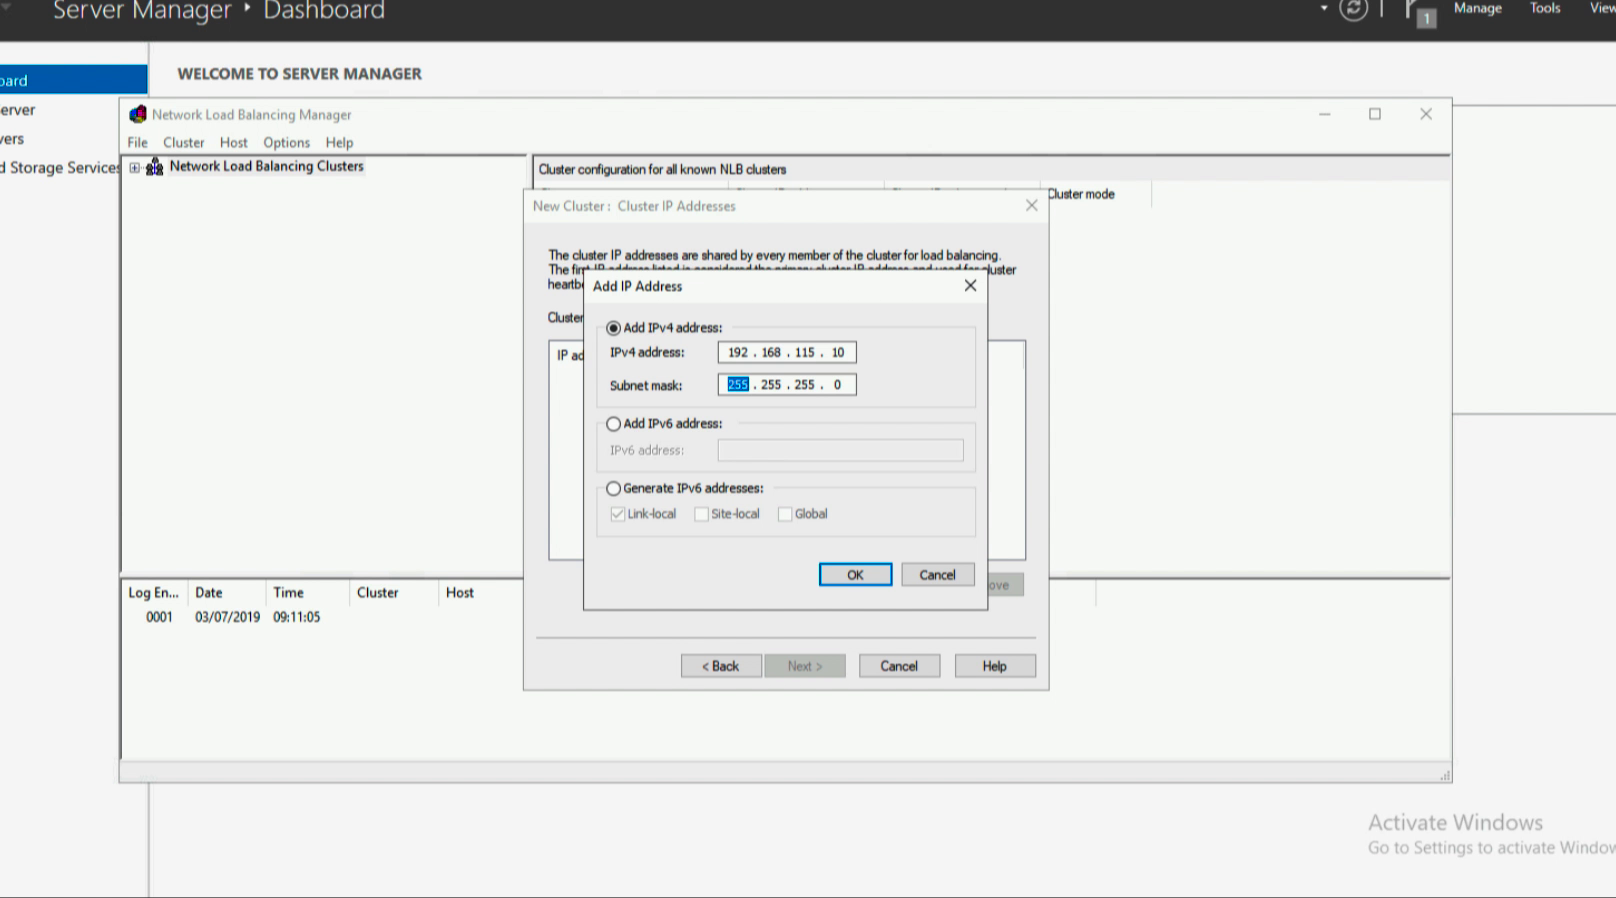
Add a ‘Cluster IP’, (this is the IP that you will connect to for services), and is the ‘Shared’ IP > OK > Next.
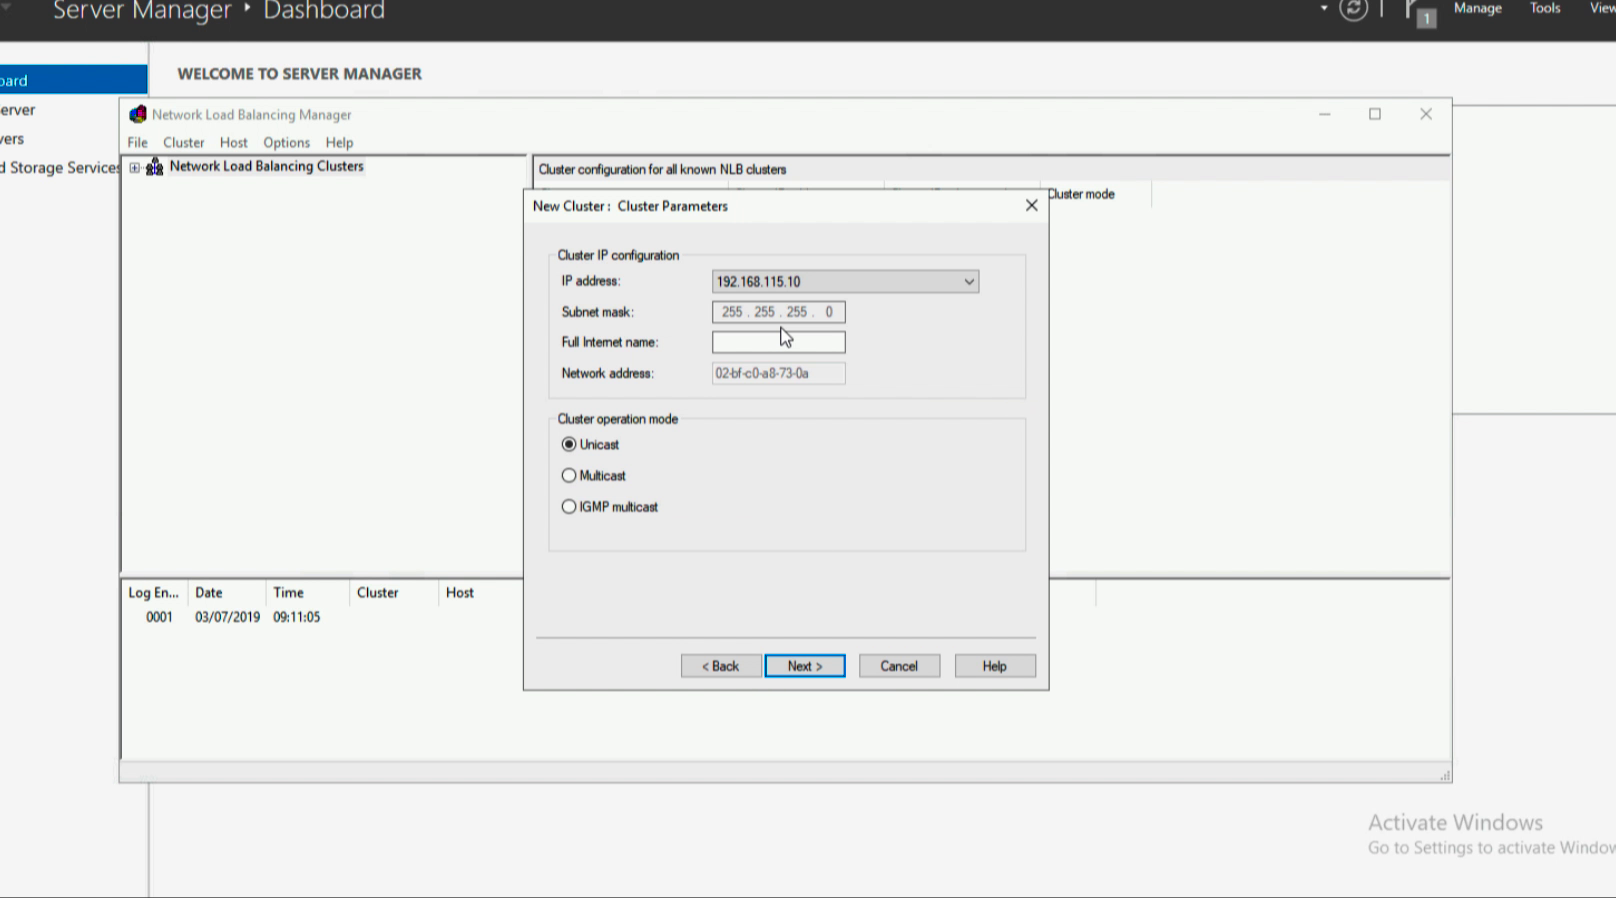
Next.
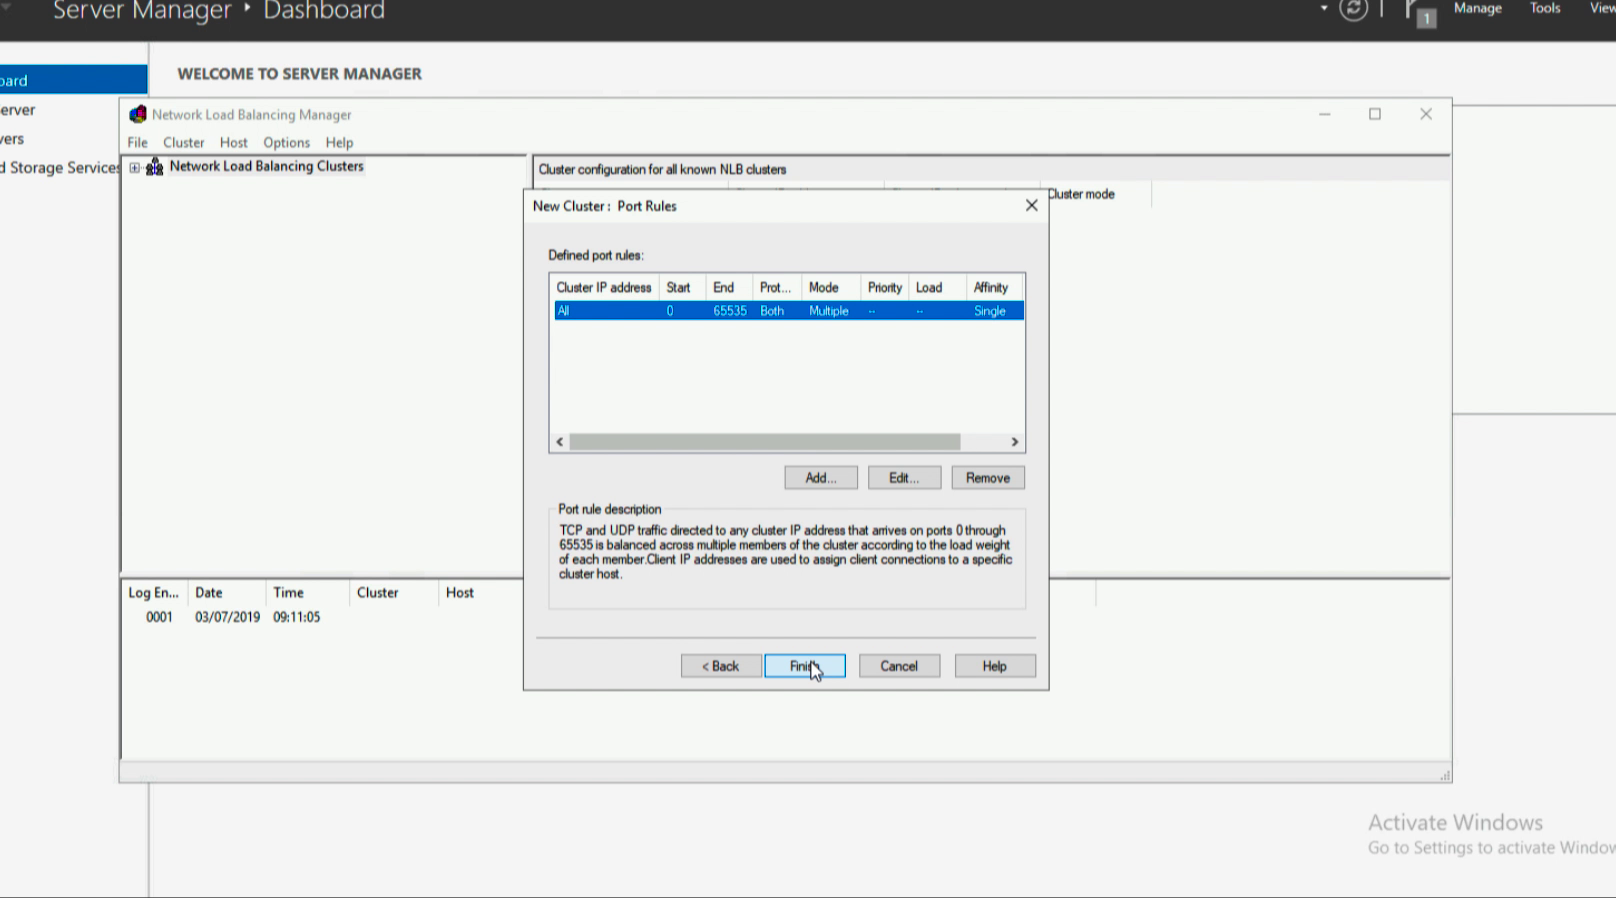
Next.
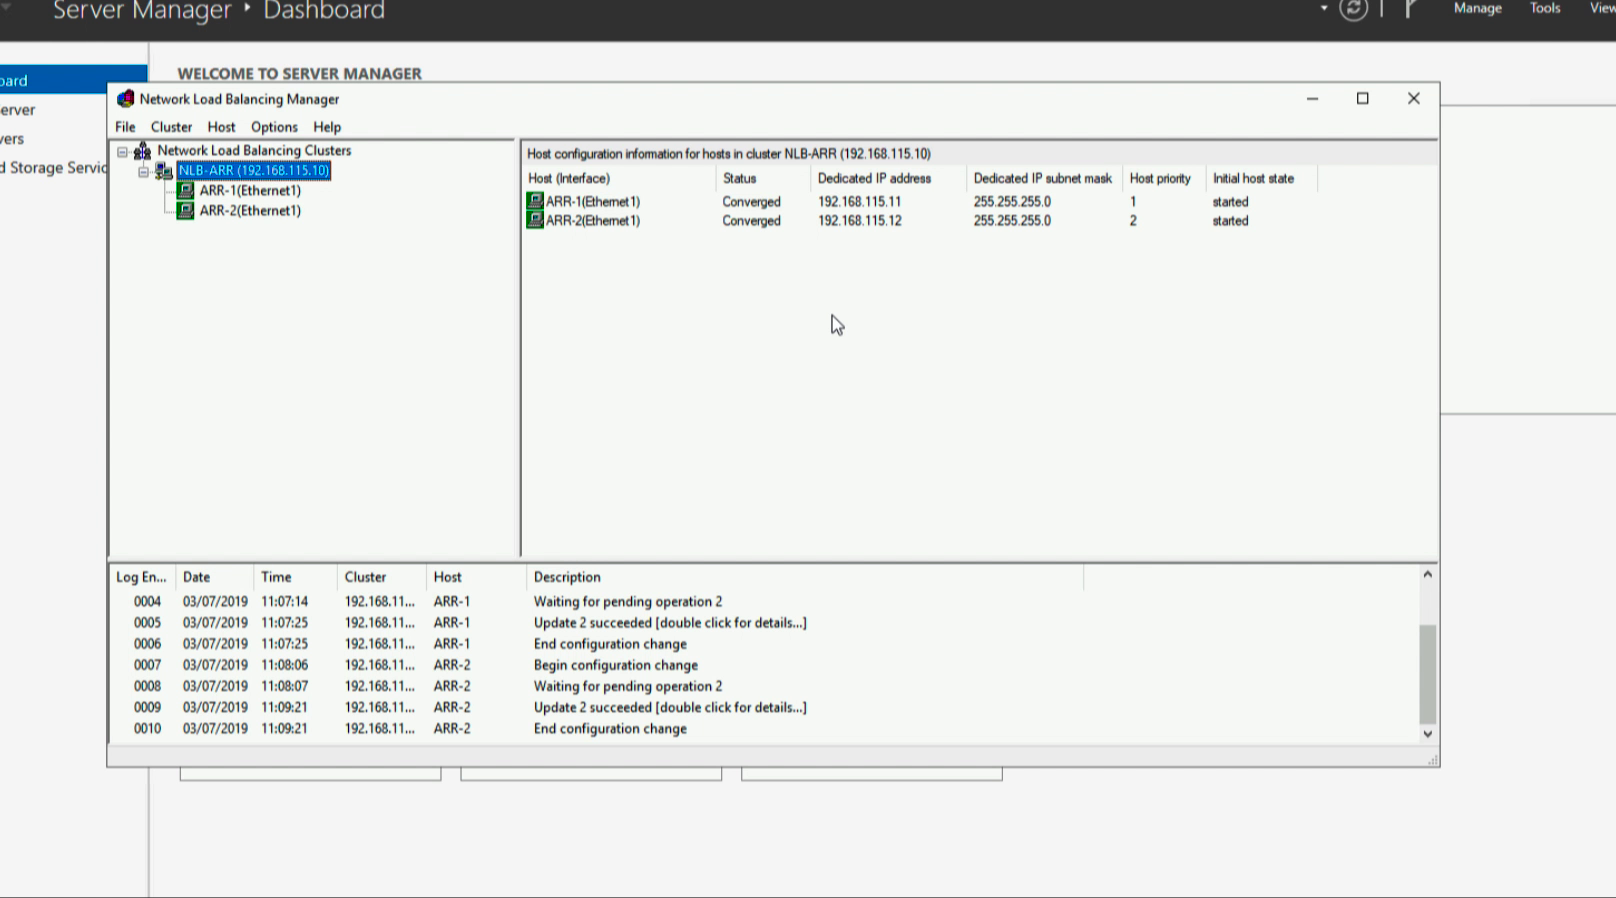
Repeat the procedure to add the additional IP(s).
You will need to make the NLB IP is ‘Publicly Available,’ and open HTTP/HTTPS as required. Also the ARR hosts will need HTTP/HTTPS (as required) open to the internal IIS servers. I usually test all that at this point.
Deploy ARR and ‘URLRewrite’ for Load Balancing
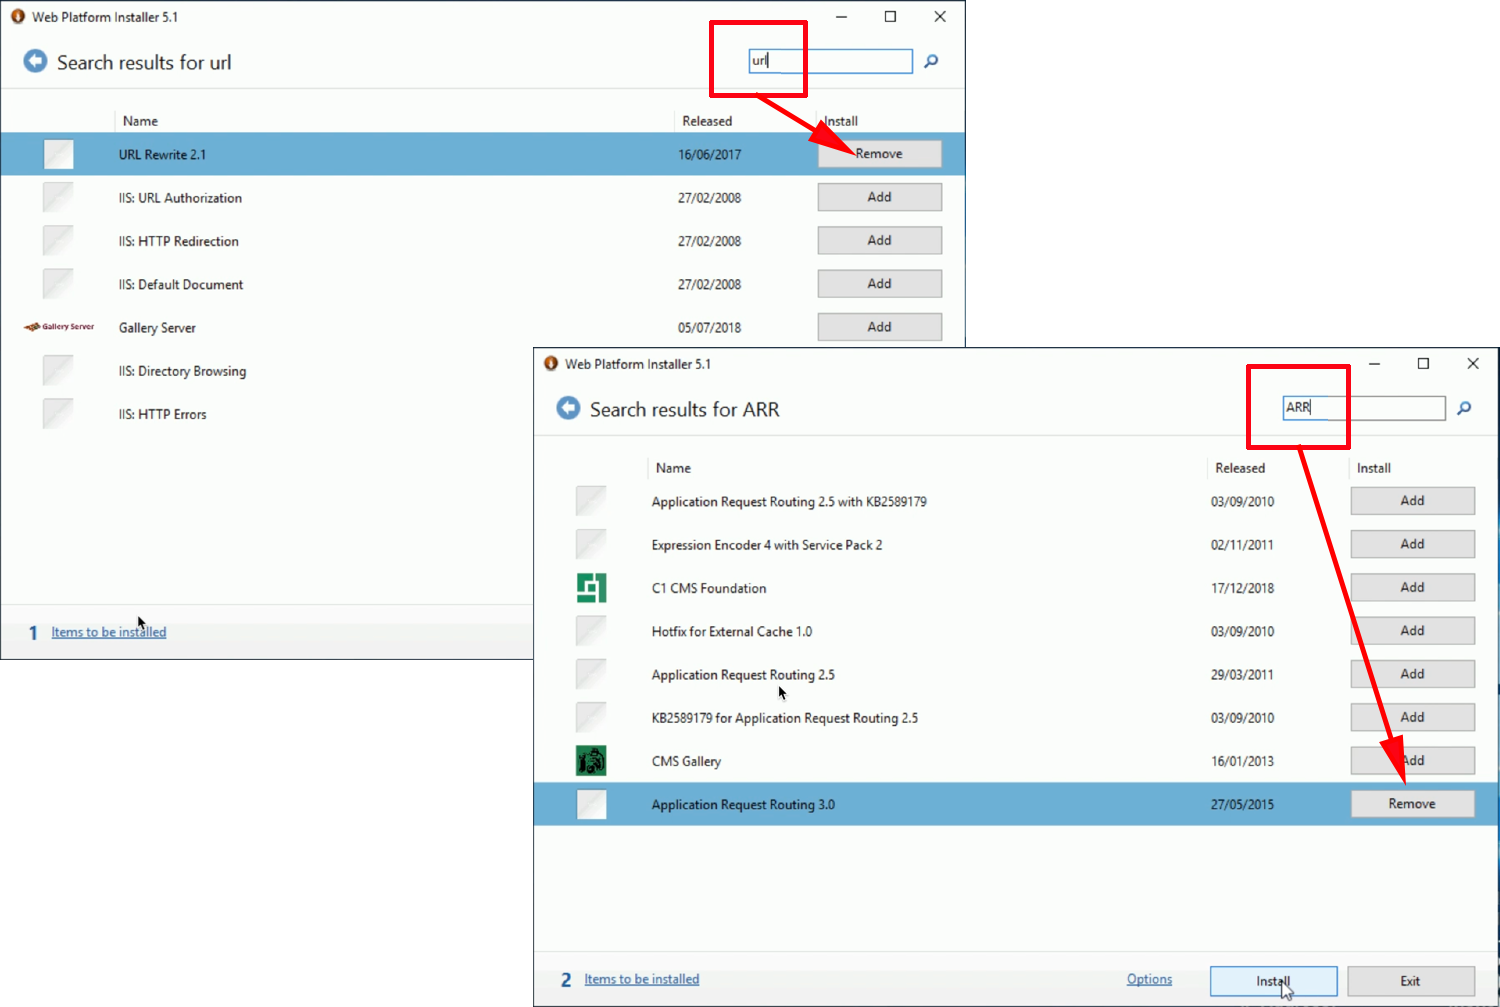
ARR and URL rewrite are both IIS components, but you don’t need to install IIS yourself. You can if you wish, and then install URL Rewrite THEN ARR (In that order!) But it’s much simpler to download and use the ‘IIS Web Platform Installer‘.
Launch the Web Platform Installer, and do a search for URL > Select URL Rewrite > Add > Repeat the process, searching for ARR, and add Application Request Routing version 3, (Not the 2.5 version at the top!) > Next > Follow the wizard and complete the install.
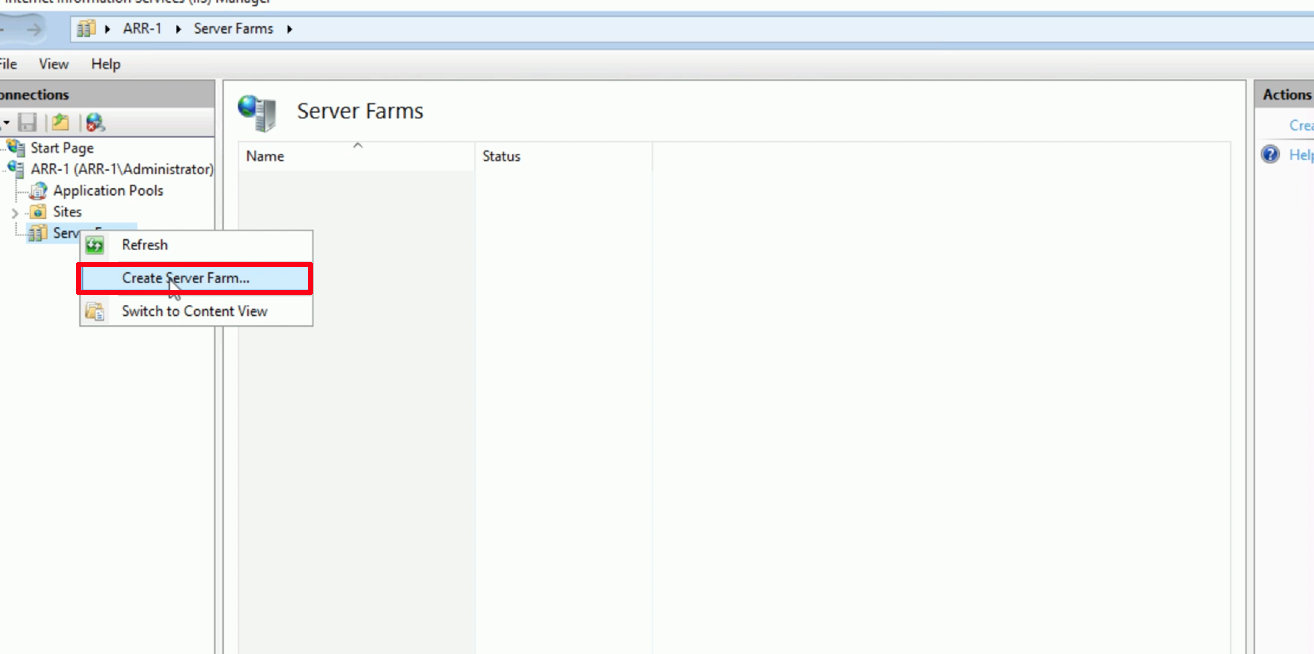
Launch IIS Manager > Now you will see you have a new option ‘Server Farm‘ > Create Server Farm.
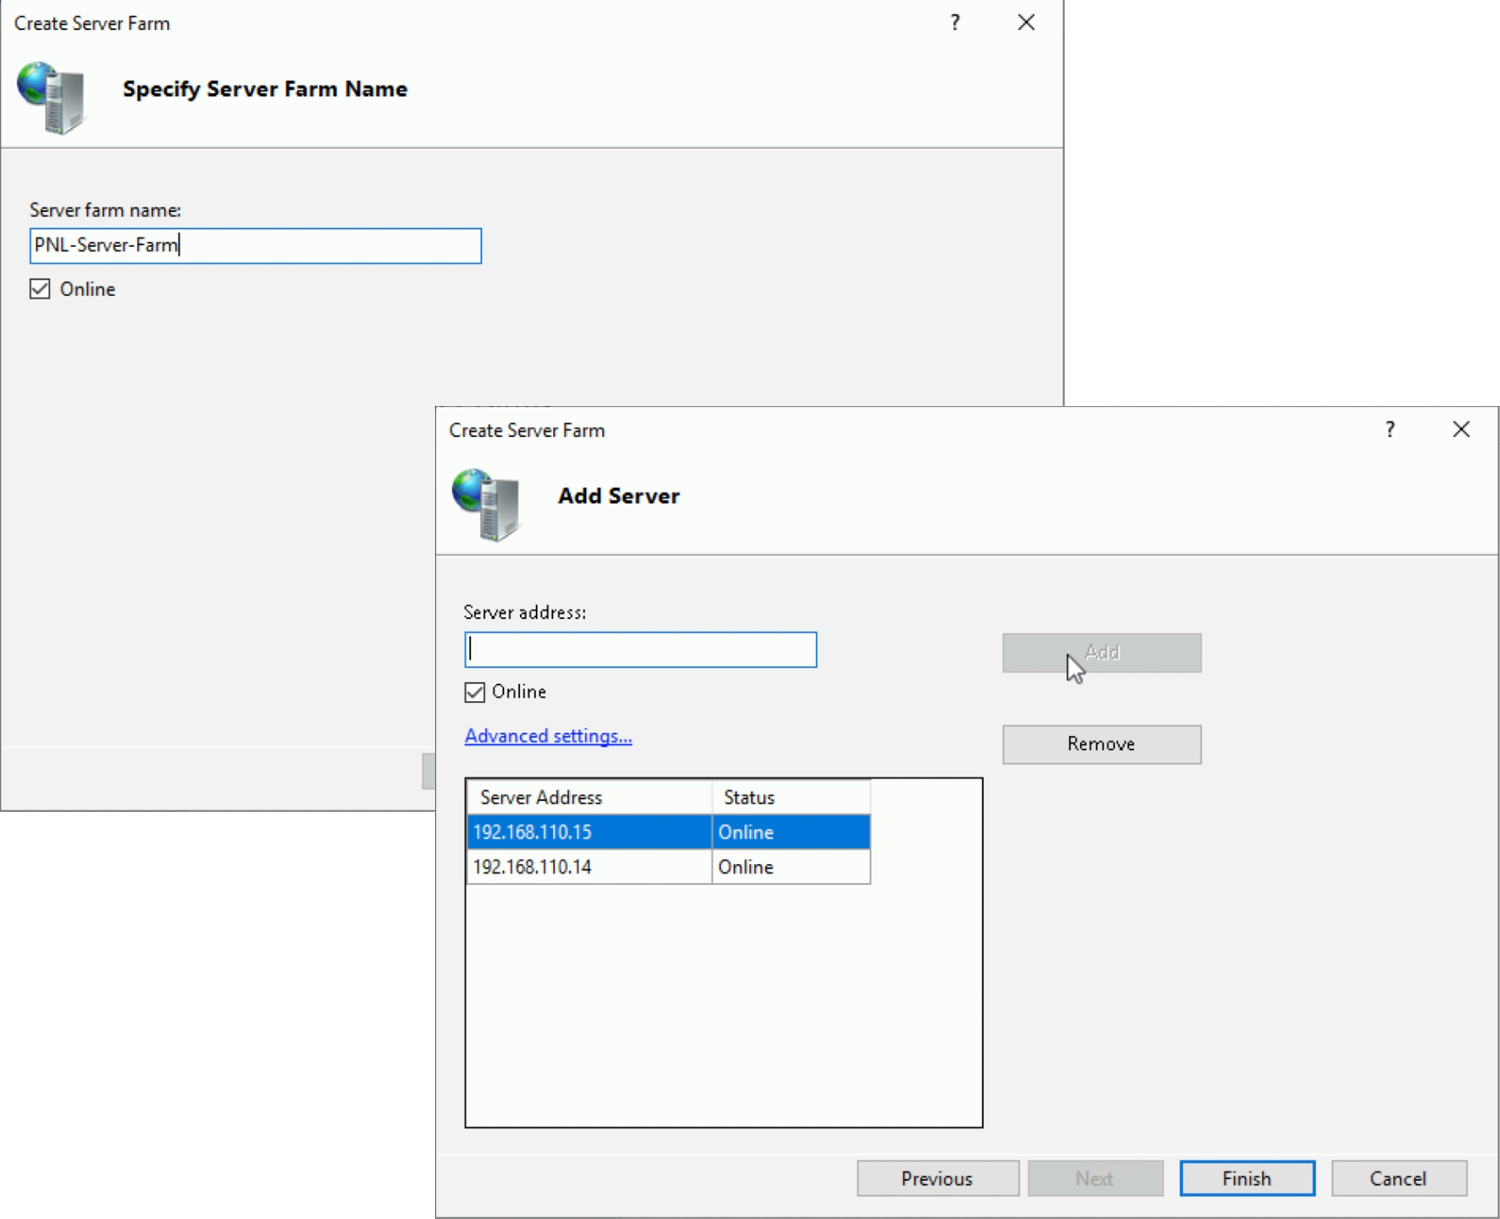
Give your server farm a name > Next > Add in all the ‘Back-end’ IIS servers > Finish.
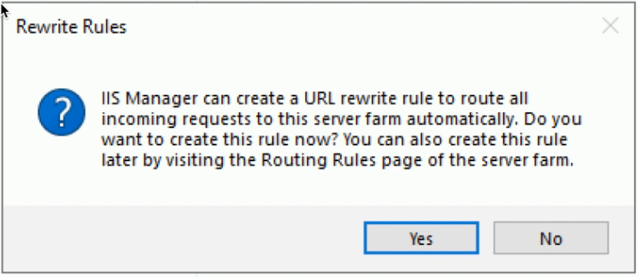
You will get a pop-up asking if you want to create a URL rewrite rule. In this case we want a simple rewrite rule as we are doing plain old load balancing and we have no special requirements, so Select YES. (Only click No if you have specific rewrite requirements and you want to set them up manually).
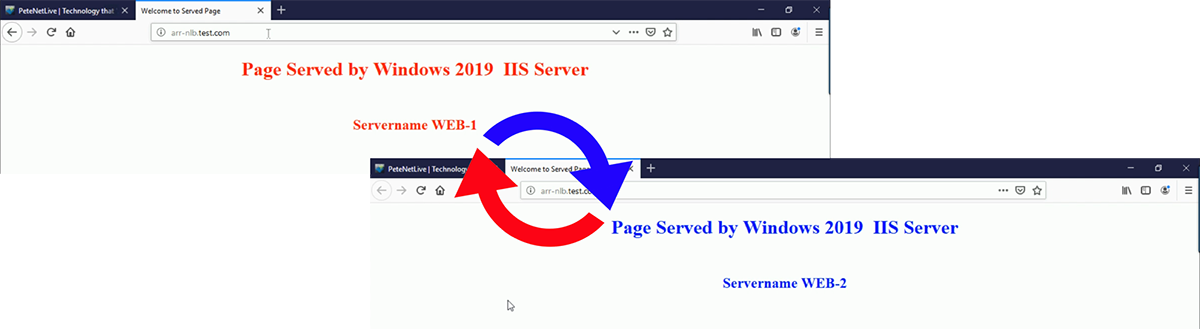
Now test externally. WARNING don’t expect the page to ‘flip over’ every time, remember ARR is caching these web requests, and your browser will also be performing web page cashing, use a couple of browsers and wait a minute or two between refreshes to make sure that all the web servers are being used!.
Related Articles, References, Credits, or External Links
NA