
KB ID 0001524
Problem
Like many protocols and solutions, DNS was designed in a time when we all trusted each other, and a ‘hacker’ was some sort of farm equipment. To ensure when you get a response form a DNS server it is coming from where you expect it to, and you can trust it. We use DNSSEC. Basically it signs the DNS record with a digital cypher.
The client can then validate the DNS record when it receives it and it knows its not been ‘tampered’ with.
Solution
DNSSEC – Digitally Sign a DNS Zone
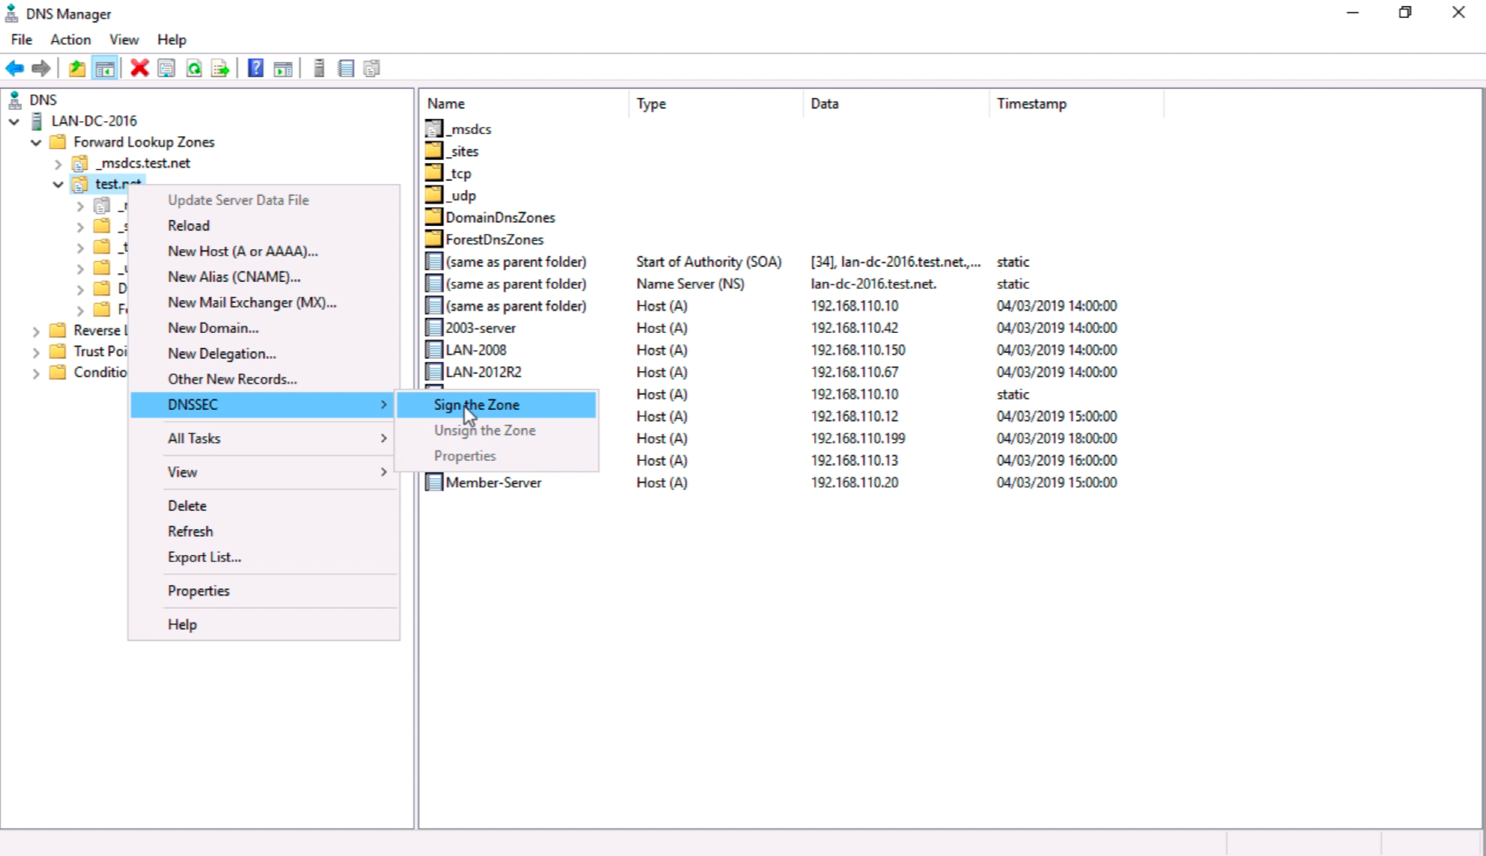
From DN Manager, locate the one you wish to secure with DNSSEC > Right Click > DNSSEC > Sign the Zone.
Next > Accept the default ‘Customise zone signing parameters’ > Next. >The DNS Server {Server-Name} is the Key Master.
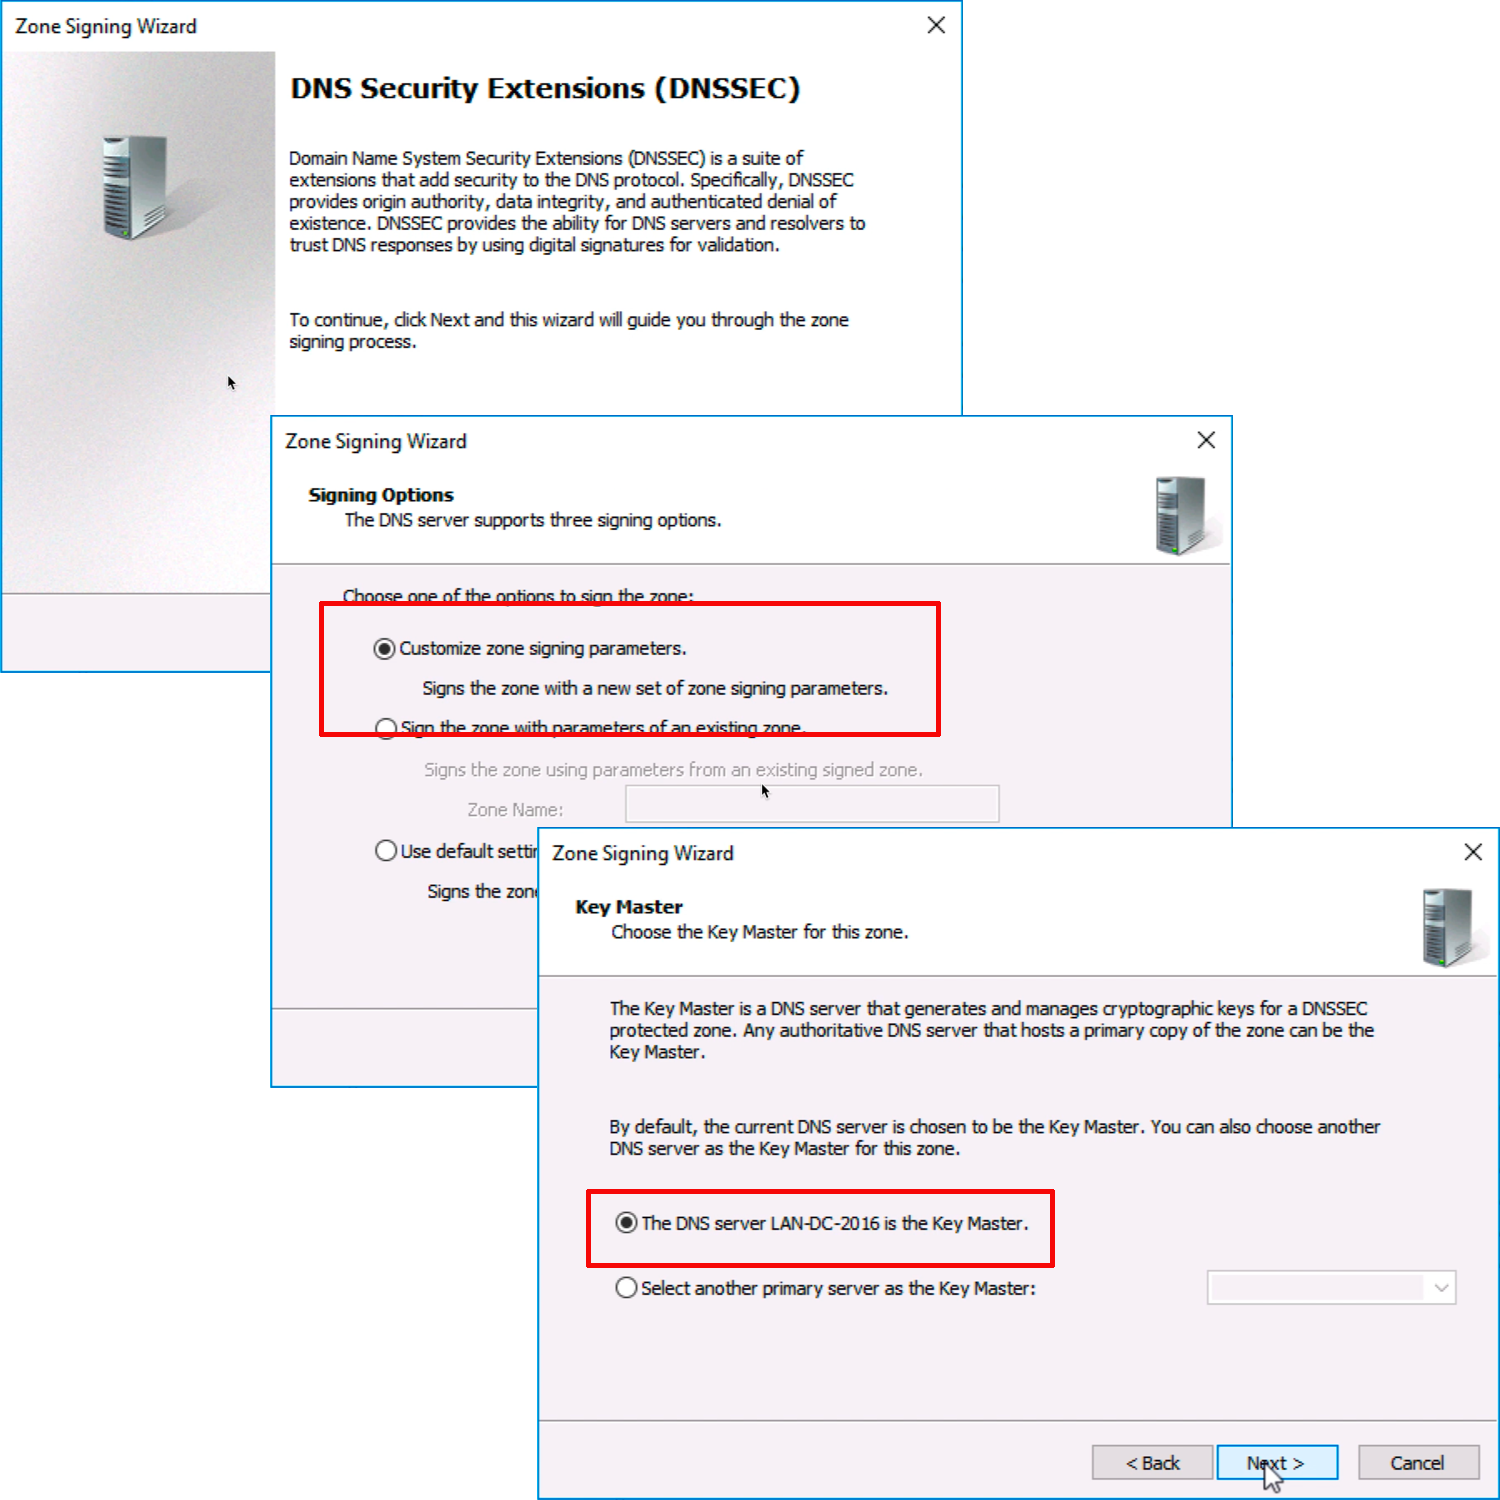
Note: You will only have one Key Master, as this is the first DNS DNSSEC server you will configure, it selects the local host by default.
Next > Add > Accept tech defaults > OK.

Note: KSK (Key Signing Key) is the MASTER public/private key pair that Weill be used to sign the ZSK (Zone Signing Key).
Next > Next > Add > Again accept the defaults > OK.
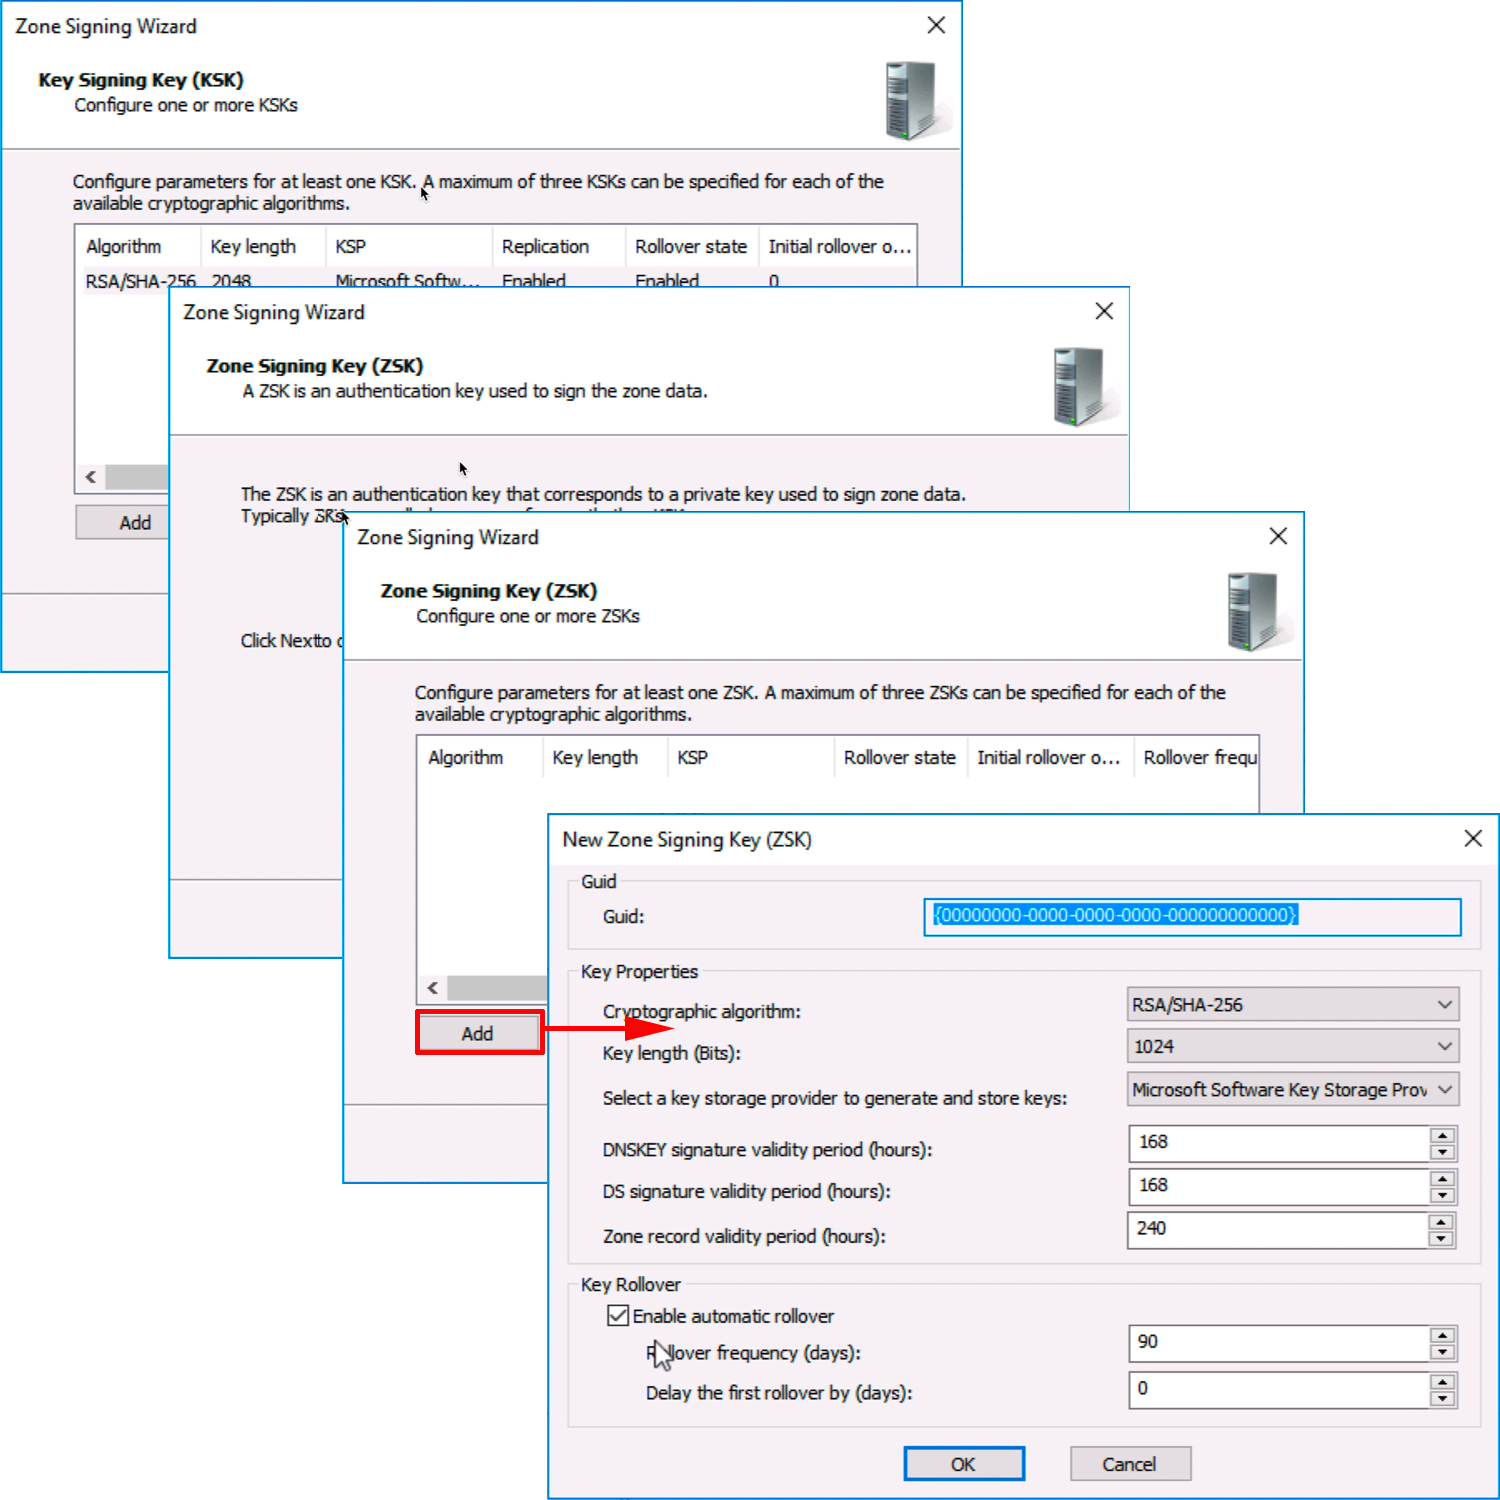
Note: ZSK (Zone Signing key) is the public/private key pair that will be used to sign and produce RRSIG (Resource Record Signatures), These will be used to sign the each of the records in an RRSET (Resource Record Set).
Next > Use NSEC3 > Next > Select ‘Enable the distribution of trust anchors for this zone’ > Next
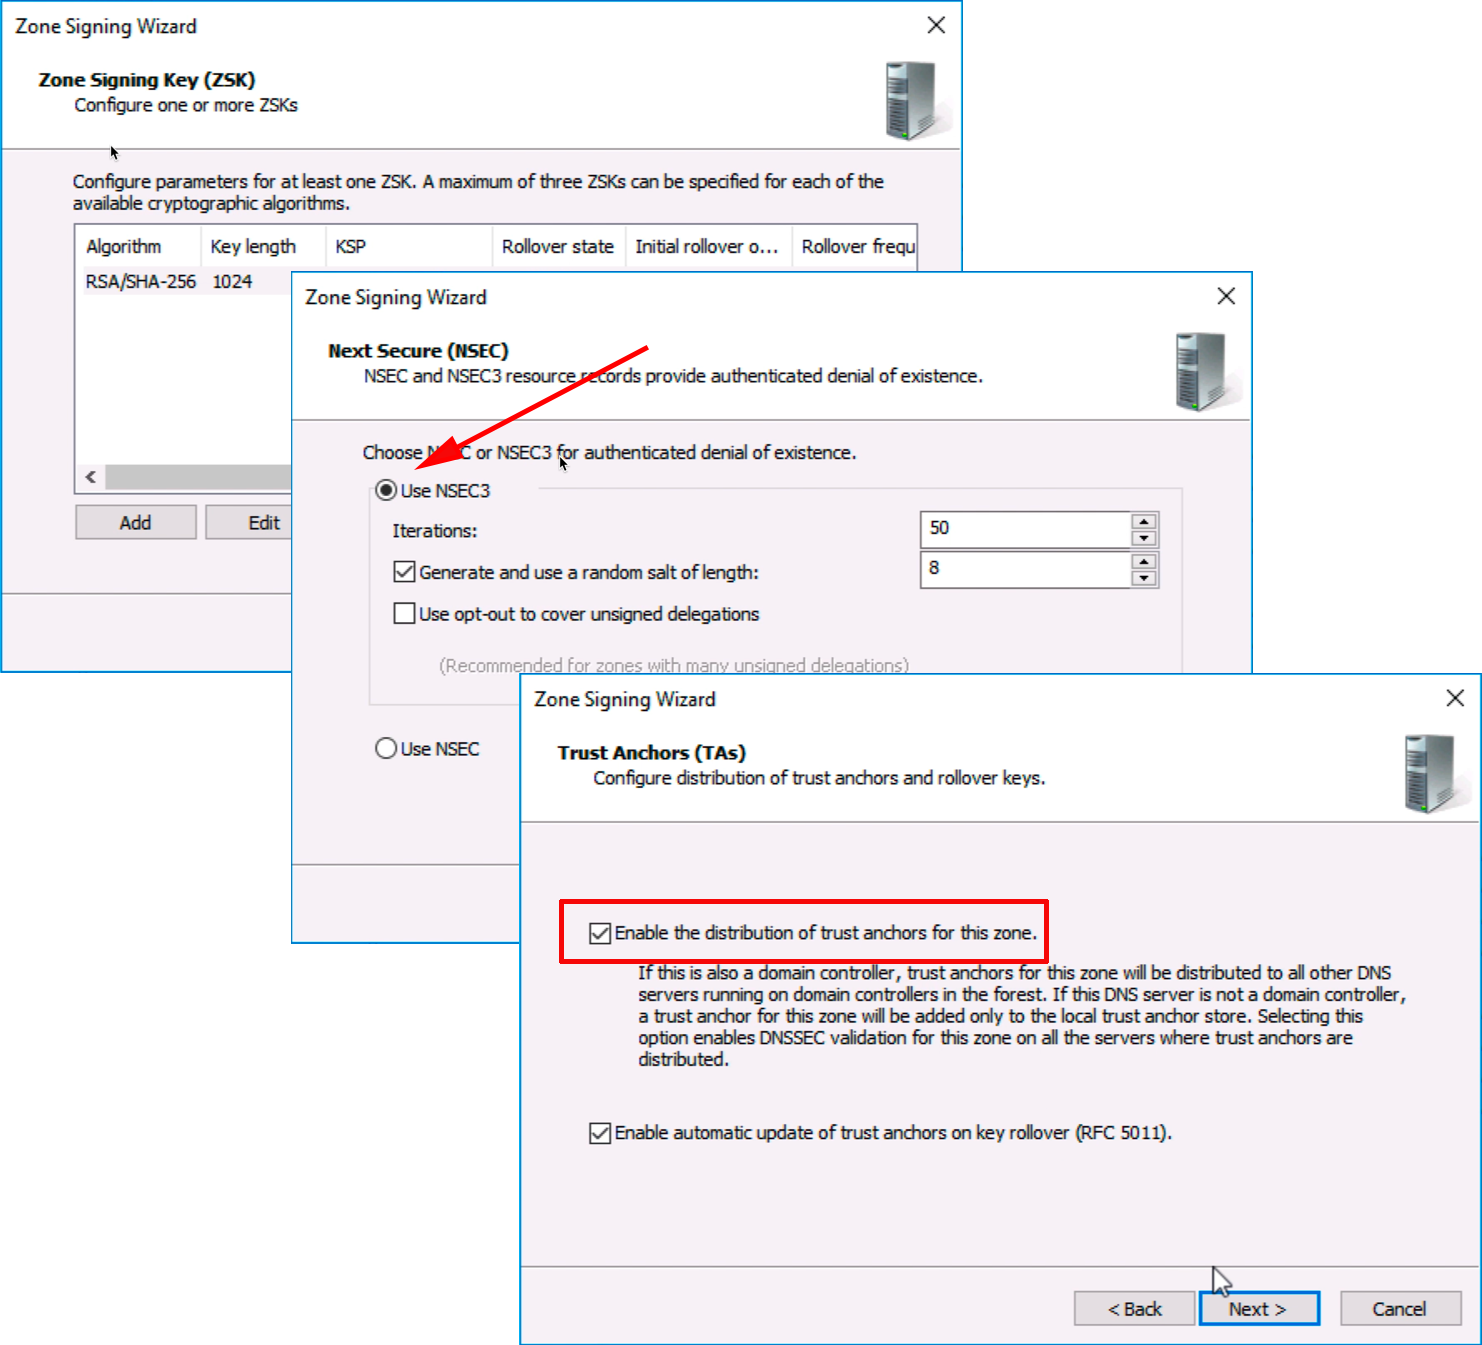
Note: NSEC3 (and NSEC which is older and less secure), is a method of digitally signing a response for a record that does NOT EXIST in a zone.
Note: Trust Anchor This is basically a DNS record that says ‘Trust me, and everything above me”.
Next > Next > Finish.
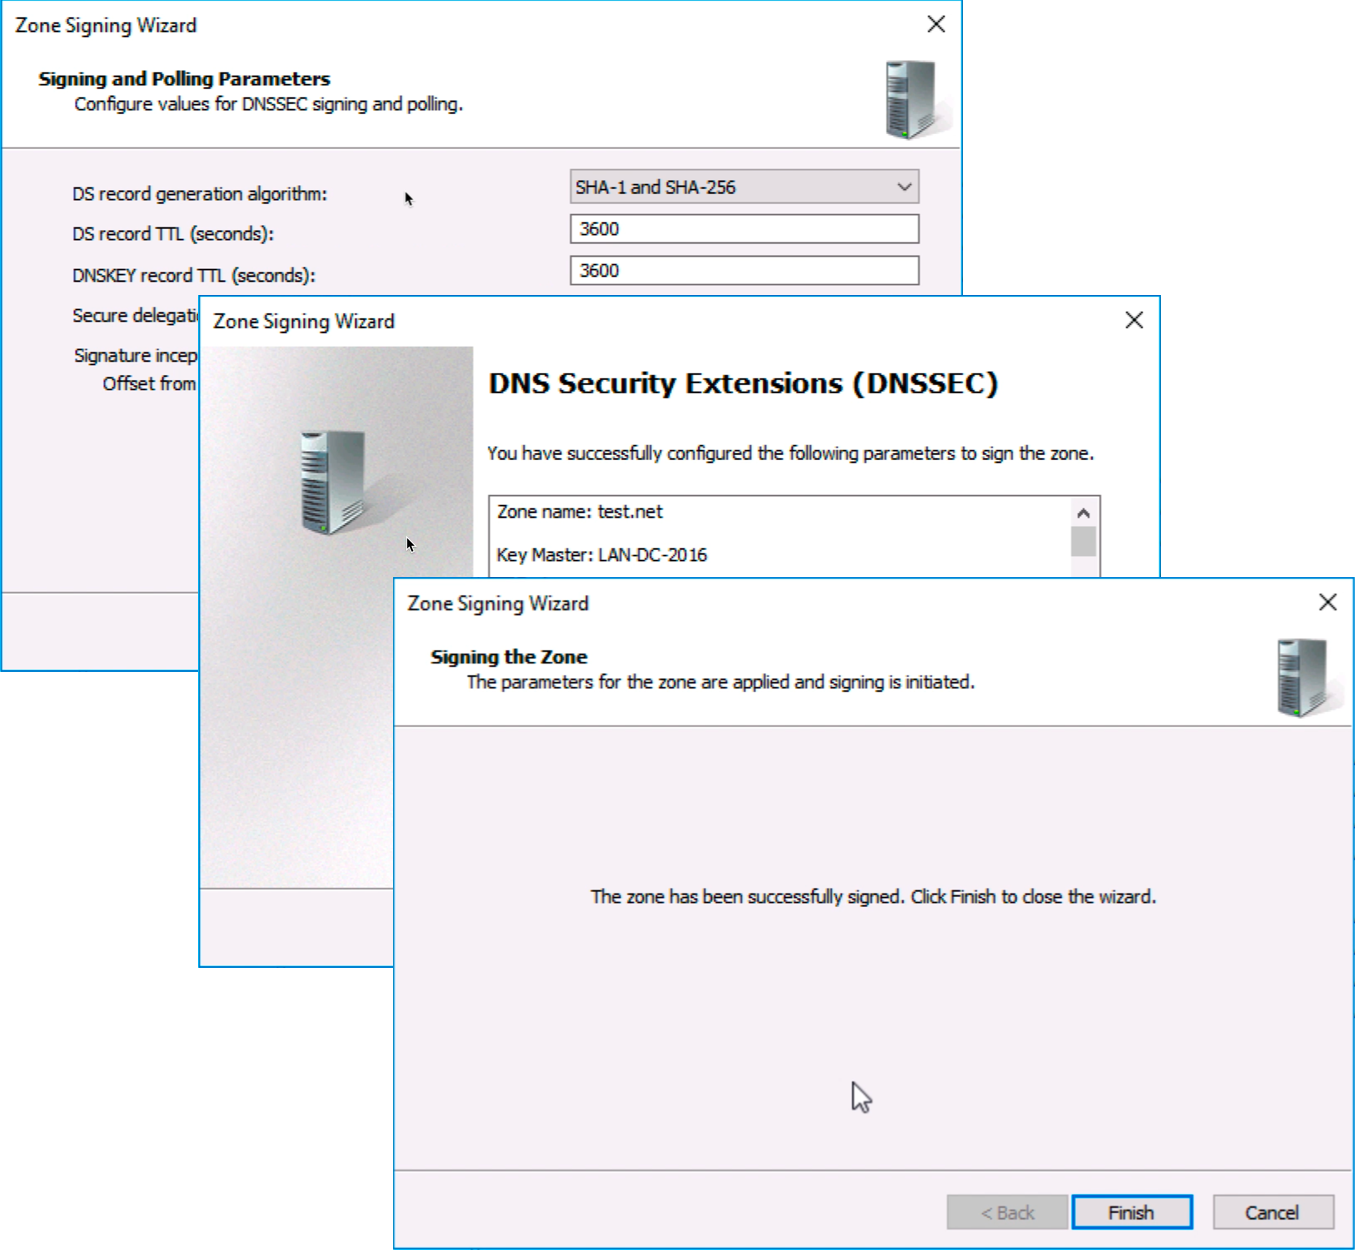
Thats the DNS Zone signed. Now you need to tell your clients they need to ‘Validate’ their DNS requests this is simply done with a Group Policy.
Deploy a DNSSEC Name Resolution Policy
Create a GPO object (or edit an existing one), and link it to the location where your ‘Computers’ are (or simply the root of the domain).
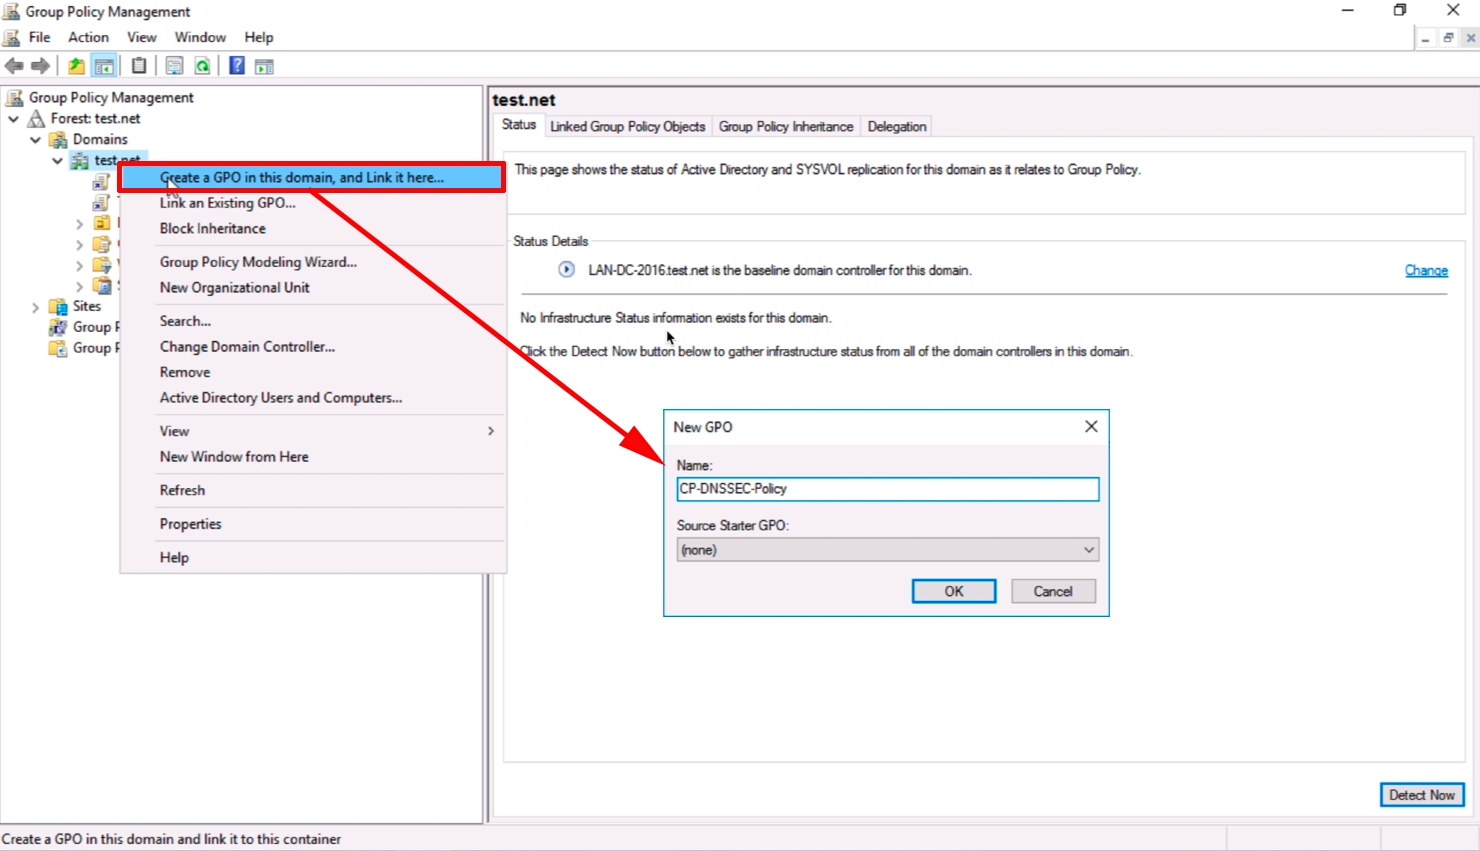
Navigate to;
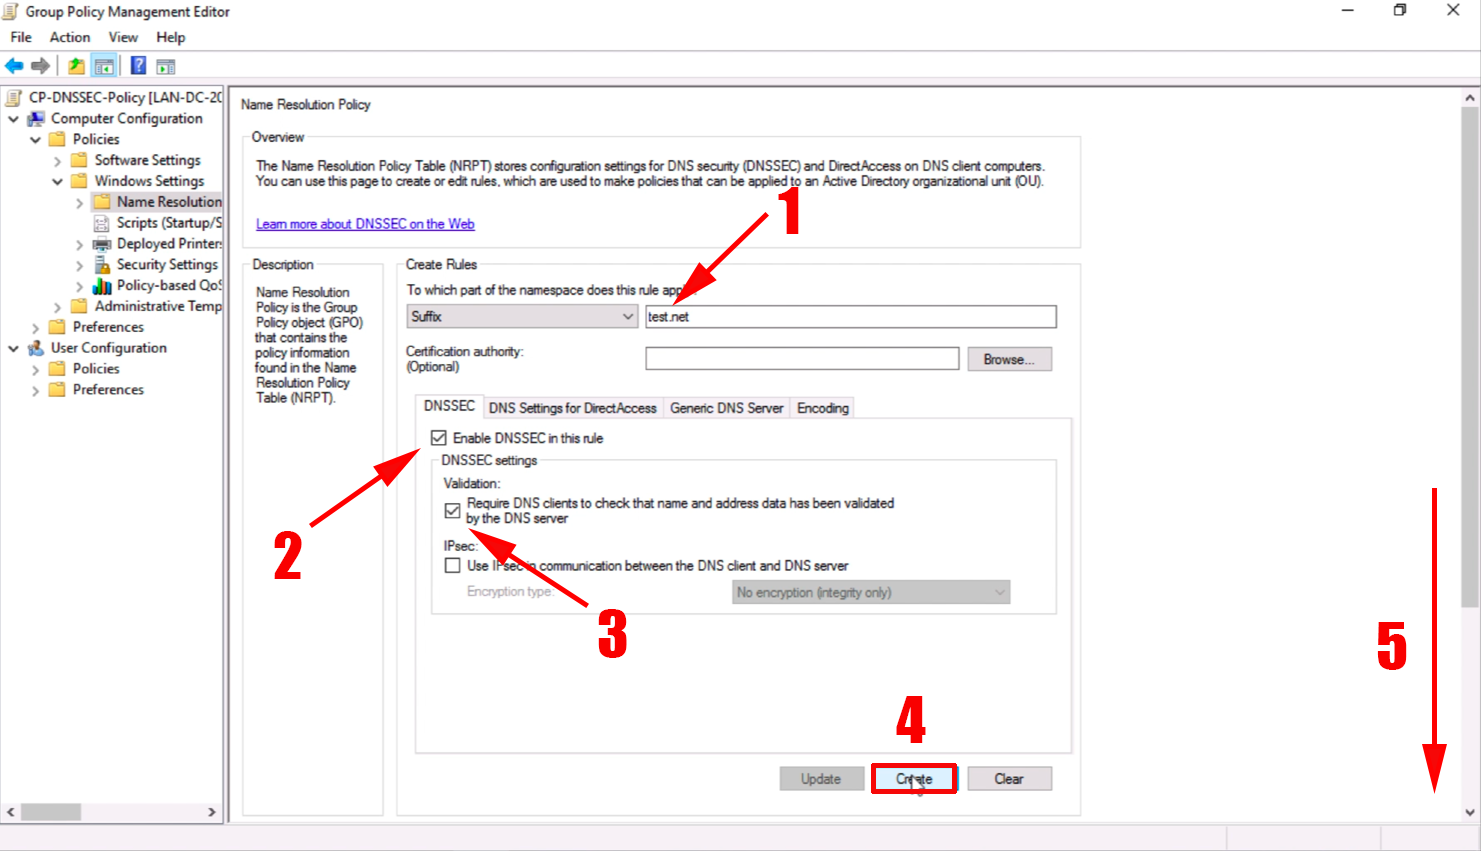
Computer Configuration > Policies > Window Settings > Name Resolution Policy
After ‘Suffix’ enter your domain name > Tick ‘Enable DNSSEC in this rule’ > Tick ‘Require DNS clients to check…’ > Create > Scroll Down.
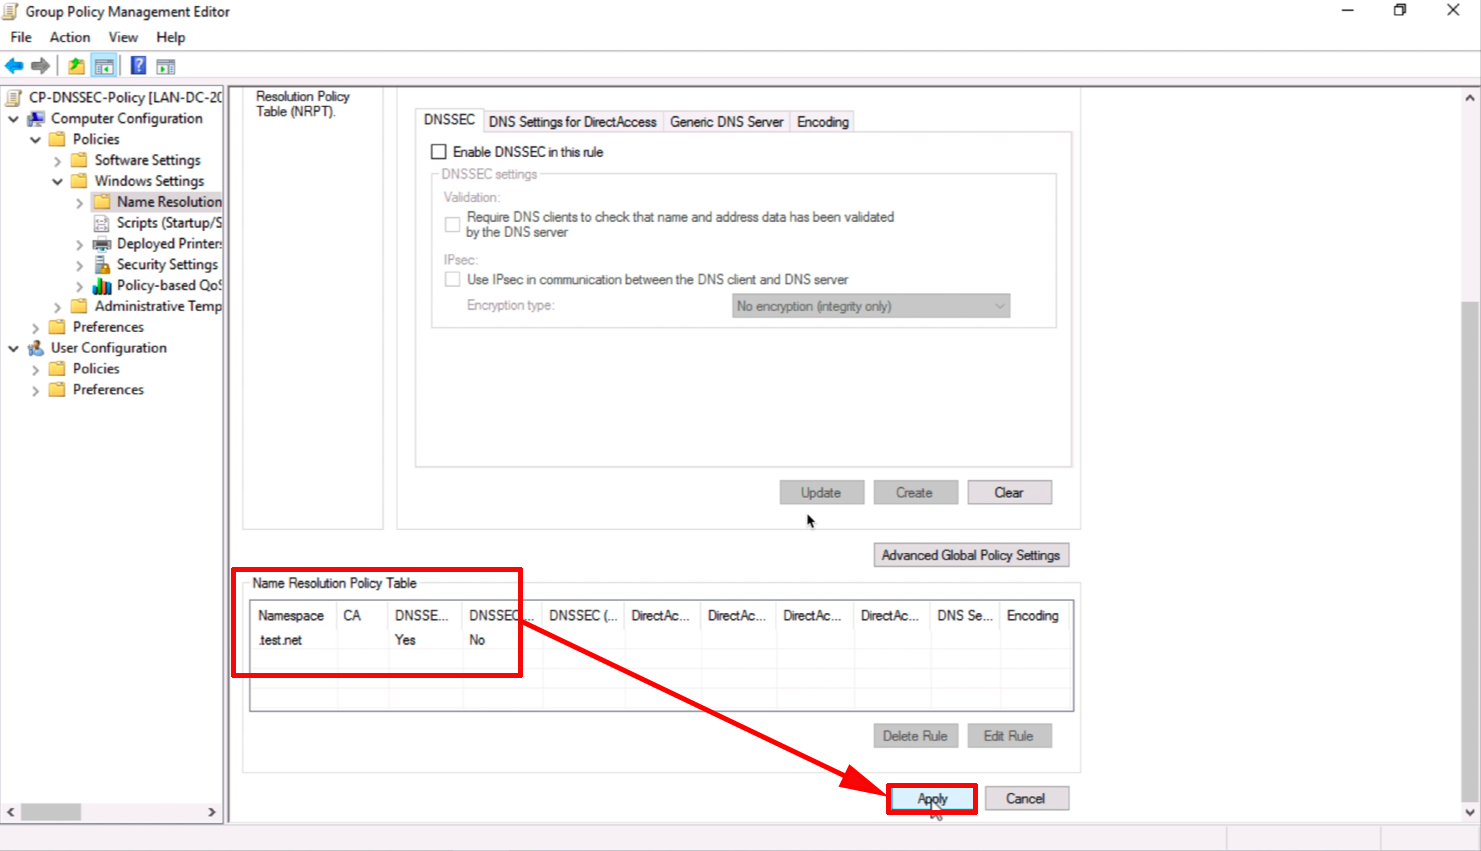
Ensure it’s been added to the Name Resolution Policy Table > Apply.
Then wait or Force Group Policy.
Testing & Troubleshooting DNSSEC
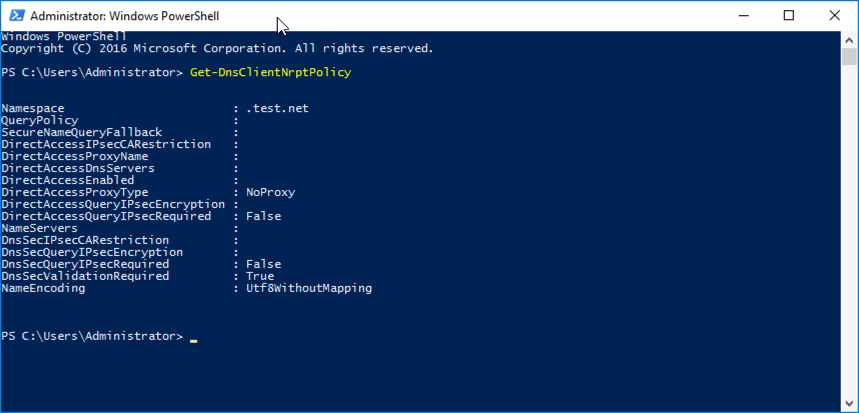
Ensure clients have the correct Name Resolution Policy Table, with the following PowerShell Command;
Get-DnsClientNrptPolicy
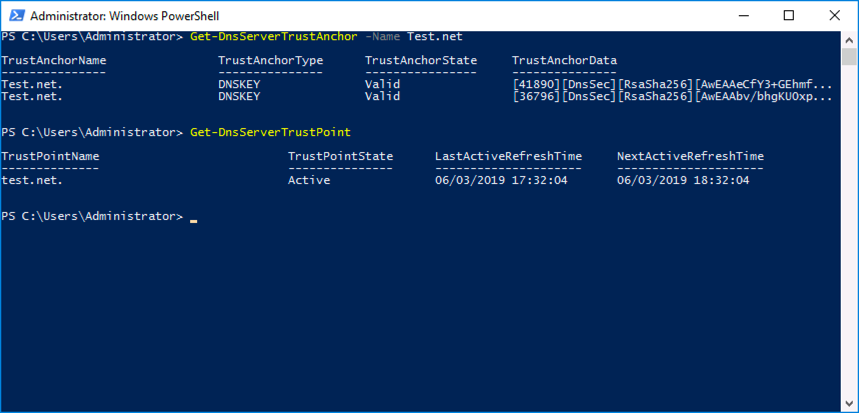
To check the ‘Trust Anchors’ and ‘Trust Points”.
Get-DnsServerTrustAnchor -Name Test.net

Get-DnsServerTrustPoint
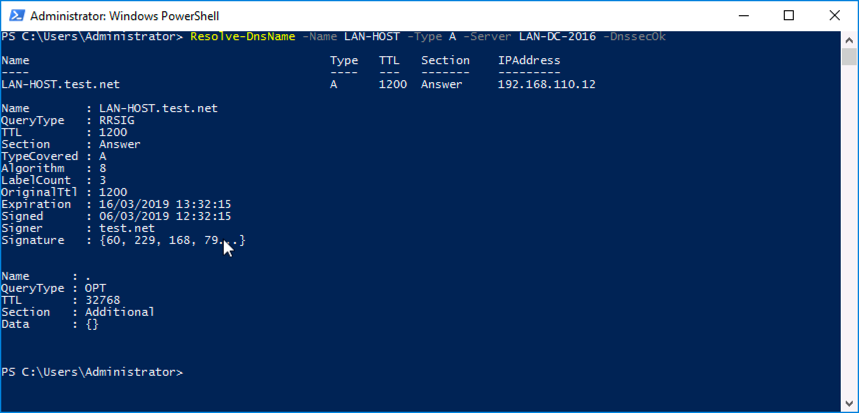
And to ensure that records are actually getting signed, use the following syntax;
Resolve-DnsName -Name lan-host -Type A -Server lan-dc-2016 -DnsSecOK
Related Articles, References, Credits, or External Links
NA