
KB ID 0001514
Problem
Back in PART ONE, we setup our Azure Site Replication Server, now we create a “Replication Policy“, and perform a test failover. In addition to the pre-requisites we needed before to perform the following steps, we will also require you to create a “Storage Account” in your Azure Subscription.
Solution
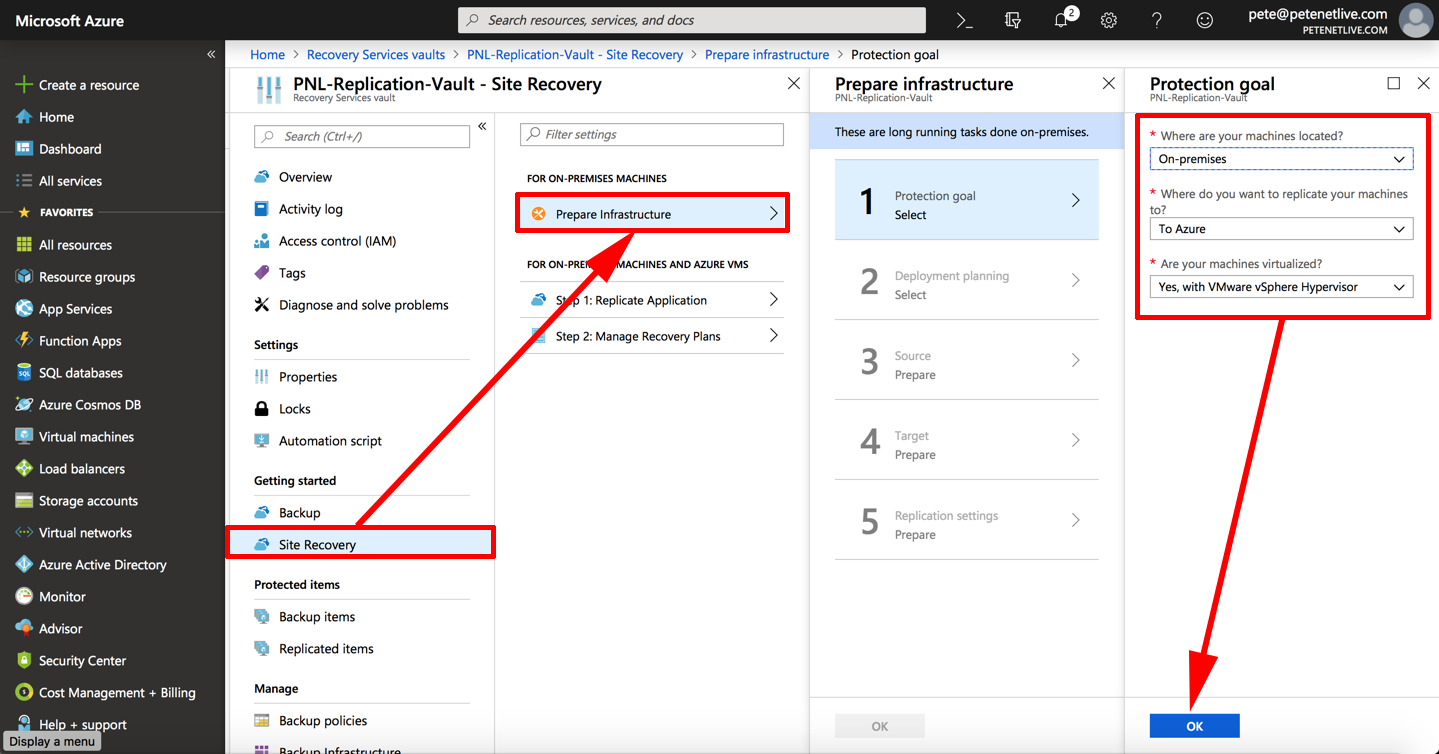
Locate the Replication Vault we already created > SiteRecovery > Prepare Infrastructure > Set your requirements > OK.
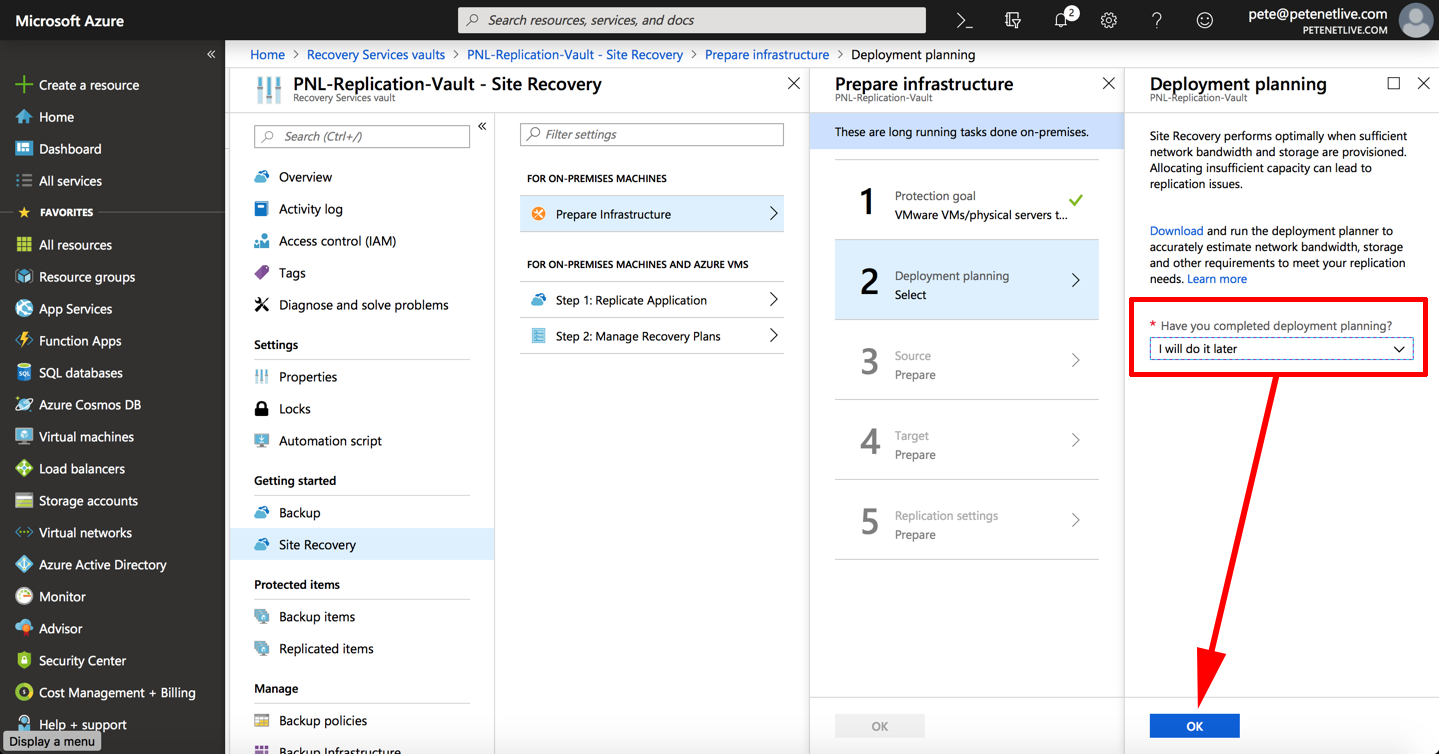
I have not run the deployment planner, this is a PowerShell tool that will give you some stats on what your replication performance will be like, with your VMs and internet connection. I am simply putting “I will run it later: > OK.
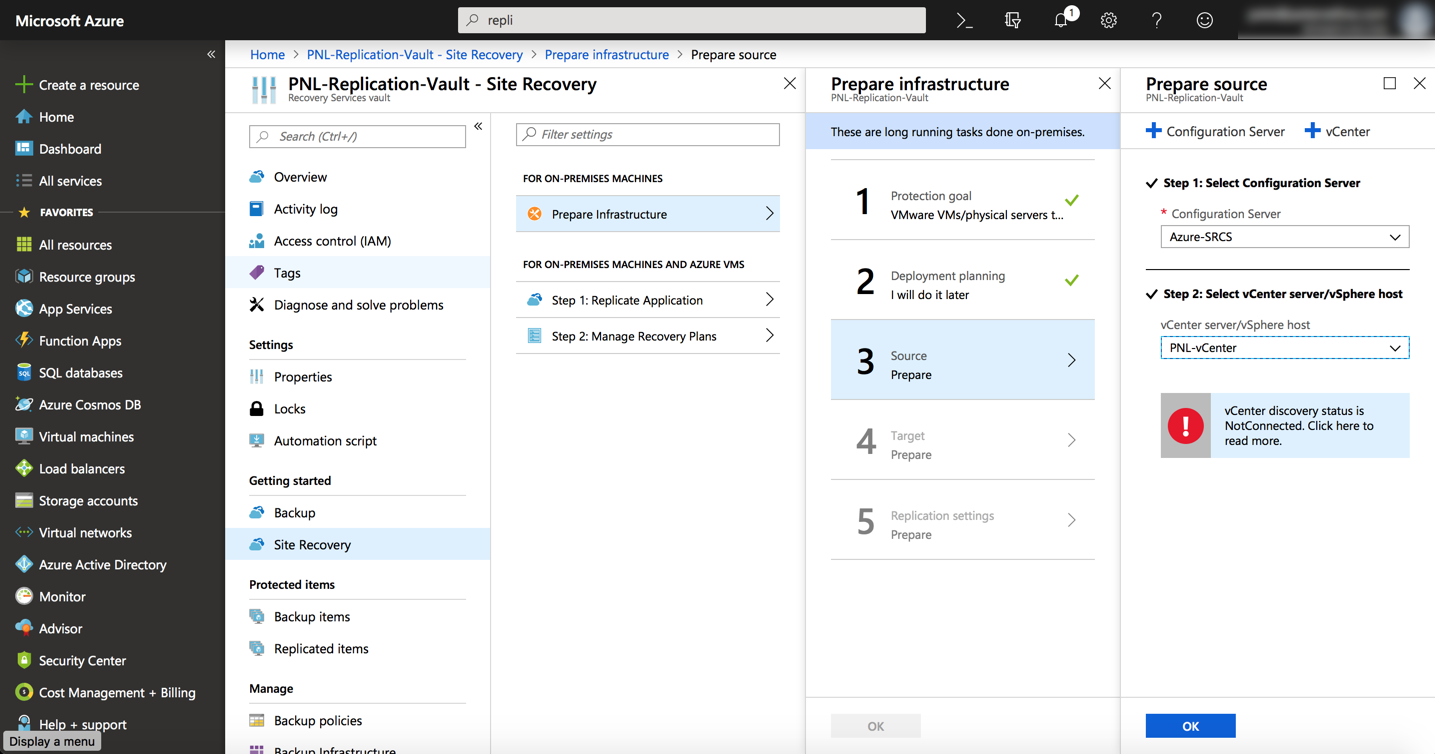
Select your onsite Configuration Server > Select your vCenter/Hyper-V server > OK.
Note: I was worried about the “vCenter discovery status is NotConnected Click here to read more” Notice, but everything worked OK?
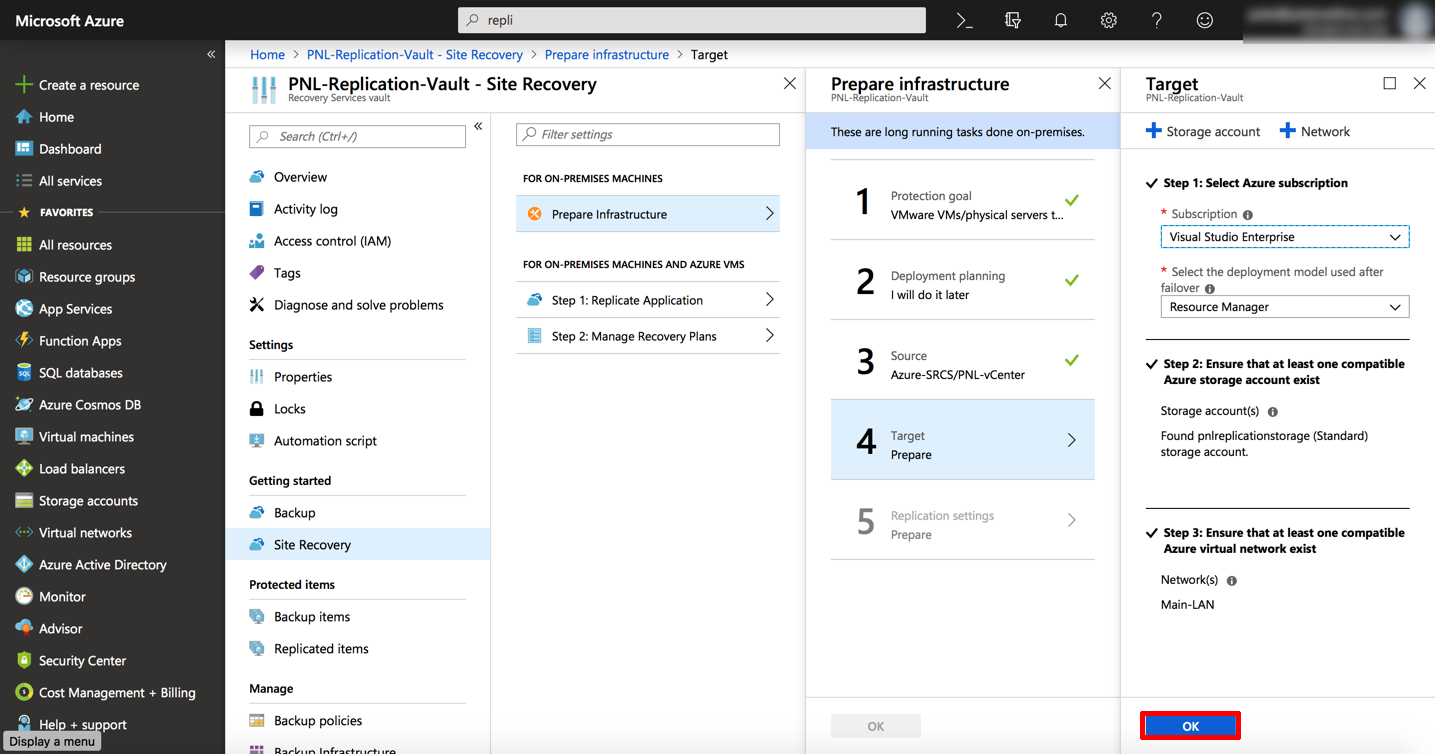
Select your Storage Account > and LAN/Subnet > OK.
Azure Create an ASR Replication Policy
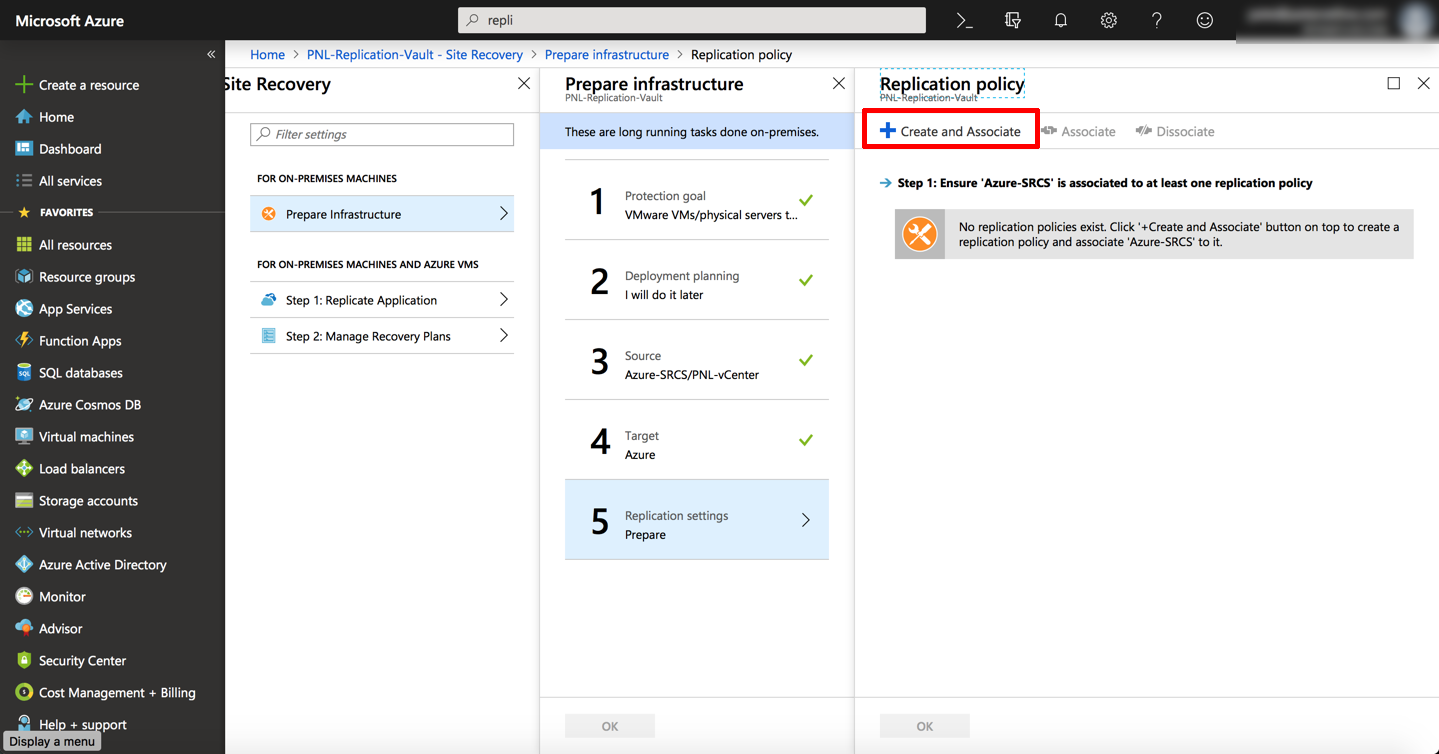
Create and Associate.
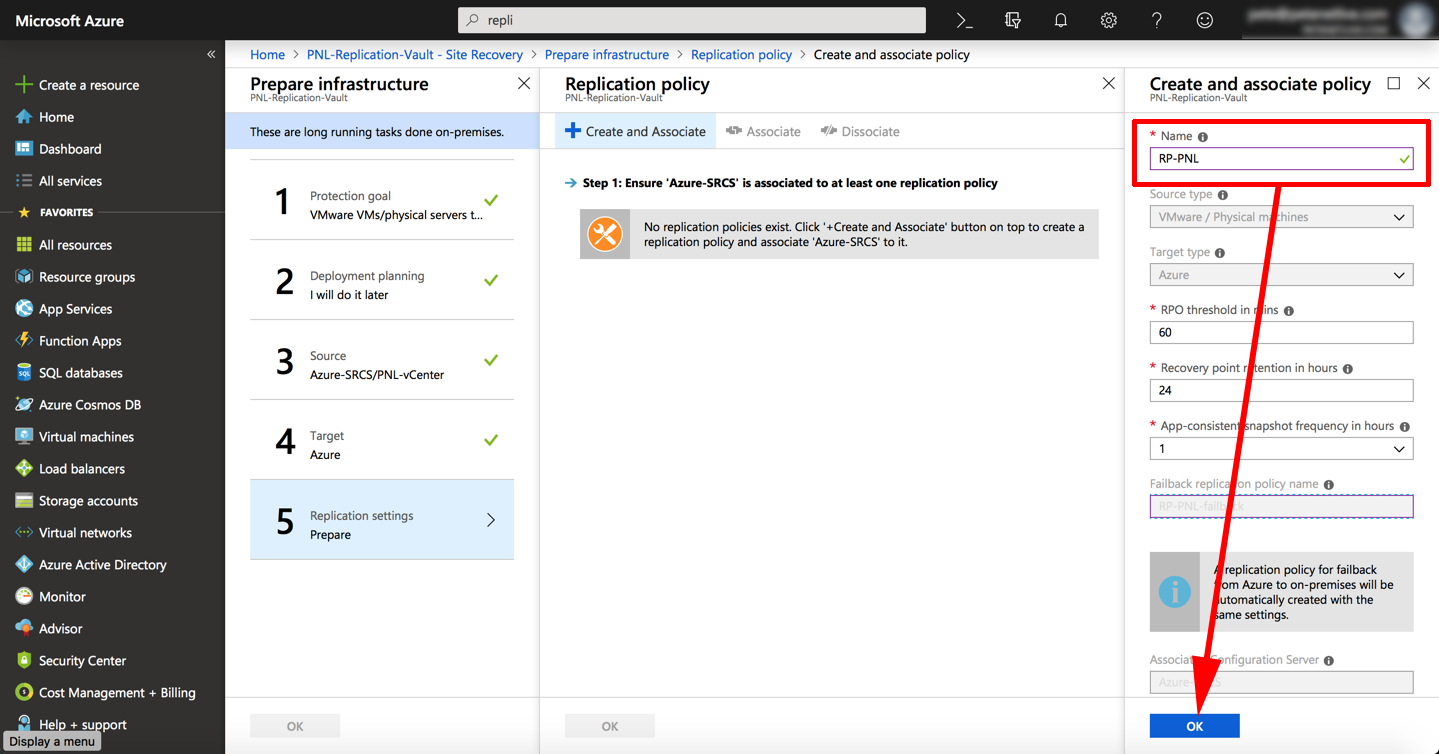
Give the policy a name (accept the defaults) > OK.
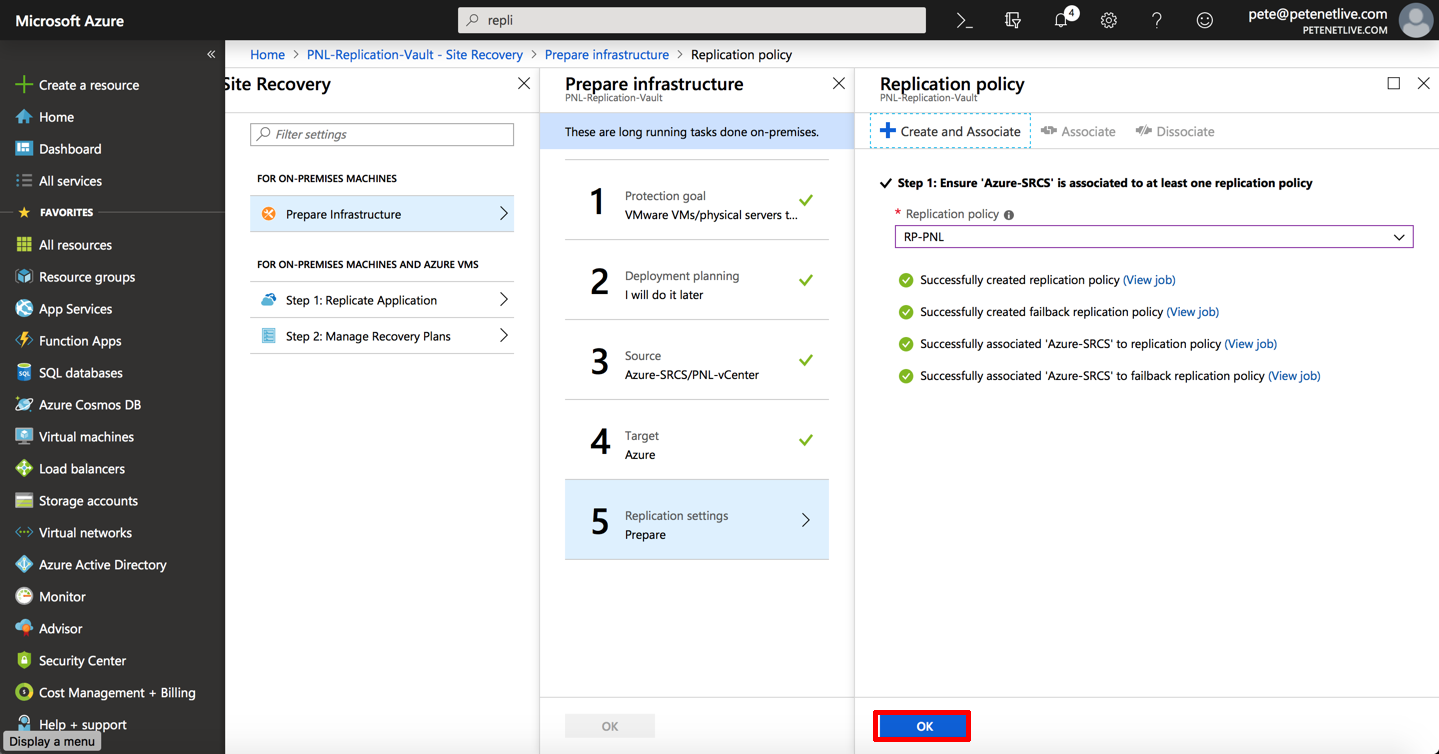
Once you are “all-green” > OK.
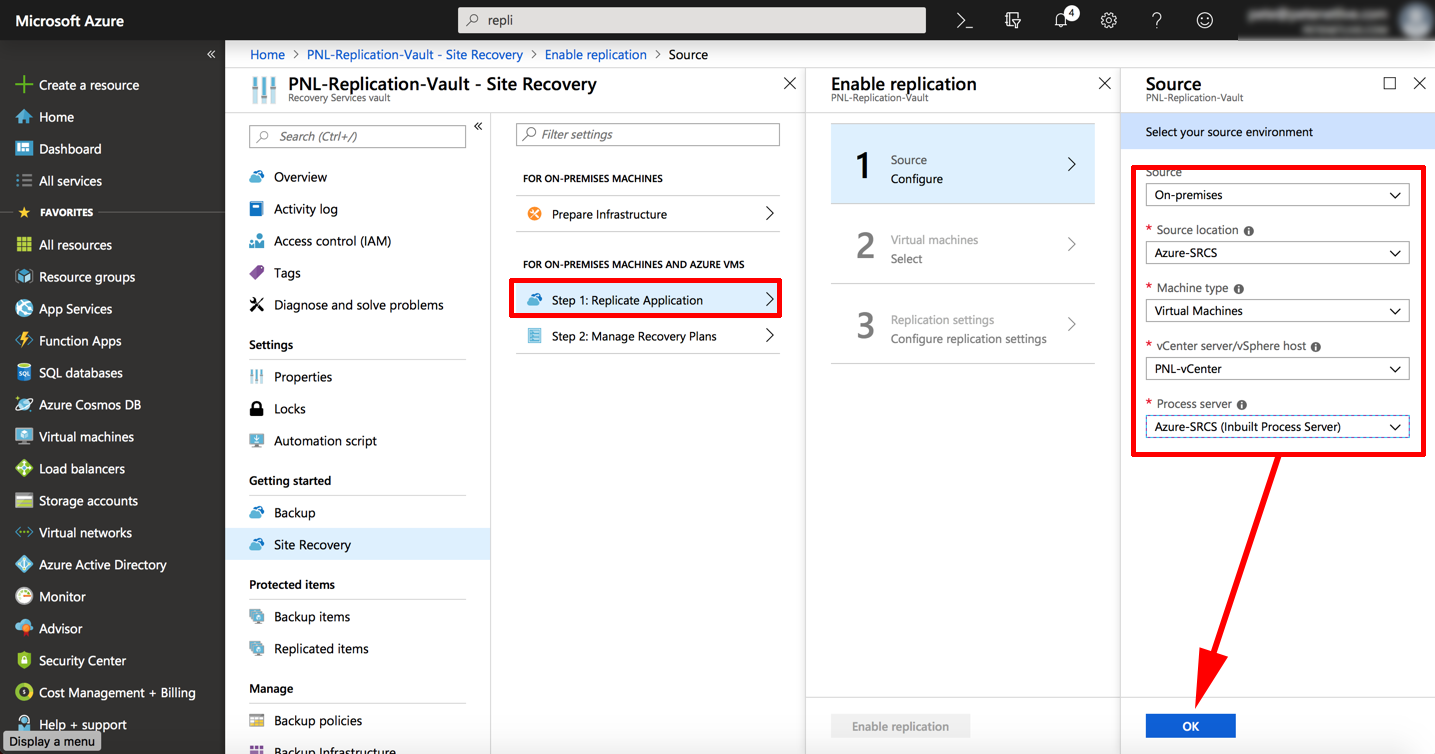
Select Step 1: Replicate Application > Select your replication preferences > OK.
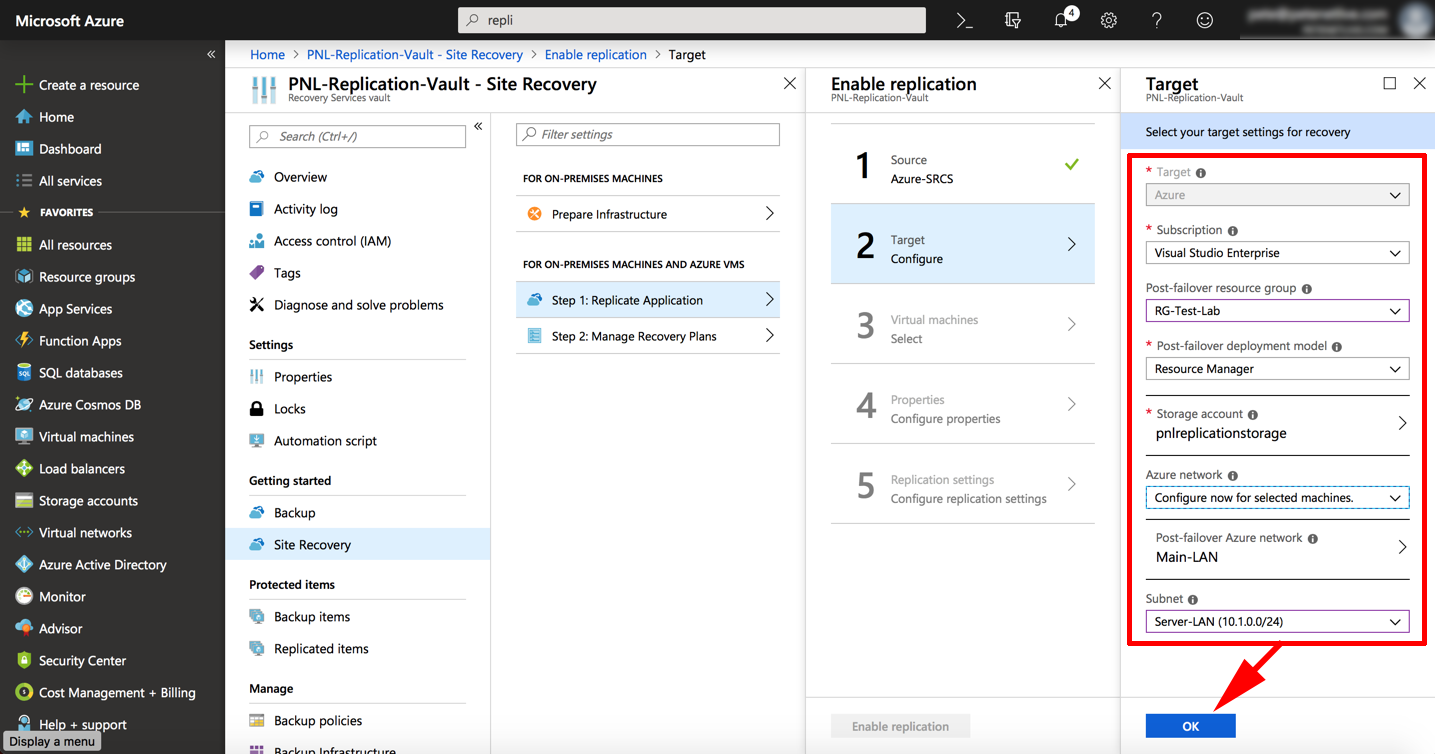
Enter the Azure ‘target VM‘ settings > OK.
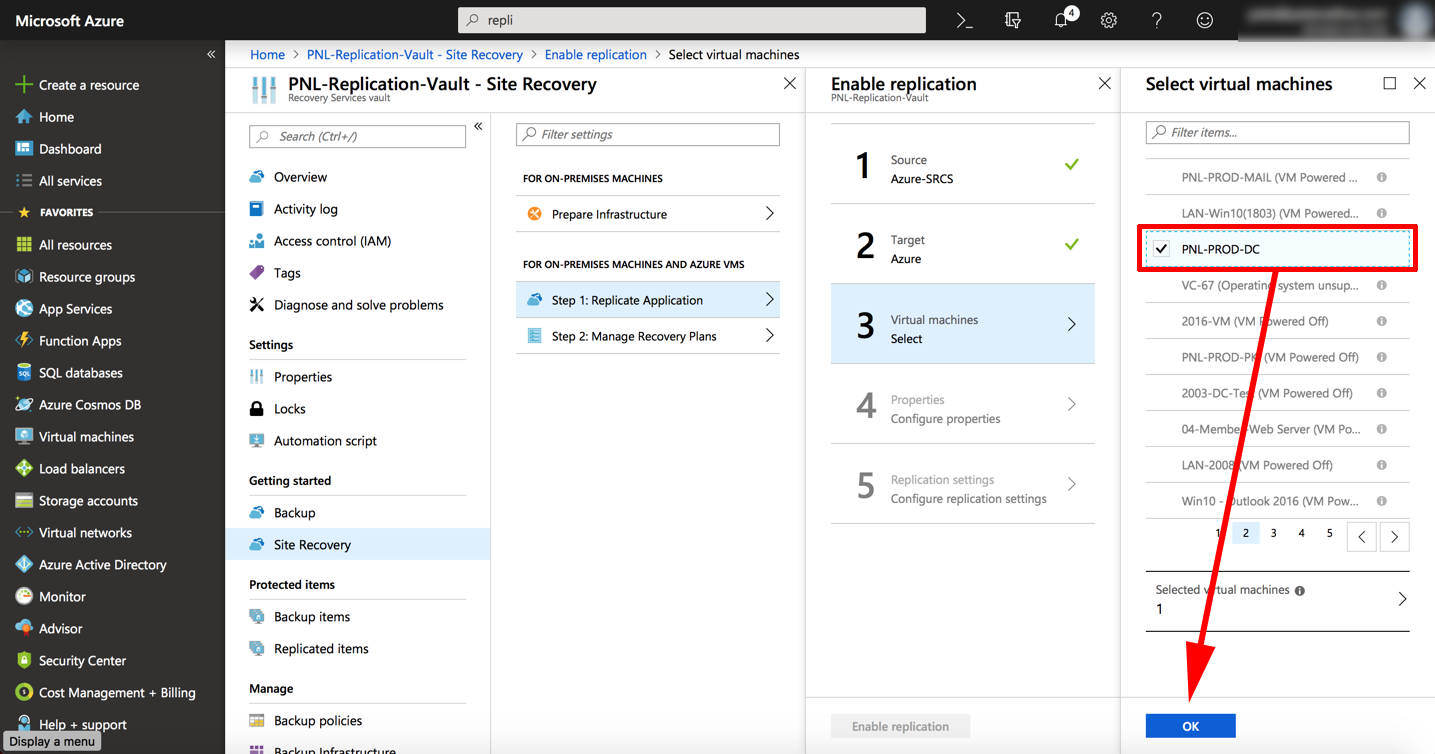
Select the VM(s) that you want to replicate > OK.
Make sure an account with the correct access is chosen > OK.
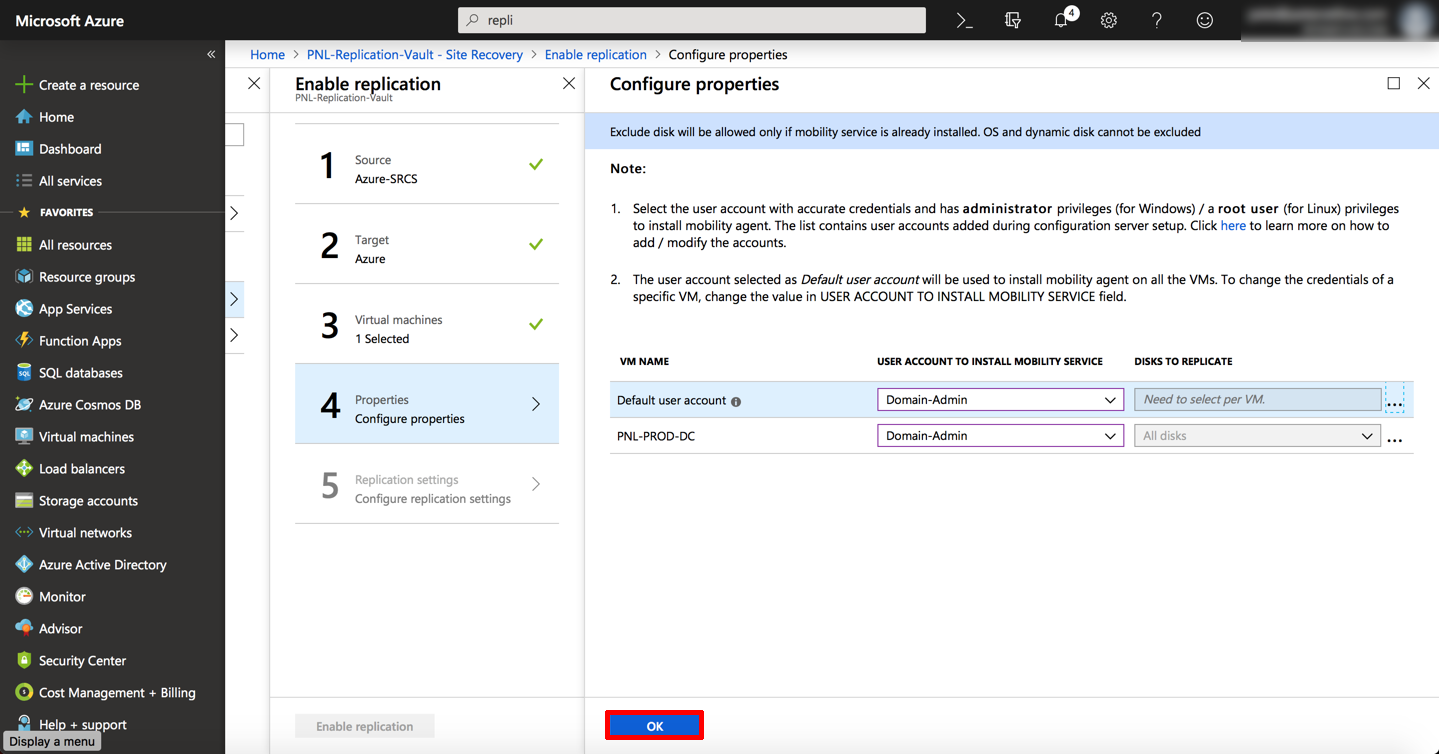
OK.
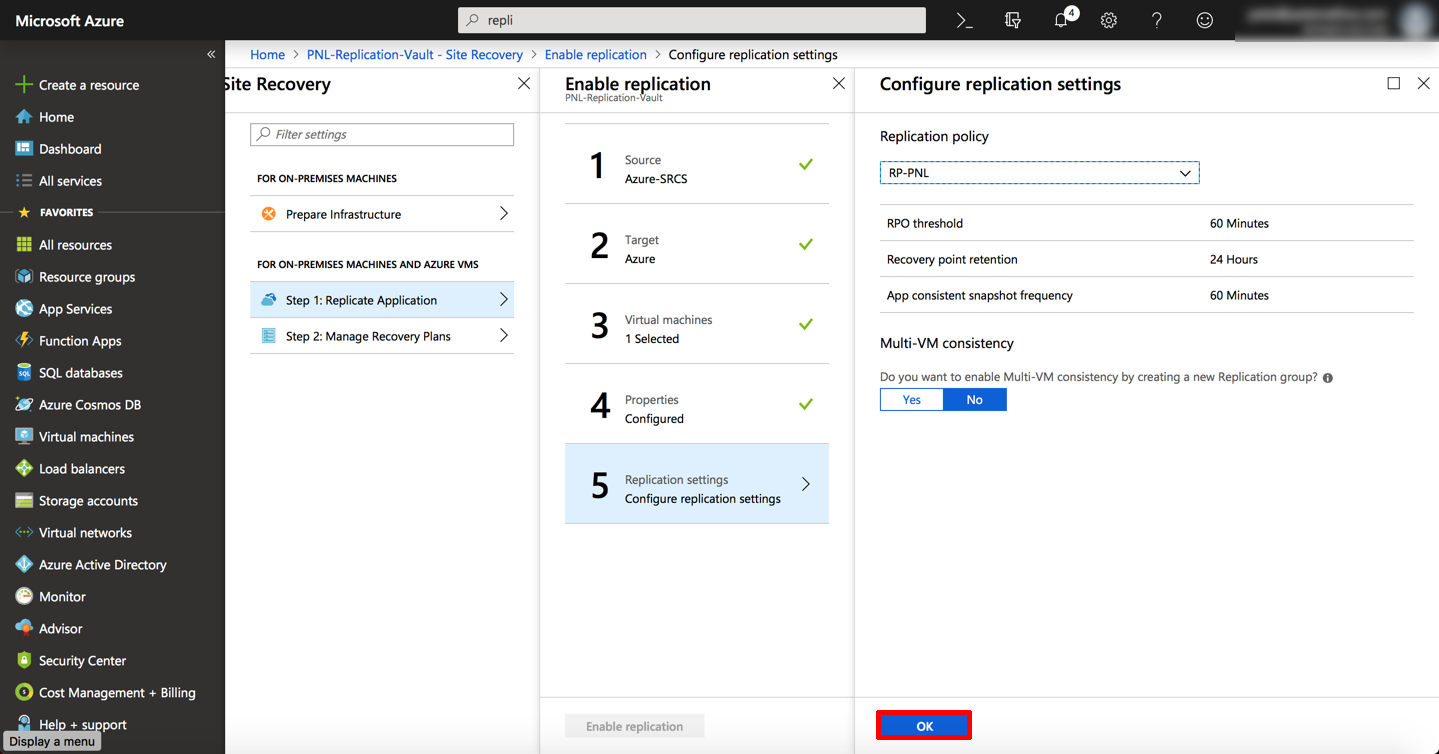
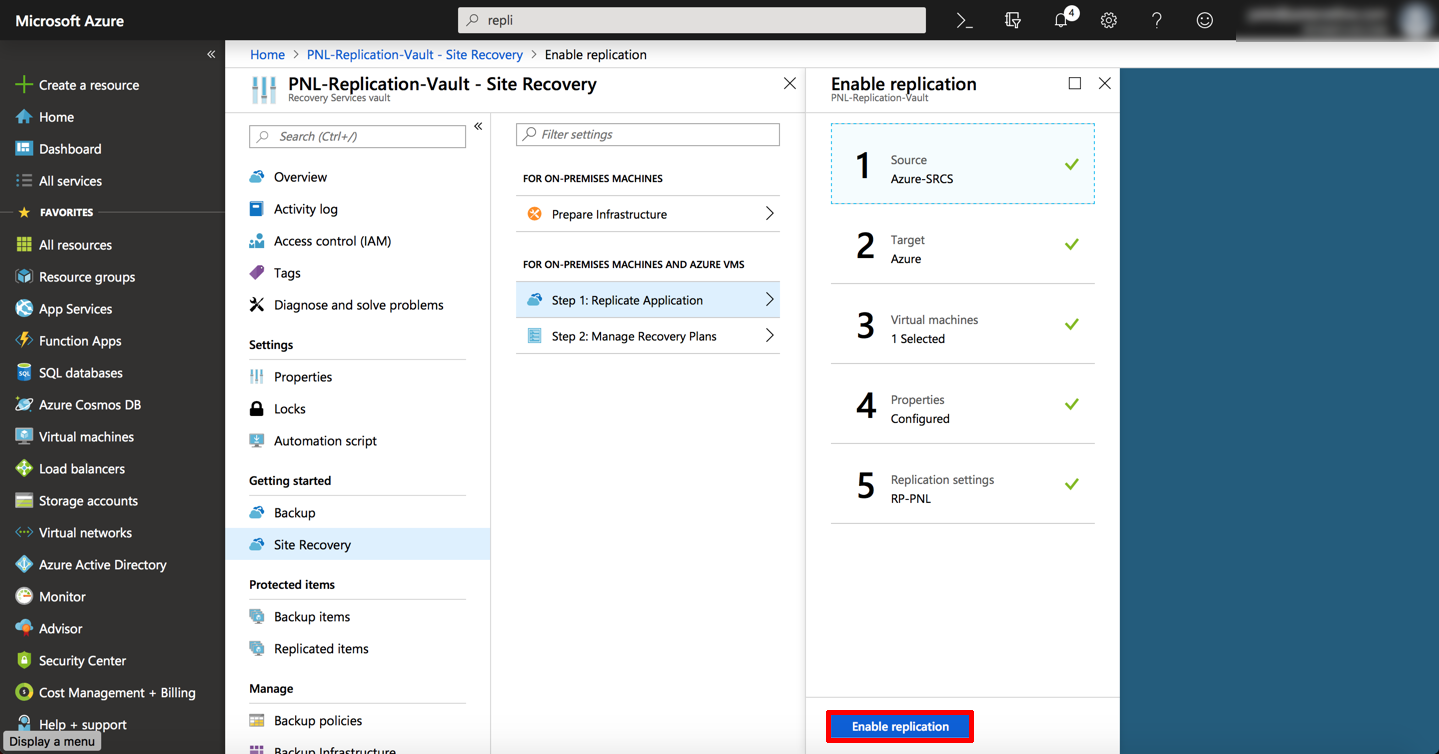
Enable Replication.
Obviously, this may take some time, I left it running and checked the following day.
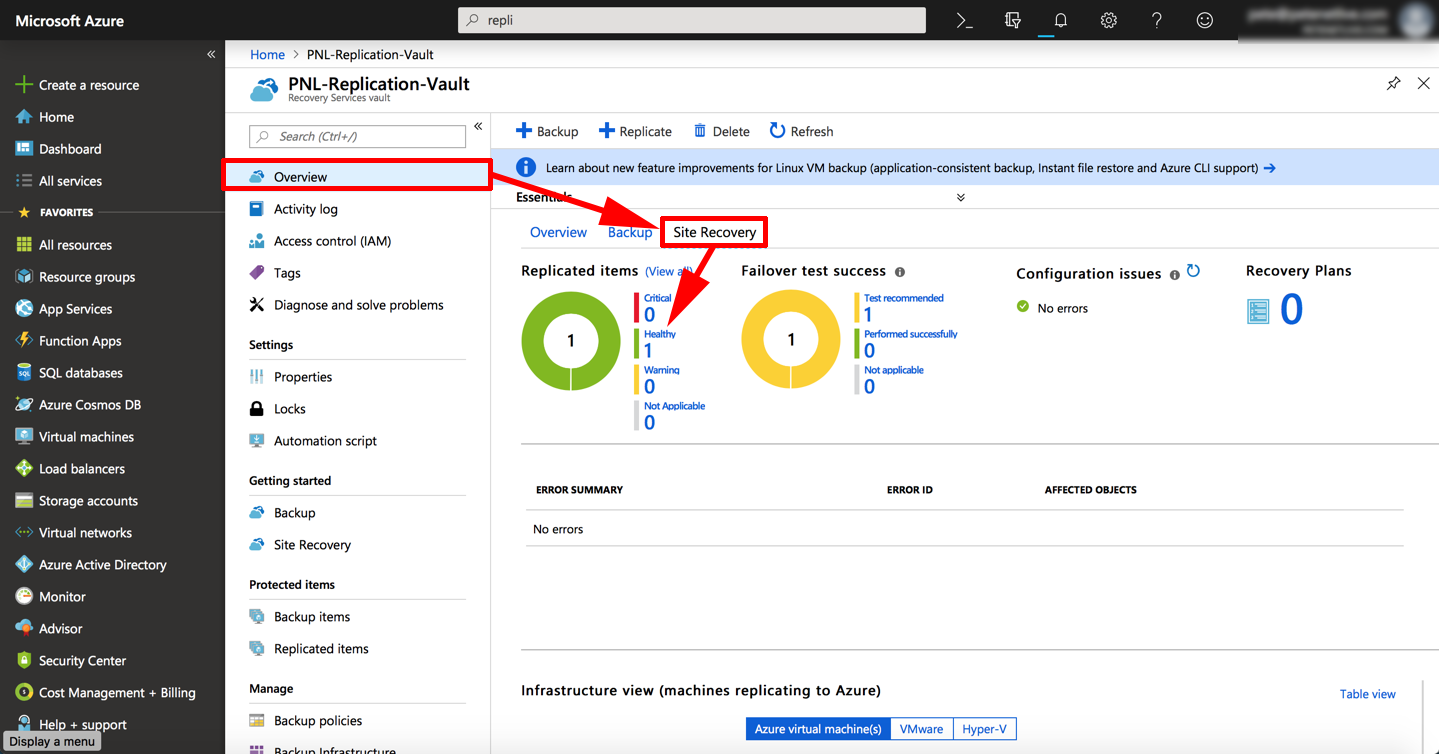
Replication Vault > Overview > Sire Recovery > Wait until all your replicated items are “Healthy”.
Azure SRS Perform Test Failover
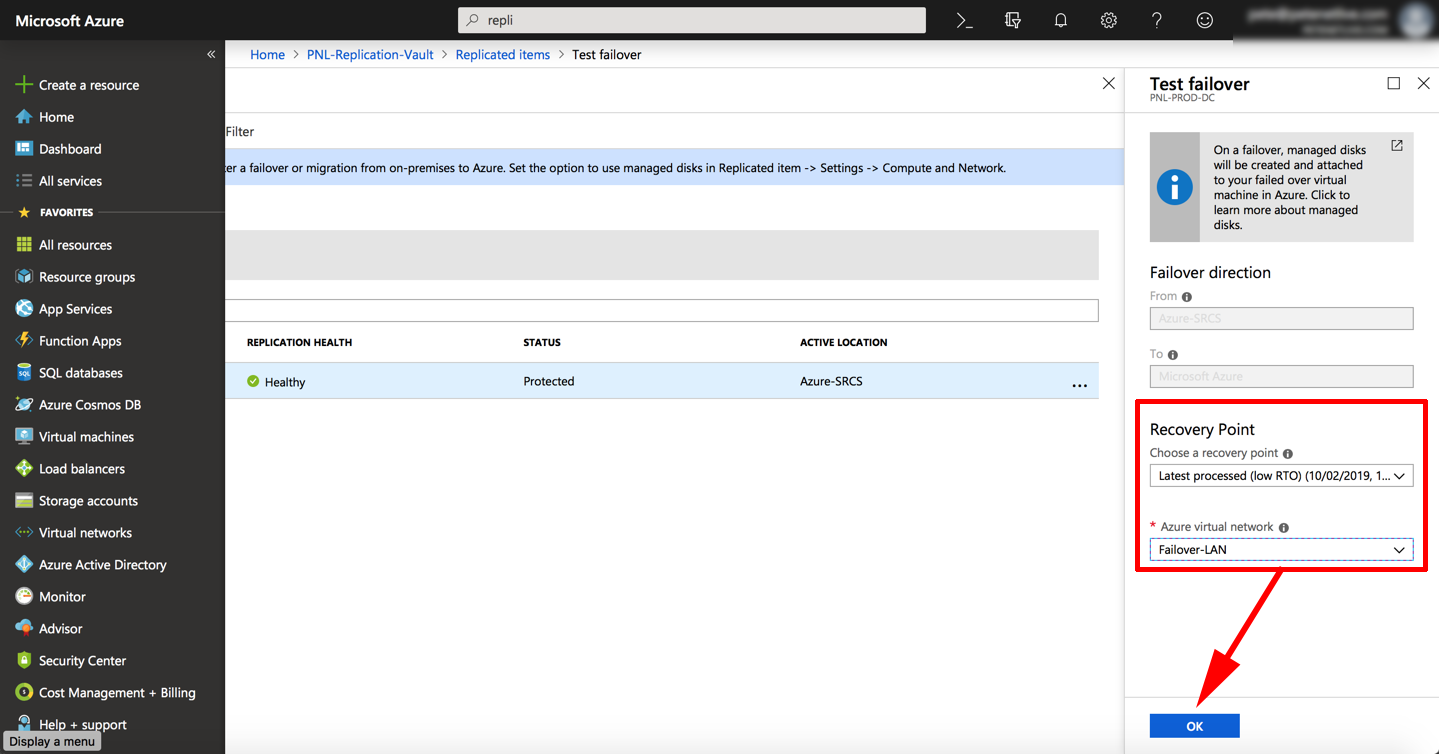
Replication Vault > Replicated Items > Select your replicated machine > Test Failover.

Select your latest replication > and destination network > OK.
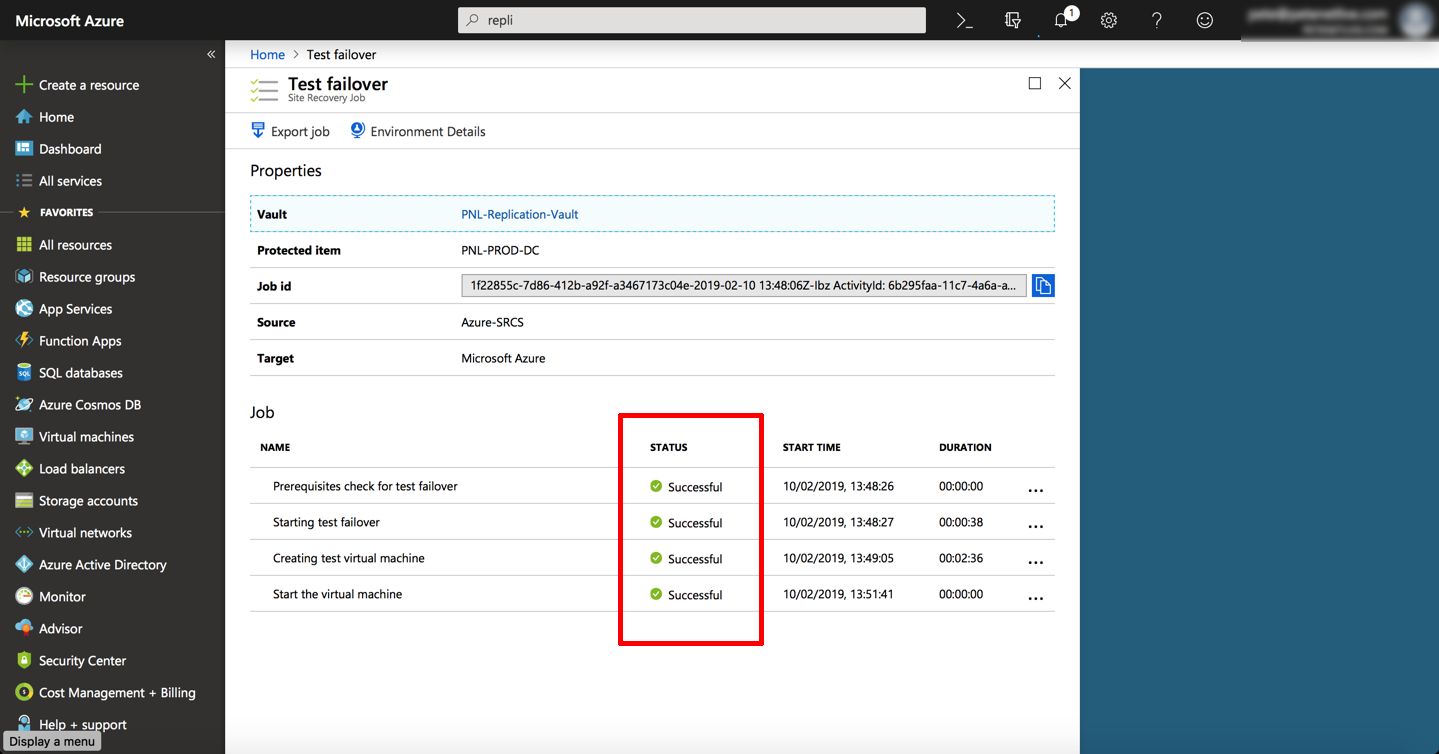
Wait till we are “all-green” In practicality you need to wait a while longer, you will see, (if you go to boot login and watch the screen), the VM will boot up install new hardware items, it will be a while before you see the login screen.
At this point if you have failed over into a ‘production LAN” you will be able to connect to the failed over machine.
Warning: The failed over machine will have a DHCP address, if you have failed over a domain controller, or asset that needs a static IP, then you will need to manually rectify that, when moving it into production.
In my case I just want to give my machine a Public IP so I can connect to to via RDP (to Test)
Azure: How To Assign a Public IP to a VM
All Services > Public IP addresses > Create Public IP Addresses > Give it a name > Choose your Resource Group > OK.

On your VM > Networking > Select the NIC.
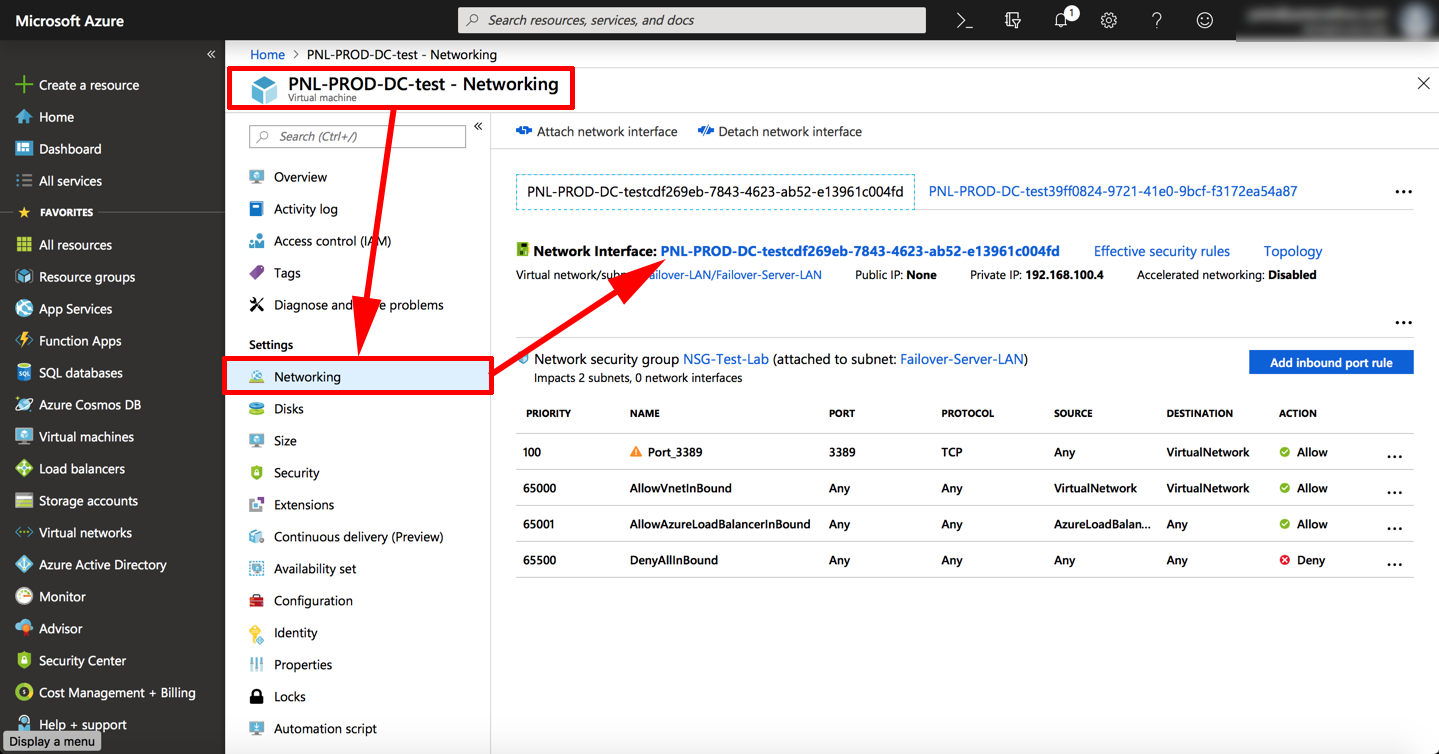
IP Configuration > Select the configuration.

Select “Enabled” > Assign the public IP object > Save.
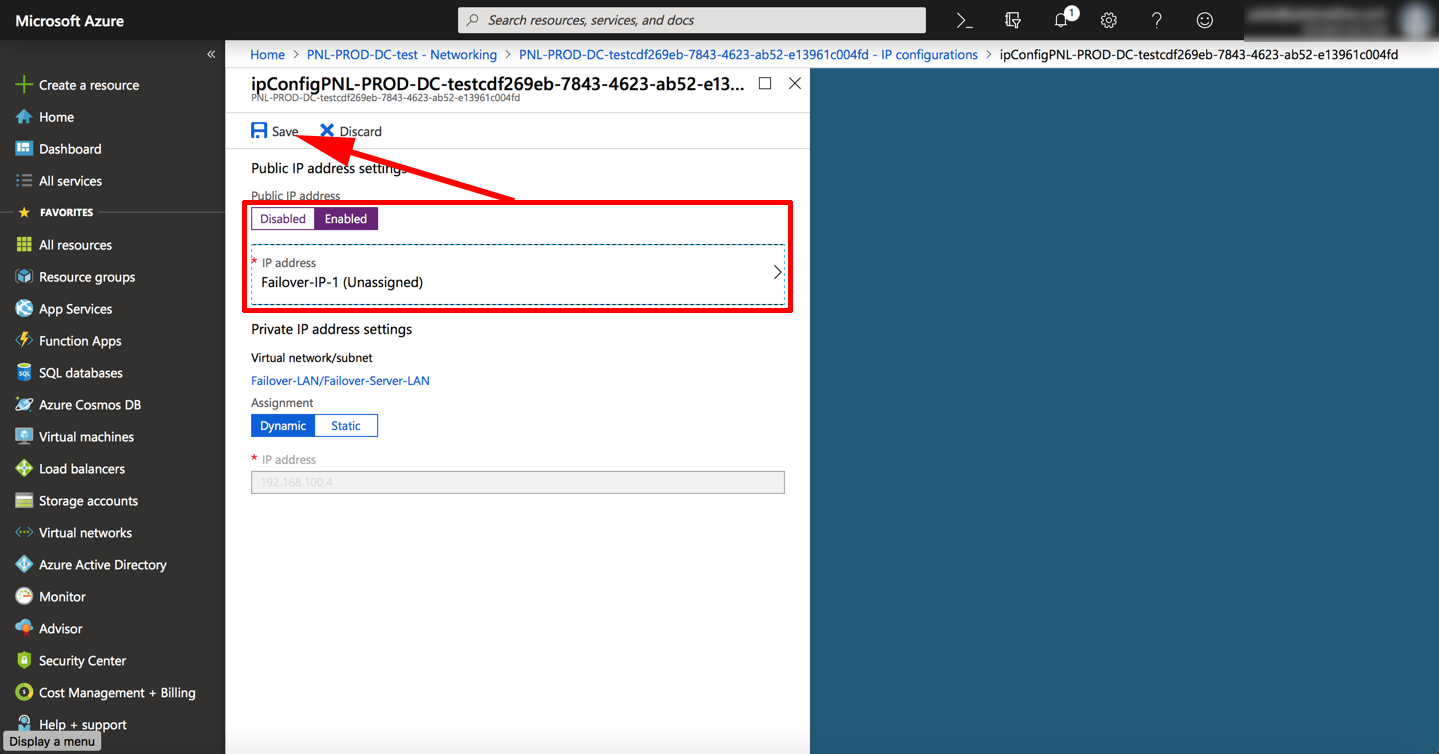
You can now connect to your VM.

You can now, perform a “Cleanup Test Failover” and perform a live failover.
Related Articles, References, Credits, or External Links
NA