
KB ID 0001418
Problem
This is Part-One of a migration from ‘on-premise’ Microsoft Exchange, to Office 365 (Exchange Online). I’m using my spare ‘test domain’ (.co.uk). And I’m using the 5 user E3 Office 365 subscription that the good folk at Microsoft let me have, as part of my MVP benefits.
Note: I’m using Exchange 2016, with a ‘full-hybrid’ migration into Office 365.
Step 1: Pre-Requisites
DNS: You will need access to the DNS records for your public domain, both to ‘prove’ it is your domain, and to divert mail flow, and client requests to Exchange online, rather than your on premise Exchange.
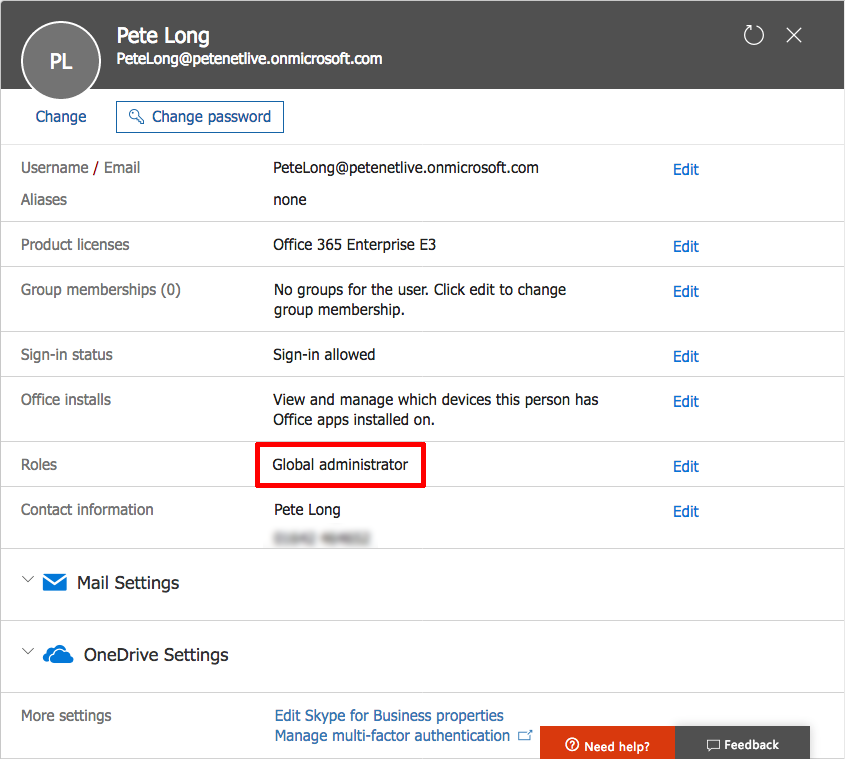
Licenses/Subscription: You need an office 365 subscription, and available licences for all the users you want to migrate. At time of writing the minimum subscription level that includes Exchange Online is E3. (Note that’s not strictly true, you do get Exchange online with E1, but you dont get any office products, so I’ve never seen an E1 licensed migration). You’ll need to have access to Office 365 with a ‘global administrator‘ account.
Backups: Not really a pre-requisite, but how are you going to backup your cloud mailboxes? As far as Microsoft is concerned, your online email gets deleted after its retention period, (amount of time after a user deletes it, i.e. up to 100 days). If your business continuity plan, requires you to keep mail ‘x‘ years, then you will need to think about Azure Backup, or a third party backup solution.
Existing Exchange: Unless you are going to use a third party migration tool, then your on premise Exchange needs to be at Exchange 2010. So if you’re still at Exchange 2007/2003/2000, then you need to either; 1) Upgrade your on-prem Exchange, 2) Do another on-prem migration before you start, or 3) Purchase a third part migration tool. Note: With Exchange 2007 you can add one Exchange 2010 Exchange server, then migrate.
Certificates: You MUST HAVE a certificate on your Exchange that is publicly singed by a third party certificate vendor. There’s no excuse to use self signed certificates these days, (for Exchange). For this exercise I bought a certificate for a year and it cost me less than ten dollars, thats half the price of a one users monthly licence for Office 365? WARNING even with a correctly setup PKI environment with publicly published CRLs etc, your own certificates wont work, and you wont find out what’s wrong, until you have migrated users, and carnage/downtime will ensue! BUY A CERTIFICATE: I’d recommend a wildcard cert for your public mail domain.

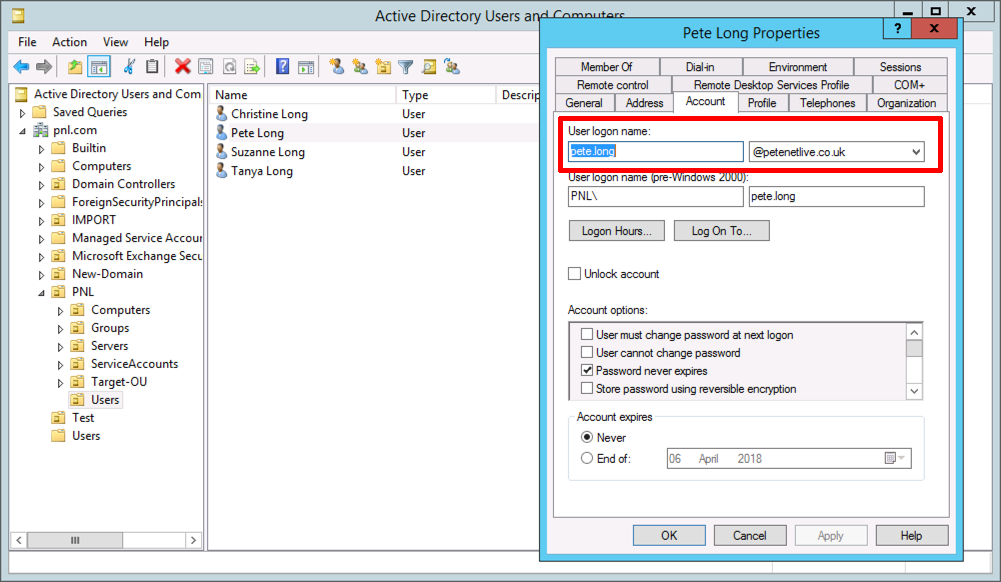
User UPN’s: I’ve already covered this before in the past, things will be a lot easier, if you change all your users UPN’s to match their Email addresses.
For more information, see the following article;
Changing Domain Users’ ‘User Logon Names’ and UPN’s
Step 2: Onsite Preparation
Fail to prepare – prepare to fail.
What most people fail to do is make sure both their AD domain, and existing Exchange is healthy, (just because everything appears to be working, doesn’t mean everything is healthy). Install the latest cumulative update for your on-premise Exchange server ,and dig into the logs to make sure everything is as it should be!
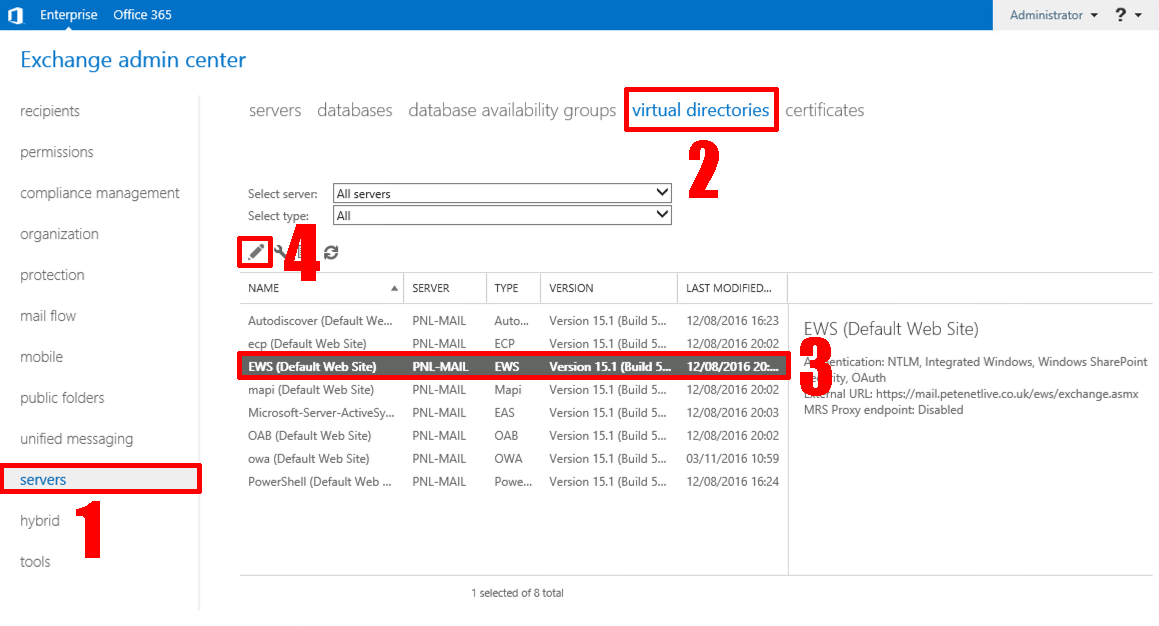
Mailbox Replication Proxy Service
MRS Proxy is at the same solution we use for ‘cross-forest’ mailbox migrations, and your on-prem Exchange will act as the MRS proxy for your mailbox migration. To enable MRS Proxy: Exchange Admin Center > Servers > Virtual Directories > EWS > Edit.
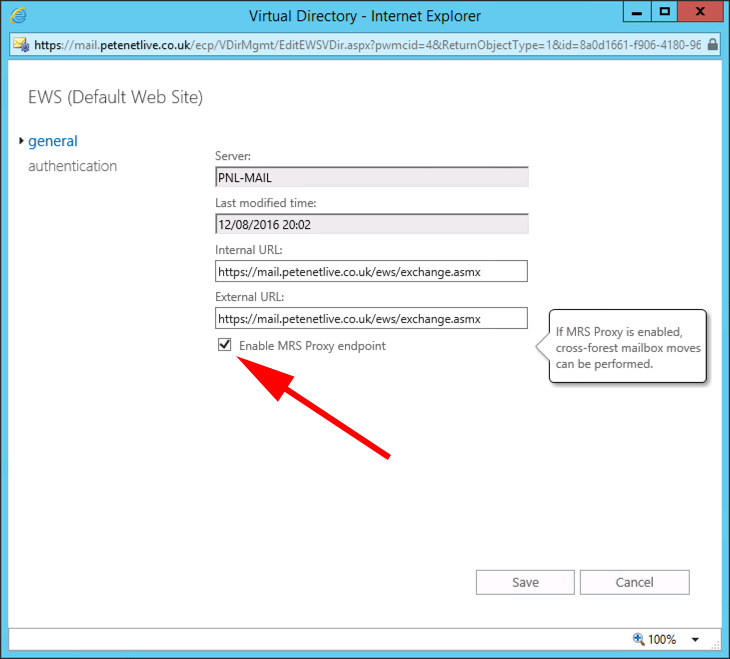
General > Enable MRS Proxy Endpoint > Save
You can also check the service is running, (Windows Key +R > Services.msc {Enter}).

Exchange 2010 Note: If you’re running Exchange 2010, you can enable MRS Proxy with the following PowerShell command;
Azure Active Directory Connector
You can download the Azure AD connector from Microsoft, it can be installed on any member server. It will replicate your users and groups etc, into Office 365. Download and execute the installer > Tick ‘I agree….’ > Continue.
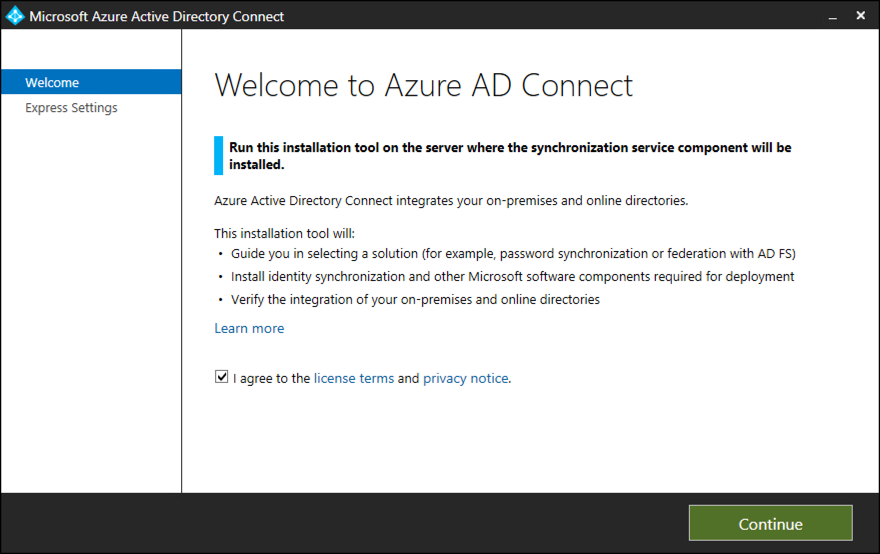
Use Express Settings.
Note: You would only NOT use Express settings if you only wanted to replicate certain groups or sub domains, or if you wanted to use ADFS, (for example because you already had Azure secured services).

Provide your office 365 logon details > Next.

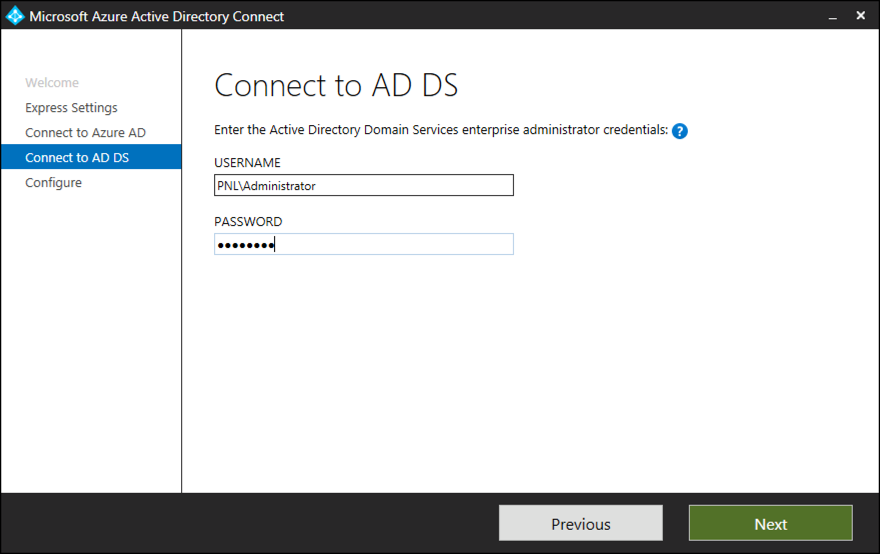
Provide logon details for your on-premise domain > Next.
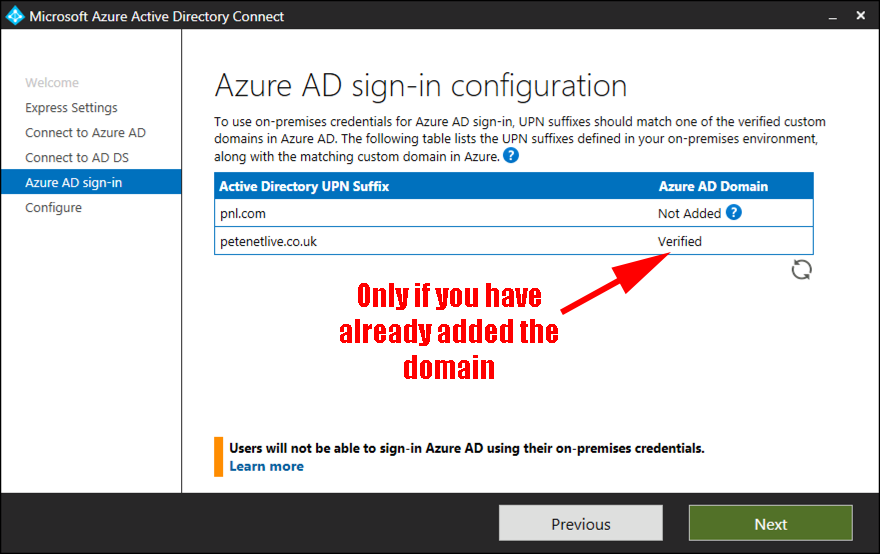
You will probably only see your local domain, and it will be flagged ‘Not Added’ that’s fine, below you can see my public domain because it’s already been added to office 365, (I’ll cover that later) > Next.
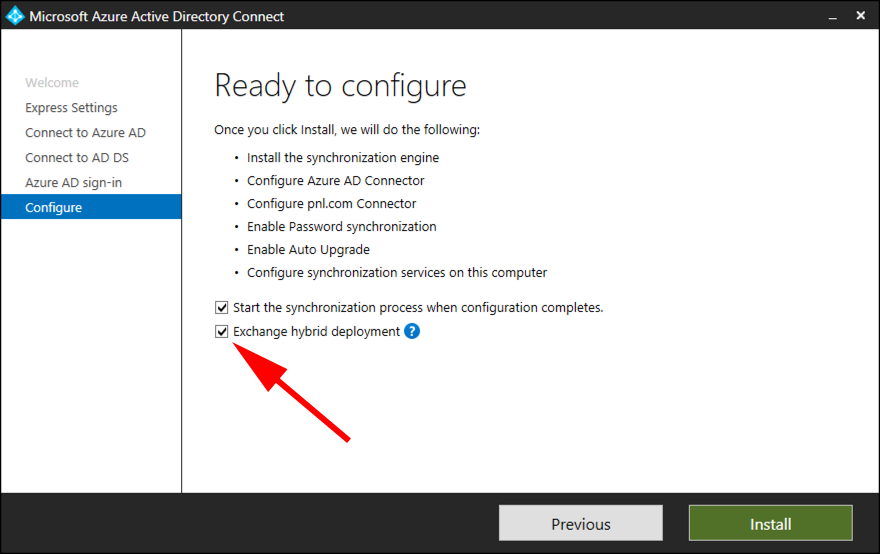
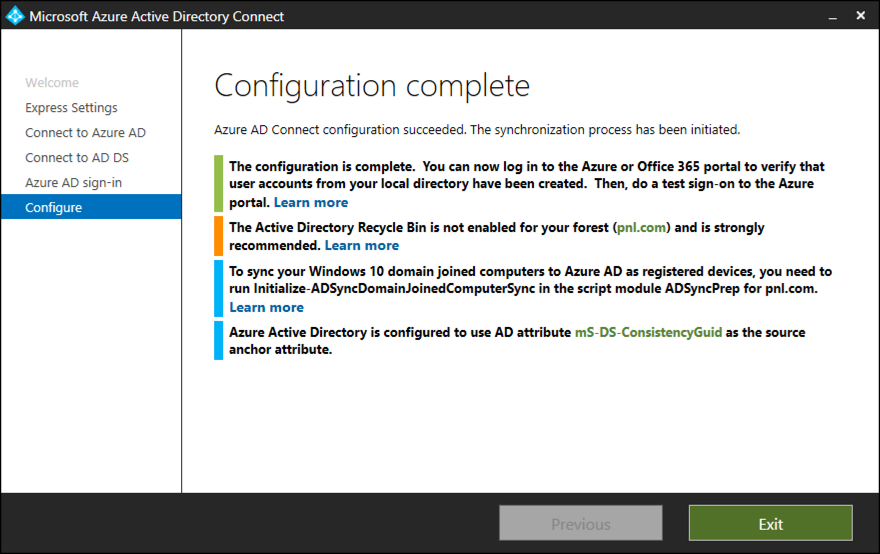
Tick ‘Exchange hybrid deployment’ > Install.
Read and act on any warnings > Exit.
Note: If, (as above) it asks you to enable the ‘AD Recycle bin’, see the following post;
Windows Server 2016: Active Directory Recycle Bin
It will take a while, (depending on the size of your AD,) to replicate.
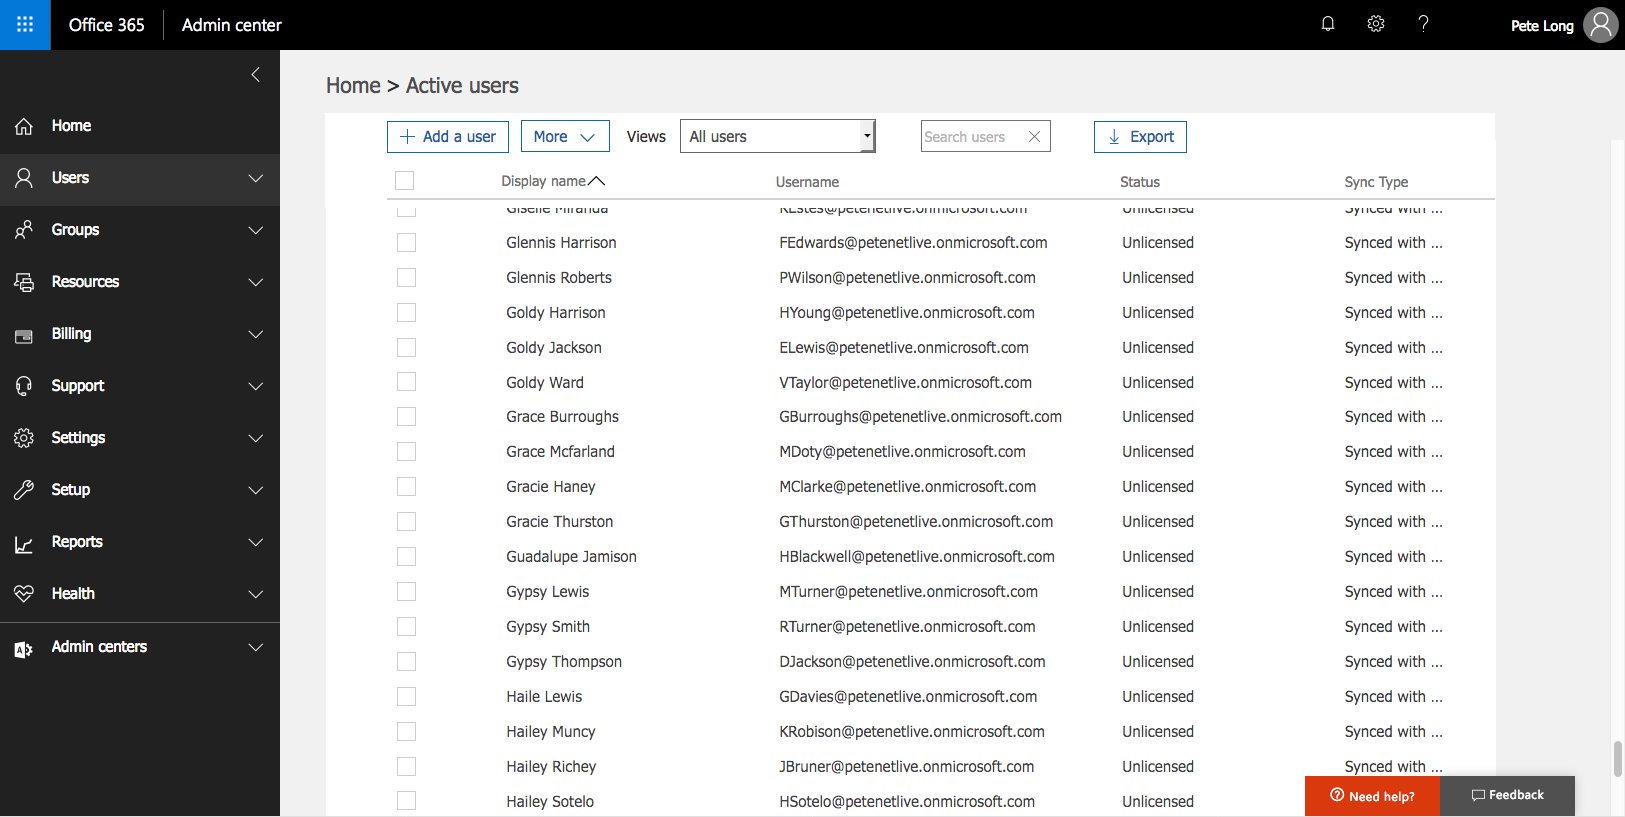
After a while you will start to see all your users appear in your office 365 portal, as they are replicated across.
Enable Exchange Hybrid Deployment
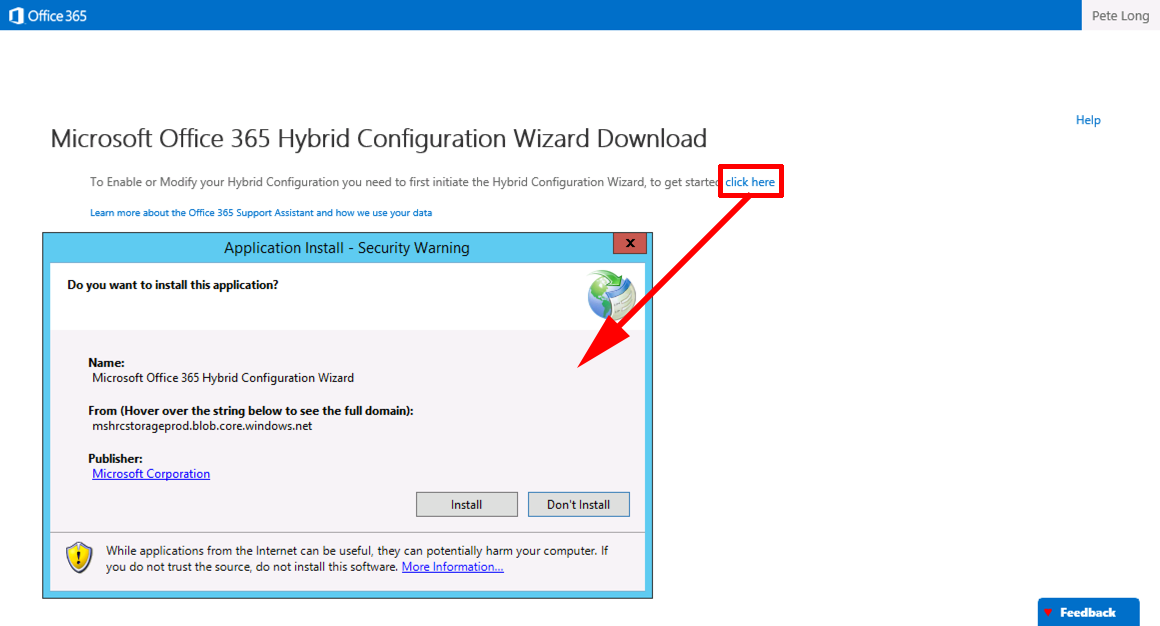
Back in Exchange admin Center > Hybrid > Configure > Sign into Office 365.

Once authenticated, notice the URL changes to Exchange online! > Configure.

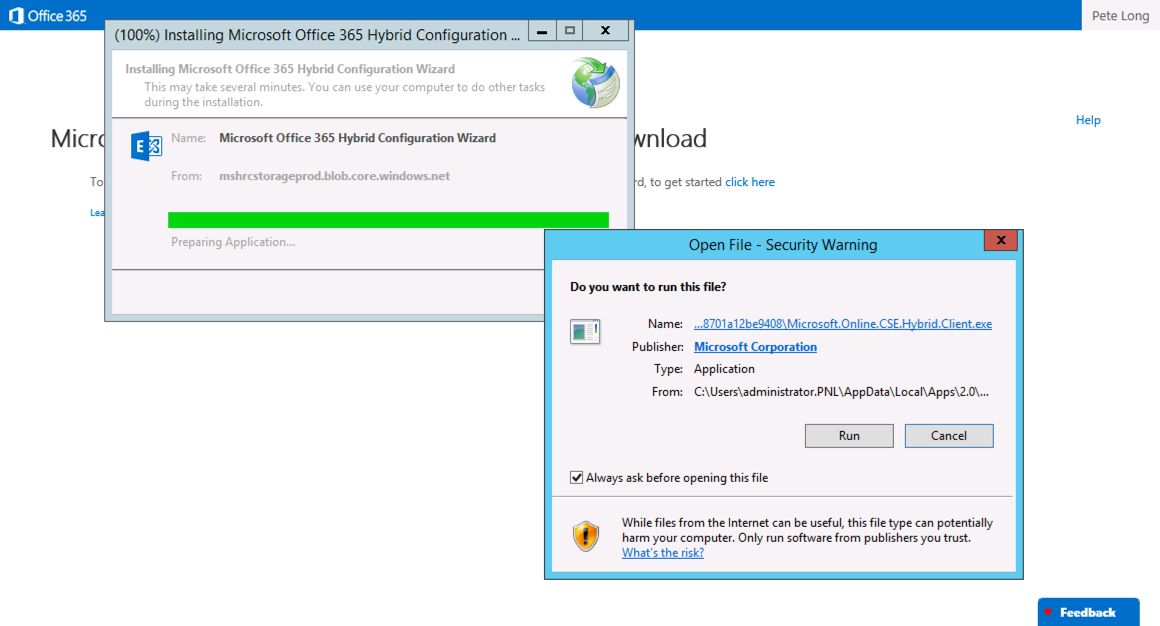
Click here > Install.
Run.
Next.

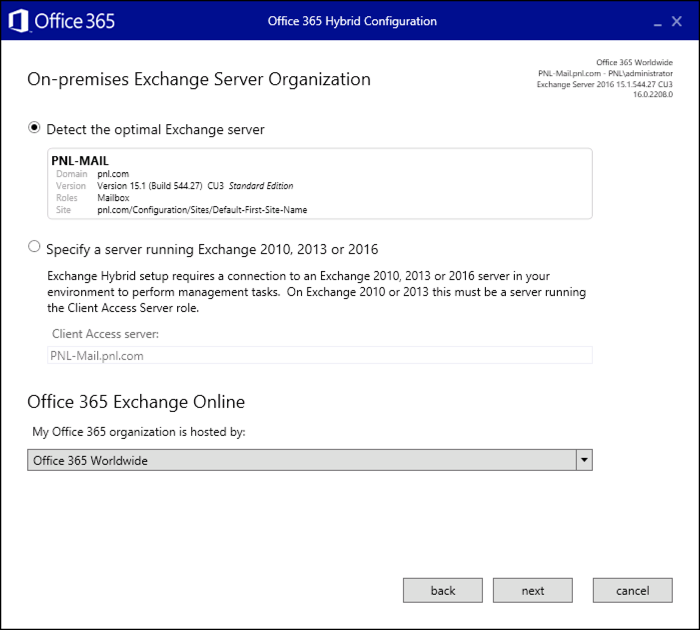
I only have one on-premise Exchange server, so that’s selected,( if you had multiple servers, choose the one you want to use) > Next.
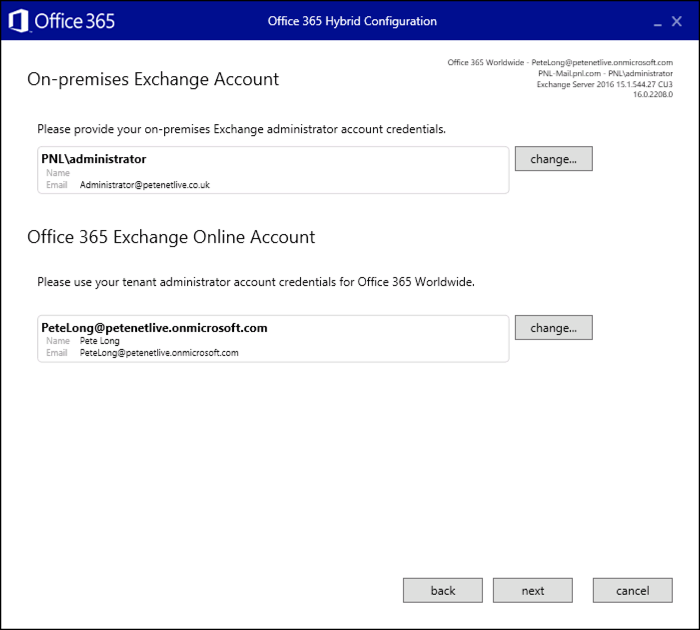
Sign in.

Once authenticated > Next.
Full Hybrid > Next.

Enable.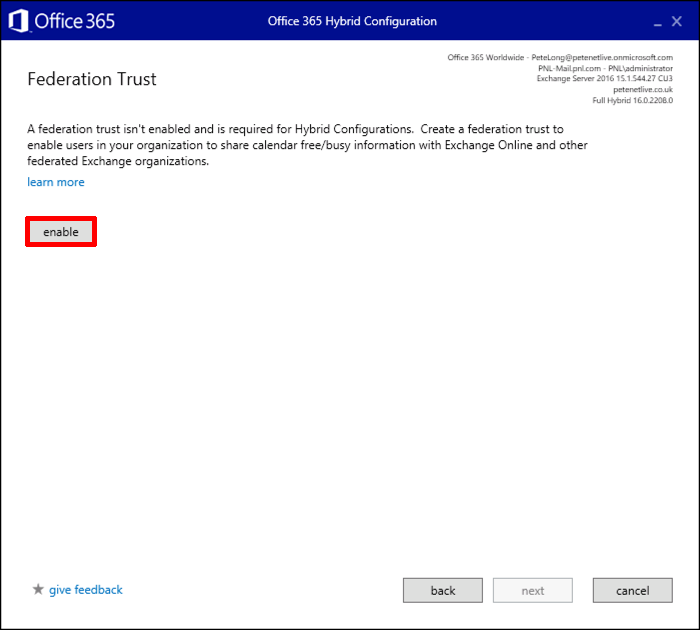
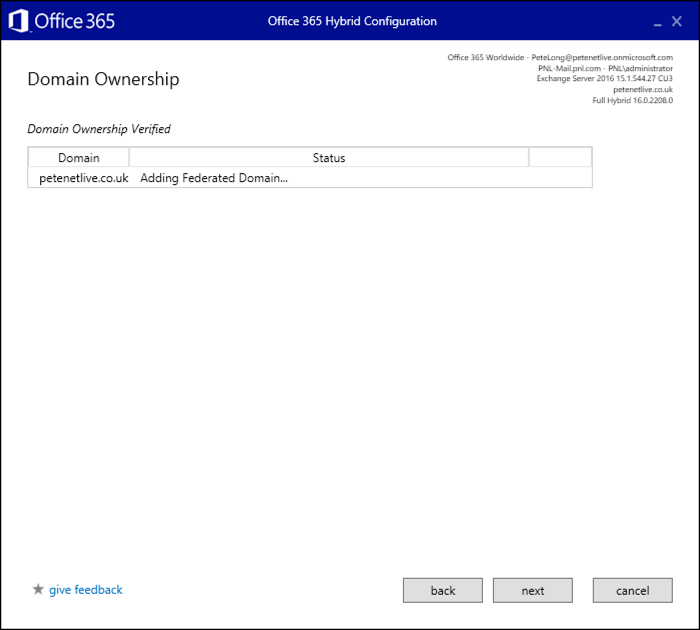
You need to create a ‘text’ record in your public DNS to proceed.

So I’ve jumped on my public DNS host management portal, and created the text record required.

Tick ‘I have created…..’ > Verify > Next.
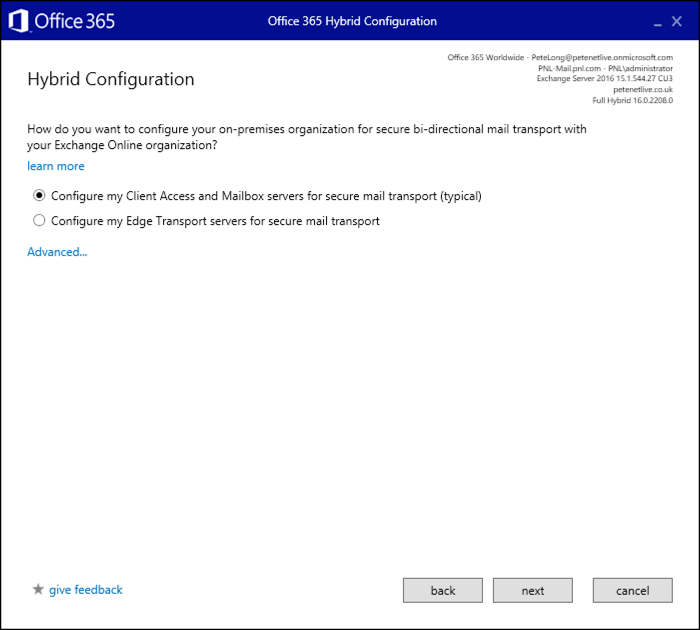
I dont have any ‘Edge Transport Servers’ > Next.
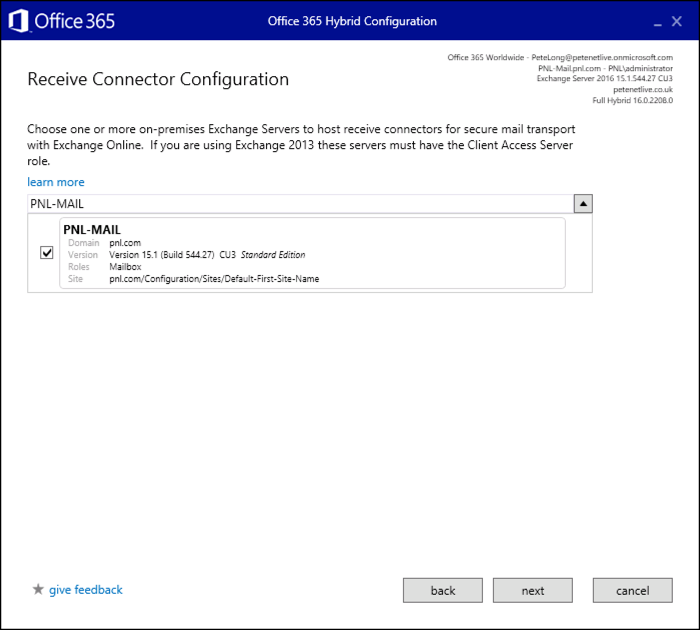
Again I only have one, if you have multiple CAS servers, select the one you want > Next.
And again for the ‘Send Connector’ select the CAS server that will connect to Office 365 > Next.

Select your certificate. MAKE SURE it has selected a publicly signed one, NOT a self signed one! > Next.

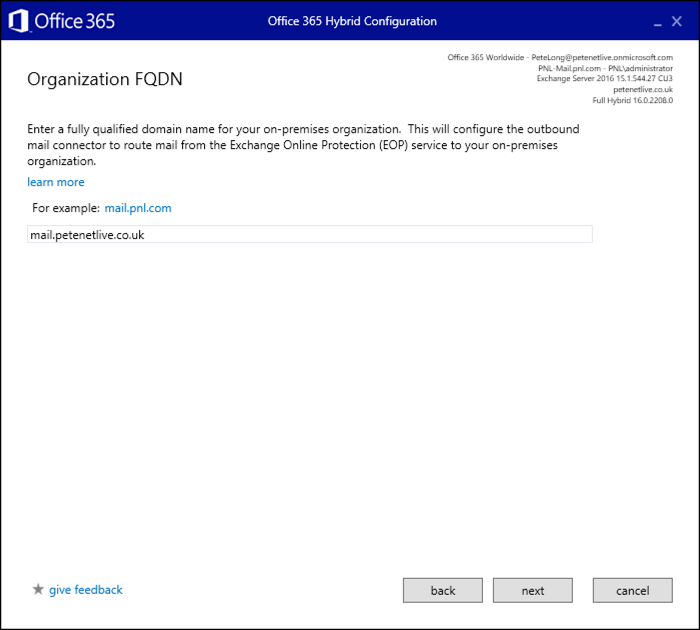
Enter the correct public FQDN for your on-prem Exchange > Next.
Note: This must match either the CN on your certificate, or if it’s a wildcard certificate, the domain must be the same.
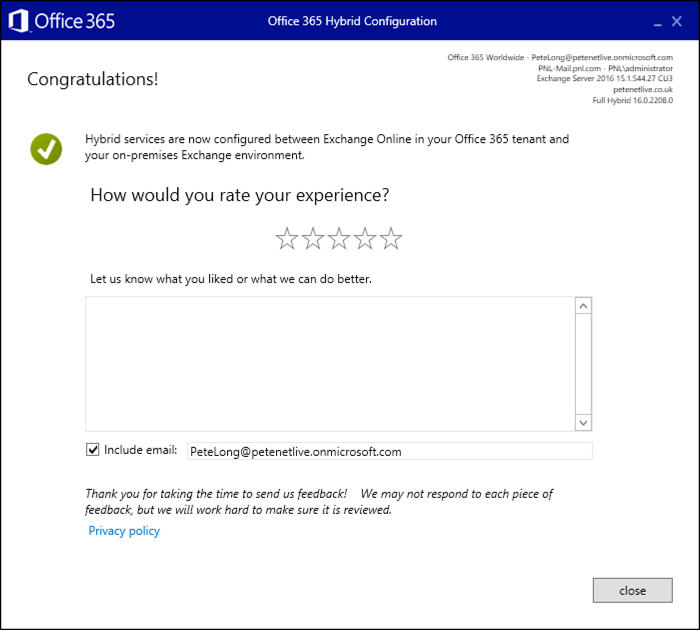
Update

Close
So far so good, in Part Two, I’ll add my public domain to my Office 365 account and start migrating some users.
Related Articles, References, Credits, or External Links
NA
18/05/2018
It made my day.
Though I have completed my current project using a third party named Shoviv email migration.
But this step by step guide helps to clarify every concerns and proceed further in safer way.
18/05/2018
ThanQ – Glad to help
07/01/2019
Where’s part two?
07/01/2019
Click the link above that says Part Two ?
P
19/09/2020
if you do have Edge Transport server, what to do when you get to that step above?
click next to go thru all the process and do it again for Edge Transport?
21/09/2020
You simply need to tick that you have a Edge Transport connector?
03/08/2021
This worked very well for me. Just a few comments: I was using Firefox as my default browser and when I clicked the “Configure” tab it was trying to download the files instead of running the configuration tool. I had to install Edge and then use that to launch the hybrid configuration wizard.
Also, the pattern of dialog boxes that appeared during the configuration was slightly different. I think this was because I had a tenant already set up with the company domain connected and set as the default domain (i.e., company.domain.com instead of company.onmicrosoft.com). So I didn’t need to go through that part of the configuration.
Thanks,
Deb