KB ID 0001263
Problem
You have been able to manage your firewalls Internal SFR module for while using the ASDM
Setup FirePOWER Services (for ASDM)
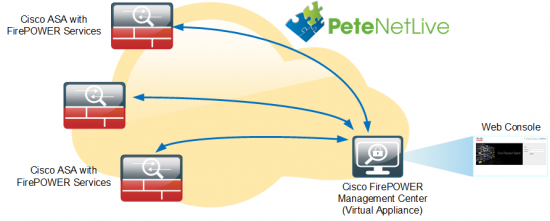
For most people that’s fine, but if you have a lot of FirePOWER devices to manage that does not scale well. In those cases you should use theFMC (FirePOWER Management Center). Here ‘Im going to use the Vmware virtual appliance, (at time of writing there is no Hyper-V version).
This lets you create policies centrally and then deploy them to your devices in bulk.
Solution
Deploy the FirePOWER Management Center Appliance
Obviously before you start you need to have VMware (ESX or vCenter). With 250GB of storage free, (you can deploy it thin provisioned). You will also need to allocate 8GB of RAM and 4 virtual CPUs. Whichever network (or VMware port Group) you connect the appliance to it needs to have IP connectivity to the devices you intend to manage.
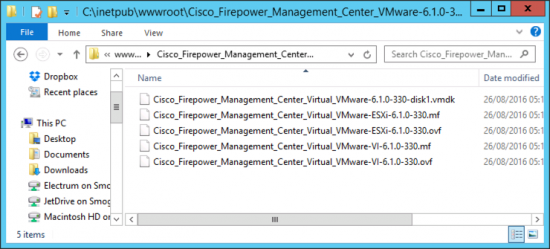
Download the FMC Appliance: Be aware it downloads in tar.gz format so on a Windows machine you will need something like 7Zip to uncompress the files. You WONT find the file under the firewalls, they are listed under;
Downloads > Produces > Security > Firewalls > Firewall Management > Firepower Management Center Virtual Appliance
Make Sure: You download the same version that is installed on the modules you want to manage! (‘show module’ on the ASA will yell you).
Get the files extracted and on a machine that you can access your VMware infrastructure from;
The appliance comes in OVF format if you are unsure how to import an OVF file see the following article;
VMware vSphere – How to Import and Export OVF and OVA Files
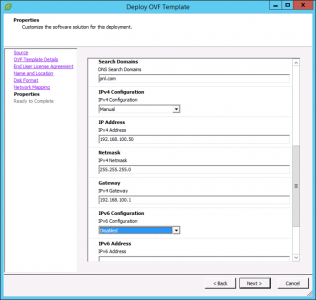
You will need to accept the EULA, then set the admin password, and some basic IP settings.
I’ve got IPv6 disabled, if you want to address the appliance with IPv6 enter the details here.
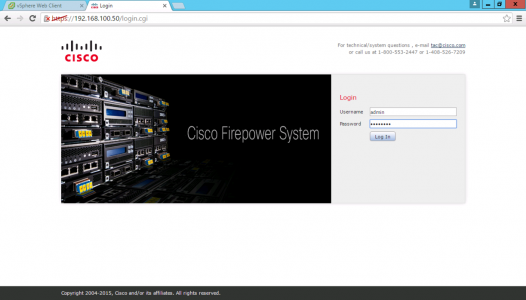
Even after the appliance has been imported and powered on it can take 20-30 minutes before you can log on. At this point I would go and do something else. If you really must, then open a ‘console’ session and wait until the logon prompt is shown. You can then logon to the web portal.
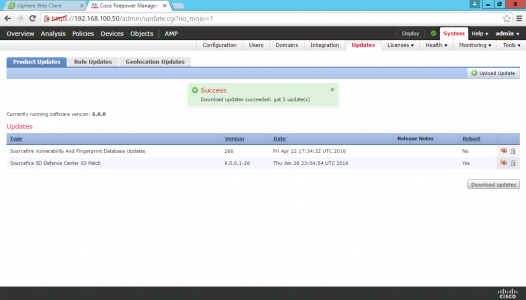
Go to System > Updates > Download and install any updates > Visit both the ‘Rule Updates’ and the ‘Geolocation Updates’ tabs and set a time to download them.
Don’t Install the licences Just Yet! Add your devices to the FMC first, then if there’s a problem and you need to rebuild/redeploy, you don’t have to go cap in hand to Cisco licensing to get the licences re-armed. To add the SFR devices see the following article;
Cisco Add FirePOWER Module to FirePOWER Management Center
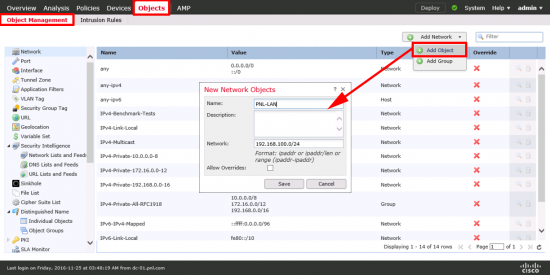
Network Discovery: Older version of the FMC used to only look for RFC 1918 IP ranges, This was changed at some point to 0.0.0.0/0 so you couldn’t misconfigure the system by having a private address space internally for example. This was a good idea but Ive seen some firewalls fall over trying to run discovery on every IP address they see! So lets manually add in our subnets. Objects > Object Management > Add Network > Add Object > Add one for you internal network(s).
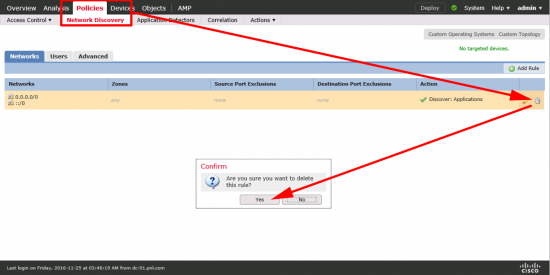
Policies > Network Discovery > Remove the 0.0.0.0 Rule.
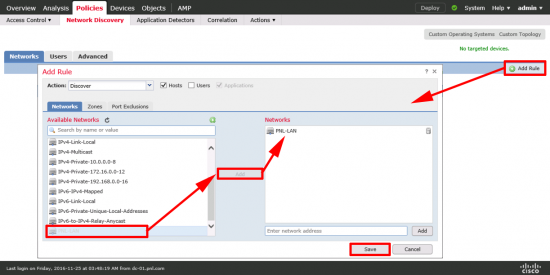
Create a new discovery rule using just your subnet(s).
Adding Licences To FirePOWER Management Center
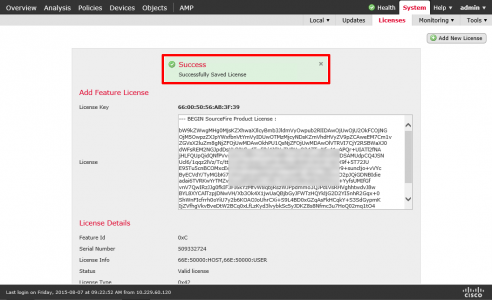
You used to have to licence the appliance itself, after version 6 you don’t need to do that, if you have a licence and you try and apply it nothing happens and you just see this message;
Note: FireSIGHT is the old name for FirePOWER Management Center.
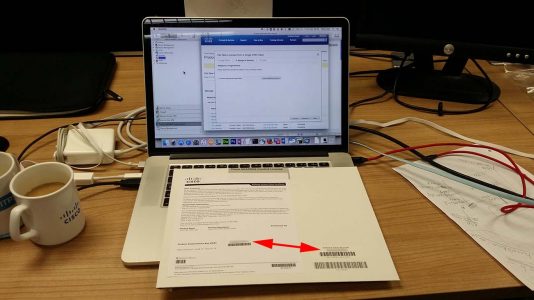
What Licences do I need to Add? Your Next Generation Firewalls now come with a ‘CONTROL LICENSE‘ in the box, it is in a large white card envelope, you don’t need to open it the number you need is on the front of the envelope. You add a control licence for every device you want to manage (they do not expire).
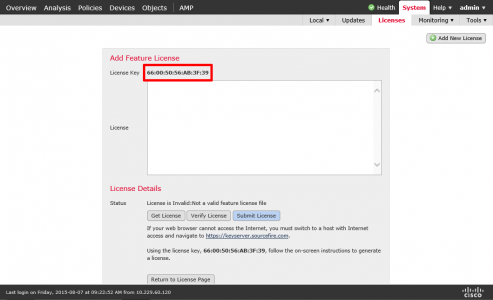
System > Licences > Classic Licenses > You need to take a note of the ‘Licence Key’, (which is the MAC address of the appliance with a 66 in front of it). This is the serial number you need to enter on the Cisco licensing portal.
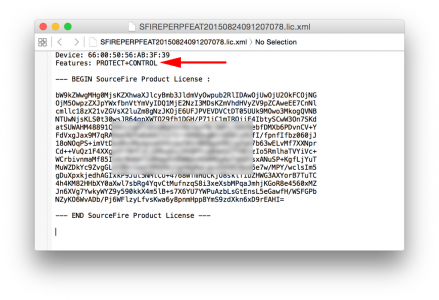
When you get the licence back, if you open it in a text editor, it will look like this (its essentially a digital certificate). Copy everything from ‘— BEGIN‘ to ‘License —‘
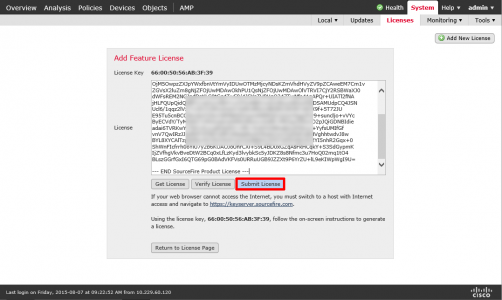
Paste in the text > Submit License.
Repeat for each licence (IDS, AMP, URL Filtering ,etc)
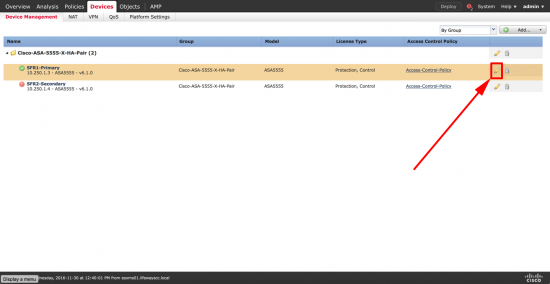
You will also need to allocate the licenses to devices. Devices > Device Management Select the Device in question > Edit.
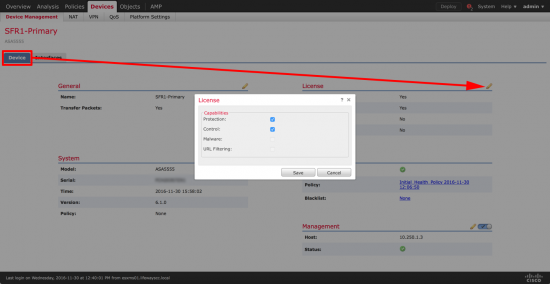
Device > License Section >Edit > Allocate accordingly.
Configuring FirePOWER Intrusion Policy
To use an intrusion policy the devices each need a ‘Protection‘ licence. Note: You get a protection licence now automatically when you add a CONTROL licence, but you still need to pay a subscription to legally obtain the updates.
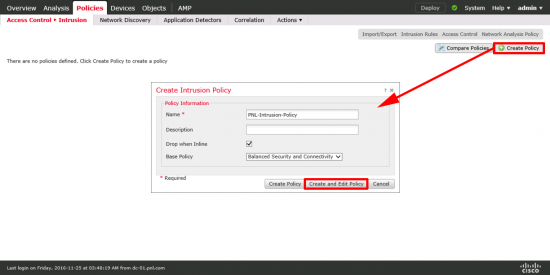
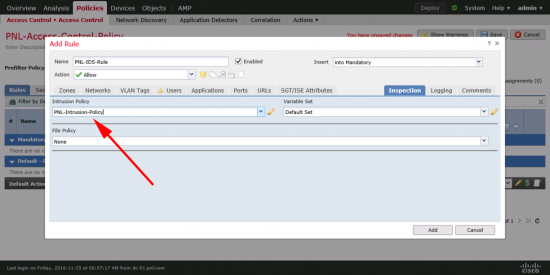
Policies > Access control > Intrusion > Create Policy.
Give the policy a recognisable name > Create and Edit policy.
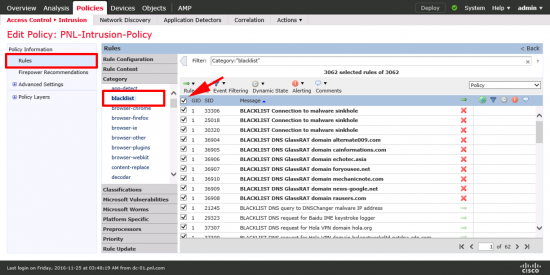
The policy it creates is based on the ‘Balances Security and Connectivity’ Template. You might want to add a few extra rules > Rules > Blacklist > Select All.
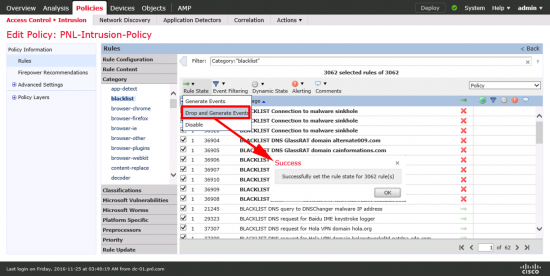
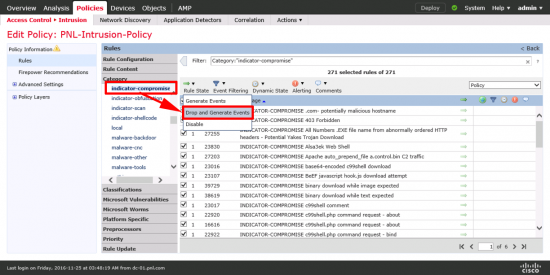
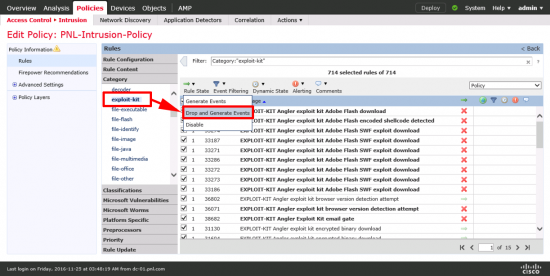
Rule State > Drop and Generate Events.
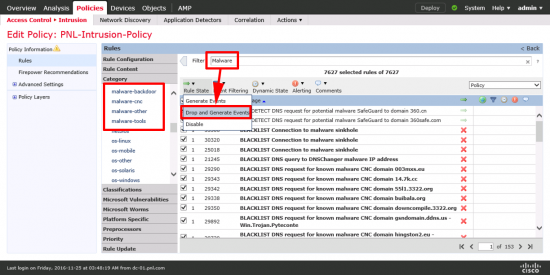
Repeat for ‘Malware’. Note: This does NOT require and AMP licence@
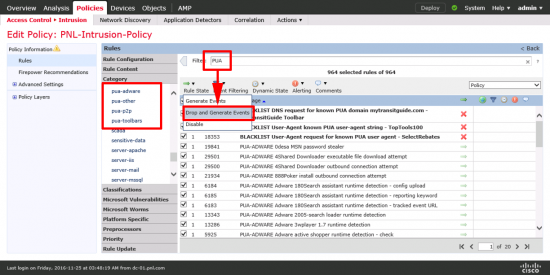
Repeat for PUA (Probably Unwanted Applications).
Repeat for ‘Indicator Compromise‘.
Repeat for ‘Exploit Kit‘.
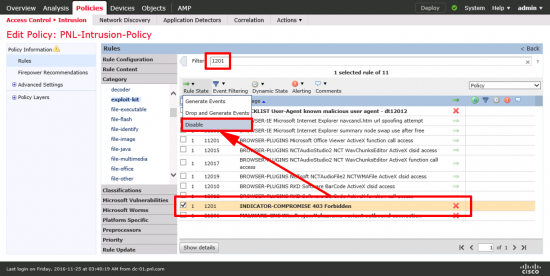
Search for ‘1201’ and locate the ‘INDICATOR-COMPROMISE 403 Forbidden’ rule and DISABLE IT.
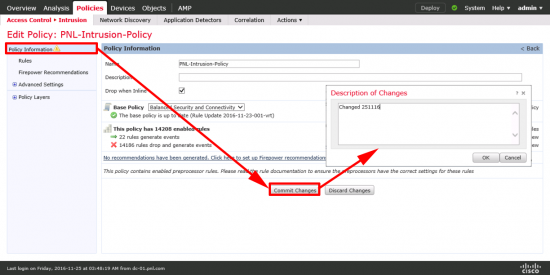
Policy Information > Commit Changes > OK.
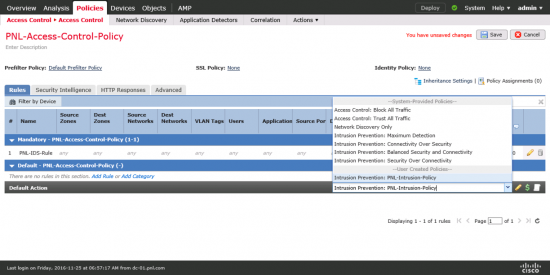
Note: To be used, the Intrusion policy needs to be declared in an Access control policy (or set as a Default Action).
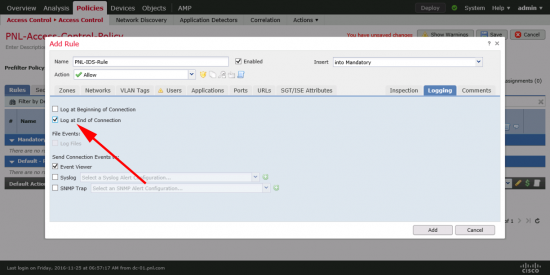
Also in the Access Policy set the logging to ‘Log at the end of connection‘.
As mentioned above you can also set it as the ‘Default Action‘.
Configuring FirePOWER AMP and File Policy
You need an AMP, (subscription based licence) to enable the ‘Malware Cloud Lookup, or Block Malware‘ Actions, but you can have a file policy and block specific file types.
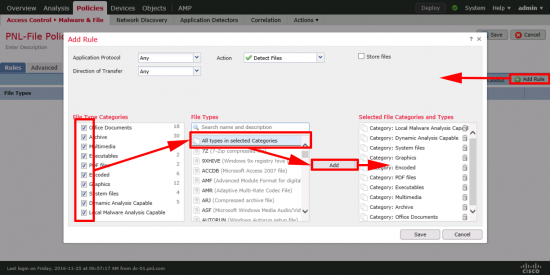
Polices > Access Control > Malware and File > New File Policy.
Give the policy a name you will remember > Save.
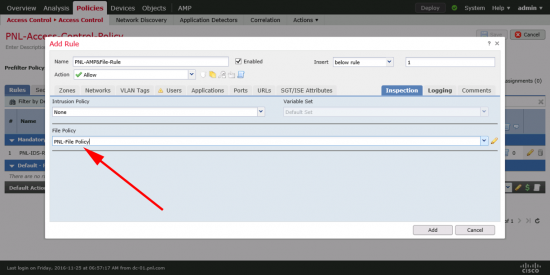
Action = Malware Cloud lookup > Add in the files you want to scan > Below I’ve set it to store unknown files > Save.
Then create another rule below that that detects all files.
As above the file policy wont be applied to anything unless you specify it in an access policy.
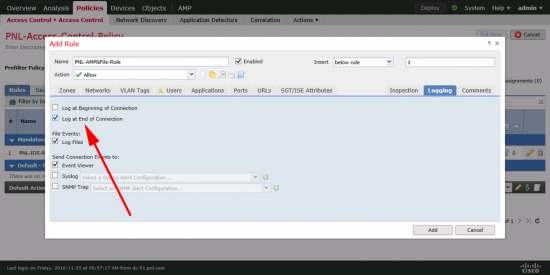
In the rule also set the logging to ‘log at the end of connection’.
Configuring FirePOWER URL Filtering Policy
You need to have a URL filtering licence allocated to the devices you want to use this policy on.
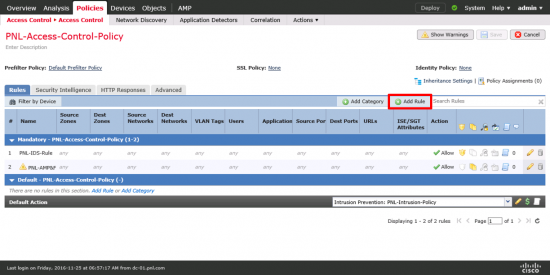
Unlike File policies and Intrusion policies, URL filtering is configured directly on your Access Control policy > Add Rule.
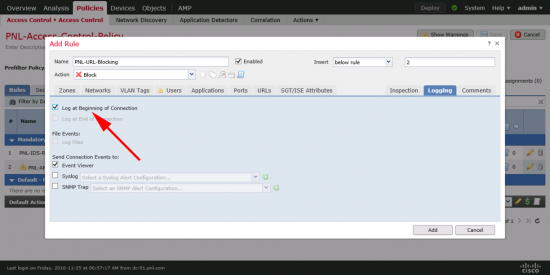
Here’s an example of blocking some categories you don’t want viable in tour organisation.
In a rule that only has URL filtering set the login to ‘Log at the beginning of the conneciton‘.
When done, don’t forget to ‘Deploy‘ the new policy to your managed devices. Deploy > Select Devices > Deploy.
hen Related Articles, References, Credits, or External Links
NA







17/01/2017
Thank you for this concise and readable guide to getting this setup. I was struggling with my first deployment of this system for two ASA FP Modules and your directions got us all setup. I’m looking for more resources on properly tuning the appliance, (System Variables, Rule flow, Correlation, etc.)
Can someone point me in the right direction?
Also – It would be a good to make sure users set the System Variables, as without these, I was getting quite a few false positives from my Web servers.
Thanks again!
18/01/2017
Thanks for the feedback, most of the articles get updated as I deploy more of them, and see problems to gotchas etc.
P
13/07/2017
Hi Pete,
Very good description on how to setup the Cisco Firepower. In your setup for Intrusion policy, I elected to use Firepower recommendations which covers a broader list of potential ‘bad’links. I don’t think many of us can really understand all of the intrusion possibilities listed.
26/08/2017
Thanks and very much appreciated
02/10/2020
Thanks for the great write-up.
petenetlive is one of my favorite sites for info.
I am confused about applying the control license.
Where do enter the control licence that came with my ASA?
Above you have the two steps that say;
“You need to take a note of the ‘Licence Key’”
and then
“When you get the licence back”
My confusion is what do I have to do the get the license back? I assume I must enter the Control license somewhere.
I tried clicking on the “Get License” button, but all that did was take me to my legacy licencing portal.
Thanks again for this and all your great posts.
02/10/2020
Control licences come with the ASA, they are simply a PAK number, that you need to register to the Appliance, with traditional licences you go to the licence portal, enter the PAK and the MAC address of the the management appliance > It will send you >BACK< a licence code, that is actually a digital certificate but it looks like a text file, that's what you enter.
05/10/2020
Thanks. This was the piece I needed.
19/03/2021
Just wanted you to know 4 years later this article is still ABSOLUTE GOLD. Thank you for putting the time in! Very helpful!
19/03/2021
Cheers Adam!