FSMO Roles KB ID 0001257
Problem
I’ve written about transferring and sizing FSMO roles, (Flexible Single Master Operations) before, see the following article;
Now you have a PowerShell Commandlet to help ‘Move-ADDirectoryServerOperationMasterRole‘.
FSMO Roles : Solution
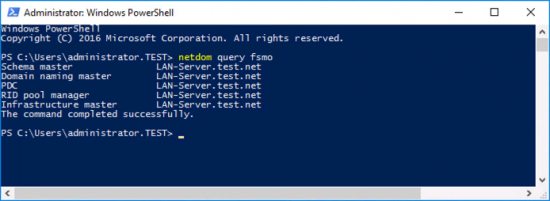
As before you can view your FSMO role holders, by using the following command.
To transfer them to another server, (in the case a host called LAN-2016.
If you can’t be bothered to type the names, you can also use numbers, i.e.
- PDCEmulator 0
- RIDMaster 1
- InfrastructureMaster 2
- SchemaMaster 3
- DomainNamingMaster 4
Obviously this will move them all, omit any you don’t want to move!
How to Seize FSMO Roles In Server 2016
Easy! Same command as above, but you put the ‘-Force’ switch on the end of the command, i.e.
Note: If you prefer to do this graphically, then see the following article.
Related Articles, References, Credits, or External Links
NA


07/07/2017
Perfect! Saved me time. Thanks for the post.
20/10/2017
Very clean procedure… thank you
31/12/2018
Very nice. Works well
14/12/2020
Worth noting that as in Pete’s screenshot, you’ll need to run an elevated PowerShell session for this to work. Otherwise you’ll get an Access Denied message. 🙂
23/10/2023
Nice and easy. Worked out for me. Thanks you!