
KB ID 0000599
Problem
A client who we recently did a WDS (Windows 7) install for, needed to image a couple of Windows XP machines, (They had some software that either would not run, or was not supported on Windows 7).
They asked me for some documentation on how to do this, it’s been such a long time since I imaged any XP machine, so I took the opportunity to document it properly.
Solution
Before you begin, be aware you need to be building your reference machine with a Volume Licenced copy of Windows XP NOT an OEM or Retail copy (i.e. DONT build the machine with manufacturers rescue disks like Dell or HP). If you don’t do this you will need to activate every Windows machine that you deploy with Microsoft.
Make sure the version of sysprep you are using is at the same service pack level as the reference machine or bad things will happen.
Windows XP SP3 version of Deploy.cab
1. Build your reference machine, and configure it as you require.
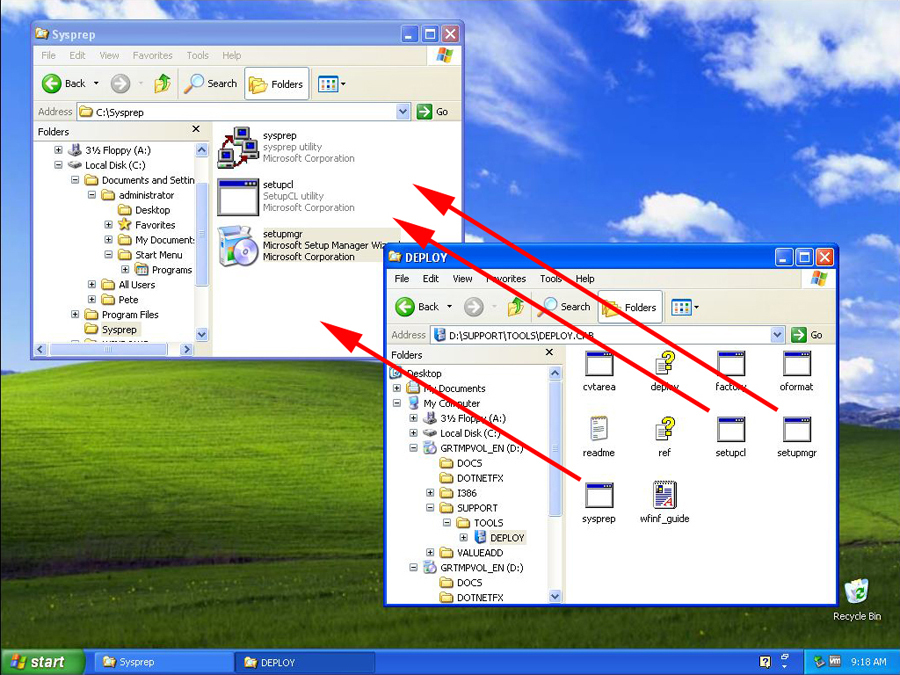
2. Create a folder on the root of the C: Drive called ‘Sysprep”. Insert the Windows XP CD and locate the Deploy cabinet file. (This is ‘like’ a zip file and it’s in the supporttools folder).

3. Double click the support cab, then copy over the sysprep.exe file, the setupcl.exe file and the setupmgr.exe file to your c:sysprep folder.
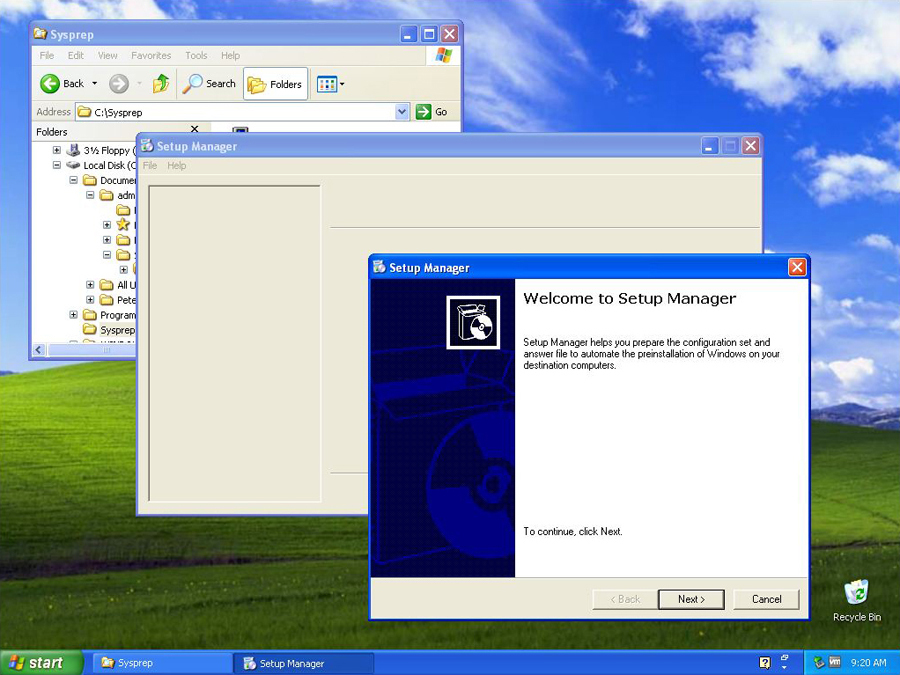
4. You can now run sysprep.exe and skip to step 13. BUT if you require an answerfile (a script that will answer all the questions Windows will ask while it’s reinstalling post sysprep) then run the setupmgr.exe program, at the welcome screen click next.
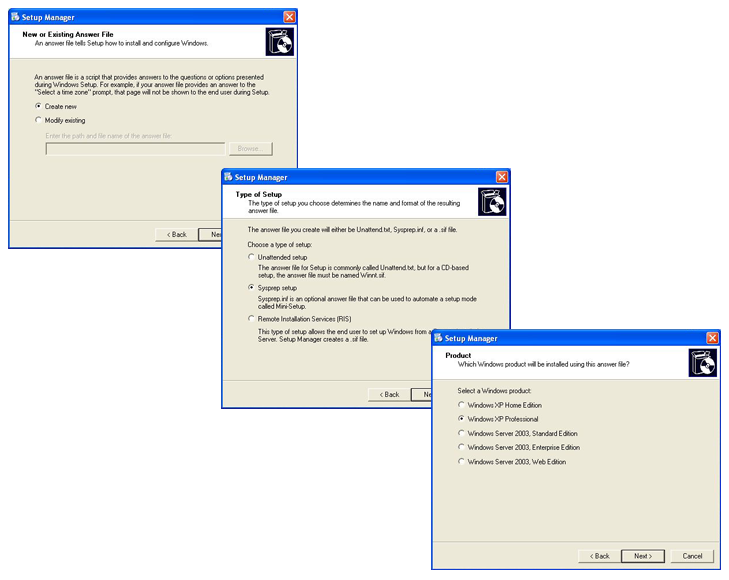
5. Create New > Sysprep Setup > Windows XP Professional.
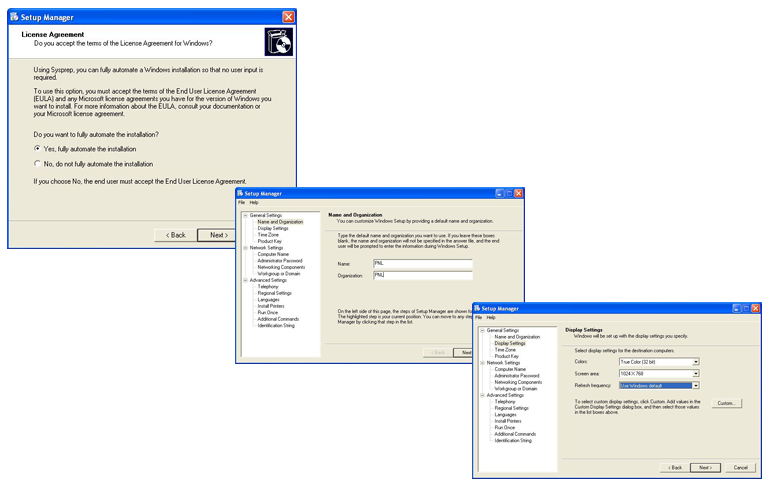
6. Fully Automate > Enter Name and Organisation > Set the Display Properties.
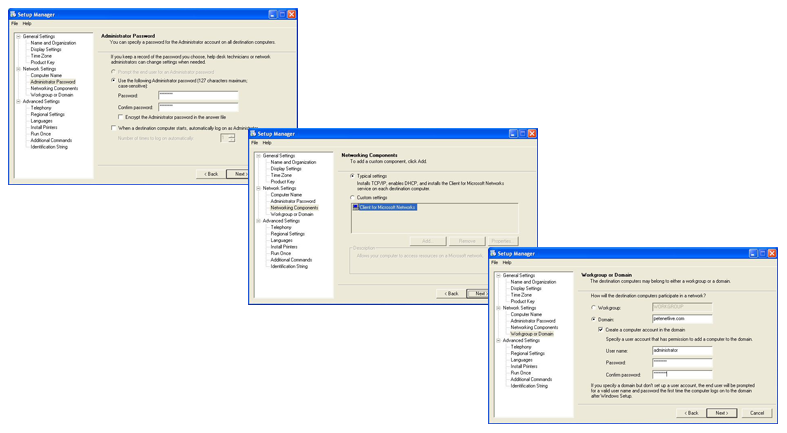
7. Set Time Zone > Enter the Volume Licence unlock code > If you are joining a domain, I suggest generating a random name then changing it later.

8. Set the Local Administrators password > Typical settings will enable DHCP > Supply any domain and domain credentials you need to join your domain.
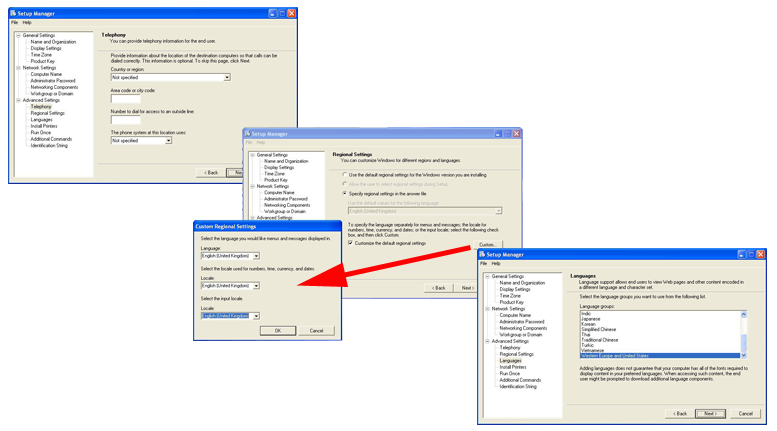
9. Telephony (I just skip this) > Regional Settings > Languages.
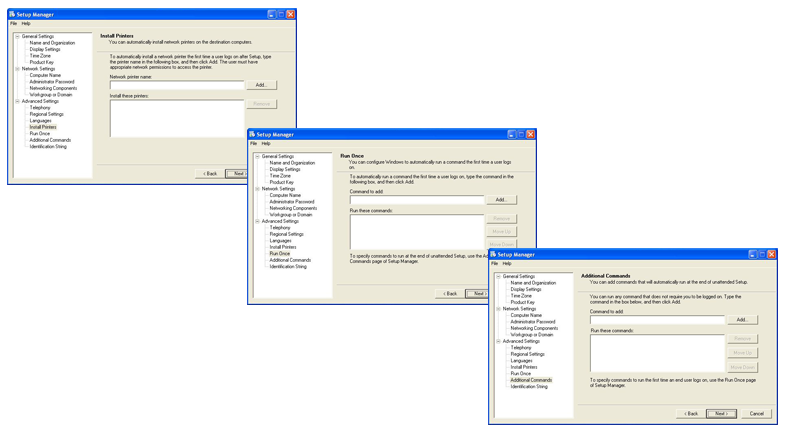
10. Printers > Run Once commands > Additional Commands.
11. Enter a string that will go into the registry, and can be identified later > Finish > Accept the default save path > OK > At this point it looks like it’s crashed, you can manually close the setupmgr.

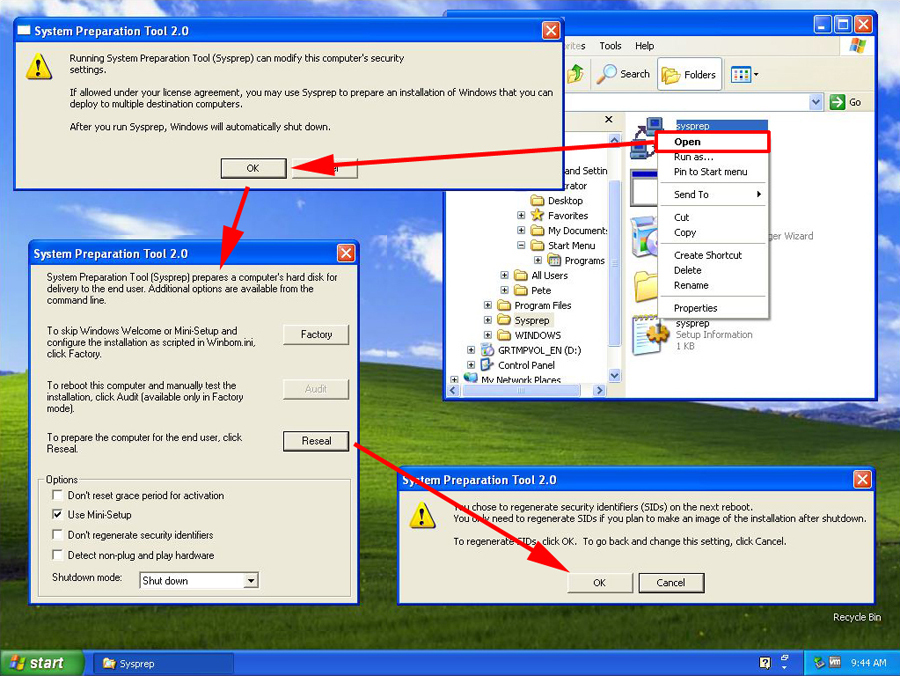
12. Now you can run sysprep.exe > OK > I select ‘mini-setup’ (If you don’t, it will run the welcome to windows session and play the annoying music you cant turn down!) > If you have installed applications and are going to image the machine click Reseal > OK.
Note: Factory will literally set the machine back to a ‘day one’ install of Windows XP.
The machine will then shut down and can be imaged.
Final Note: If you power it back on, it will rebuild itself and delete the c:sysprep directory. Which is fine unless you are doing some testing and realise you have to do the whole thing from scratch!
Related Articles, References, Credits, or External Links
Windows Deployment Services (Server 2003)
Deploying Windows XP
Windows Deployment Services (On Server 2008 R2)
Deploying Windows 7