
KB ID 0000592
Problem
Windows Server Update Service or WSUS, (previously called SUS Software Update Services) was an additional download that you could use to let one or more servers in your organisation handle the updates for your Windows clients and Microsoft applications.
With Server 2008 R2, it is now included as a server ‘role’ rather than a download. It’s a great tool for centrally managing and reporting on your network’s update status, and if you do not allow your clients web access, lets you update them without punching holes in your firewall. Also it saves all your clients pulling their updates from Microsoft, and hammering your internet connection.
Solution
WSUS Prerequisites
Before you start, make sure the server you are going to use is fully updated. You will also need 6GB (Approx) to hold the updates.
Step 1 Add and Configure the Windows Server Update Services Role
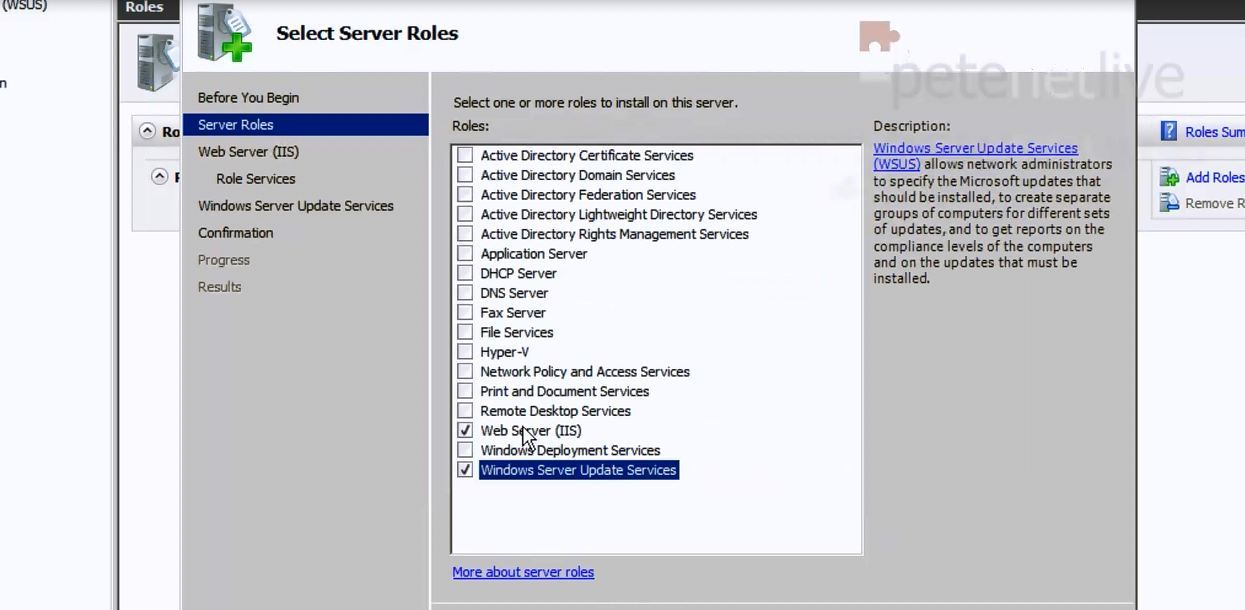
1. On the WSUS Server run the ServerManager (CompMgmtLauncher.exe) > Roles > Add Role > If you see the “Before you begin page” click Next > Select “Windows Server update Services” > At this point if IIS is not installed it will ask to add the required role service > Let it do so > Next.
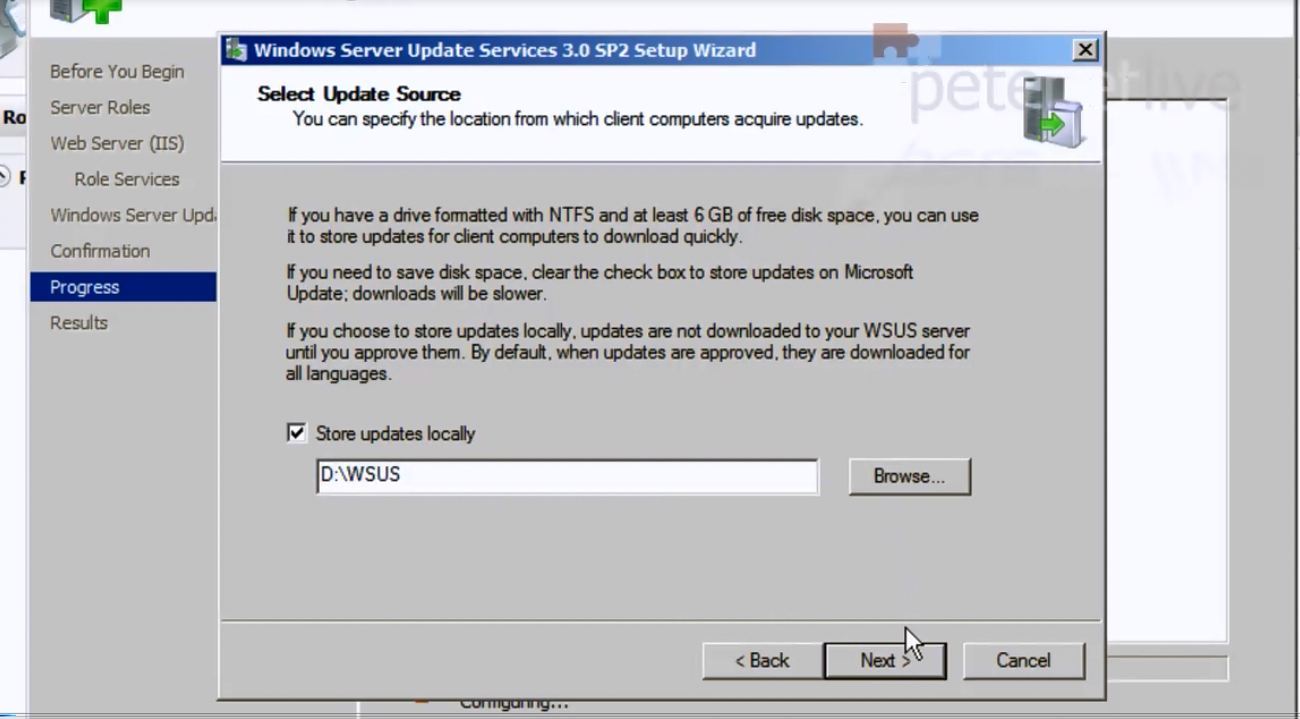
2. Next > Next > Next > Install > During the install the WSUS Setup Wizard will start > Next > Accept the EULA > Next > Specify a location to store the updates > Next.
3. You can choose an existing Database or click next to install and use SQL Express > Choose your web site settings > Next.
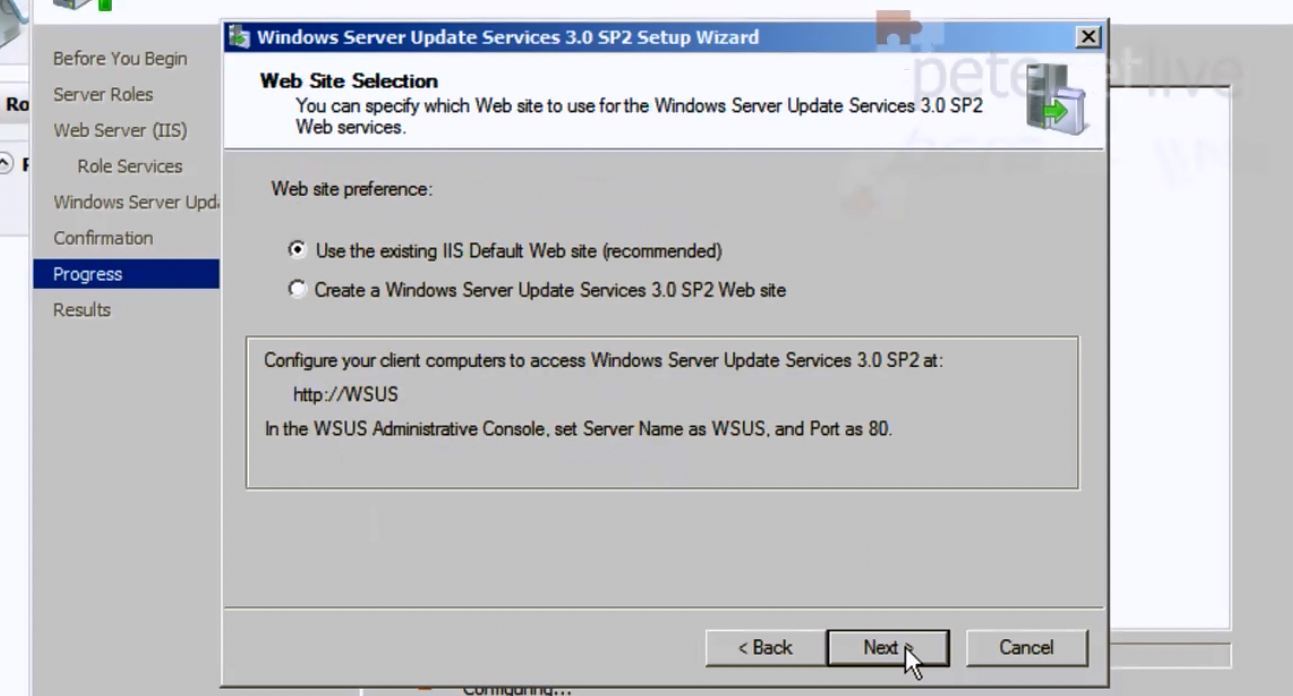
Note: The default setting will install and configure web services on TCP Port 80 (http). If you have another service or program using that port you will have a problem, (i.e. a program that uses Apache web server, or UPS software that has a management console on port 80, etc). If you choose the second option it will set the site up on TCP port 8530 for http and 8531 for https.
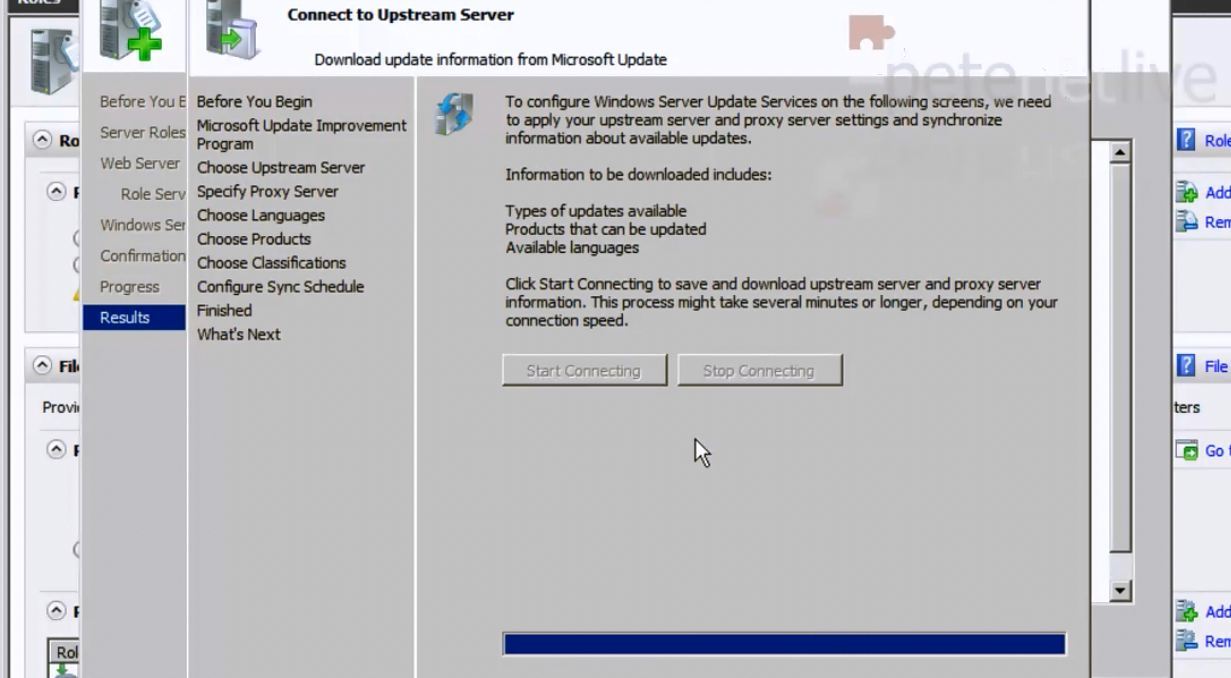
4. Next > Finish > Now the configuration wizard will open > Next > Next > If you are going to pull your updates from another WSUS server enter it here > If not click Next > If you need to enter proxy server details do so > Next > Click “Start Connecting” (this can take a while > Next.
5. Select the languages you want to download > Next > Select the products you would like to download updates for > Next.

6. Select the ‘Classifications’ (types of update) you want to serve > Next > Set your sync schedule (I usually do this once a day) > Next.

7. Next > Finish > Close.
Step 2 Group Policy Settings for WSUS Clients.
Remember these policies are Computer Policies NOT User Policies, you need to link the GPO to your computers, If you link it to an OU containing users nothing will happen!
1. On a domain controller > Start > Administrative Tools > Group Policy Management > Locate the OU containing your computers > Right click and create a new GPO.
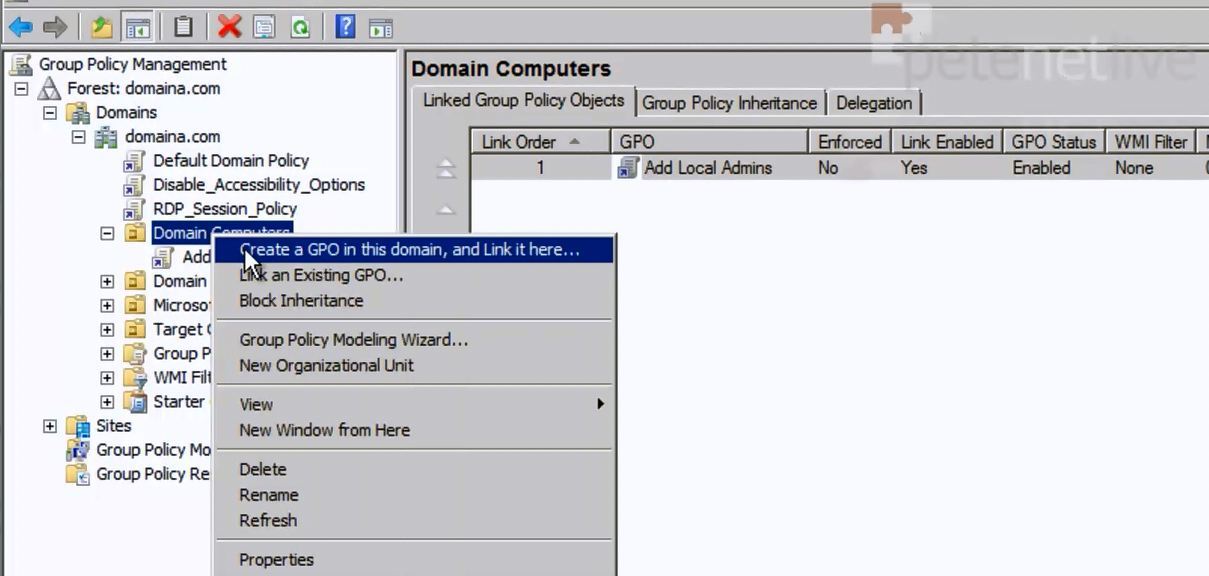
2. Give the GPO a name > The Edit the new GPO > Navigate to:
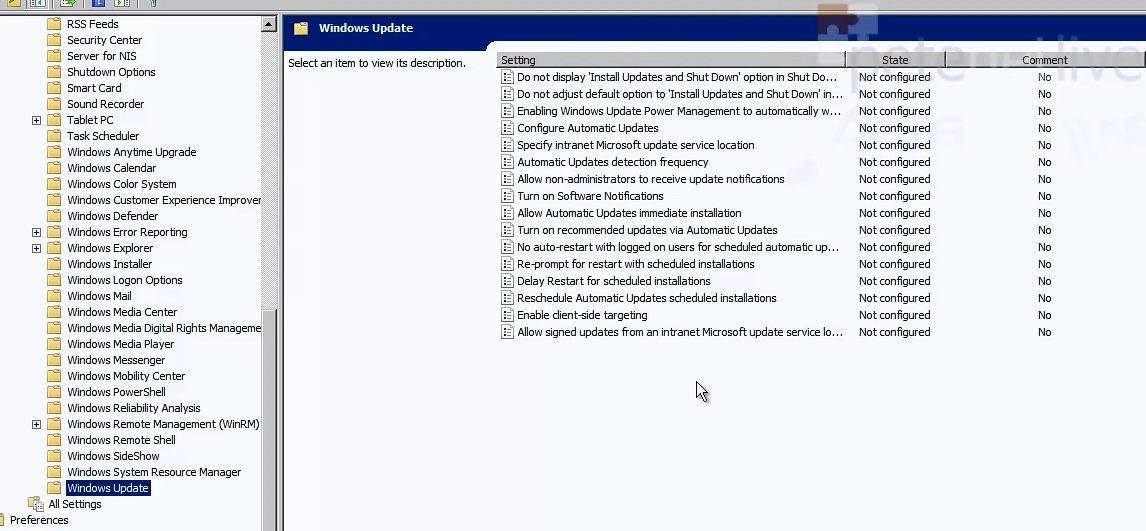
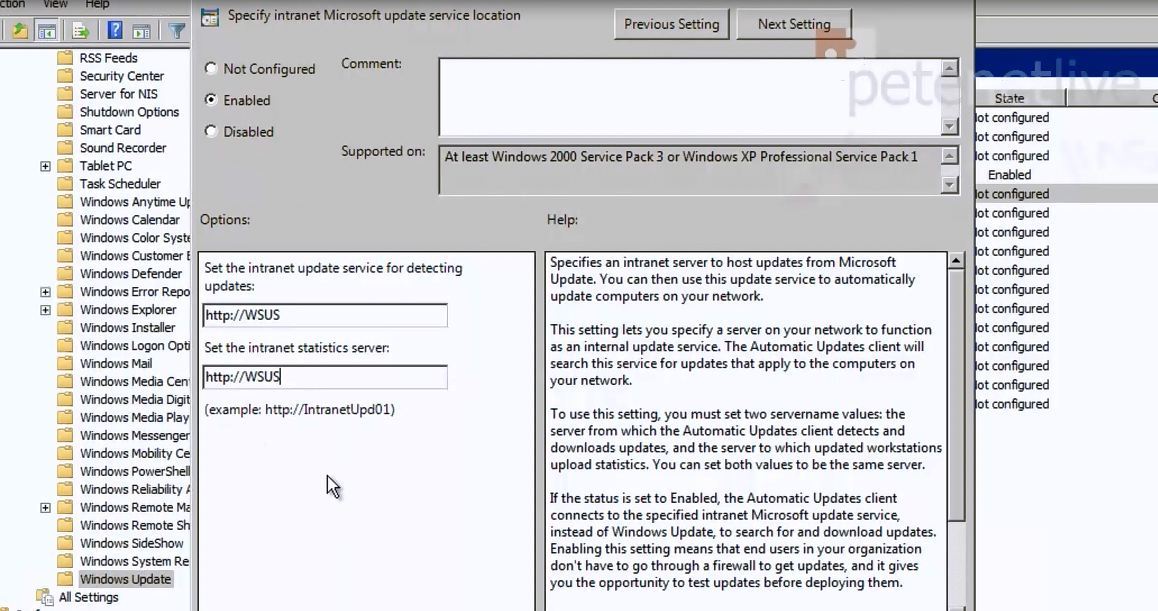
3. Edit the settings on the right to suit your requirements. > Close the group policy editor Window, (to see what settings I usually set see the video above).
4. You clients will get these settings next time they boot, after a maximum of two hours, or after you run “gpupdate /force” on them.
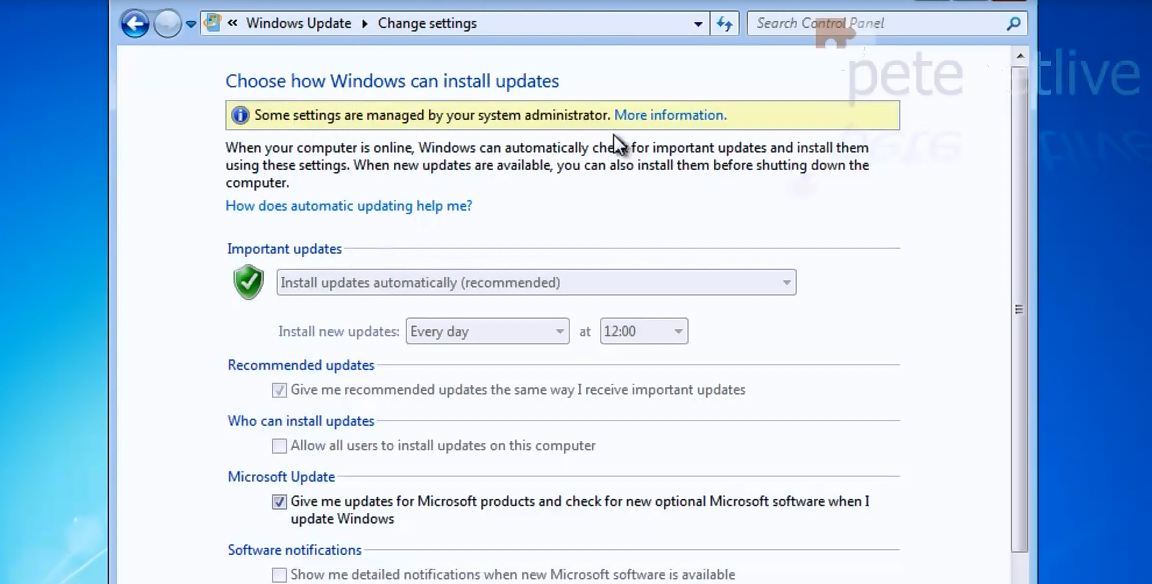
5. If you check your clients you will see their Windows Update settings are now “Grayed Out”
Step 3 Configure Windows Server Update Services.
1. WAIT a while before returning to the WSUS server to configure it, (I typically wait a few days). Assuming your computers are now appearing in the “Computers Section” you need to either manually approve the updates or set them to automatically update.
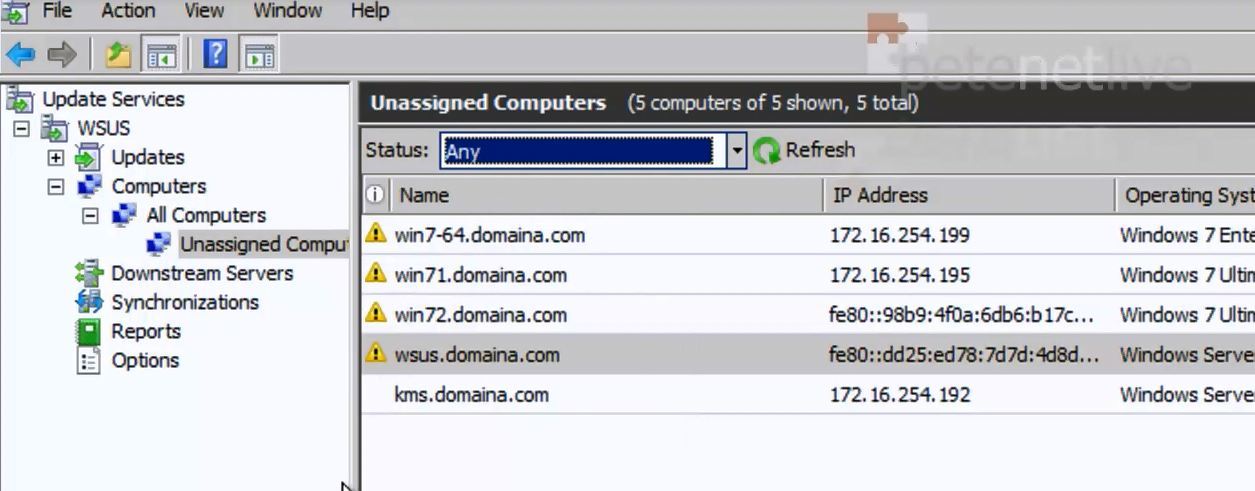
If your computers fail to ‘appear” see Windows Client(s) not ‘appearing’ in WSUS
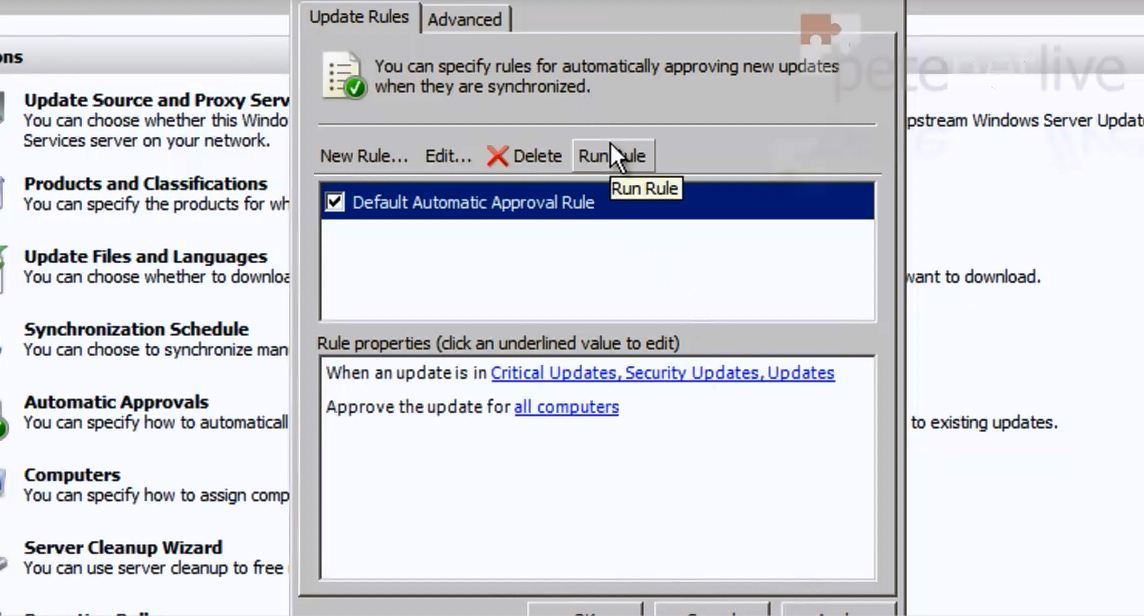
2. If you want to simply “Auto approve” all new updates then navigate to Options > Automatic approvals > And Select the “Default Automatic Update Rule” > Click the Hyperlinks in the rule to edit them > Apply > Run Rule > Select ‘Yes’ to save and run.
3. If you want to create computer groups and roll out updates in a more staged manner, you can create different computer groups, and add your computers to those groups.

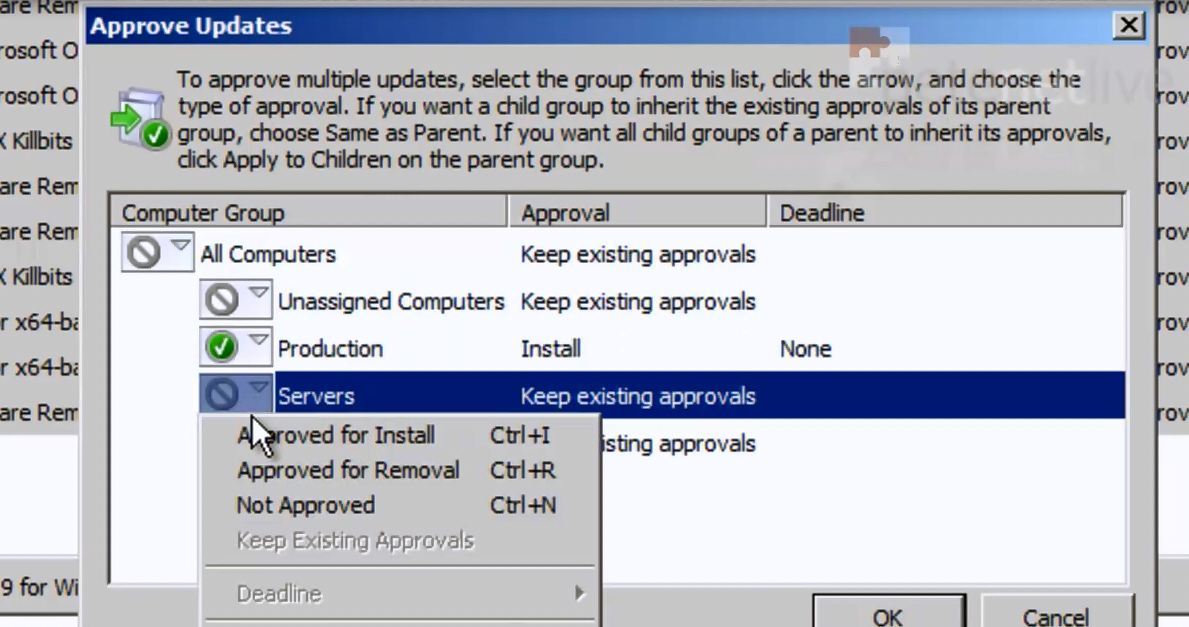
4. If you want to manually approve updates navigate to Updates > All updates > Select the “Unapproved” updates > Right Click > Approve > Select your computer groups as appropriate.
Note: You can select mass select the updates by holding down Shift, or individually by selecting them while pressing Ctrl.
Related Articles, References, Credits, or External Links
Windows Client(s) not ‘appearing’ in WSUS
WSUS Install Error – ‘The update could not be found. There may be a network connection issue.’
Message ID 6600: sms wsus configuration manager failed to configure upstream server
WSUS Install Error on Windows Server 2008 R2