
KB ID 0000302
Problem
You have a reference machine (physical or virtual), and you want to capture an image of that machine to your System Center Configuration Manager 2007 Infrastructure.So you can then deploy that image to multiple machines.
Solution
Prerequisites
1. SCCM needs to be installed and configured.
2. Download the Task and Registry File in Zip Format (Edit the .reg file with notepad to enter the correct administrator password see below).
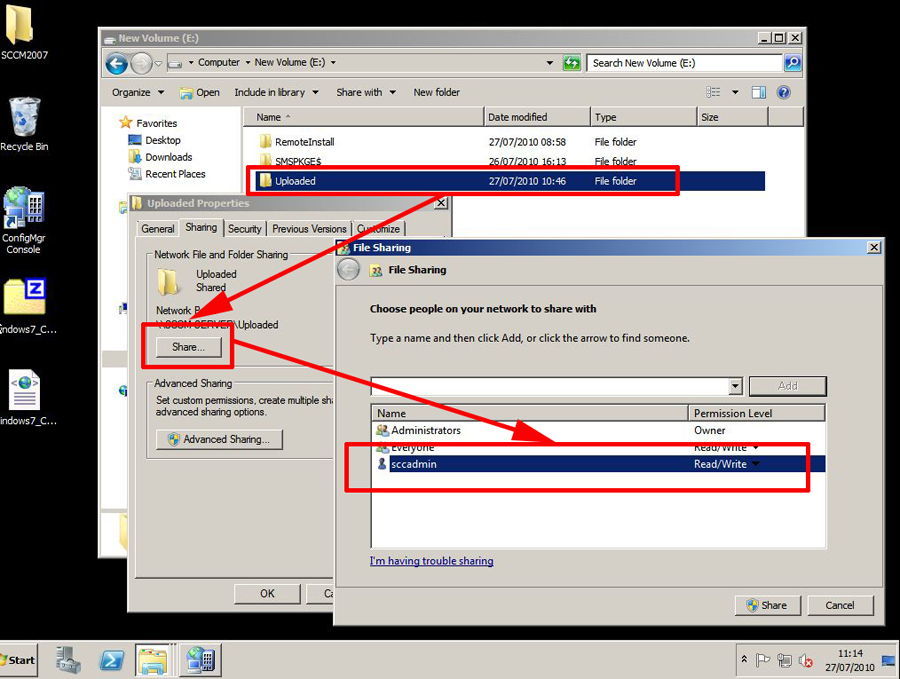
3. Create a SHARE on your network to hold the images and files > and grant full control to your sccadmin user.
4. Windows and application media that is either “Volume Licensed” or “Multiple Activation Licensed”.
5. Your Windows 7 reference machine needs the local administrators account enabling, and the local administrator’s password changing to mach the password in the registry file you downloaded above. (In the example below Password123).
Windows Registry Editor Version 5.00
[HKEY_LOCAL_MACHINESOFTWAREMicrosoftWindows NTCurrentVersionWinlogon]
"AutoAdminLogon"="1"
"DefaultUserName"="Administrator"
"DefaultPassword"="Password123"
Step 1: SCCM Put your Reference Machine into a Collection
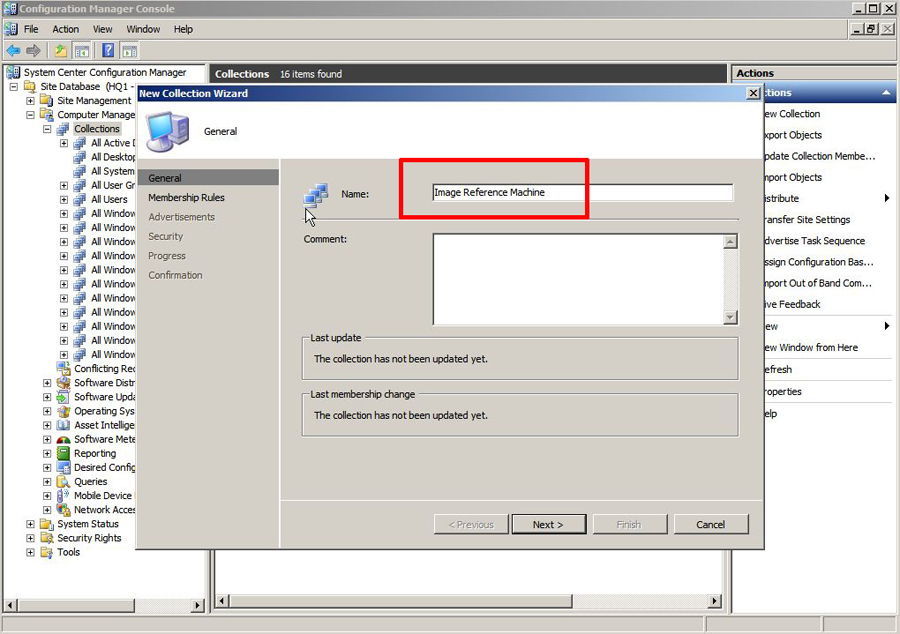
1. Open the SCCM Manager > Expand Site Database > Computer Management > Collections > Right Click > New Collection > Call It “Image Reference Machine” > Next.
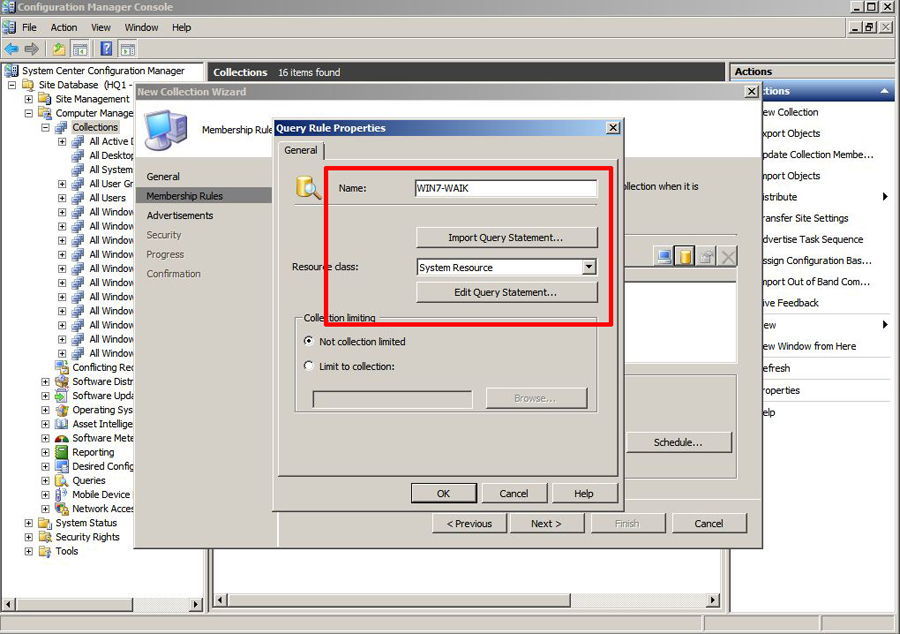
2. Next > Click the small computer Icon to add a rule > Next > Change the Resource Class to “System Resource” > Change the attribute name to “Name” > Enter the reference machines Name.
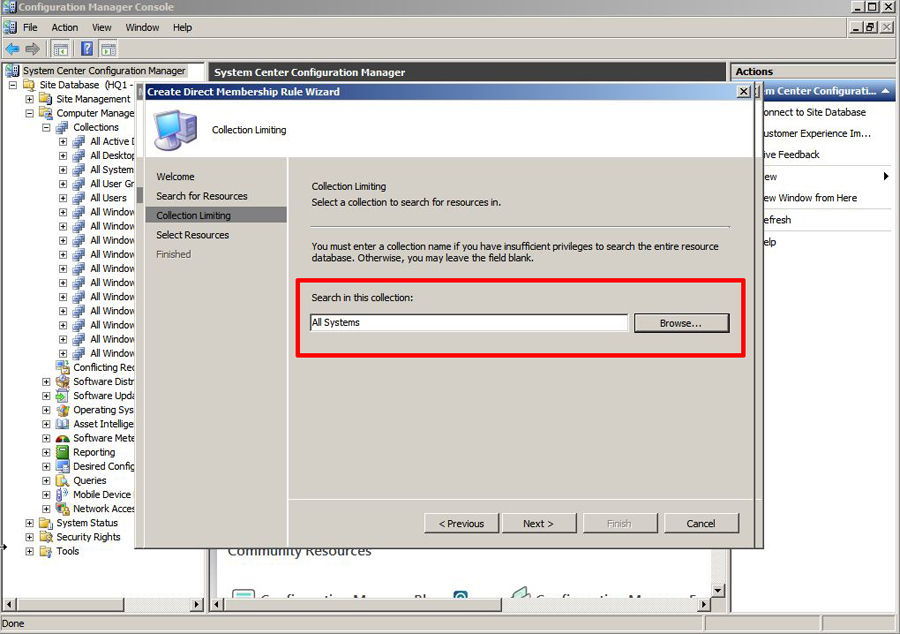
3. Supply the “All systems” Collection > Next.
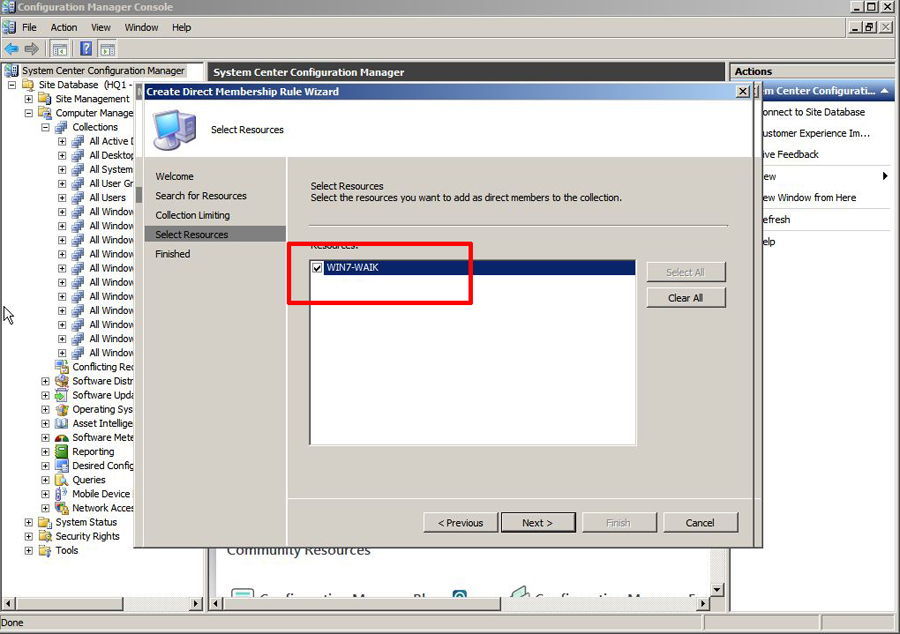
4. Select your Reference Machine > Next
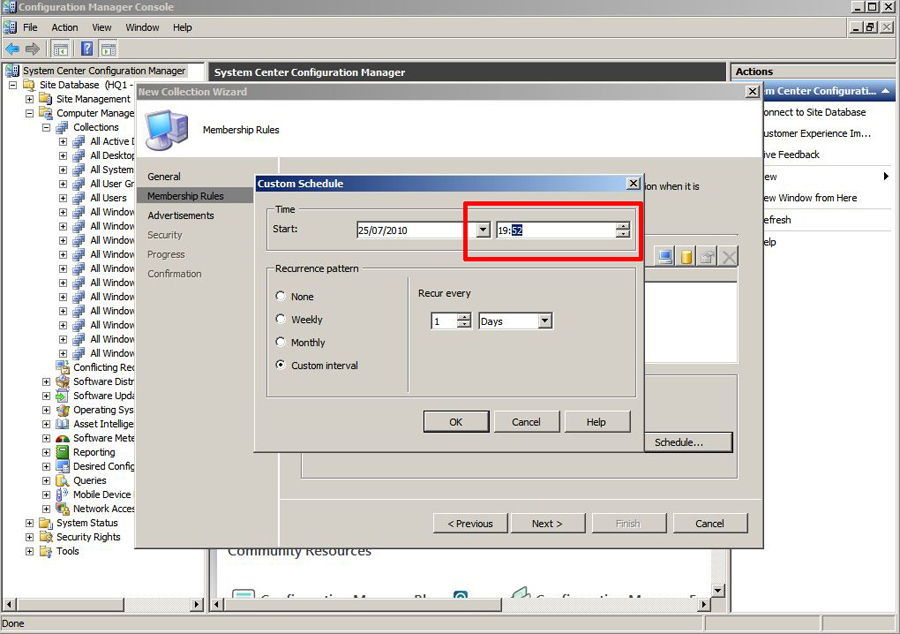
5. Set the schedule so it occurs 5 minutes in the future > OK > Next > Next > Finish.
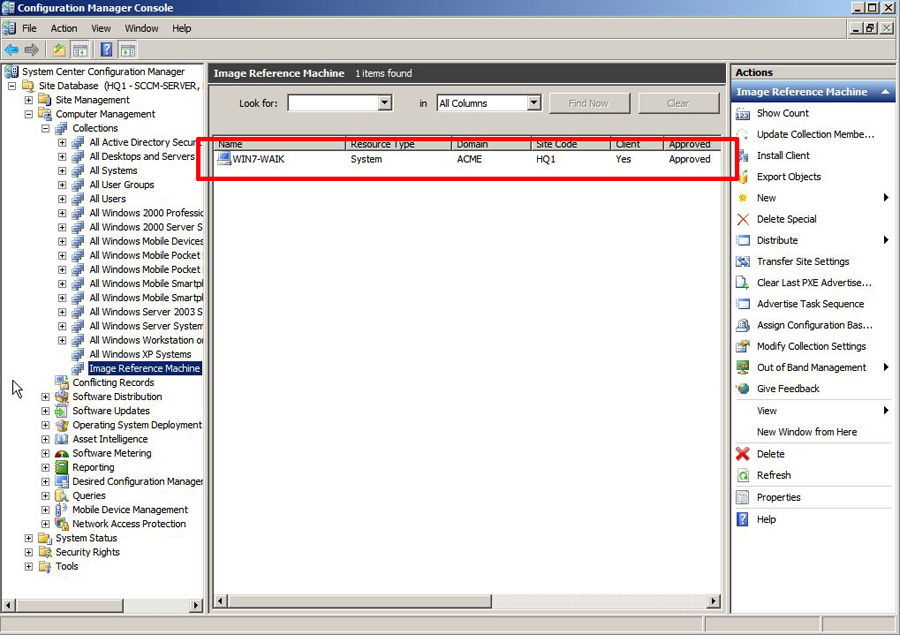
6. When finished you should have your Reference Machine in the Collection.
Step 2: SCCM Create an “AutoLogon Package”
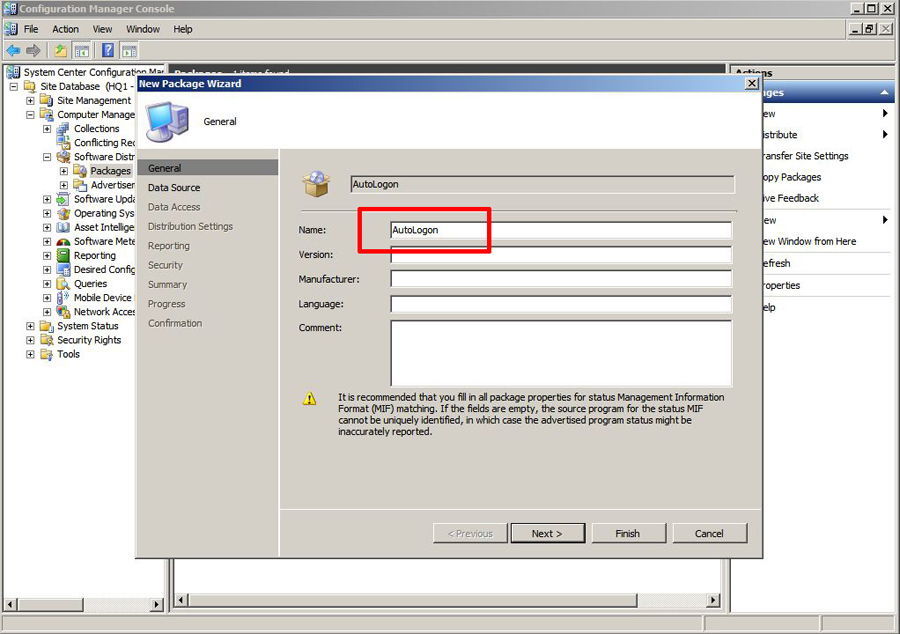
1. Open the SCCM Manager > Expand Site Database > Computer Management > Software Distribution > Right Click > New > Package > Call it AutoLogon > Next.
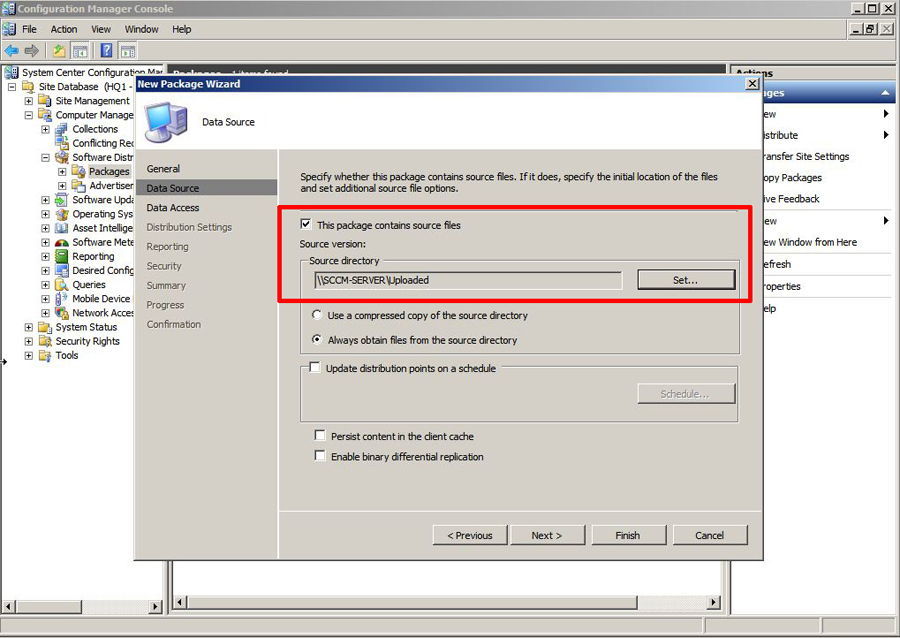
2. Tick “This Task contains source files” > Put in the path to share containing the AutoLogon.reg file > Next.
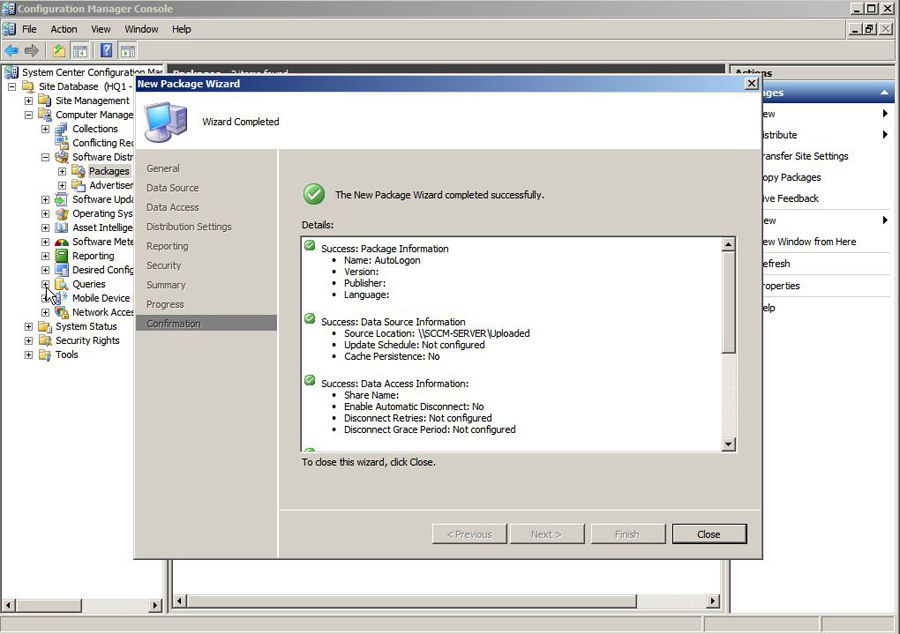
3. Next > Next > Next > Next > Next > Close
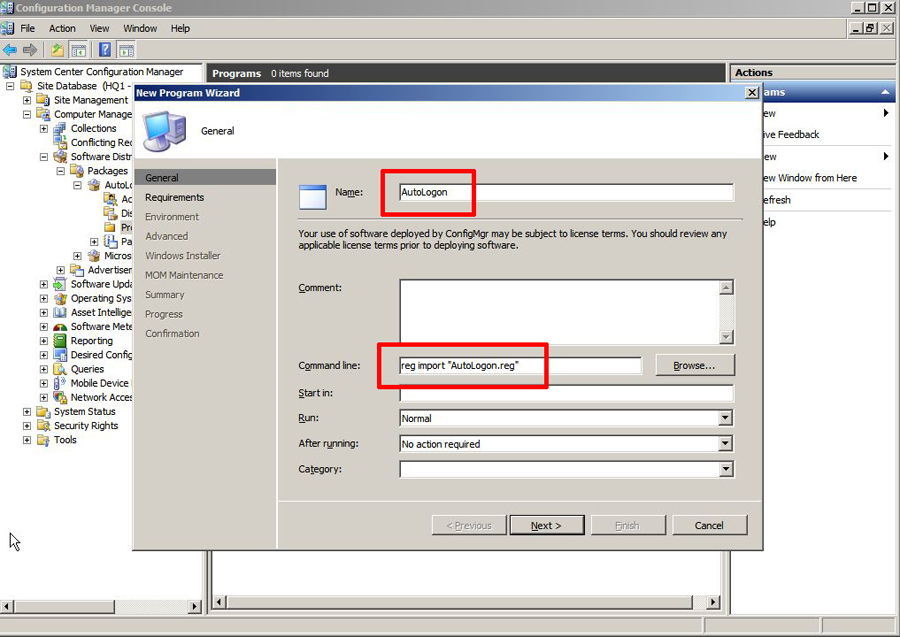
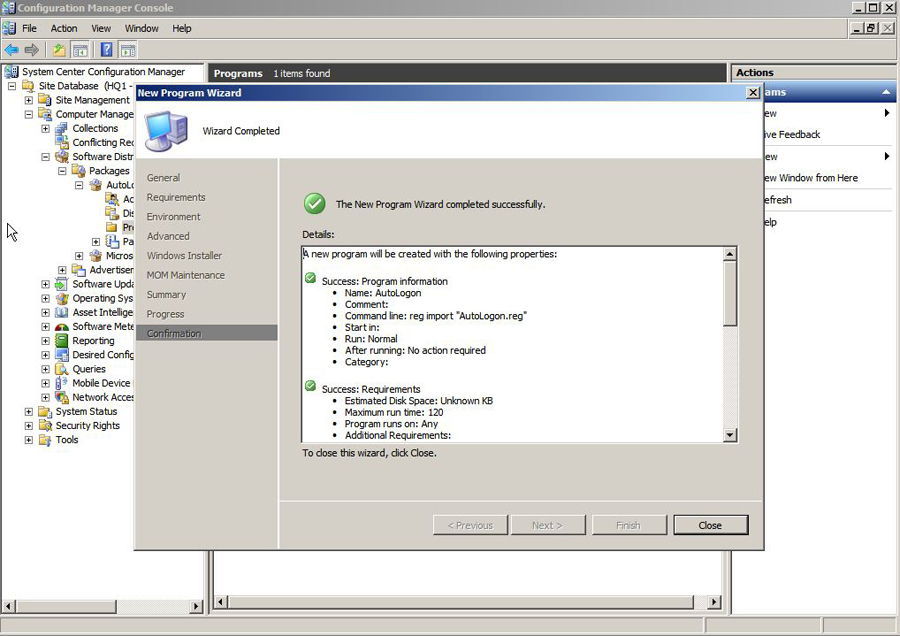
4. Expand Your AutoLogon Package > Programs > Right Click > New > Program > Call it “AutoLogon” > In the Command Line Section enter reg import “AutoLogon.reg” > Next.
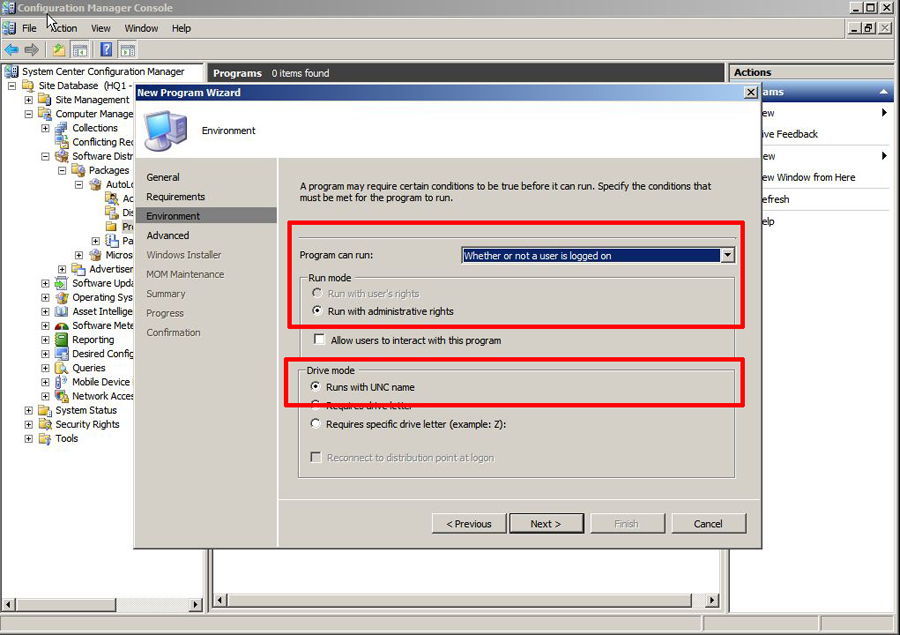
5. Next > In the Environment Section change the “Program Can Run” Section to “Whether of not a User is Logged on” > Tick Run with Administrative rights > Tick “Runs with UNC Name” > Next.
6. Next > Next > Next > Next > Close.
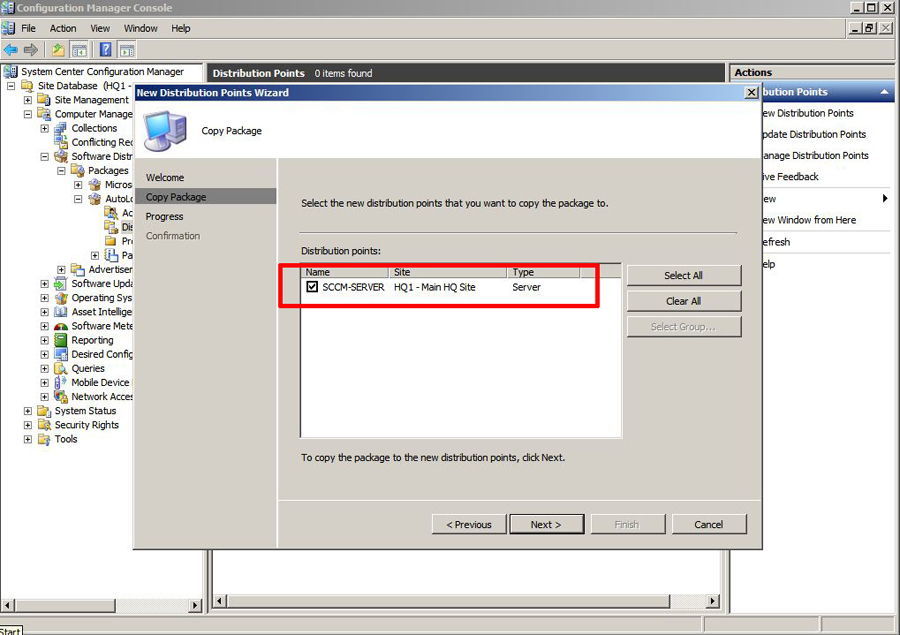
7. Expand your AutoLogon Package > Distribution Points > Right Click > New Distribution Point > Next > Tick the Server > Next > Close.
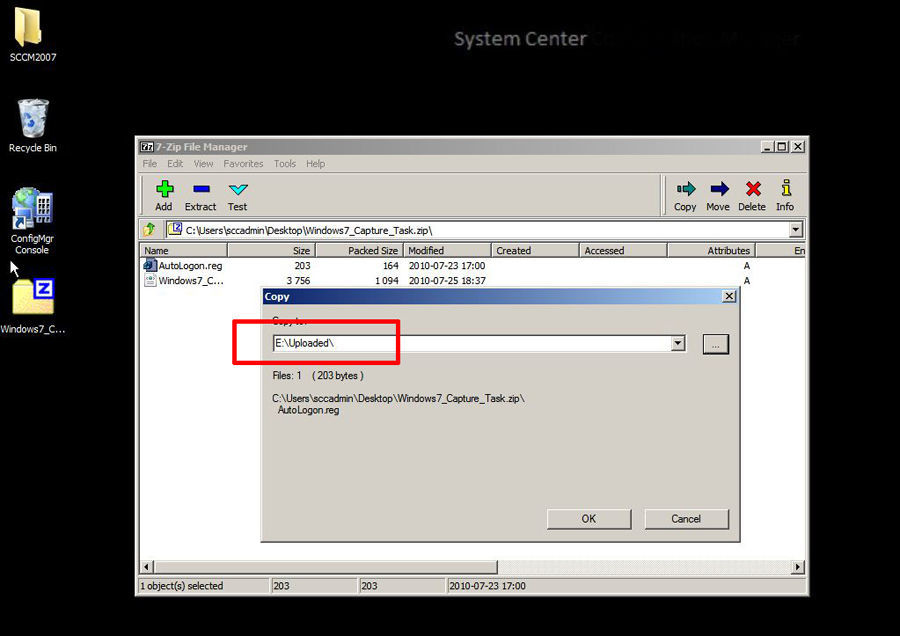
8. Extract the AutoLogon.reg file to the location you specified in number 2 above.
Step 3: SCCM Import the “Windows 7 Import Task”
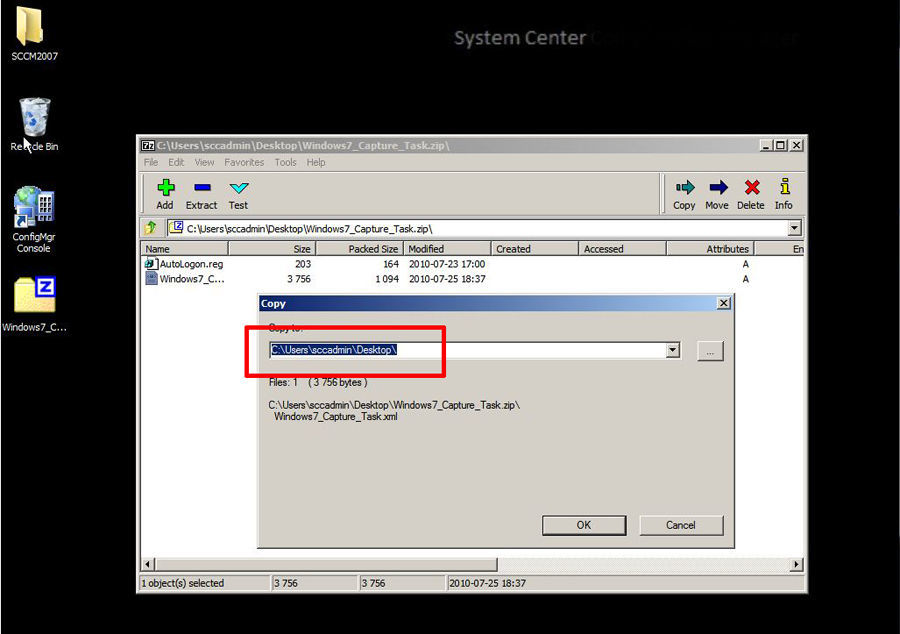
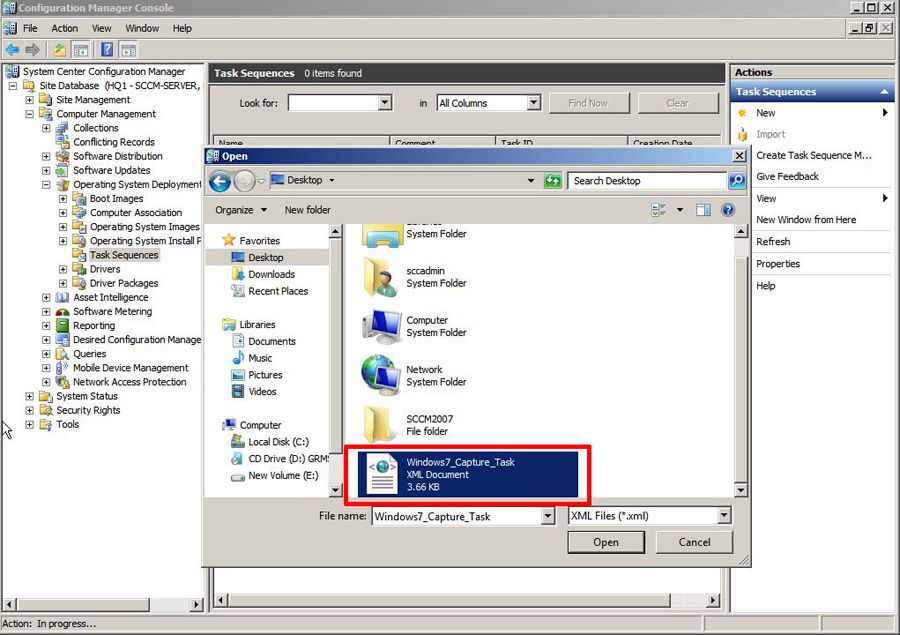
1. Extract the Windows7_Capture_Task.xml file to the Desktop.
2. Launch the SCCM Manager > Expand > Site Database > Computer Management > Operating System Deployment > Task Sequences > Right Click > Import > Select the Windows7_Capture_Task.xml from your desktop.
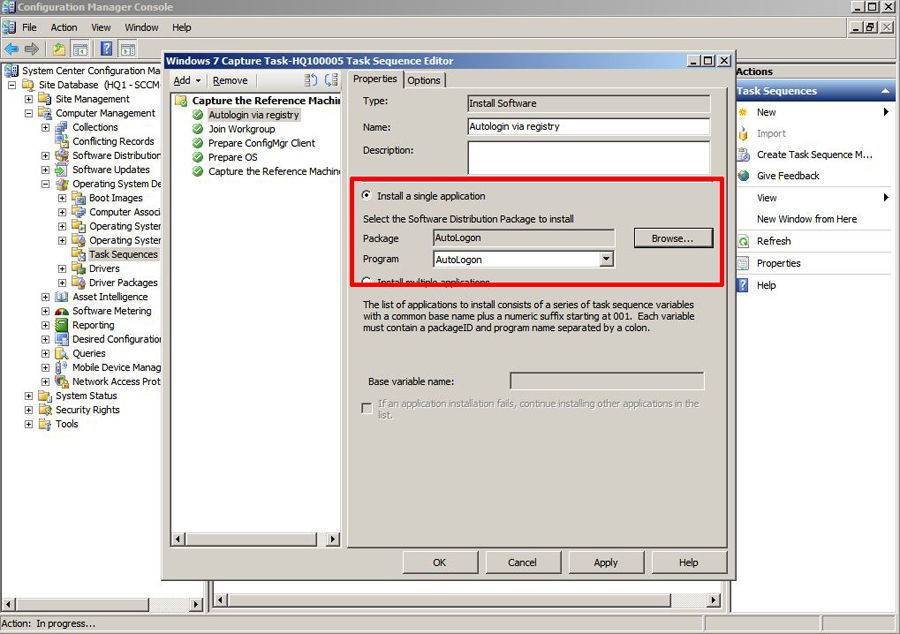
3. You Will be asked if you want to Edit the Task Select Yes > Under “Autologin Via Registry” Select the Package you created in Step 2 above.
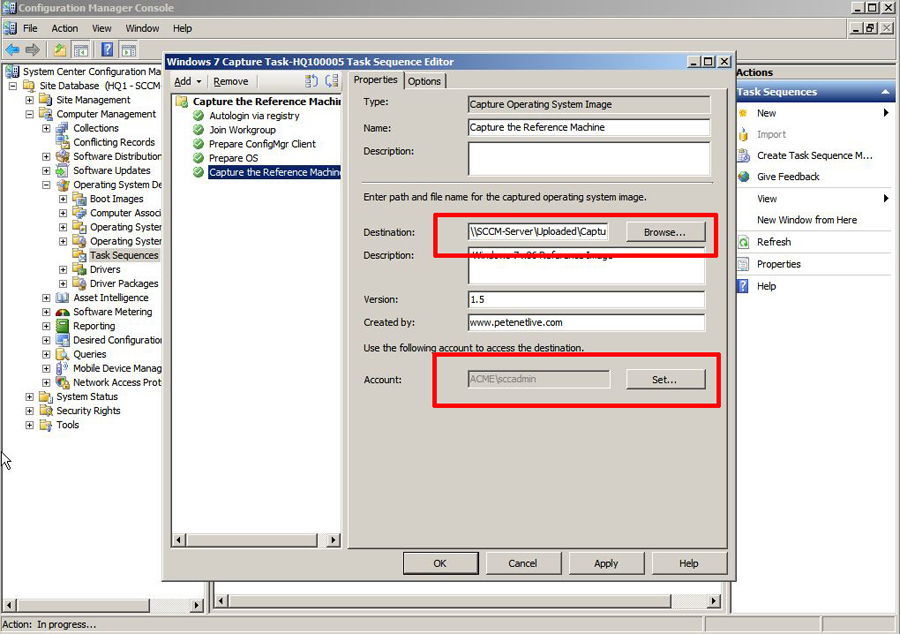
4. In the Capture The Reference Machine Section > Set the Network share you want to save the Image in > Set an account (Note user DOMAINNAMEusername) that account MUST have permissions to the network share > Apply > OK.
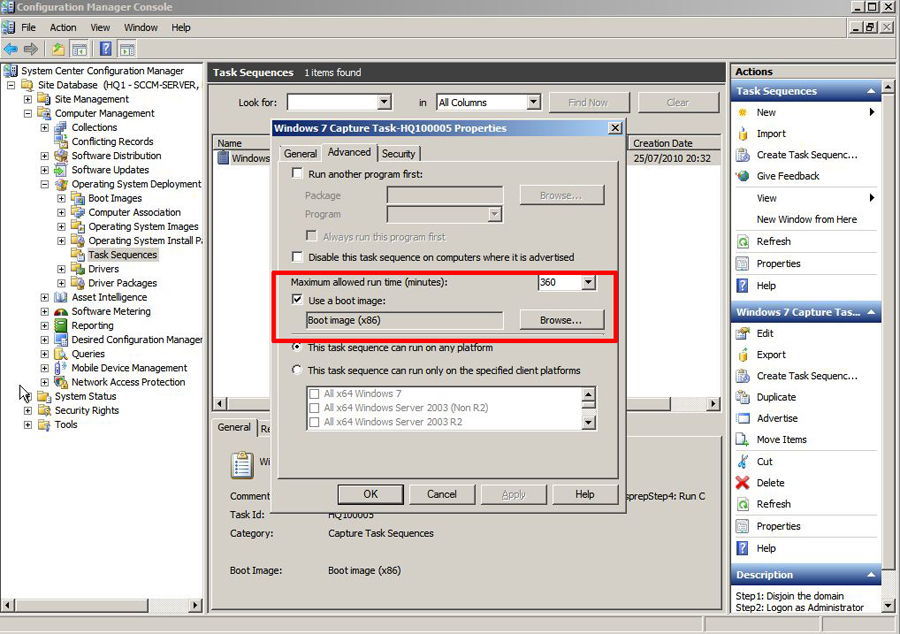
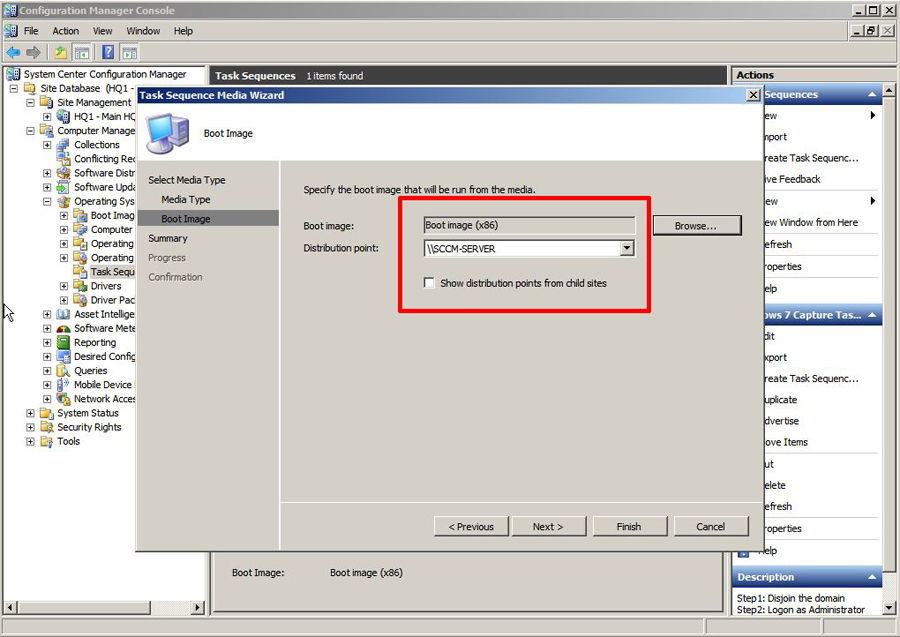
5. Right Click the Task you have just imported > Properties > Advanced > Tick “Use Boot Image” > Select either the x86 or x64 (to match your reference machine) > Apply > OK.
6. Right Click the Task you have just imported > Advertise > Under Collection Set your “Reference Image Machine” > Next.
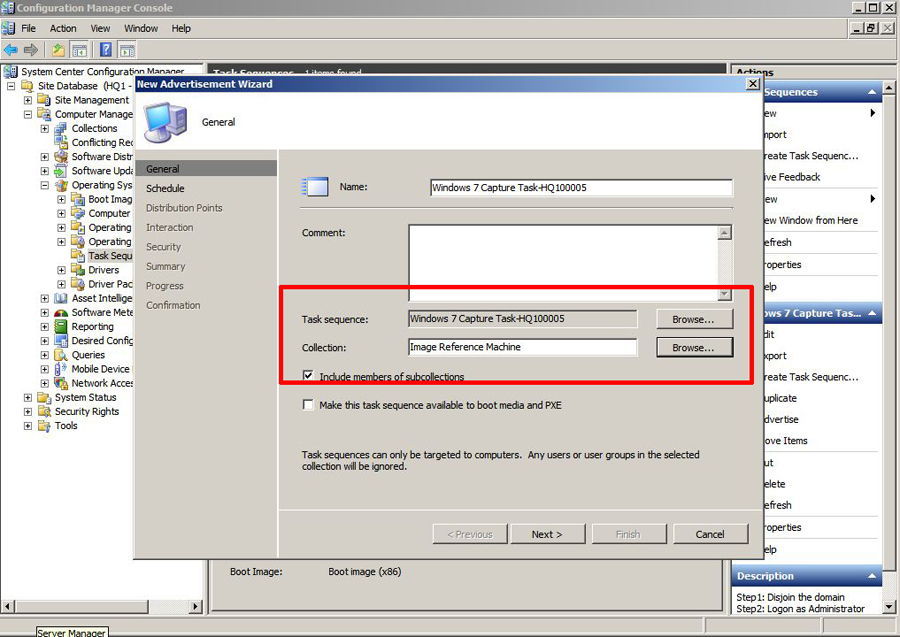
7. Next > Next > Next > Next > Close.
Step 6: SCCM Send the Boot Media to Distribution
1. Launch the SCCM Manager > Expand > Site Database > Computer Management > Operating System Deployment > Boot Images > Boot Image (x86) > Distribution Points > Right CLick > New Distribution Points > Next.
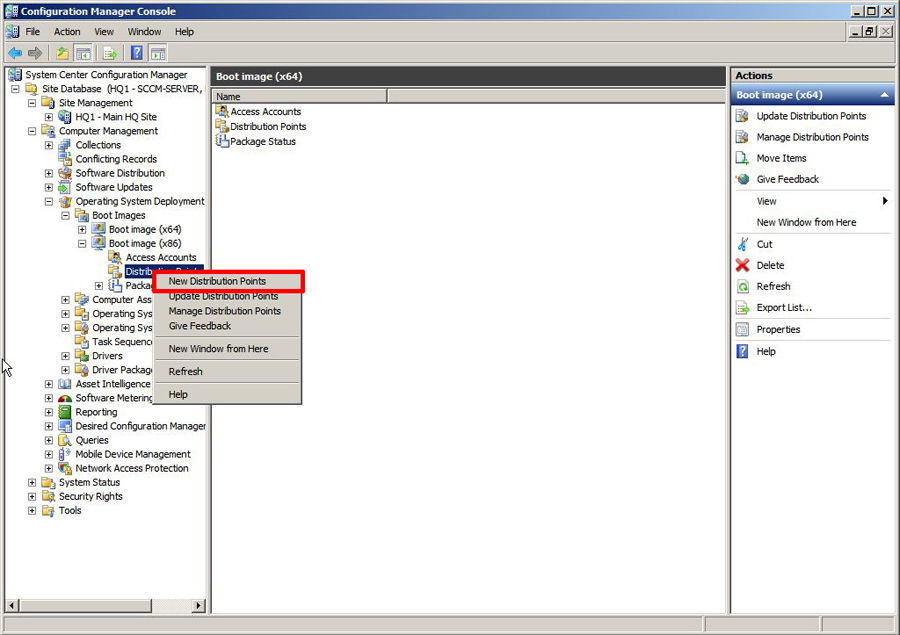
2. Select the Server share > Next
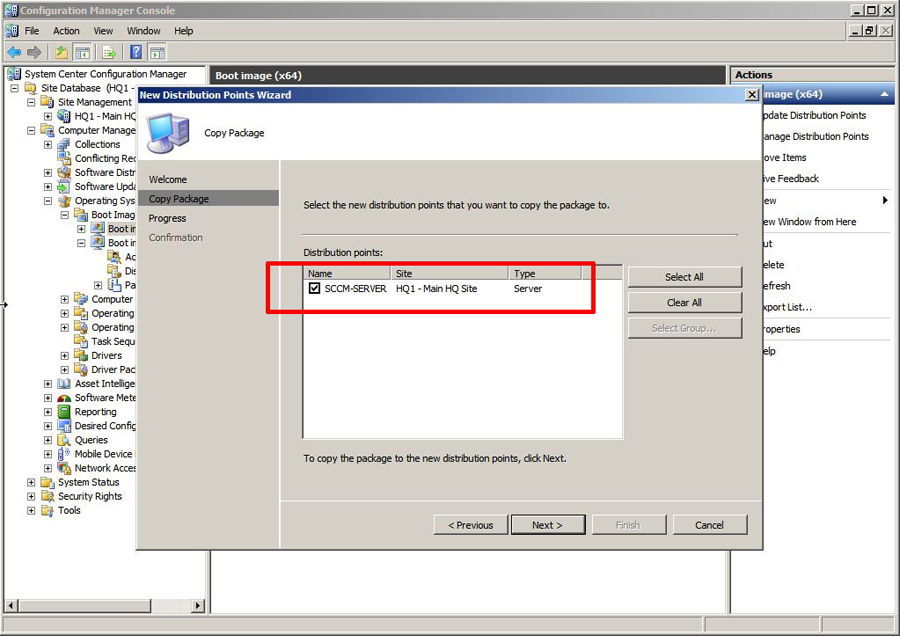
3. Check the settings > Next.
3. Repeat the above for the Boot Image x64
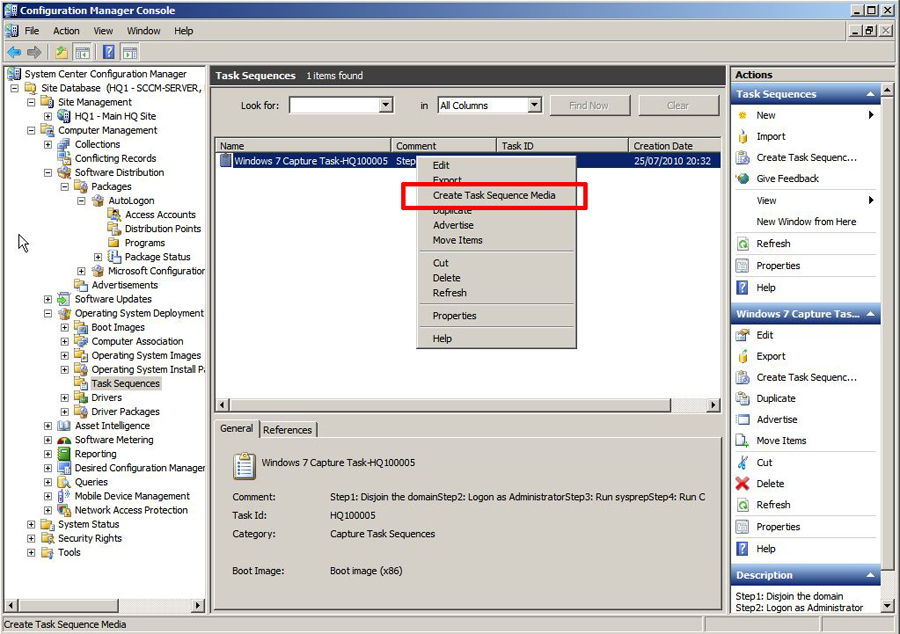
Step 7: SCCM Create Task Sequence Media
1. Right click the Task you have created > Create Task Sequence Media.
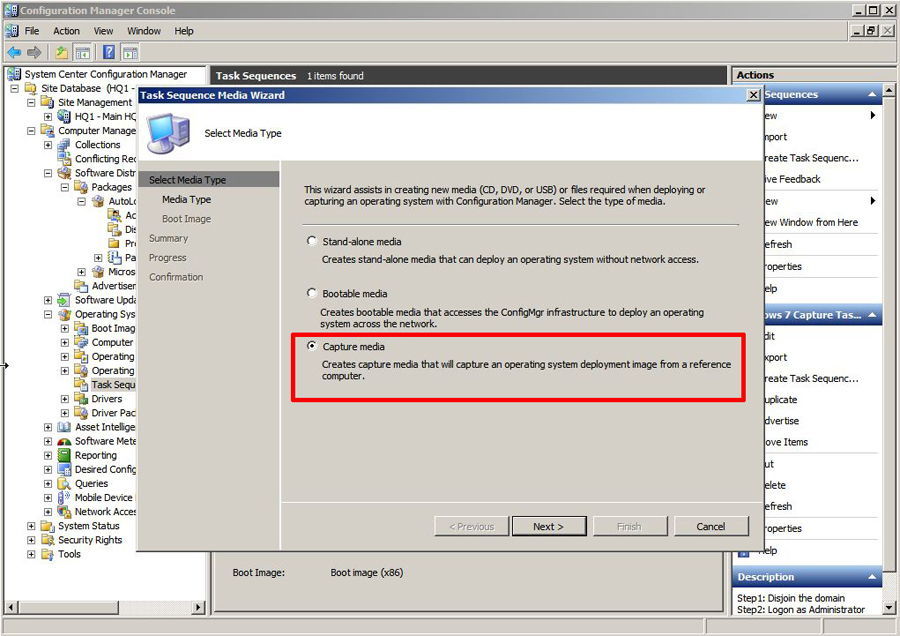
2. Capture Media > Next.
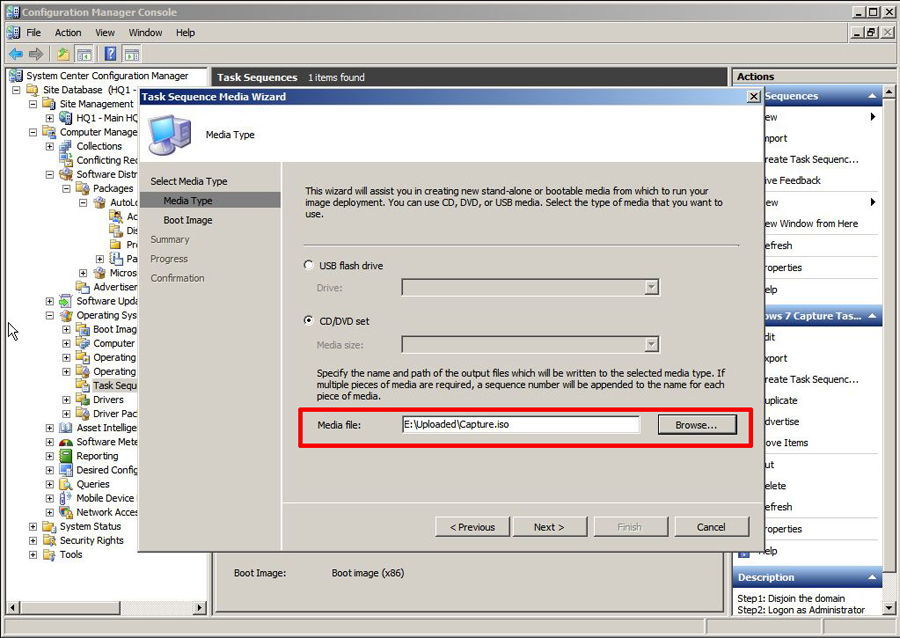
2. Save the ISO image to the network share you created earlier.
Step 8: SCCM Perform the Capture
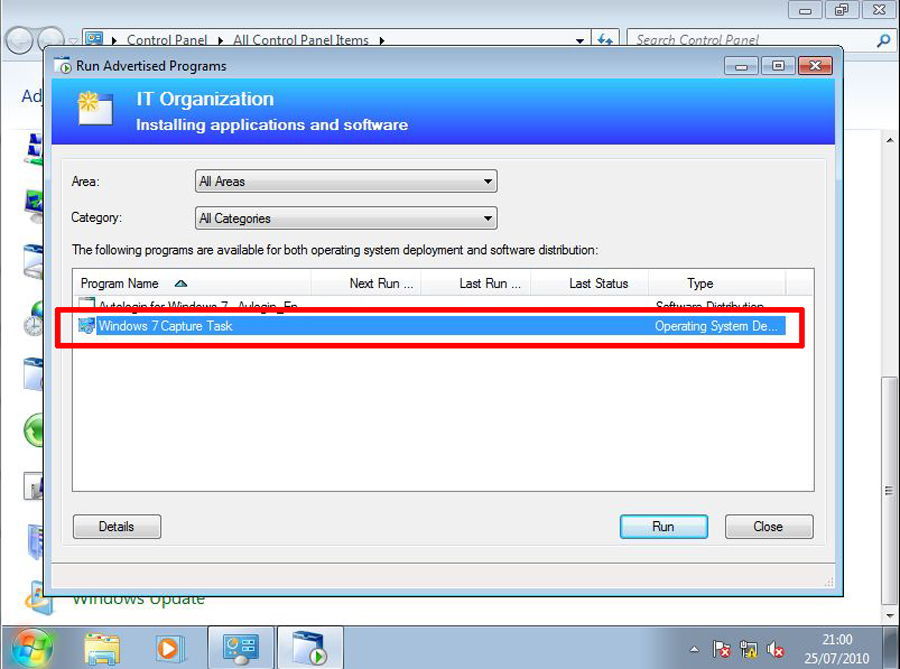
1. Boot Your Windows 7 Reference Machine > Start > Control Panel > Run Advertised Programs > Select “Windows 7 Capture Task” (If it’s not there, reboot and apply the cup of coffee rule) > Run > Yes.
2.The machine will reboot then “Prepare ConfigMgr Client.”

3. Then it will run sysprep.

4. Then it will reboot again, sccm will launch.
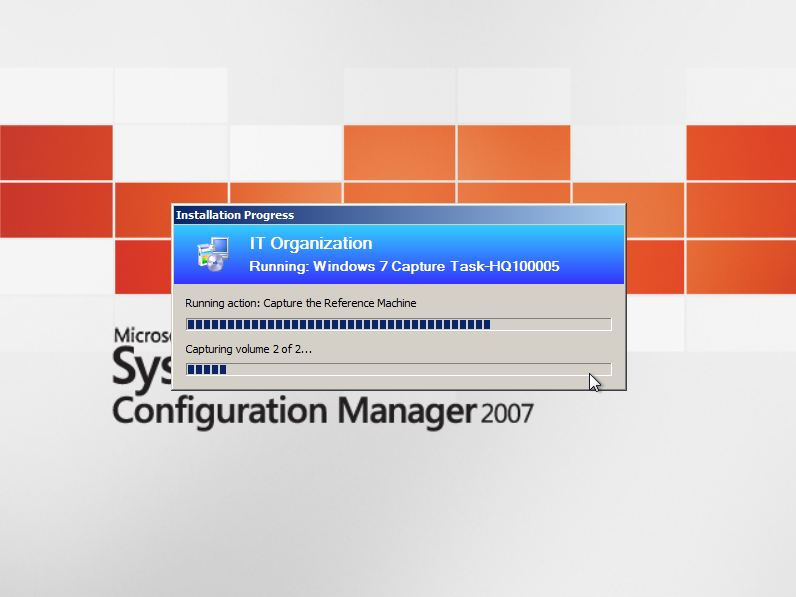
5. The Machine will start to capture.
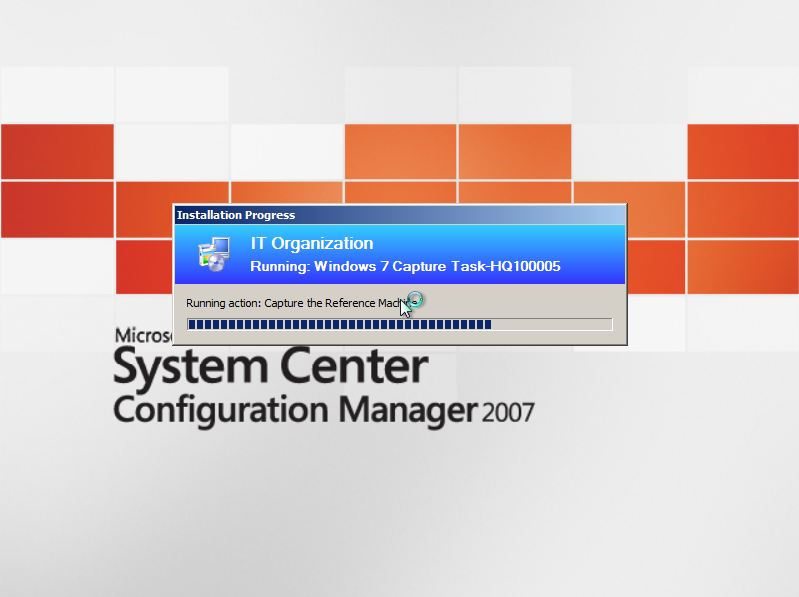
6. Capturing can take a LONG! time
7. When finished the machine will reboot and (because its been sysprepped) will rebuild itself.
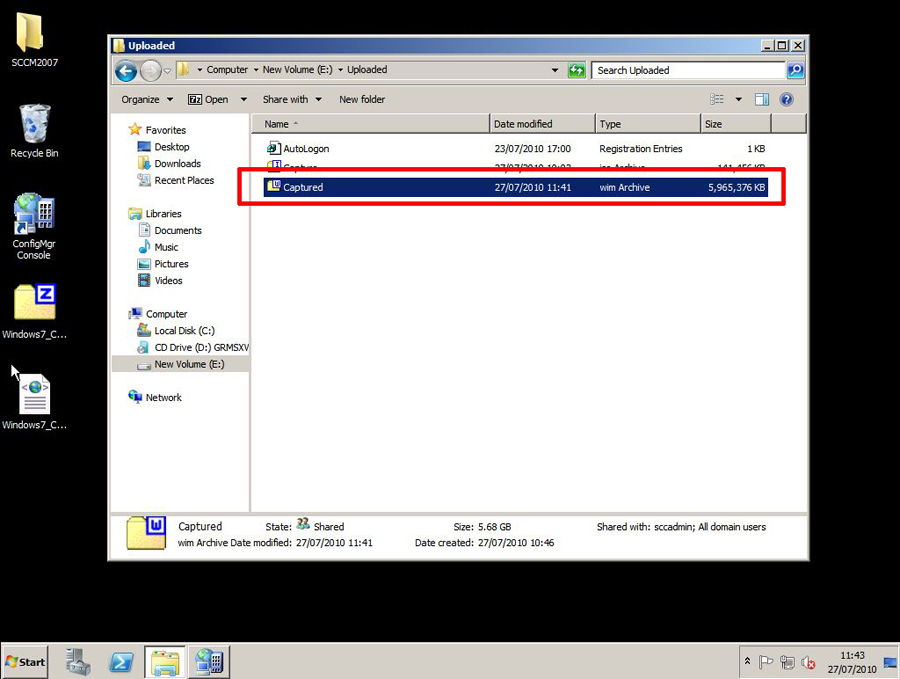
8. Your Image file will be in the network share you defined in step xx above with the name you specified in step xx above
Related Articles, References, Credits, or External Links
Server 2008 R2 – Step by Step
SCCM 2007 Initial Setup and Configuration