
KB ID 0000300
Problem
I’ve covered installing system Center Configuration Manager 2007 SP2 on Server 2008 R2, in a previous article. Once you have it installed, you need to perform a few further actions to get your machines imported. Then get the client software onto them.
Solution
Assumptions
SCCM has already been installed.
Step 1: SCCM Set up Boundary
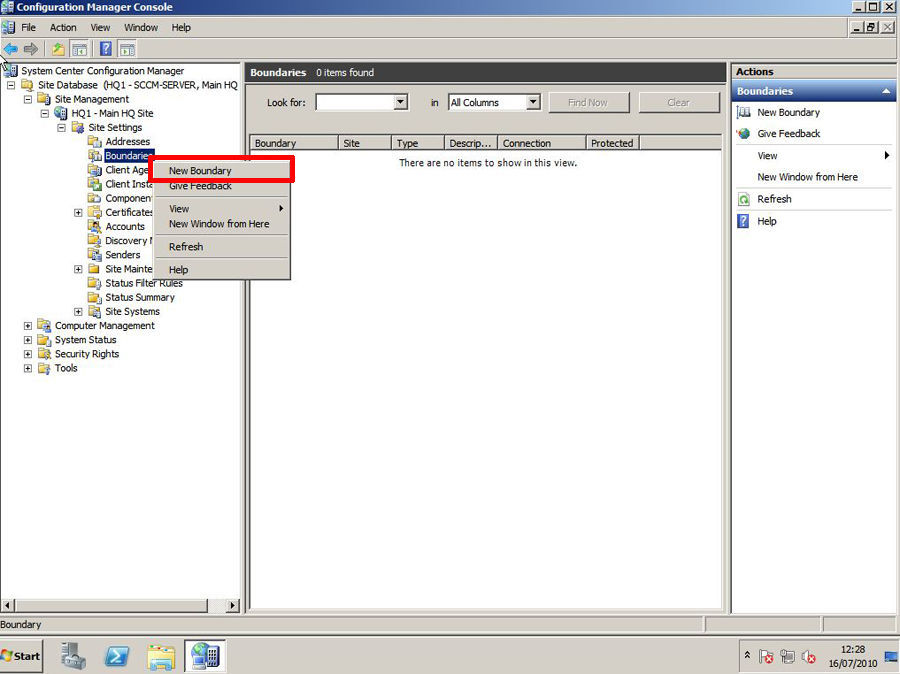
1. Launch the Configuration Manager Console > Expand Site Database > Site Management > {Your Site} > Boundaries > Right click > New Boundary.
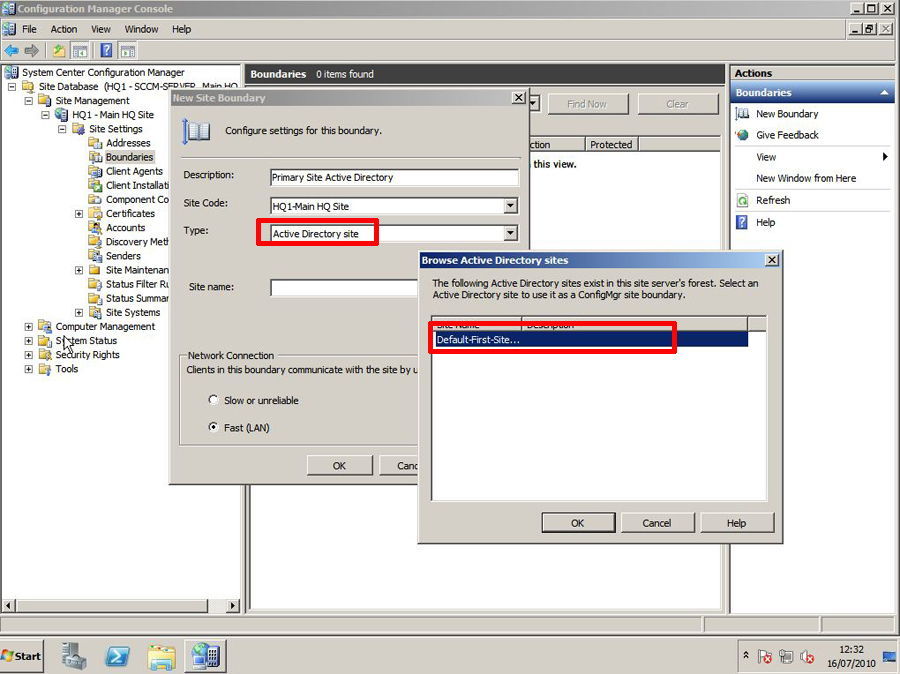
2. Give the Boundary an Descriptive Name > Change Type to “Active Directory Site” (unless you want an IP range) > Browse > Select your Active Directory Site > OK.
Step 2: SCCM Configure Client Agents
1. Launch the Configuration Manager Console > Expand Site Database > Site Management > {Your Site} > client agents > Hardware Inventory Client Agent should be already enabled.

2. Open the properties for Software Inventory Client Agent > Properties > Inventory collection > this will find all .exe files on all clients anywhere on the drives, this is probably too much.
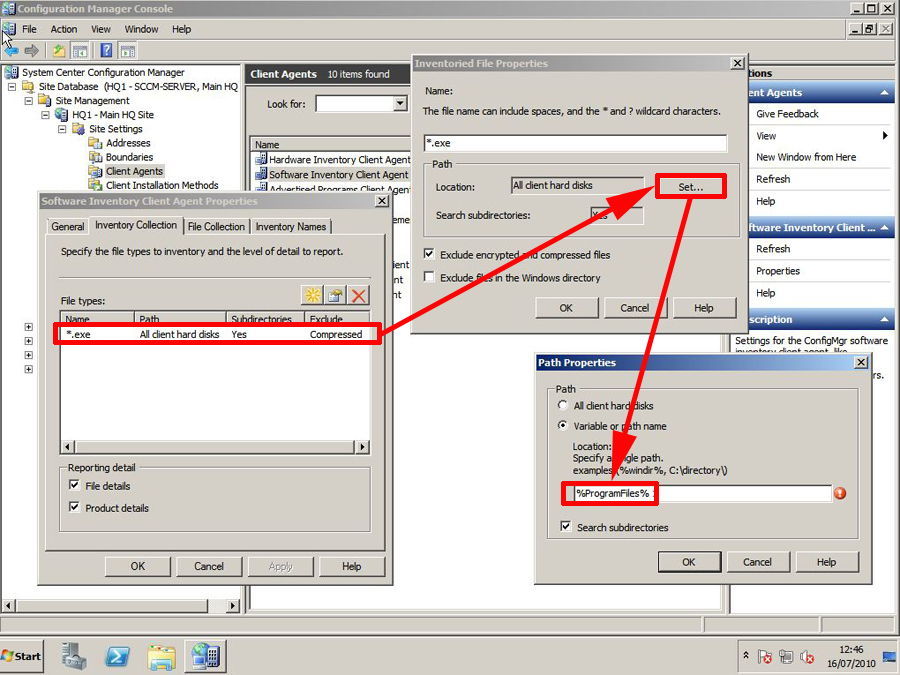
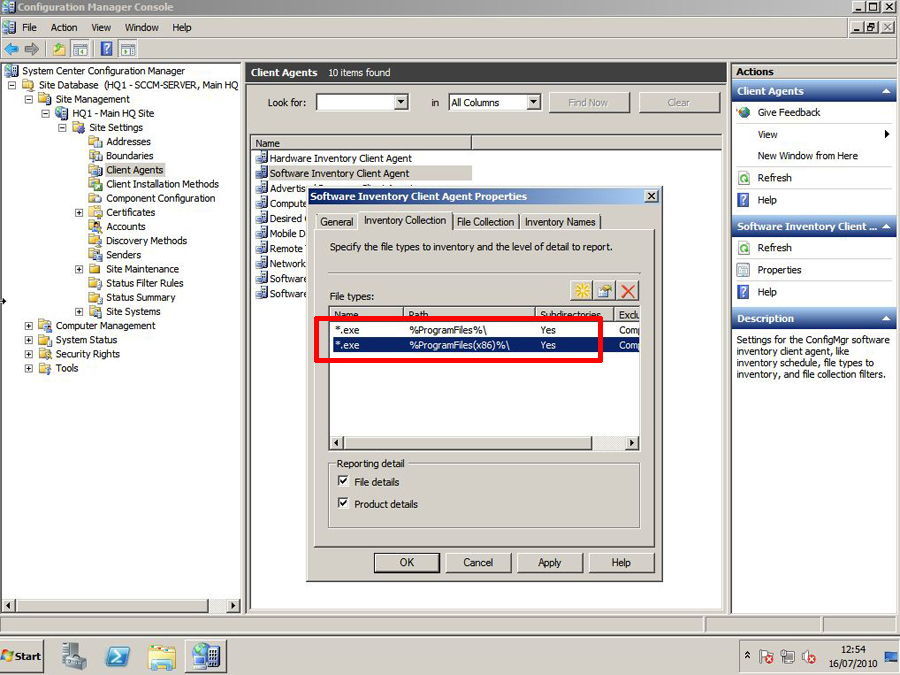
3. Open the properties of this “File Type” > By Location > Click Set > Variable or Path Name > enter %ProgramFiles% > OK > OK > Apply > OK (note with x64 bit machines may also want to add a further file collection rule for %ProgramFiles(x86)%
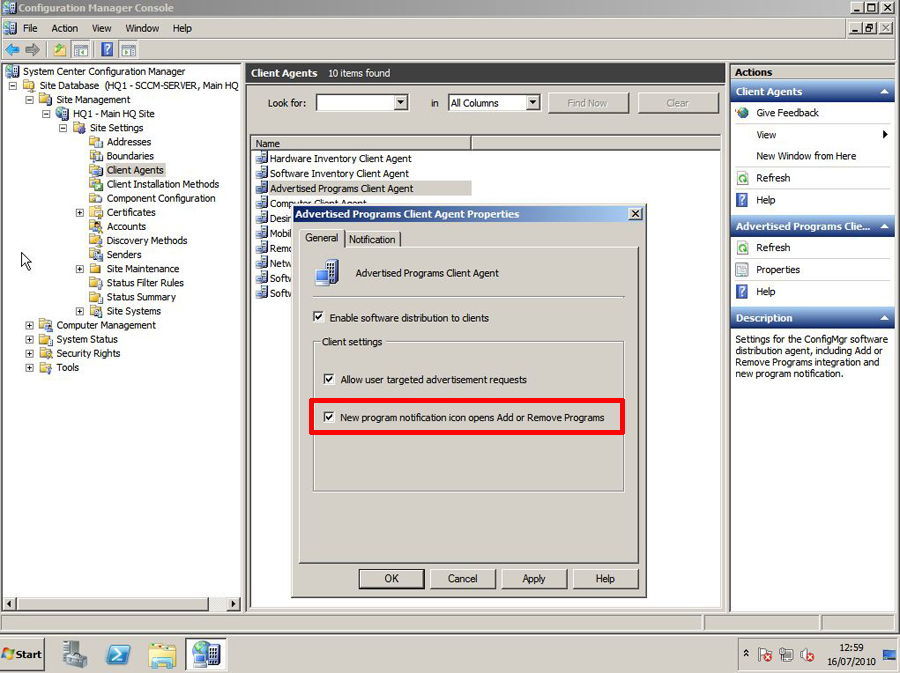
4. Open the Advertised Programs Client Agent Properties and tick “New program notification icon opens Add Remove Programs” > Apply > OK.
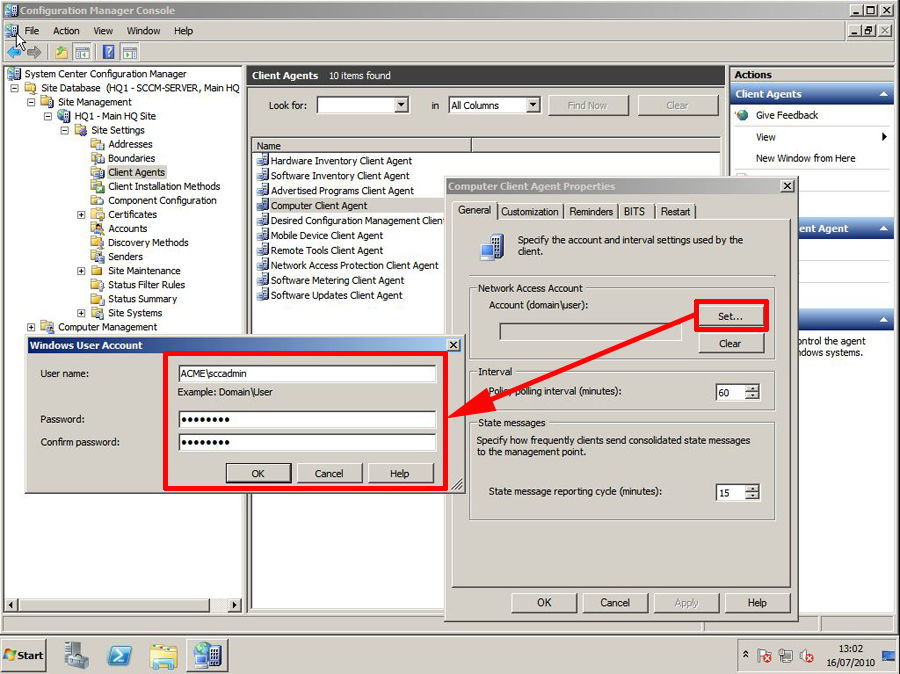
5. Open the Computer Client Agent Properties > General > Set > Enter the sccmadmin details > OK. Apply > OK.
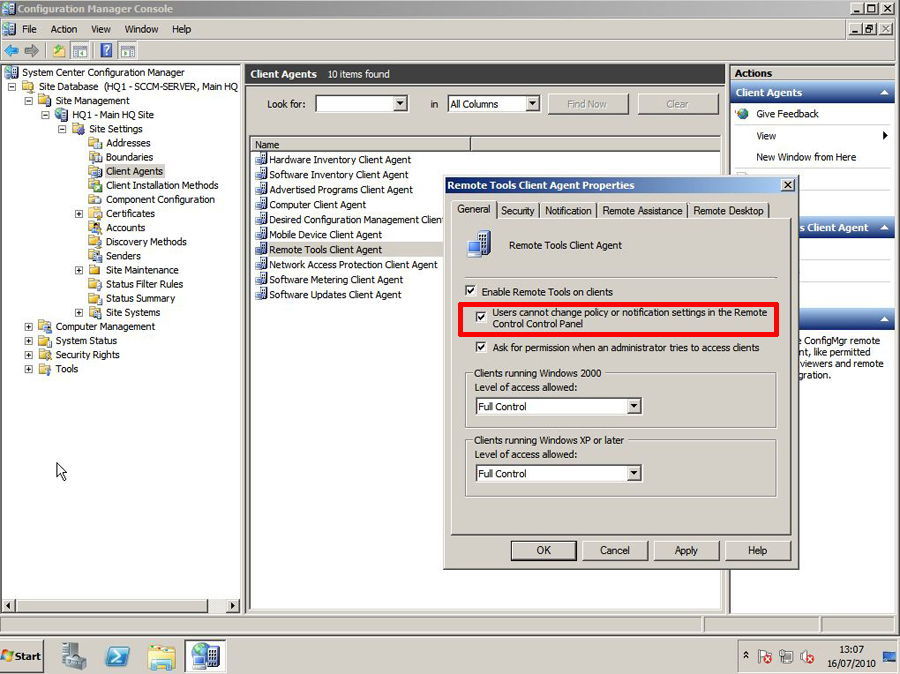
6. Open the Remote Control Tools Properties > Tick “Users cannot change policy or notification settings >in the Remote Control Panel”. Apply >OK.
Step 3: SCCM Deploy Agents
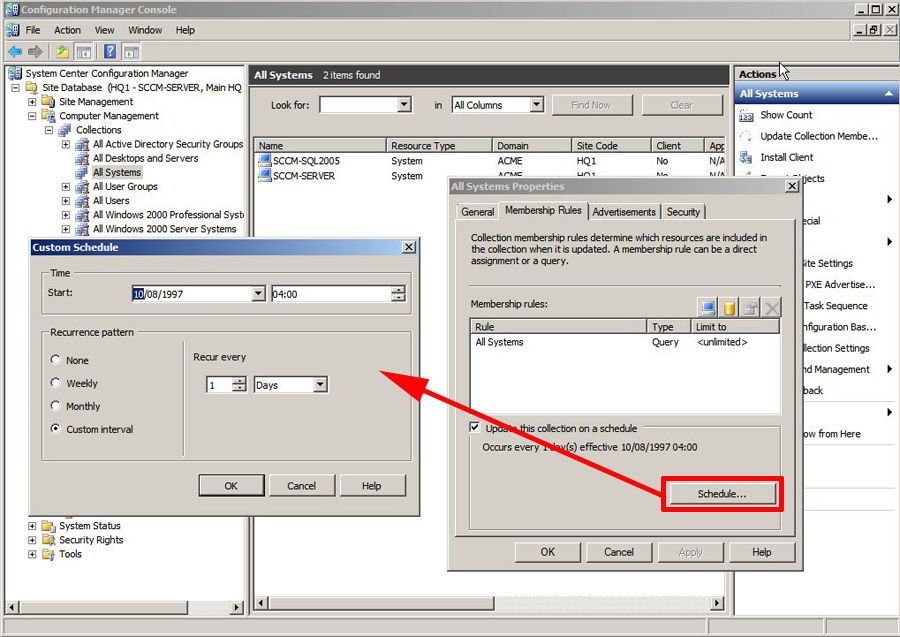
Collection will not occur until 0400 on the following morning (All systems > properties > Membership rules > Schedule).
1. Wait for the system to collect the client machines > Launch the Configuration Manager Console > Expand Site Database > Computer Management > Collections > All Systems.
Note: If the clients have their firewalls on the agent will not be deployed to them See http://technet.microsoft.com/en-us/library/bb694088.aspx
Step 4: SCCM Setup Discovery Methods
Warning: Windows firewall will STOP your clients being discovered – either disable the firewall via policy or add the correct exceptions. ( http://technet.microsoft.com/en-us/library/bb694088.aspx )
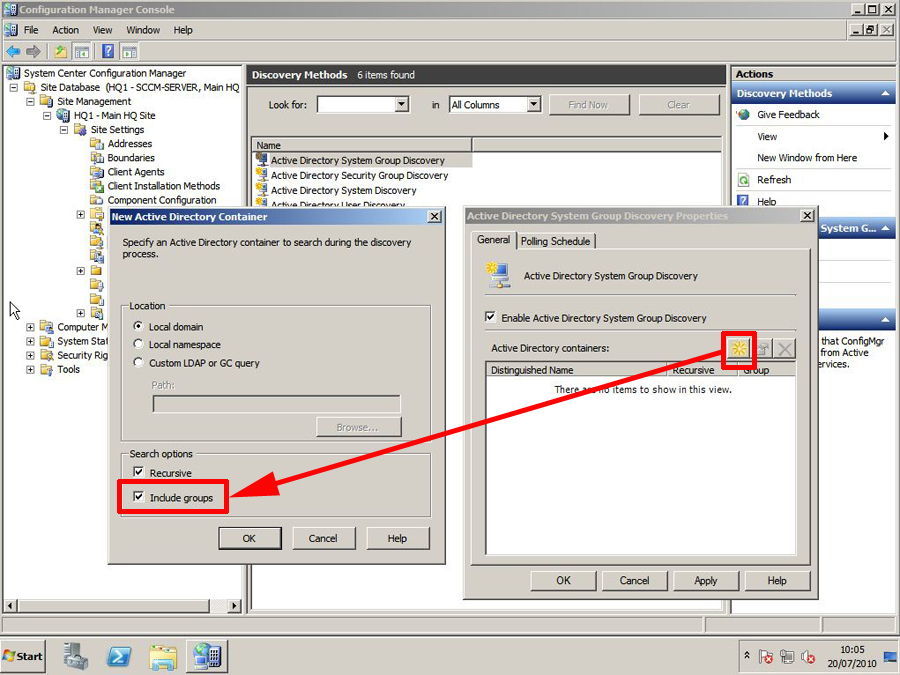
1. Expand site management > Site Name > Site Settings > Discovery Methods > Right click “Active Directory System Group Discovery” > Properties > Tick “Enable Active Directory Group Discovery” > Add (yellow star) > Tick Include Groups > OK > Select the domain (or an OU of your choice) > Select the Polling Schedule Tab > Tick “Run Discovery as soon as Possible” > OK > Apply > OK.
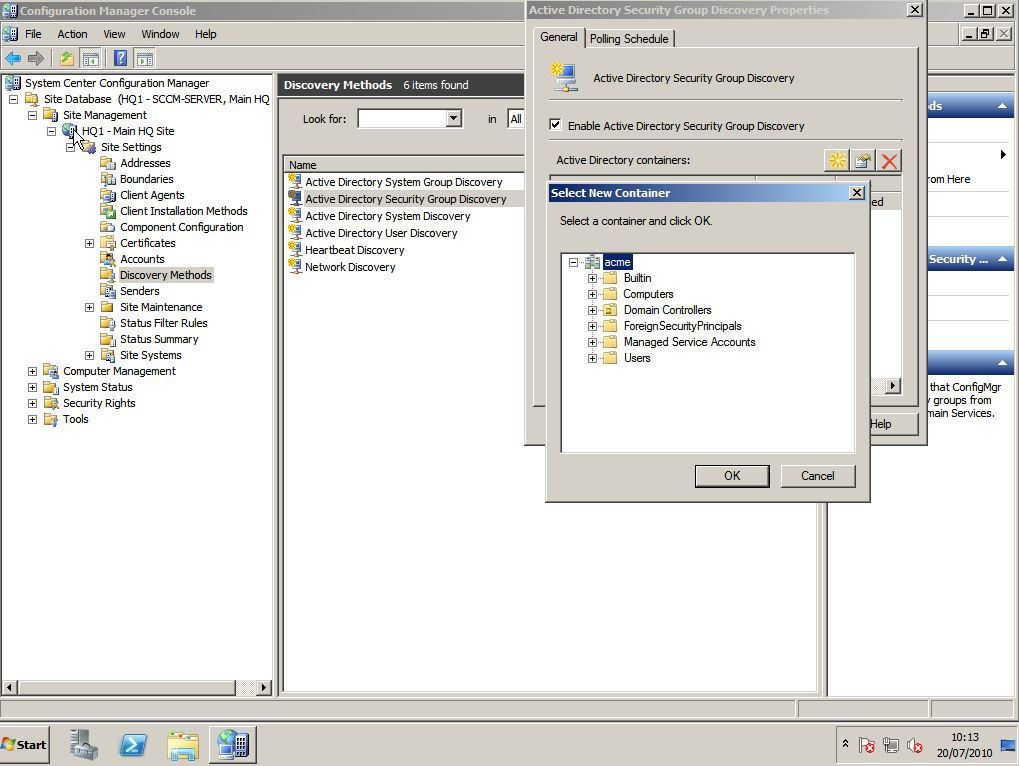
2. Right click “Active Directory Security Group Discovery” > Properties > Tick “Enable Active Security Group Discovery” > Add (yellow star) > Tick Include nested Groups > OK > Select the domain (or an OU of your choice) > Select the Polling Schedule Tab > Tick “Run Discovery as soon as Possible” > OK > Apply > OK.
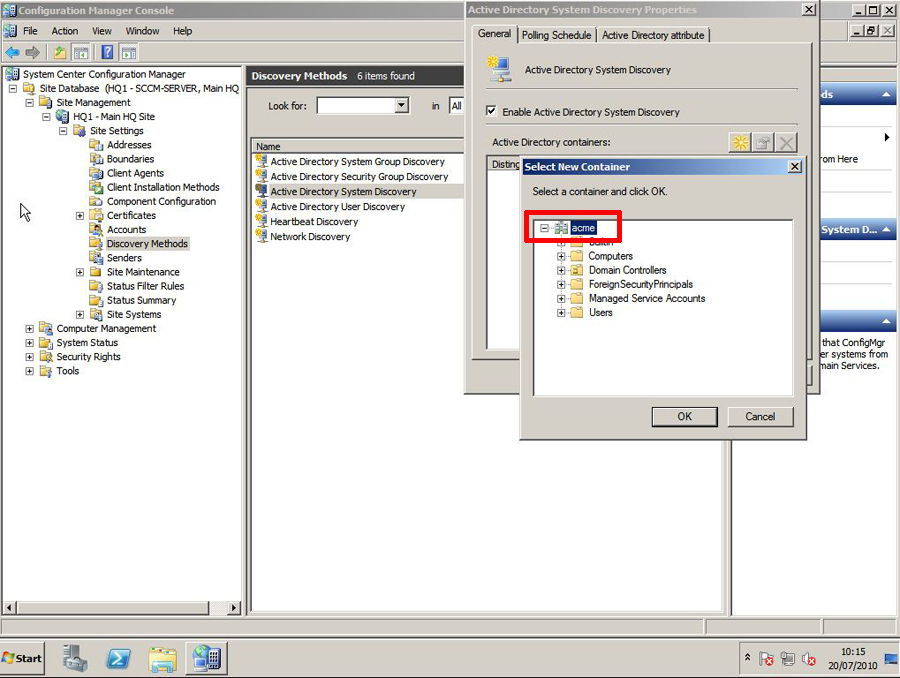
3. Right click “Active Directory System Discovery” > Properties > Tick “Enable Active System Discovery” > Add (yellow star) > Tick Include Groups > OK > Select the domain (or an OU of your choice) > Select the Polling Schedule Tab > Tick “Run Discovery as soon as Possible” > OK > Apply > OK.
4. Repeat the above for “Active Directory User Discovery”.
5. Heartbeat Discovery should already be enabled.
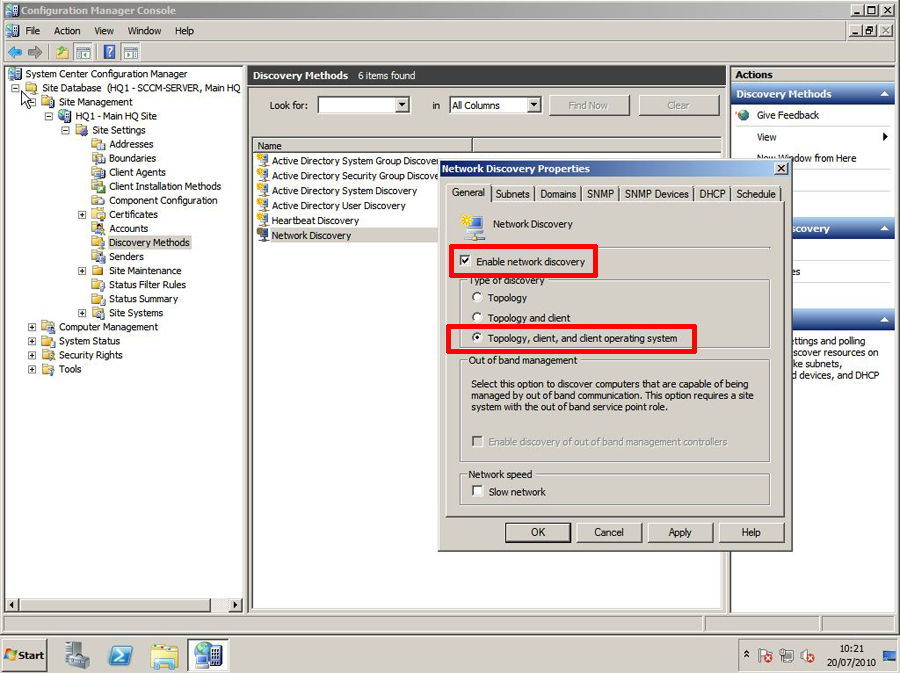
6. Right Click “Network Discovery” Properties tick “Enable net work discovery” > Select Topology, client and client operating system.
7. Select the subnet tab > the server will search its own subnet you can additional subnets.
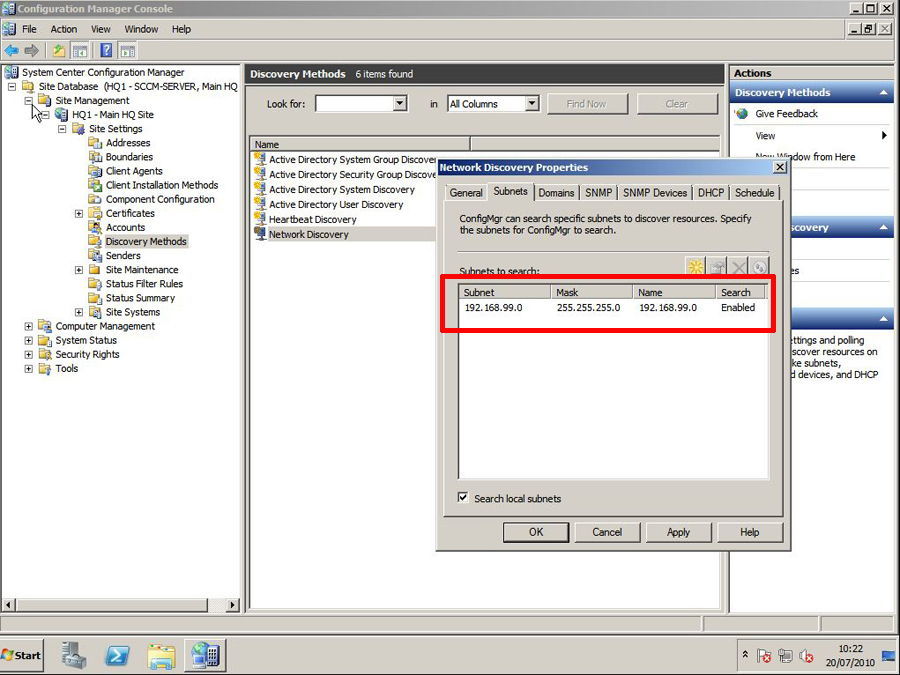
Note you can also add additional domains and SNMP devices to be discovered on the other tabs.
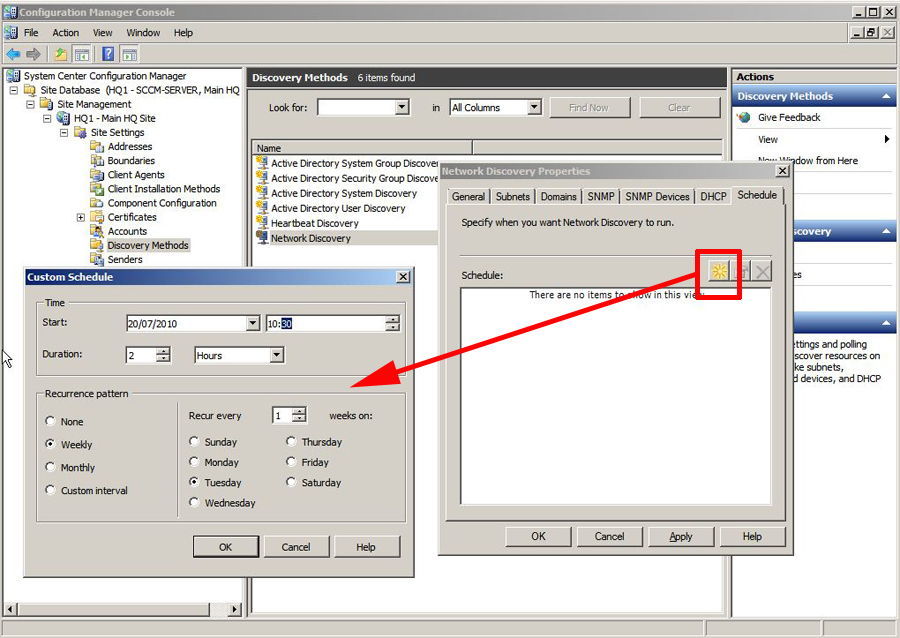
8. Select the Schedule tab > Add > Set Schedule > OK > Apply > OK.
Step 5: SCCM Setup Client Installation Methods
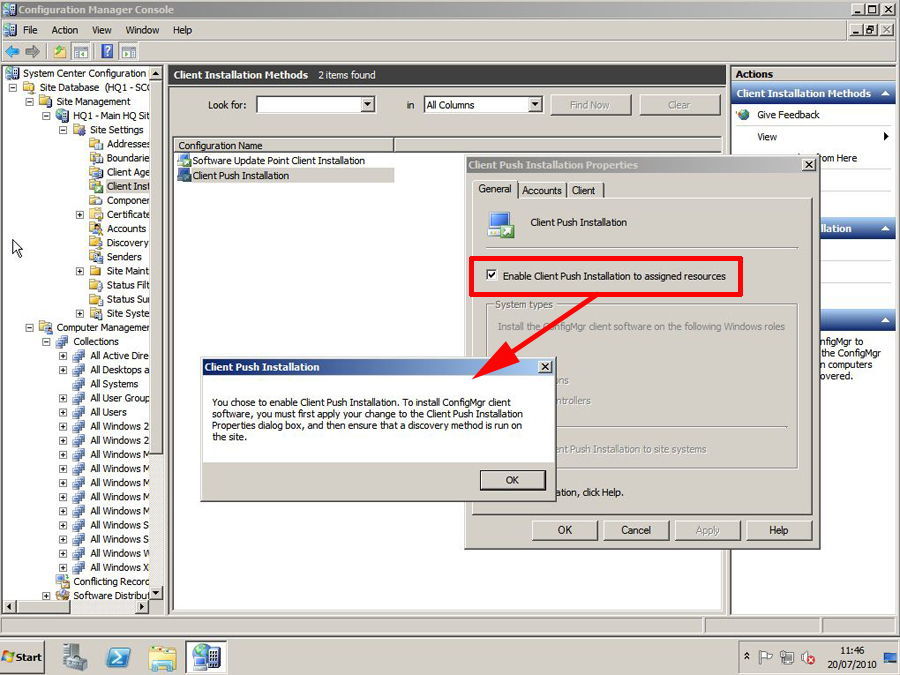
1. Expand Site Database > Site Management > Site name > Site Settings > Client Installation Methods > Client Push Installation > Tick “Enable Client Push Installation to Assigned resources” Accept the warning.
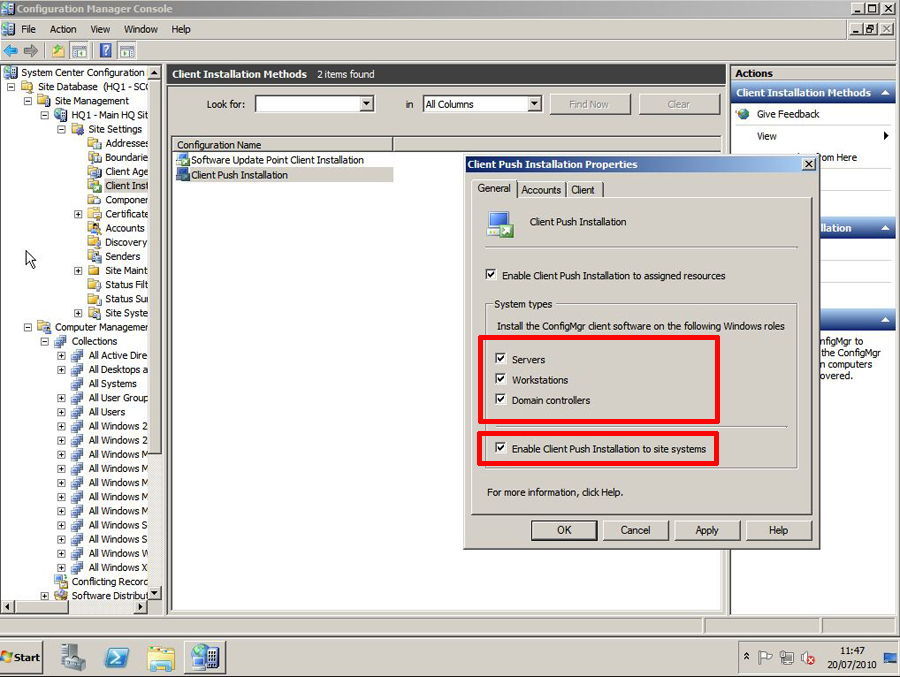
2. Tick options as appropriate.
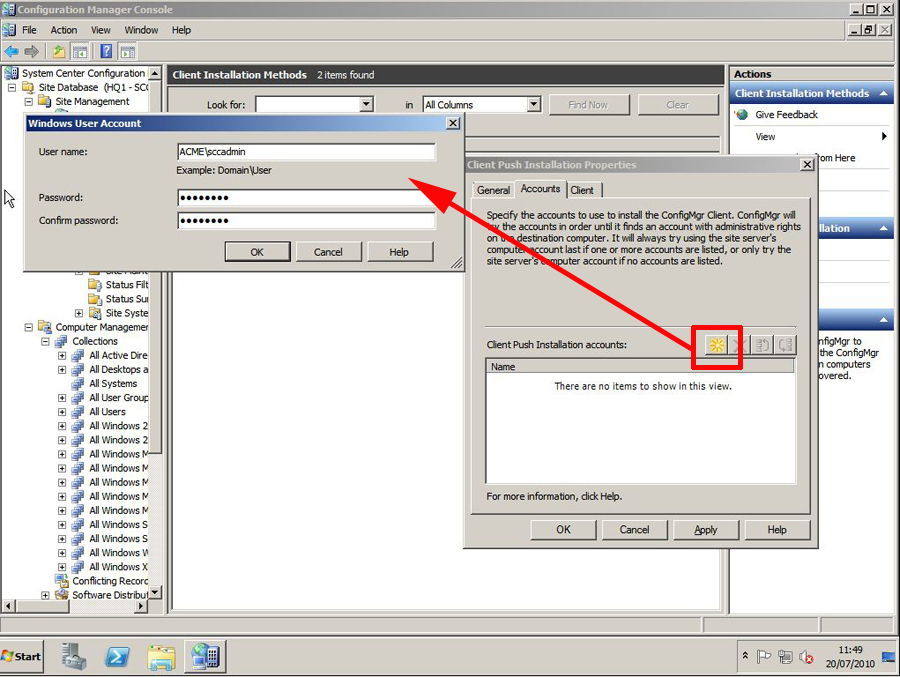
3. Select the Accounts tab and enter your sccmadmin account details.
4. Select the Client Tab and Add the following to the end SMSCACHESIZE=8000 > Apply > OK.

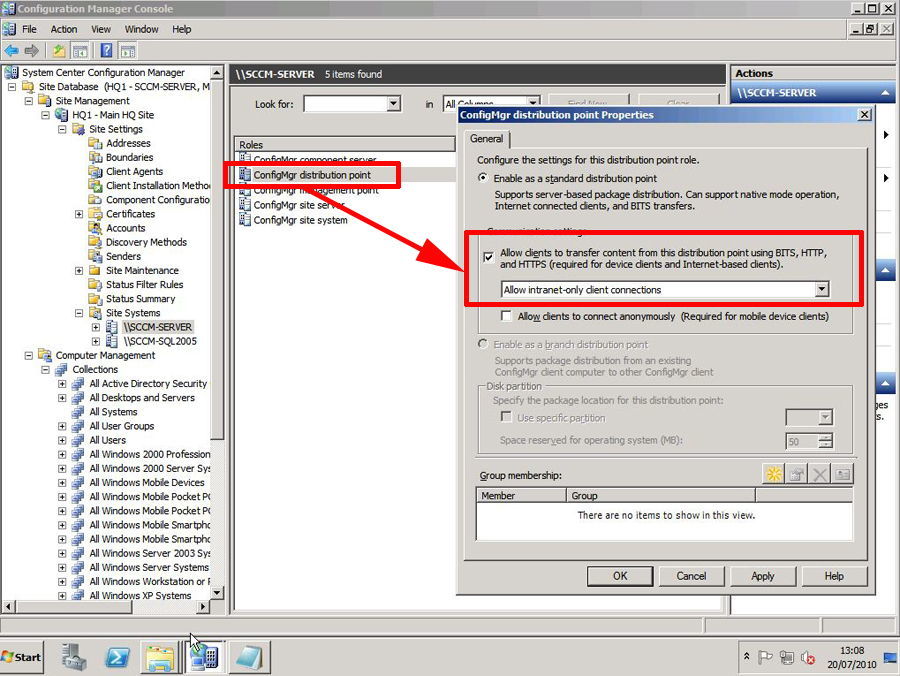
5. Expand site management > Site Name > Site Settings > Site systems > Select the SCCM Server > Right click “ConfigMgr distribution point” > Properties > Tick “Allow clients to transfer content from this distribution point using BITS, HTTP and HTTPS) > Apply OK.
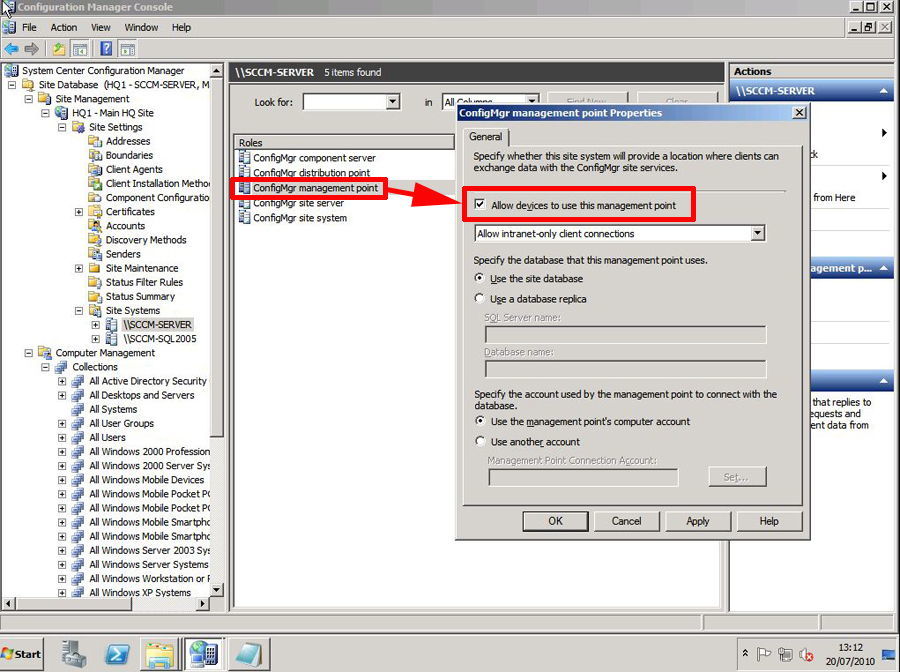
6. Go to the properties of “Configmgr management point” > Tick “Allow devices to use this management point” > Apply > OK.
Step 6: SCCM Install the Client
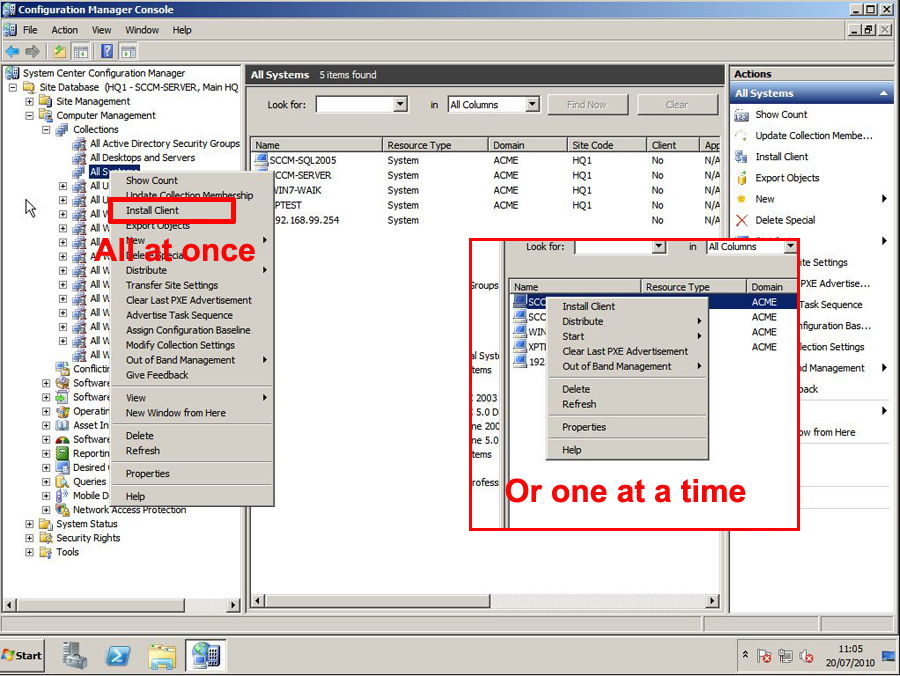
1. Expand Site Database > Computer Management > Collections > All systems > either right click “All systems” and Select Install Client > Or do them One by one.
2. At the Welcome page > Next > I select ALL the installation options > Next > Finish.
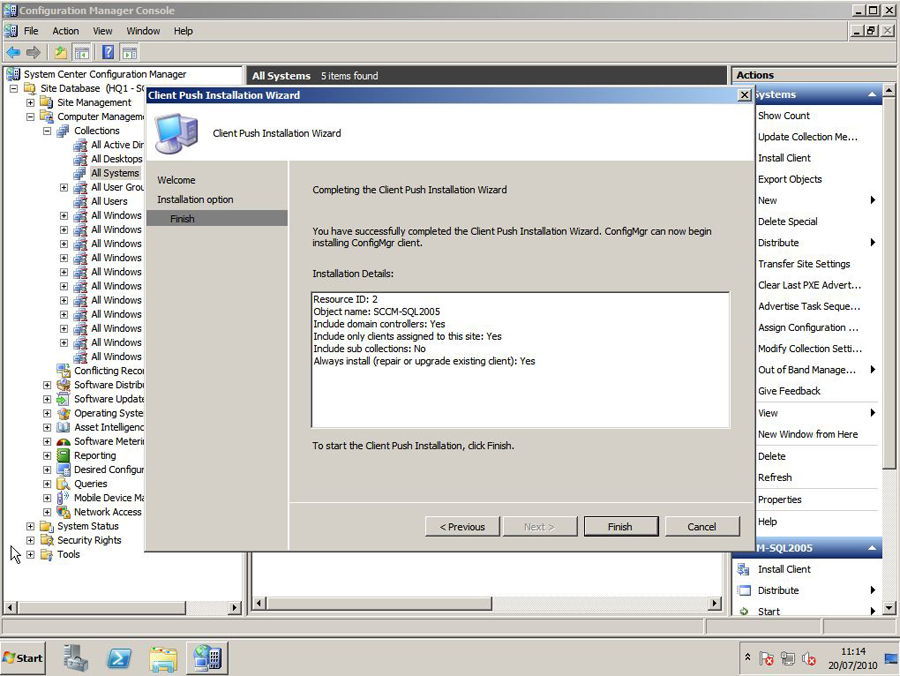
3. Repeat as necessary.
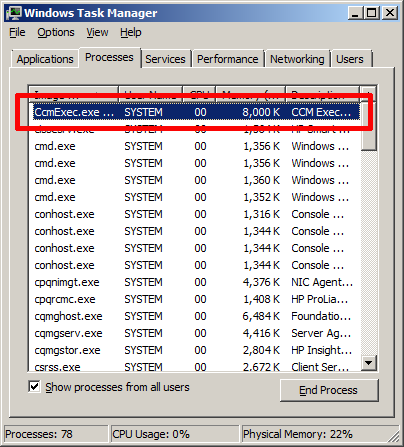
4. During the install process you will see CcmExec.exe running in the client machines task list
5. Once the clients have reported in you will see that the “client” column will change to “Yes”.

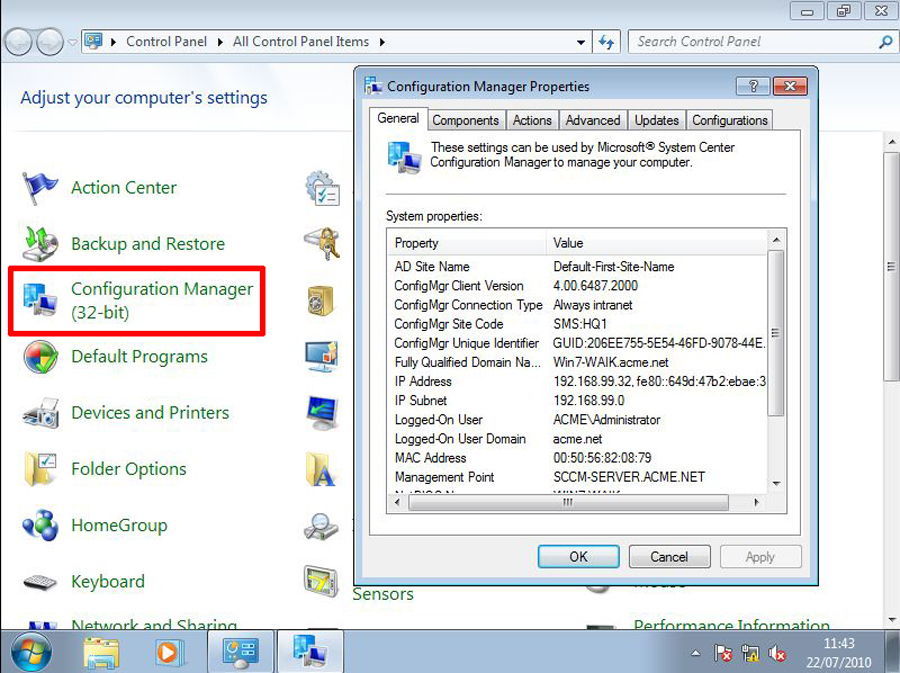
6. And on the client machines, you will notice that there is a “Configuration Manager” Icon in the Control Panel.
Related Articles, References, Credits, or External Links
Install SCCM 2007 on Windows Server 2008 R2 – Step by Step
SCCM OSD Capture a Windows 7 Reference Machine</strong.