
KB ID 0001214
Problem
Last week, myself and a few of my colleagues had to deploy a LOT of servers into Hyper-V. The client did not have System Center Virtual Machine Manager, so the process of creating and deploying a machine from a template is a little more convoluted
Solution
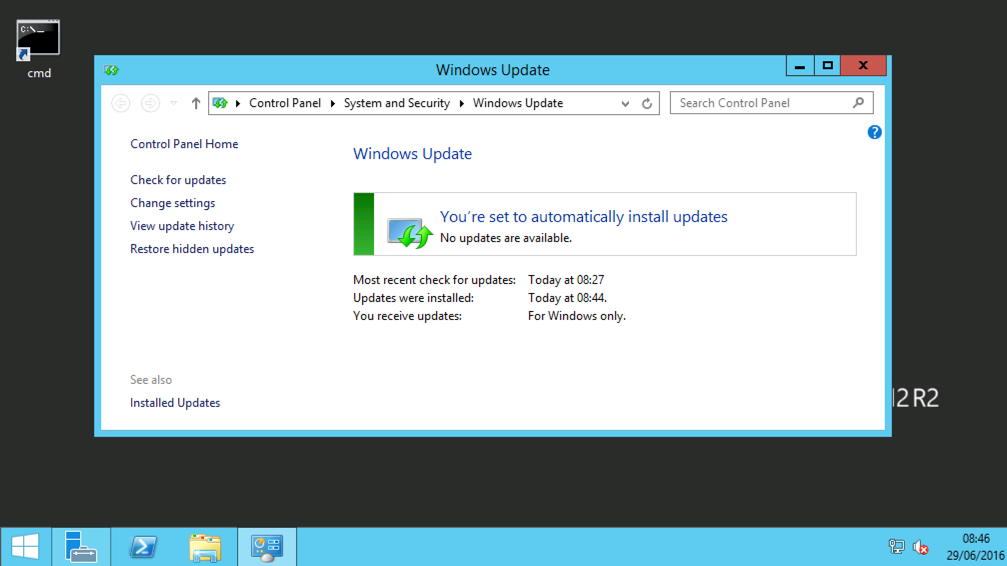
Here I’m deploying Windows Server 2012 Datacenter, but we repeated the process for Oracle Linux (Red Hat,) and, with the exception of sysprep, the process was the same. To start, build an ‘image machine‘ and ensure it is updated, and has on it any software you may require.
Keeping the Image For Future Updates?
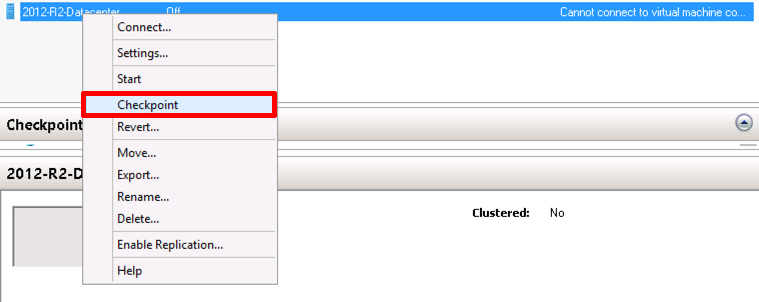
If you intend to re-use this master image in the future, i.e. start it up install any outstanding updates, and then re-use it to deploy future virtual machines then BEFORE you sysprep it, take a ‘Checkpoint’. Then in future you can revert to this checkpoint and rerun sysprep again, this is because there is a three time limit on sysprep with the generalize option.
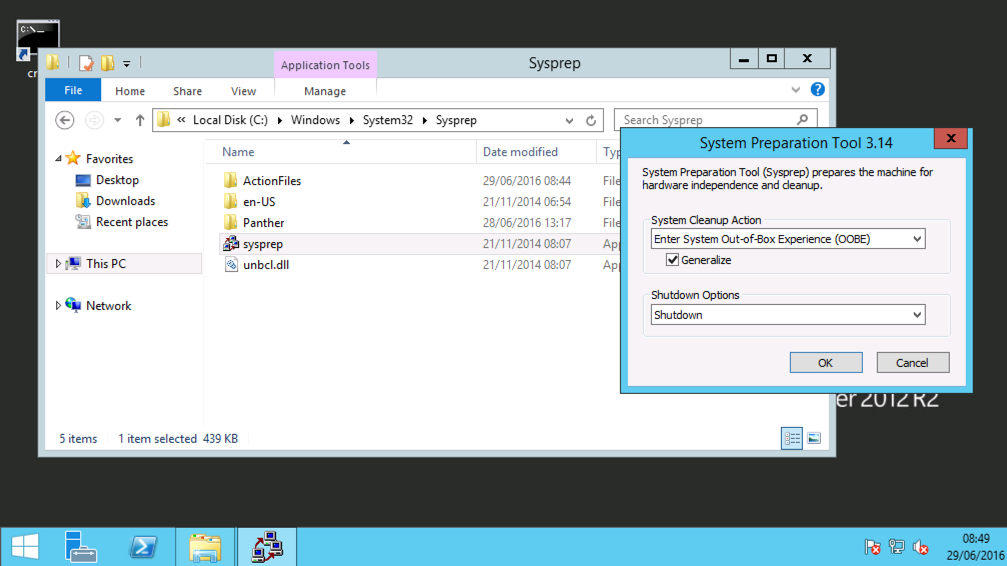
Run sys prep, it lives in;
C:\Windows\System32\Sysprep\
Tick the ‘Generalise’ option, and set it to ‘Shutdown’.
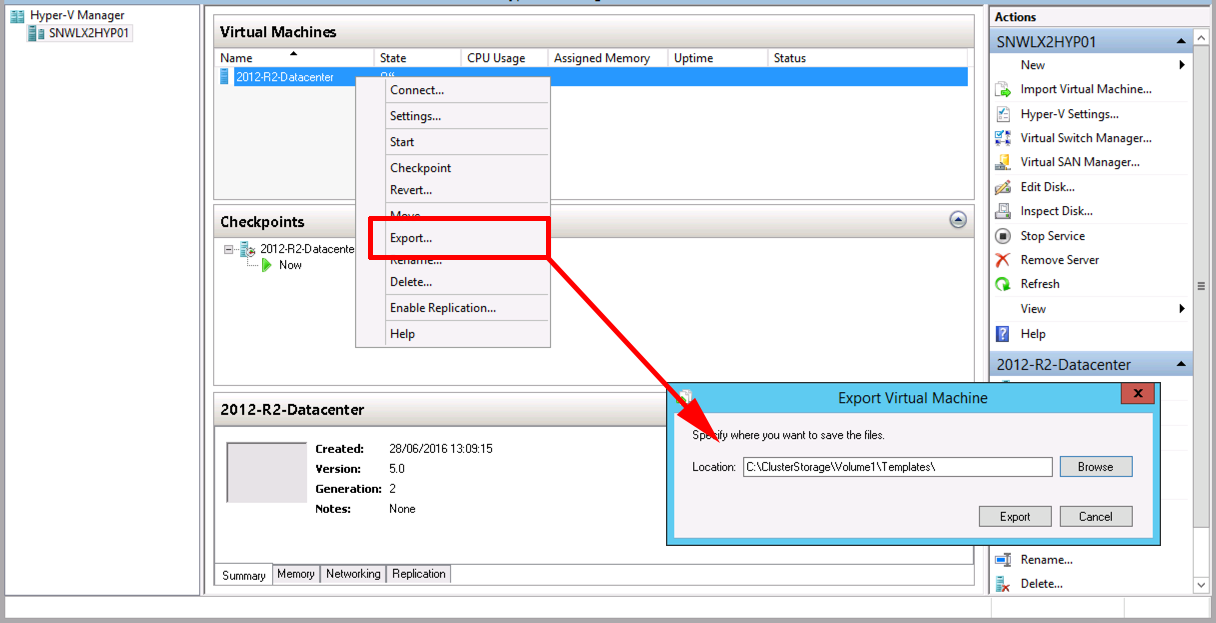
Create a folder to hold your template(s).

Export your master VM into the templates directory you have just created.
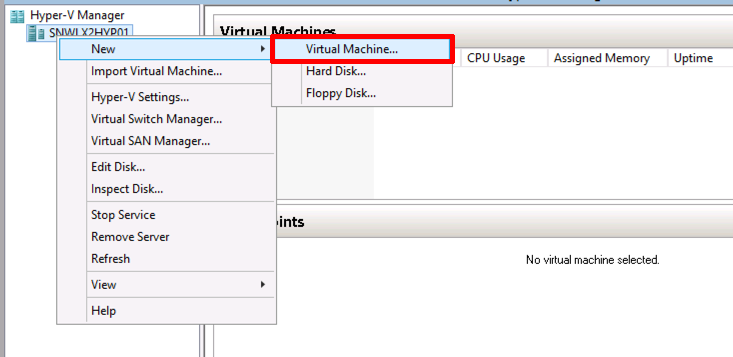
Hyper-V Deploying Machines From Template
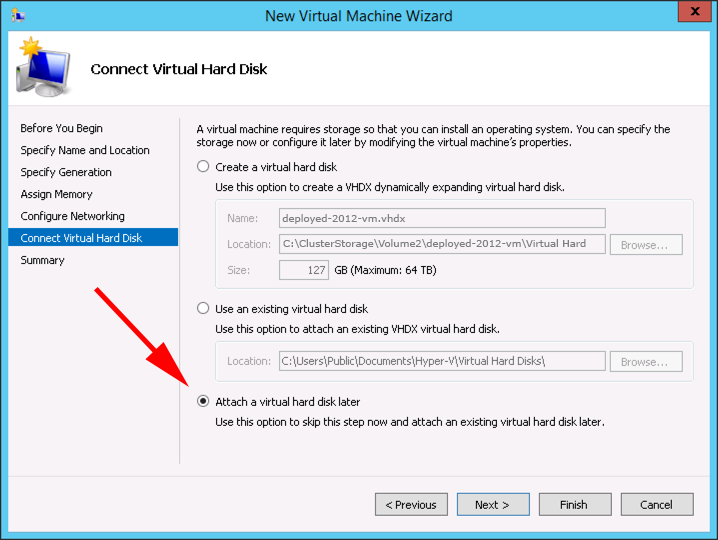
Create a new virtual machine.

MAKE SURE: You select the option ‘attach a virtual disk later’, select all other options for the new VM as you require.
Within your template directory, create a copy of the hard drive and rename it so it has the same name as your newly deployed VM.
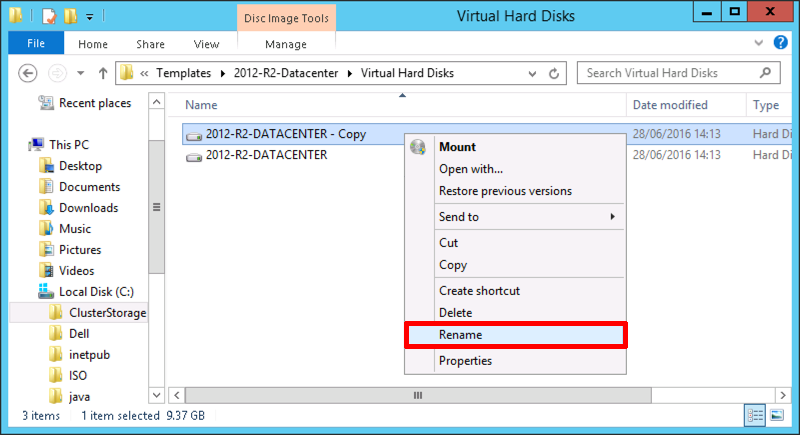
Then cut/paste this newly renamed drive into the folder for your new virtual machine.

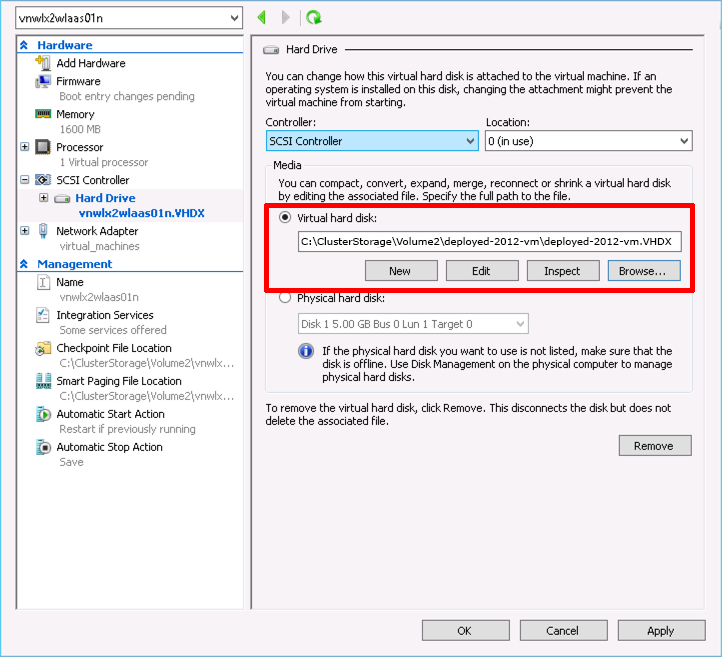
On your new VM > Settings > SCSI Controller > Hard Drive > Add.
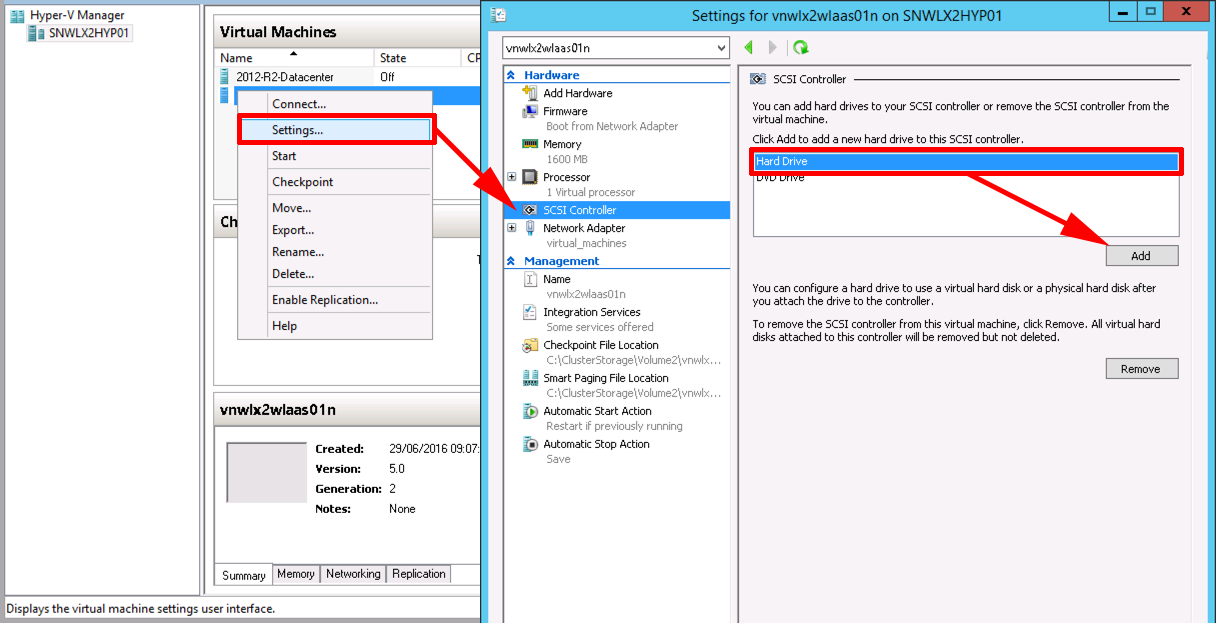
Navigate to the hard drive file you copied and renamed > Apply > OK.
On the ‘Firmware’ tab move the new hard drive up, so it is at the top of the boot order.
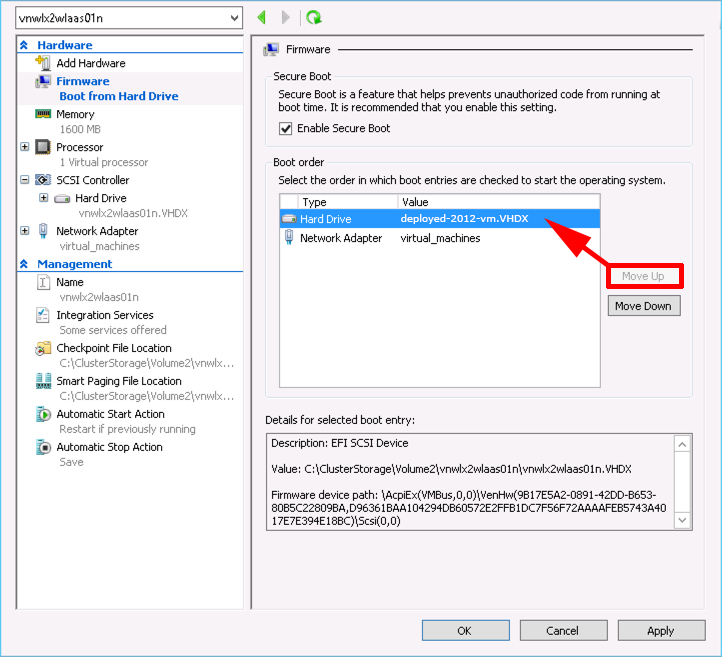
You can now power on the new VM.
Related Articles, References, Credits, or External Links
NA