
KB ID 0000824
Problem
“I seem to get a lot of spam”, and “I get a lot more spam than I used to” are right up there with “My computer is running slow”. It’s a problem that, eats up users time and fills your mail stores with junk, and time/disk space costs money.
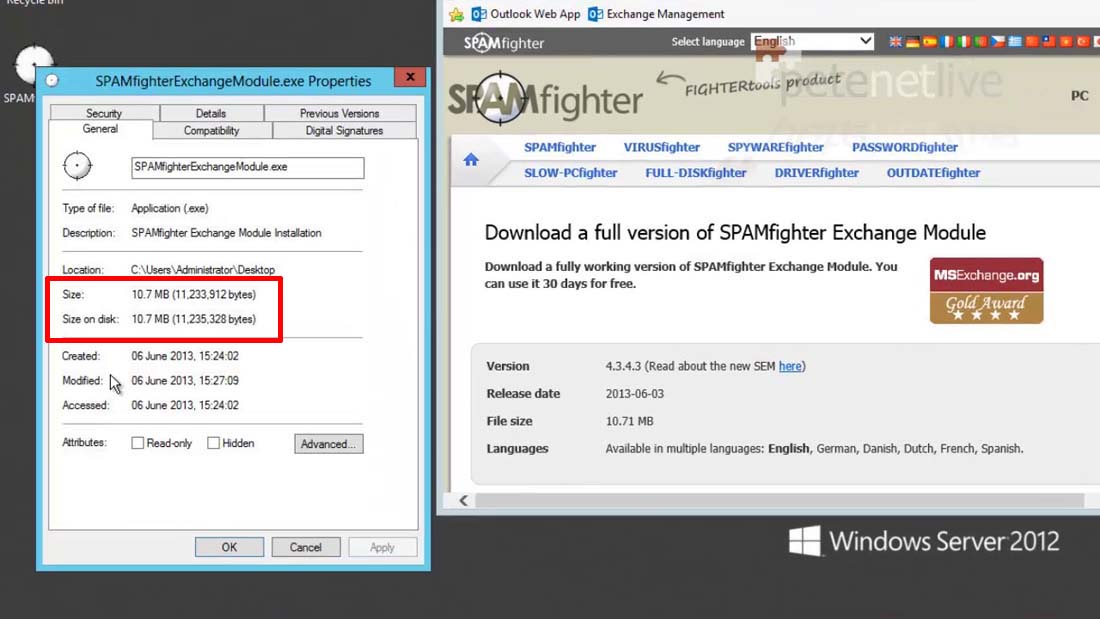
SEM is tiny! In a world where a graphics driver is now over 100MB the entire install suite is less than 11MB. This is going into my test network so testing its ability to limit spam is NOT the point of this exercise, I’m looking at the ease of installation, configuration, and administration.
SEM Pre-Requisites
1. Exchange 2000, 2003, 2007, 2010, or 2013.
2. Windows Server 2000, 2003, 2003 R2, 2008, 2008 R2, or 2012.
3. .Net framework version 2.0 (SP1).
4. MDAC (Microsoft Data Access Components) version 2.7.
5. Internet Information Services.
Solution
Before You Start
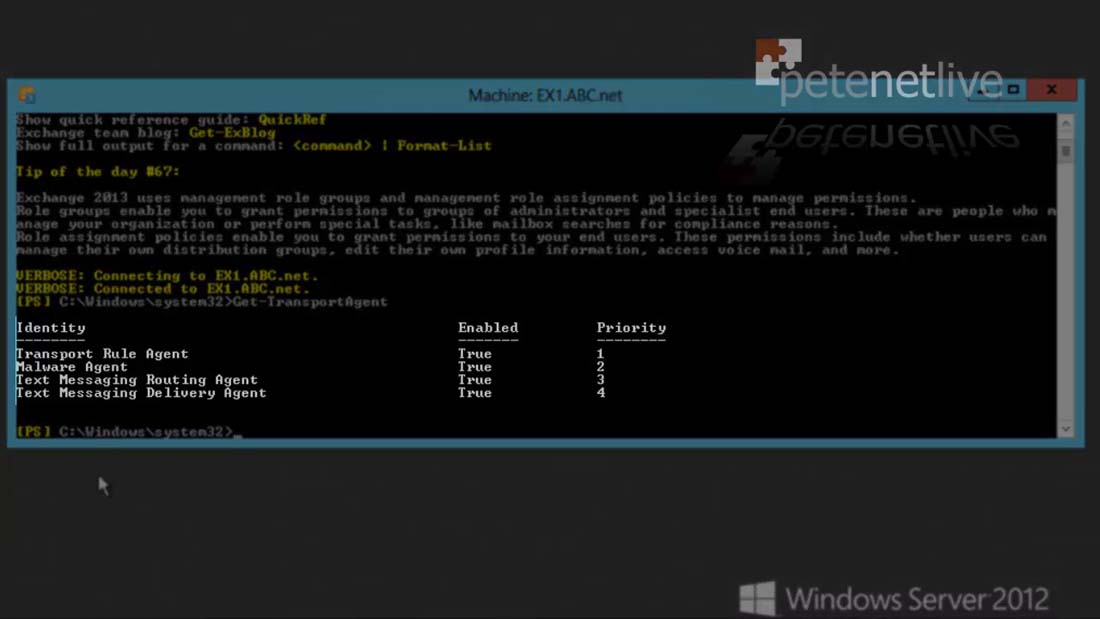
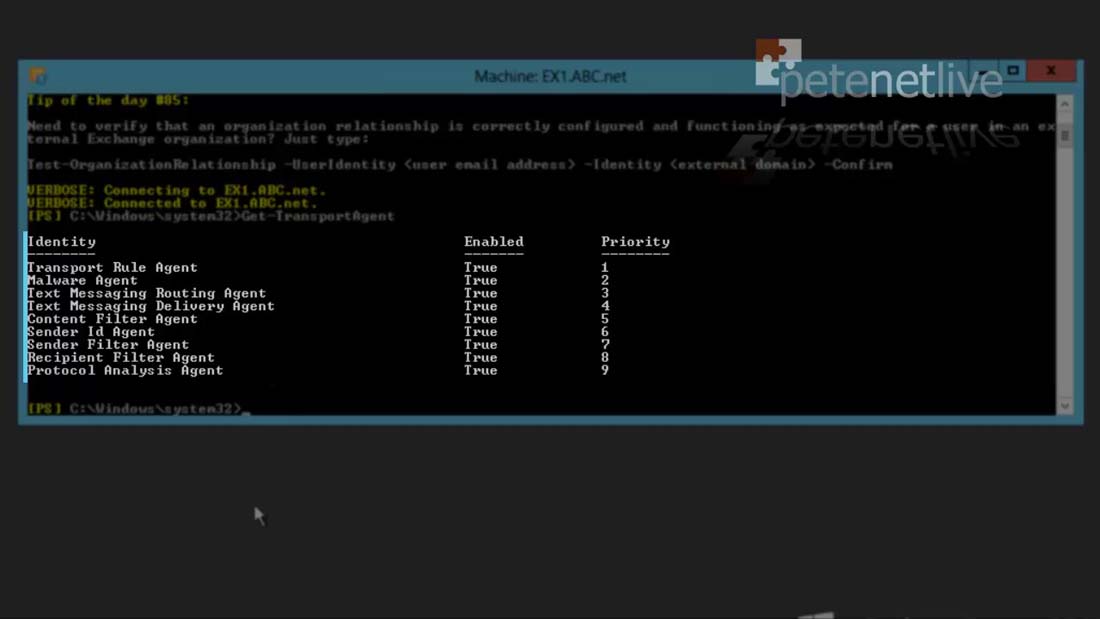
1. If you have already installed the Microsoft Anti Spam agents you might want to remove them, (not that you have to). If you don’t know you can run the following command;
If you just have the four below then you DO NOT have the extra agents installed.
2. If yours looks like the one below, then YOU DO have them installed.
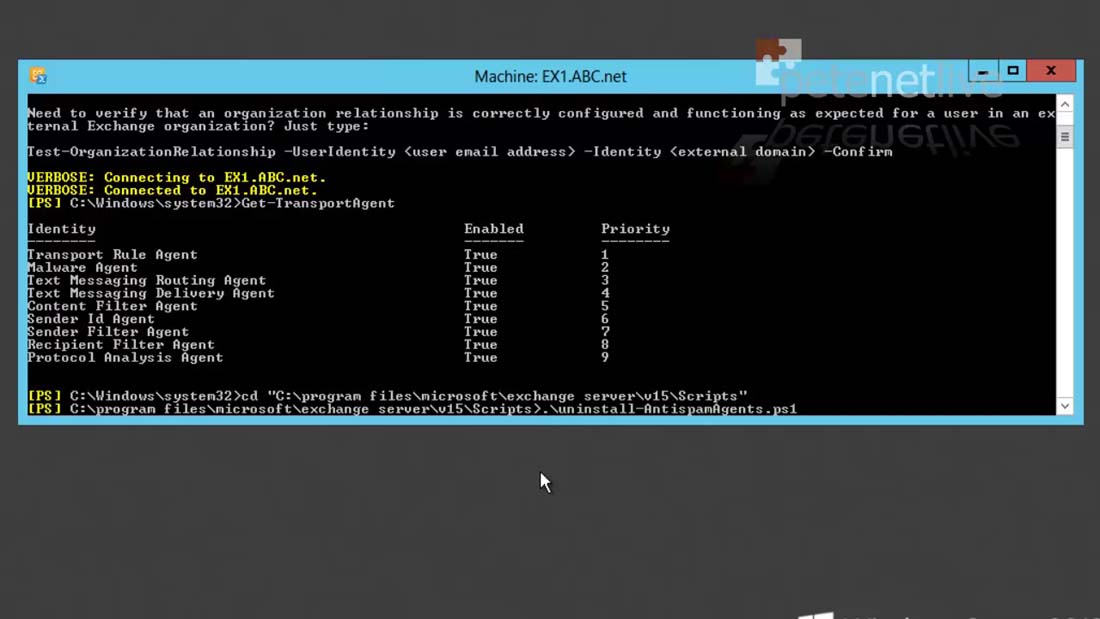
3. As stated you don’t have to remove them but if you want to simply execute the following two commands;
cd "Program FilesMicrosoftExchange ServerV15Scripts"
./Uninstall-AmtispamAgents.ps1
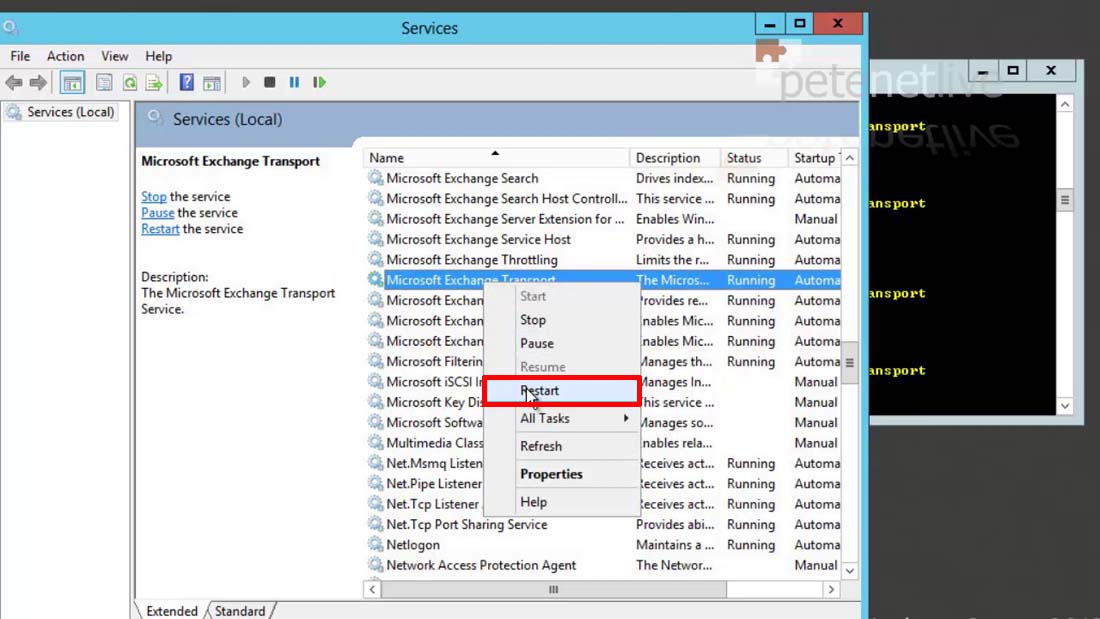
4. Answer each question, then run;

5. Restart the Microsoft Exchange Transport service.
Install SPAMfighter
6. Download the installer, and run it.
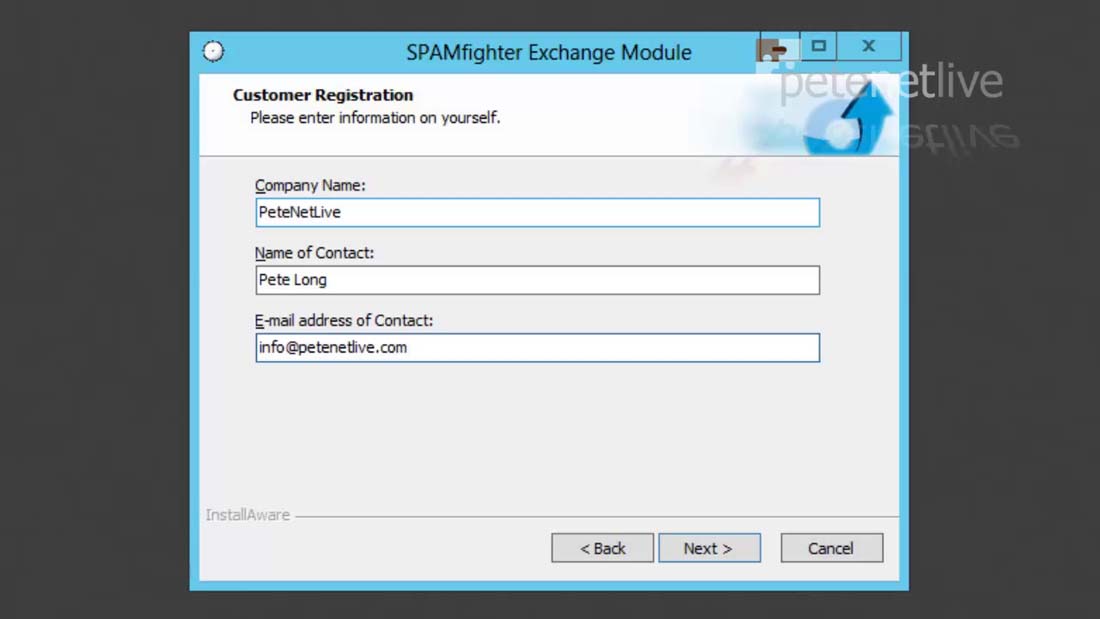
7. The installer is pretty straight forward > Next > Accept the EULA > Next > Enter your details > Next > Accept or change the install location > Next.
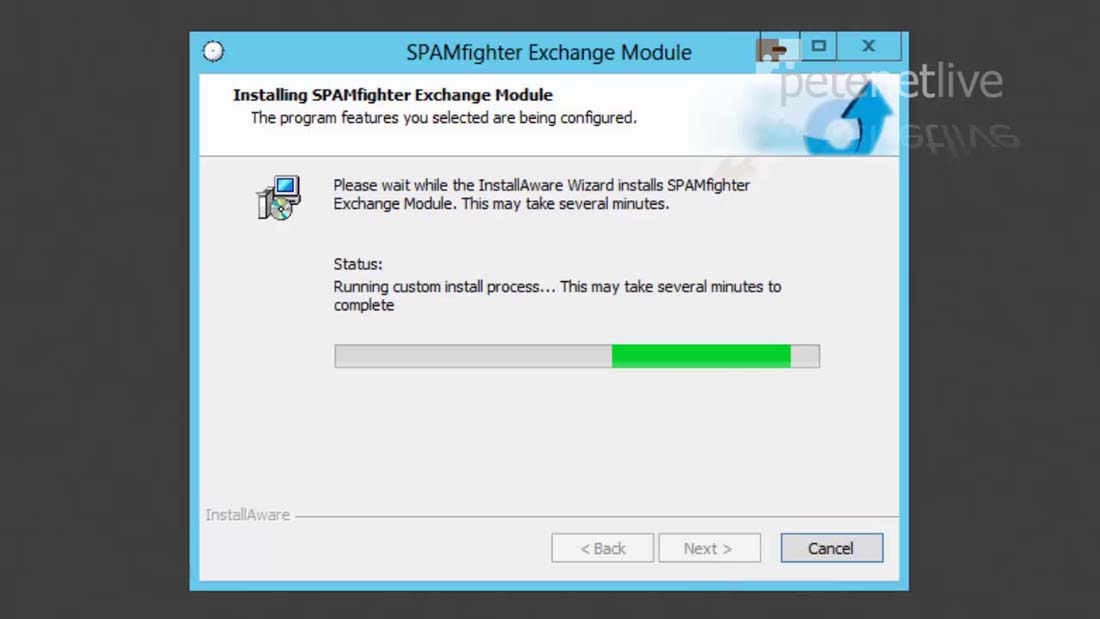
8. The product will install.
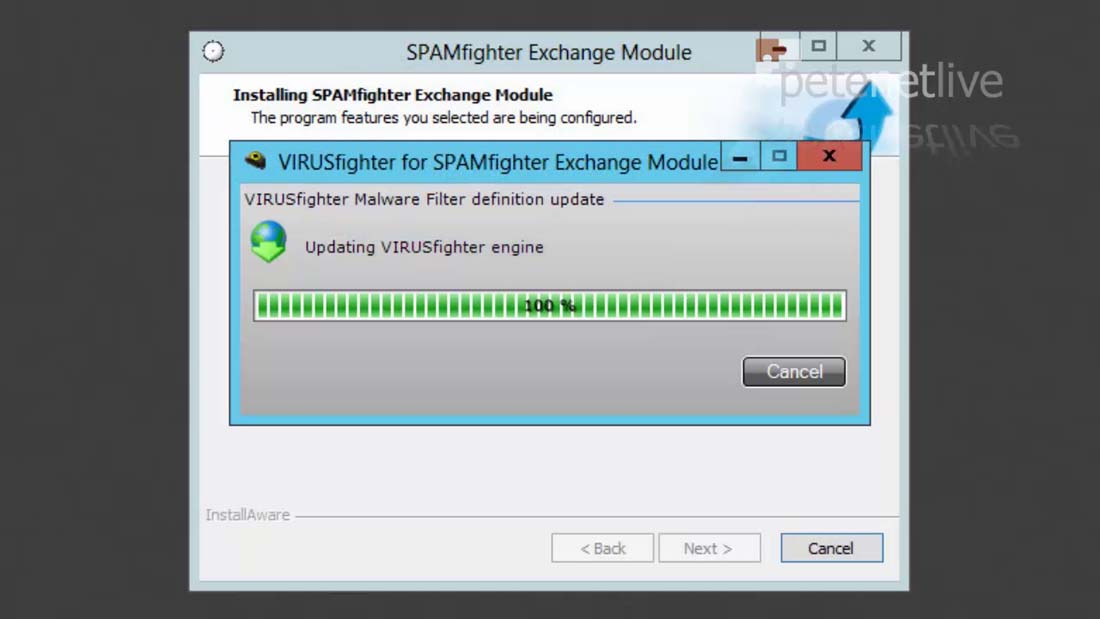
9. At this point it’s downloading definitions form the internet, and it will take a while.
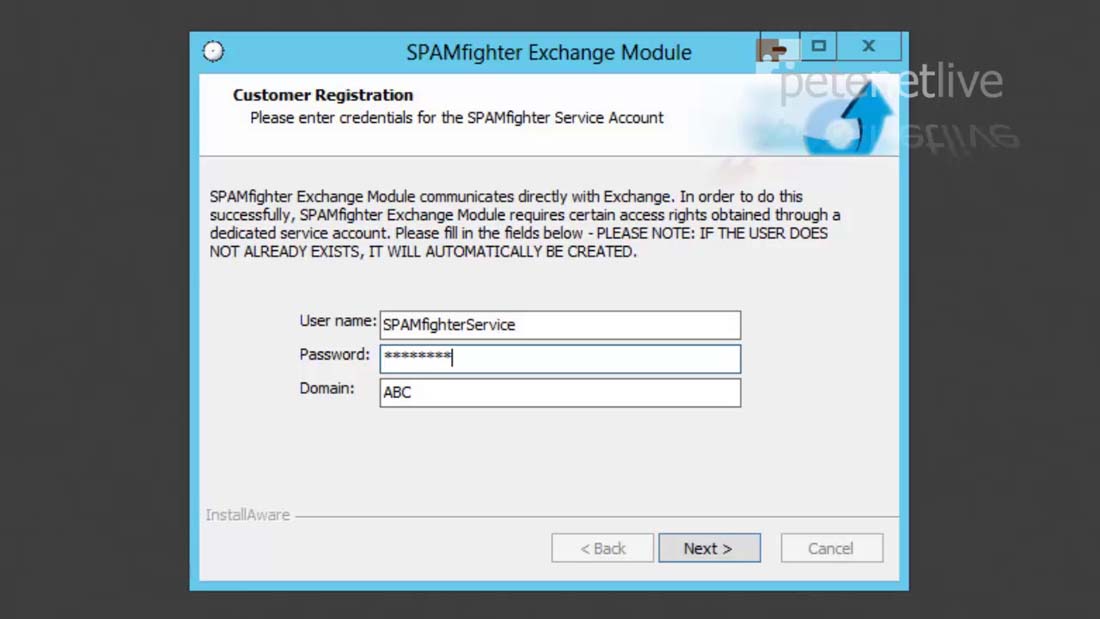
10. When complete it needs to setup a user that the services will run under. Just supply a password > Next.
Note: This user (by default) is added to the local administrators group, and the Exchange Organization Management group.
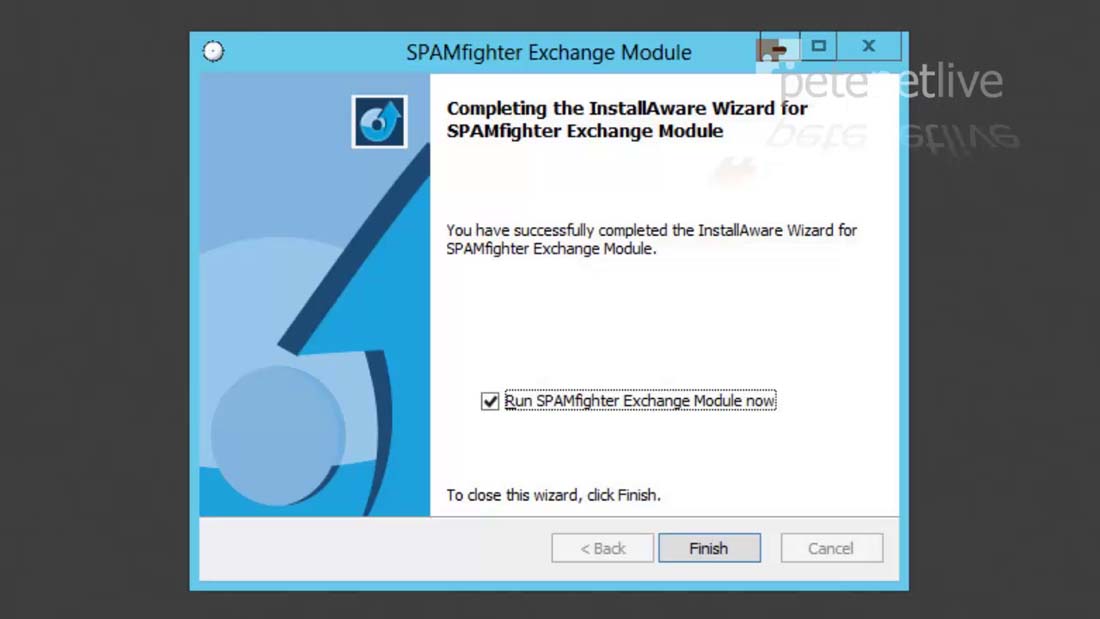
11. Finish.
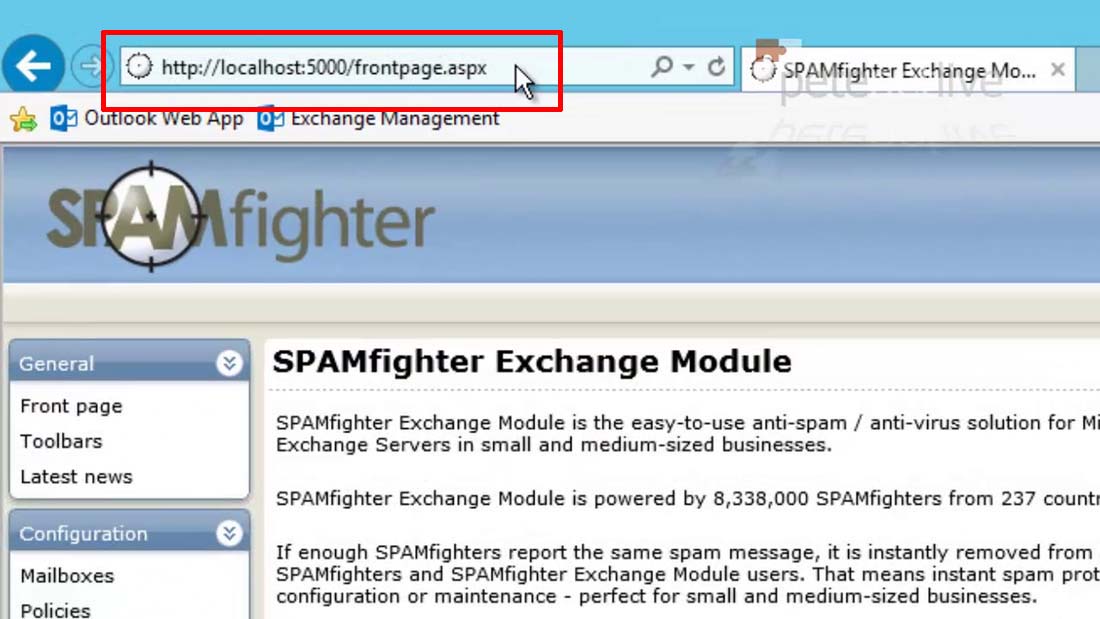
12. The management console installs on TCP port 5000, so if you need to access it through a firewall you will need to open that port.
13. Toolbars Tab: From here, I’ll jump straight to the configuration section, this drops you straight onto the Plugins tab. From here you can change the logo that will be displayed with the toolbar (this is NOT visible with Outlook 2013). You can also change the URL it points to and adding rights to users.

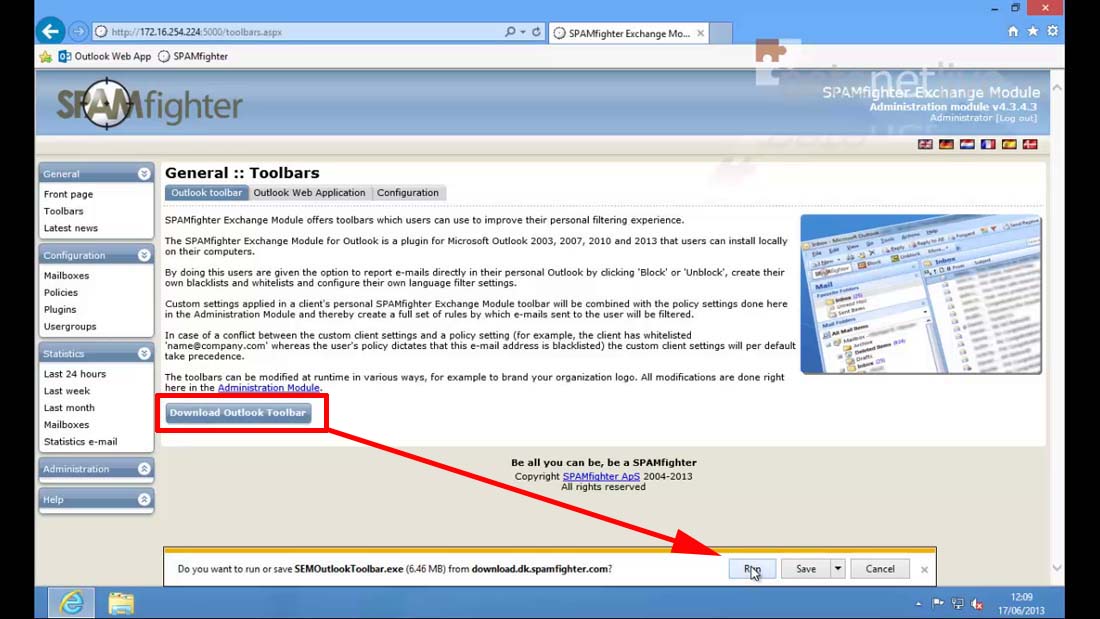
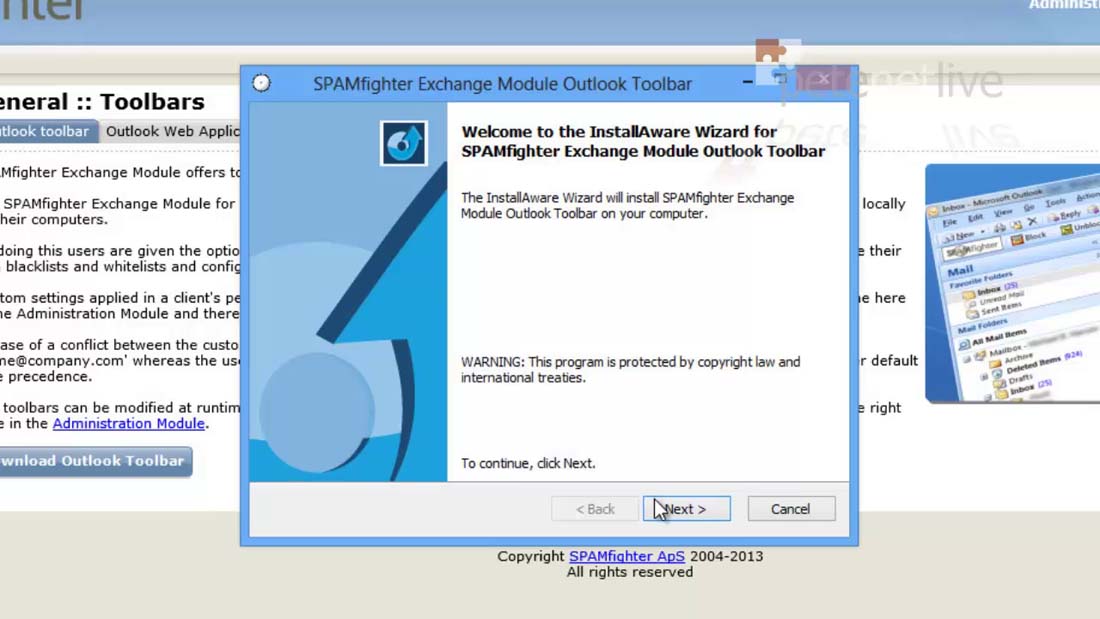
14. Toolbar Tab > Outlook Toolbar: On a client running Outlook > Download Outlook Toolbar > Run the installer.
Note: The installer is a .exe file, I would have preferred a .msi file, so I could deploy this out (on mass), to domain clients via GPO.
15. Next > Accept the EULA > Next > Next.
16. Finish.
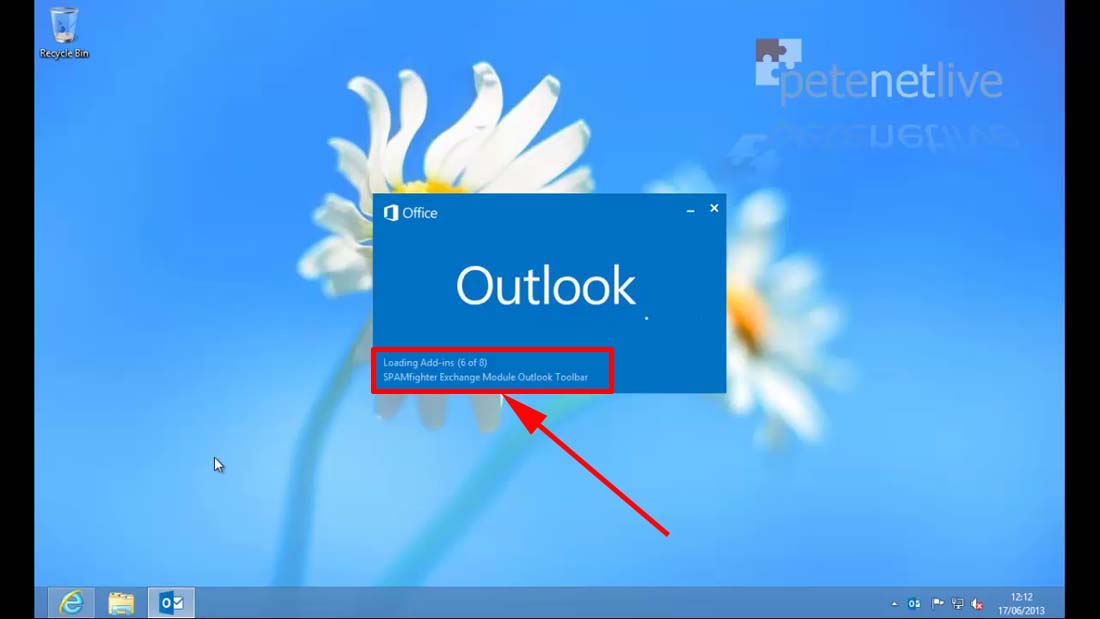
17. Now when you launch Outlook you can see the plugin loading.
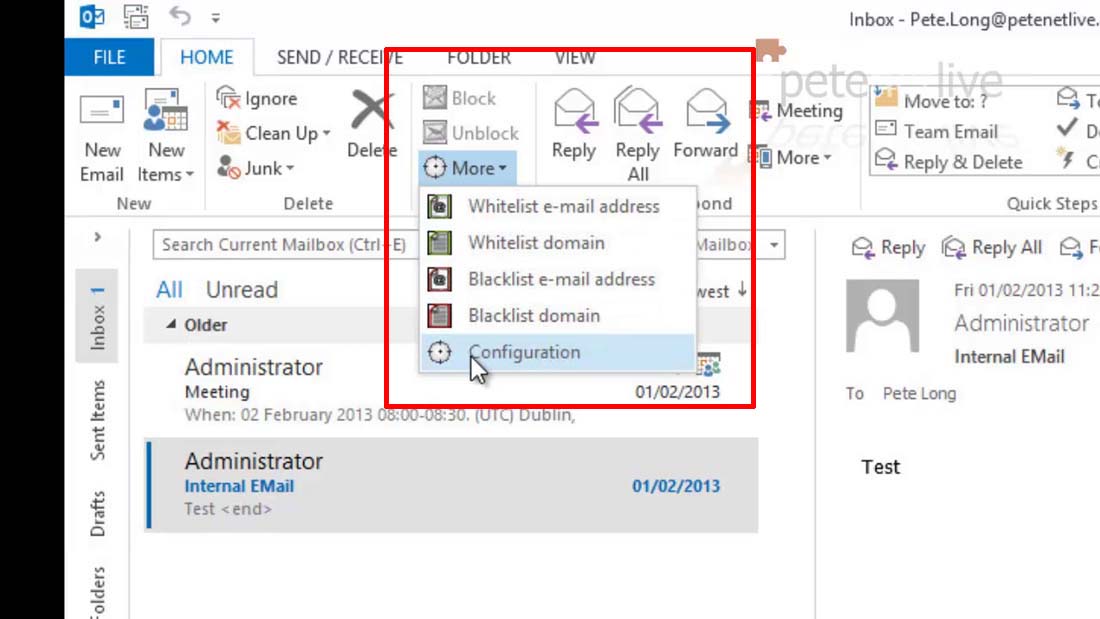
18. You will now have an extra toolbar with the following options.
BE AWARE: You install the OWA toolbar ONCE on the Exchange CAS server.
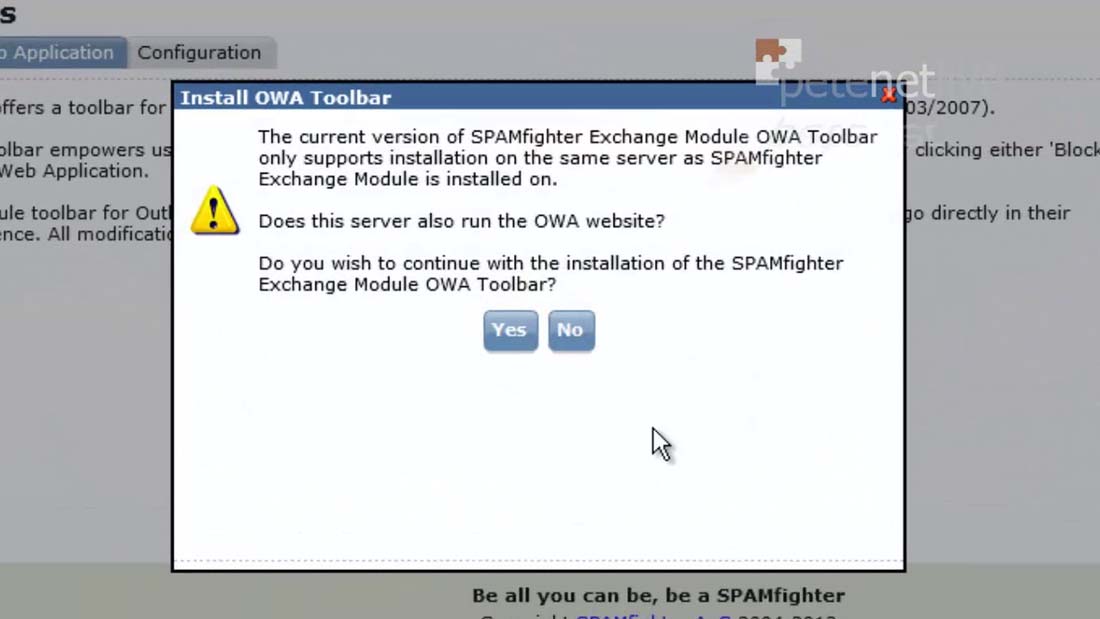
19. Toolbars > Outlook Web Application: Install OWA toolbar.

20. Yes.
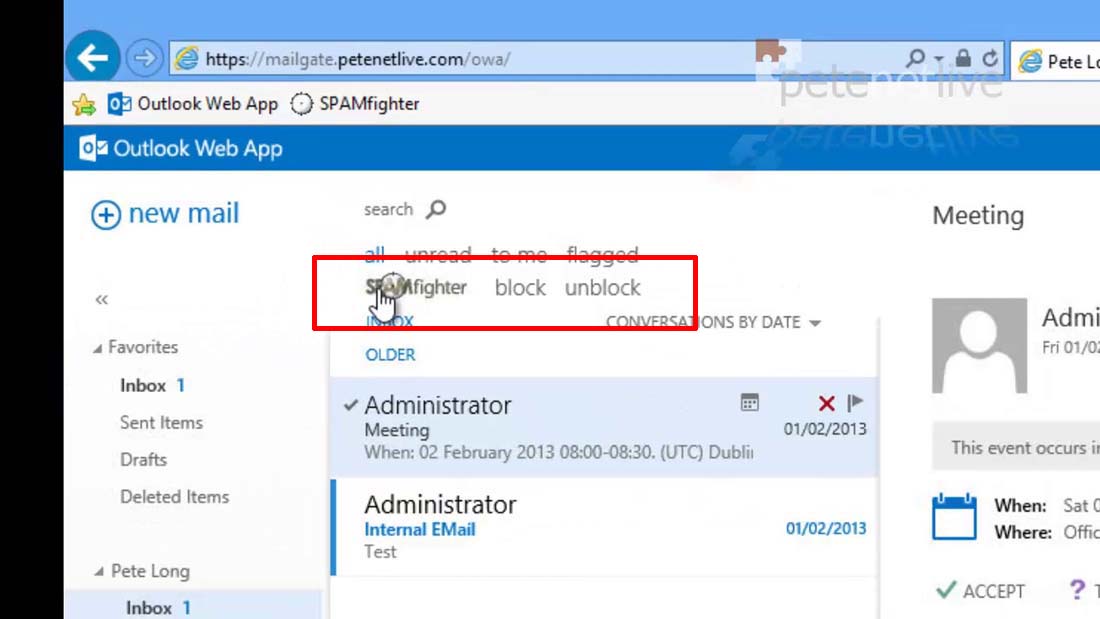
21. Now when your clients access OWA, you have the toolbar.
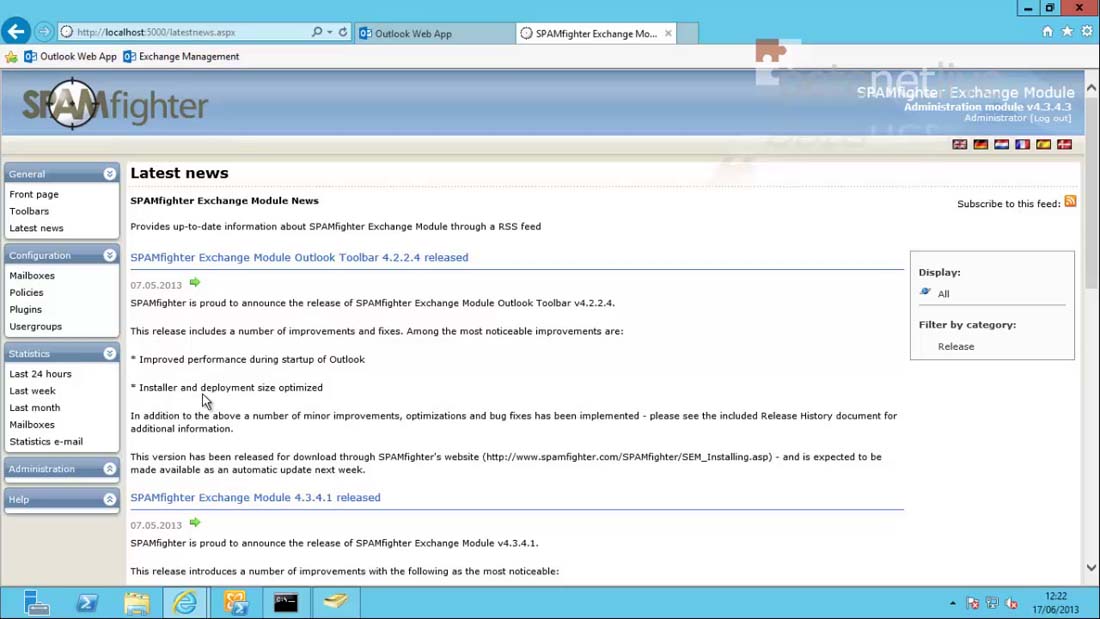
22. Latest news: Essentially this is just an RSS feed from the manufacturer to keep you abreast of software updates etc. If you have some RSS aggregation software you can add this same feed.
23. Mailbox Tab > Mailboxes: Here it will list all the mailboxes, by default the ‘Default policy’ will be applied and virus filtering will NOT be enabled (this is an add on license). you can also access statistics for this particular mailbox, and view quarantined emails. The User filter settings are for applying an exception for this one mailbox (I’ll cover this later). If you can’t locate a particular user there is also a search function.

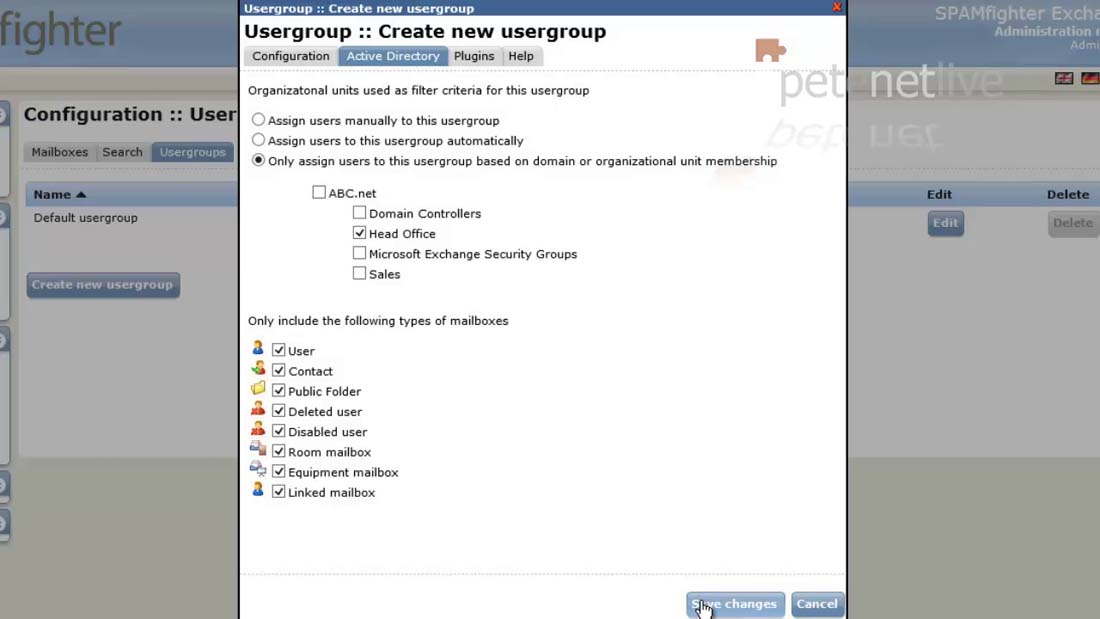
24. Mailbox Tab > Usergroups: Usergroups are used to apply policies, any new group requires you to maintain membership manually. But if your Active Directory is well designed, you can select your SPAMfighter groups based on your OU structure.
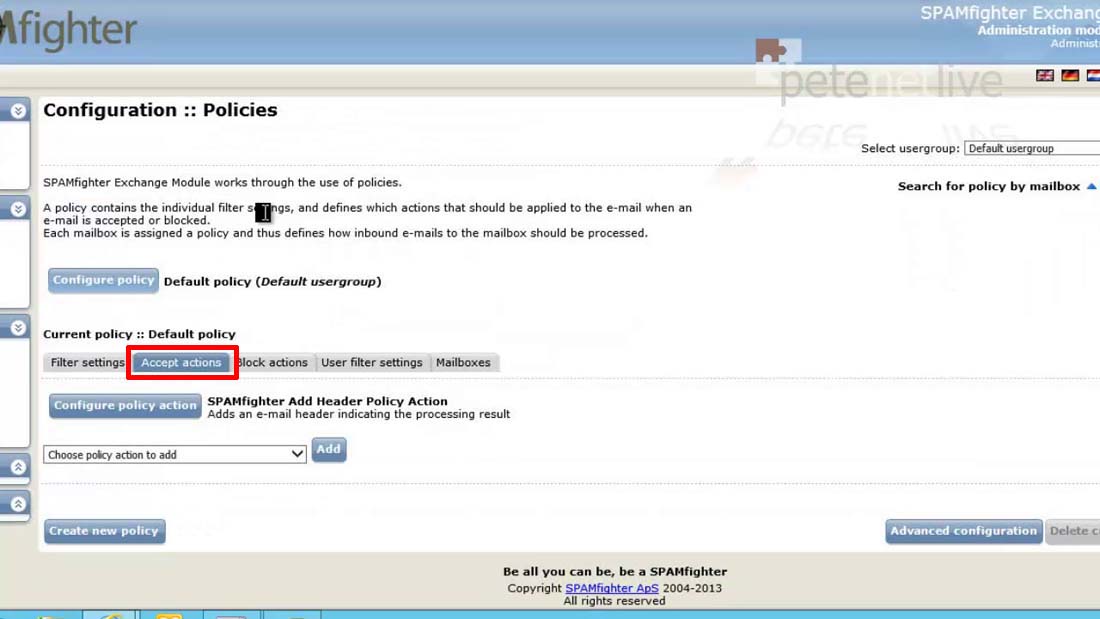
SEM – SPAMfighter – Configuring and Working with Policies
This is pretty intuitive, and the default policy comes preconfigured and already applied, though with all filtering systems it will probably take you a little while to get it streamlined to your requirements. The policies section has four main tabs;
Filter Settings: What tools you are going to use to look for spam.
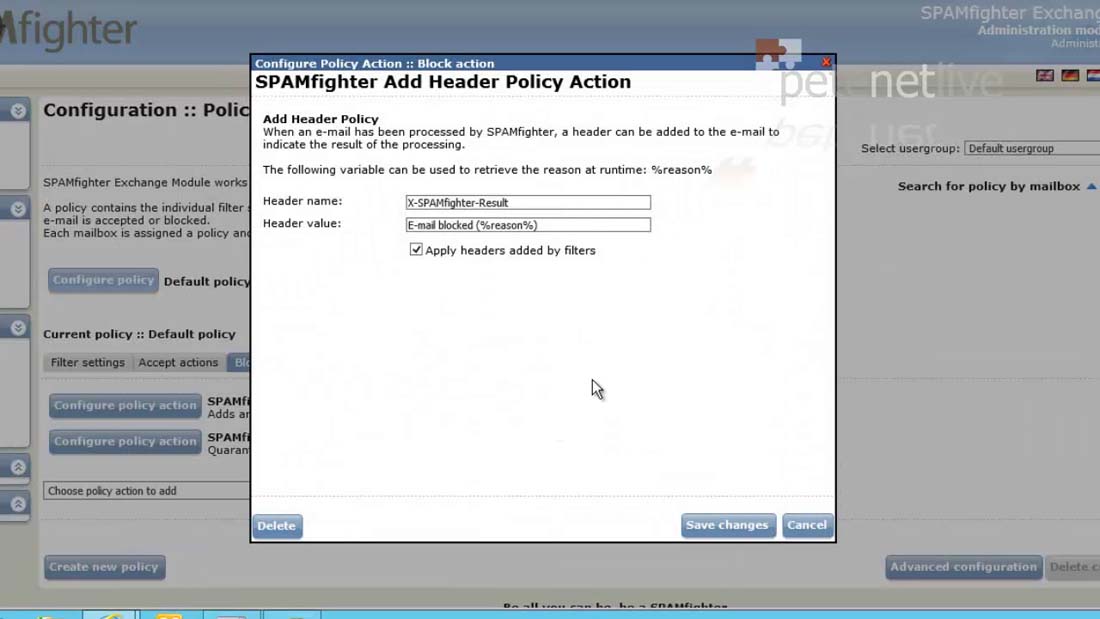
Accept Actions: What it will do if it finds nothing.
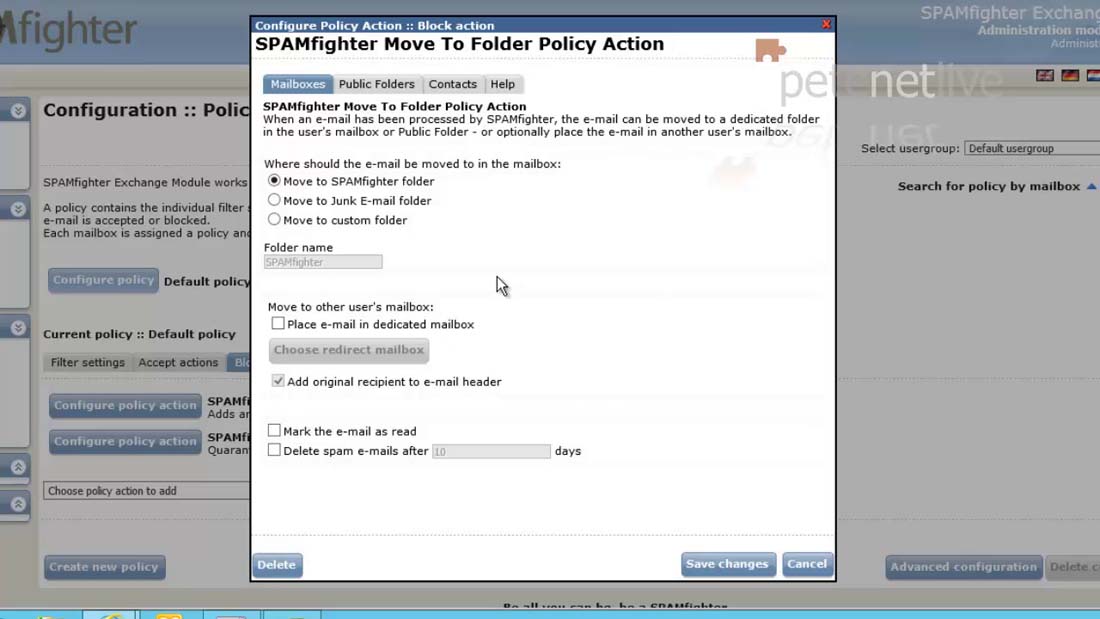
Block Actions: What it will do if it finds something.
User Filter settings: Exceptions to the filters for one or more users.
Mailboxes: Puts you straight back to the mailbox section you saw earlier.
25. Out of the box there are five filters enabled.
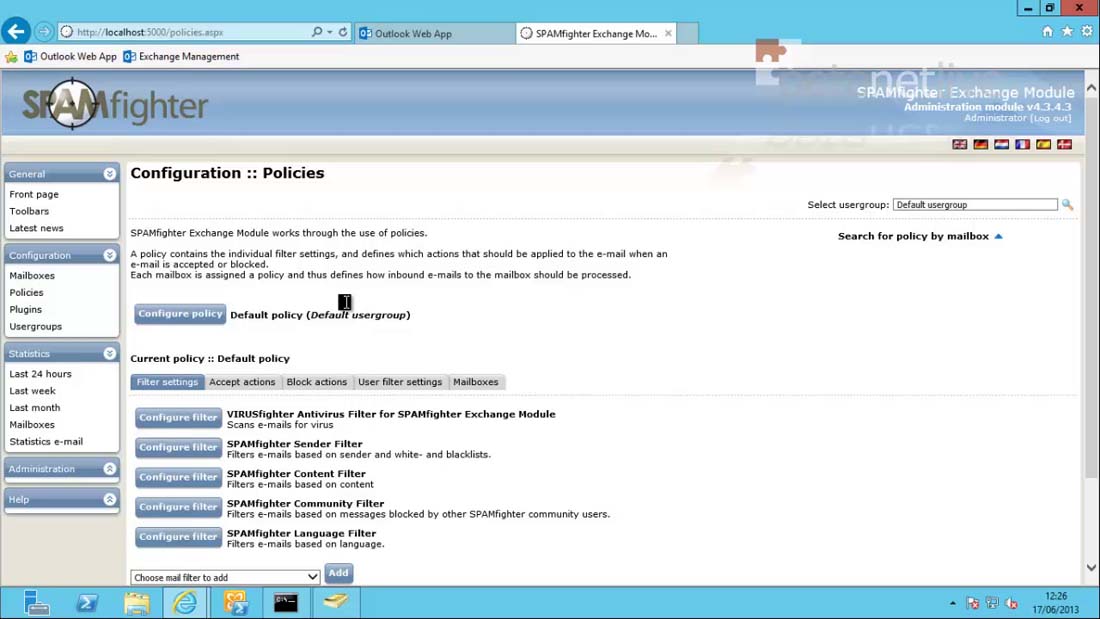
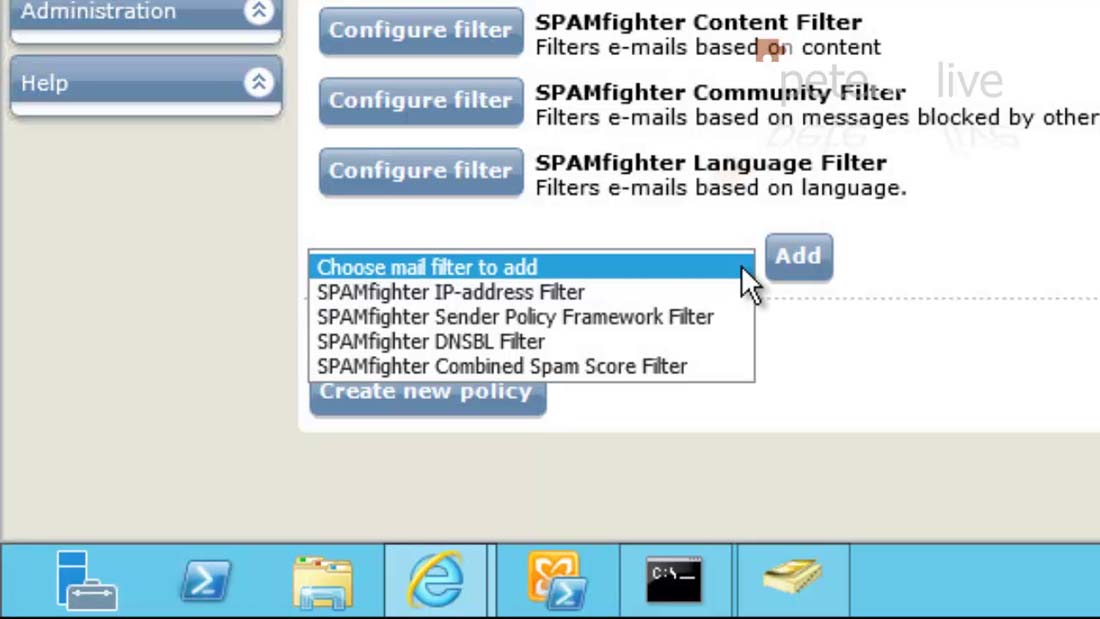
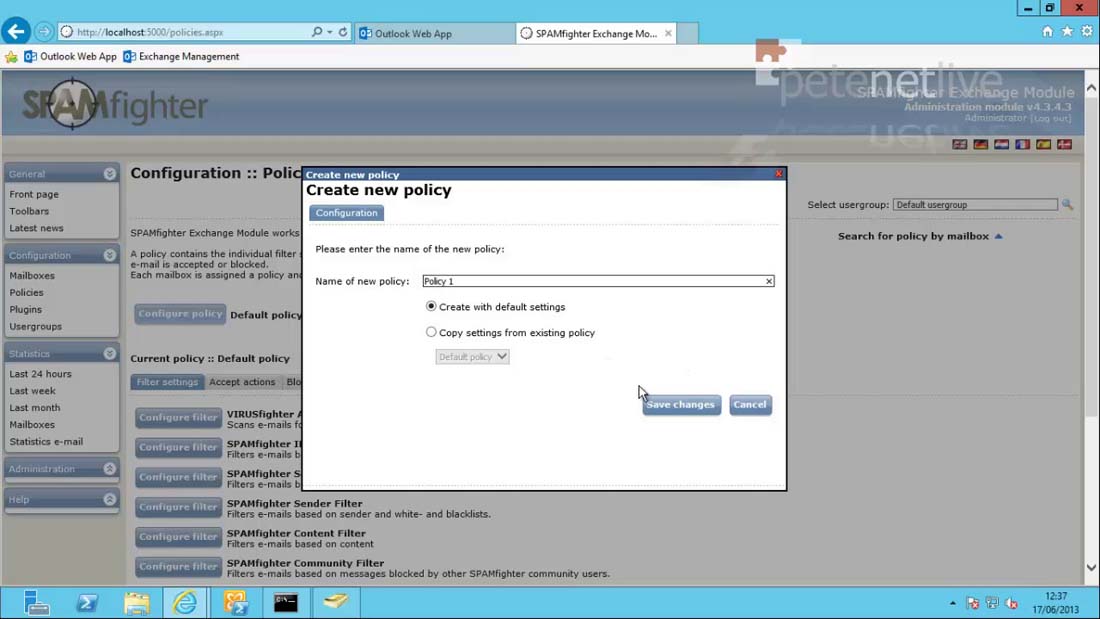
26. But there are four further filters that you can add to the policies.
SPAMfighter – Filters
27. VIRUSfighter Antivirus Filter for SPAMfighter Exchange Module: Remember this is an ‘Add on’ so it would only apply to mailboxes that have this enabled. It’s on its most conservative setting, and will replace the infected email with safe content.

28. SPAMfighter Sender Filter > Whitelist:Simply add either a particular email address you want to allow or add in an entire domain.
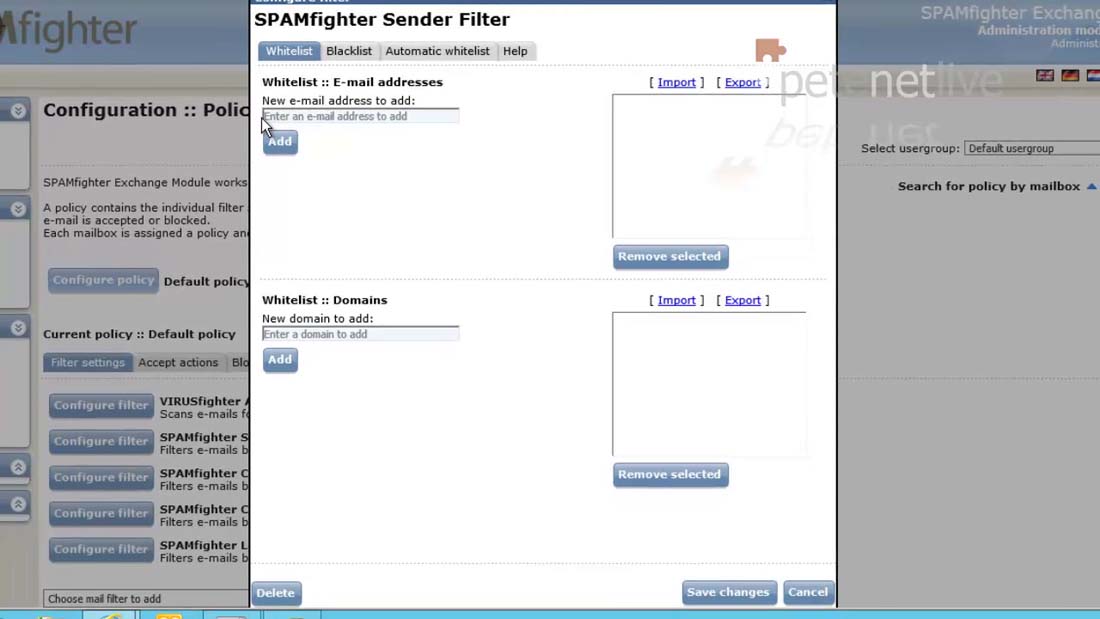
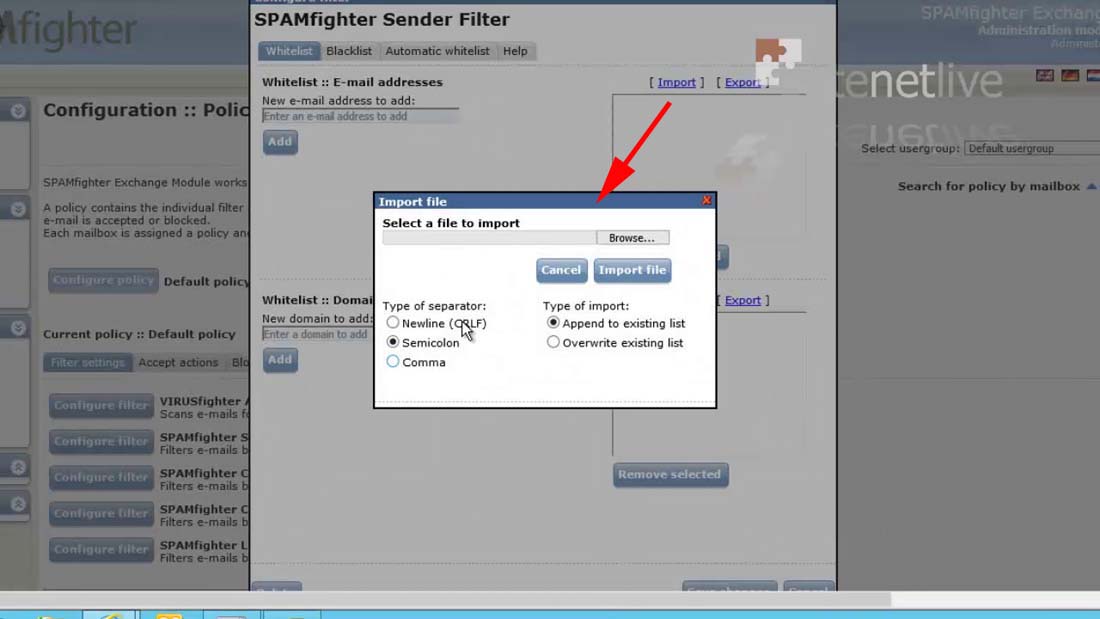
29. If your lists get a little unwieldy you can import or export them, and chose weather to overwrite them or append the imported list to your existing list.
30. And where there is a Whitelist there is a Blacklist, it’s configured exactly the same.

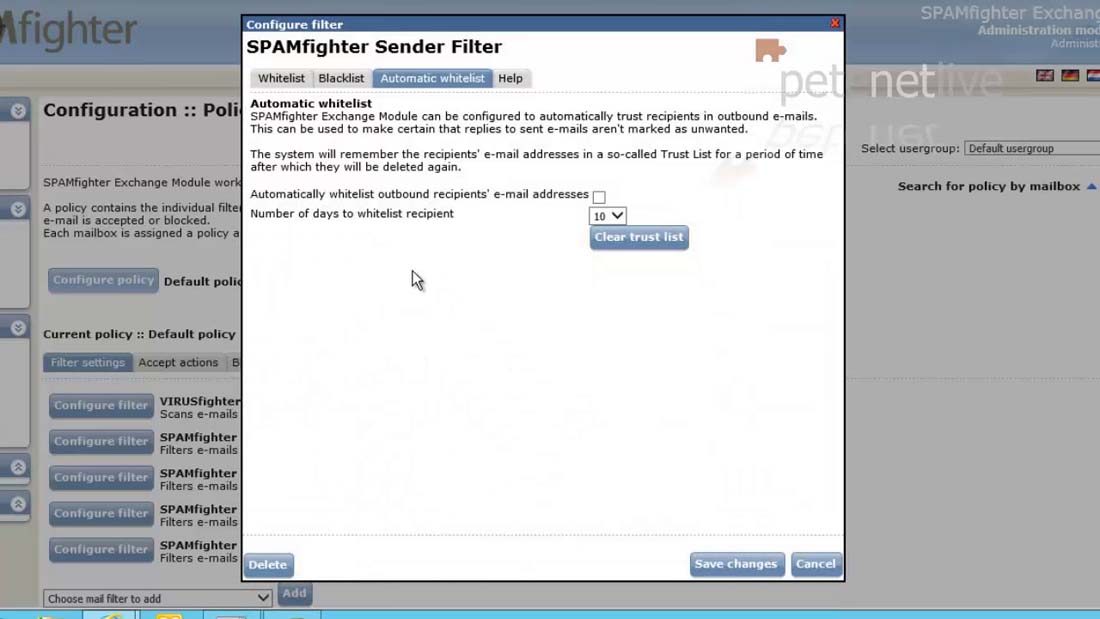
31. Automatic Whitelist: This is a brilliant feature! It dynamically adds the addresses our users send to to the Whitelist, and maintains the cache for 10 days (which you can alter). I’m surprised this is disabled by default.
Note: This will be enabled by default in the next release.
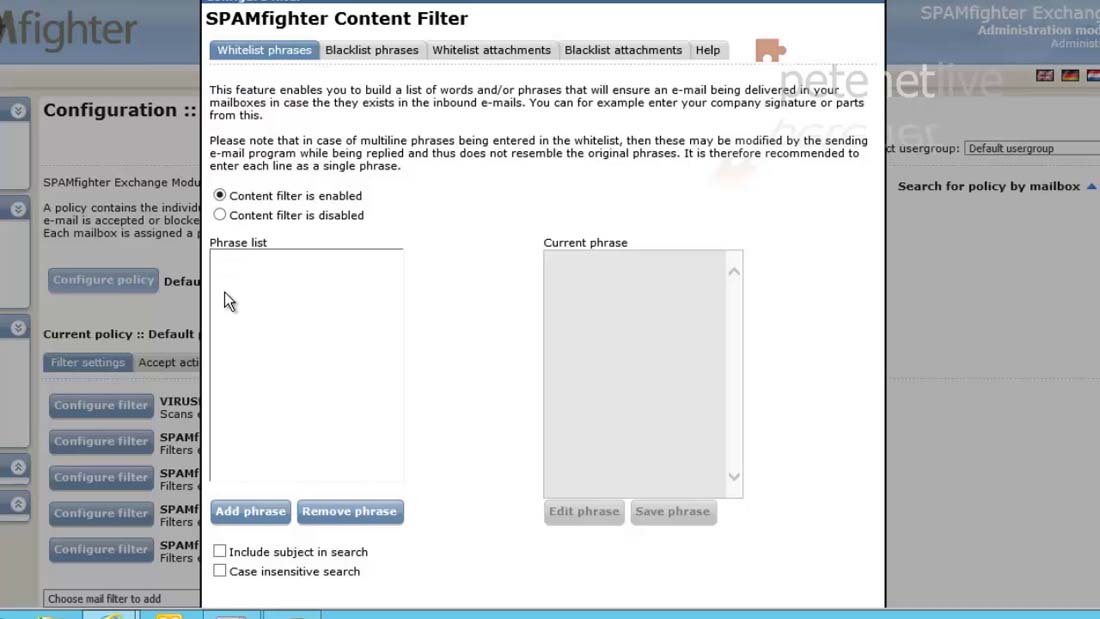
32. SPAMfighter Content Filter > Whitelist phrases: Gives you the power to automatically Whitelist emails based on a phrase they contain i.e. Your corporate email disclaimer or default signature.
33. SPAMfighter Content Filter > Blacklist phrases: As the warning says be careful with this section, this is the sort of thing that is handy for blocking “We attempted to deliver your parcel but were unable to” emails that urge you to click an attached zip file full of infected spyware nastiness.

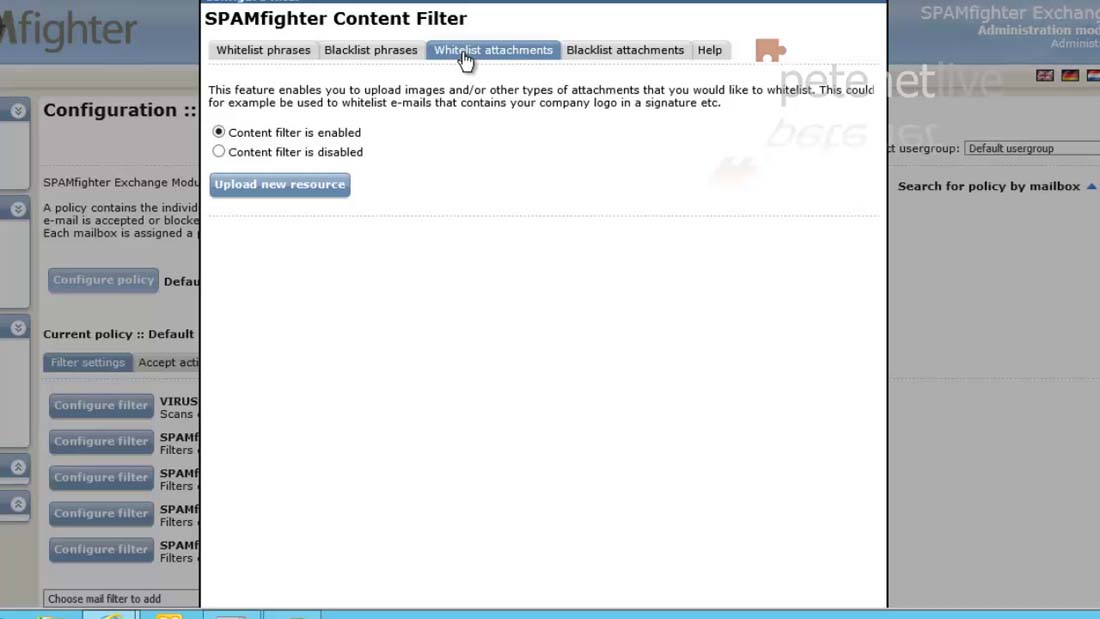
34. SPAMfighter Content Filter > Whitelist Attachments: Here you can upload an attachments (like your company logo from your email signatures) and the system will whitelist and allow through emails containing them.
35. SPAMfighter Content Filter > Blacklist Attachments: Thankfully this is disabled by default, the list of file extensions is quite long, and contains some commonly used file extensions, You will need to do some planning and testing with this one if you want to enable it.

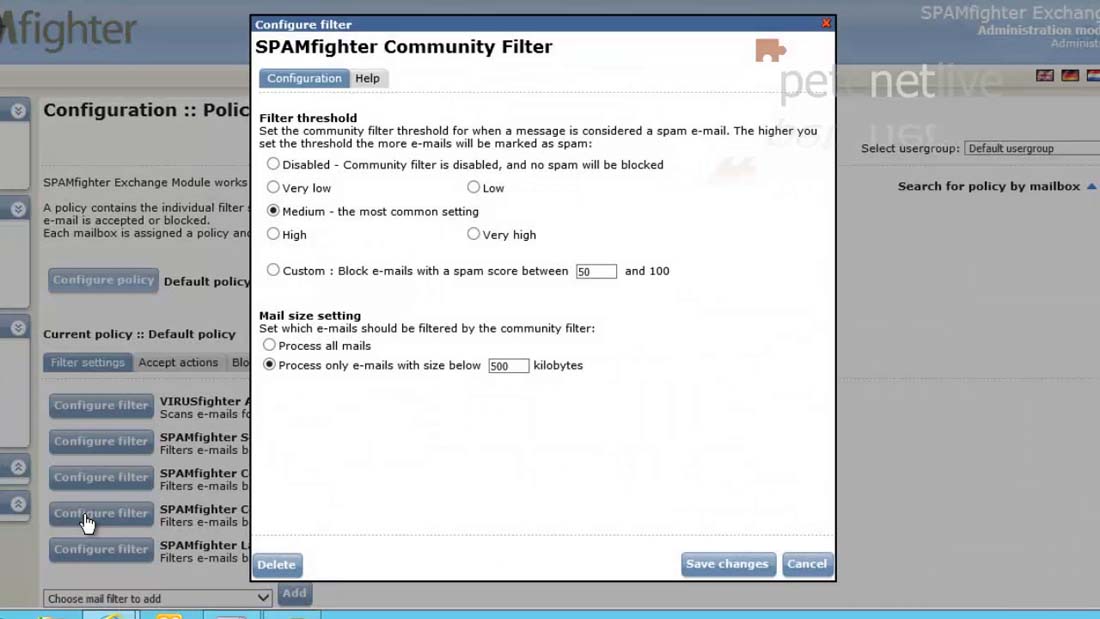
36. SPAMfighter Community Filter: This will filter mail based on mails that have already been blocked by other SPAMfighter users, it uses a scoring/weighting system. You simply set a threshold the higher you set it the more mail will be stopped, this will require some fine tuning.
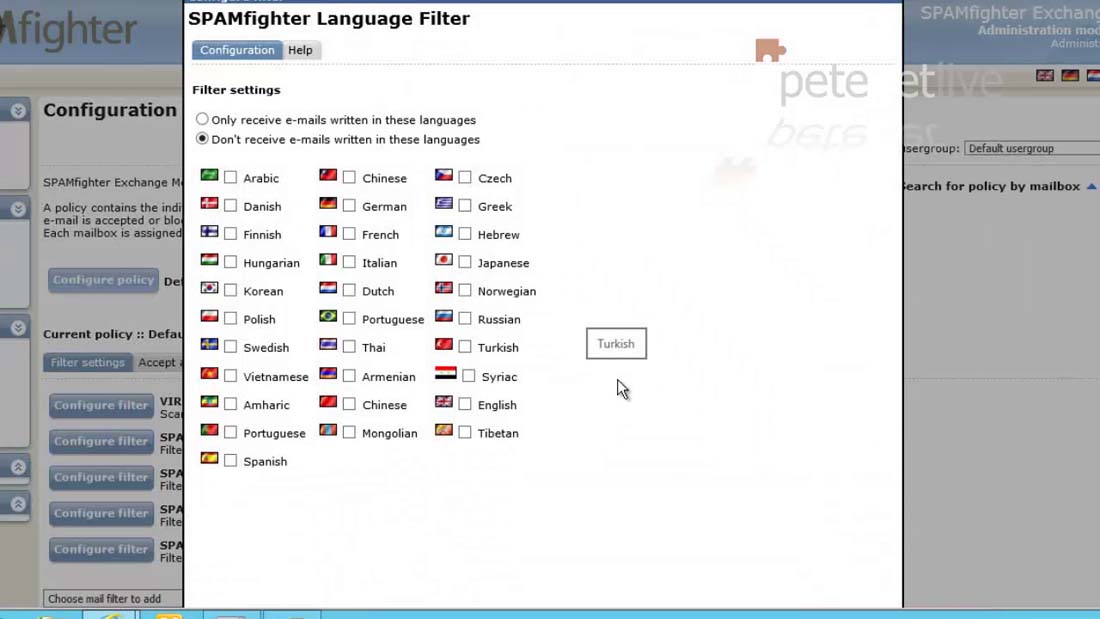
37. SPAMfighter Language Filter:This is enabled by default, but no languages are selected (which is sensible). If you are never expecting any emails in Chinese you can block them here.
SPAMfighter Filters that you can Manually Add to the Policy.
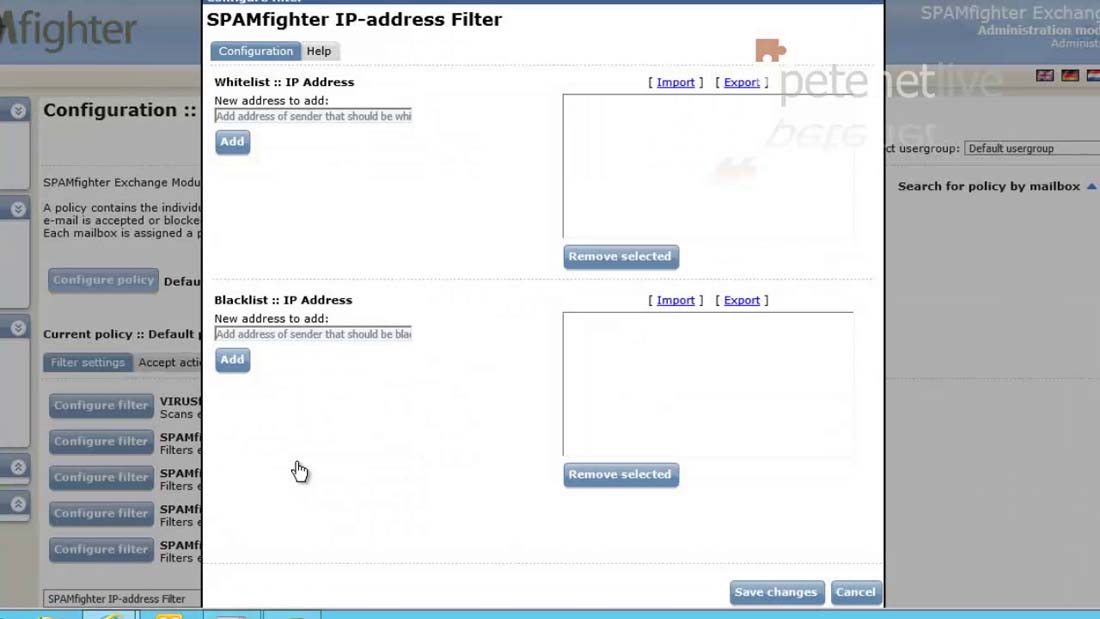
38. SPAMfighter IP-address Filter: Pretty much does what it says on the tin! Though blocking spammers by IP address is a little hard to manage, and it’s pretty easy to spoof an IP address anyway, which is probably when this is not on the default policy.
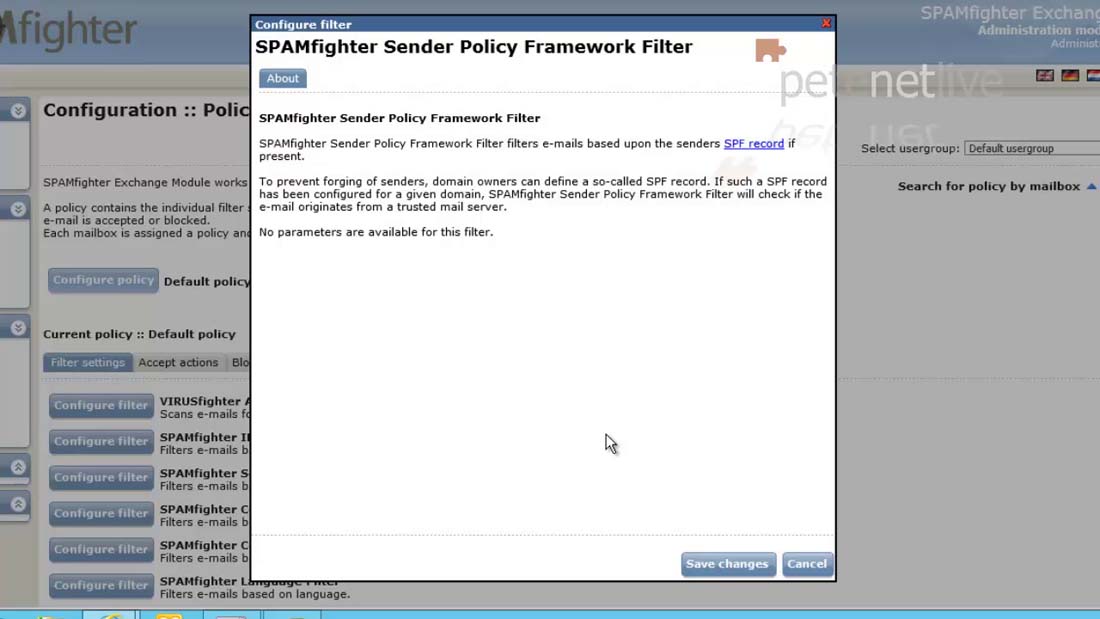
39. SPAMfighter Sender Policy Framework Filter: Personally I think you would be crazy to turn this on! If you don’t know what an SPF record is then read the following article.
Setting up the Correct DNS Records for your Web or Mail Server
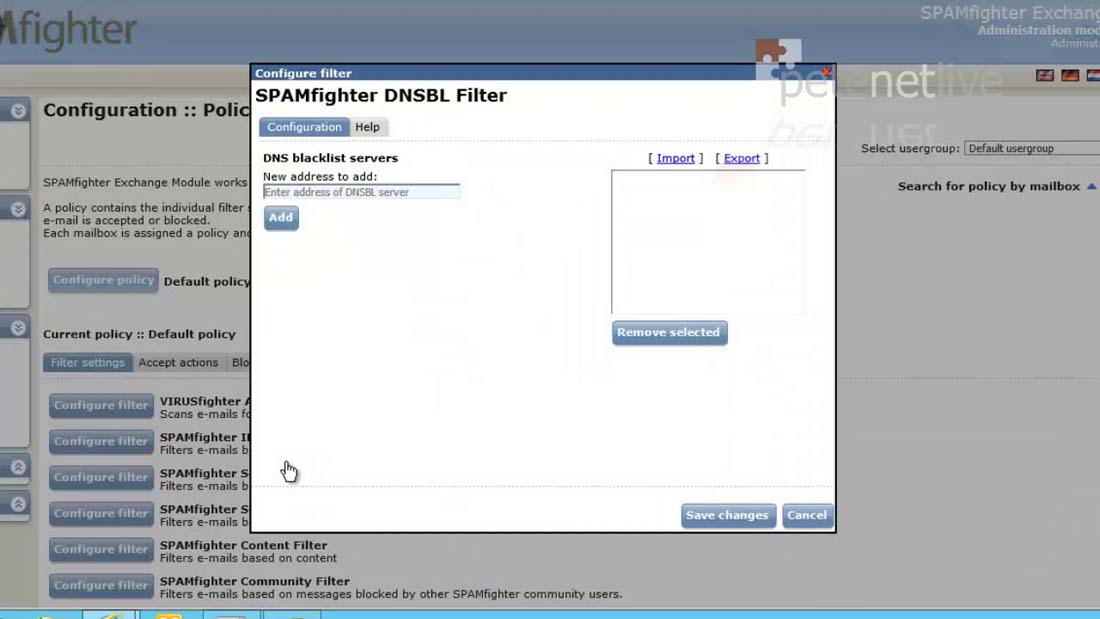
40. SPAMfighter DNSBL Filter: A DNSBL is a dynamic DNS list of known spammers, if you are familiar with RBL block lists this is similar.
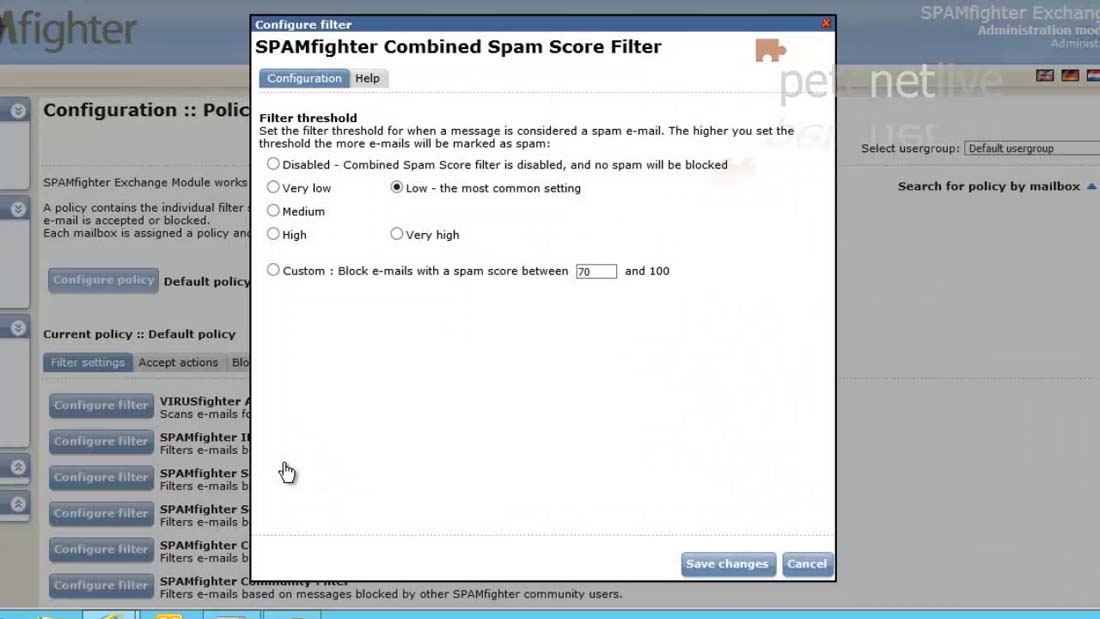
41. SPAMfighter Combined Spam Score Filter: All the other filters check the mail and give it a score, if the score is higher than a certain threshold this this filter will aggregate all those scores and block the mail.
SPAMfighter – Policies > Accept Actions
42. If the mail makes it through all the filters, then this section decides what happens with it.
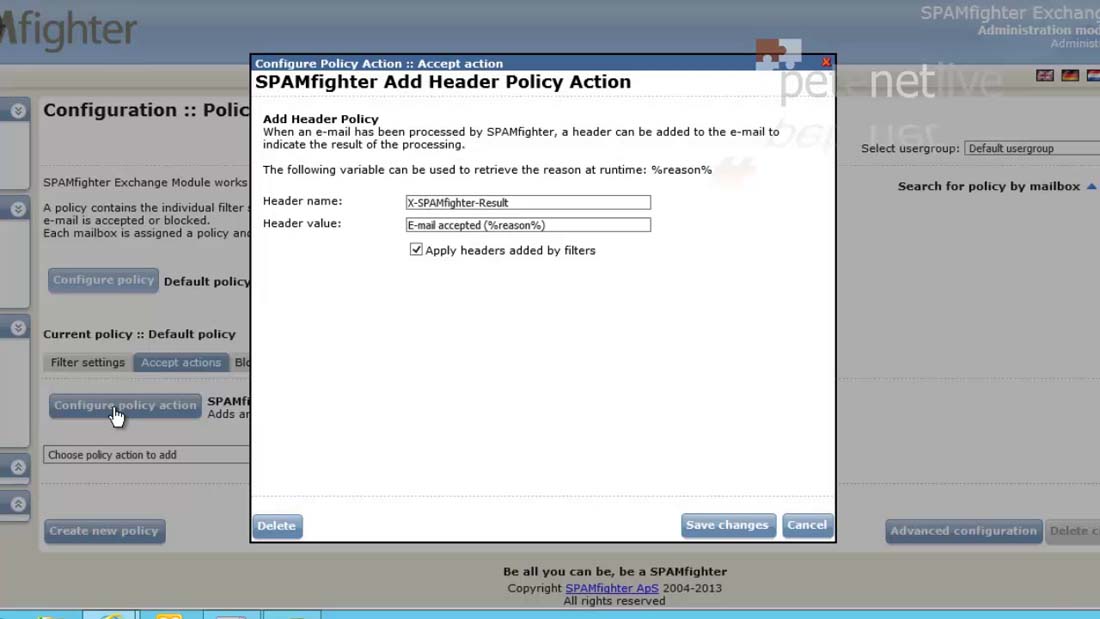
43. And that is adding information to the mail header that says the mail was scanned and accepted.
SPAMfighter – Policies > Block Actions
44. If the mail gets blocked by any of the filters, this section decides how that is handled.
Note: You can add other actions from the drop-down list below if this does not do what you require.
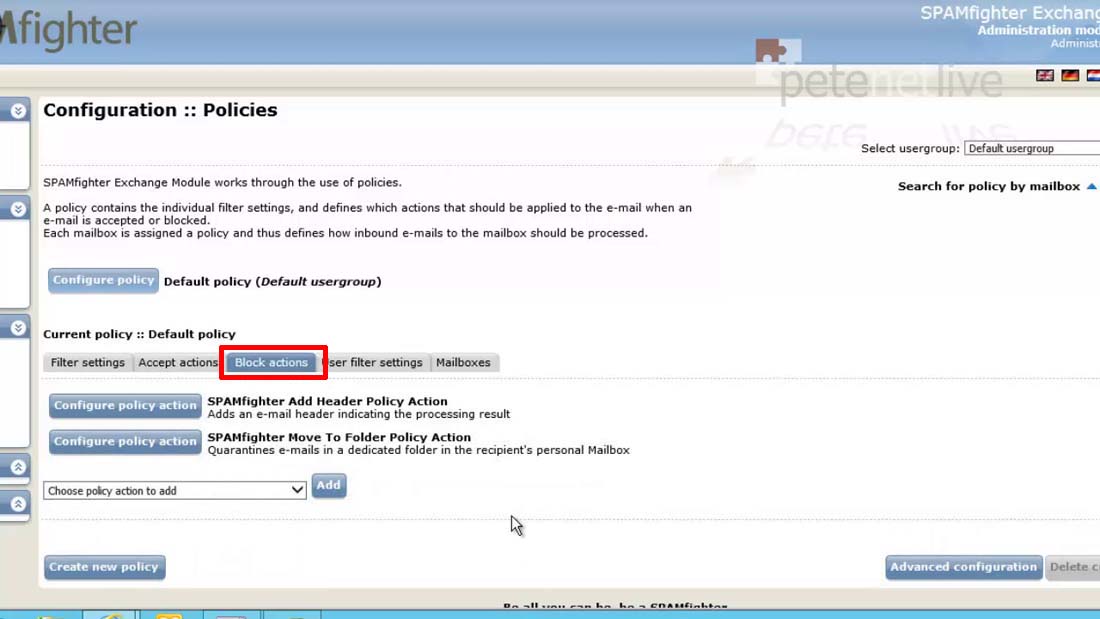
45. Just as for the accept policy action, this modifies the email header, though this one says the mail was blocked.
46. SPAMfighter Move To Folder Policy Action > Mailboxes : The second default policy action takes that filtered email and places it within a folder called SPAMfighter within the users mailbox.
Note: You can redirect that mail to another mailbox if that is your preference.
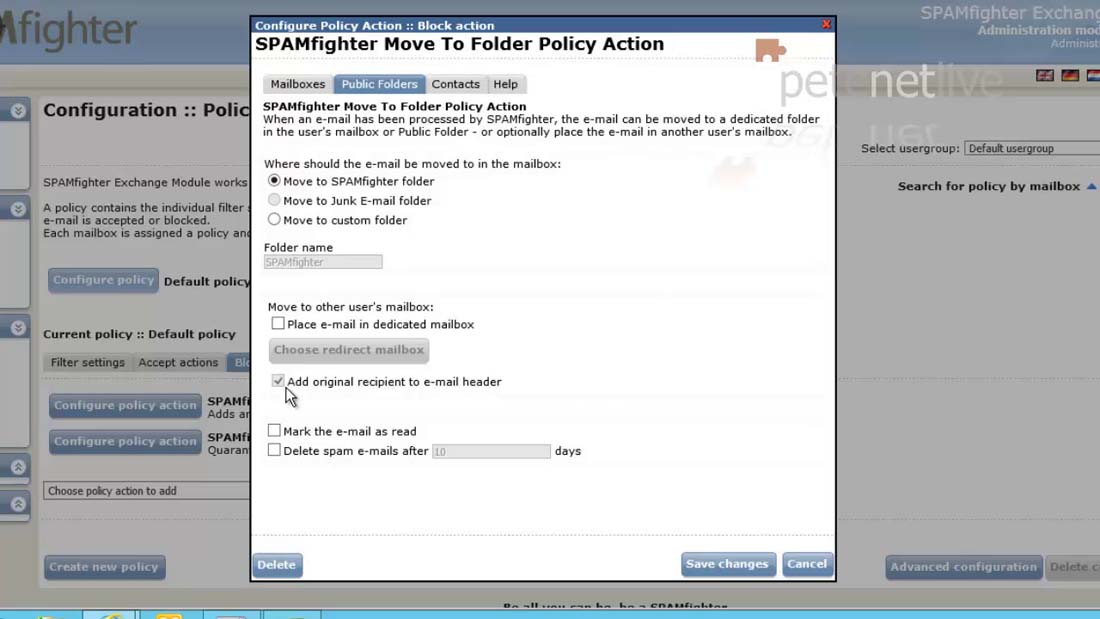
47. The system for Public Folders (if you use them) is identical.
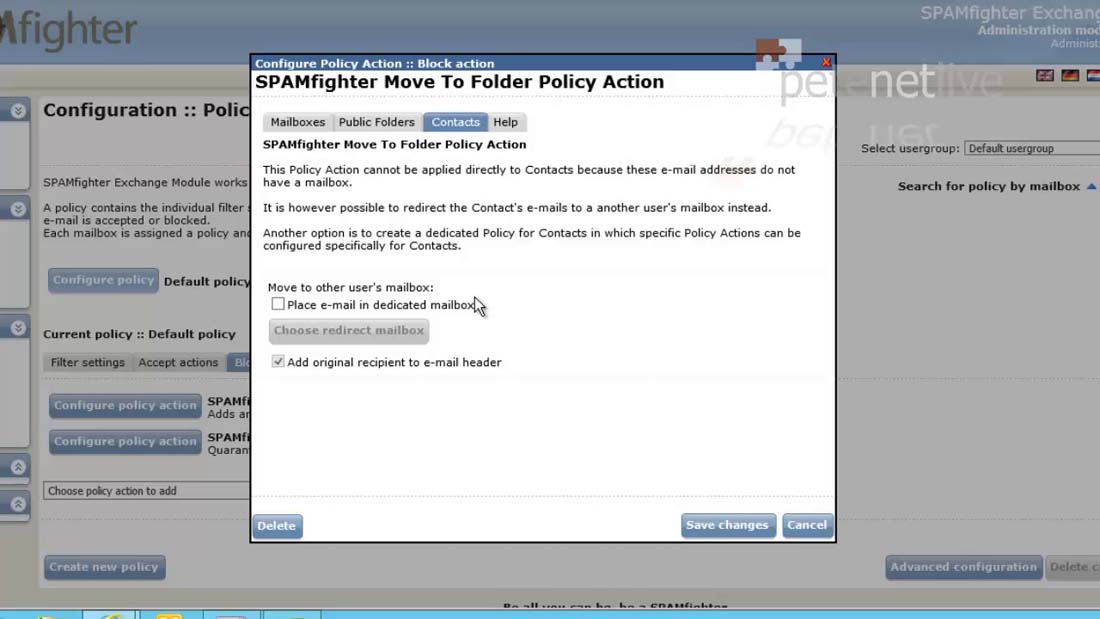
48. Contacts: As is says contacts do not have a mailbox, but you can redirect filters contact mail to a specific mailbox should you wish.
49. User Filter Settings: This section can create an exception for one particular user, it simply creates another policy that you can apply to that user.

50. You can create new policies and apply then to particular users or usergroups, and make the system as granular as you like.
51. Statistics: On my test network I didn’t have any throughput on which to pull some meaningful statistics.

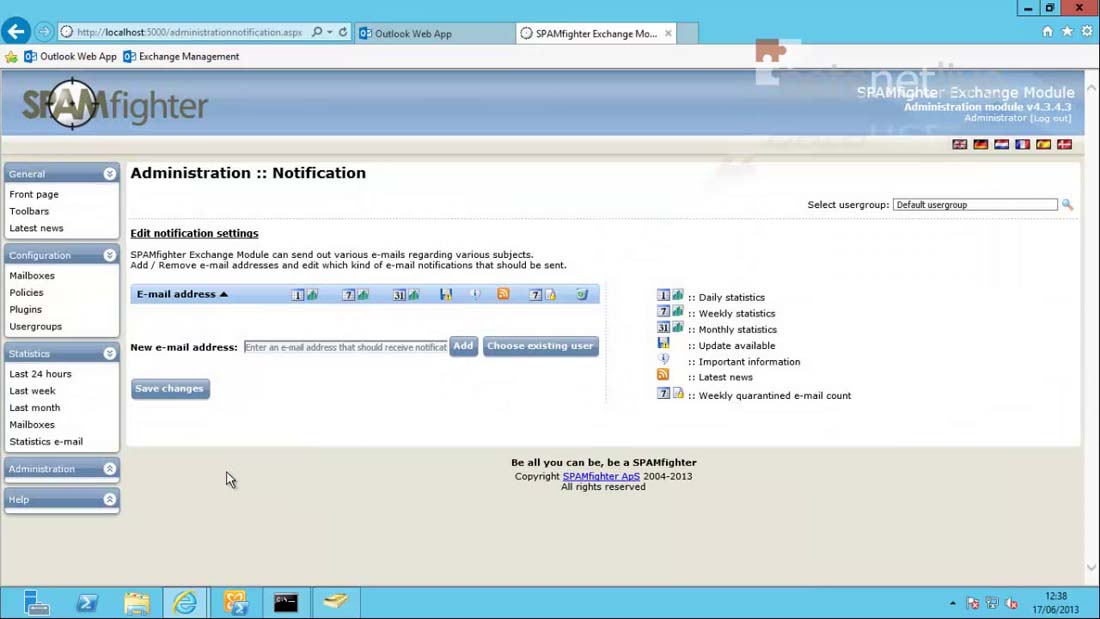
52. Statistics > Notifications: You can have daily/weekly/monthly reports emailed to you.
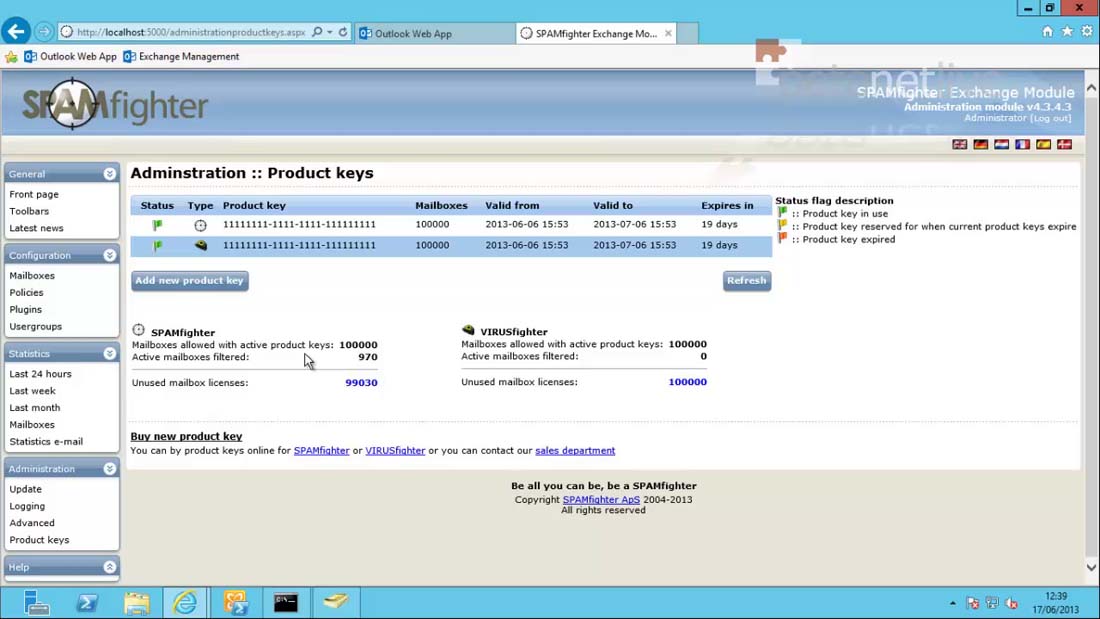
53. If you decide to purchase, the licenses are priced per mailbox. Prices start at £14.50 each (or £29.00 with the Antivirus) And go down to £2.45 (or £4.90 with Antivirus) depending on the amount you buy. They are available for 1, 2, and 3 year periods. For an up to date price list go here.
Related Articles, References, Credits, or External Links
NA