
KB ID 0000542
Problem
Back in the early days of email, just about all mail servers let you relay mail though them. That was fine until someone worked out you could then get someone else to send out your “spam”, and they would look like the guilty party. Even today people misconfigure their Exchange servers and make them an open relay.
But what happens if you have a particular server or machine that you want to let use your Exchange server as a relay? e.g. a Linux server that sends mail, or a SQL server running SQLMail? Then you need to allow relaying from either that IP address, or the network it’s on.
Allow Relay from an IP with Office 365 (Exchange Online)
Allow Relay from an IP with Exchange 2016 & 2013
Allow Relay from an IP with Exchange 2010
Allow Relay from an IP with Exchange 2007
Allow Relay from an IP with Exchange 2003
Allow Relay from an IP with Exchange 2000
Solution
Allow Relay from an IP with Exchange 2010 and 2007
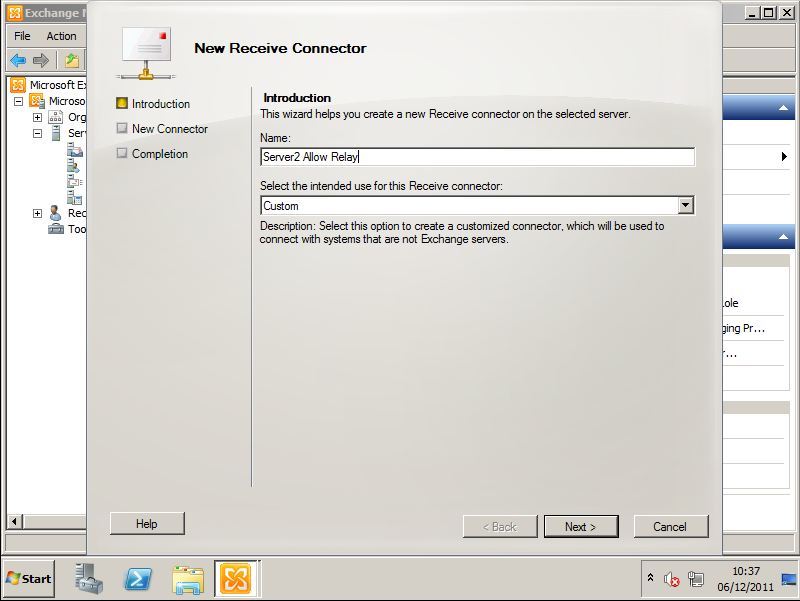
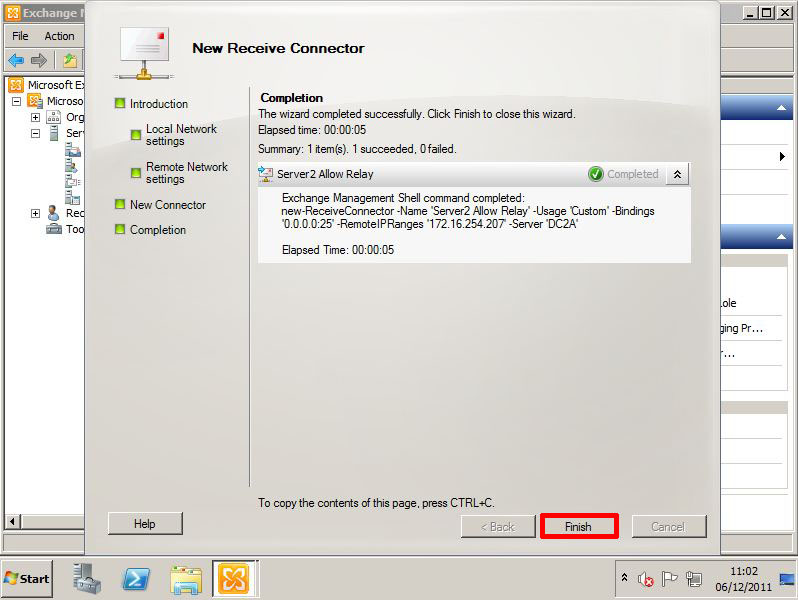
1.From the Exchange Management Console > Server Configuration > Hub Transport > New Receive Connector.

2. Give the connector a name and select Custom > Next.
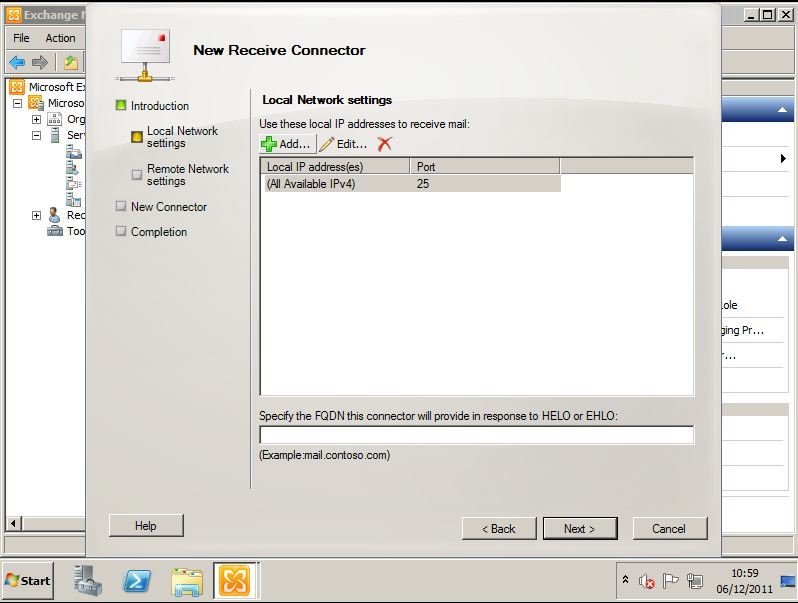
3. Next.
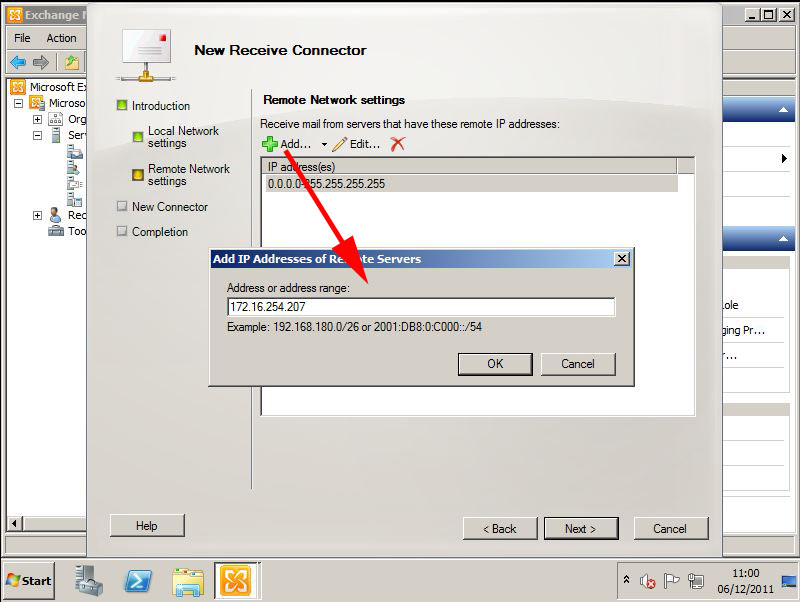
4. Add > Add in the IP address(s) or network you want to allow relay from > OK.
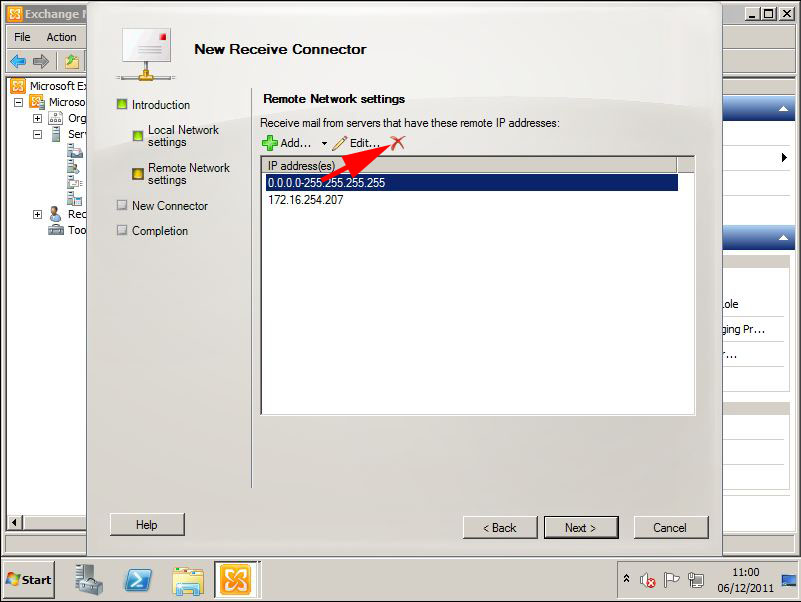
5. Select the 0.0.0.0 255.255.255.255 entry and click DELETE.
Warning: Leaving this entry in will make your Exchange Server an Open Relay. (Note: This does NOT mean that your default connector is an “Open Relay” as this uses “authentication”
6. Next.

7. New.

8. Finish.
9. Select your new connector then right click > Properties.

10. On the Permission Groups tab ensure “Exchange Servers” is selected.

11. On the Authentication Tab > Tick “Externally Secured (for example with IPSEC).” > Apply > OK.

Allow Relay from an IP with Powershell
The following Powershell does the same as above;
Allow Relay from an IP with Exchange 2003 and 2000
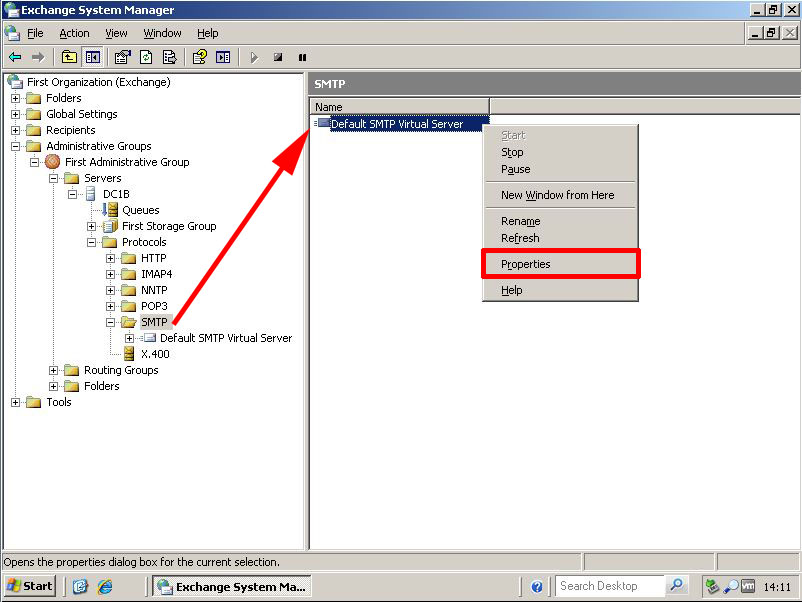
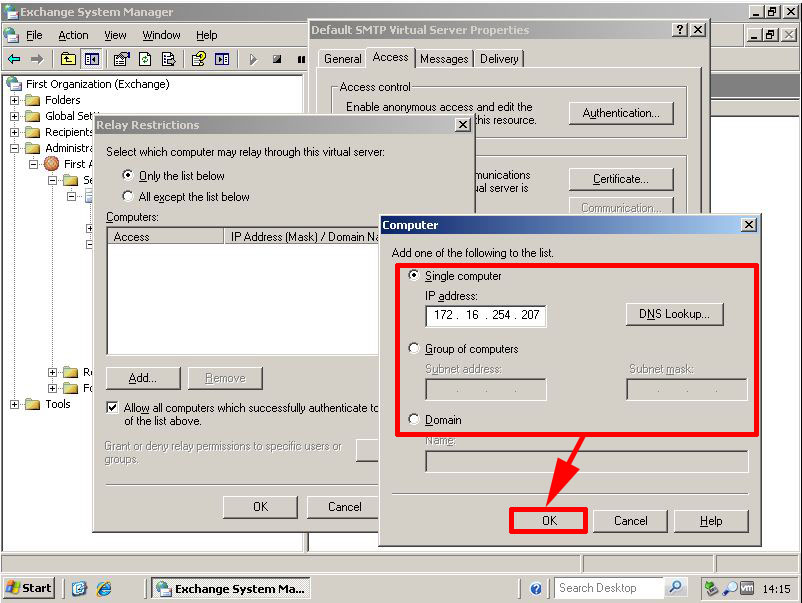
1. Launch Exchange System Manager > Administrative Groups > Administrative group Name > Servers > Servername > SMTP > Right click Default SMTP Virtual Server > Properties.
Note: If you can’t see administrative groups right click the top level (in this case “First Organization (Exchange)) and tick the box to show administrative groups.
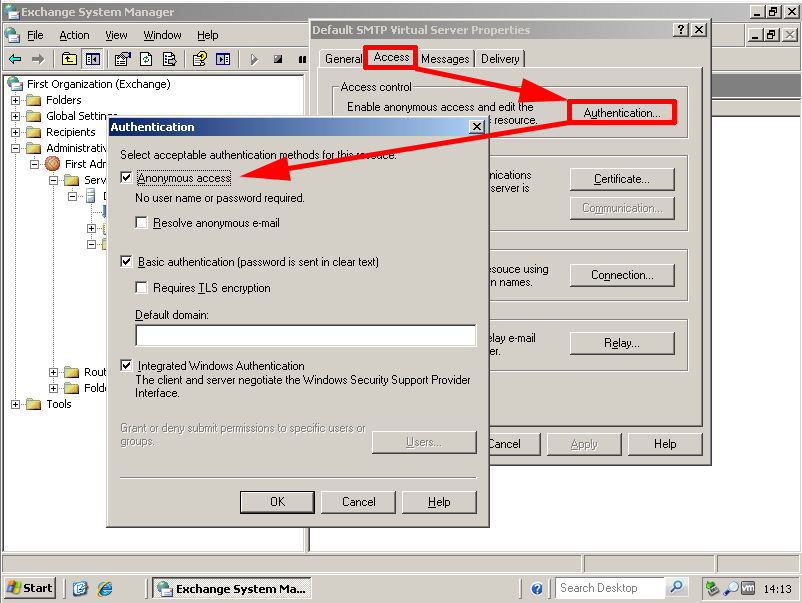
2. Access Tab > Authentication > Ensure “Anonymous Access” is enabled.
3. Click Relay > Ensure the default of “Only the list below” is selected > Add.
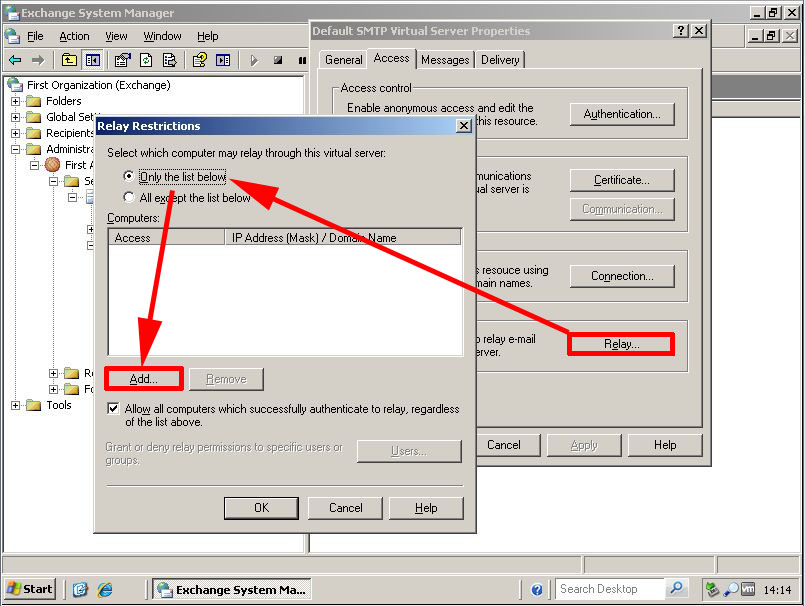
4. Add in the IP addresses(s) networks or domains you want to allow ‘relaying’ from > OK.
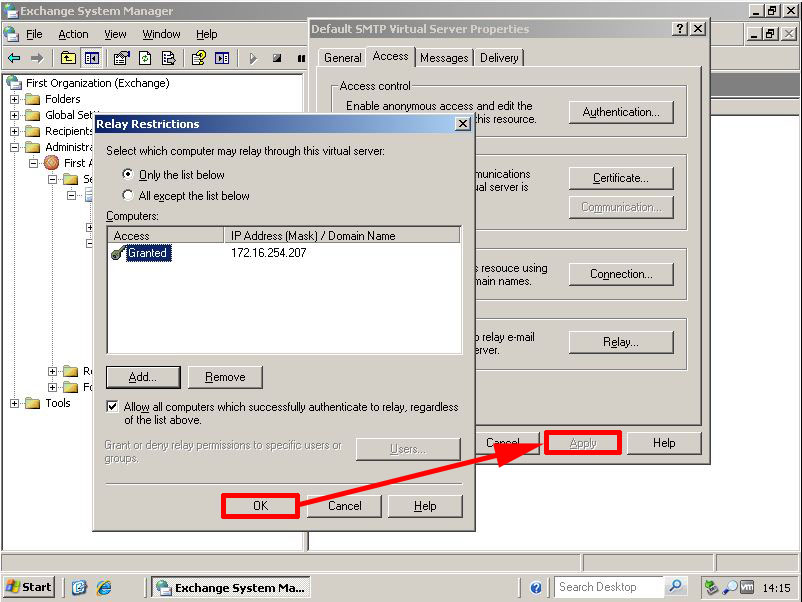
5. OK > Apply > OK.
Related Articles, References, Credits, or External Links
Exchange – Are you an Open Relay?