
KB ID 0000391
Problem
I had a client the other week with about 25 sites, his core site was changing ISP and therefore changing its IP address. On the main site this is pretty straightforward, just change the outside interfaces IP address, sub net mask and the default route (That’s the default gateway for non cisco-ites).
All well and good, but what about his other 24 sites? They all had VPN’s back to the main site, and all these VPN’s were “hairpinned” together for “spoke to spoke” communication.
Well you can simply delete the VPNs and recreate them, but multiply that by 24 – then add on all the extra config for the hairpins and that’s a massive amount of work (and for the client a LOT of downtime.) So a swift config change on the remote sites is a much better idea.
For Cisco PIX firewalls running version 6 click here.
Solution
Option 1 From Command Line (for ASDM see below)
In this example my main site (123.123.123.123) has changed its IP address to (234.234.234.234), and I need to reconfigure the remote site(s).
1. First – you need to understand a couple of things, for a VPN to work, it needs the IP address of the “Other End” of the tunnel in two places.
a. In the Cryptomap.
b. In a Tunnel Group.
2. First lets find the cryptomap, connect to the ASA, log in go to enable mode then configuration mode.
RemoteSite>
RemoteSite> enable
Password: ***********
RemoteSite# configure terminal
RemoteSite(config)#
3. To see all the cryptomaps issue a “show run crypto map” command. (you may see more or less depending on the amount of VPN tunnels you have.
RemoteSite(config)# show run crypto map
crypto map outside_map 1 match address outside_1_cryptomap
crypto map outside_map 1 set pfs
crypto map outside_map 1 set peer 111.111.111.111
crypto map outside_map 1 set transform-set ESP-3DES-SHA
crypto map outside_map 2 match address outside_2_cryptomap
crypto map outside_map 2 set pfs
crypto map outside_map 2 set peer 123.123.123.123 <<<< Here it is!!!
crypto map outside_map 2 set transform-set ESP-3DES-SHA
crypto map outside_map 3 match address outside_3_cryptomap
crypto map outside_map 3 set pfs
crypto map outside_map 3 set peer 133.133.133.133
crypto map outside_map 3 set transform-set ESP-3DES-SHA
crypto map outside_map 4 match address outside_4_cryptomap
crypto map outside_map 4 set pfs
crypto map outside_map 4 set peer 144.144.144.144
crypto map outside_map 4 set transform-set ESP-3DES-SHA
RemoteSite(config)#
4. From the example above we can see the tunnel we want to change is using “outside_map 2” so lets remove the entry for the old IP address and put one in for the new IP address.
RemoteSite(config)# no crypto map outside_map 2 set peer 123.123.123.123
WARNING: The crypto map entry will be incomplete!
RemoteSite(config)# crypto map outside_map 2 set peer 234.234.234.234
RemoteSite(config)#
5. That’s the cryptomap changed, now for the tunnel group. You can see all your tunnel groups with a “sho run tun” command.
RemoteSite(config)# sho run tun
tunnel-group DefaultL2LGroup ipsec-attributes
isakmp keepalive threshold 20 retry 2
tunnel-group DefaultRAGroup ipsec-attributes
isakmp keepalive threshold 20 retry 2
tunnel-group DefaultWEBVPNGroup ipsec-attributes
isakmp keepalive threshold 20 retry 2
tunnel-group 111.111.111.111 type ipsec-l2l
tunnel-group 111.111.111.111 ipsec-attributes
pre-shared-key *****
tunnel-group 123.123.123.123 type ipsec-l2l <<<< Here it is!!!
tunnel-group 123.123.123.123 ipsec-attributes
pre-shared-key *****
tunnel-group 133.133.133.133 type ipsec-l2l
tunnel-group 133.133.133.133 ipsec-attributes
pre-shared-key *****
isakmp keepalive threshold 20 retry 2
tunnel-group 144.144.144.144 type ipsec-l2l
tunnel-group 144.144.144.144 ipsec-attributes
pre-shared-key *****
6. To delete a tunnel group, you use the “clear config tunnel-group” command.
Note: Before you delete it, make sure you know the pre shared key / shared secret – to see this, issue a “more system:running-config” command.
RemoteSite(config)# clear config tunnel-group 123.123.123.123
RemoteSite(config)#
7. Then simply create a new tunnel group, with the new IP address, and the same shared secret / pre shared key as the old one.
RemoteSite(config)# tunnel-group 234.234.234.234 type ipsec-l2l
RemoteSite(config)# tunnel-group 234.234.234.234 ipsec-attributes
RemoteSite(config-tunnel-ipsec)# pre-shared-key 123456789
8. Save the new config with a “write mem” command
RemoteSite(config)# write mem

Building configuration...

Cryptochecksum: f3645705 ae6bafda c5606697 ecd61948
9830 bytes copied in 1.550 secs (9830 bytes/sec)
[OK]
RemoteSite(config)#
9. Job done!
Well that didn’t seem very quick? No, but for the sake of explanation I did go a little deep, if you have multiple sites, just have the following in notepad.
configure terminal
no crypto map outside_map 2 set peer 123.123.123.123
crypto map outside_map 2 set peer 234.234.234.234
clear config tunnel-group 123.123.123.123
tunnel-group 234.234.234.234 type ipsec-l2l
tunnel-group 234.234.234.234 ipsec-attributes
pre-shared-key 123456789
write mem
Then simply jump from site to site changing the cryptomap name and shared secret for each one. If you get all this info first, you can migrate hundreds of sites in minutes, (That’s why I prefer command line to GUI ASDM).
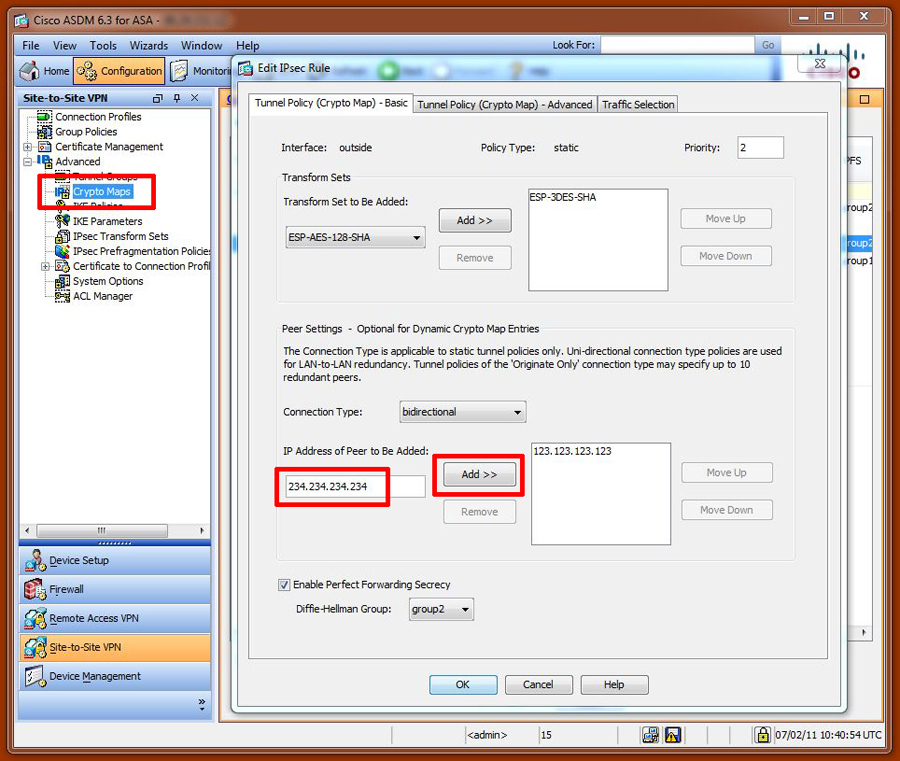
1. Connect to the ASDM, Configuration > Site-to-Site VPN > Advanced > Crypto Maps > Select the cryptomap going to 123.123.123.123 > Edit > Add the new IP Address.
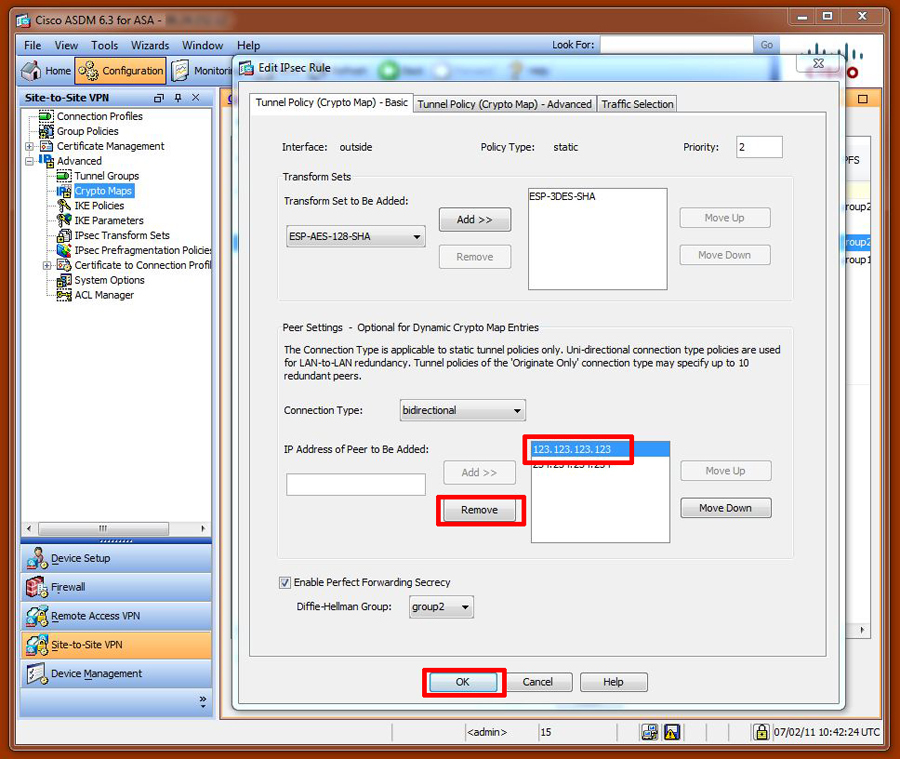
2. Remove the old one > OK > Apply.
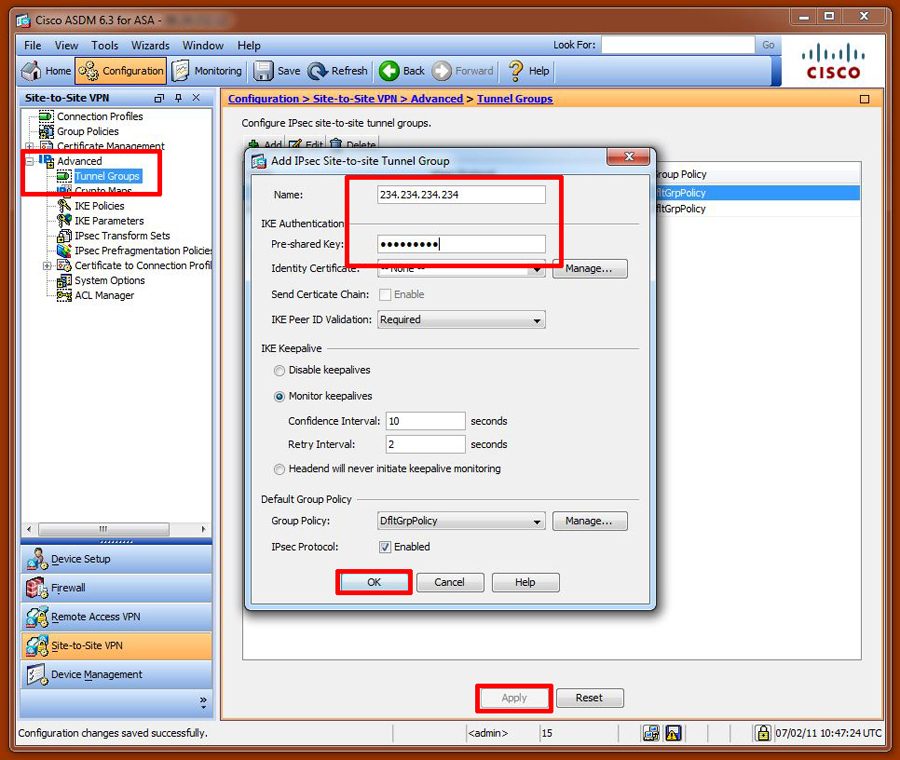
3. Configuration > Site-to-Site VPN > Advanced > Tunnel Groups > Select the old one > Delete > Apply.

4. Then to add a new one > Add > Set the Tunnel group name to the new IP > Enter the shared secret > OK > Apply.
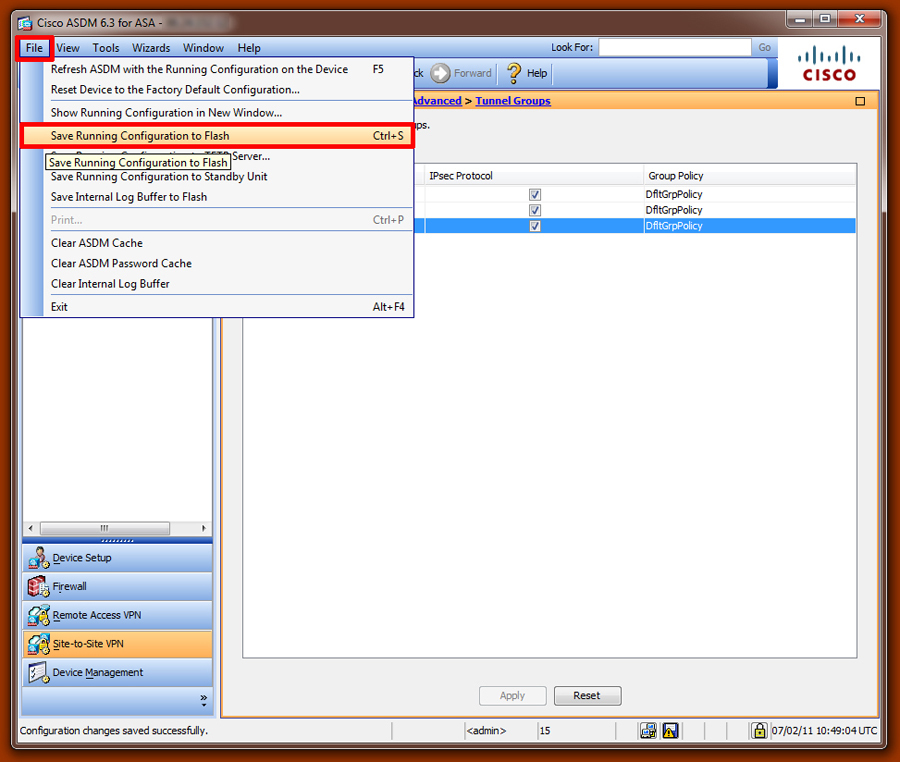
5. Finally Save the changes > File > Save running configuration to Flash.
For older firewalls you will notice there is no “Tunnel-Group”, these came in with version 7. The process is similar, again you have to change the peer entry in the cryptomap, but you also need to set an isakmp peer.
no crypto map outside_map 20 set peer 123.123.123.123
crypto map outside_map 20 set peer 234.234.234.234
no isakmp key ******** address 123.123.123.123 netmask 255.255.255.255
isakmp key 123456789 address 234.234.234.234 netmask 255.255.255.255
Related Articles, References, Credits, or External Links
NA