
KB ID Article
Problem
I’ve had a Windows 2012R2 server image that I’ve ben using in EVE-NG for ever. This week it bit the dust so I thought, can I deploy a shiny new 2019 server?
EVE-NG Windows Virtual Machines
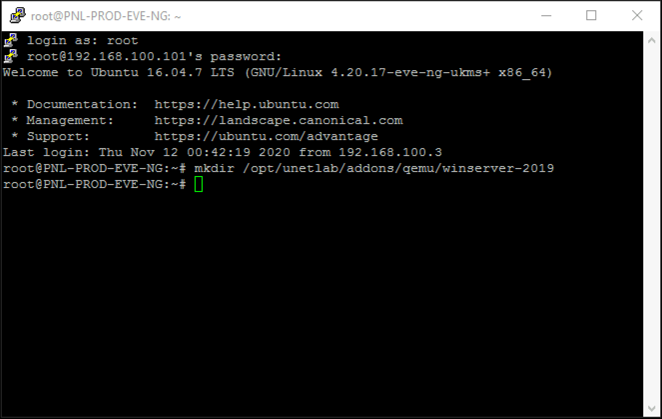
Yes! In fact the deployment procedure is the same for 2019 as it was for earlier versions of Windows server. First log onto your EVE-NG host and create the folder;
mkdir /opt/unetlab/addons/qemu/winserver-2019/
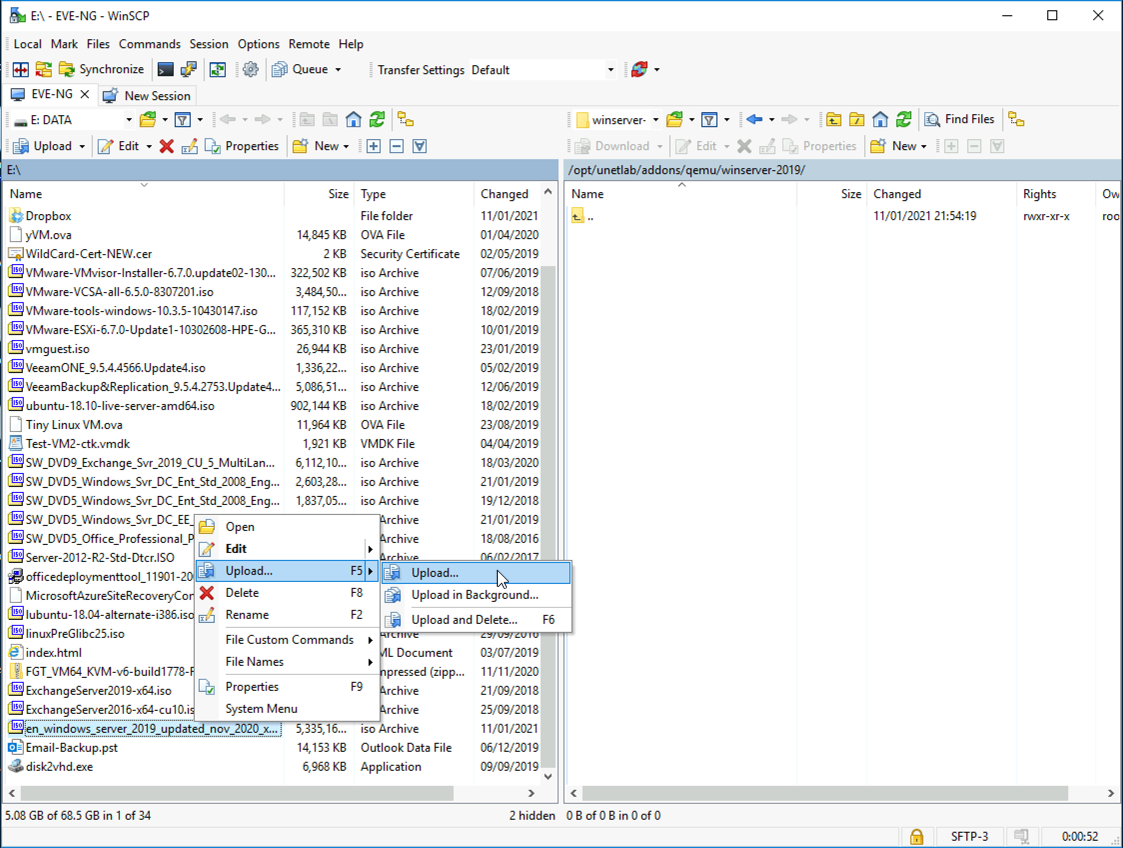
Then ‘upload’ a copy of the Windows Server 2019 installation iso into that folder with WinSCP or FileZilla.
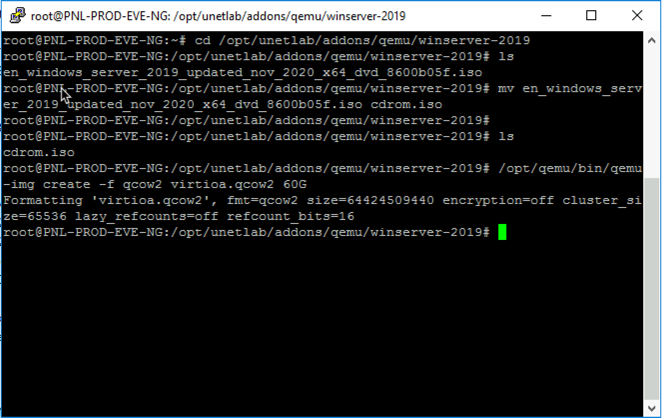
Now rename the ISO image file to cdrom.iso, then create a new, (empty) hard drive file, that we will install windows onto. (Note: below I’m setting it to 60GB in size).
mv en_windows_server_2019_updated_nov_2020_x64_dvd_860005f.iso cdrom.iso
/opt/qemu/bin/qemu-img create -f qcow2 virtioa.qcow2 60G
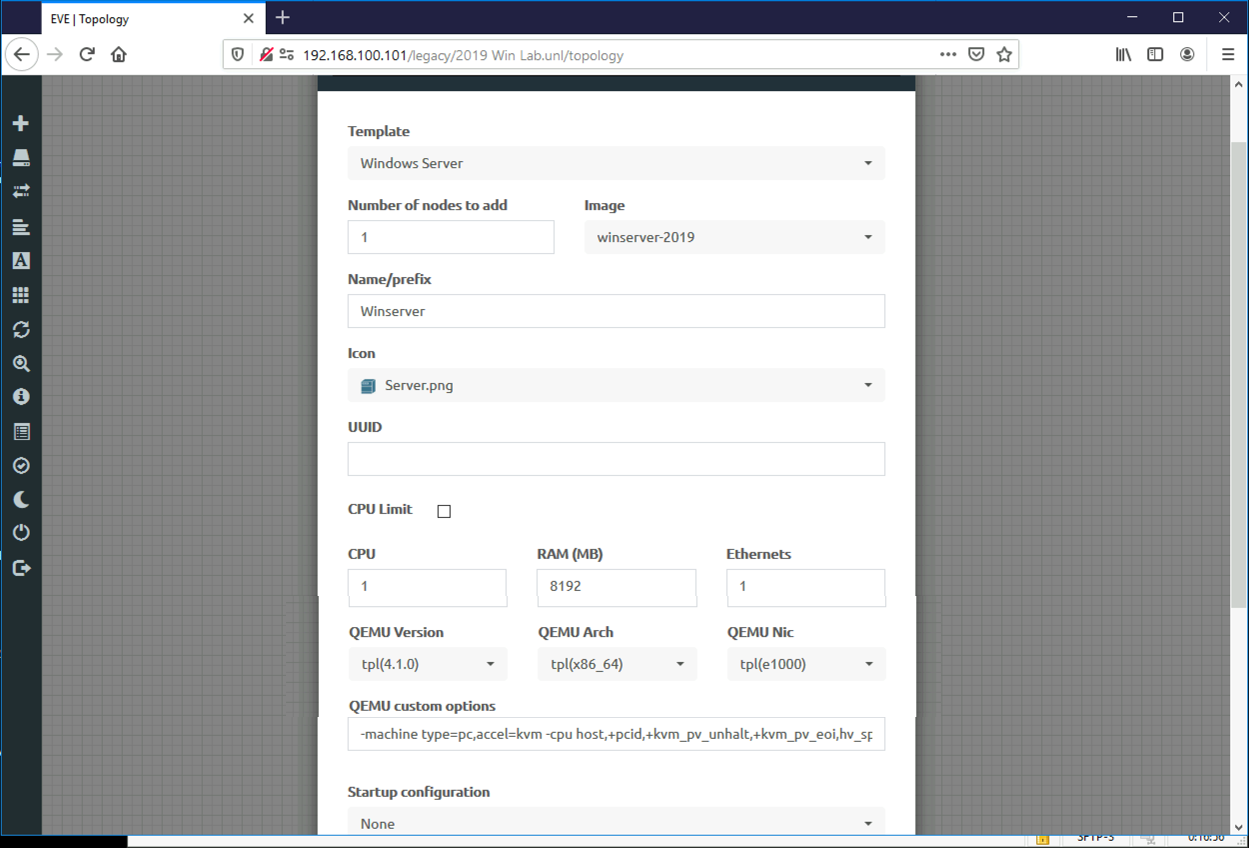
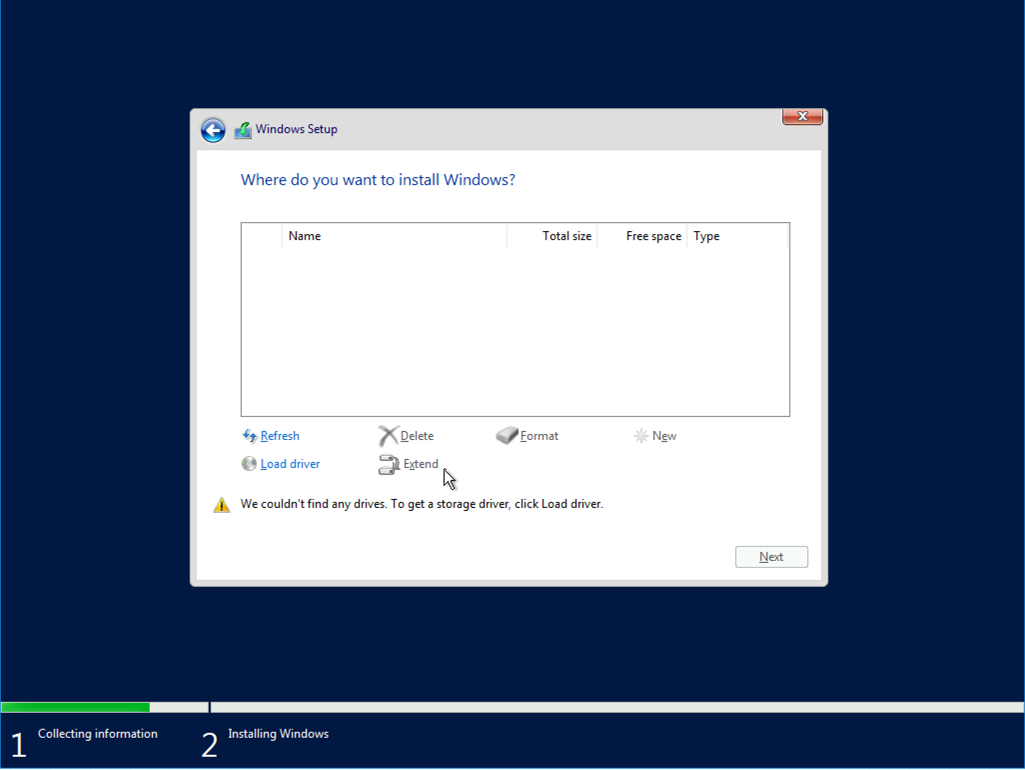
In EVE-NG create a new Lab and add in your Windows 2019 Server, then power it on.
It wont find the hard drive, because it has not got the controller driver, click ‘Load Driver‘.
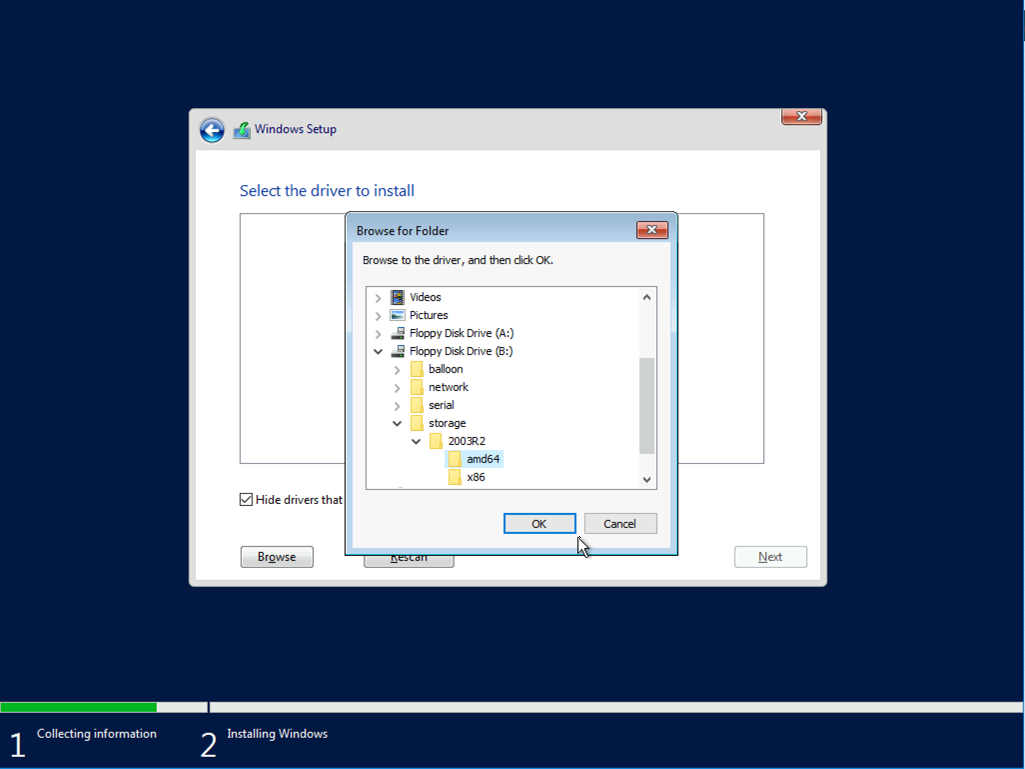
Navigate to B:\Storage\2003R2\amd64 OK > Next > It will detect and load the ‘Red Hat Virtio‘ driver and install Windows. Once done shut the Windows server down.
WARNING: If you intend to deploy ‘multiple’ Server OS’s into single EVE-NG Labs, then run ‘Sysprep‘ on the server image select ‘Generalize’ and Shutdown THEN commit the image, once it’s shut down.
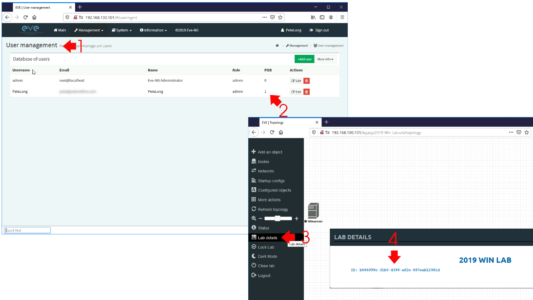
Now you need to ‘commit’ that image (so all new VMs will be created form that image). Ive written about this before, see the following link;
EVE-NG: Committing / Saving Qemu Virtual Machine Settings
But essentially get the ‘Pod Number’ from user management, and the Lab ID from Lab details.
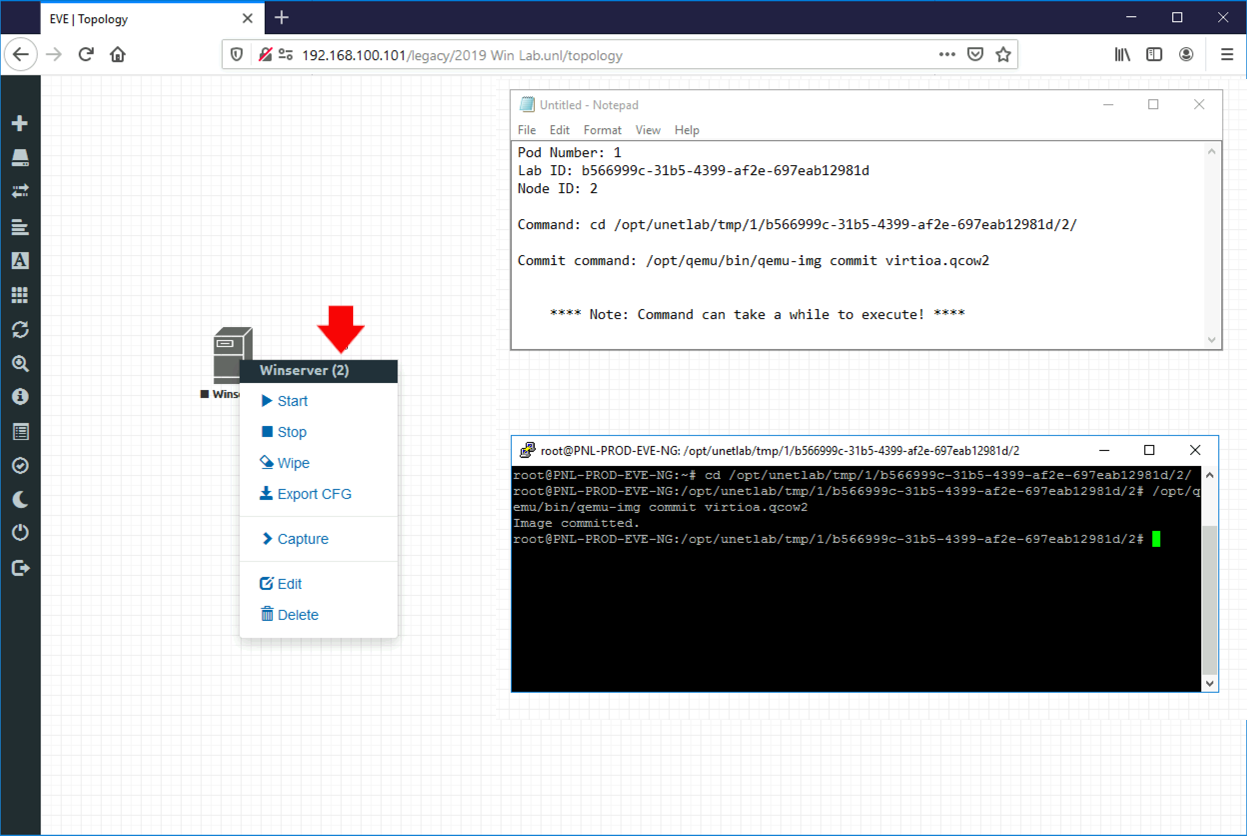
Get the Node ID from the virtual machine, and execute the following command;
cd /opt/unetlab/tmp/POD-Number/Lab-ID/Node-Number/
e.g.
cd /opt/unetlab/tmp/1/b56699c-31b5-4399-af2e-697eab12981d/2/
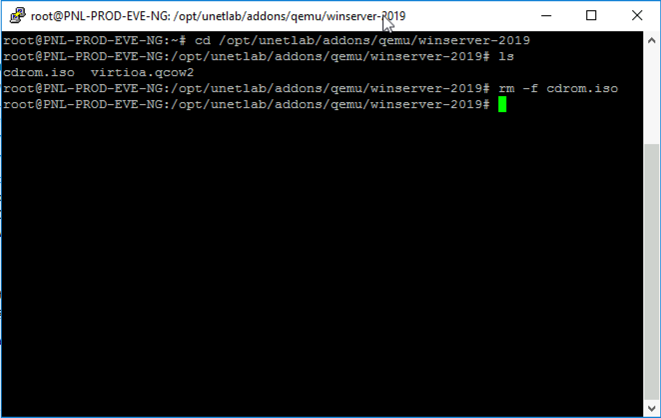
Lastly, don’t forget to tidy up and delete the ISO image now you no longer need it.
cd /opt/unetlab/addons/qemu/winserver-2019
rm -f cdrom.iso
Related Articles, References, Credits, or External Links
NA
26/09/2022
Thank you sir !