Aruba / HP Switches Clear Interface Counters

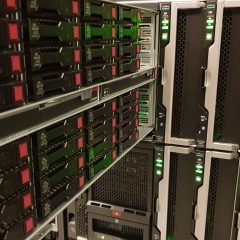
KB ID 0001519

Problem

I was looking for a way to clear (zero) ALL interface counters, (in my case on a 5412-Zl2).

[box]

Petes-HP-Switch# show int A1

 Status and Counters - Port Counters for port A1

  Name  : Trunk Uplink Member 1
  MAC Address      : f40343-787aaa
  Link Status      : Up
  Port Enabled     : Yes
  Totals (Since boot or last clear) :
   Bytes Rx        : 3,243,414,990        Bytes Tx        : 4,155,683,352
   Unicast Rx      : 1,729,923,935        Unicast Tx      : 3,184,593,493
   Bcast/Mcast Rx  : 24,777,382           Bcast/Mcast Tx  : 59,001,502
  Errors (Since boot or last clear) :
   FCS Rx          : 56,422               Drops Tx        : 0
   Alignment Rx    : 0                    Collisions Tx   : 0
   Runts Rx        : 0                    Late Colln Tx   : 0
   Giants Rx       : 4,869,708            Excessive Colln : 0
   Total Rx Errors : 4,926,130            Deferred Tx     : 0
  Others (Since boot or last clear) :
   Discard Rx      : 53                   Out Queue Len   : 0
   Unknown Protos  : 0
  Rates (5 minute weighted average) :
   Total Rx(Kbps) : 4,176                  Total Tx(Kbps) : 768
   Unicast Rx (Pkts/sec) : 695            Unicast Tx (Pkts/sec) : 674
   B/Mcast Rx (Pkts/sec) : 2              B/Mcast Tx (Pkts/sec) : 9
   Utilization Rx  : 00.04 %		  Utilization Tx  :     0 %

[/box]

Solution

The command I was looking for is, clear statistics local.

[box]

Petes-HP-Switch# clear statistics global

[/box]

So now, my stats have ‘dropped” (Note: its a busy port!)

[box]

Petes-HP-Switch# show int A1

 Status and Counters - Port Counters for port A1

  Name  : Trunk Uplink Member 1
  MAC Address      : f40343-787aaa
  Link Status      : Up
  Totals (Since boot or last clear) :
   Bytes Rx        : 1,759                Bytes Tx        : 1,555
   Unicast Rx      : 1,630                Unicast Tx      : 1,301
   Bcast/Mcast Rx  : 15                   Bcast/Mcast Tx  : 29
  Errors (Since boot or last clear) :
   FCS Rx          : 0                    Drops Tx        : 0
   Alignment Rx    : 0                    Collisions Tx   : 0
   Runts Rx        : 0                    Late Colln      : 0
   Giants Rx       : 0                    Excessive Colln : 0
   Total Rx Errors : 0                    Deferred Tx     : 0
  Others (Since boot or last clear) :
   Discard Rx      : 0                    Out Queue Len   : 0
   Unknown Protos  : 0
  Rates (5 minute weighted average) :
   Total Rx(Kbps) : 1,120                 Total Tx(Kbps) : 752
   Unicast Rx (Pkts/sec) : 689            Unicast Tx (Pkts/sec) : 672
   B/Mcast Rx (Pkts/sec) : 2              B/Mcast Tx (Pkts/sec) : 10
   Utilization Rx  : 00.04 %		  Utilization Tx  :     0 %

[/box]

Related Articles, References, Credits, or External Links

NA

HP Switches – Find ‘Uptime’

KB ID 0001299 

Problem

Nice short and sweet article, you have an HP Switch, and you want to know how long it’s been online.

Solution

Execute the following command;

[box]

show system-information

[/box]

Note: On newer versions of the OS, the command may omit the hyphen i.e. show system information

Related Articles, References, Credits, or External Links

NA

Event ID 434

KB ID 0000350

Problem

Event ID 434

Source: CPQTeamMP

Description

HP Network Team #1: PROBLEM: A non-Primary Network Link is not receiving. Receive-path validation has been enabled for this Team by selecting the Enable receive-path validation Heartbeat Setting. ACTION: Please check your cabling to the link partner. Check the switch port status, including verifying that the switch port is not configured as a Switch-assist Channel. Generate Broadcast traffic on the network to test whether these are being received. Also make sure all teamed NICs are on the same broadcast domain. Run diagnostics to test card. Drop the NIC from the team, determine whether it is receiving broadcast traffic in that configuration.

There are many causes, this can be caused by Cisco switches (and HP Procurve switches), not liking the firmware, NIC driver, or HP Teaming software.

Solution

The best way to fix this is,

1. Update the firmware on the network cards.

2. Update the Drivers for the network cards.

3. Update the HP Teaming software.

Quick Fix:

1. Open the properties of the network team (double click the teaming icon in the task tray).

2. Settings tab > un-tick “Enable receive path validation” > OK.


Related Articles, References, Credits, or External Links

NA

HP Networking ‘ProCurve’ – Trunking / Aggregating Ports

KB ID 0000638 

Problem

I was lending a hand this week, while my colleague swapped out a lot of switches. I don’t usually deploy a large number of HP switches, so I was surprised when we installed a chassis switch and after patching the fiber links, the Cisco Catalyst switches all got upset and we lost three out of four ping packets.

I (wrongly) assumed that STP would be enabled, so I wandered back and pulled the second fiber link. I knew from conversations I’d had before, that HP call having multiple uplinks between the same switch, to increase throughput “Trunking”. (Note: For people like me, who think that switch trunks are links for carrying multiple VLAN traffic. In “HP Land” trunking means aggregating switch uplinks).

Solution

Note: Up to four uplinks can be aggregated into one trunk.

Option 1 Configure a Trunk via Telnet/Console Cable

1. Connect to the switch either by Telnet or via the console cable > Log in > type menu {Enter} > The Switch menu will load > Select “2. Switch Configuration…”.

2. Port/Trunk Settings.

3. Press {Enter} > Edit >Scroll to the first port you want to add to the trunk > Use the arrow keys to navigate to the “Group” column > Press {Space} > Select the first unused trunk > Arrow to the “Type” column > Change to “Trunk” > Press Enter > Save.

4. Repeat to add the additional “Links”, then configure the mirror image on the switch at the other end.

Option 2 Configure a Trunk via the Web / GUI Console

1. Log into the wen console > Interface >Port Info/Config > Select the first link you want to trunk > Change.

2. Set the Trunk Type to “Trunk” > Change the Trunk Group to the next available trunk > Save.

3. Repeat to add the additional “Links”, then configure the mirror image on the switch at the other end.


Related Articles, References, Credits, or External Links

NA


HP and Cisco – VLANs and Trunks Confusion!

KB ID 0000741

Problem

When I first started in IT, I went and did my Cisco CCNA. So I learned that to connect Cisco switches and pass VLAN traffic between them, I needed to create a ‘Trunk’ to pass the VLAN traffic. Fast forward a few years, and I now work for an HP reseller. Very early on I came to realise that what HP called a ‘trunk’ was very different from what I had been taught. Below is an article I did a while ago about setting up HP Trunks.

HP Networking ‘ProCurve’ – Trunking / Aggregating Ports

I was in some HP/Wireless training last week and once again I was struggling with their terminology, so today I lined up a bunch of switches on the test bench and worked out the differences.

Below you will find the following scenarios;

Scenario 1 Configuring Cisco Catalyst Switches with VLANs.

Scenario 2 Configuring HP Switches with VLANs.

Scenario 3 Setting up HP Switches with Trunked VLANs

Scenario 4 Setup VLANs via HP Trunks and Cisco Port Channels

Setting up VLANs on older Cisco Switches

Solution

Scenario 1 Configuring Cisco Catalyst Switches with VLANs.

In ‘Ciscoland’ All ports are either in access mode or trunk mode, the access mode allows the port to communicate with the VLAN. The trunk mode carries the VLAN traffic to another switch (or device). So to replicate the diagram above, this is what you would need to do. (Note: For older switches like the 3550XL the VLAN commands are a little different see here)

[box]

Switch01>
 Switch01>enable
 Password: xxxxxxxx
 Switch01#configure terminal
 Enter configuration commands, one per line. End with CNTL/Z.
 Switch01(config)#vlan 10
 Switch01(config-vlan)#name Admin
 Switch01(config-vlan)#exit
 Switch01(config)#vlan 20
 Switch01(config-vlan)#name Data
 Switch01(config-vlan)#exit
 Switch01(config)#int f0/2
 Switch01(config-if)#switchport mode access
 Switch01(config-if)#switchport access vlan 10
 Switch01(config-if)#exit
 Switch01(config)#inf f0/16
 Switch01(config-if)#switchport mode access
 Switch01(config-if)#switchport access vlan 20
 Switch01(config-if)#exit
 Switch01(config)#int f0/23
 Switch01(config-if)#switchport mode trunk
 Switch02(config-if)#switchport trunk allowed vlan 1,10,20
 Switch01(config-if)#exit
 Switch01(config)#exit
 Switch01#write mem
 Building configuration...
 [OK]
 Switch01#


 Switch02>
 Switch02>enable
 Password: xxxxxxx
 Switch02#configure terminal
 Enter configuration commands, one per line. End with CNTL/Z.
 Switch02(config)#vlan 10
 Switch02(config-vlan)#name Admin
 Switch02(config-vlan)#exit
 Switch02(config)#vlan 20
 Switch02(config-vlan)#name Data
 Switch02(config-vlan)#exit
 Switch02(config)#int f0/2
 Switch02(config-if)#switchport mode access
 Switch02(config-if)#switchport access vlan 10
 Switch02(config-if)#exit
 Switch02(config)#inf f0/15
 Switch02(config-if)#switchport mode access
 Switch02(config-if)#switchport access vlan 20
 Switch02(config-if)#exit
 Switch02(config)#int f0/1
 Switch02(config-if)#switchport mode trunk
 Switch02(config-if)#switchport trunk allowed vlan 1,10,20
 Switch02(config-if)#exit
 Switch02(config)#exit
 Switch02#write mem
 Building configuration...
 [OK]
 Switch02#[/box]

Scenario 2 Configuring HP Switches with VLANs.

With HP switches the terminology is different, here switch ports are either tagged members or untagged members of a VLAN.

What’s the difference between tagged and untagged? If a port is a tagged member it passes the VLAN information with the traffic it sends. If it is untagged it sends the VLAN traffic without adding in the VLAN tag. So you would only make a port a tagged member if the device that is plugged into it is VLAN aware, i.e. another switch, router, or machine with a VLAN aware NIC. (Note: The VLAN tag is the ID that gets inserted into the head of a network packet). So to do exactly the same as we did in scenario 1, but with HP switches, you would do the following:

BE AWARE: Any single port can only be untagged on one VLAN. Out of the box all ports are untagged on VLAN 1 (or the default VLAN), so if you untag a port into VLAN 20 (for example) it will automatically remove the ‘vlan 1 untagged’ property for that port.

[box]

Switch01> enable
 Password:xxxxx
 Switch01# configure terminal
 Switch01(config)# vlan 10 name Admin
 Switch01(config)# vlan 20 name Data
 Switch01(config)# vlan 10
 Switch01(vlan-10)# untagged 6
 Switch01(vlan-10)# exit
 Switch01(config)# vlan 20
 Switch01(vlan-20)# untagged 16
 Switch01(vlan-20)# exit
 Switch01(config)# vlan 10
 Switch01(vlan-10)# tagged 13
 Switch01(vlan-10)# exit
 Switch01(config)# vlan 20
 Switch01(vlan-20)# tagged 13
 Switch01(vlan-20)# exit
 Switch01(config)# write mem
 Switch01(config)#
 
 Switch02> enable
 Password:xxxxx
 Switch02# configure terminal
 Switch02(config)# vlan 10 name Admin
 Switch02(config)# vlan 20 name Data
 Switch02(config)# vlan 10
 Switch02(vlan-10)# untagged 4
 Switch02(vlan-10)# exit
 Switch02(config)# vlan 20
 Switch02(vlan-20)# untagged 20
 Switch02(vlan-20)# exit
 Switch02(config)# vlan 10
 Switch02(vlan-10)# tagged 23
 Switch02(vlan-10)# exit
 Switch02(config)# vlan 20
 Switch02(vlan-20)# tagged 23
 Switch02(vlan-20)# exit
 Switch02(config)# write mem
 Switch02(config)#[/box]

Scenario 3 Setting up HP Switches with Trunked VLANs

Remember with HP a Trunk is adding together lots of links, (if you’re a Cisco head think of port-channeling). So here we create a trunk, then use that trunk to pass tagged VLAN traffic across the switches.

[box]

Switch01> enable
 Password:xxxxx
 Switch01# configure terminal
 Switch01(config)# vlan 10 name Admin
 Switch01(config)# vlan 20 name Data
 Switch01(config)# vlan 10
 Switch01(vlan-10)# untagged 6
 Switch01(vlan-10)# exit
 Switch01(config)# vlan 20
 Switch01(vlan-20)# untagged 16
 Switch01(vlan-20)# exit
 Switch01(config)# trunk 21,23 Trk1 LACP
 Switch01(config)# vlan 10
 Switch01(vlan-10)# tagged Trk1
 Switch01(vlan-10)# exit
 Switch01(config)# vlan 20
 Switch01(vlan-20)# tagged Trk1
 Switch01(vlan-20)# exit
 Switch01(config)# write mem 
 Switch01(config)# 

 
 Switch02> enable
 Password:xxxxx
 Switch02# configure terminal
 Switch02(config)# vlan 10 name Admin
 Switch02(config)# vlan 20 name Data
 Switch02(config)# vlan 10
 Switch02(vlan-10)# untagged 4
 Switch02(vlan-10)# exit
 Switch02(config)# vlan 20
 Switch02(vlan-20)# untagged 20
 Switch02(vlan-20)# exit
 Switch01(config)# trunk 21,23 Trk1 LACP
 Switch01(config)# vlan 10
 Switch01(vlan-10)# tagged Trk1
 Switch01(vlan-10)# exit
 Switch01(config)# vlan 20
 Switch01(vlan-20)# tagged Trk1
 Switch01(vlan-20)# exit
 Switch02(config)# write mem
 Switch02(config)#

[/box]

Scenario 4 Setup VLANs via HP Trunks and Cisco Port Channels

Now we have gone full circle, we know what all the differences are, the final part is to get them to talk to each other. So I’ll set up a two cable HP Trunk, and connect it to Cisco LACP port channel, and then finally add in the VLAN traffic.

[box]

Switch01> enable
 Password:xxxxx
 Switch01# configure terminal
 Switch01(config)# vlan 10 name Admin
 Switch01(config)# vlan 20 name Data
 Switch01(config)# vlan 10
 Switch01(vlan-10)# untagged 6
 Switch01(vlan-10)# exit
 Switch01(config)# vlan 20
 Switch01(vlan-20)# untagged 16
 Switch01(vlan-20)# exit
 Switch01(config)# trunk 21,23 Trk1 LACP
 Switch01(config)# vlan 10
 Switch01(vlan-10)# tagged Trk1
 Switch01(vlan-10)# exit
 Switch01(config)# vlan 20
 Switch01(vlan-20)# tagged Trk1
 Switch01(vlan-20)# exit
 Switch01(config)# write mem 
 Switch01(config)# 

 
 Switch02>
 Switch02>enable
 Password: xxxxxxx
 Switch02#configure terminal
 Enter configuration commands, one per line. End with CNTL/Z.
 Switch02(config)#vlan 10
 Switch02(config-vlan)#name Admin
 Switch02(config-vlan)#exit
 Switch02(config)#vlan 20
 Switch02(config-vlan)#name Data
 Switch02(config-vlan)#exit
 Switch02(config)#int f0/2
 Switch02(config-if)#switchport mode access
 Switch02(config-if)#switchport access vlan 10
 Switch02(config-if)#exit
 Switch02(config)# interface range fa0/23 - 24
 Switch02(config-if-range)# spanning-tree portfast trunk
 %Warning: portfast should only be enabled on ports connected to a single
 host. Connecting hubs, concentrators, switches, bridges, etc... to this
 interface when portfast is enabled, can cause temporary bridging loops.
 Use with CAUTION

Switch02(config-if-range)# channel-protocol lacp
 Switch02(config-if-range)# channel-group 1 mode active
 Creating a port-channel interface Port-channel 1
 Switch02(config-if-range)# interface port-channel 1
 Switch02(config-if)# switchport mode trunk
 Switch02(config-if-range)#switchport trunk allowed vlan 1,10,20
 Switch02(config-if)#exit
 Switch02(config)#exit
 Switch02#write mem
 Building configuration...
 [OK]
 Switch02#

[/box]

Setting up VLANs on older Cisco Switches

Here’s an example using the older vlan database commands.

[box]

Switch01>
 Switch01>enable
 Password: 
 Switch01#
 Switch01#vlan database
 Switch01(vlan)#vlan 10 name Admin
 VLAN 10 modified:
 Name: Admin
 Switch01(vlan)#vlan 20 name Data
 VLAN 20 modified:
 Name: Data
 Switch01(vlan)#exit
 APPLY completed.
 Exiting....
 Switch01#configure terminal
 Enter configuration commands, one per line. End with CNTL/Z.
 Switch01(config)#int f0/2
 Switch01(config-if)#switchport mode access 
 Switch01(config-if)#switchport access vlan 10
 Switch01(config-if)#exit
 Switch01(config)#int f0/16
 Switch01(config-if)#switchport mode access
 Switch01(config-if)#switchport access vlan 20
 Switch01(config-if)#exit
 Switch01(config)#int f0/23
 Switch01(config-if)#switchport mode trunk
 Switch01(config-if)#switchport trunk encapsulation dot1q 
 Switch02(config-if-range)#switchport trunk allowed vlan 1,10,20
 Switch01(config-if)#exit
 Switch01(config)#exit
 Switch01#write mem
 Building configuration...
 
 Switch01#[/box]


Related Articles, References, Credits, or External Links

Thanks to Valentin Bajramifor the feedback


Setup an HP 1800-24G (J9028B) Switch

KB ID 0000800 

Problem

Essentially you can unbox this switch, plug it in and it will do what you want (unless you have VLANS, or trunks (port-channels)). Which is what my client had done, but I needed to get on the web console and have a look at what was going on, and there is NO CONSOLE socket on this unit at all.

Solution

1. Don’t bother looking in DHCP, it’s NOT set to DHCP by default. From the factory the switch will have the following IP address; 192.168.2.10 (255.255.255.0). So put yourself on the same network segment and connect to the switch via a normal network cable.

Note: Start > Run > ncpa.cpl will get you there.

2. Now open a browser window and connect to https://192.168.2.10 by default the password will be blank.

3. To change the IP address, navigate to System > IP Address > Set accordingly > Apply.

Note: Obviously this will kick you off, and you will need to change your IP address again to reconnect.

4. To change the password navigate to System > Password > change accordingly > Apply.


Related Articles, References, Credits, or External Links

NA