You have forgotten your password, or the administrators password fo your Windows machine.
Note: You can also ‘Blank’ or reset the DSRM (Directory Services Restore Mode) password on a Domain Controller (Tested on 2012 R2, by blanking the password). Using this method.
Lost Password : Fix
Lost Password Software Download Links
Password Reset CD Image(3.5Mb) Note: This is a .iso file – you need to burn it as an image! Simply dropping this file on a CD will NOT work.
WARNINIG – If your drive has been encrypted with Windows Bitlocker this procedure will not work!
Related Articles, References, Credits, or External Links
Note: This procedure allows you to reset the password WITHOUT LOSING THE CONFIG
You need to access a Cisco ASA device and do not have the passwords, there can be lots of reasons for this, lack of good documentation, bought a second hand firewall, the last firewall admin never told anyone etc.
This method does require physical access to the ASA, a console cable, and a machine running some terminal emulation software.
Note: This procedure is for Cisco ASA 5500-X and ASA 5500 Firewalls, for Cisco PIX go here, and Cisco Catalyst go here.
Password Recovery ASA5505-X
Password Recovery ASA 5500
Password Recovery / Reset Procedure for ASA 5500-X/5500 Firewalls
Below is a run though on changing the Cisco ASA passwords (setting them to blank then changing them to something else). Basically you boot the ASA to its very basic shell operating system (ROMMON) then force it to reboot without loading its configuration. At this point you can load the config, without having to enter a password, manually change all the passwords, and finally set the ASA to boot properly again.
Below I’ve used both HyperTerminal and Putty to do the same thing, you can use either, or another terminal emulation piece of software, the procedure is the same.
1. Connect to the the ASA via a console cable (settings 9600/8/None/1/None).
2. Reboot the ASA, and as it boots press Esc to interrupt the normal boot sequence and boot to ROMMON mode.
3. Execute the “confreg” command and take a note of the number that’s listed (copy it to notepad to be on the safe side).
4. Answer the questions as follows (Note: Just pressing Enter will supply the default answer). Answer no to all apart from the TWO listed below:
ON AN ASA 5500-X (Slightly Different)
do you wish to change the configuration? y/n [n]: Y<<< THIS ONE disable “password recovery”? y/n [n]: n disable “display break prompt”? y/n [n]: n enable “ignore system configuration”? y/n [n]: Y<<< AND THIS ONE disable “auto-boot image in disks”? y/n [n]: n change console baud rate? y/n [n]: n select specific image in disks to boot? y/n [n]: n
ON AN ASA 5500
Do you wish to change this configuration? y/n [n]:Y<<< THIS ONE enable boot to ROMMON prompt? y/n [n]:
enable TFTP netboot? y/n [n]:
enable Flash boot? y/n [n]:
select specific Flash image index? y/n [n]: disable system configuration? y/n [n]: Y<<< AND THIS ONE go to ROMMON prompt if netboot fails? y/n [n]:
enable passing NVRAM file specs in auto-boot mode? y/n [n]:
disable display of BREAK or ESC key prompt during auto-boot? y/n [n]:
5. You may notice, that the configuration register has changed, on an ASA 5500 to 0x00000040, or on an ASA5505-X to 0x00000041, to boot the firewall execute the “boot” command.
6. This time when the ASA boots it will start with a {blank} enable password, you can load the normal config into memory with a “copy startup-config running-config” command.
7. Now you are in enable mode with the correct config loaded, you can change the passwords, and once completed, change the configuration register setting back with a config-register {paste in the number you saved earlier} command, or simply a no config-register command. Save the changes, (write mem) and reboot the firewall.
Related Articles, References, Credits, or External Links
The title is a bit of a misnomer, we are not going to recover the password, we are simply going to change the password to one we know.
Solution
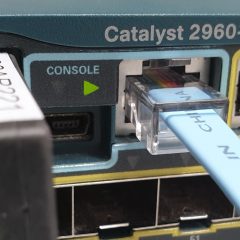
Note: This procedure works on models, 2900, 2940, 2950, 2955, 3500XL, and 3550. Before you start connect the the device with a console cable and terminal emulation software, the procedure is the same as the one I’ve outlined here.
1. Power the switch off >press and hold the “Mode” button > Power on the switch.
2. For 2900, 3500XL and 3550 Switches release the mode button when the 1x LED light goes out (all the other port lights will remain lit). For a 2940 and 2950 Switch release the mode button after the “Stat” LED goes out. For a 2955 switch press CTRL+BREAK.
3. On screen you should see the following.
[box]
Base ethernet MAC Address: 00:0b:be:78:a2:00
Xmodem file system is available.
The password-recovery mechanism is enabled.
The system has been interrupted prior to initializing the
flash filesystem. The following commands will initialize
the flash filesystem, and finish loading the operating
system software:
flash_init
boot
[/box]
4. Type “flash_init” then when it has ran type “load_helper”
7. Eventually when the switch boots it will ask if you want to configure it, say no.
[box]
Model revision number: G0
Motherboard revision number: A0
Model number: WS-C3550-24-SMI
System serial number: CAT0650Y1VR
--- System Configuration Dialog ---
Would you like to enter the initial configuration dialog? [yes/no]: no
[/box]
8. At this point we can go to enable mode, change the name of the config.text file back again, and load it into memory (press Enter to accept the default filenames).
9. Finally you can remove the password, and reset it to whatever you want, and save the new config.
[box]
HostName#conf t
Enter configuration commands, one per line. End with CNTL/Z.
HostName(config)#no enable secret
HostName(config)#enable password thisisthenewpassword
HostName#wr mem
Building configuration...
[OK]
HostName#
[/box]
Related Articles, References, Credits, or External Links
If you have a Cisco router that you have forgotten the password for, or have been given one, or simply bought one from ebay, you may not know the password. In fact many years ago an ISP was going to charge me a ridiculas amount of money to put an entry in a routers routing table, this procedure ‘ahem’ would have allowed to to do it myself, for free, and then reload the router.
Solution
The reason you are able to do this is because of the router’s configuration register, this is the setting that decides how the system boots and how it operates. Usually it’s set to 0x2102 you can see this on a working router by running a ‘show version‘ command.
There are a number of different config register settings;
Configuration Register
Router Behavior
0x102
Ignores break, 9600 console baud
0x1202
1200 baud rate
0x2101
Boots into bootstrap, ignores break, Boots into ROM if initial boot fails, 9600 console baud rate
0x2102
Ignores break, Boots into ROM if initial boot fails, 9600 console baud rate default value for most platforms
0x2120
Boots into ROMmon, 19200 console speed
0x2122
Ignores break, Boots into ROM if initial boot fails, 19200 console baud rate
0x2124
NetBoot, Ignores break, Boots into ROM if initial boot fails, 19200 console speed
0x2142
Ignores break ,Boots into ROM if initial boot fails, 9600 console baud rate, Ignores the contents of Non-Volatile RAM (NVRAM) (ignores configuration)
0x2902
Ignores break, Boots into ROM if initial boot fails, 4800 console baud rate
0x2922
Ignores break, Boots into ROM if initial boot fails, 38400 console baud rate
0x3122
Ignores break, Boots into ROM if initial boot fails, 57600 console baud rate
0x3902
Ignores break, Boots into ROM if initial boot fails, 2400 console baud rate
0x3922
Ignores break, Boots into ROM if initial boot fails, 115200 console baud rate
The one we are interested in I’ve emboldened above (0x2142), if we can boot the router, without loading the config, we can manually load the config whilst we have administrative access, which means we can do what we like, (including changing the passwords).
1. Connect a console cable to the router and connect to it using some terminal emulation software (like PuTTy)*. Power cycle the router and as it starts to boot press the ‘break’ key (on some keyboards press Ctrl+Break, on others you can simply press the Esc Key. You will know you are successful if the router boots into ROMMON mode. Issue the following commands;
[box]
rommon 1 > confreg 0x2142
rommon 2 > reset
[/box]
*Typically at Baud 9600, 8 bits, 1 Stop Bit, No parity, No flow control.
2. The router will reboot, when prompted select no to not enter the setup dialog. (Don’t panic your config is safe in NVRAM!).
3. Now you can go to enable mode without entering a password, and load the routers startup-configuration into memory.
4. You can at this point make any changes you like, but we are here to change the passwords. On this router I want to reset the enable password, and I protect console access with a username and password, so I want to add a new one for myself. Set the configuration register back to its default setting of 0x2101, save the changes. Then reload the router and make sure you can now get access.
[box]
Petes-Router# configure terminal
Enter configuration commands, one per line. End with CNTL/Z.
Petes-Router(config)# enable secret P@ssword123
Petes-Router(config)# username petelong privilege 15 password P@ssword123
Petes-Router(config)# config-register 0x2102
Petes-Router(config)# end
Petes-Router# write memory
Petes-Router# reload
Proceed with reload? [confirm] {Enter}
[/box]
5. And we are in.
Related Articles, References, Credits, or External Links