Connecting to and Configuring Cisco Routers with ‘Cisco Configuration Professional’

KB ID 0000512 

Problem

It’s not often I work on Cisco routers, but as I tend to do most of the Cisco ASA Firewalls, I’m the unofficial “Cisco Guy”. Which is fine until someone wants a router or some complex switching, then I need to do some heavy duty frowning.

Last time I put in a Cisco router it was a baby Cisco 800 series (an 877W) so I assumed the 1921 ISR router I had to put in would be the same. Before I used the Cisco SDM console that’s now either depreciated or not used, and a quick look in the flash memory of the router told me there was nothing in there apart from the IOS.

Now for all your web based router needs, you use the “Cisco Configuration Professional” software, it comes in two flavours:

1. Express – this installs on the router itself and is a cut down version.

2. PC Version – the full suite of tools installs on a Windows PC (that has Java installed) Note: is does NOT need anything else installing on the router.

To download the software you will need a valid Cisco CCO login and a valid support contract (or SmartNet) for your router. (download link).

Solution

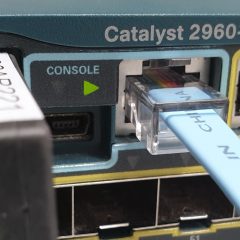
1. Using the console cable provided with your router connect a PC/Laptop to the router and access using Hyperterminal or PuTTy, (See here for details).

2. Connect an ethernet port to your LAN, we are going to configure it to get an IP from DHCP (assuming you have DHCP of course if not give is a static IP address).

3. While connected via console cable, go to enable mode, set the ether net port you connected to DHCP, then configure Telnet and SSH login, and finally allow HTTP access.

Note: If you get an error message like “IP address may not be configured on L2 Links” then assign the IP address to the VLAN (usually, but not always VLAN 1).This is seen on smaller 800 series routers, to resolve also make sure the Ethernet port is NOT shutdown like this;

[box]

interface FastEthernet0
! <<<<<<<Note: Make sure the Ethernet ports you will use are NOT in a shutdown state!
interface FastEthernet1
shutdown
!
interface FastEthernet2
shutdown
!
interface FastEthernet3
shutdown
!
interface Vlan1
ip address 192168.1..1 255.255.255.0 <<<Or use DHCP as appropriate

[/box]

4. So all being well, this is what you should see if you issue a “show run” command.

5. Lets make sure it got an IP address with “show ip interface”.

6. Install CCP on you PC and launch it > Select “Manage Devices” > Enter the IP, username and password you set earlier > OK.

7. If discovery fails make sure you’re cabled correctly and select “Discover”.

8. It connects over https so it’s normal to see this, just click yes.

9. You can now configure the router as required.

10. If you have the Security/Firewall IOS you can also manage that from here.


Related Articles, References, Credits, or External Links

Original Article Written 26/09/11


Backup and Restore Cisco IOS (Switches and Routers)

KB ID 0000538 

Problem

It’s been a long time since I ran through setting up a TFTP server, but I still use 3CDeamon. Below I’ll run though the simple commands to back up, and restore the devices configuration.

Solution

Backing up a Cisco IOS Device

1. First you have to setup a TFTP server, and know the IP address of the machine it’s on!

2. Connect to the device, either via console cable, Telnet or SSH.

3. Log in > Go to enable mode > issue a “copy running-config tftp”* command > Supply the IP address of the TFTP server > Give the backup file a name.

Note: You can also use startup-config to copy the config saved in NVRAM rather than the running-config.

[box]

User Access Verification

Username: username
Password:*******

PeteRouter#enable
PeteRouter#copy running-config tftp
Address or name of remote host []? 10.10.0.1
Destination filename [PeteRouter-confg]? PeteRouter_Backup
!!
7400 bytes copied in 0.548 secs (13504 bytes/sec)

PeteRouter#

[/box] 4. If you keep an eye on the TFTP server you can see the file coming in.

Restoring a Cisco Cisco IOS Device

1. As above have your TFTP server up and running with the file you want to restore in its root directory.

2. Connect to the device either via console cable, Telnet or SSH.

3. Log in > Go to enable mode > issue a “copy tftp running-config”* command > Supply the IP address of the TFTP server > Give the backup file a name.

Note: You can also use startup-config to restore the config saved in NVRAM rather than the running-config.

[box]

User Access Verification

Username: username
Password: *******

PeteRouter#enable
PeteRouter#copy tftp running-config
Address or name of remote host []? 10.10.0.1
Source filename []? PeteRouter_Backup
Destination filename [running-config]? {Enter}
Accessing tftp://10.10.0.1/PeteRouter_Backup...
Loading PeteRouter_Backup from 10.10.0.1 (via GigabitEthernet0/0): !
[OK - 7400 bytes]

7400 bytes copied in 0.440 secs (16818 bytes/sec)

PeteRouter#

[/box]

4. Remember you have restored the running-config you would need to issue a “copy run start” command to make this config persistent (i.e. after a restart or reload of the router). If you issued a “copy tftp startup-config”, you would need to reboot for the restored config to be loaded into memory.

Related Articles, References, Credits, or External Links

Install and Use a TFTP Server

Backup and Restore a Cisco Firewall