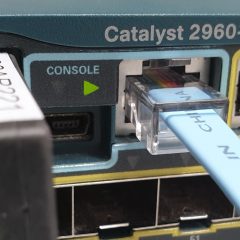
ENE-NG and GNS3 – Speed and Duplex Mismatch

KB ID 0000983 

Problem

I don’t know why this happens sometimes with GNS3, and EVE-NG but occasionally I will get a connection between two devices that constantly complains.

%CDP-4-DUPLEX_MISMATCH: duplex mismatch discovered on {interface-name} (not half duplex), with {host-name} {interface-name} (half duplex).

For the uninitiated, a speed/duplex mismatch, usually happens when both ends of the link are set differently, or (more commonly) both ends are set to ‘auto’.

[box]

!
interface FastEthernet0/1
ip address 192.168.1.1 255.255.255.0
duplex auto
speed auto
!

[/box]

Solution

WARNING: DO NOT carry out this procedure on live networking equipment, this is only for use in the GNS3 environment.

If this happens to you, you will sensibly try and set the speed/duplex of both ends of the link correctly, on real networking equipment that would solve the problem like so;

[box]

PetesRouter(config)#interface FastEthernet0/1
PetesRouter(config-if)#duplex full
*Aug 6 13:40:39.815: %LINEPROTO-5-UPDOWN: Line protocol on Interface FastEthernet0/1, changed state to down
*Aug 6 13:40:41.823: %LINK-3-UPDOWN: Interface FastEthernet0/1, changed state to up
*Aug 6 13:40:42.823: %LINEPROTO-5-UPDOWN: Line protocol on Interface FastEthernet0/1, changed state to up
PetesRouter(config-if)#speed 100
*Aug 6 13:40:47.855: %LINEPROTO-5-UPDOWN: Line protocol on Interface FastEthernet0/1, changed state to down
*Aug 6 13:40:49.859: %LINK-3-UPDOWN: Interface FastEthernet0/1, changed state to up
*Aug 6 13:40:50.859: %LINEPROTO-5-UPDOWN: Line protocol on Interface FastEthernet0/1, changed state to up
PetesRouter(config-if)#

[/box]

But in some cases on GNS3 it does not, (not sure if it’s a bug?)

Is that happening to you, the only way to stop it is to suppress the error. To do this add the ‘no cdp log mismatch duplex’ command to the interface giving you the error.

[box]

PetesRouter(config)#interface FastEthernet 0/1
PetesRouter(config-if)#no cdp log mismatch duplex
PetesRouter(config-if)#exit
PetesRouter(config)#exit
*Aug 6 13:45:55.235: %SYS-5-CONFIG_I: Configured from console by console
PetesRouter#write mem
Building configuration...
[OK]
PetesRouter#
[/box]

Related Articles, References, Credits, or External Links

NA


Cisco ASA: Prioritise RDP Traffic

KB ID 0001359

Problem

I have a client who had two sites, one didn’t have a particularly good internet connection, (which is the actual problem that needed to be solved). But in the interim, he wanted me to prioritise RDP traffic, as his staff were constantly complaining about the speed of their connections.

Note: They may be a myriad of reasons why user experience is bad for an RDP session, this was quite simply a bandwidth issue.

The client requested I prioritise RDP traffic on the link. We were not really sure if that would cure the problem, but they have not complained since!

Solution

On the main site, (with the RDP server(s) on), create an ‘access-list‘ to match our interesting traffic. (I’m just using ‘any’ as the source.)

[box]

Main-Site# configure terminal
Main-Site(config)# access-list ACL-RDP-Traffic extended permit tcp any eq 3389 172.16.0.0 255.255.0.0

[/box]

Create a ‘priority-queue‘ on the outside interface.

[box]

Main-Site(config)# priority-queue outside
Main-Site(config-priority-queue)#  exit

[/box]

Create a ‘class-map‘ that matches our ‘access-list‘.

[box]

Main-Site(config)# class-map CM-RDP-Traffic
Main-Site(config-cmap)#  match access-list ACL-RDP-Traffic
Main-Site(config-cmap)#  exit

[/box]

Create  ‘policy-map‘ that uses the ‘class-map‘ and assigns it priority.

[box]

Main-Site(config)# policy-map PM-RDP-Traffic
Main-Site(config-pmap)#  class CM-RDP-Traffic
Main-Site(config-pmap-c)#   priority
Main-Site(config-pmap-c)#   exit
Main-Site(config-pmap)#  exit

[/box]

Apply the ‘service-policy‘ to the ‘outside interface‘.

[box]

Main-Site(config)# service-policy PM-RDP-Traffic interface outside
Main-Site(config)# end

[/box]

You can ensure it has worked with  the following command;

[box]

Main-Site# show service-policy interface outside priority

Interface outside:
  Service-policy: PM-RDP-Traffic
    Class-map: CM-RDP-Traffic
      Priority:
        Interface outside: aggregate drop 0, aggregate transmit 0
Main-Site#

[/box]

Then, do the mirror image on the remote site, (where the clients are). Note: I’ve made this access list a little more specific.

[box]

Remote-Site# configure terminal
Remote-Site(config)# access-list ACL-RDP-Traffic permit tcp 172.16.0.0 255.255.0.0 192.168.1.0 255.255.255.0 eq 3389
Remote-Site(config)# priority-queue outside
Remote-Site(config-priority-queue)#  exit
Remote-Site(config)# class-map CM-RDP-Traffic
Remote-Site(config-cmap)#  match access-list ACL-RDP-Traffic
Remote-Site(config-cmap)#  exit
Remote-Site(config)# policy-map PM-RDP-Traffic
Remote-Site(config-pmap)#  class CM-RDP-Traffic
Remote-Site(config-pmap-c)#   priority
Remote-Site(config-pmap-c)#   exit
Remote-Site(config-pmap)#  exit
Remote-Site(config)# service-policy PM-RDP-Traffic interface outside
Remote-Site(config)# end

[/box]

Don’t forget: To save the changes with a ‘write memory‘ command when you’re happy.

Related Articles, References, Credits, or External Links

NA

Cisco IOS – How To Find VLAN IPs (SVI’s)

KB ID 0001258 

Problem

If you have a complicated network, you can spend more time finding out how it’s configured, than actually doing any work on it!

Today I had a client that needed some changes made on their LAN, I knew their name, and their network address, and common sense told me which of the core switches they were connected to.

Solution

A quick search on the client name told me what VRF they were in, and what VLAN they were in (3000), let’s have a look at that;

[box]

Petes-Core-SW#show run vlan 3000
Building configuration...

Current configuration:
!
vlan 3000
 name CORP:NET
end

[/box]

That doesn’t yield much more than I already know, so I can either do this and get a LOT of information;

[box]

Petes-Core-SW#show interfaces vlan 3000
Vlan3000 is up, line protocol is up
 Hardware is EtherSVI, address is c062.6be3.3000 (bia c062.6be3.9d40)
 Description: CORP:NET
 Internet address is 192.168.1.100/24
 MTU 1500 bytes, BW 1000000 Kbit, DLY 10 usec,
 reliability 255/255, txload 1/255, rxload 1/255
 Encapsulation ARPA, loopback not set
 Keepalive not supported
 ARP type: ARPA, ARP Timeout 04:00:00
 Last input 00:00:00, output never, output hang never
 Last clearing of "show interface" counters never
 Input queue: 0/75/0/0 (size/max/drops/flushes); Total output drops: 0
 Queueing strategy: fifo
 Output queue: 0/40 (size/max)
 5 minute input rate 254000 bits/sec, 115 packets/sec
 5 minute output rate 504000 bits/sec, 119 packets/sec
 L2 Switched: ucast: 22179333 pkt, 1561846492 bytes - mcast: 0 pkt, 0 bytes
 L3 in Switched: ucast: 471521755 pkt, 367932934560 bytes - mcast: 0 pkt, 0 bytes
 L3 out Switched: ucast: 493390206 pkt, 464908773459 bytes - mcast: 0 pkt, 0 bytes
 475554223 packets input, 366284328453 bytes, 0 no buffer
 Received 0 broadcasts (1116 IP multicasts)
 0 runts, 0 giants, 0 throttles
 0 input errors, 0 CRC, 0 frame, 0 overrun, 0 ignored
 493591347 packets output, 462947525840 bytes, 0 underruns
 0 output errors, 0 interface resets
 0 output buffer failures, 0 output buffers swapped out

[/box]

Or a more sensible;

[box]

Petes-Core-SW#show run interface vlan 3000
Building configuration...


Current configuration : 160 bytes
!
interface Vlan3000
 description CORP:NET
 mac-address c062.6be3.3000
 vrf forwarding CORP:NET
 ip address 192.168.1.100 255.255.255.0
end

[/box]

Find What VLAN An IP Address Is In

If you have the opposite problem, i.e. you know the IP, (or a part of the IP). You can get the VLAN number like so;

[box]

Petes-Core-SW#show ip int br | incl 192.168.1.100
Vlan3000               192.168.1.100     YES NVRAM  up                    up

[/box]


Related Articles, References, Credits, or External Links

NA

Cisco IOS – DHCP Helper (DHCP Relay) – IP-Helper Setup

KB ID 0001168 

Problem

Cisco documentation calls this a ‘DHCP Relay’, and uses the command IP-Helper, and I usually call this DHCP Helper, just to confuse everyone. To be fair the term DHCP Relay is an industry standard, it’s not particular to Cisco (as you will see later when I Wireshark the traffic).

So If you are reading this you have a DHCP server and you want to use it to lease addresses to clients that are on a different network segment (layer 2, or layer3).

To do that you need an agent to be on the same network segment as the client listening for DHCP requests, when it receives one it talks to the DHCP server on the clients behalf and gets the correct address.

Solution

Example 1 Cisco Router

Here we need to lease two different DHCP scopes to two different network segments, R1 will act as the IP-Helper for both of those networks, R2 and R3 will get their IP addresses from the correct DHCP scope.

This works because each (client facing) interface on R1 has an IP-Helper address defined that points to the DHCP server.

So How Does It Know Which Scope To Lease From? This is because the Router supplies the IP address of a RELAY AGENT, which is just the IP address of the physical interface that intercepted the DHCP request. When it asks for an IP address from the DHCP server, the Server leases an address from the same range, (again I’ve tracked all this in Wireshark below).

IP-Helper Router Configuration

[box]

R1 Config

!
interface GigabitEthernet0/0
 description Uplink to DHCP Server
 ip address 10.2.2.254 255.255.255.0
 negotiation auto
!
interface GigabitEthernet2/0
 description Uplink to 192_168_2_0
 ip address 192.168.2.1 255.255.255.0
 ip helper-address 10.2.2.10
 negotiation auto
!
interface GigabitEthernet3/0
 description Uplink to 192_168_3_0
 ip address 192.168.3.1 255.255.255.0
 ip helper-address 10.2.2.10
 negotiation auto
!
ip route 0.0.0.0 0.0.0.0 10.2.2.10
!


R2 Config

!
interface GigabitEthernet2/0
 description Uplink to R1
 ip address dhcp
 negotiation auto
!
ip route 0.0.0.0 0.0.0.0 GigabitEthernet2/0
!

R3 Config

!
interface GigabitEthernet3/0
 description Uplink to R1
 ip address dhcp
 negotiation auto
!
ip route 0.0.0.0 0.0.0.0 GigabitEthernet3/0
!

[/box]

You can see this works because the DHCP server has matching scopes for both network segments. (Yes one of my test servers is 2003, you’re going to see some Windows XP in a minute!

Well that’s fine for routers, but what about machines? They send a DHCP Discover just like any other client. I’ve replaced one of the routers with an actual machine.

With its network card set to DHCP you will again get a lease from the correct scope, because the Router brokered it for us.

Back on the DHCP server you can see the lease to the windows XP machine entered in the current scope leases, It knows the name of the client because (as you will see below) the relay agent (Router) passed that information (along with the MAC address of the client) to the DHCP server.

Example 2 Cisco Switches

OK, I did the routers first because I find it easier to explain things at layer 3. Not that you can’t create sub interfaces on the router, add those sub interfaces to VLANs, and run DHCP relays from them. But in most cases you will be setting up DHCP helpers on switches. Here the principle is the same but you define the ip-helper on the VLAN, (unless it’s routed port then treat it the same as a router interface). Let’s modern things up a bit, and use a 2012 R2 DHCP server, and some Windows 8 clients.

I need to lease addresses from my second scope to clients in VLAN 200, (the other client and server are in the same VLAN, so that will just work. (Remember a VLAN is a broadcast domain, and DHCP is using broadcasts).

Here’s the two scopes setup on the 2012 server;

And my client, (DHCP Client in VLAN 200) gets the correct IP.

IP-Helper Switch Configuration (VLANS)

[box]

SW1 Config

interface FastEthernet1/0/1
 description Uplink to DHCP Server
 switchport access vlan 100
 switchport mode access
 spanning-tree pordtfast
!
interface FastEthernet1/0/4
 description Uplink 192_168_200_0
 switchport access vlan 200
 switchport mode access
 spanning-tree pordtfast
!
interface FastEthernet1/0/5
 description Uplink 192_168_100_0
 switchport access vlan 100
 switchport mode access
 spanning-tree portfast
!
interface Vlan200
 ip address 192.168.200.1 255.255.255.0
 ip helper-address 192.168.100.10
!

IF YOU HAVE MULTIPLE/FAILOVER IP-HELPERS OR SPLIT SCOPES YOU CAN ADD A SECOND 
ADDRESS LIKE SO;

!
interface Vlan200
 ip address 192.168.200.1 255.255.255.0
 ip helper-address 192.168.100.10
 ip helper-address 192.168.100.15
!

[/box]

Analysing (Packet-Sniffing) DHCP Relay Sequence with Wireshark

Other packet sniffers are available, but I’ve got a soft spot for Wireshark. To filter DHCP traffic you can use the following ‘filter’.

bootp.option.type == 53

DHCP works by using four messages, (which I remember using the acronym DORA: Discover, Offer, Request, Acknowledge). If you sniff the traffic on the DHCP server, you can watch this process being brokered by your DHCP Relay Agent.

Discover

Offer

Request

Acknowledge

And just to prove it’s not all ‘smoke and mirrors’, here’s the client with the leased address, showing a matching MAC address, and hostname.

Related Articles, References, Credits, or External Links

NA

HP Networking – Tracing Networks and Locating IP addresses

KB ID 0001110

After not touching one for a couple of years, I was back on HP switches recently, and I had to map out a clients switches. Now I could have used some software, but they didn’t have SNMP enabled so, I had to ‘re acquaint’ myself with LLDP.

For a basic LLDP View of attached devices.

[box]

HP-Switch-1# show lldp info remote-device

 LLDP Remote Devices Information

  LocalPort | ChassisId                 PortId PortDescr SysName
  --------- + ------------------------- ------ --------- ----------------------
  10        | Cisco1.petenetlive.com       Gig...
  10        | 00 1c f6 c8 55 8f         || ... Gigabi... Cisco1.petenetlive.com
  13        | Cisco1.petenetlive.com       Gig...
  13        | 00 1c f6 c8 55 92         || ... Gigabi... Cisco1.petenetlive.com
  23        | c0 91 34 dd 3b c0         23     23        HP-Switch-2
  24        | c0 91 34 dd 3b c0         24     24        HP-Switch-2

[/box]

For a More Detailed LLDP View of attached devices.

Note: This command will NOT show up in the help menu!

[box]

HP-Switch-1# show lldp info remote all

 LLDP Remote Device Information Detail

  Local Port   : 10
  ChassisType  : local
  ChassisId    : Cisco1.petenetlive.com
  PortType     : local
  PortId       : GigabitEthernet0/15
  SysName      :
  System Descr : Cisco IOS Software, C2960 Software (C2960-LANBASE-M), Ver...
  PortDescr    :

  System Capabilities Supported  : bridge
  System Capabilities Enabled    : bridge

  Remote Management Address
     Type    : ipv4
     Address : 111.222.111.222

------------------------------------------------------------------------------
  Local Port   : 10
  ChassisType  : mac-address
  ChassisId    : 00 1c f6 c8 55 8f
  PortType     : inte...
  PortId       : || PeteNet || 10Mb ||...
  SysName      : Cisco1.petenetlive.com
  System Descr : Cisco IOS Software, C2960 Software (C2960-LANBASE-M), Ver...
  PortDescr    : GigabitEthernet0/15

  System Capabilities Supported  : bridge, router
  System Capabilities Enabled    :

  Remote Management Address
     Type    : ipv4
     Address : 111.222.111.222

------------------------------------------------------------------------------
  Local Port   : 13
  ChassisType  : local
  ChassisId    : Cisco1.petenetlive.com
  PortType     : local
  PortId       : GigabitEthernet0/18
  SysName      :
  System Descr : Cisco IOS Software, C2960 Software (C2960-LANBASE-M), Ver...
  PortDescr    :

  System Capabilities Supported  : bridge
  System Capabilities Enabled    : bridge

  Remote Management Address
     Type    : ipv4
     Address : 111.222.111.222

------------------------------------------------------------------------------
  Local Port   : 13
  ChassisType  : mac-address
  ChassisId    : 00 1c f6 c8 55 92
  PortType     : inte...
  PortId       : || PeteNet || Previou...
  SysName      : Cisco1.petenetlive.com
  System Descr : Cisco IOS Software, C2960 Software (C2960-LANBASE-M), Ver...
  PortDescr    : GigabitEthernet0/18

  System Capabilities Supported  : bridge, router
  System Capabilities Enabled    :

  Remote Management Address
     Type    : ipv4
     Address : 111.222.111.222

------------------------------------------------------------------------------
  Local Port   : 23
  ChassisType  : mac-address
  ChassisId    : c0 91 34 dd 3b c0
  PortType     : local
  PortId       : 23
  SysName      : HP-Switch-2
  System Descr : HP J9145A 2910al-24G Switch, revision W.15.13.0014, ROM W...
  PortDescr    : 23

  System Capabilities Supported  : bridge, router
  System Capabilities Enabled    : bridge, router

  Remote Management Address
     Type    : ipv4
     Address : 192.168.1.221

  Poe Plus Information Detail

    Poe Device Type         : Type2 PSE
    Power Source            : Unknown
    Power Priority          : Unknown
    Requested Power Value   : 0 Watts
    Actual Power Value      : 0 Watts

------------------------------------------------------------------------------
  Local Port   : 24
  ChassisType  : mac-address
  ChassisId    : c0 91 34 dd 3b c0
  PortType     : local
  PortId       : 24
  SysName      : HP-Switch-2
  System Descr : HP J9145A 2910al-24G Switch, revision W.15.13.0014, ROM W...
  PortDescr    : 24

  System Capabilities Supported  : bridge, router
  System Capabilities Enabled    : bridge, router

  Remote Management Address
     Type    : ipv4
     Address : 192.168.1.221

  Poe Plus Information Detail

    Poe Device Type         : Type2 PSE
    Power Source            : Unknown
    Power Priority          : Unknown
    Requested Power Value   : 0 Watts
    Actual Power Value      : 0 Watts

[/box]

To find what Port an IP address is on

First ping the IP address, to make sure that the switch has the MAC address you are looking at, in its ARP cache.

  [box]

HP-Switch-1# ping 192.168.251.2
192.168.251.2 is alive, time = 3 ms

[/box]

Then look for it in the ARP cache;

[box]

HP-Switch-1# show arp

 IP ARP table

  IP Address       MAC Address       Type    Port
  ---------------  ----------------- ------- ----
  192.168.251.1    e8b748-c757b0     dynamic 13
  192.168.251.2    005056-a61c1c     dynamic 5  << It’s on port 5
  192.168.251.5    005056-a606d9     dynamic 7

[/box]

Or if you already know its MAC address;

[box]

HP-Switch-1# show mac-address 005056-a61c1c

 Status and Counters - Address Table - 005056-a61c1c

 Port
 -------
 5

[/box]

Related Articles, References, Credits, or External Links

Cisco IOS – Enabling LLDP

GNS3 Cannot Connect Network Interfaces when running on VMware vSphere

KB ID 0000671 

Problem

I have plenty of real ASA firewalls to play with, but it’s getting round to re-certification time, so for ease I thought I’d run up a Virtual ASA on my vSphere 5 box just for testing and breaking.

However no matter what type of Virtual Network adaptor I used (vmxnet3, e1000, etc) I could not connect to the virtual firewall.

Solution

1. Firstly make sure you actually have an IP address in the correct range set on the ASA, and the interface is up.

Note: To connect a virtual ASA to the outside world you need to have a ‘Cloud’, then assign your machines NIC to the cloud. Finally you join the cloud to the ASA with a switch.

2. From my laptop (out on the network), I could not connect to, or ping the ASA 🙁

3. However if you log into your ESX/vCenter Server and change the settings on the virtual switch that the parent VM is attached to. Configuration > Networking > Switch > Properties > vSwitch > Edit > Security Tab > Change Promiscuous Mode to Accept > OK.

4. Now it works!

Related Articles, References, Credits, or External Links

NA

Cisco Router – Configure NAT (NAT Overload)

KB ID 0000971 

Problem

NAT is the process of taking one or more IP adresses and tranlsating it/them into differnet IP addreses. You may require your router to translate all your internal IP addresses to your public (ISP allocated) IP address. To do that we use a process called NAT Overload.

Solution

1. Connect to the router, and got to enable mode, then global configuration mode.

[box]

PetesRouter#configure terminal
Enter configuration commands, one per line. End with CNTL/Z.
PetesRouter(config)#

[/box]

2. Setup the WAN (outside facing) interface.

[box]

PetesRouter(config)#interface GigabitEthernet0/0
PetesRouter(config-if)#ip address 123.123.123.123 255.255.255.0
PetesRouter(config-if)#ip nat outside
PetesRouter(config-if)#no shutdown
PetesRouter(config-if)#exit

[/box]

3. Setup the LAN (inside facing) interface.

[box]

PetesRouter(config)#interface GigabitEthernet0/1
PetesRouter(config-if)#ip address 192.168.1.1 255.255.255.0
PetesRouter(config-if)#ip nat inside
PetesRouter(config-if)#no shutdown
PetesRouter(config-if)#exit

[/box]

4. You will need a ‘default route’ which will be the routers ‘next hop’ towards the internet.

[box]

PetesRouter(config)#ip route 0.0.0.0 0.0.0.0 123.123.123.2

[/box]

5. Create an ACL that wil match any trafic coming from inside (remember permit means match).

[box]

PetesRouter(config)#access-list 100 remark NAT-ACL
PetesRouter(config)#access-list 100 permit ip 192.168.1.0 0.0.0.255 any

[/box]

6. Then tie it all together with the following command;

[box]

PetesRouter(config)#ip nat inside source list 100 interface GigabitEthernet 0/0 overload

[/box]

7. Save the changes.

[box]

PetesRouter(config)#exit
PetesRouter#write mem
Building configuration...
[OK]
PetesRouter#

[/box]


Related Articles, References, Credits, or External Links

NA

Update Cisco ASA – Directly from Cisco (via ASDM)

KB ID 0000636 

Problem

Warning:

Before upgrading/updating the ASA to version 8.3 (or Higher) Check to see if you have the correct amount of RAM in the firewall (“show version” command will tell you). This is VERYIMPORTANT if your ASA was shipped before February 2010. See the link below for more information.

ASA – Memory Error (Post upgrade to version 8.3)

Warning 2:

Be aware, if you are upgrading to an OS of 8.4(2) or newer you can no longer access the device via SSH when using the default username of “pix” you need to enable AAA authentication for SSH, do this before you reboot/reload the firewall or you may lock yourself out.

ASA Enable AAA LOCAL Authentication for SSH

Its been a while since I wrote how to update the ASA by command line, and how to update the ASA from the ASDM. Now you can update the ASA directly from Cisco, providing you have a valid cisco CCO account.

Solution

1. Connect to the the ASDM on the ASA > Tools > Check for ASA/ASDM Updates.

2. Supply your Cisco CCO account information.

3. Next.

4. Decide if you want to update the OS of the ASA or the ASDM, or both.

5. Next.

6. The software will download. (The OS is downloading here), Note: it will get downloaded to the machine that the ASDM is running on first.

7. Then the ASDM software will download.

8. You may find that there is not enough room in flash memory, if so you will see this error. (if it does not error skip to step 11).

9. If you are stuck for room you can delete some items from your flash memory > Tools > File Management.

10. Here you can see I’m deleting and old version of the ASDM. Note you could delete the live version of the ASDM and Operating system if you had no choice (THOUGH DONT REBOOT THE FIREWALL until the new ones have uploaded, or you will be loading the files in in ROMMON mode!)

11. Once all the files have been downloaded to your location, they will be uploaded to the firewalls flash memory.

12. Next.

13. Finish.

Note: What happens now is the following commands are issued in the background automatically; (Note the versions numbers may be different in your case).

[box]

asdm image disk0:/asdm-649.bin
no boot system disk0:/asa843-k8.bin
boot system disk0:/asa844-1-k8.bin
boot system disk0:/asa843-k8.bin

[/box]

14. After the firewall reboots, it should come back up with the new OS and ASDM version.

Related Articles, References, Credits, or External Links

Cisco ASA5500 Update System and ASDM (From CLI)

Cisco ASA5500 Update System and ASDM (From ASDM)

Cisco ASA 5500 – Remote Management via VPN

KB ID 0000984

Problem

It’s been ages since I has to do this, I usually just manage firewalls via SSH from outside. But I was out on a client site last week and needed to connect to to my ASA, so I simply connected in via AnyConnect;

Note: The same procedure is applicable if you are an IPSEC VPN client, L2TP VPN client, or simply coming in over a site to site VPN link.

And attempted to SSH, no joy, I tried the ASDM, nothing. So basic troubleshooting kicked in, and I tried to ping its inside interface;

Solution

Normally, you would see this if you forgot to add ‘management-access inside‘ to the firewall. I was sure I had done, so I connected to one of my servers and then SSH’d to the firewall to check, and that command was there?

The cause of the problem was a change made in version 8.4(3). I had to edit the NAT rule for the remote traffic. But I’ll cover ALL the bases in case you are missing anything else.

1. Connect to the the firewall via CLI, and check management-access is on, on the interface you are connecting to, mines the ‘inside’ interface yours might be management or some other name you have allocated to the interface in question.

[box]

 User Access Verification

Password:
 Type help or '?' for a list of available commands.
 PetesASA> enable
 Password: ********
 PetesASA# show run management-access
 management-access inside
 PetesASA#

If yours is different or missing;

PetesASA# configure terminal
 PetesASA(config)# management-access inside [/box]

To do the same via ASDM.

2. Now I know, my remote VPN clients are getting a 10.253.254.x addresses, (show run ip local pool should tell you, unless you are using internal DHCP for the remote clients). After version 8.4(3) you need an extra command on the end of the NAT rule for that traffic. I’ll highlight the line below;

[box]

PetesASA# show run nat
 nat (inside,any) source static obj-10.254.254.0 obj-10.254.254.0 destination static obj-10.253.253.0 obj-10.253.253.0
 !
 object network obj_any
 nat (inside,outside) dynamic interface
 object network Media_PC
 nat (inside,outside) static interface service tcp 467 467
 !
 nat (outside,outside) after-auto source dynamic VPN_Pool interface
 PetesASA#[/box]

3. The line highlighted above, needs ‘route-lookup’ adding to the end of it.

[box]

PetesASA# configure terminal
 PetesASA(config)#nat (inside,any) source static obj-10.254.254.0 obj-10.254.254.0 destination static obj-10.253.253.0 obj-10.253.253.0 route-lookup[/box]

To do the same in the ASDM locate the NAT rule, edit it, and tick this box. (Configuration > Firewall > NAT Rules).

4. At this point your VPN client(s) should now be ale to ping the interface again.

5. As with any management traffic, also ensure that the subnet you are connecting from, has been allowed.

[box]

Check SSH

PetesASA# show run ssh
 ssh 10.253.253.0 255.255.255.0 inside
 ssh 10.254.254.0 255.255.255.0 inside
 ssh 123.123.123.123 255.255.255.255 outside
 ssh timeout 45
 ssh key-exchange group dh-group1-sha1
 PetesASA#

Check Telnet (If used)

PetesASA# show run telnet
 telnet 10.253.253.0 255.255.255.0 inside
 telnet 10.254.254.0 255.255.255.0 inside
 telnet timeout 45
 PetesASA#

Check ASDM (If used)

PetesASA# show run http
 http server enable
 http 10.253.253.0 255.255.255.0 inside
 http 10.254.254.0 255.255.255.0 inside
 http 123.123.123.123 255.255.255.255 outside
 PetesASA#

[/box]

5. Save the changes.

[box]

 PetesASA# write mem
 Building configuration...
 Cryptochecksum: 79745c0a 509726e5 b2c66028 021fdc7d

7424 bytes copied in 1.710 secs (7424 bytes/sec)
 [OK]
 PetesASA# [/box]


Related Articles, References, Credits, or External Links

Cisco ASA – Allow Remote Management

Connecting to and Managing Cisco Firewalls

Cisco ASA 5500 – Throttling (Rate Limiting) Traffic

KB ID 0001001 

Problem

If you have one client that’s taking all your bandwidth, or a server that’s getting a lot of connections from external IP addresses, and that’s causing you performance problems, you can ‘throttle’ traffic from/to that client by ‘policing’ its traffic.

Solution

To demonstrate, I have a 30Mb connection at home, when I run a test on the download connection speed from my desktop PC this is what I get;

So I’m going to throttle traffic to that IP address (10.254.254.90), so that it can only use 1Mb of the connection.

1. Create an ACL for traffic to and from the IP address you want to throttle. (Note: If your firewall is running a version older than 8.3, and you are throttling an IP that has a public IP address, use its public IP address not its private one).

[box]

User Access Verification

Password:*******
Type help or ‘?’ for a list of available commands.
PetesASA> enable
Password: ********
PetesASA# configure terminal
PetesASA(config)# access-list ACL-THROTTLE extended permit ip host 10.254.254.90 any
PetesASA(config)# access-list ACL-THROTTLE extended permit ip any host 10.254.254.90


[/box]

2. Now create a class-map that will match all traffic in that ACL, (so all traffic to and from 10.254.254.90).

[box]

PetesASA(config)# class-map CM-THROTTLE
PetesASA(config-cmap)# match access-list ACL-THROTTLE
PetesASA(config-cmap)# exit

[/box]

3. Then create a policy-map, that takes all traffic identified in your class map, and rate limits the traffic to 1000000 bps (1Mbps) with a ‘burst-rate’ of 2000bps.

[box]

PetesASA(config)# policy-map PM-THROTTLE
PetesASA(config-pmap)# class CM-THROTTLE
PetesASA(config-pmap-c)# police output 1000000 2000
PetesASA(config-pmap-c)# police input 1000000 2000
PetesASA(config-pmap-c)# exit
PetesASA(config-pmap)# exit 

[/box]

4. Now apply that policy-map with a service policy. (Note: Generally you apply the policy to the interface closest to where the traffic is coming from, as this is an internal host, I’m applying it to the inside interface. If you were throttling traffic from outside it would be better to apply the service-policy to the outside interface).

[box]

PetesASA(config)# service-policy PM-THROTTLE interface inside

[/box]

5. Let’s run our test again.

6. Looks good!


Related Articles, References, Credits, or External Links

NA