
KB ID 0001377
Problem
Cisco ASA firewalls have had USB sockets on them for a while, but a dig into the documentation only yielded, ‘for use in future releases’. Well they are working now!
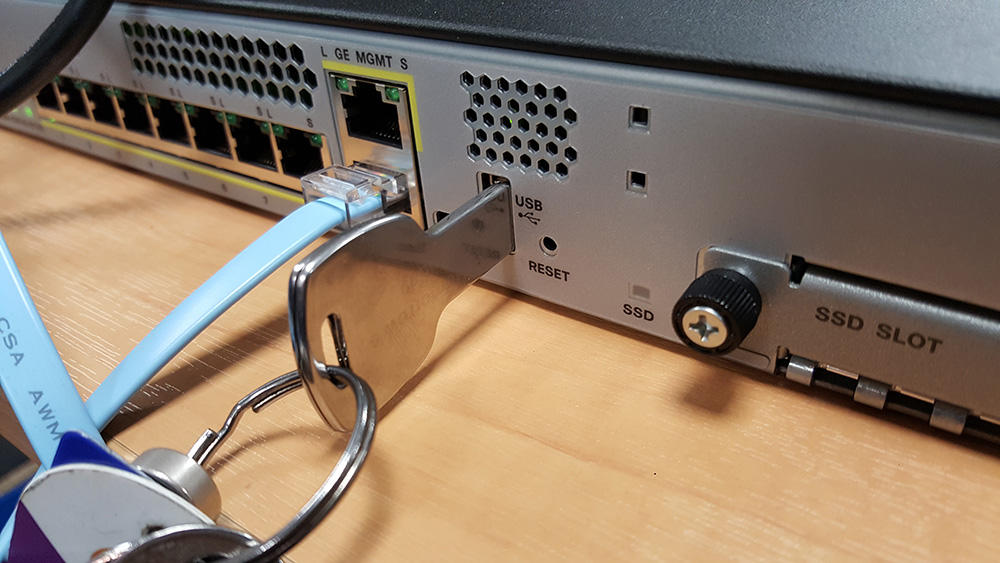
Note: Firewall shown is a 5516-X (running version 9.8(1))
Solution
Your drive needs to be formatted as FAT (not NTFS), I’m going to update/install some AnyConnect client software, but there’s nothing to stop you uploading a new IOS or ASDM images.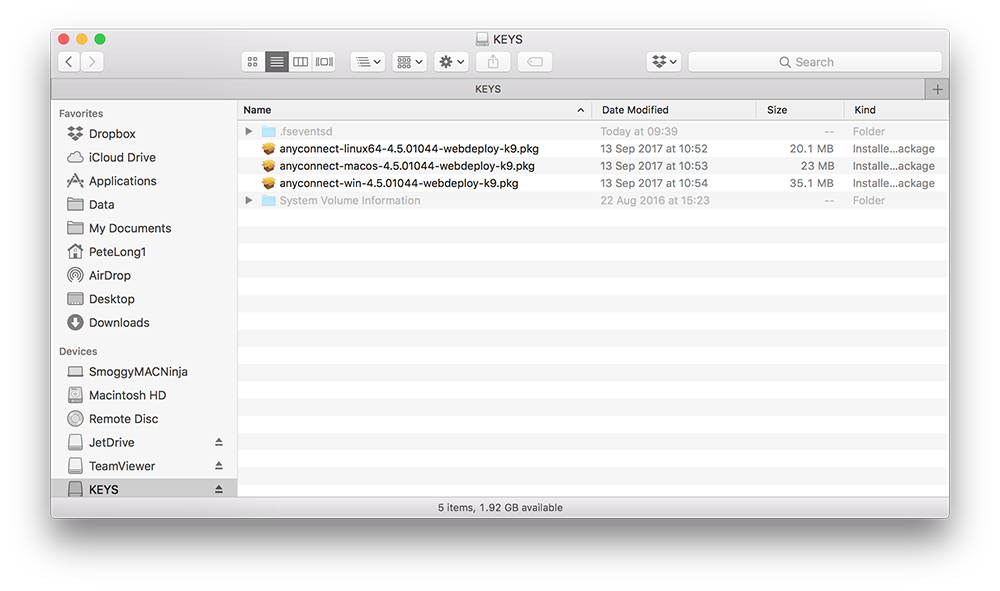
Your drive will get mounted as ‘Drive1’ (unless you have a secondary flash drive onboard already).
PetesASA(config)# show disk1
--#--  --length--  -----date/time------  path
  394  20130794    Sep 13 2017 10:52:40  anyconnect-linux64-4.5.01044-webdeploy-k9.pkg
  395  4096        Dec 05 2017 09:40:28  ._anyconnect-linux64-4.5.01044-webdeploy-k9.pkg
  396  22997589    Sep 13 2017 10:53:14  anyconnect-macos-4.5.01044-webdeploy-k9.pkg
  397  4096        Dec 05 2017 09:40:36  ._anyconnect-macos-4.5.01044-webdeploy-k9.pkg
  398  35122744    Sep 13 2017 10:54:12  anyconnect-win-4.5.01044-webdeploy-k9.pkg
  399  4096        Dec 05 2017 09:40:46  ._anyconnect-win-4.5.01044-webdeploy-k9.pkg

2004582400 bytes total (1926103040 bytes free)
PeteASA(config)#
Note: I have seen drives not get recognised like so;
Petes-ASA# Extra storage device is not supported.

Petes-ASA# show disk1

--#--  --length--  -----date/time------  path

No files in directory
If that happens to you, you will need to reload the ASA (assuming the drive is formatted correctly) before it will be recognised.
You can then copy the files to the main flash (disk0:).
PeteASA(config)# copy disk1:/anyconnect-linux64-4.5.01044-webdeploy-k9.pkg disk0:

Source filename [anyconnect-linux64-4.5.01044-webdeploy-k9.pkg]? {Enter}

Destination filename [anyconnect-linux64-4.5.01044-webdeploy-k9.pkg]?{Enter}

Copy in progress...CCCCCCCCCCCCCCCCCCCCCCCCCCCCCCCCCCCC
CCCCCCCCCCCCCCCCCCCCCCCCCCCCCCCCCCCCCCCCCCCCCCCCCCCCCCC
CCCCCCCCCCCCCCCCCCCCCCCCCCCCCCCCCCCCCCCCCCCCCCCCCCCCCCC
CCCCCCCCCCCCCCCCCCCCCCCCCCCCCCCCCCCCCCCCCCCCCCCCCCCCCCC
CCCCCCCCCCCCCCCCCCCCCCCCCCCCCCCCCCCCCCCCCCCCCCCCCCCCCCC
CCCCCCCCCCCCCCCCCCCCCCCCCCCCCCCCCCCCCCCCCCCCCCCCCCCCCCC
CCCCCCCCCCCCCCCCCCCCCCCCCCCCCCCCCCCCCCCCCCCCCCCCCCCCCCC
CCCCCCCCCCCCCCCCCCCCCCCCCCCCCCCCCCCCCCCCCCCCCCCCCCCCCCC
INFO: No digital signature found
20130794 bytes copied in 1.560 secs (20130794 bytes/sec)
PetesASA(config)#
To prove the file is in the main ‘flash’.
PetesASA(config)# show flash
--#--  --length--  -----date/time------  path
   96  104489760   Sep 13 2017 14:11:34  asa981-lfbff-k8.SPA
   97  26916068    Sep 13 2017 14:11:54  asdm-781.bin
   98  33          Dec 05 2017 02:29:03  .boot_string
   11  4096        Sep 13 2017 14:15:24  log
   13  500         Dec 05 2017 01:59:00  log/asa-appagent.log
   21  4096        Sep 13 2017 14:16:16  crypto_archive
   22  4096        Sep 13 2017 14:16:18  coredumpinfo
   23  59          Sep 13 2017 14:16:18  coredumpinfo/coredump.cfg
   99  41848832    Nov 15 2017 07:01:54  asasfr-5500x-boot-6.2.2-3.img
  408  20130794    Dec 05 2017 02:44:59  anyconnect-linux64-4.5.01044-webdeploy-k9.pkg

7365472256 bytes total (3948736512 bytes free)
Related Articles, References, Credits, or External Links
NA
31/07/2018
Your posts are spot on. I am new to firewalls (ASA 5525X w/firepower) and ASDM and I find your notes the most concise and useful out there. Thank you very much for your time and effort.
I have many to configure and have to them manually, including sfr. Quite the pain.
02/08/2018
Thanks for the feedback 🙂
18/09/2019
How to back up ASA and reload a cold spare with a USB Drive
With USB drive in primary ASA:
PuTTY into primary ASA and log into the ASA
CLI | Elevate to enable and then Elevate to config terminal
CLI | show disk1: to make sure it is empty
CLI | dir to display the current directory content (should be disk0:/)
CLI | copy running-config disk0:/
CLI | will prompt you…
CLI | Source filename [running-config]? PRESS ENTER
CLI | Destination filename [running-config]? NAMEYOUWANT and PRESS ENTER
CLI | dir and look for NAMEYOUWANT filename w/current date
CLI | copy disk0:/NAMEYOUWANT disk1:
CLI | Source filename [NAMEYOUWANT]? PRESS ENTER
CLI | Destination filename [NAMEYOUWANT]? PRESS ENTER
———————————————————————
also repete copy of the current ASA and ASDM software files if needed
———————————————————————
CLI | show disk1: to verify all needed files are listed
exit PuTTY session and proceed to Cold Spare update
*********************************************************************
Insert the USB in the Cold Spare
Establish WebEx (on a laptop on WiFi Hotspot) connected to the Cold Spare with a console cable
Make sure PuTTY is installed on the laptop
Check devices on the computer to discover the COM port with ASA
PuTTY to COM port and log into the ASA
CLI | Elevate to enable and then Elevate to config terminal
CLI | dir to display the current directory content (should be disk0:/)
CLI | show disk1: for filename list to copy from USB
CLI | copy disk1:/filename disk0:
do the same for each file to copy
CLI | show flash to verify successful copies
CLI | show running-config boot system
you will see a list of up to 4 boot files in order of selection
CLI | no boot system disk0:/filename
do this for each file to remove from the boot files in the sequence
———————————————————————–
& another option is
CLI | clear configure boot
———————————————————————–
CLI | boot system disk0:/filename
for first file to have in boot sequence and do this for each file to follow in order, if needed
———————————————————————–
& another option is to set the file to boot with
CLI | boot config disk0:/filename
———————————————————————–
CLI | reload
to initiate the ASA system reload (reboot)
When the system prompts for username: it is back up, log into the ASA
CLI | Elevate to enable and then Elevate to config terminal
CLI | show flash
or whatever else to verify your work
12/05/2021
This is GREAT HELP !!!
Thanks Much !!
06/11/2025
What is the current supported release for cisco asa 5525x and 5545x ?
Firmware and ASDM.
06/11/2025
Both ASA 5525-X and ASA 5545-X reached End of Support on September 30, 2025. Cisco no longer provides security patches or bug fixes for these models. Continuing to use them poses significant security risks, and Cisco strongly recommends migrating to newer platforms like the Firepower 1000/3100 series (e.g., FPR1150 for ASA5525-X).
Last Supported ASA Firmware Version
ASA 9.14(x) is the final supported train for both ASA 5525-X and ASA 5545-X.
Specifically, the latest interim release available was ASA 9.14(4)24, released in April 2024
ASDM (Adaptive Security Device Manager)
The last compatible ASDM version for ASA 9.14(x) is ASDM 7.14(x).
ASDM versions are generally backward-compatible, so ASDM 7.14(1) or later can manage ASA 9.14(x) appliances.
FirePOWER Module
If you have FirePOWER services enabled, the last supported version for the module is 6.6.x.